
Toeside Double Front Roll to Toeside
Technique / Intermediate


Introduction
Let’s be honest, spinning once is undeniably brilliant! Does that mean spinning twice is doubly brilliant? What if it’s from toeside? And what if it’s to toeside? There’s only one, sorry, two ways to find out. Give it a go and nail it. Perhaps a tenuous motivational tactic, but any excuse to try something new is gold dust in our book.
This is one of those extremely satisfying moves. When it works, it really flows, whilst it has the benefit of working in umpteen different conditions so you can pull it out of the hat whenever and wherever you see fit. Let’s get to it.


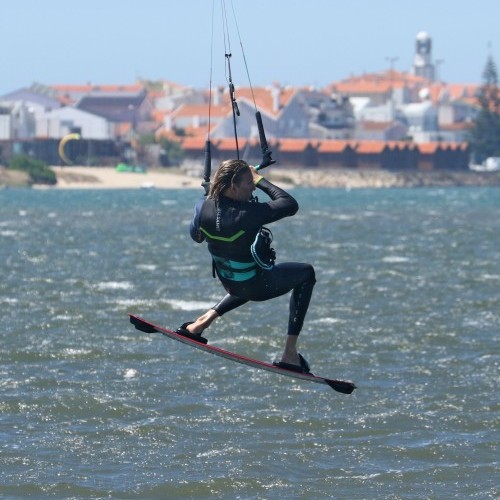
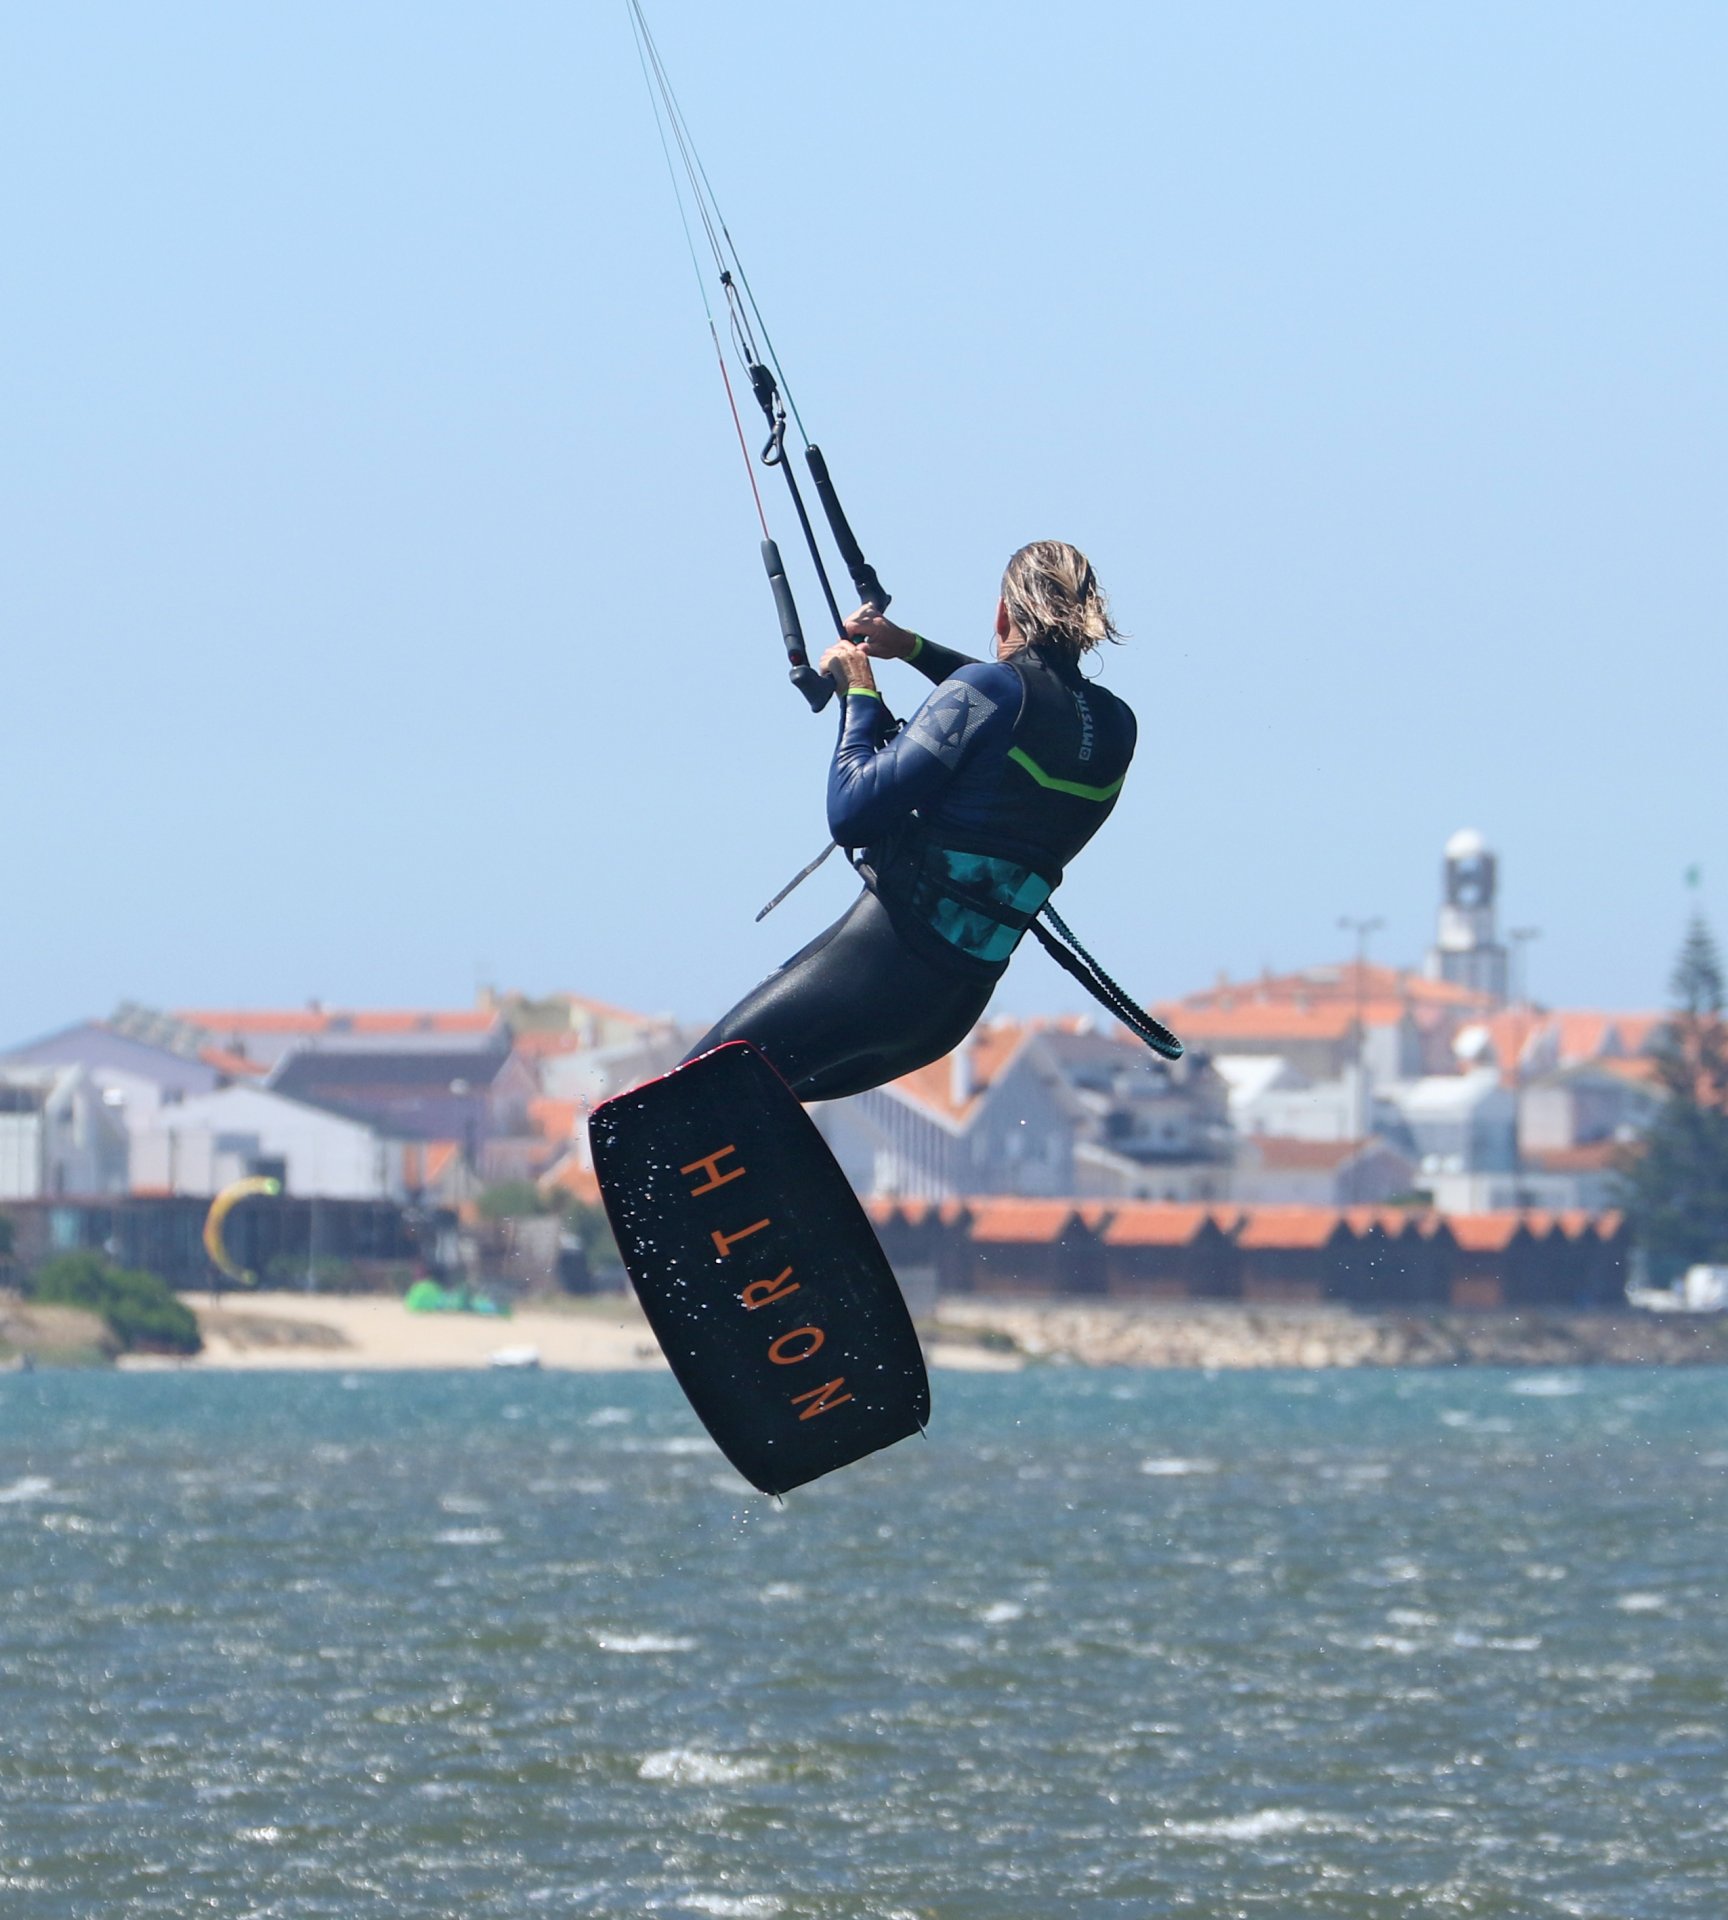
Toeside Pic A
As with all toeside moves, your toeside and resultant approach will have a massive impact on what follows. With a double rotation to squeeze in, you will undoubtedly need some speed, a solid edge from which to kick, and enough time and float in the air to complete the required “twice”. If you’re a regular to these pages, you’ll know the readying drill for toe take-offs, but it never hurts to recap. To make it efficient, you have to learn to get your weight forwards, trimming the board from front to back whilst still edging. Look at the picture where you can see plenty of Christian’s board in the water. Suffice to say, you need to get your weight forwards and onto your front foot. The easiest way to do this is to open your chest and hips, facing forwards down the board so that you have a shoulder each side. This with a bent front knee, hips and head dipped forwards and both knees driving forwards, pointing in the same direction and working together. It is easier to adopt this position if you let your back foot twist in the strap and point forwards. Always the same analogy here; think of a surfer racing down the line or a slalom snowboarder in hard boots. Coming into any toeside trick, this is your approach position. From here, like Christian, you can give the kite a good send from 11 or 1 o’clock, whilst dropping your weight to counter the rising kite.
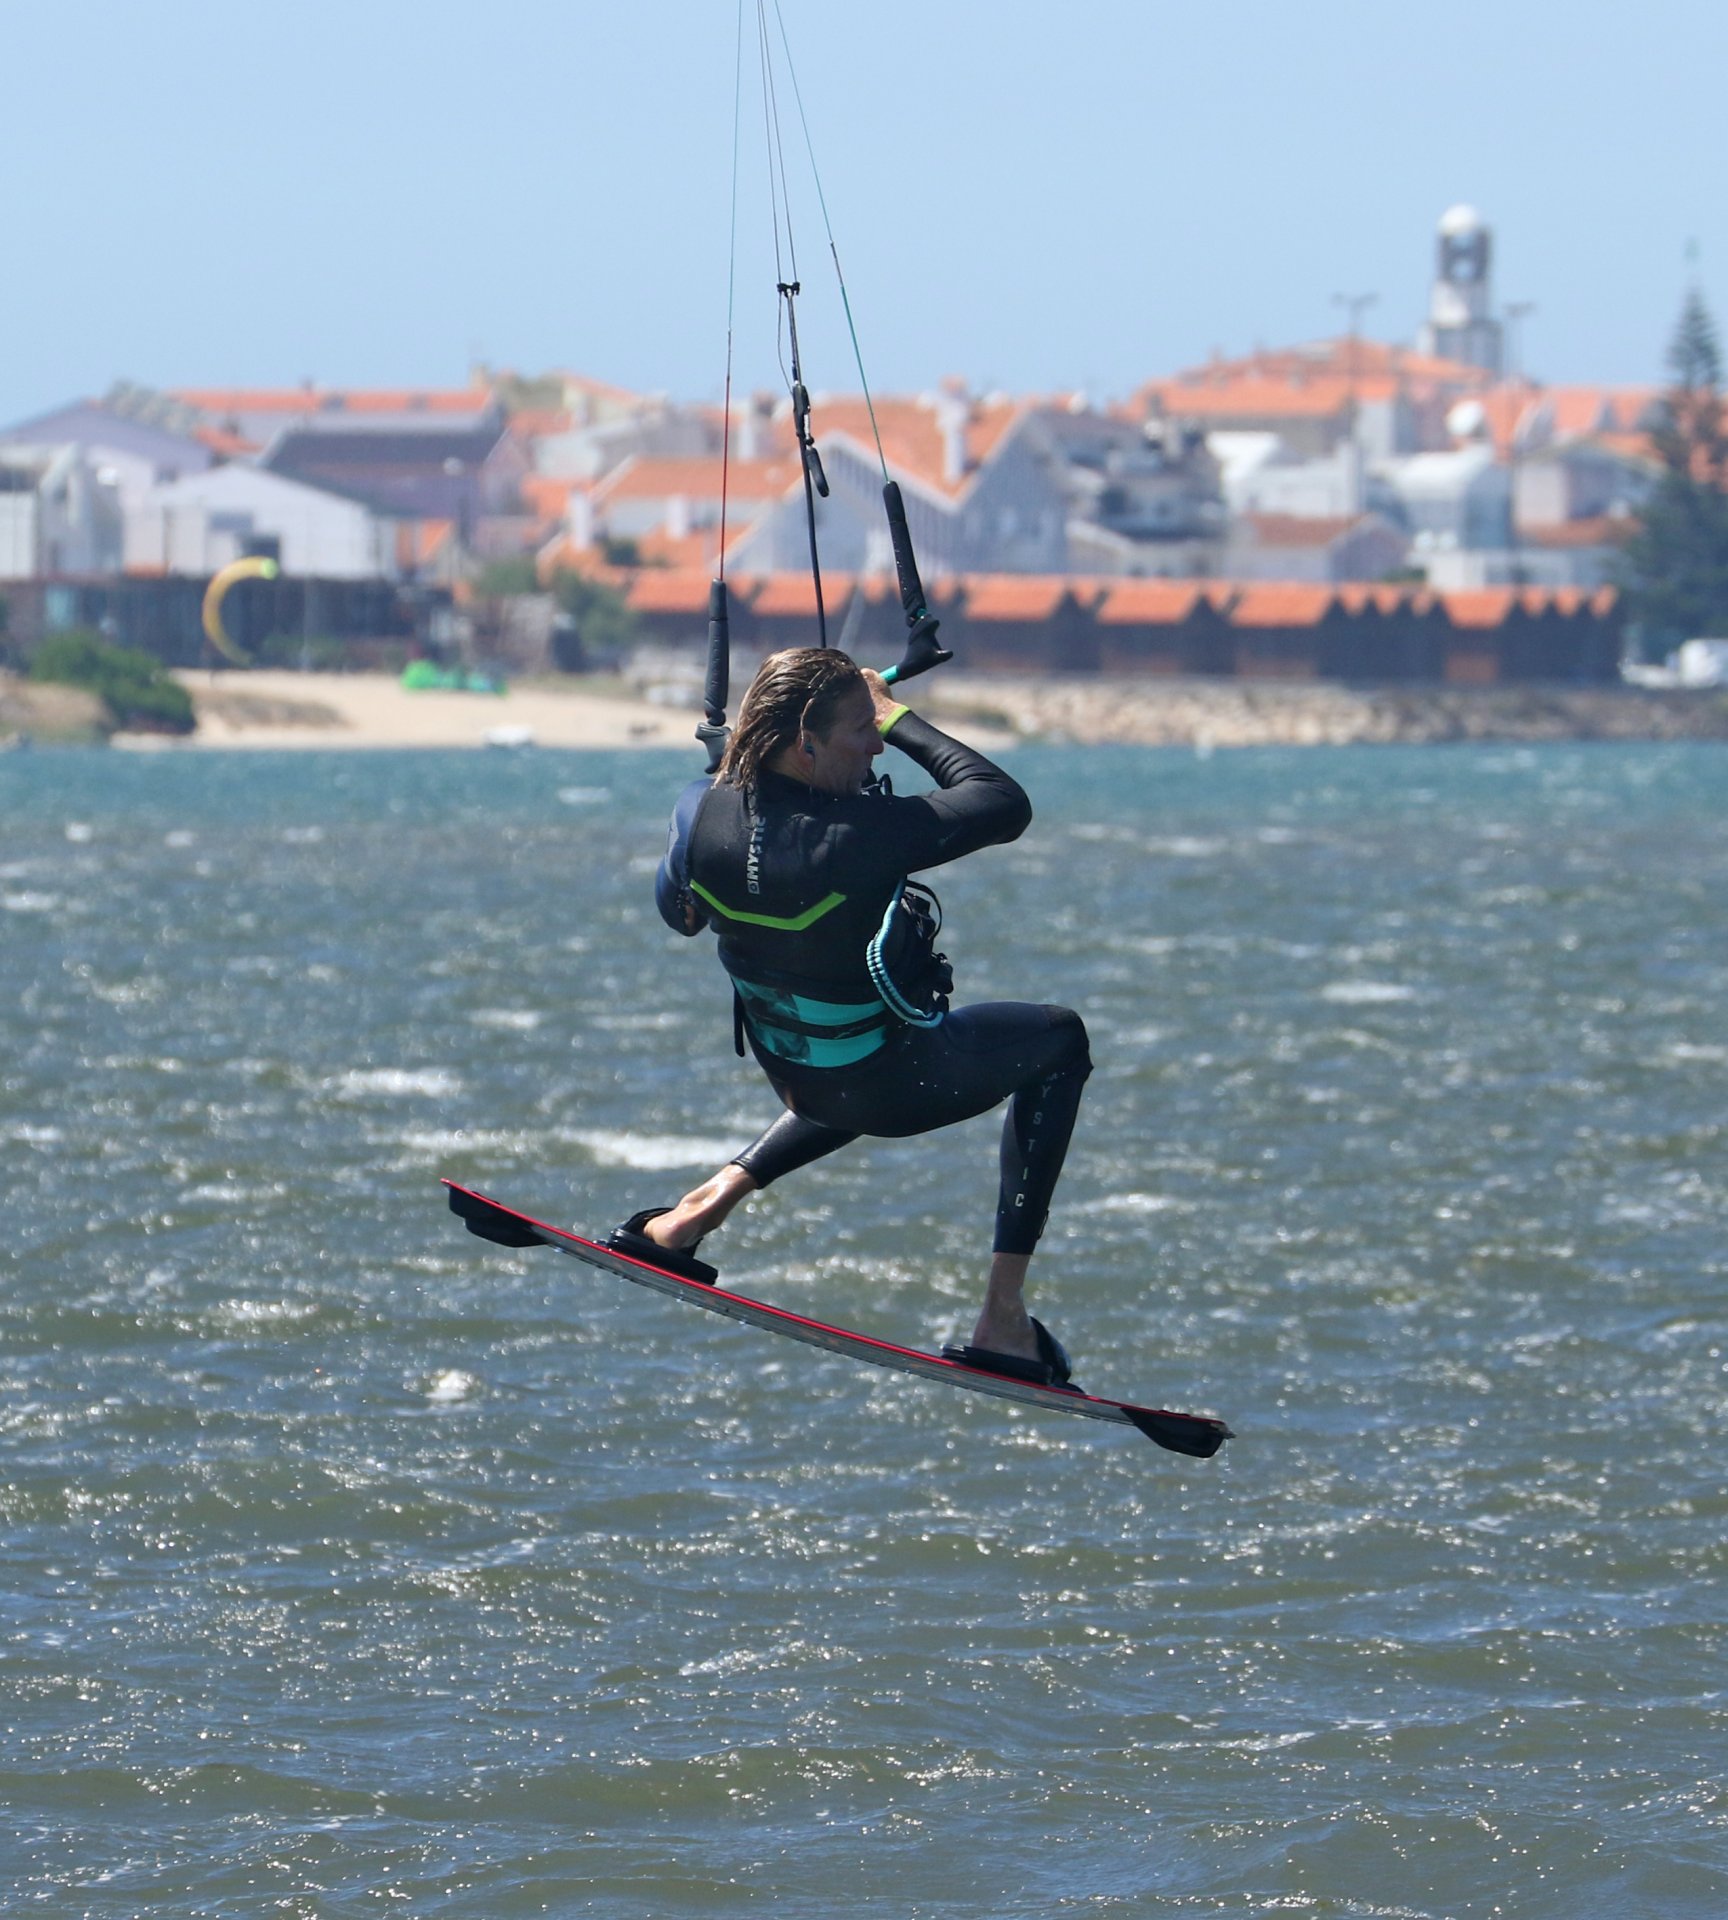
Kick-Off Pic B
Not quite Italy vs England, but you want to at least sting the goalie’s hands. You’ve got some height to get and two spins to get around, so one mighty kick is in order. Your stamp, kick, explosion, and extension needs to be directed against your edge. This will send you up, helping the kite lift you up and around with purpose. The temptation here is to throw your head and shoulders across the board in an effort to rotate as quickly as possible. Save yourself the effort as it’ll be counterproductive. Looking at the pic, Christian has kicked hard off his back foot, extending up. It’s clear to see that even though he has already left the water, his body is still upwind of the board. This means that the send forced the kite up to 12, and he’ll get maximum bang for his buck in the rotation department. All energy harnessed, none given away charitably! He’s also levelled the bar as he doesn’t want the kite carrying on any further back than necessary. All the rotation comes from the combination of the front shoulder dipping aggressively down towards the nose of the board. This shoulder movement, combined with the pull back on the harness hook by the sending kite, will get you rolling.
Front Roll Pic C
Once you’re on the go, you can treat this much like you would a normal front roll, or if you have it in the bag, a normal double. You want to make sure that you rotate quickly, no stalling, smiling for the camera or taking in the scenery; this is business! First things first, make sure that your head is leading the rotation and not getting left behind. You can look over your trailing shoulder, bite your ear, sniff your armpit, whatever trigger you need. You need float, so make sure the bar is in the sweet spot, and if you gave the kite a decent send, you want to encourage it forwards a touch. Here Christian is steering his kite forwards, both knees are up, so he’s small and will rotate more quickly, his head is turning, and his bar is in. With everything lined up from here, you’re guaranteed to stick front roll number one.
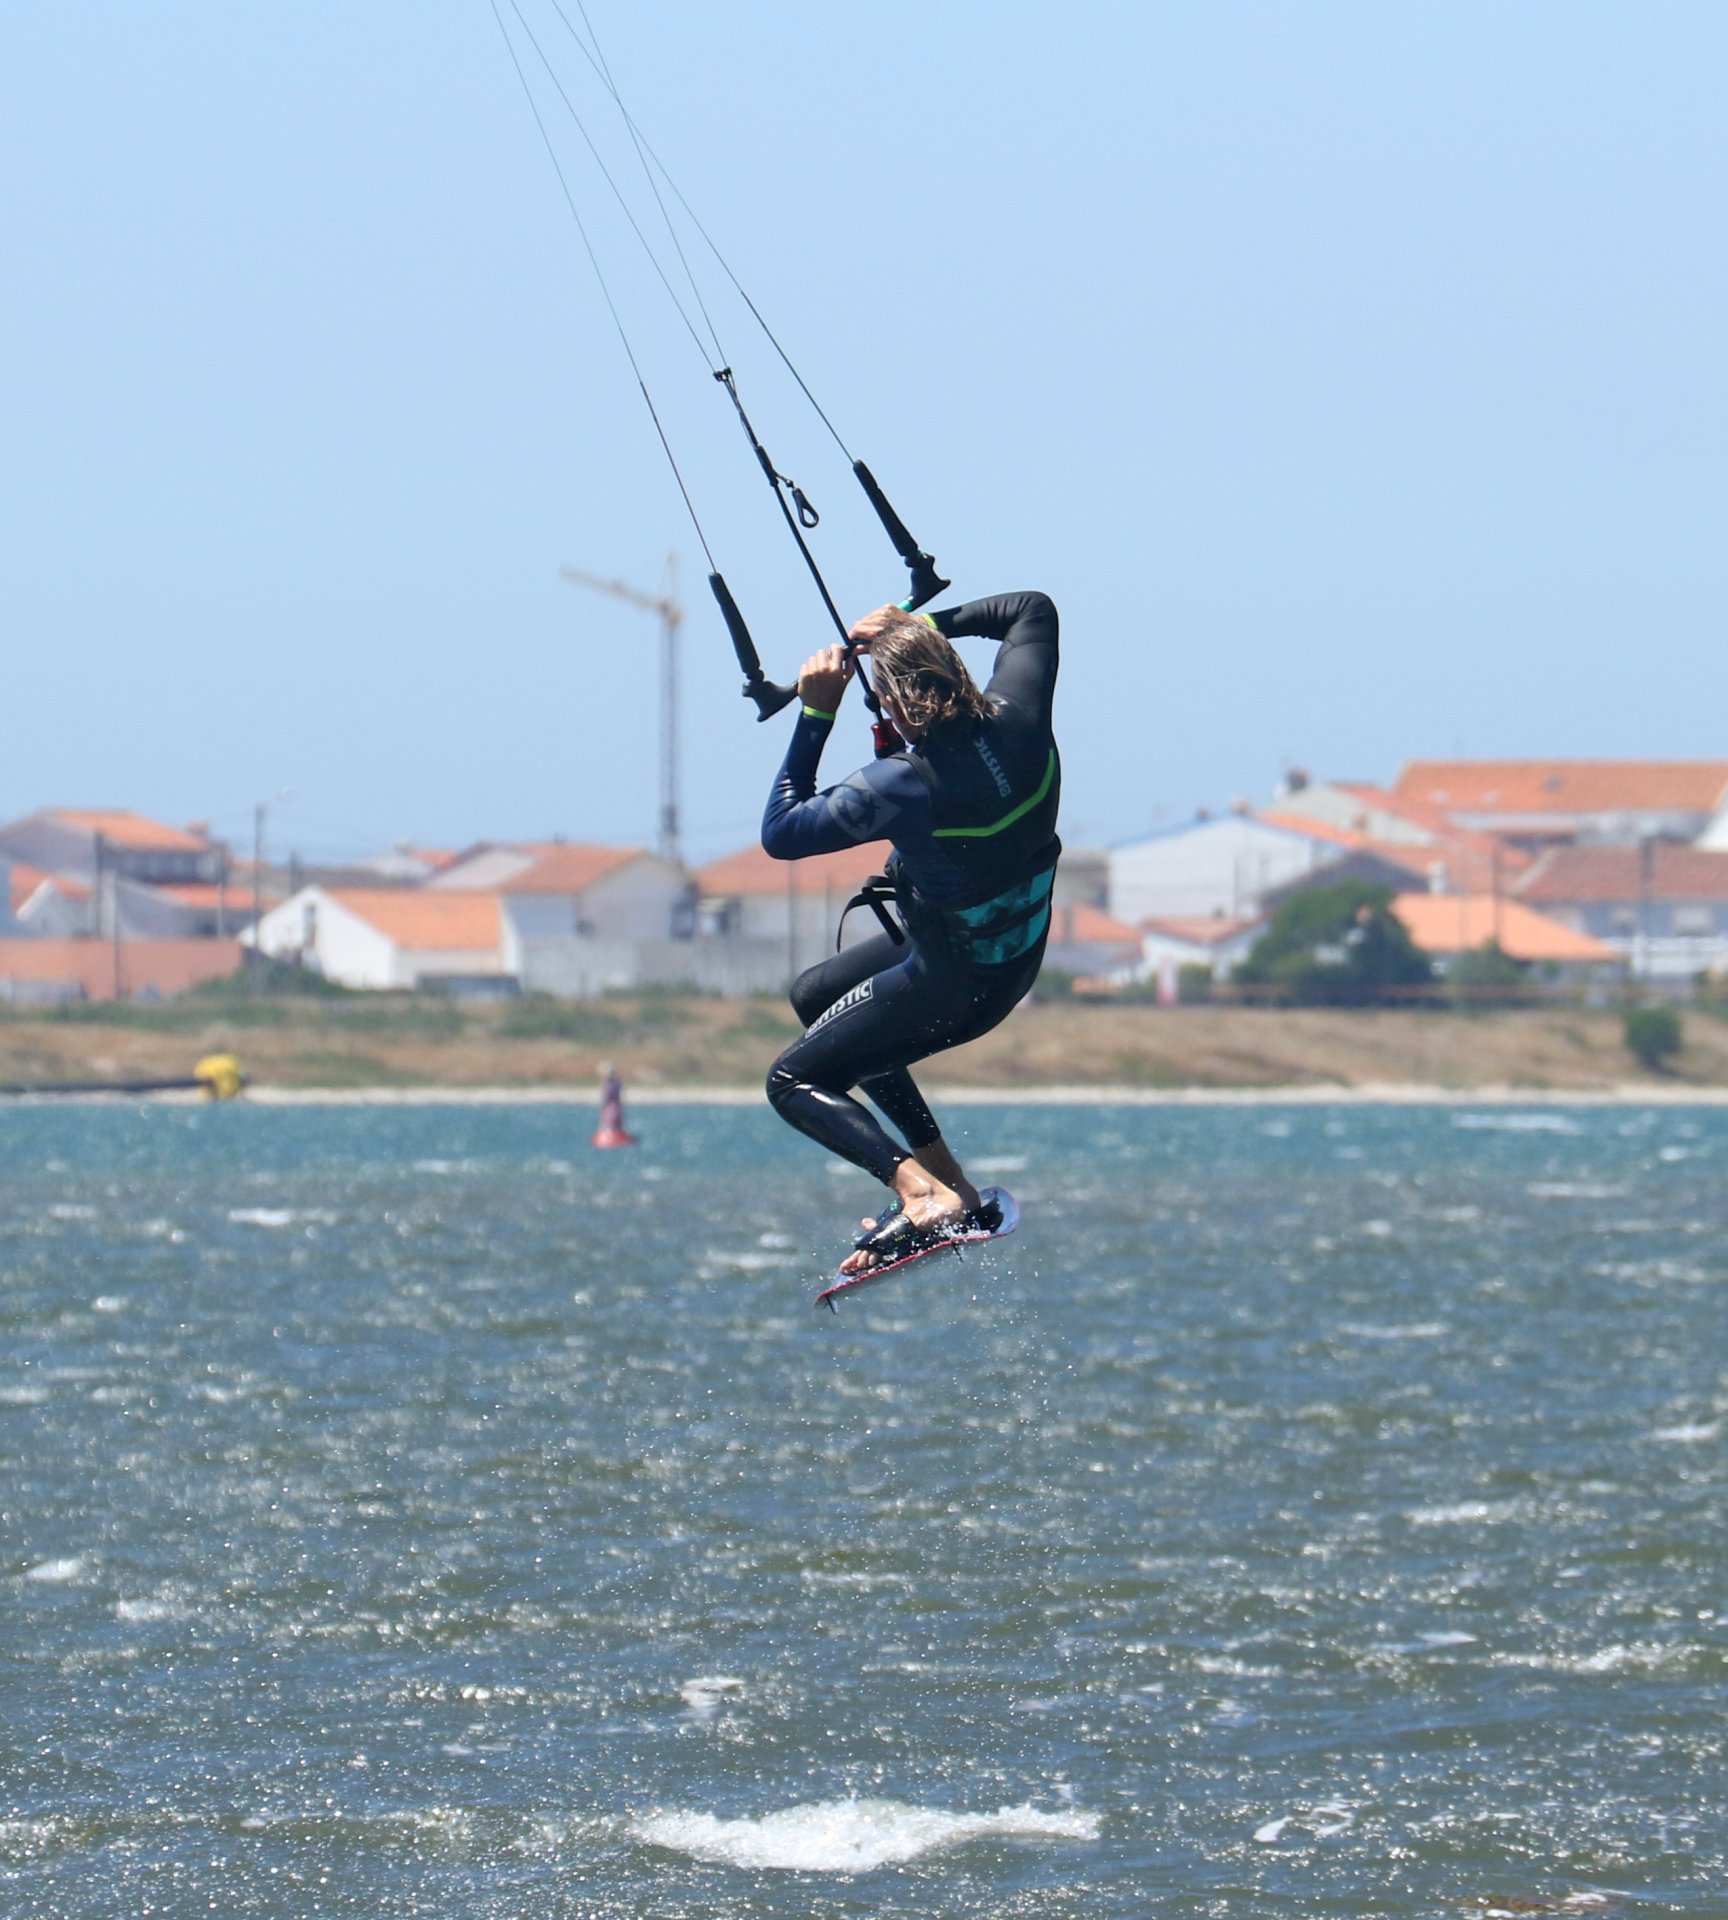
Number Two Pic D
And if all goes to plan, you’ll end up here, with one down and one to go. You will still have momentum from your take-off, but the second rotation will require some extra attention, just to be sure. Once again, get your head leading, and if it’s not already fully turned, turn it as far as you can. Stay small, keeping your knees up and the board near you. Now the bit that doesn’t come so naturally: Start to gently dive your kite for landing. Don’t give it everything, but steer it sufficiently forwards so that it gives you some pull. This will give you a touch more time and float as the kite moves, and with a bit of forward movement, it gives you a point about which to rotate. In short, you need to get your kite into the forward side of the window, ahead of you. You’ll then have help and more time to rotate. Christian has fully turned his head, he’s diving the kite and keeping small.
Patience Pic E
If you compare this picture with the previous one, Christian hasn’t turned that much. What is crucial, though, is that it’s enough to be able to see your landing and where you want to go. With a target to aim for, you’ll find it simpler to bring your body and board through the rest of the rotation. Funnily enough, if you put your feet down now, you’d theoretically land toeside. However, because the kite is pulling you downwind for the landing, you’re better off keeping your feet and board up until you come around the last little bit so that your board is pointing in the same direction as you’re travelling.


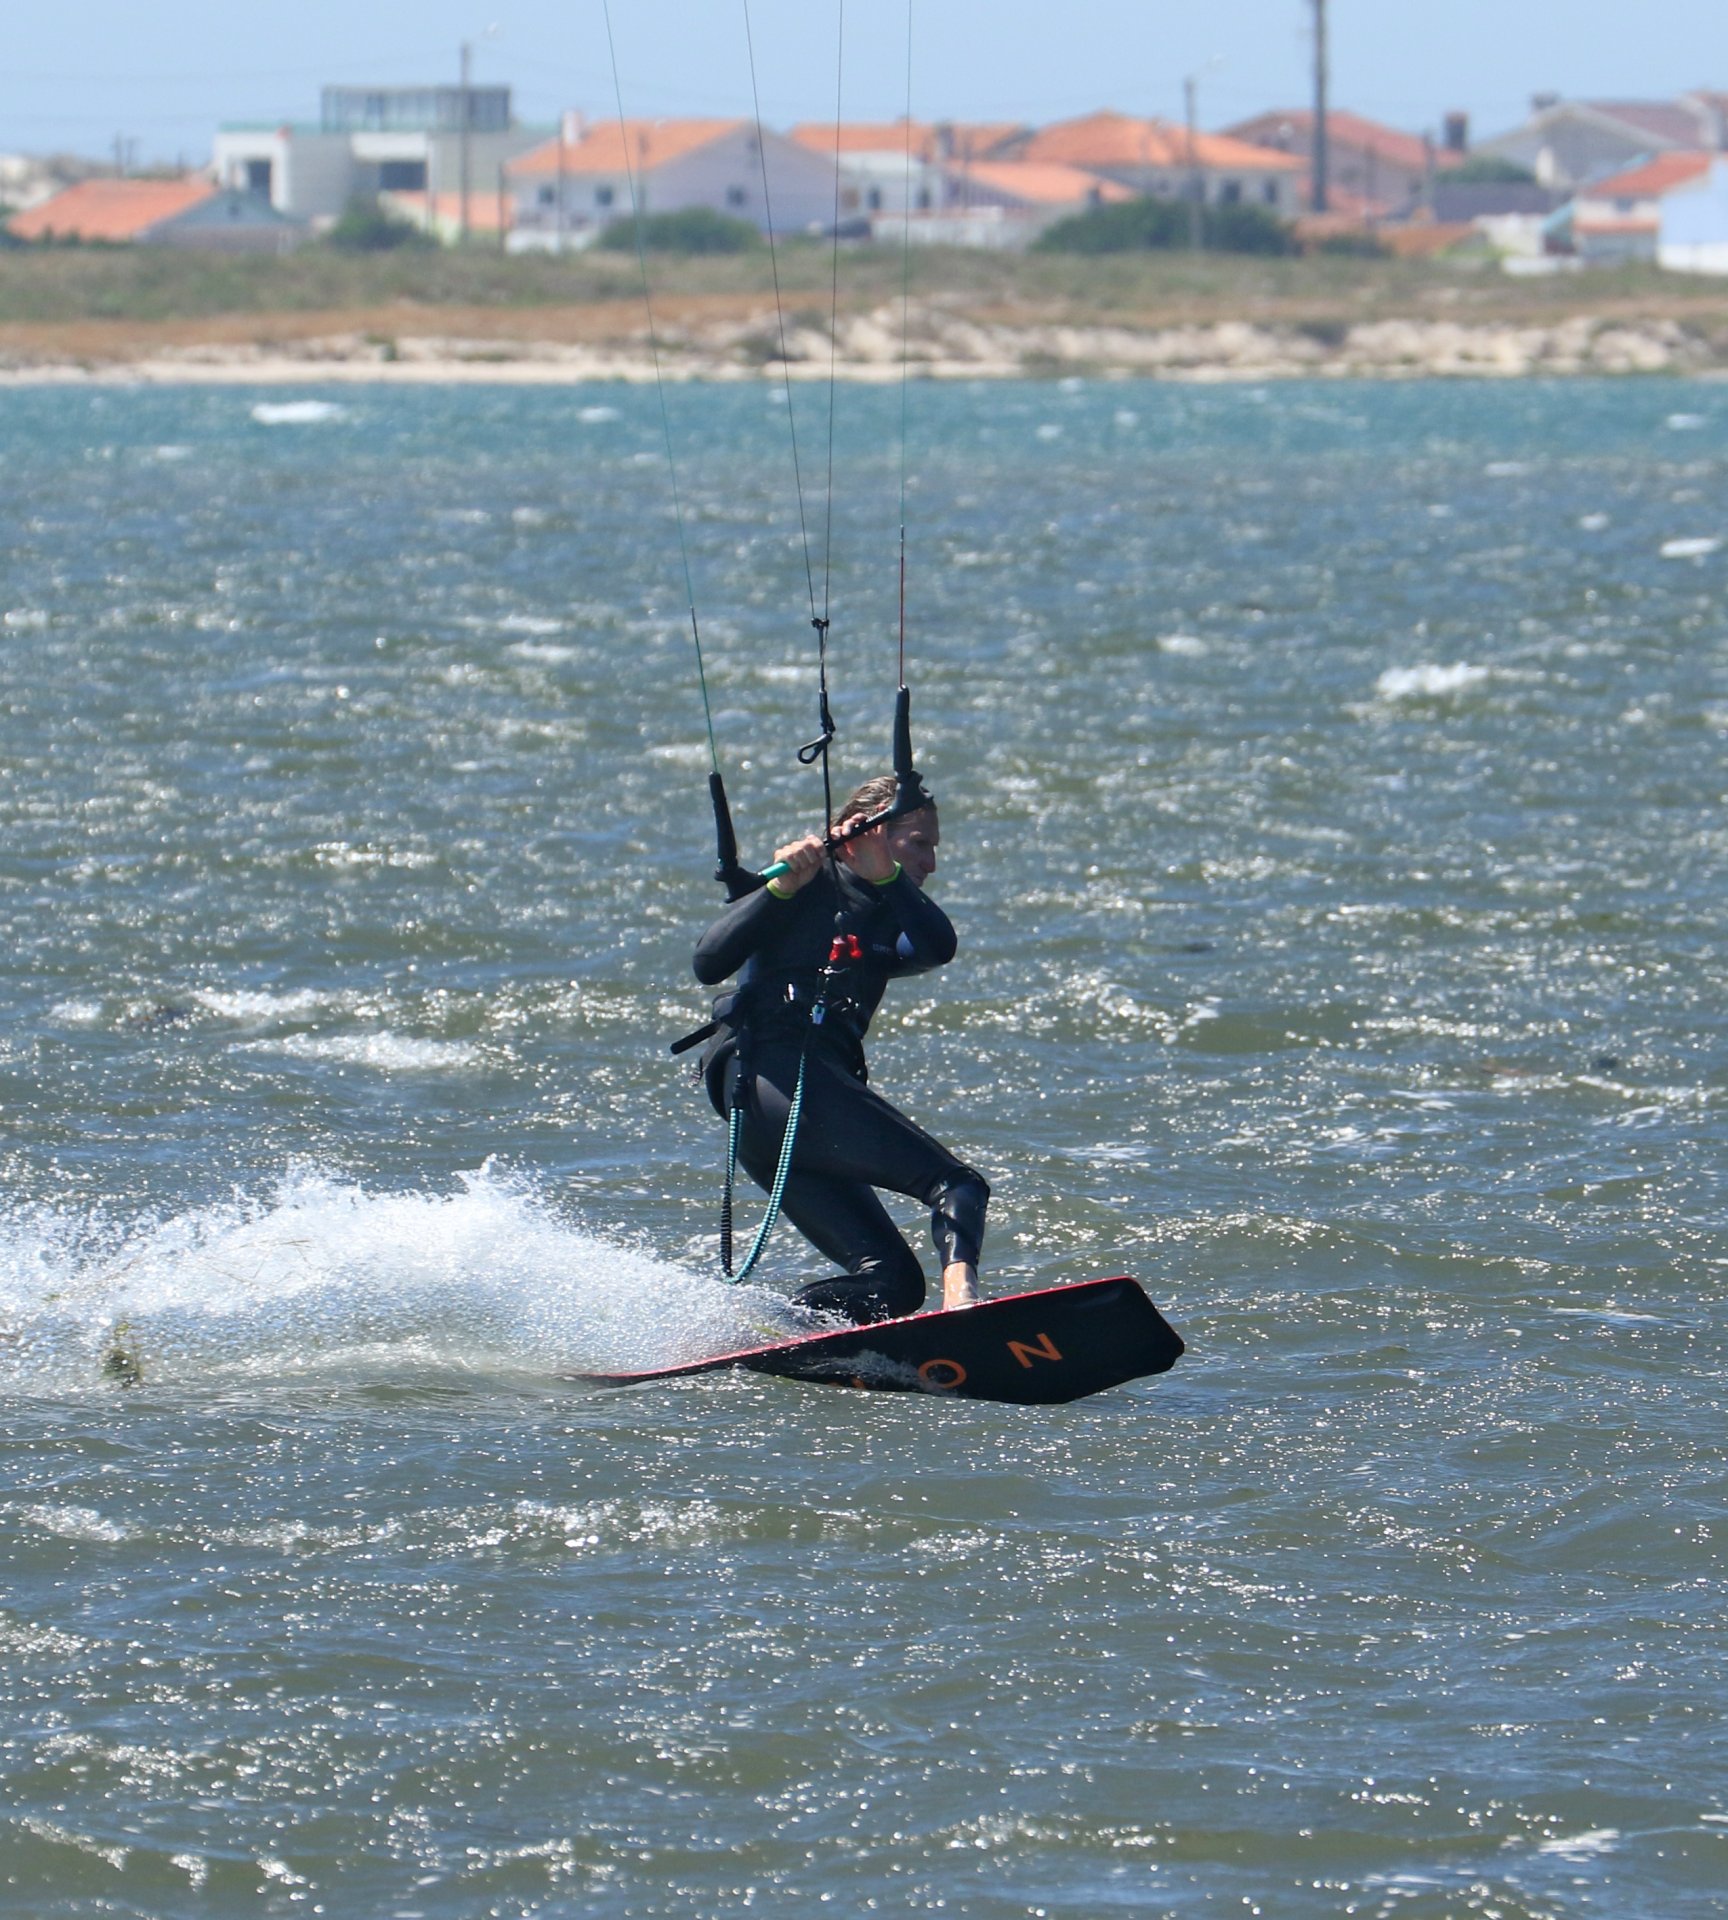
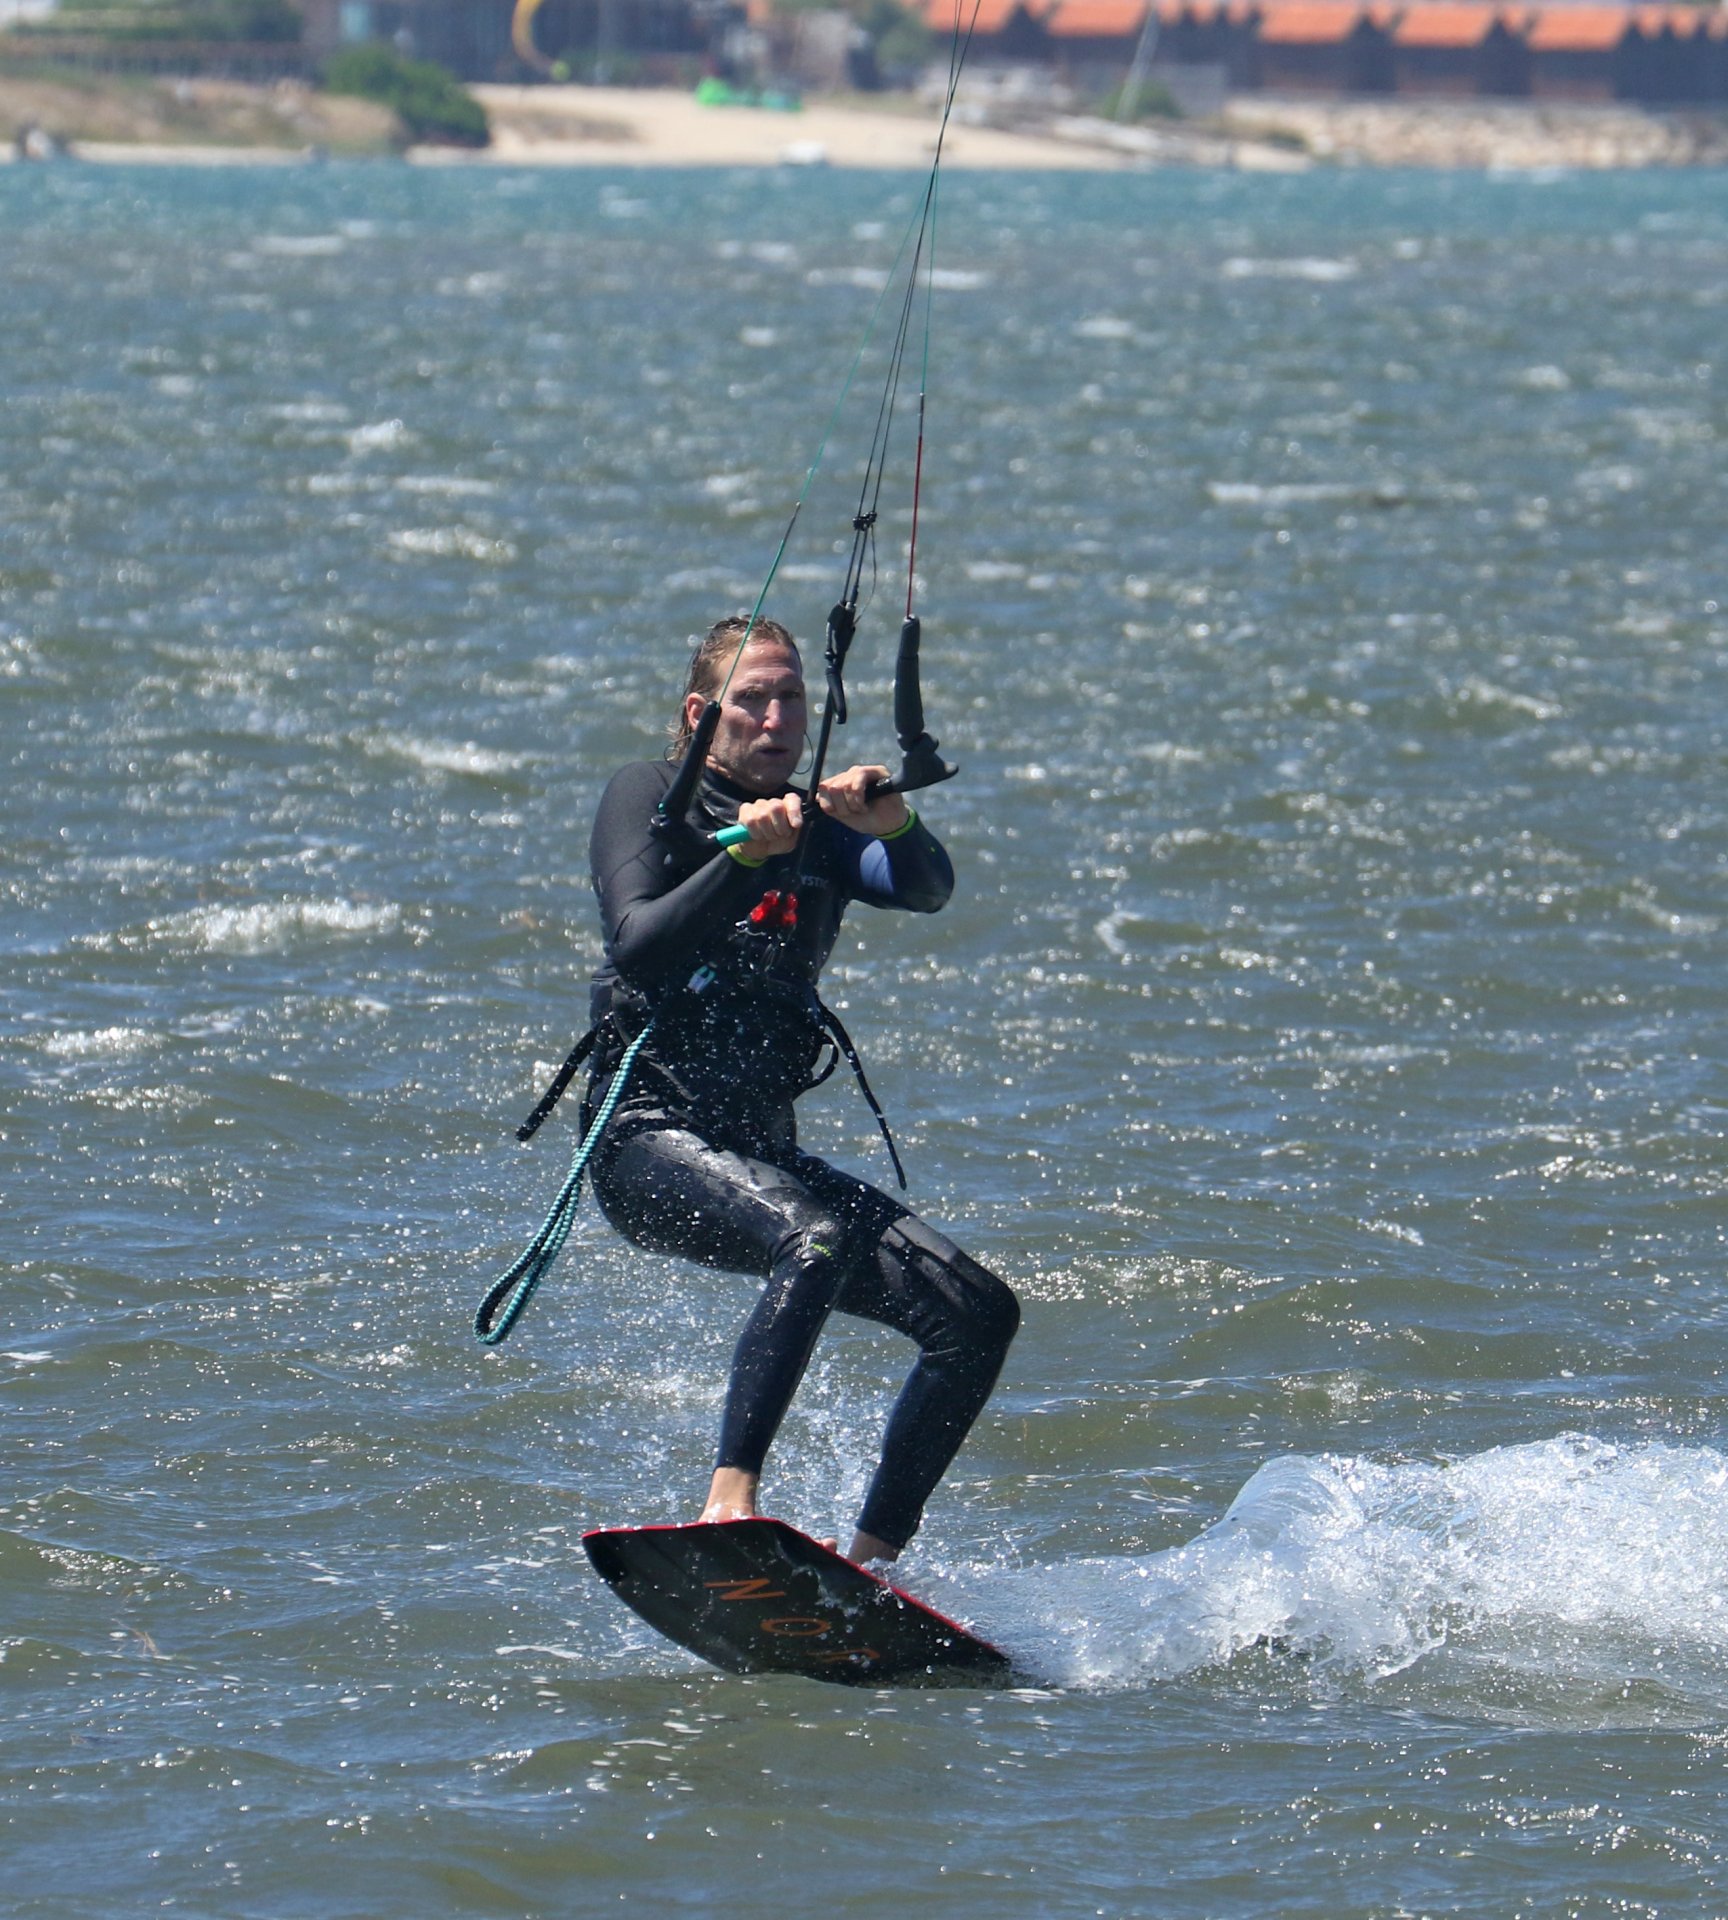
Touch Down Pic F
With the kite pulling you downwind, your patience will be rewarded. You don’t actually want to land toeside. You’re aiming to land with your board pointing downwind, your weight over the board, following the diving kite. From here, you can then regain your composure, sort the kite, shift your weight onto the balls of your feet and carve up onto your toeside edge. Looking at Christian, he’s landing following the kite and over the board. He’s steering the kite up out of the dive, and as it rises, he flexes his ankles, pushing his knees across the board to weight the toeside edge and carve back up.
Top Tips
Working on your approach and take-off is everything. As we already alluded to, this means a strong, dynamic toeside position from which you can resist and therefore send the kite with meaning. Really work on getting your hips and weight forwards. If your front leg is straight, soften it, bend it and get low. You might find that to do this, you need to take your front hand off the bar. Obviously, this will make sending the kite tricky. If you can keep your position and reach the bar, brilliant. If you can’t, you’ll need to trim a touch to bring the sweet spot and, therefore, the bar a bit closer.

Bring the kite forwards again, up and over 12 o’clock, as your spinning will give you a noticeable amount of extra time to make it around number two, so feel this into your attempts, bit by bit.
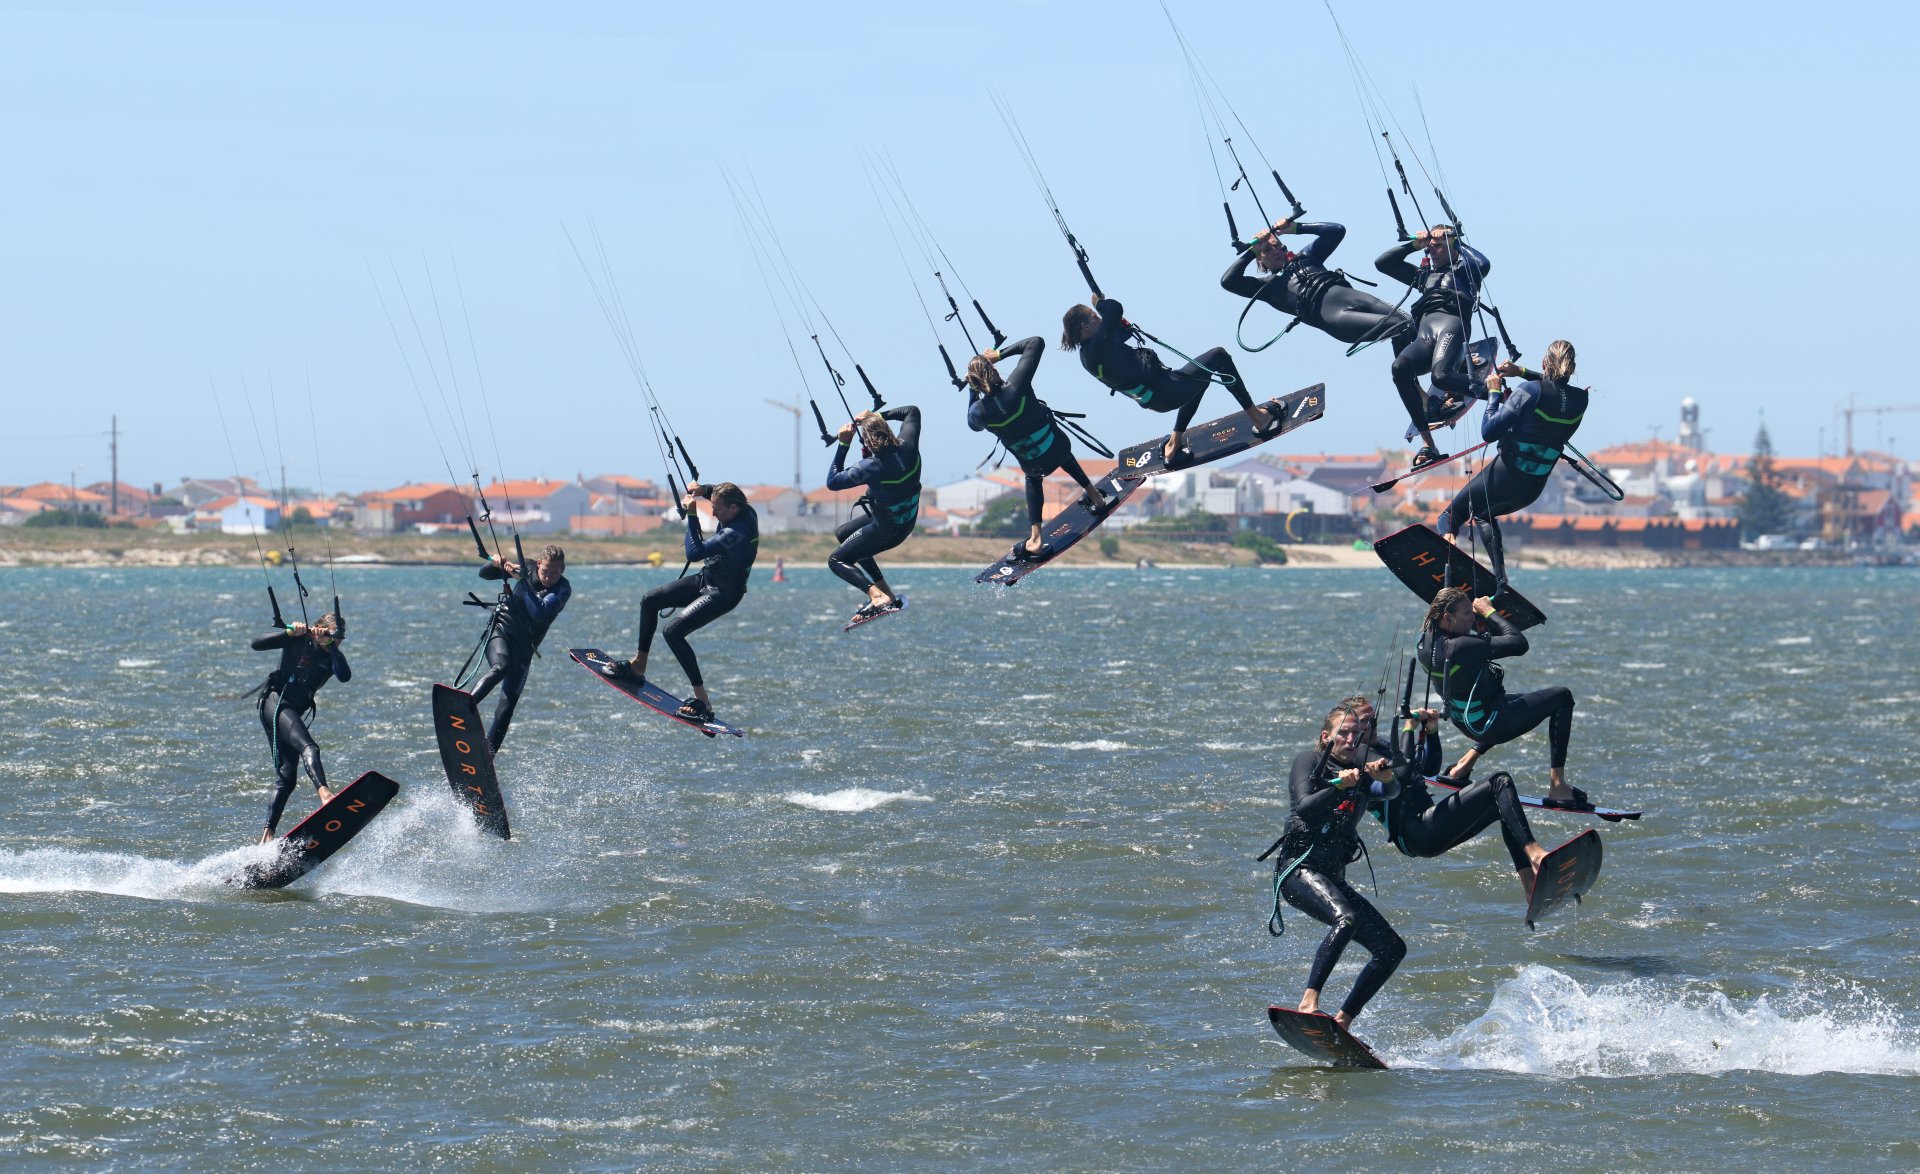
Now have a look at the sequence and video to see how it all pans out on the water.
Common Problems
Assuming that you’ve got your toeside position sorted, these are the three most likely culprits when it doesn’t go quite as hoped.

Only completing one rotation, even with an aggressive send and a monster kick-off. Generally speaking, this is because you’ve left the kite behind 12 o’clock after taking off. It’s a position that works well in many jumps, when we’re grabbing and when we want more control and less drift. However, you need the lift and pull for a double. With the kite back, it can prevent you from going into the second rotation. Make sure you level the bar on take-off and steer the kite forwards throughout the move.
Landing on your back after completing one and a half. This can be caused by losing or not holding your edge at take-off. If you get pulled by the kite because you’re yanking the bar in, or you can’t reach the bar because your sweet spot is too far out and therefore force it in, you’ll lose your edge early. If you throw yourself across the board looking for a quick spin, you’ll also release your edge too early and have the same problem. Too much downwind drift won’t allow you to get all the way around.
If you’re getting around but keep landing with weight on your heels and therefore carving away from toeside. Most likely it's because you haven’t dived the kite. If the kite is diving, it’s head down and forwards, pulling you with it. This means as you land, it should help pull you up onto the board. If it’s still up high, it won’t help, and you’re more likely to come down heavily on your heels.
Keystones
- Solid toeside stance and positive send.
- Big kick against edge, shoulders down, and head turned to rotate.
- Redirect kite throughout move.
- Kite must be forwards to complete second rotation.
- Dive kite to land downwind and carve upwind.
This technique article was in Issue 88 of IKSURFMAG.
Related


By Christian and Karine
Christian and Karine have been working together as a coaching team, running improver to advanced kitesurfing clinics since 2003.
