
The Pop to Toeside
Technique / Intermediate

Introduction
Having had a good look at how to fix your toeside in the last issue, it seems sensible to move on whilst making the most of your newly polished skills. And there is no better way to enjoy your twin tip toeside experience than popping to get there! Now, if the idea of popping sends shivers down your spine, or if you don't know what popping is, fear not. The most splendid irony of popping to toeside is that you don't need to be able to pop yet to try this, and it is, in fact, one of the best ways to introduce yourself to popping.
OK, so if you don't know what popping is, it's a general term used in kiting methodology that means getting the board off the water without using the kite to jump or a ramp to launch you. It's the kiting equivalent of an Ollie or Bunny Hop. The beauty is that whilst concentrating on getting your board and fins momentarily off the water, with the intention of switching to toeside, most kiters find the pop less problematic than if they were to focus solely on the art of popping itself.


Before moving on, we should mention three things. Firstly, to pop to toeside, you only need to get a few centimetres off the water for a fraction of a second. If you free your fins, that's enough; no daylight necessary. Secondly, popping is about using the edge of your board, stamping and corking. It's not about trying to lift the board off the water, but rather kick it against the water so that it bounces back up and off it. Thirdly, you already know how to slide to toeside, you've got the t-shirt, it's in the bag, so there'll be plenty of muscle memory helping you along the way. So, let's have a butchers at what you need to do…

The Approach Pic A.
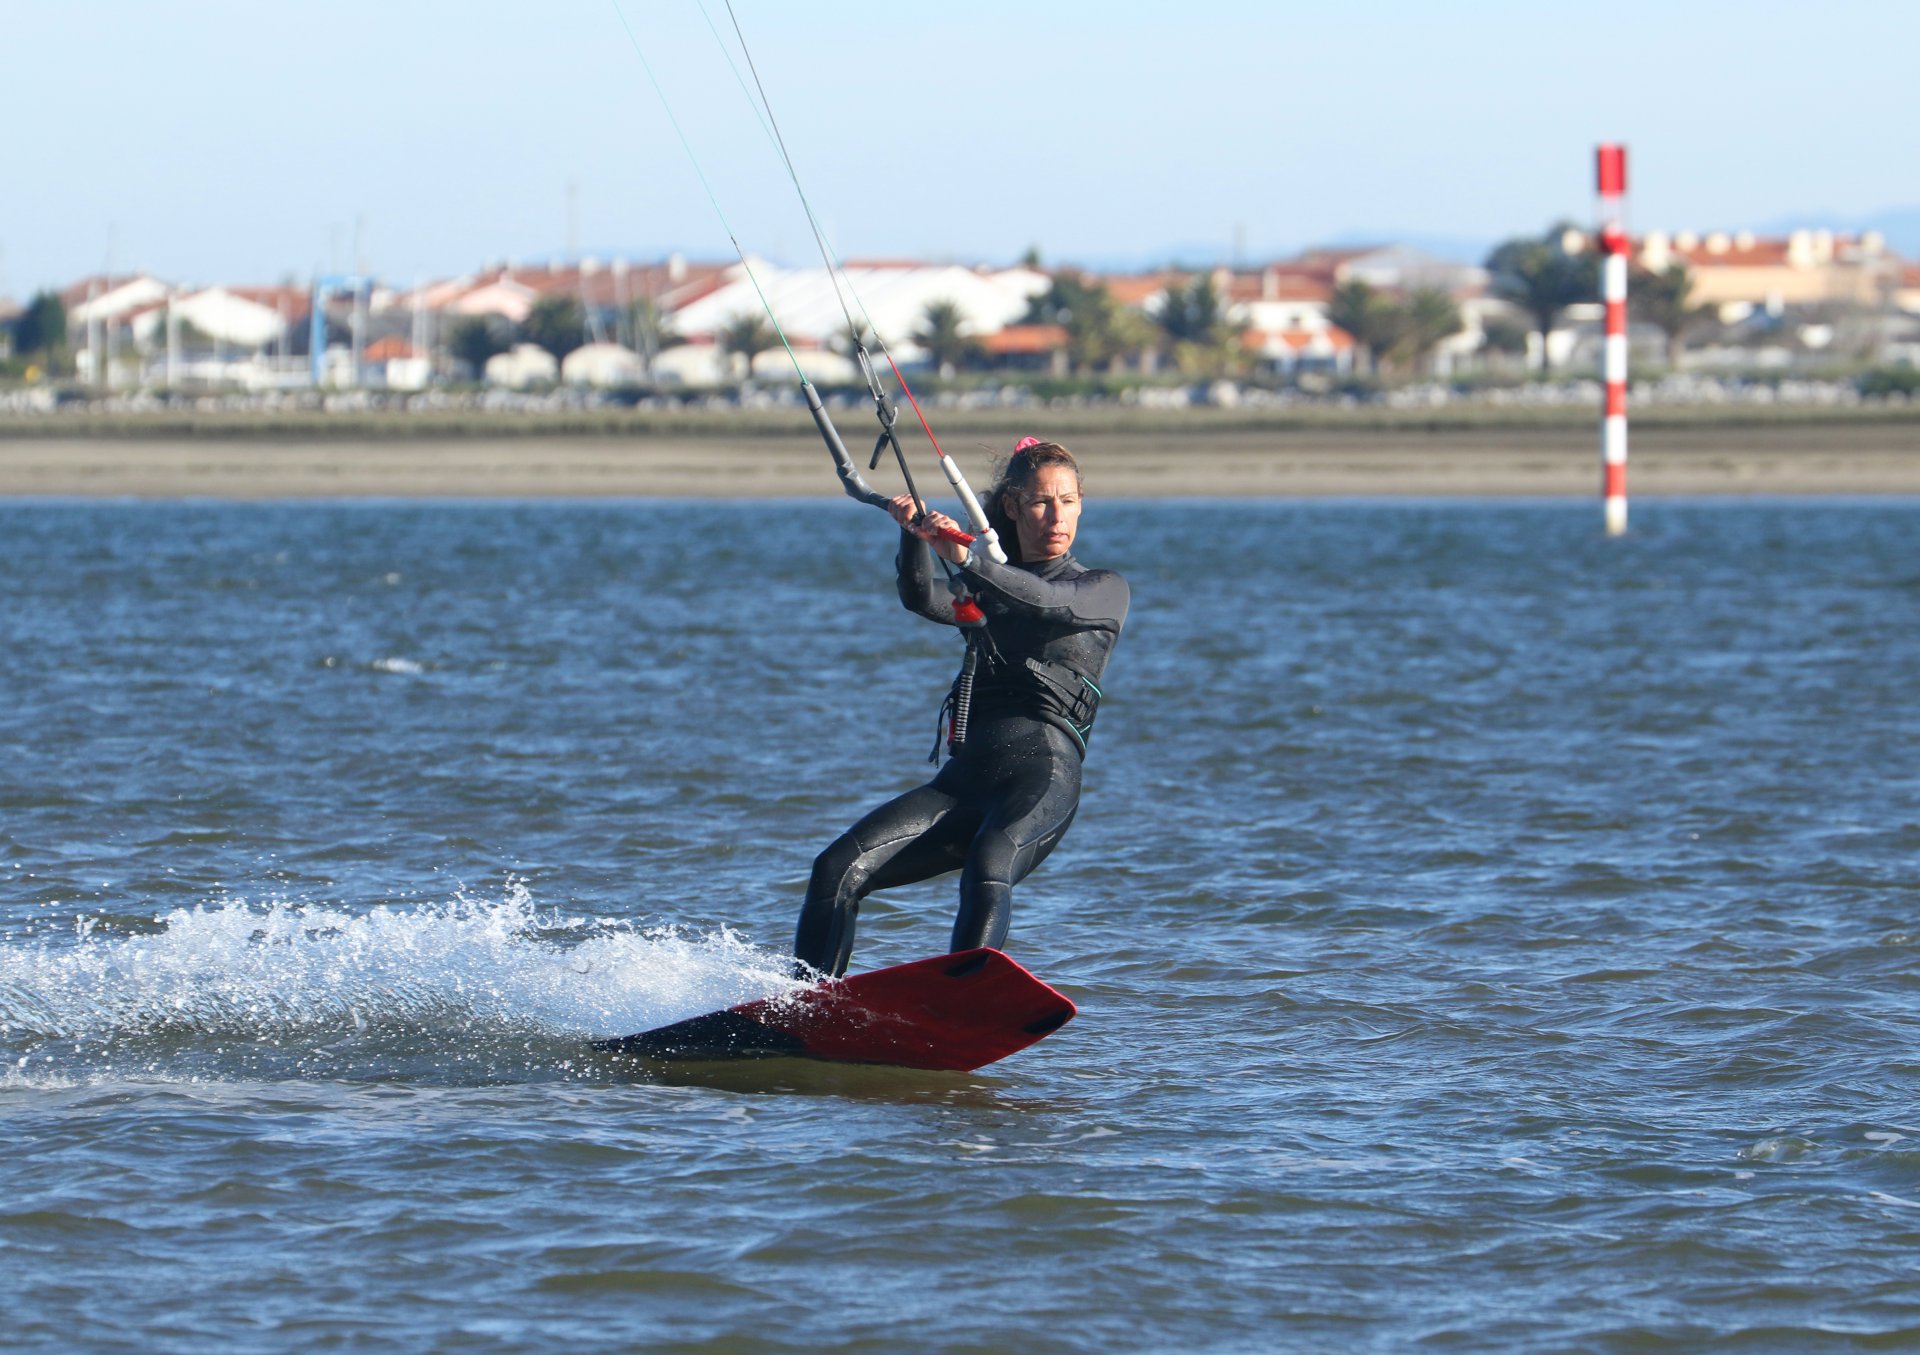
First job is to get everything into the best possible position from which to start the process. We've already mentioned that you'll be using your edge, so that's the best place to start, on a decent edge. No need to be grimacing with your bum skimming the surface and the world flashing by in a blur, just happily riding slightly upwind. If you park your kite around the 11 or 1 o'clock mark, you'll have something to resist against. Make sure that you can happily reach the bar with both hands. You can actually try this with either two hands on the bar, or one. However, you need to be in control, able to sheet out if needed and ride toeside once you've switched, so trim the bar in a touch, if it's already a stretch. You can see that Karine has both hands on the bar, she's on an edge but not racing at Mach 10 or pointing as high as possible, and her kite is around 11 o'clock. That said, she's still resisting with both legs strong.
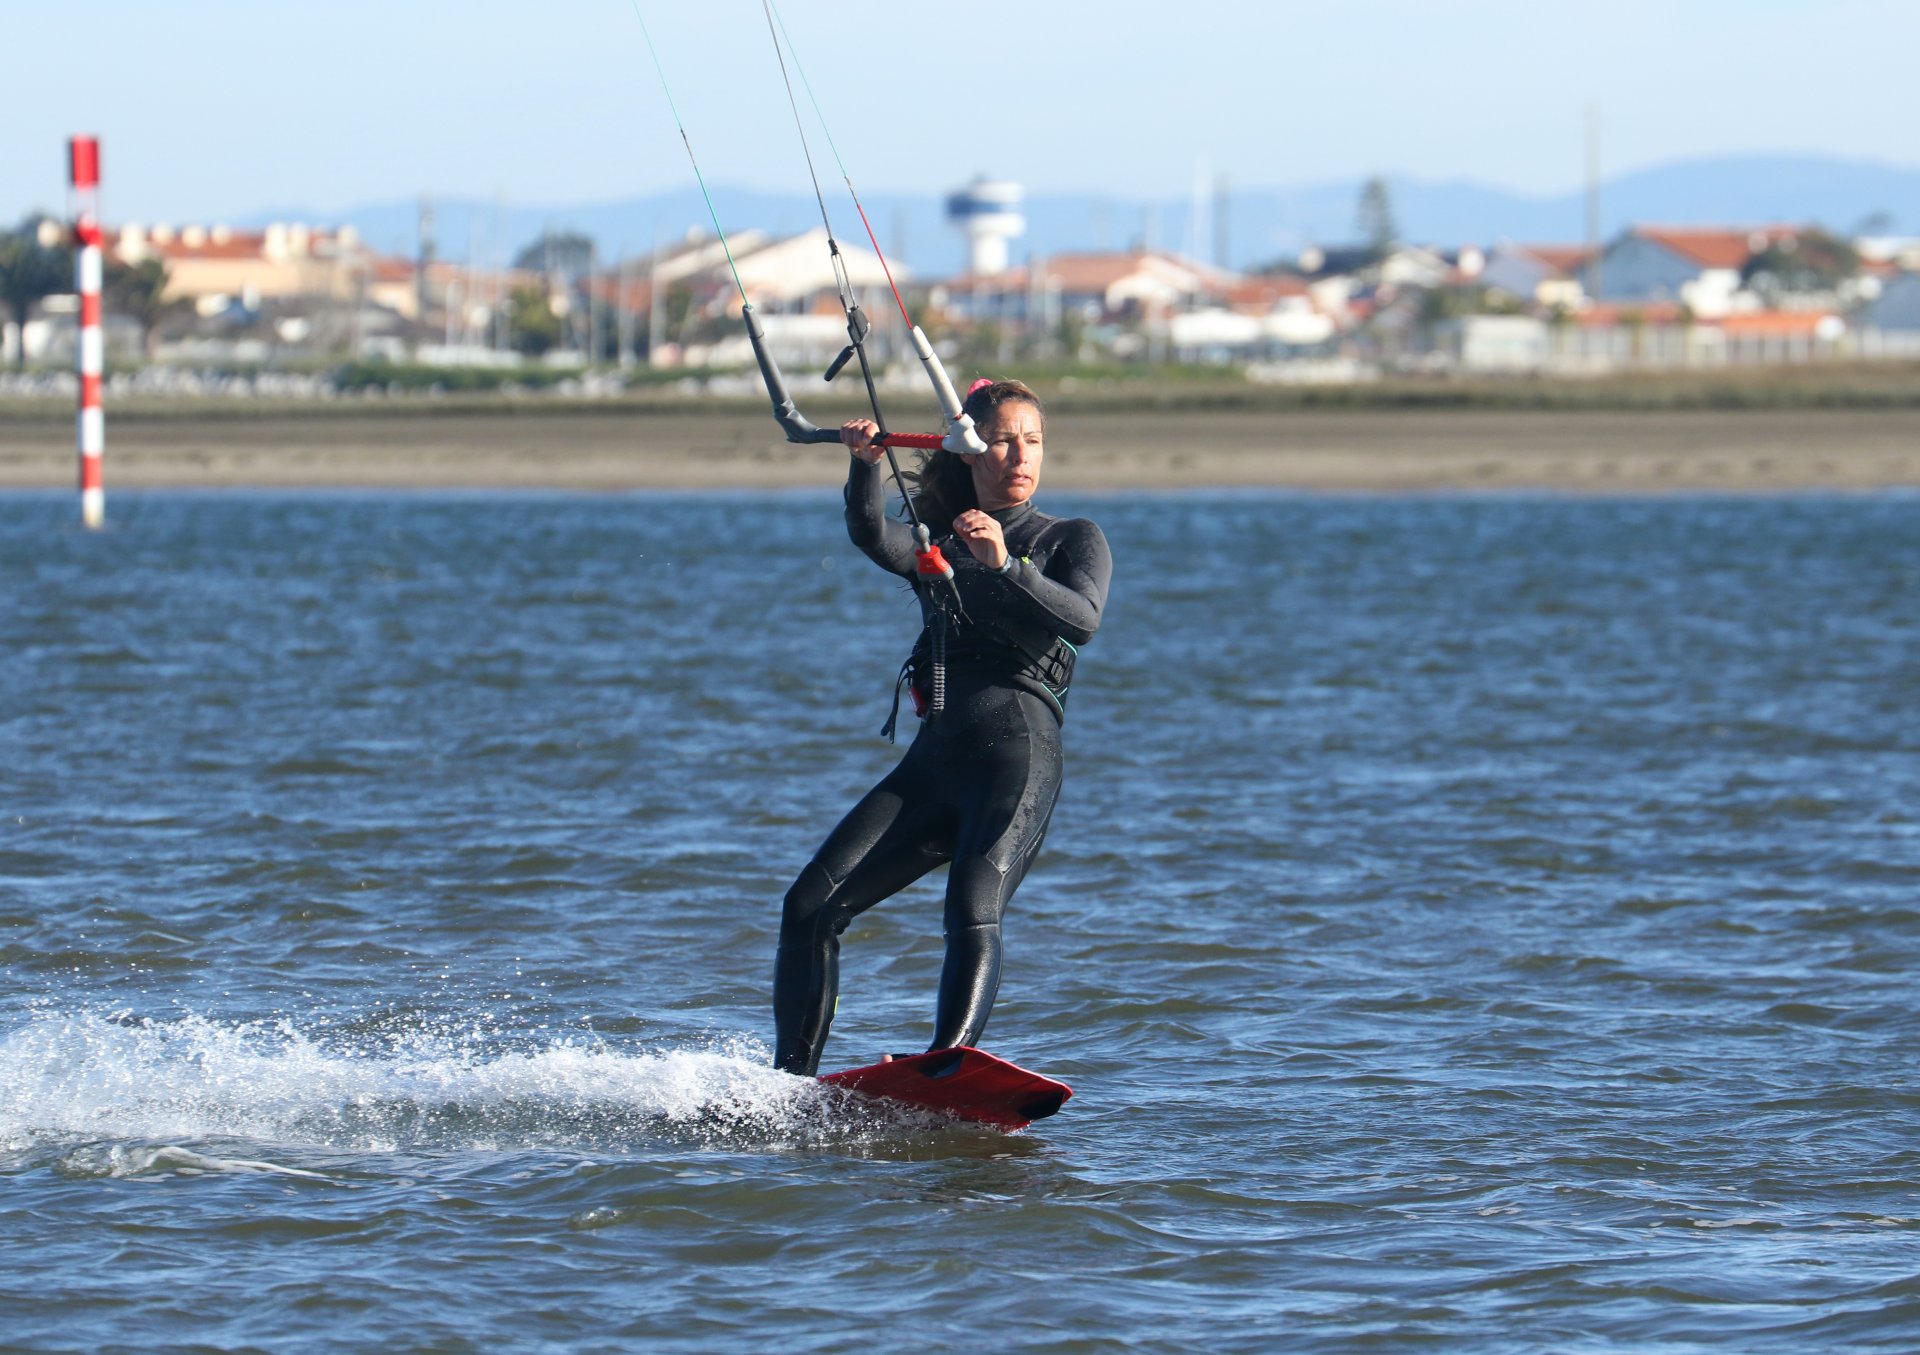
Stand Up Pic B.
Your next job is to change direction a little bit. You want to flatten off your board just a touch, relaxing your edge. You should be able to do this because you are already standing tall. If you're low, you'll have to make a bigger movement, which is still possible. The reason you flatten the board is so that it turns away from the wind. This will allow you to then carve back into the wind without stopping. Karine has relaxed her edge, standing up over the board whilst still keeping her weight on her heels. Note how her hips stay back as per normal so that her back leg is slightly more flexed than her front leg. All the while, she's keeping her bar on the sweet spot. You can see that Karine has already taken her front hand off the bar in preparation for toeside. If you have read the feature on polishing your toeside, you'll know all about the big hand.
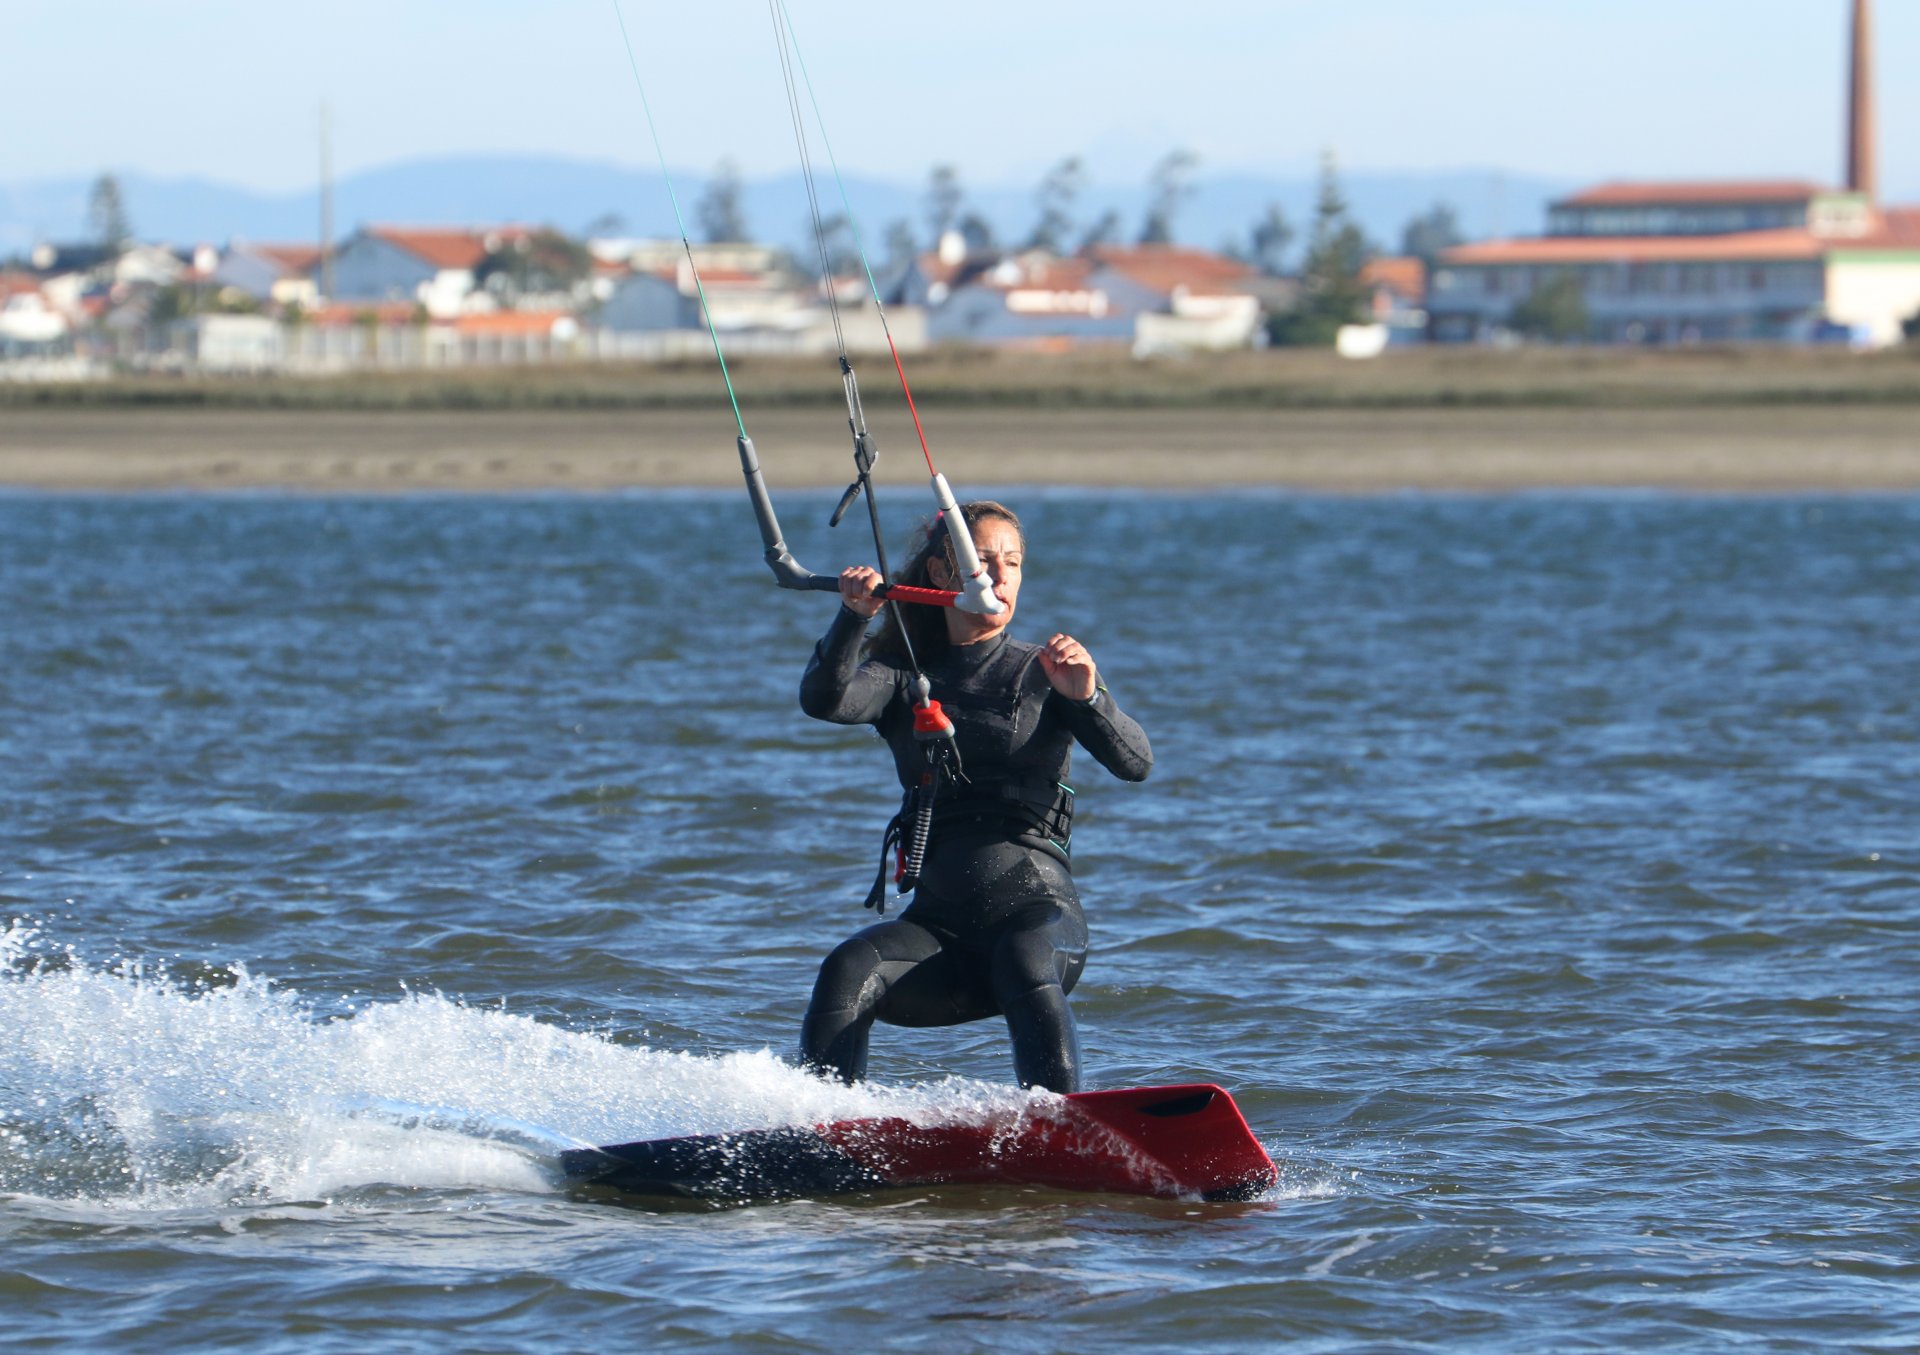
The Carve Pic C.
There's no need for thoughts of grandeur, plumes of spray or radical effort. Your aim here is to carve back onto your edge. The idea is that as you turn back upwind and away from the kite, you will put tension back on the lines and through your edge, building up energy so that you can pop. To turn the board, drop your bum a bit and push through your heels as you look where you want to go. Think of it as getting back onto your edge. The trick here is that it's a short moment, from flat back to edge. As soon as you're back on your edge, it's time for the next step. You can see that Karine has dropped her weight and turned the board back onto its edge, putting tension into the lines and resistance through her board. Really important, her bar is still on the sweet spot. Resist the urge to pull in for tension; you're turning for tension. This way, you can keep your shoulders upright rather than leaning them away from the kite.
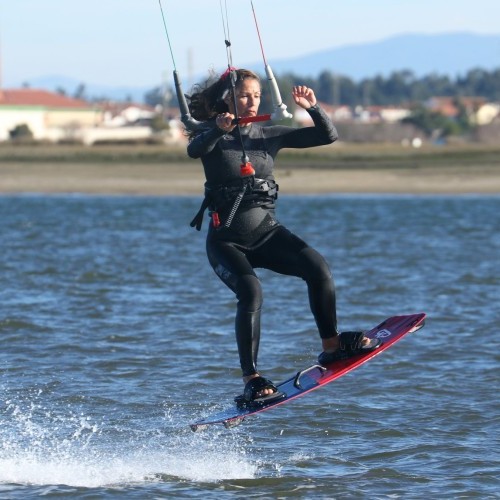
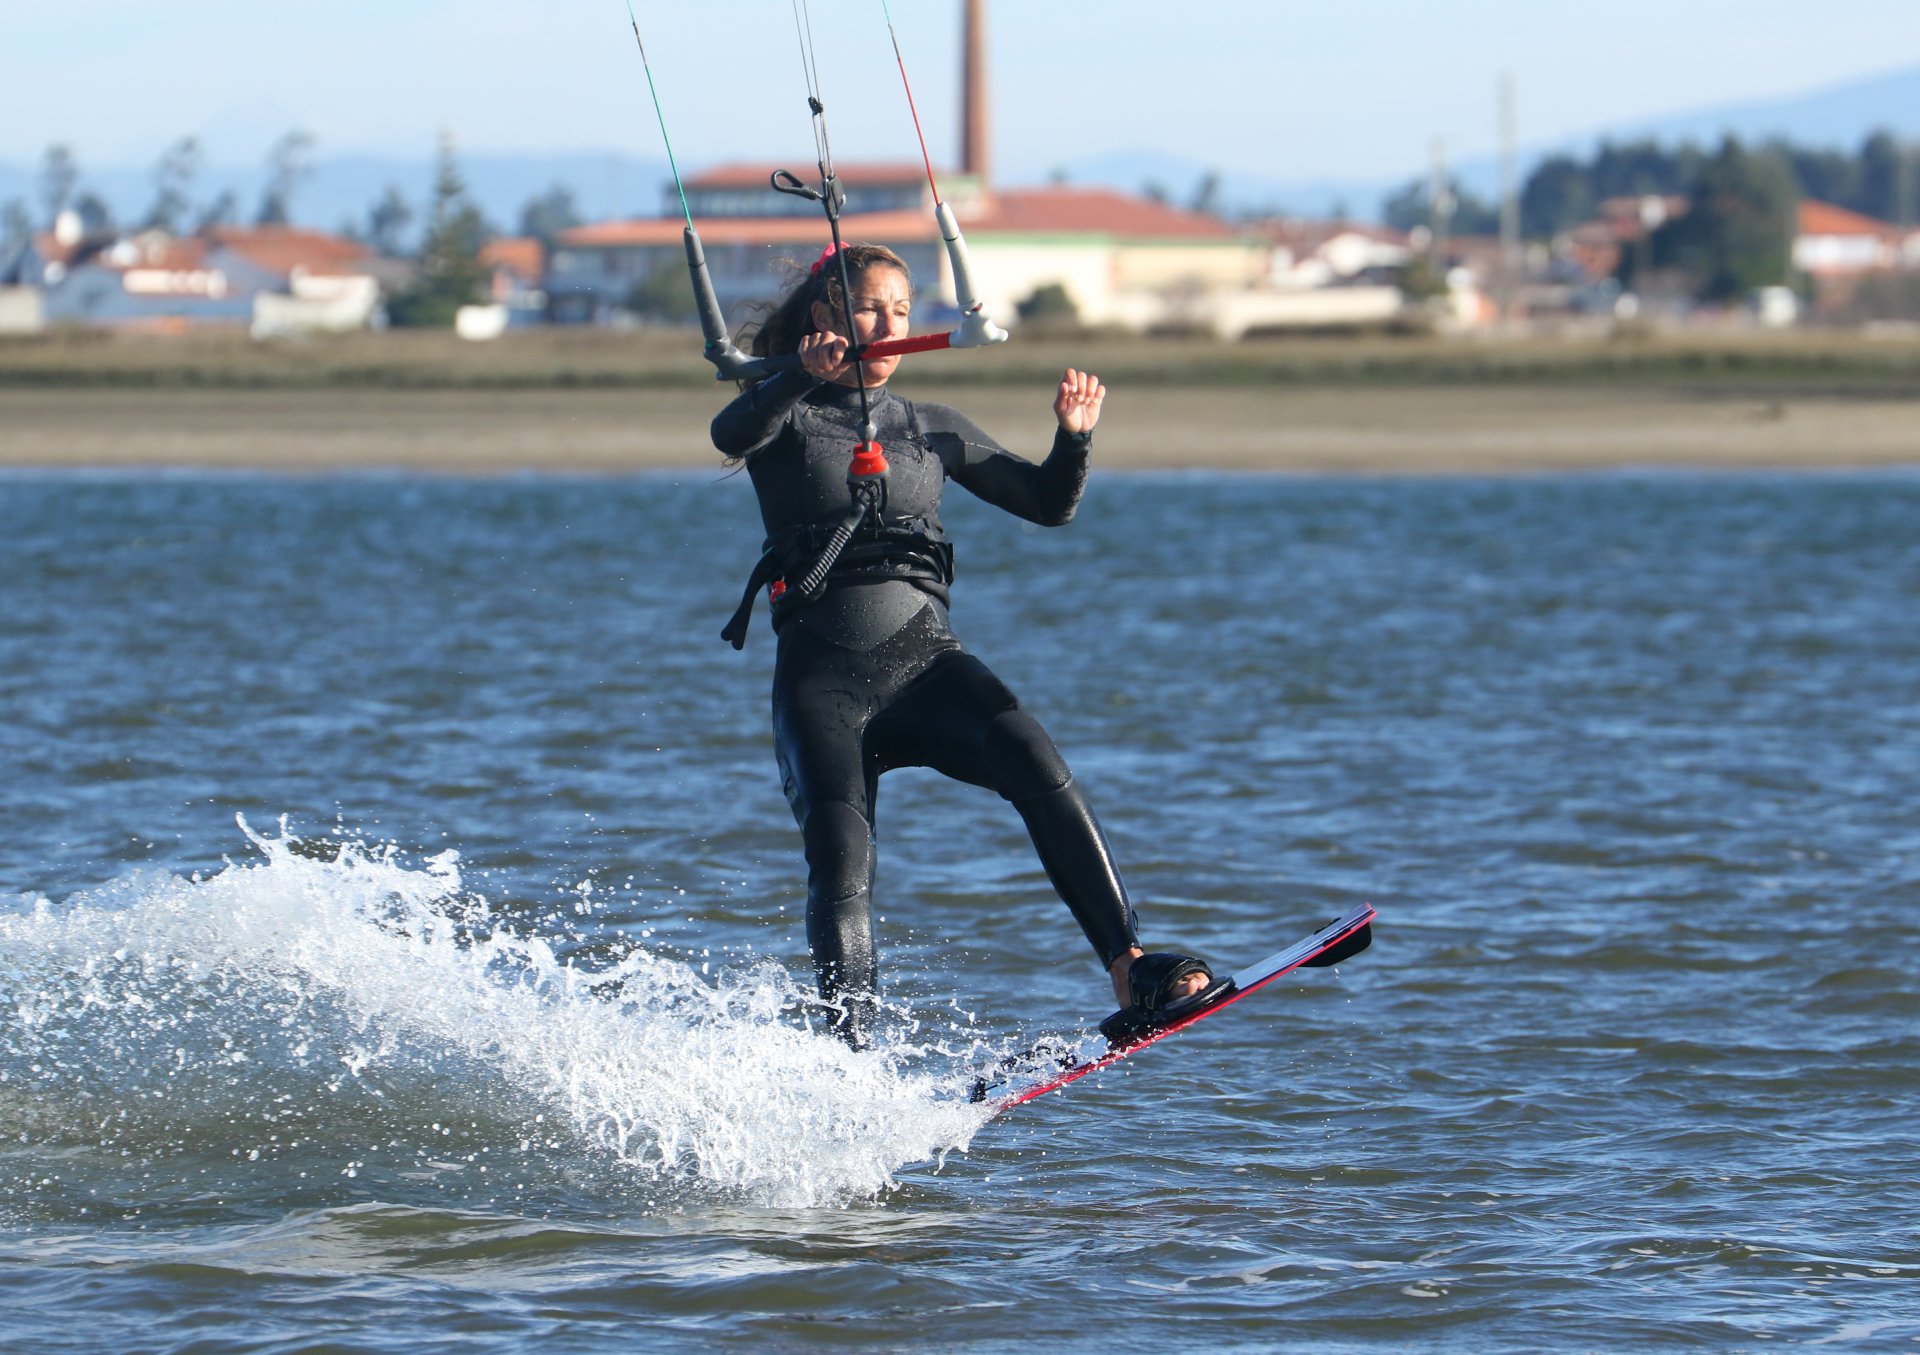
The Pop Pic D.
Realistically we should call it the stamp, as that's exactly what you do, stamp down with your back foot. This action of suddenly extending your back leg and kicking down through your heel forces the board against the tension of the water created by edging, and pops you up. It's all about extension, straightening your whole body, through your core and down into your heels. Although your front leg will also extend, your effort should be through your back leg. The timing of this is surprisingly quick, from standing and levelling, once you commit to carving upwind, it's literally carve and stamp, as quick as you can say it. Once again, if you look at Karine, she's lifting off with her board in a wheely position. This is the result of her weight and hips being towards her back foot. Her back leg is fully extended, kicking down hard, and the result is she's popping! Last point, her bar is still on the sweet spot, she hasn't used it. Pulling on it won't actually help and will prove to be spectacularly counterproductive.


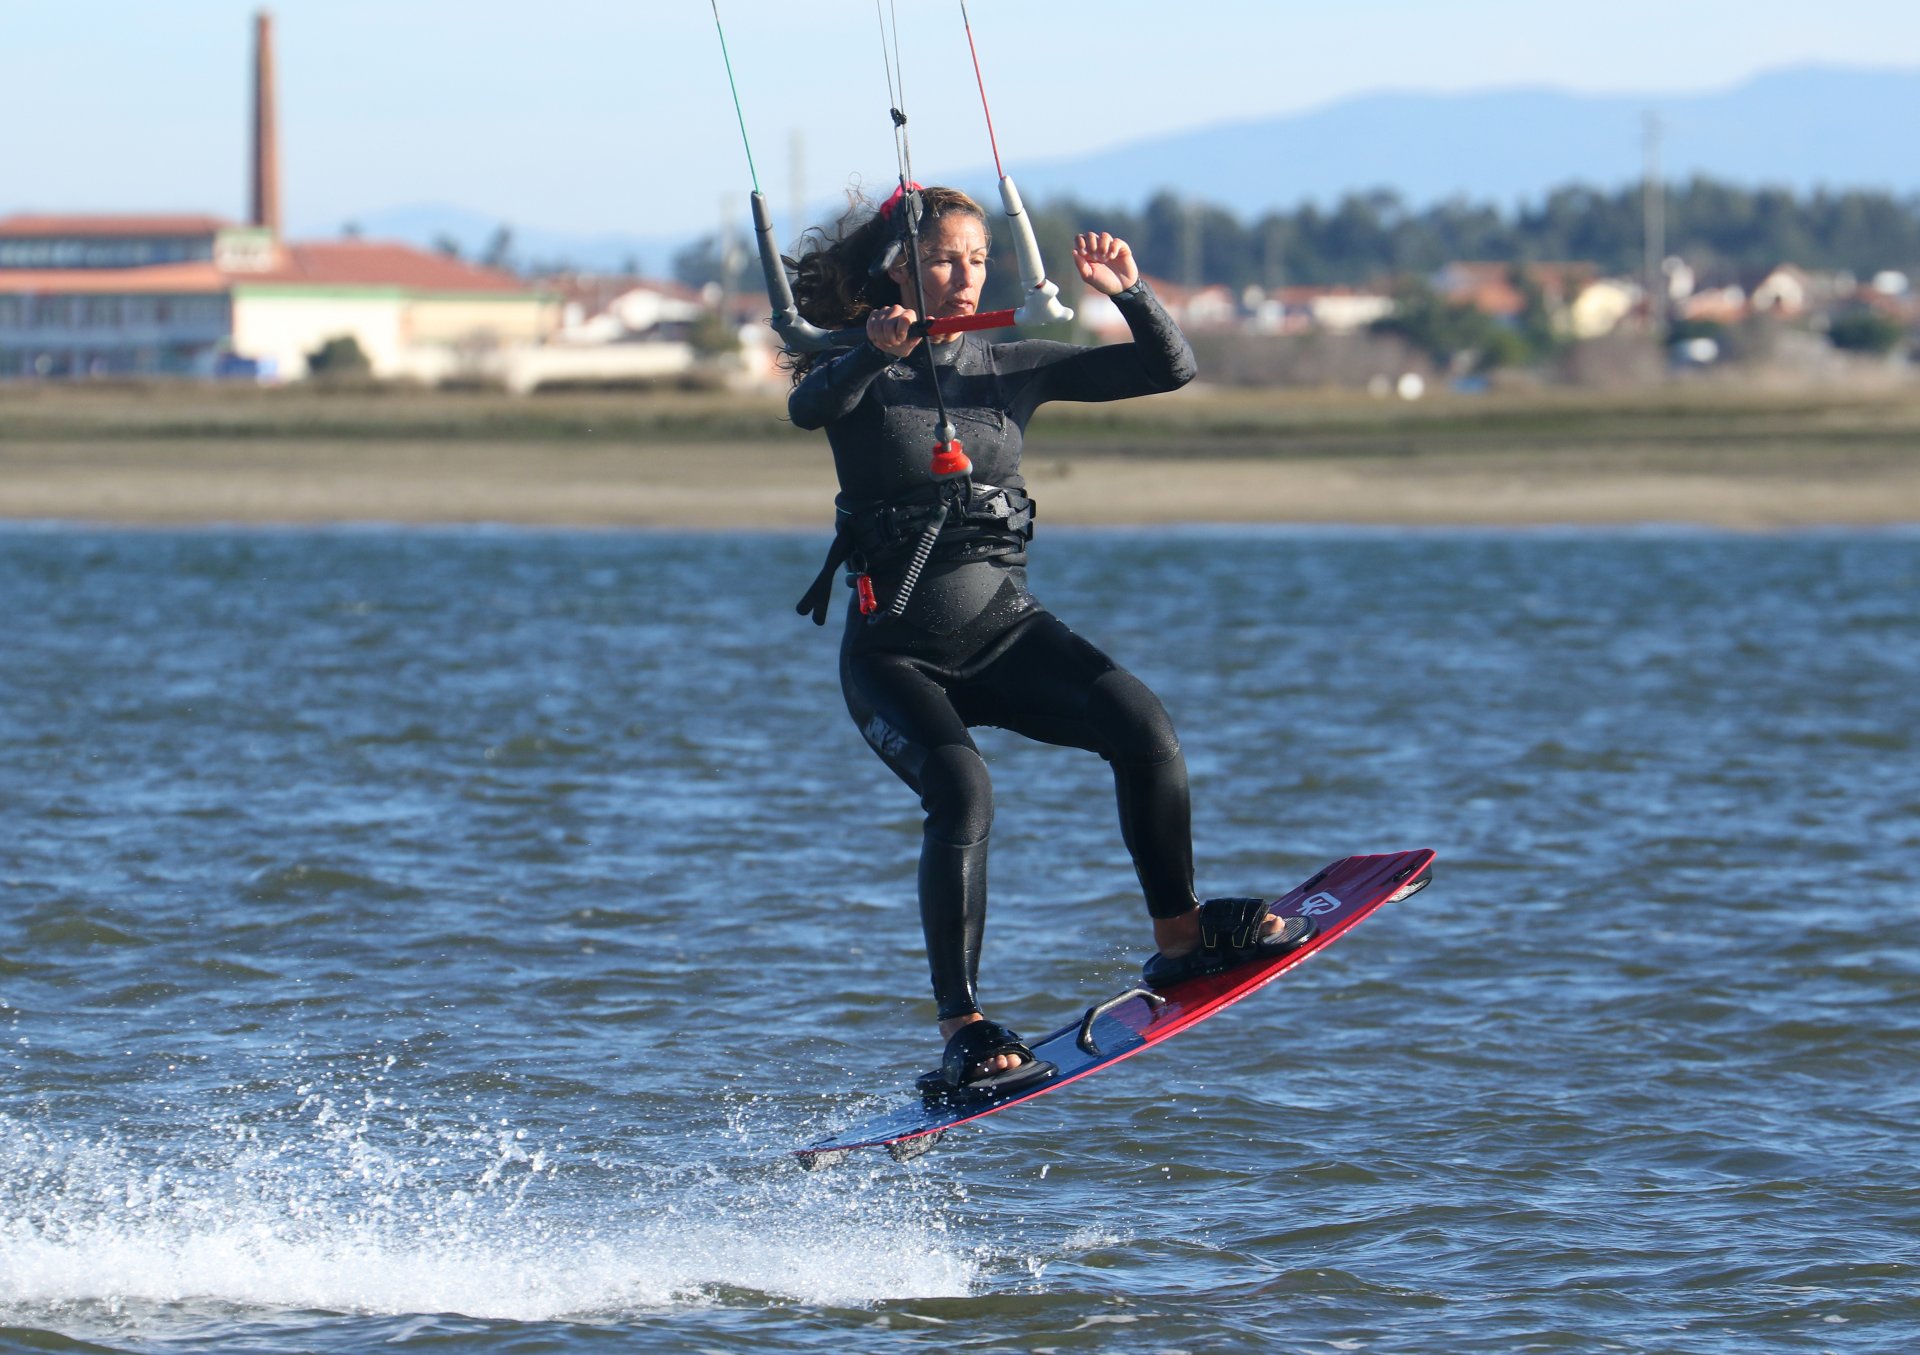
Keep Going Pic E.
We'll start this step by looking at Karine. You can see that she's over her board and therefore balanced, and her board is pointing upwind. These are a result of the pop. By carving upwind, the board turns, so once you're in the air, the board is pointing slightly up. Now, if you were going for a slide to toeside on the surface, your board would also be turning up. This is where muscle memory comes in handy. If you think toeside, you'll start to lift your back knee through, just as Karine is here. This is a movement you've done plenty of times before, so tap into it. It's the air guitar to your switch to toeside.
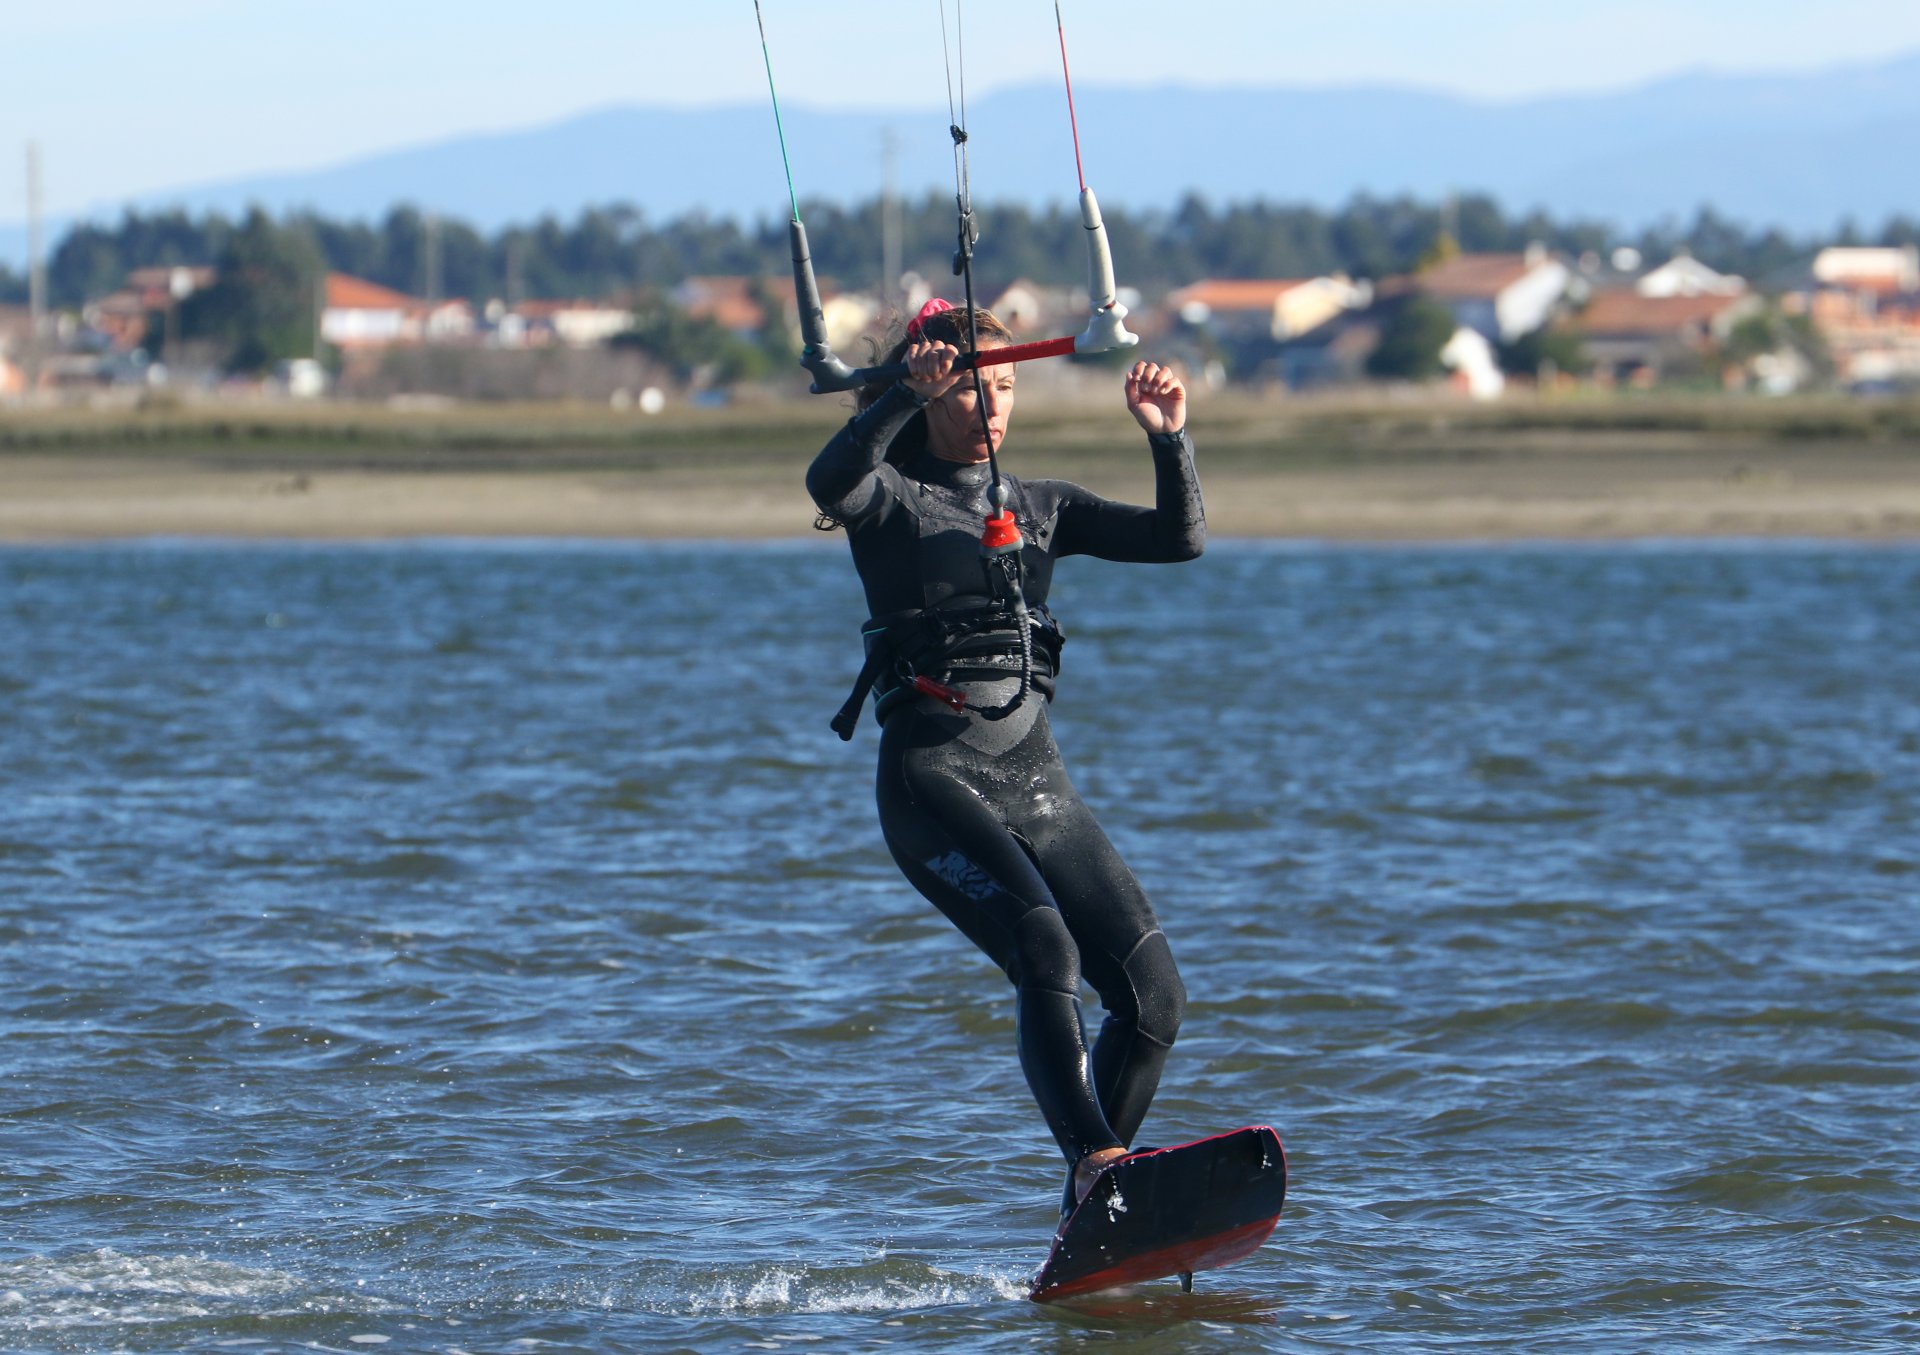
The Switch Pic F.
Once your knee is coming through, it's a matter of committing your lower body to do the work. Keep your shoulders and head up so that your weight remains balanced over the board, and bring your back foot through. This will lift the "new" nose of the board and allow the tail of the board to touch down first. There's no need to turn all the way onto an edge; you just need to get the board through enough that you are toeside, even if it's riding downwind. The great news is that as you don't have to get all the way back onto your edge, you really don't need any height. Looking at the angle that Karine is landing and the angle at which she popped off, she hasn't had to turn the board far.
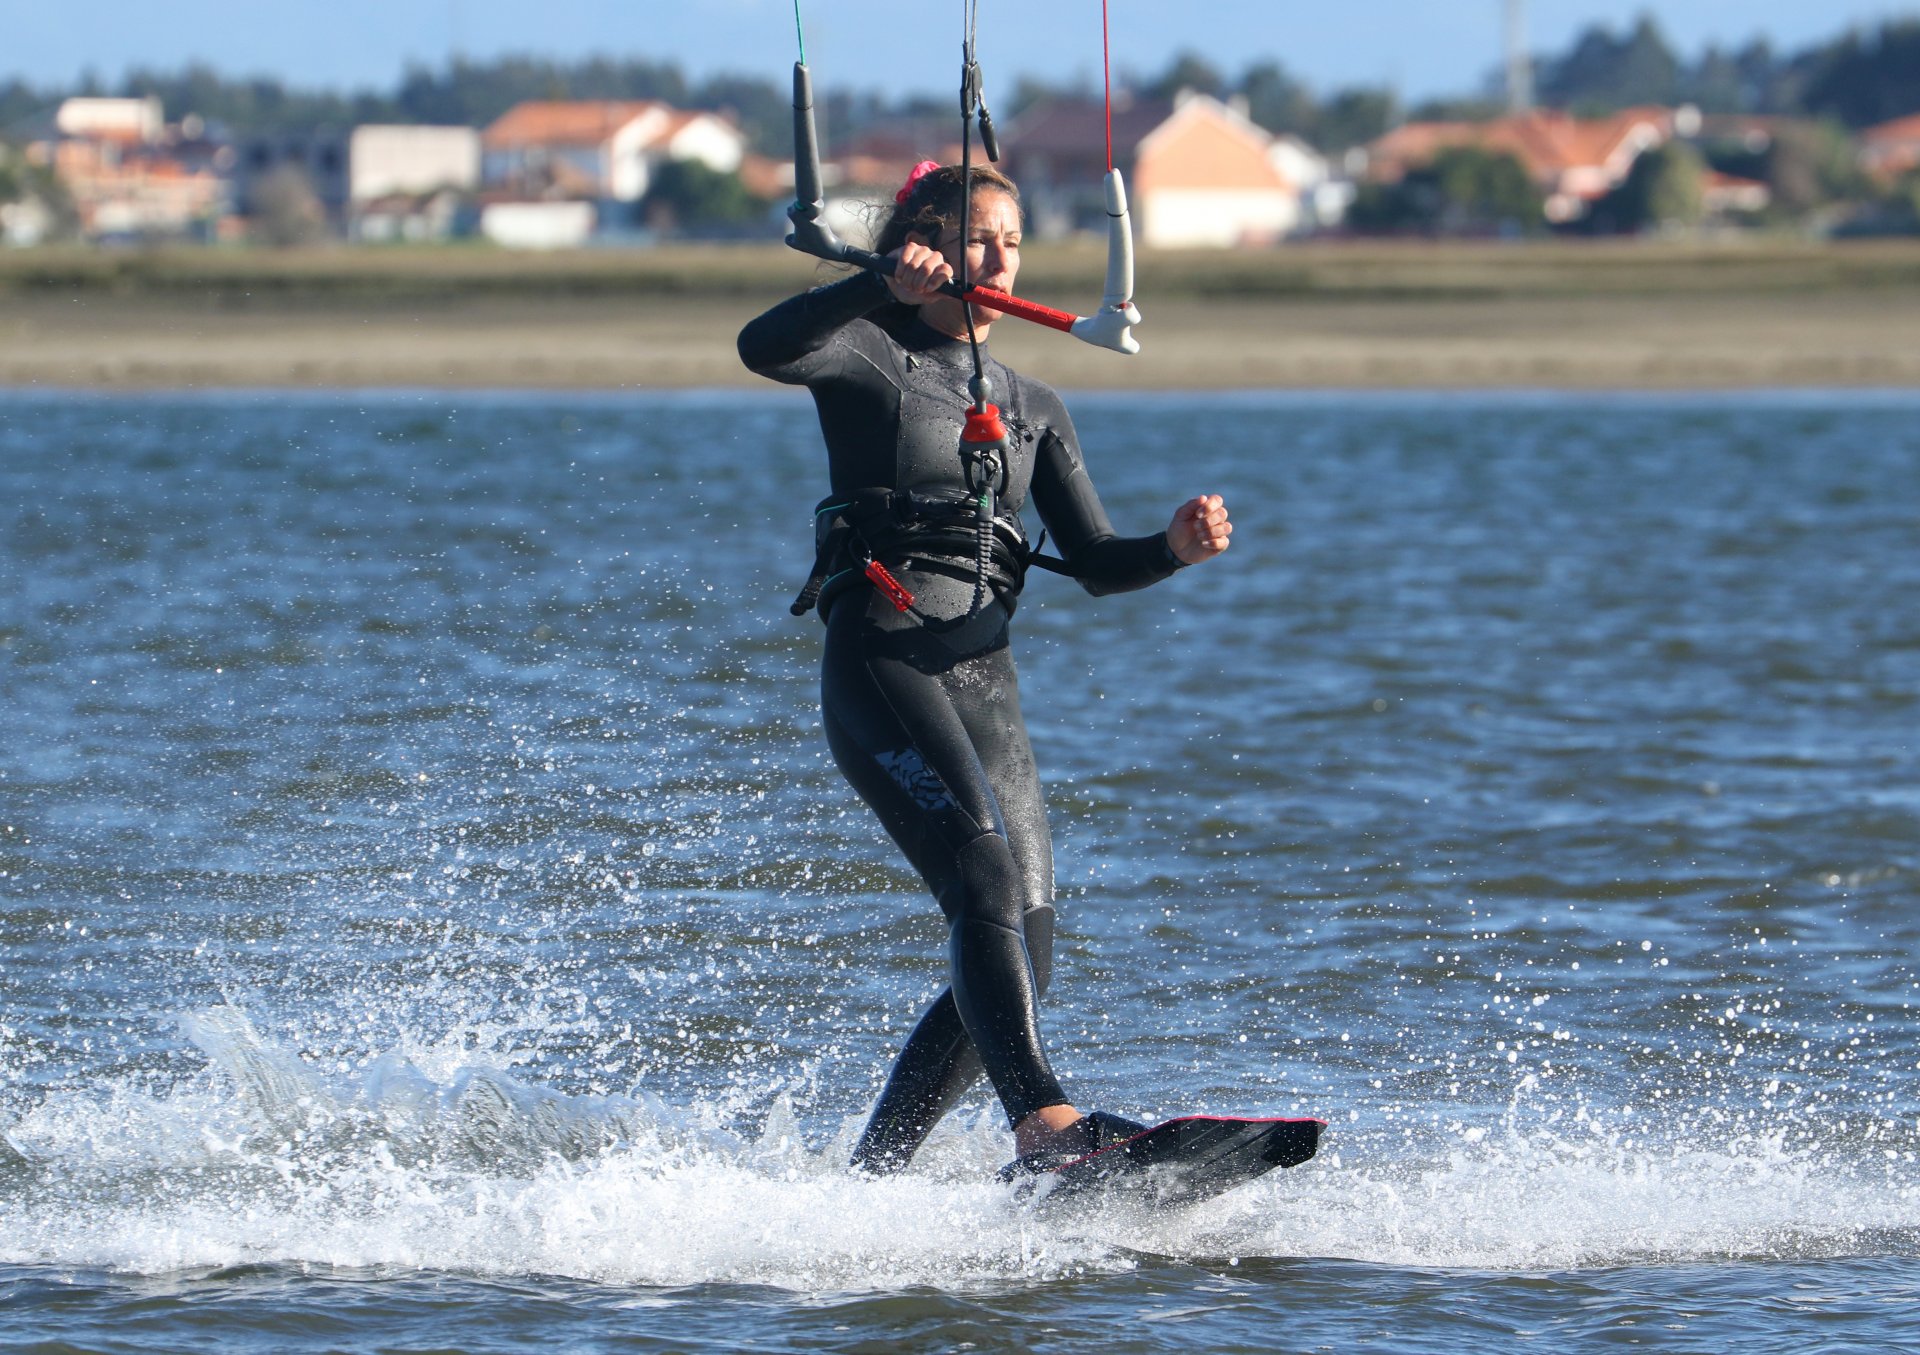
Tidy Up Pic G.
Once your board is back on the wet stuff, you can think about getting back on an edge. Keep your hips open and move your weight forwards so that you can get some pressure down through your front foot. From here on, you can flex your ankles, drive your knees across the board and edge back upwind! Or how about carving back to heel side whilst throwing buckets? If you look at the pic, Karine is now sorting herself out, ready to get back on an edge. Big hand is still leading the way, and her bar is still out on the sweet spot, as it has been throughout the move.
Top Tips
To learn anything, it's always less challenging if you're comfortable. Find some flattish water, give yourself some space and make sure that you've enough power that you're not having to work the kite, but also not so much that you're taken for a walk by your burly inflatable friend.
To make life easier on your first attempts, you can inch the kite up a tad higher. It may make the edging a little bit more tricky, but you'll feel some support from the kite as you stamp, and it'll give you a tiny bit more time to switch. However, it doesn't want to get anywhere near midday! Any lower than 11 or 1, and it'll be very difficult to learn.


Once you've nailed this, you can happily try to go edge to edge with a low pop or try popping more aggressively for more height.
Now have a look at the two-handed sequence but take note that Karine does release her front hand for landing. And check out the video for the full run-through.
Common Problems
The first and most likely problem is that you'll lose all your speed and therefore won't be able to pop the board. This is the result of your carve. The reason you slow or stop is that you've carved too far. To sort this, make sure that you stand up on your approach and don't wait for something to happen; you need to make it happen. As soon as you carve back onto your edge – pop.
If you find that you're catching your edge in the water and can't stamp against the board. This is a result of pulling the bar in. When you pull it in, the power will lift you over the board, and as a result, you can't stamp down on your heel. Make sure you keep your bar on the sweet spot. If you need some help, put the kite higher.
Keystones
- Moderate edge and kite just above 11 or 1.
- Stand up and flatten board.
- Carve and stamp.
- Extend up.
- Bring leg through.
All of the above with bar on the sweet spot!!!

This technique article was in Issue 91 of IKSURFMAG.
Related


By Christian and Karine
Christian and Karine have been working together as a coaching team, running improver to advanced kitesurfing clinics since 2003.
