
Air Gybe from Toe Side
Technique / Intermediate


Introduction
Here’s a little something for everyone, an achievable mix and match, adding a little twist to your standard transition, at least on one side. The air gybe or jump transition from toe side is both a funky move in its own right, but also seriously good practice for pretty much anything from toe side. As it requires a good solid controlled toeside edge, kite control with both hands and some hefty drive against the board. This will stand you in good stead for a box full of other tricks from your toes.
Most of us probably learnt to jump from heelside before we ventured on towards the air gybe. However, it would be a pretty safe bet to say that the majority of you haven’t jumped from toe side, but will be keen to learn this air gybe from toeside. Thus, the fundamentals of edge and send need to be learnt so that we can polish and succeed. Let’s have a look....


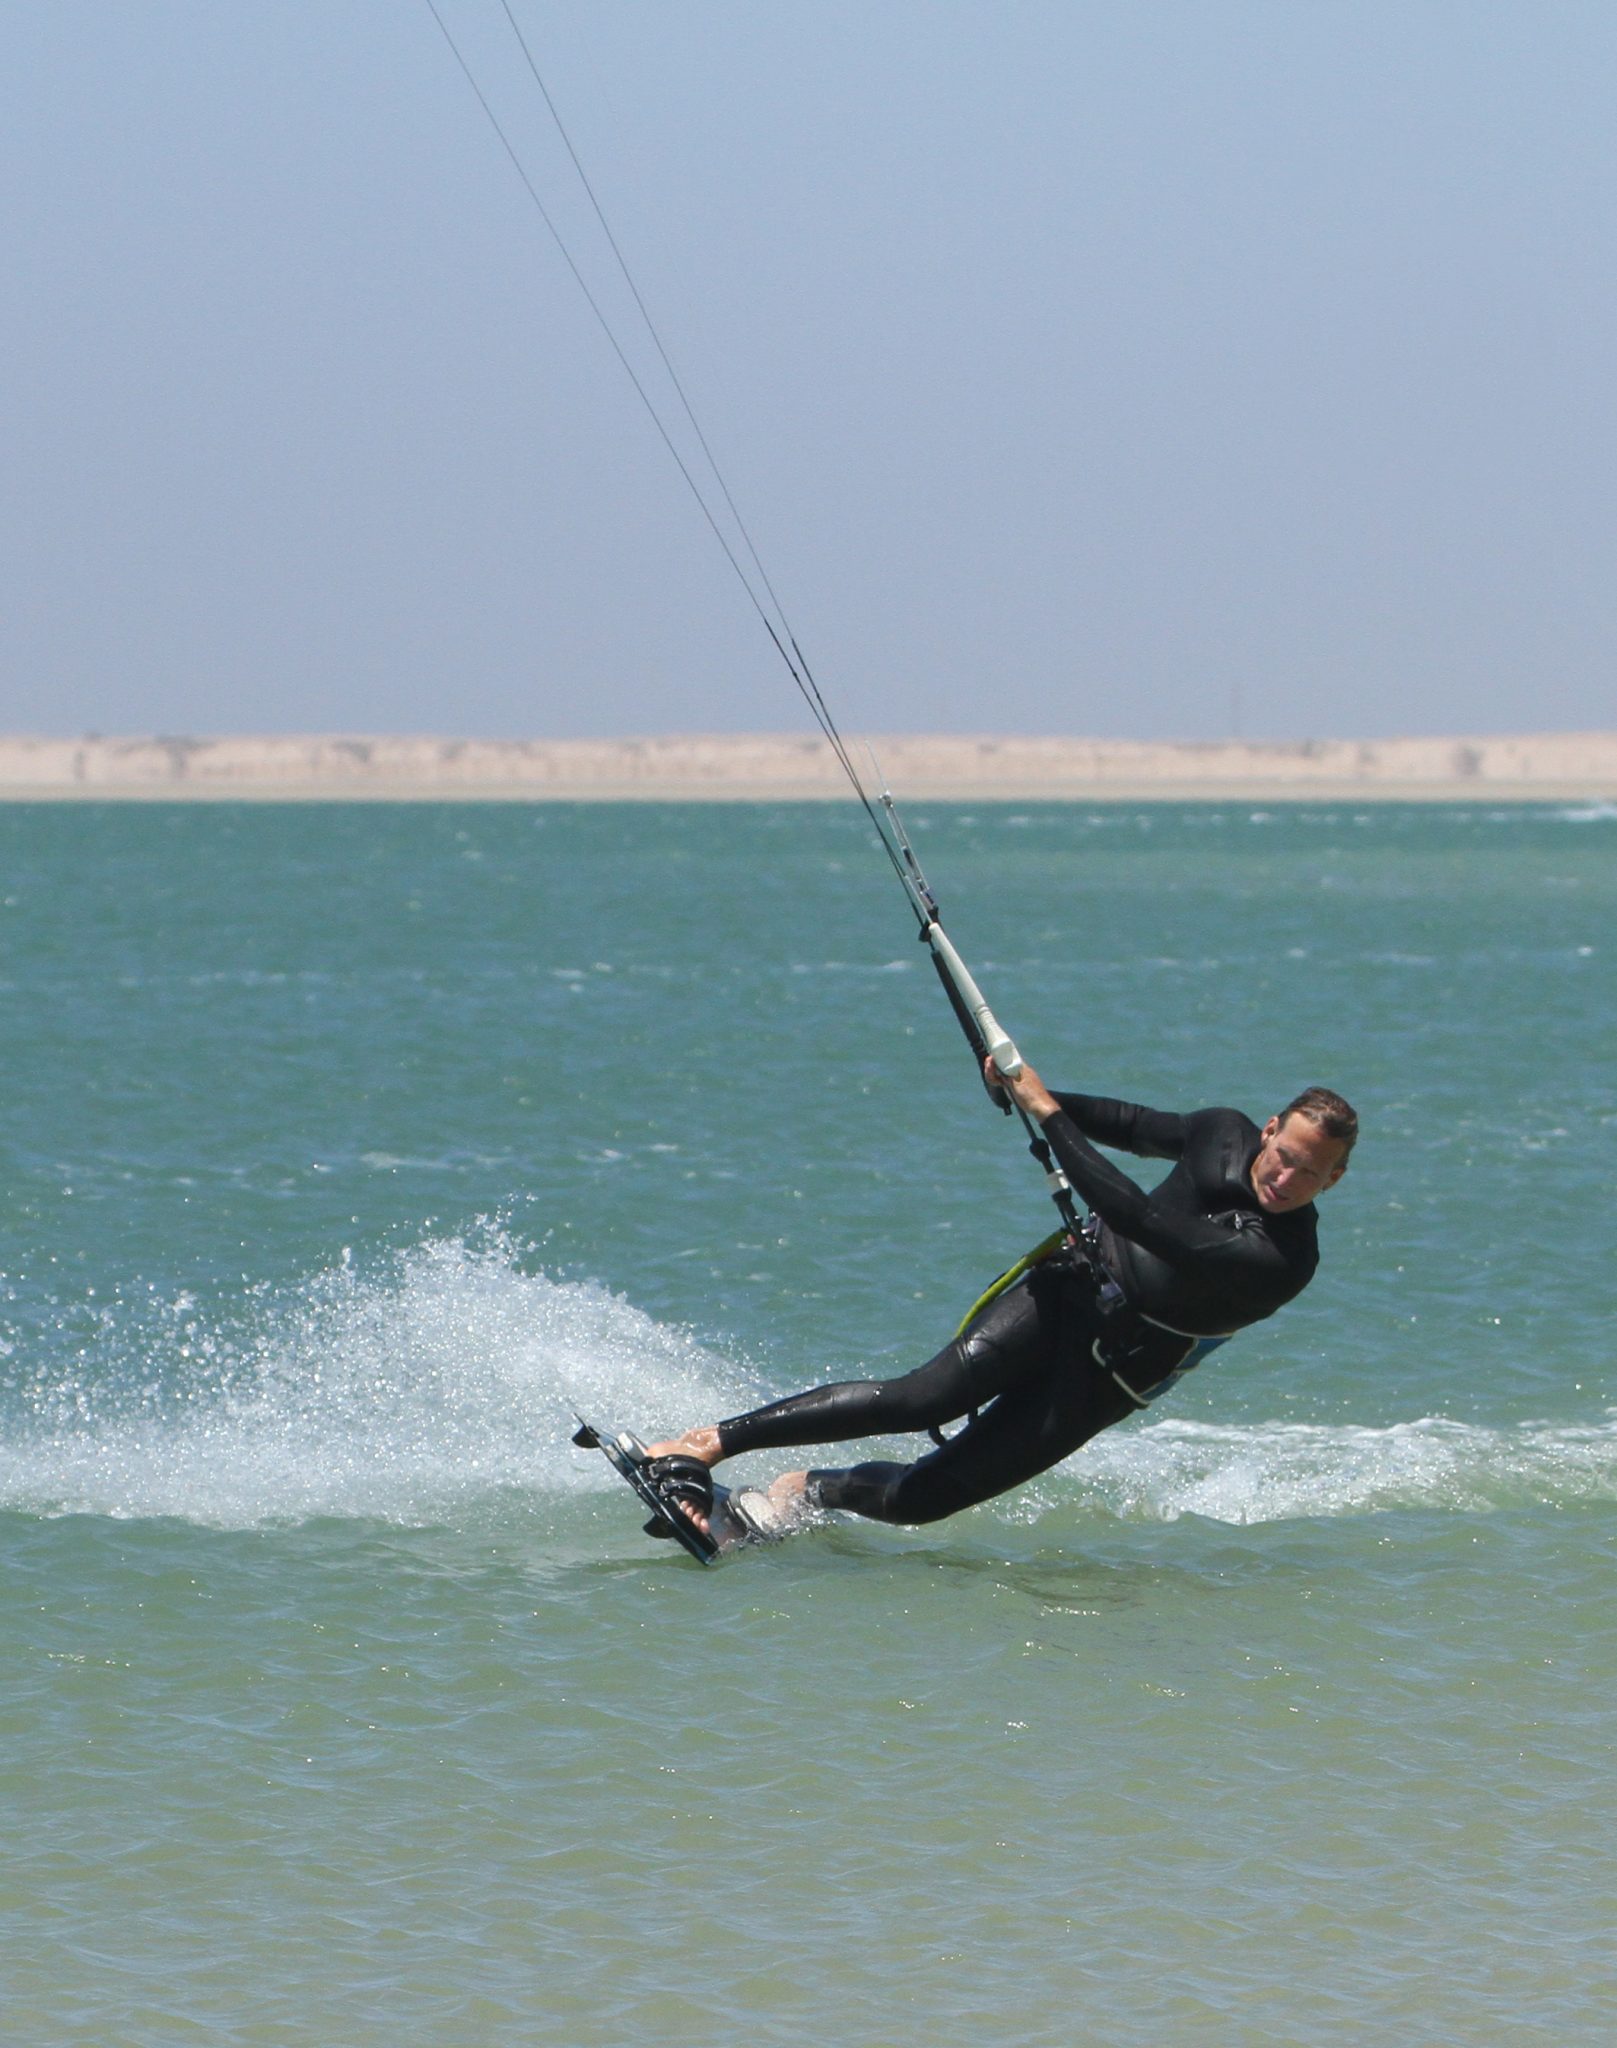
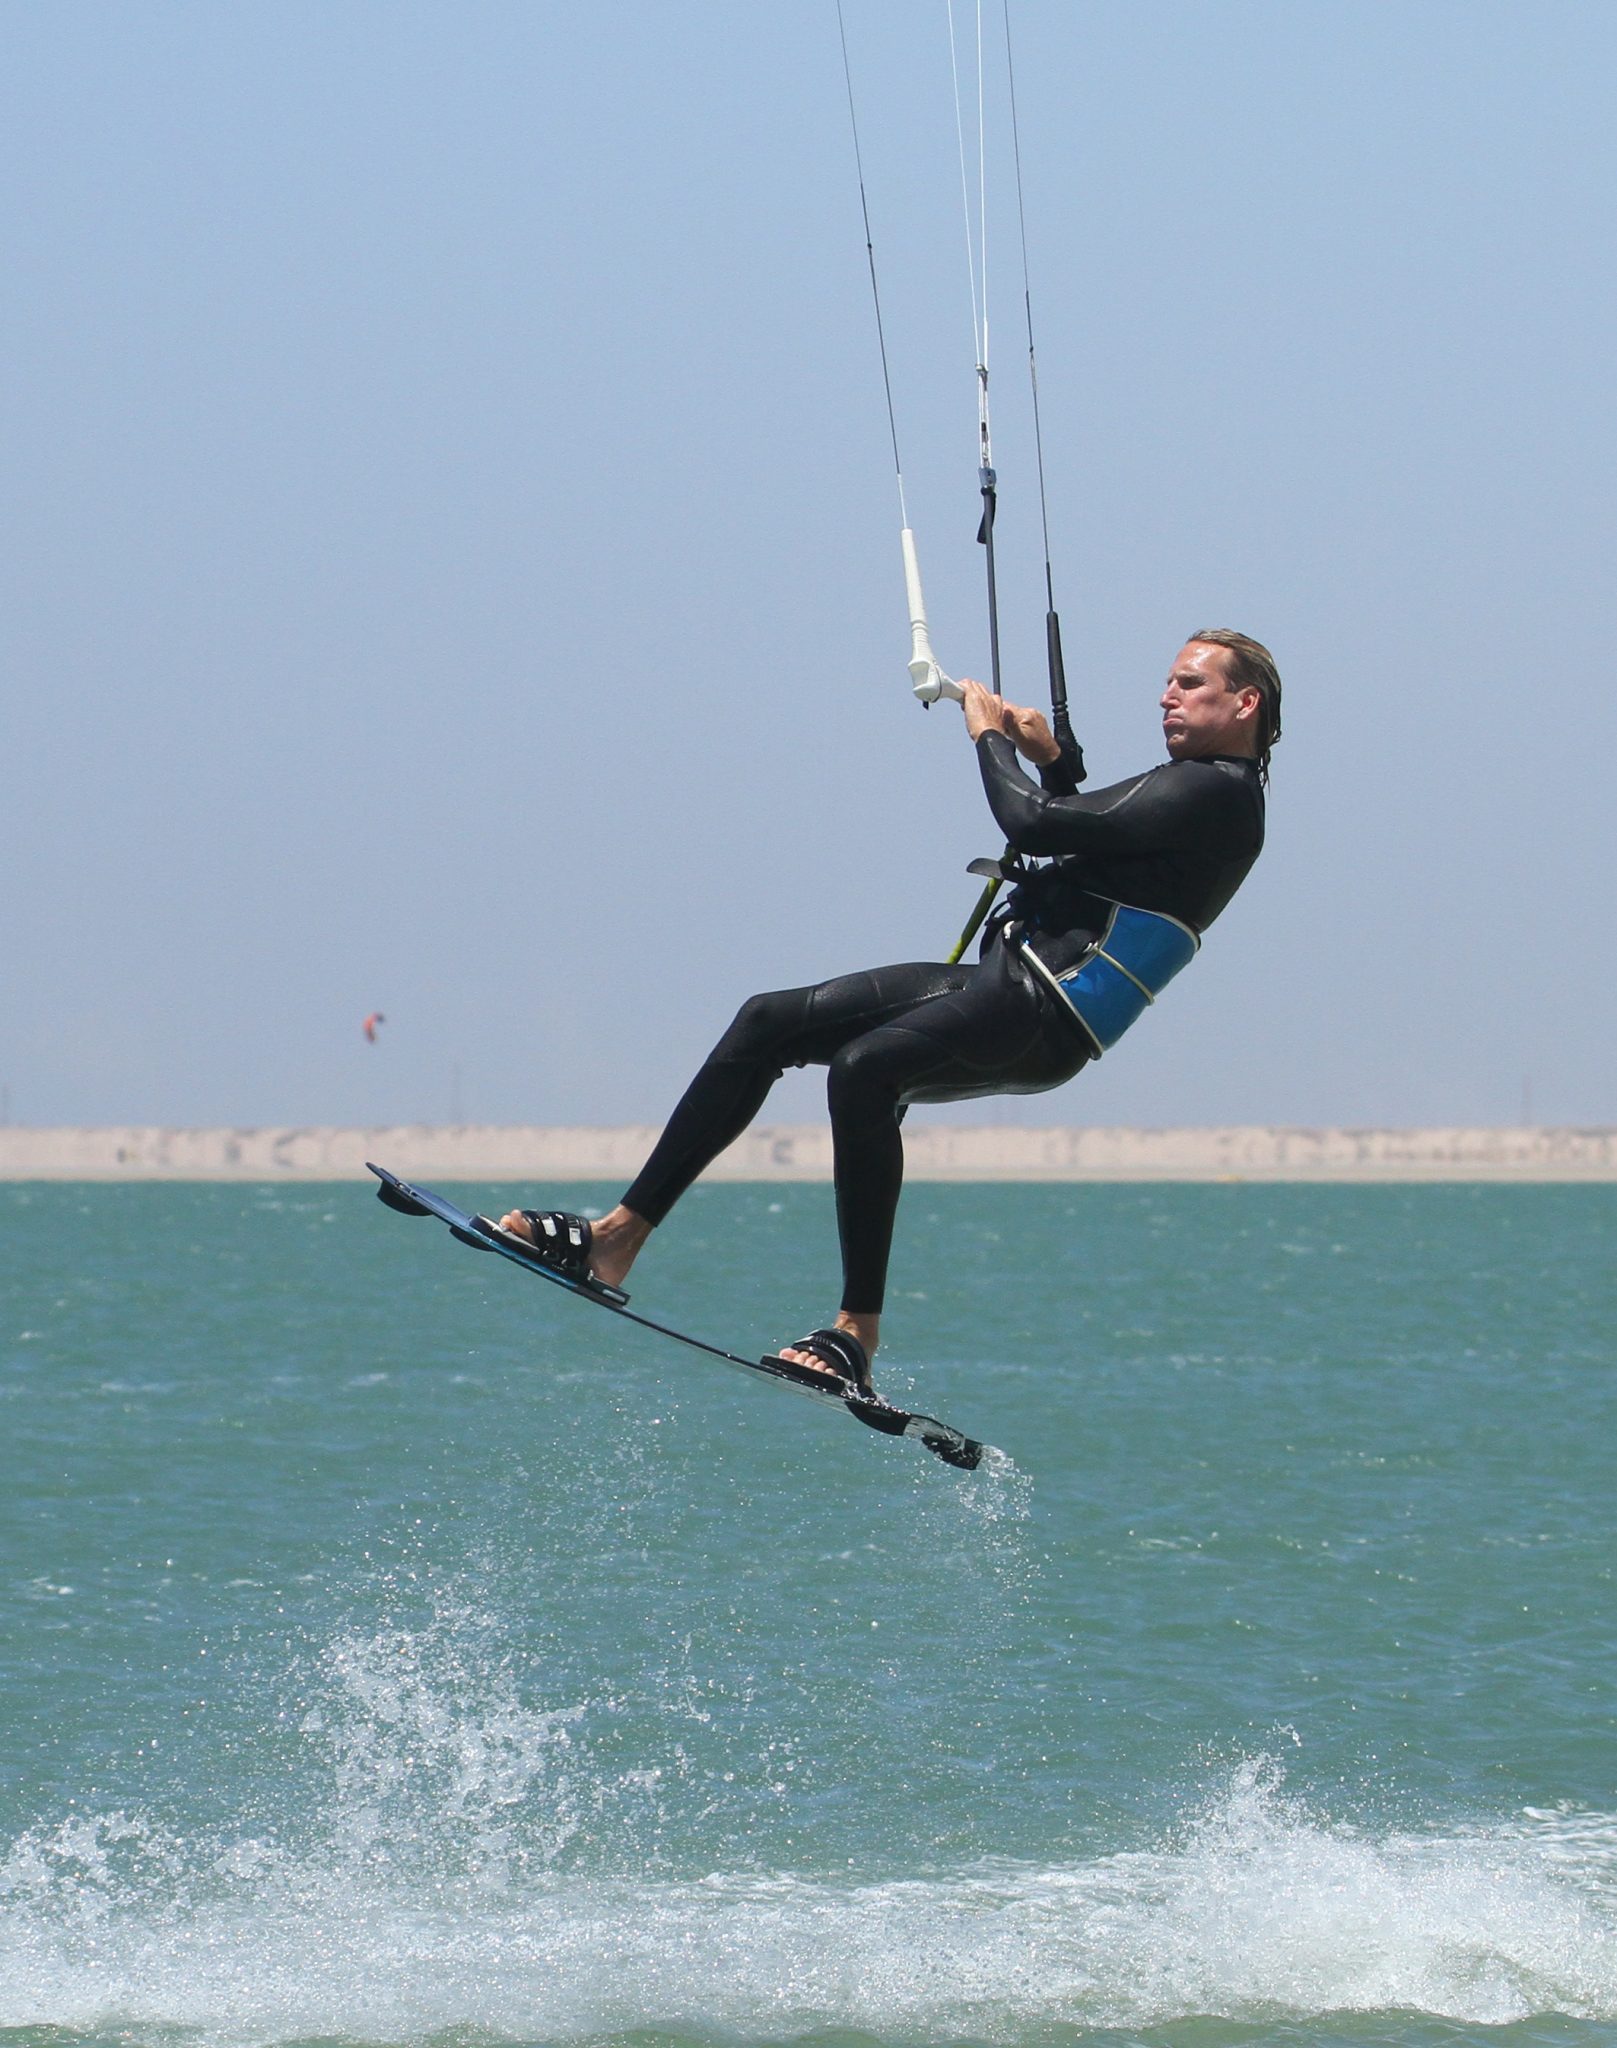
The Approach Pic A.
First things first. As you plan to send it from toeside, getting yourself comfortable and settled before piling into the move is a must. You need to make sure that you’re not going Mach 10, this is a transition, so you want to go in slow. Therefore relax, make sure that you’ve trimmed the sweet spot close enough so that you can use both hands without having to pull the bar in and stall the kite. Stand tall as this will shift your weight back, sink the tail slightly and slow you down. It’s better that you save your energy for the short burst prior to and during take-off. You can see that Christian is committed to toe side, he has his kite at 11 o’clock and bar within reach.
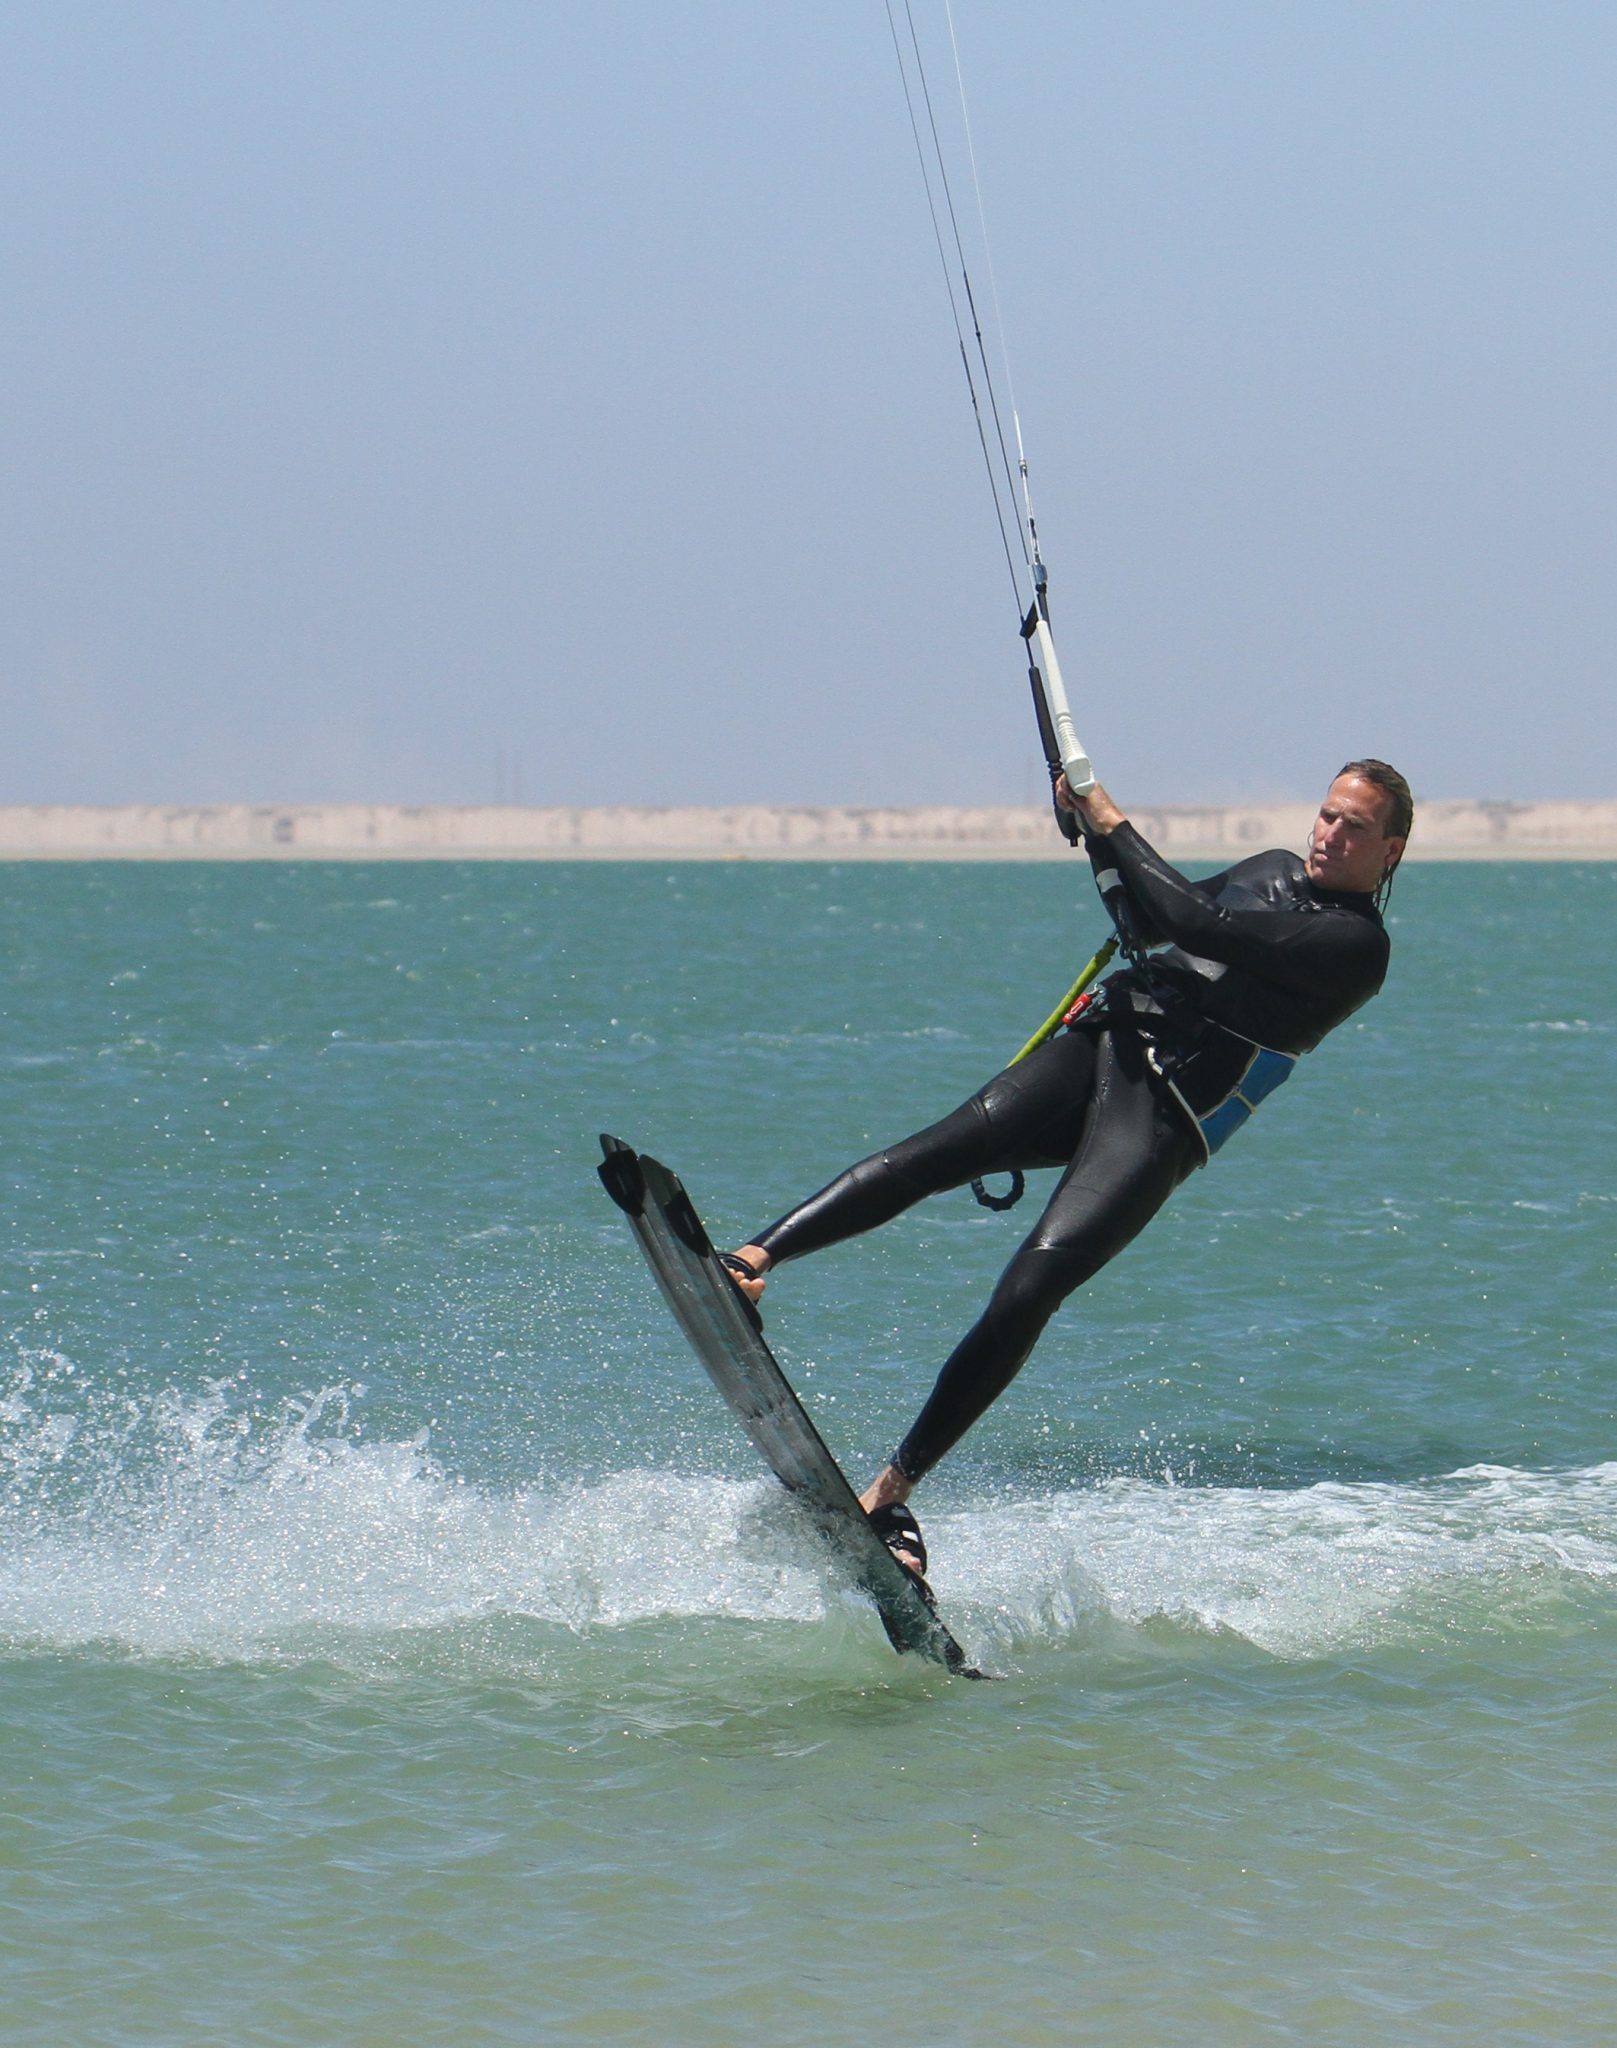
Edge and Send Pic B.
This really is the crux of the move. You need to be able to send the kite with enough meaning so that it’ll give you sufficient air, and you need to resist well so that you get picked up rather than swung around like a wrecking ball. Get this right and once you’re up there everything will become reassuringly familiar. This is why you need to relax first, because once you decide to send, it’s game on. Just like an air gybe from heelside you must give a short sharp send, so that the quite moves quickly, but doesn’t travel too far back. As you do this, drop your weight upwind, forcing your hips away from the board whilst dropping your shoulder, so that you can really drive against the edge of the board as the kite pulls. Here Christian is pushing the board away from him, whilst steering the kite up to 12. Note how Christian is looking down over his front shoulder to keep his weight low.
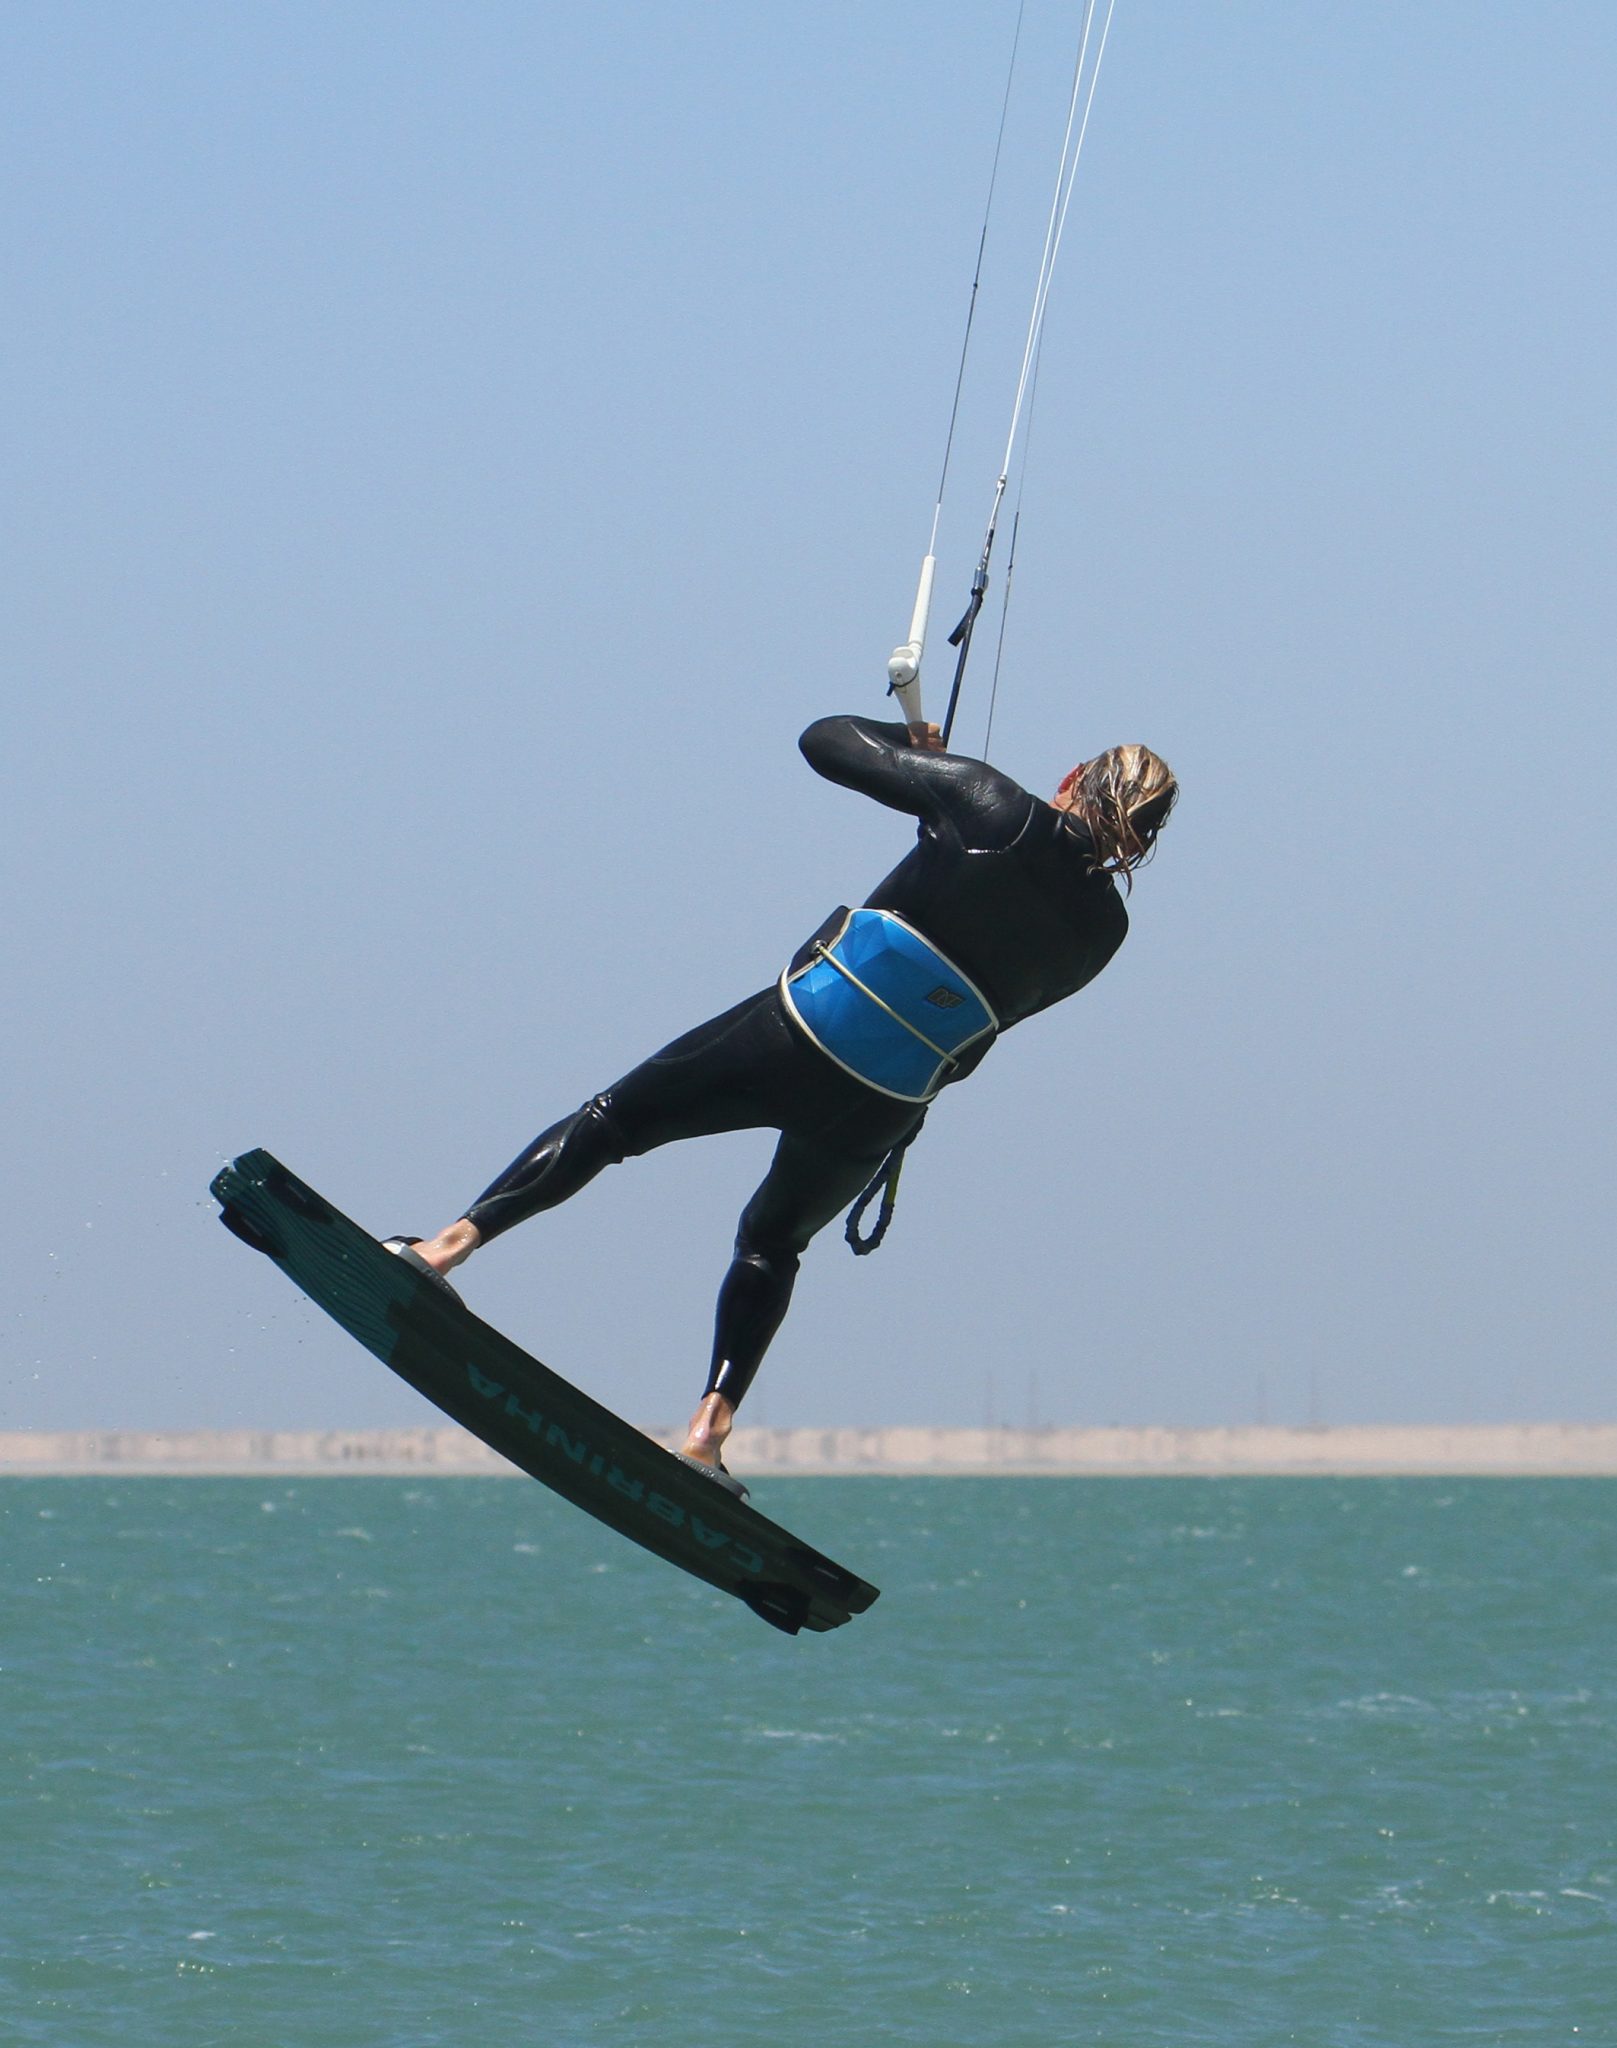
Kick for Take Off Pic C.
Again, just as per normal for an air gybe it’s good and helpful practice to add a wee kick for take-off. There are two reasons for this. Firstly, by kicking you can get yourself going up early and therefore prevent the kite from traveling too far behind. Secondly and more relevantly to the toe side take off, it will help you resist and stop you being pulled back onto the back leg, which will then soften, collapse and ultimately kill your chances. As such once you send the kite and edge like a loony, you only wait until the kite starts to lift, hopefully around 12 o’clock, and then pre-empt your take off with a hefty stamp off the back leg. As soon as you kick, it’s time to steady the kite, so as well as giving the bar a gentle pull to help the up, remember to level it to stop the kite moving any further back. Looking at the photo, Christian has kicked off his back foot, fully extending his back leg in the process and has the bar levelled.
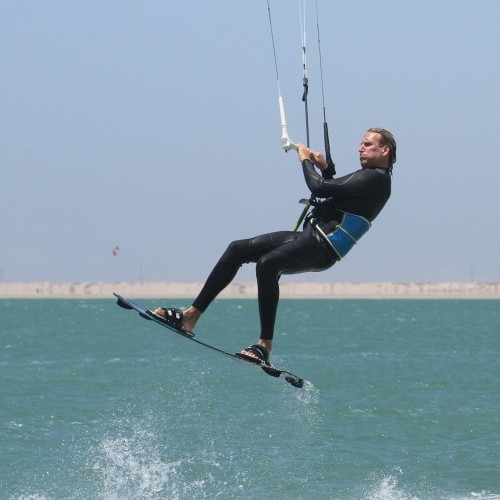
Big Chill Pic D.
From here on you should be in known territory. Keep the bar on the sweet spot and level so that the kite stays above you. Bring your knees up so that the board will end up in front of you as you’re accustomed to and then just wait in the big chill position, eyes still looking forwards. You can see Christian is bringing his knees up, the bar is in and level, the kite is above him and he’s still looking forwards. Try keeping this position until you start to descend. If you look back, you’ll likely drift the kite behind you, so be patient.

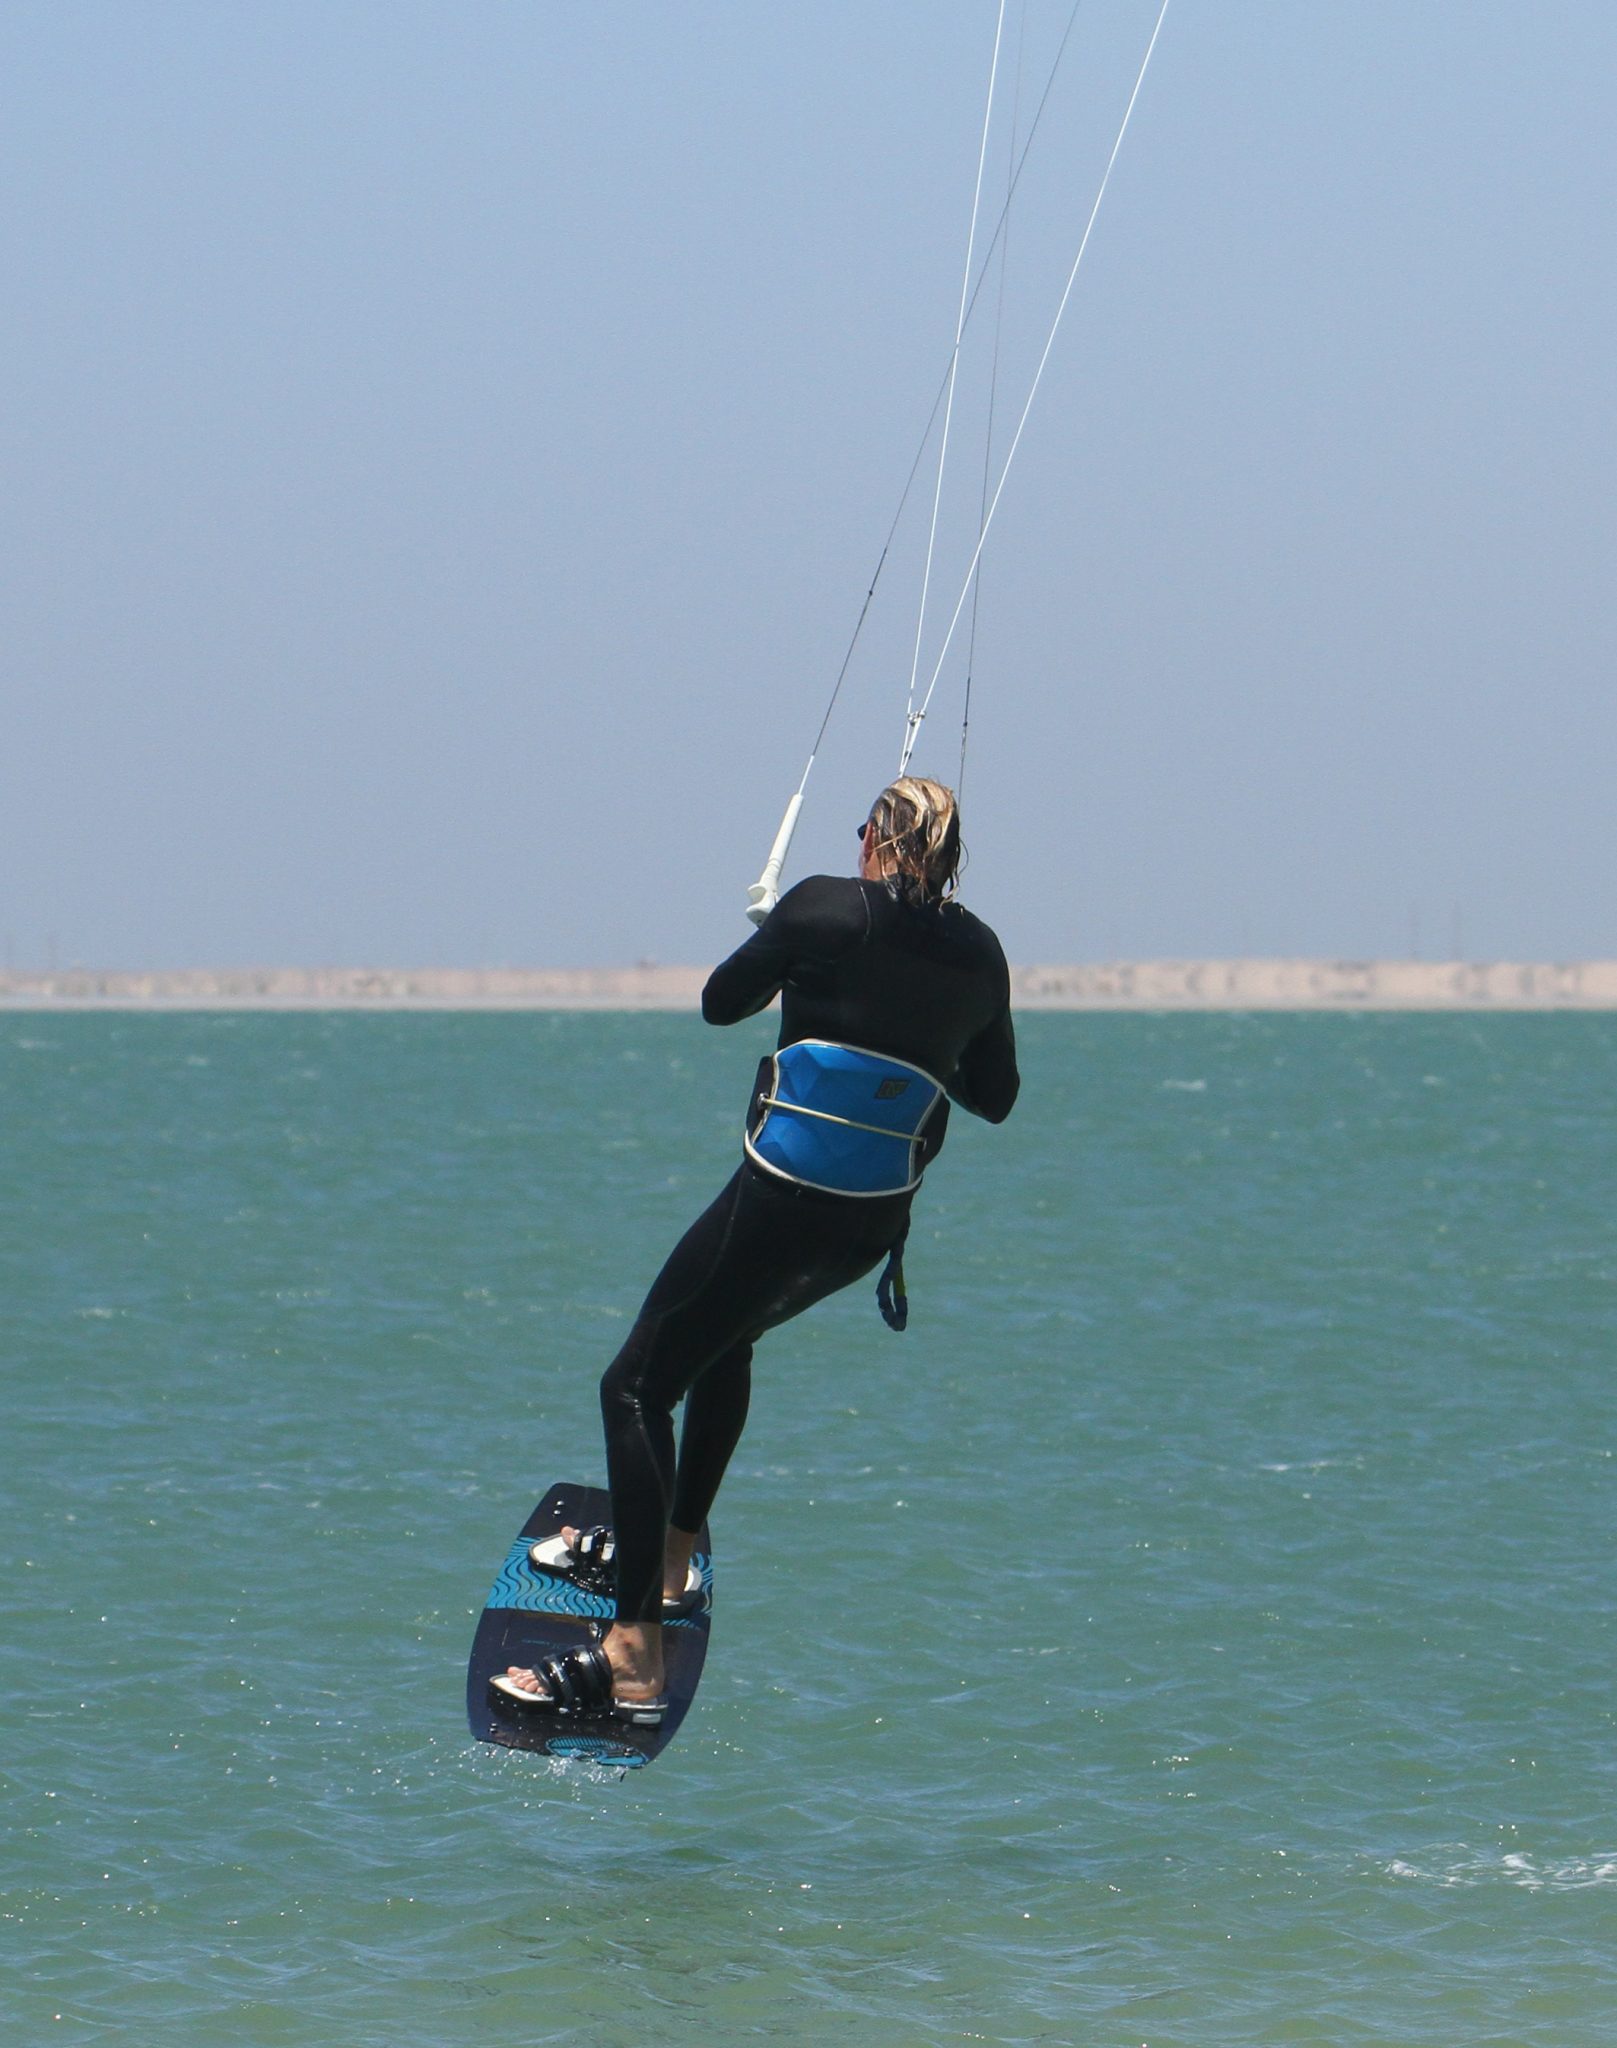
The Drop Pic E.
Once you’re coming down it’s time to think about the landing. You’ll want to give the kite a very aggressive dive to counteract any penduluming you may have due to a less solid edge on your toe side take off. The kite should be diving down at the water, not drifting along the edge of the window. Also think which way you want to land. It’s downwind, so look that way, not back in the other direction. Here Christian has started to dive the kite hard as he has swung out from under the kite slightly. He’s looking downwind as he knows that is where the pull will come from.


DWL Pic F.
The final ingredient – Down Wind Landing. This is so much easier if you’ve given the kite a hefty dive, as the pull will help you. However, even if you’ve been a bit timid with the kite, at least if you land with the board facing downwind and flat you will still keep going, rather than the breaking effect of your edge. Christian has twisted his hips and board so that he’s on course for a soft touch down, he’s looking downwind which enables him to position everything accordingly.
Top Tips
Kite Position. Don’t start with the kite too low, as you’ll struggle to hold your edge long enough. Start with the kite at that magical point where it’s relatively high but you can still just edge against it.
Trim accordingly. If your sweet spot is too far away you will stall the kite as you send it, which will then pull you off your edge. So make sure that the bar is reachable, but you’ve still got some gas available.
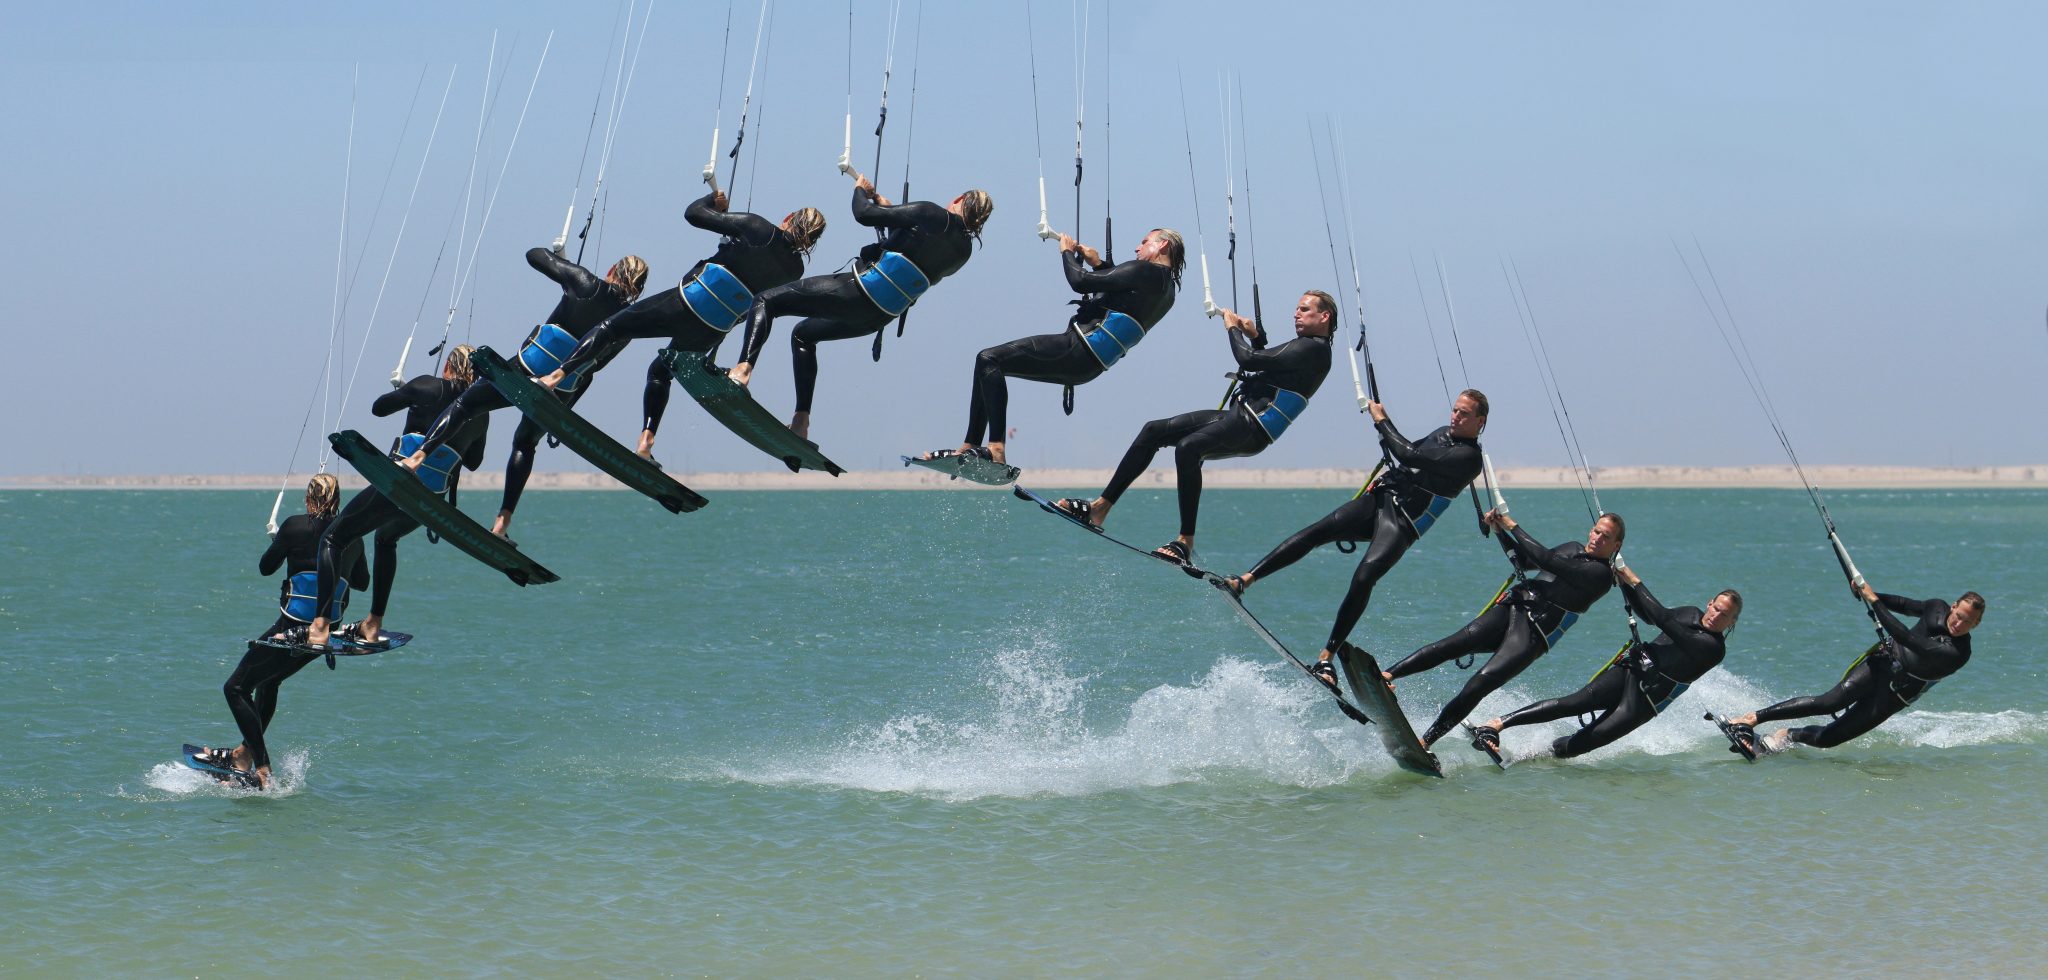
Now time to visualise with the videos and sequence...
Common Problems
Nothing happens. If you find that you don’t lift off, it’s more often the result of having the sweet spot too close, or not having enough power. However, it’s also possible that if you’re being overpowered by the kite, you’re forced to let the bar out as the kite rises and as such you lose all power. Check your trim and make sure your edge is set as best you can.


The dreaded Pendulum. If you end up swinging out from under your kite like a harmonic oscillator under a Grandfather clock. Yet again there are a few possible reasons for this. If you kick up too early, before the kite has reached 12, but don’t level the bar you’ll be gifted one hefty swing, so kick later. However, if you yank the bar in way past the sweet spot this could also happen. Most likely is that you’re losing your edge, whether the kite be stalling, you’re sending too hard, or you’re just nor edging hard enough. Concentrate on your sweet spot, use both hands to send the kite and edge as if you’ve got money on it.
Keystones
- Kite just low enough to edge
- Short sharp send, drop low and drive
- Kick off before kite goes past 12
- Level and keep looking forwards
- Aggressive dive and DWL
This technique article was in Issue 75 of IKSURFMAG.
Related


By Christian and Karine
Christian and Karine have been working together as a coaching team, running improver to advanced kitesurfing clinics since 2003.
