
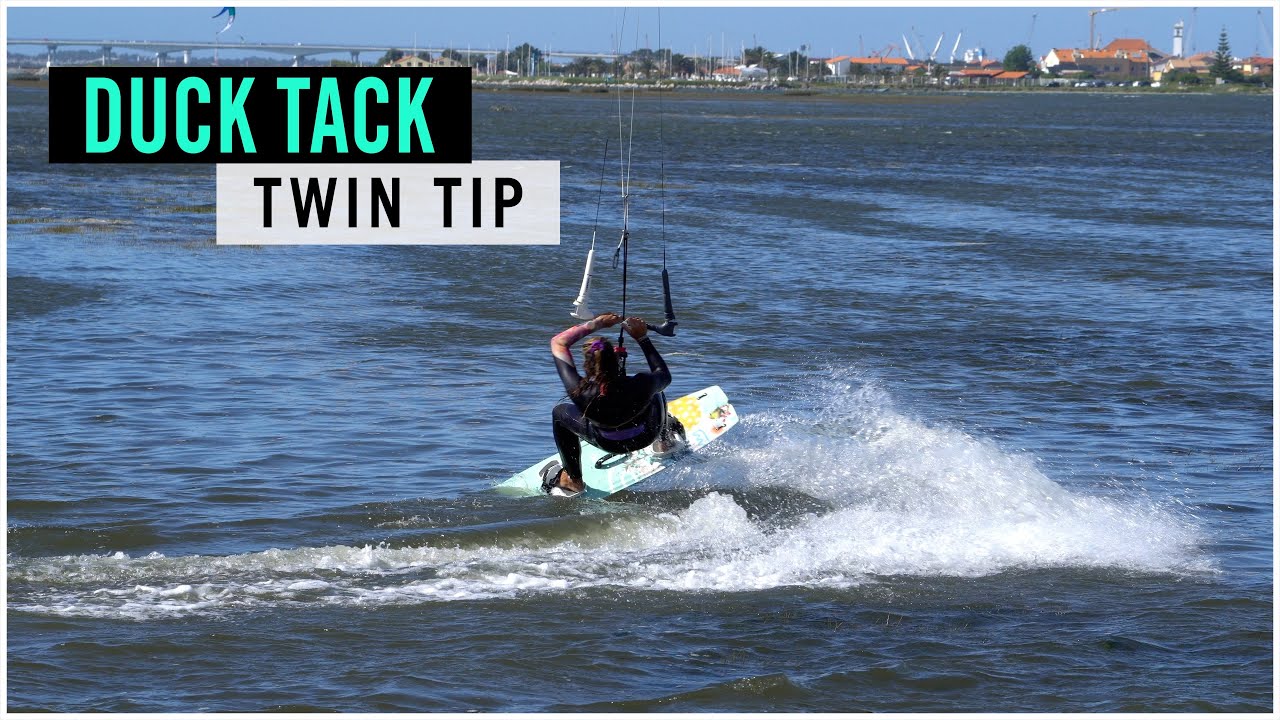
Twin Tip Duck Tack
Technique / Intermediate
Like the proverbial Phoenix, we’re resurrecting this classic move as it became trick of the week during one of our recent May clinics in Dakhla, so thank you, Sean and Rod, for your unwavering enthusiasm. It’s been over a decade since we last put pen to paper on the twin-tip duck tack! That’s when board shorts didn’t stretch, and kite racing was on ginormous windsurf-like boards. To be fair, it’s still not a move you see every day on the water. As you know, we love our transitions, and this beauty, selfishly borrowed from the surfboard fraternity, is an absolute banger. If you’re after a slick and casual USP, look no further.
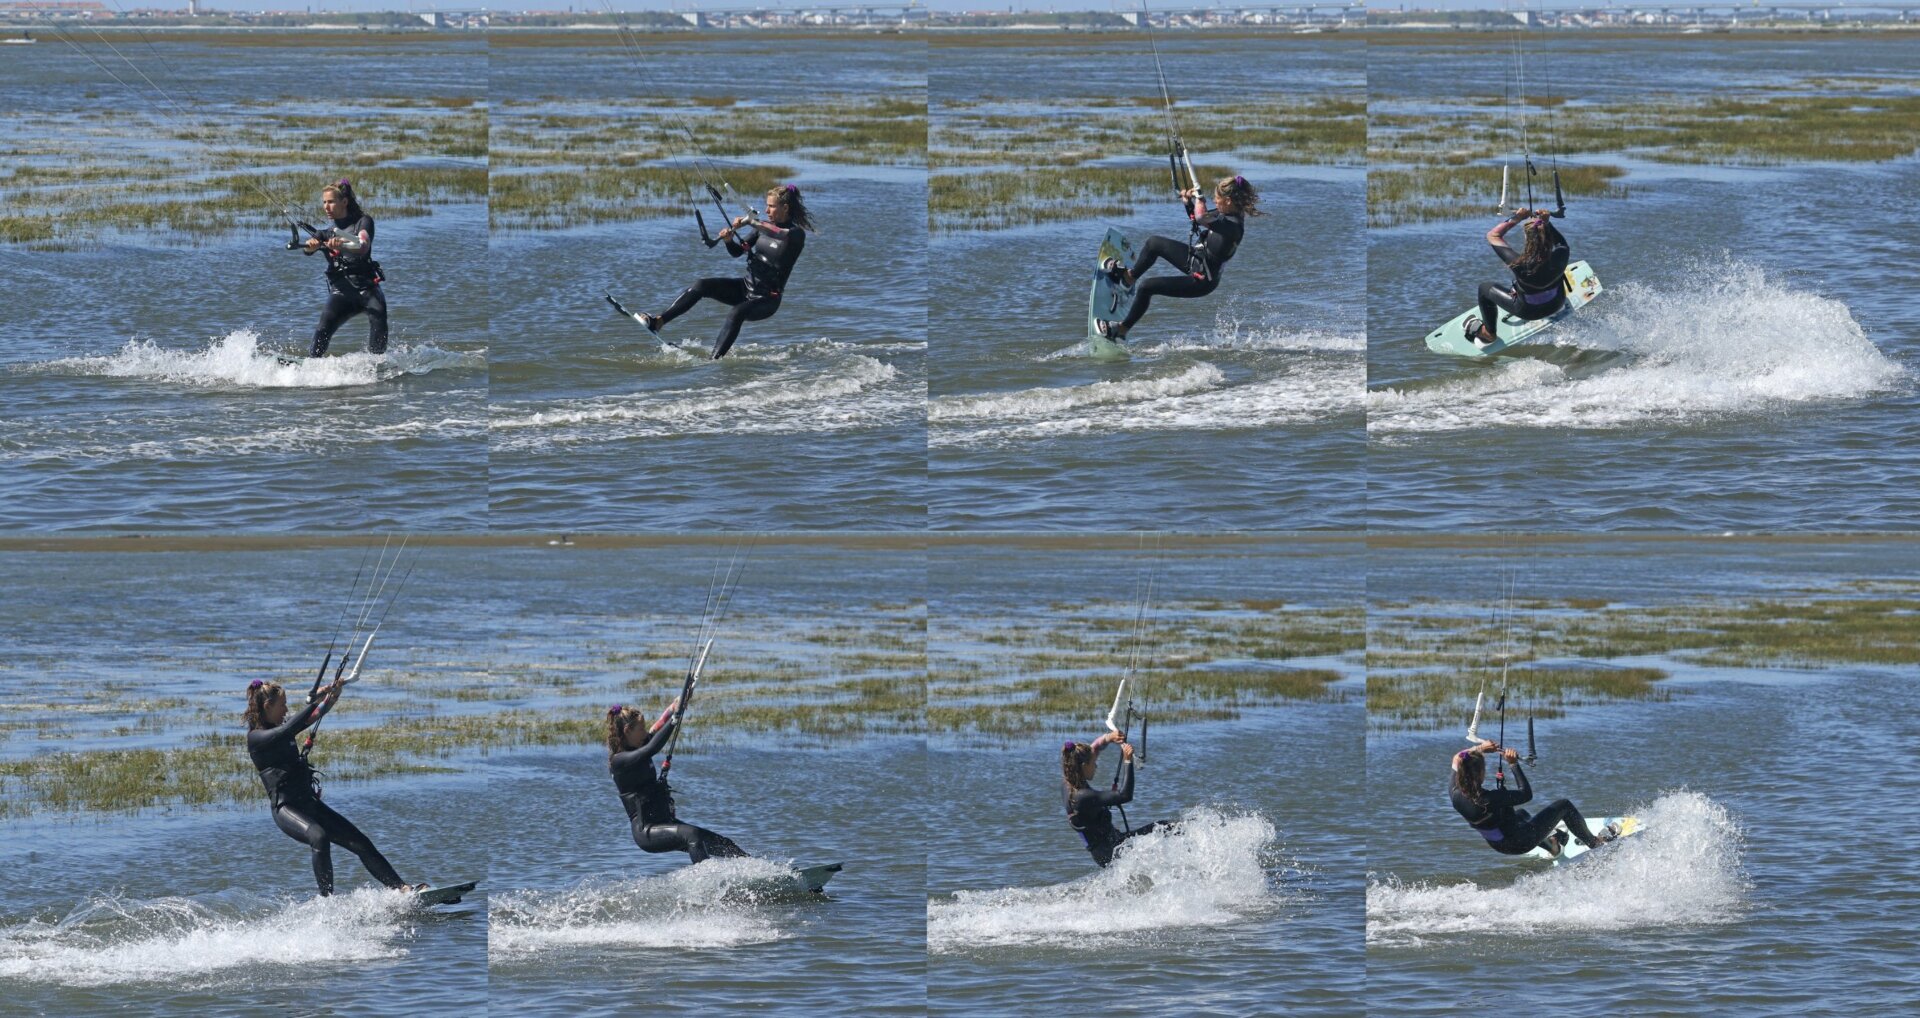
So, what is it? Have a look at the sequence, starting at the bottom left. Your mission is to carve up and through the wind before shifting your weight, burying the nose of the board, and stepping through to heel side so that you’re heading back from whence you came. It’s a tack as you’re changing by turning up and though the wind, and it’s a duck tack as you’re ducking under the bar! Although it does have a back-roll transition look, the movement is actually quite different.


Before delving into the how-to, we should consider some things that could have you pulling your hair out.
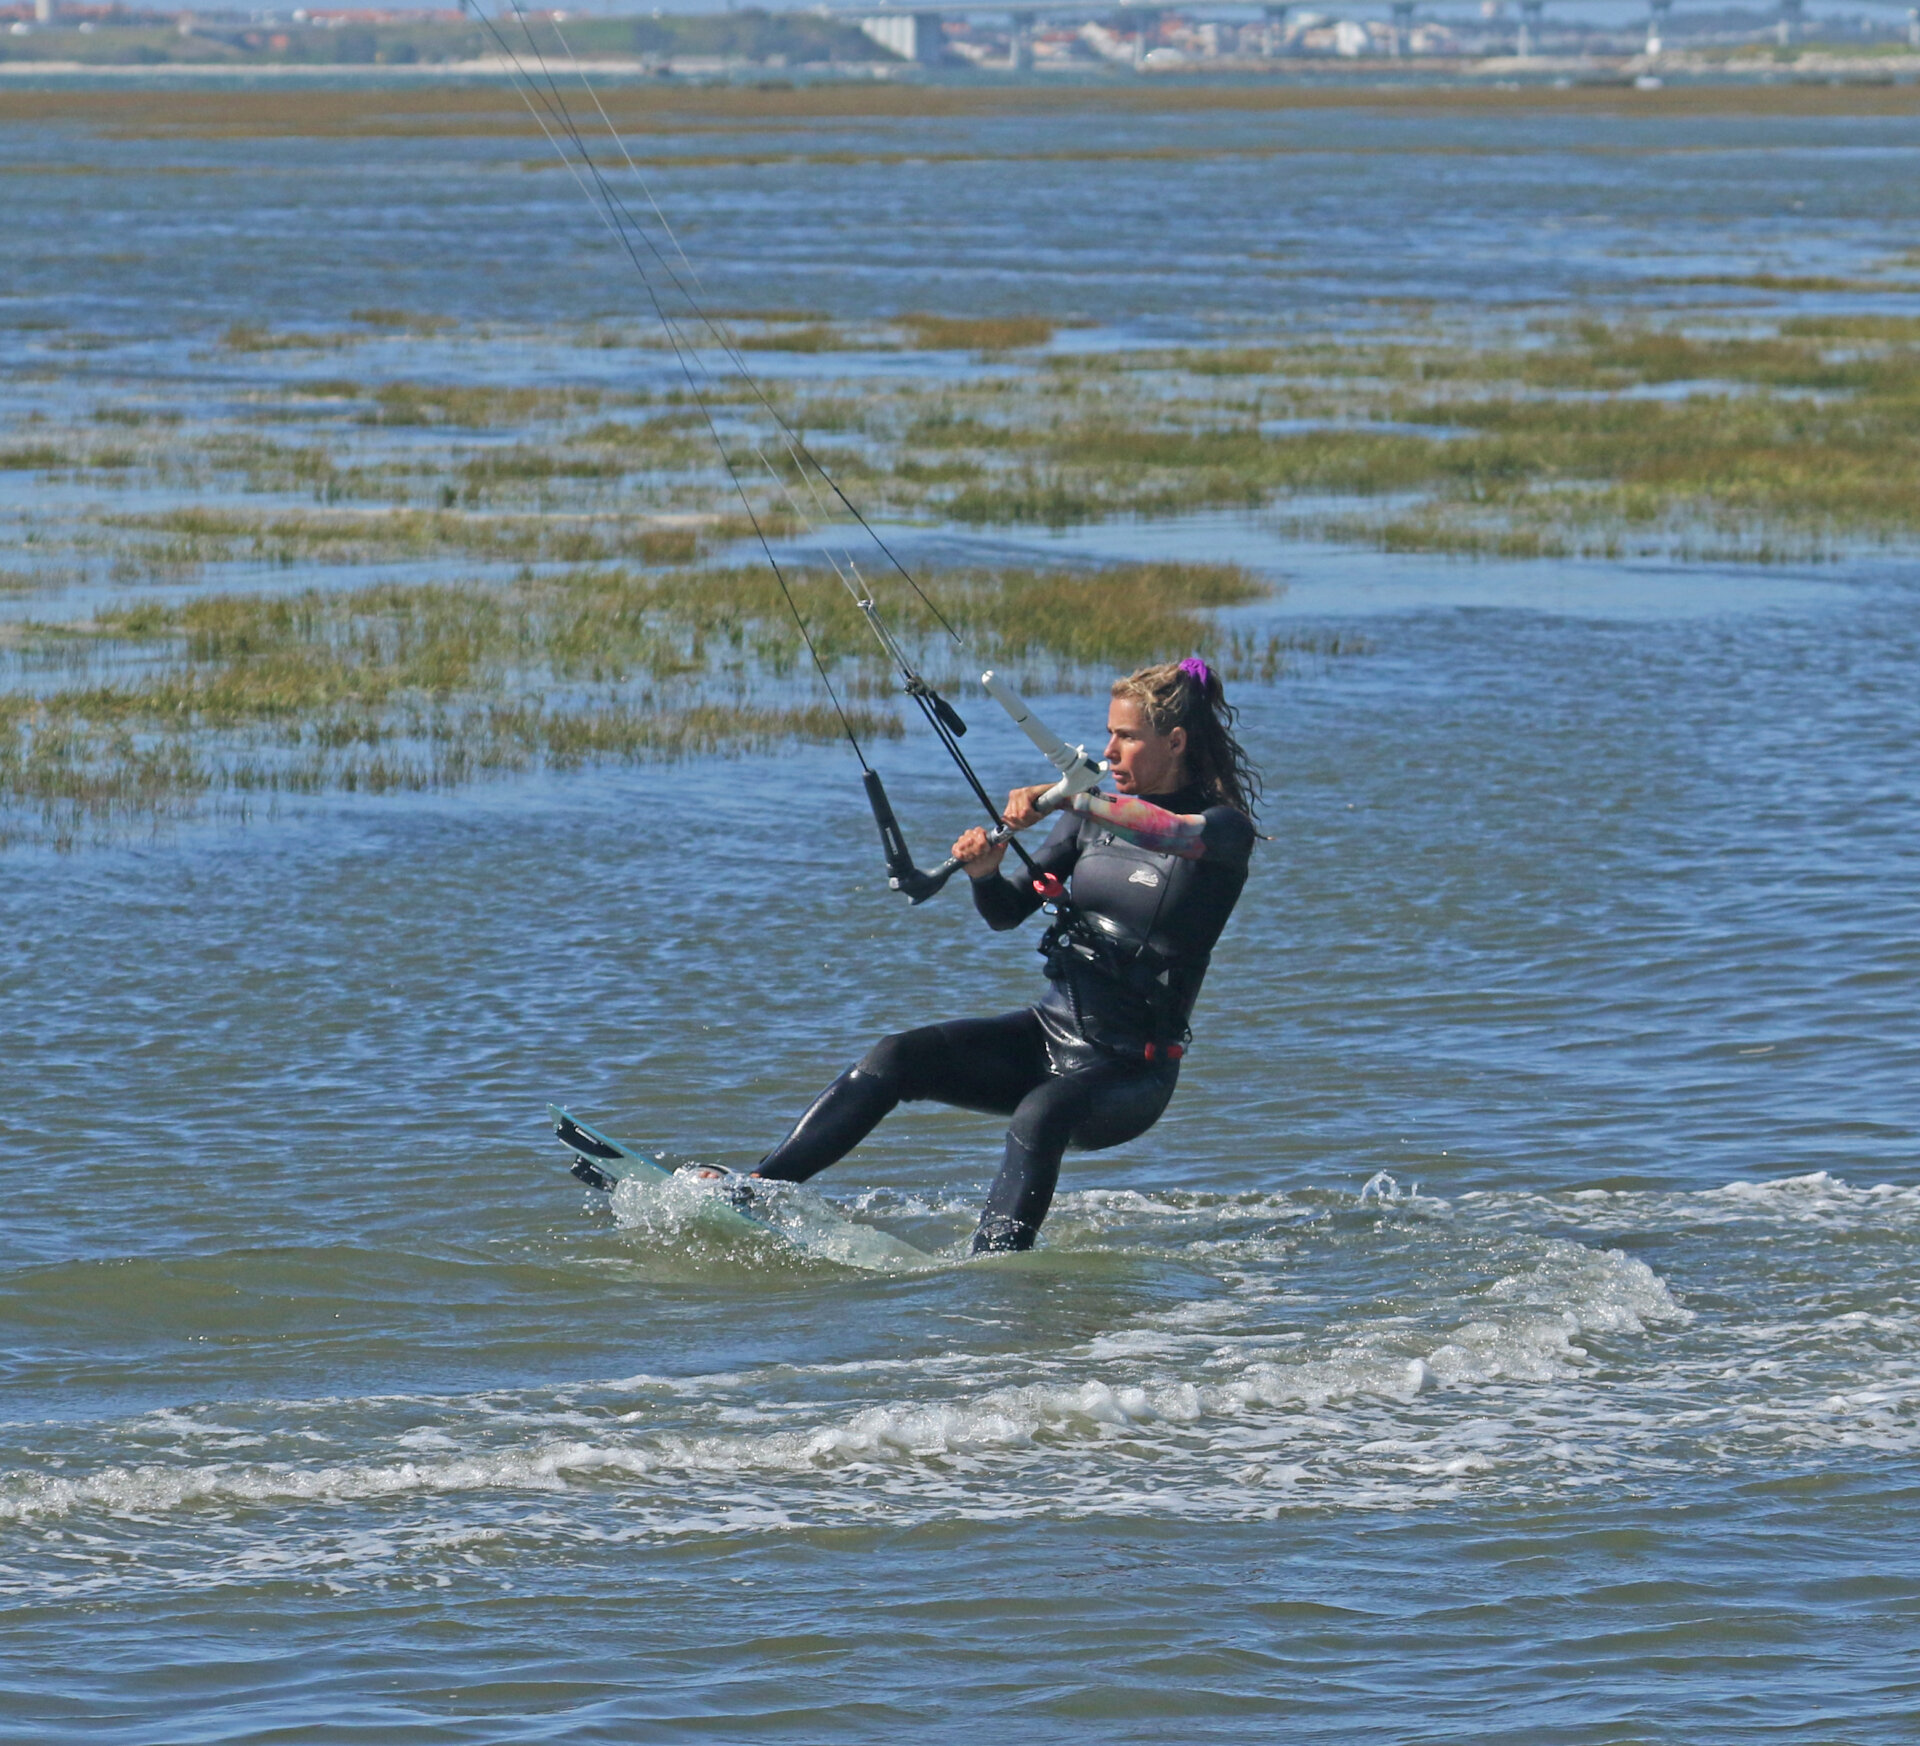
Firstly, your kite, or rather your relationship with your kite. In the twin-tip duck tack, you will need to get rid of power and pull in order to carve your board as far upwind and through the wind as possible. If you ride a surfboard or a foil, you’ll be more accustomed to not having support or pull from your kite at all times. However, if you only twin-tip, this lack of engagement will be new, unusual, and unsettling. Stay with it, as with each and every attempt, you’ll get more and more used to it.
Secondly, carving. Encouraging your board to turn that far into and through the wind without grinding to a halt, or at least dunking your derriere, will take some getting used to. Add this to the fact that you’re dumping power and support; you have some new skills to add to the bow. This may be a low-level transition, but it’ll require all the concentration of its airborne brethren.
Right, let’s have a look at the key moments and fit them together to make this happen…
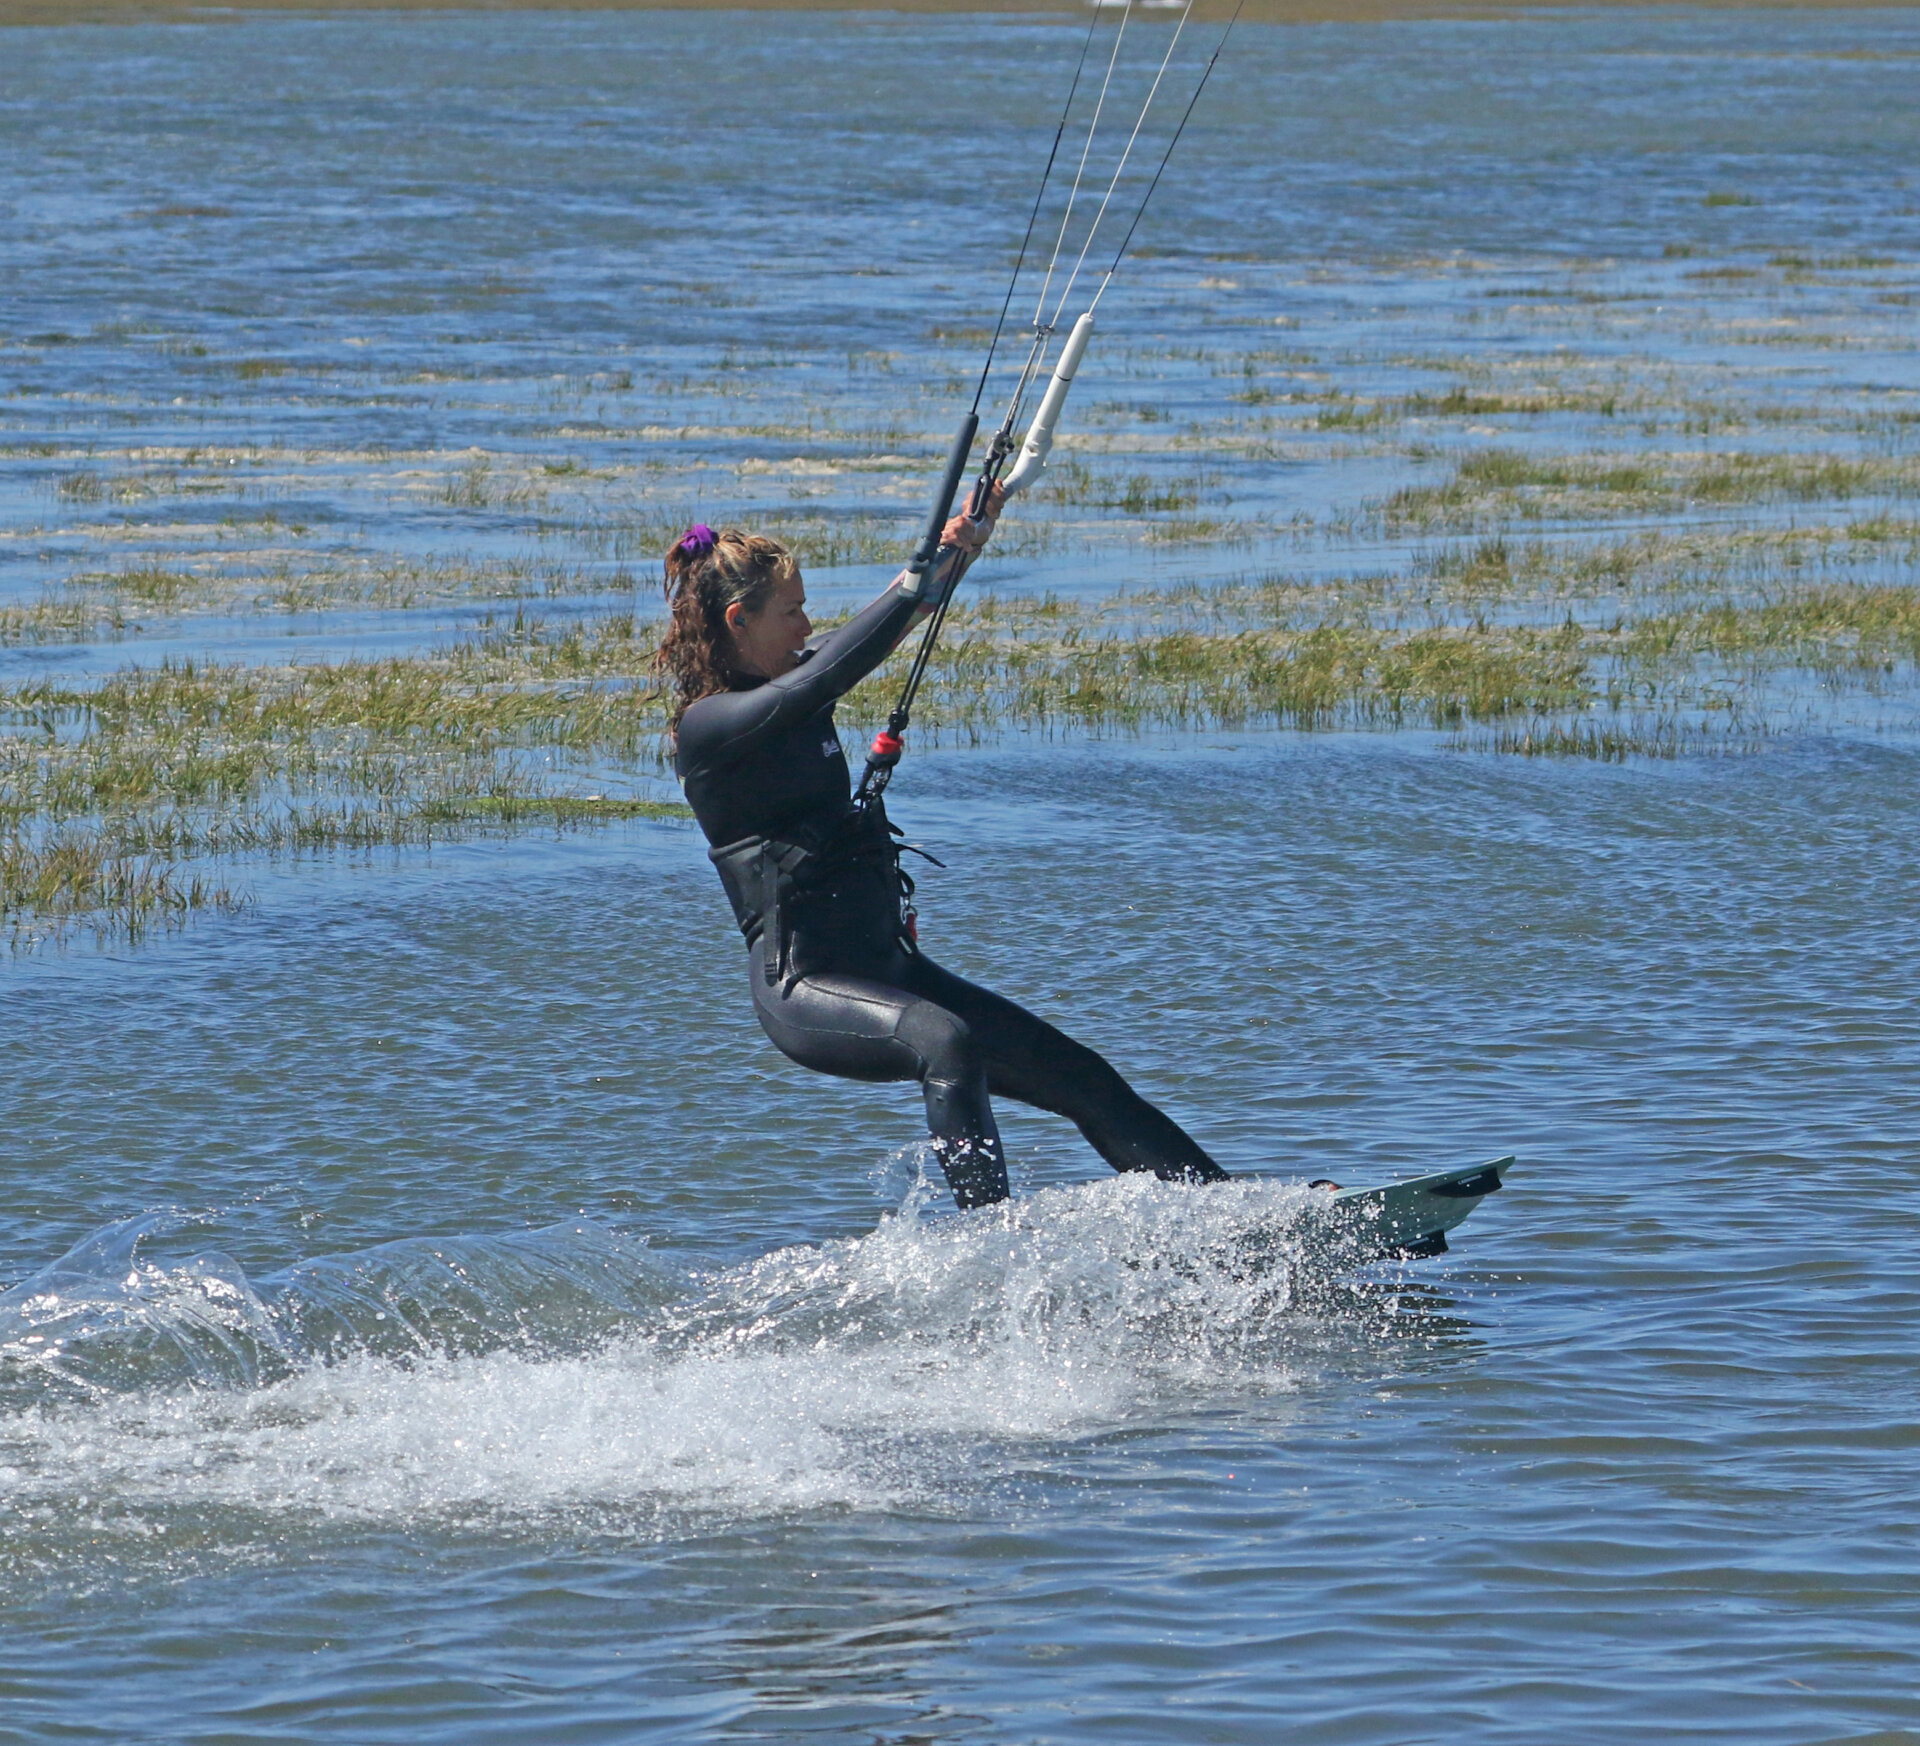
Approach Pic A.
Three key points for your approach.
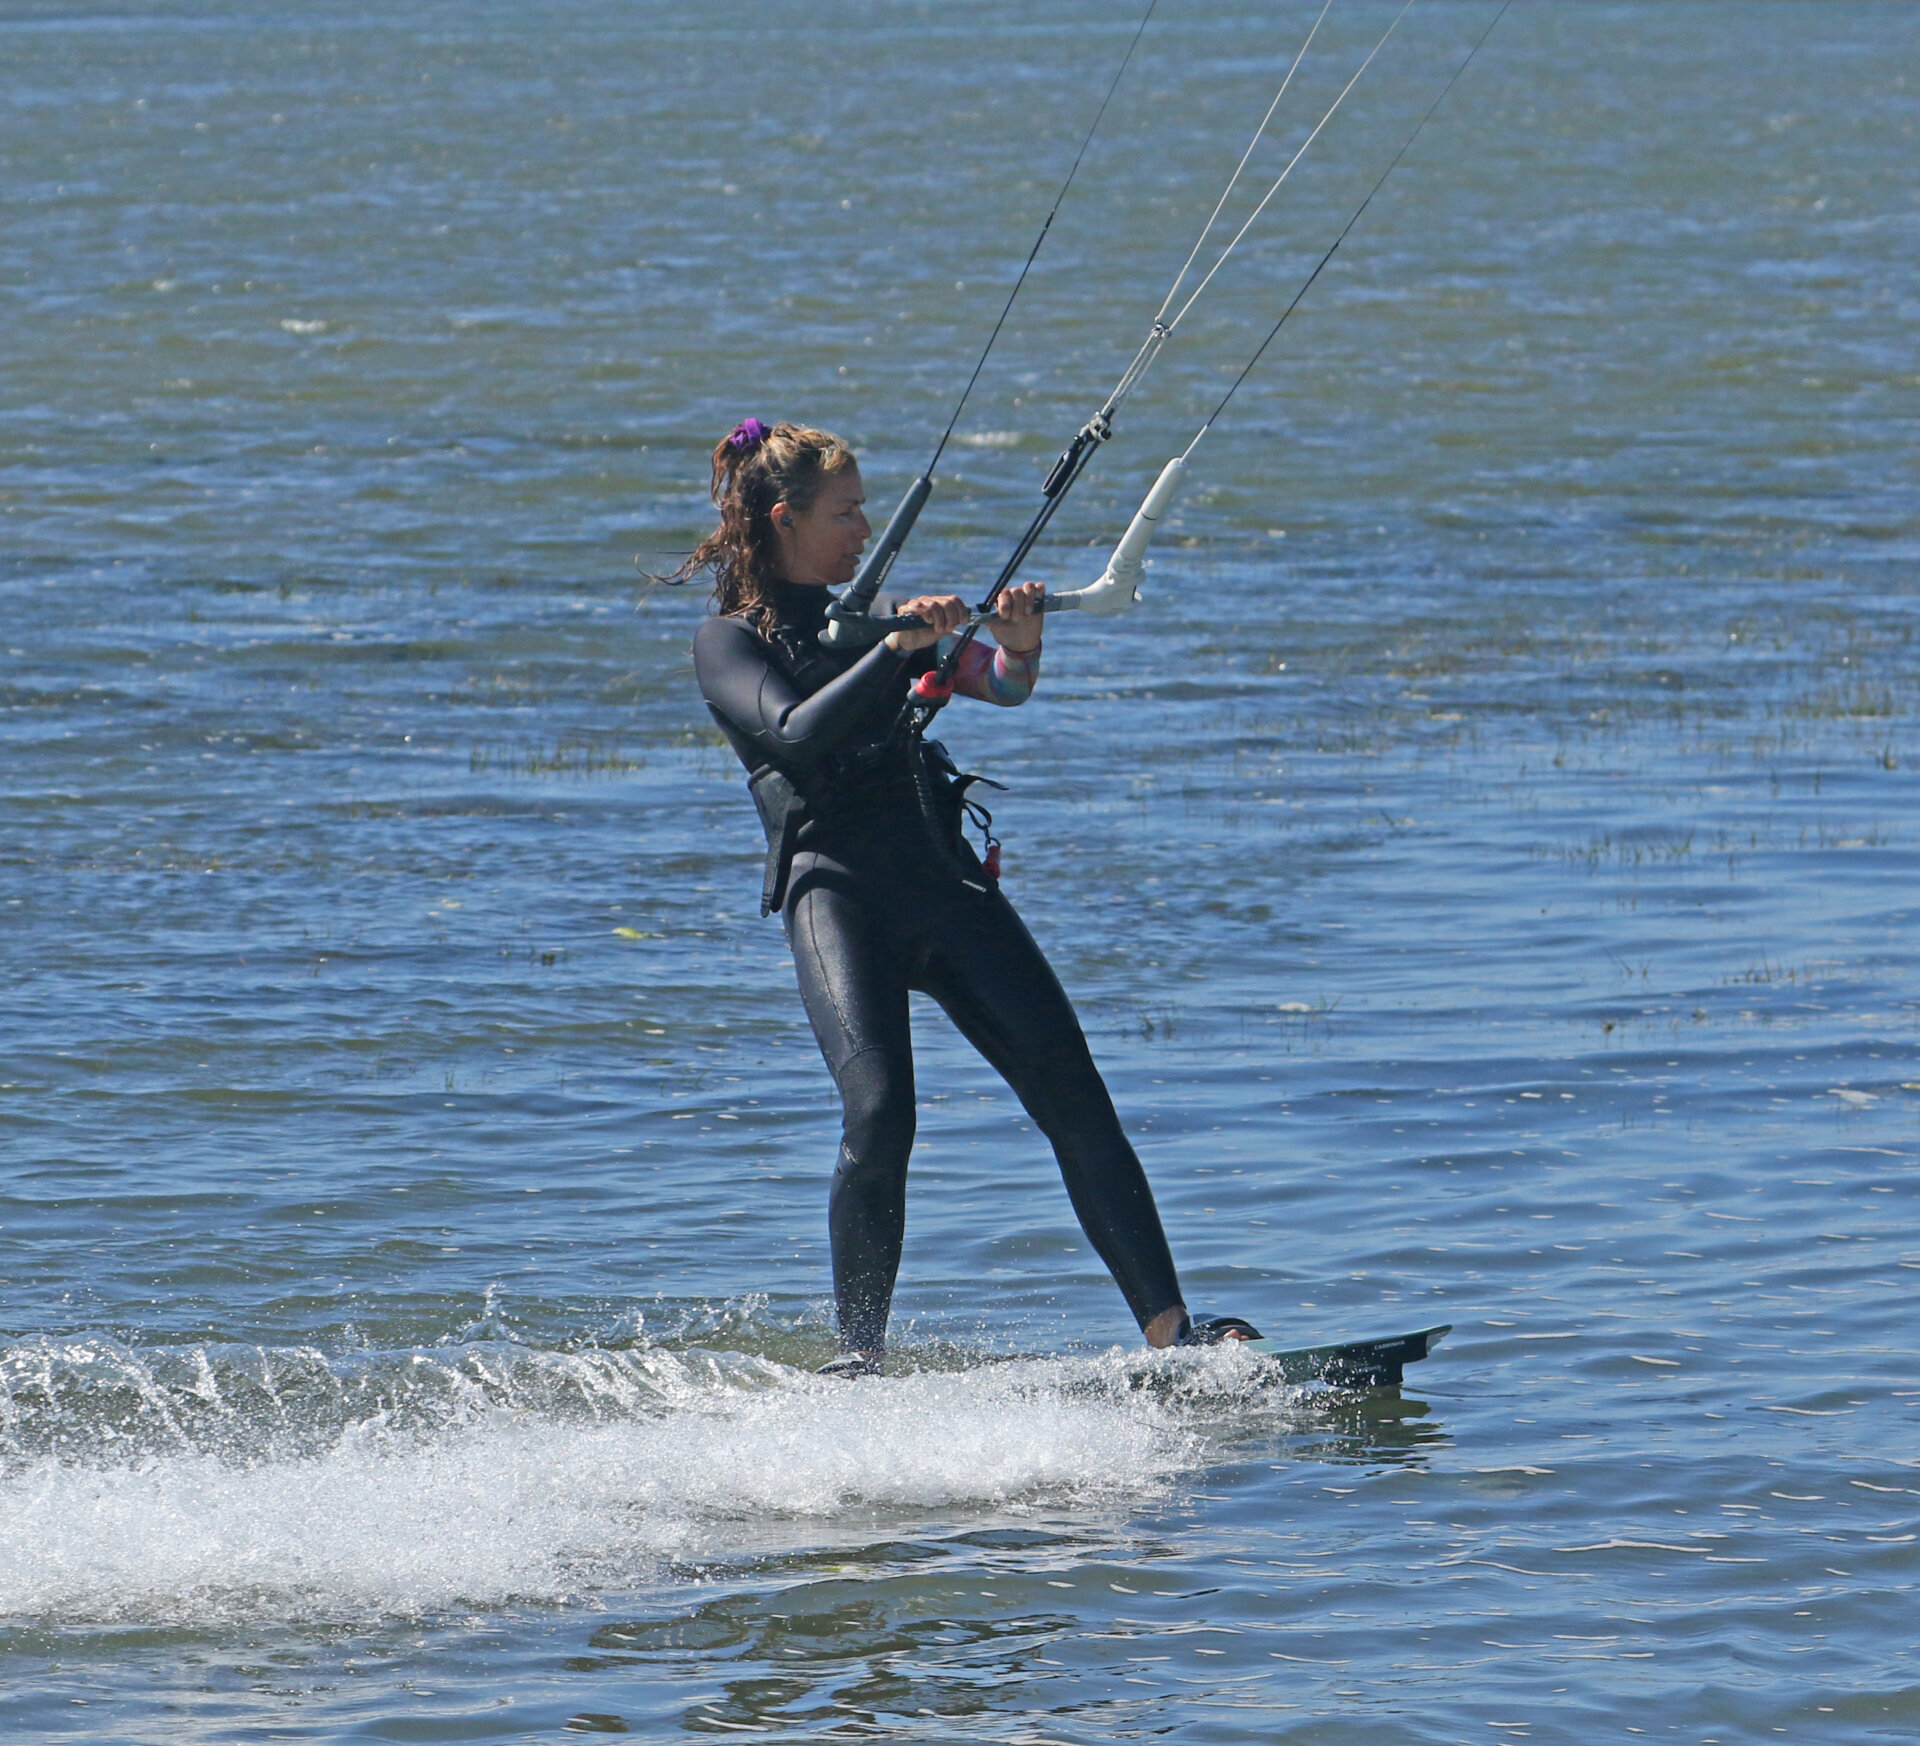
- You'll need some momentum if you’d like to turn your board as far through the wind as possible. You don’t want your foot to the floor speed, but you should relax your edge to quicken up a tad. Do this by relaxing your legs so that you roll up over the board.
- So that you can carve without rolling off the back of the board, you need to get your weight on both feet. Centre your weight by closing your hips. Turning them more parallel to the centre line of your board.
- You don’t want to be fighting against any pull from your kite, otherwise there’s no way you can carve up, so you need to dump power and get the kite up at 12 o’clock, at the edge of the window. Gently steer your kite up and feather the bar out so it doesn’t pull as it rises.
Here, Karine has flattened off a tad to increase speed. She’s centred on her stance and is gently drifting her kite up.


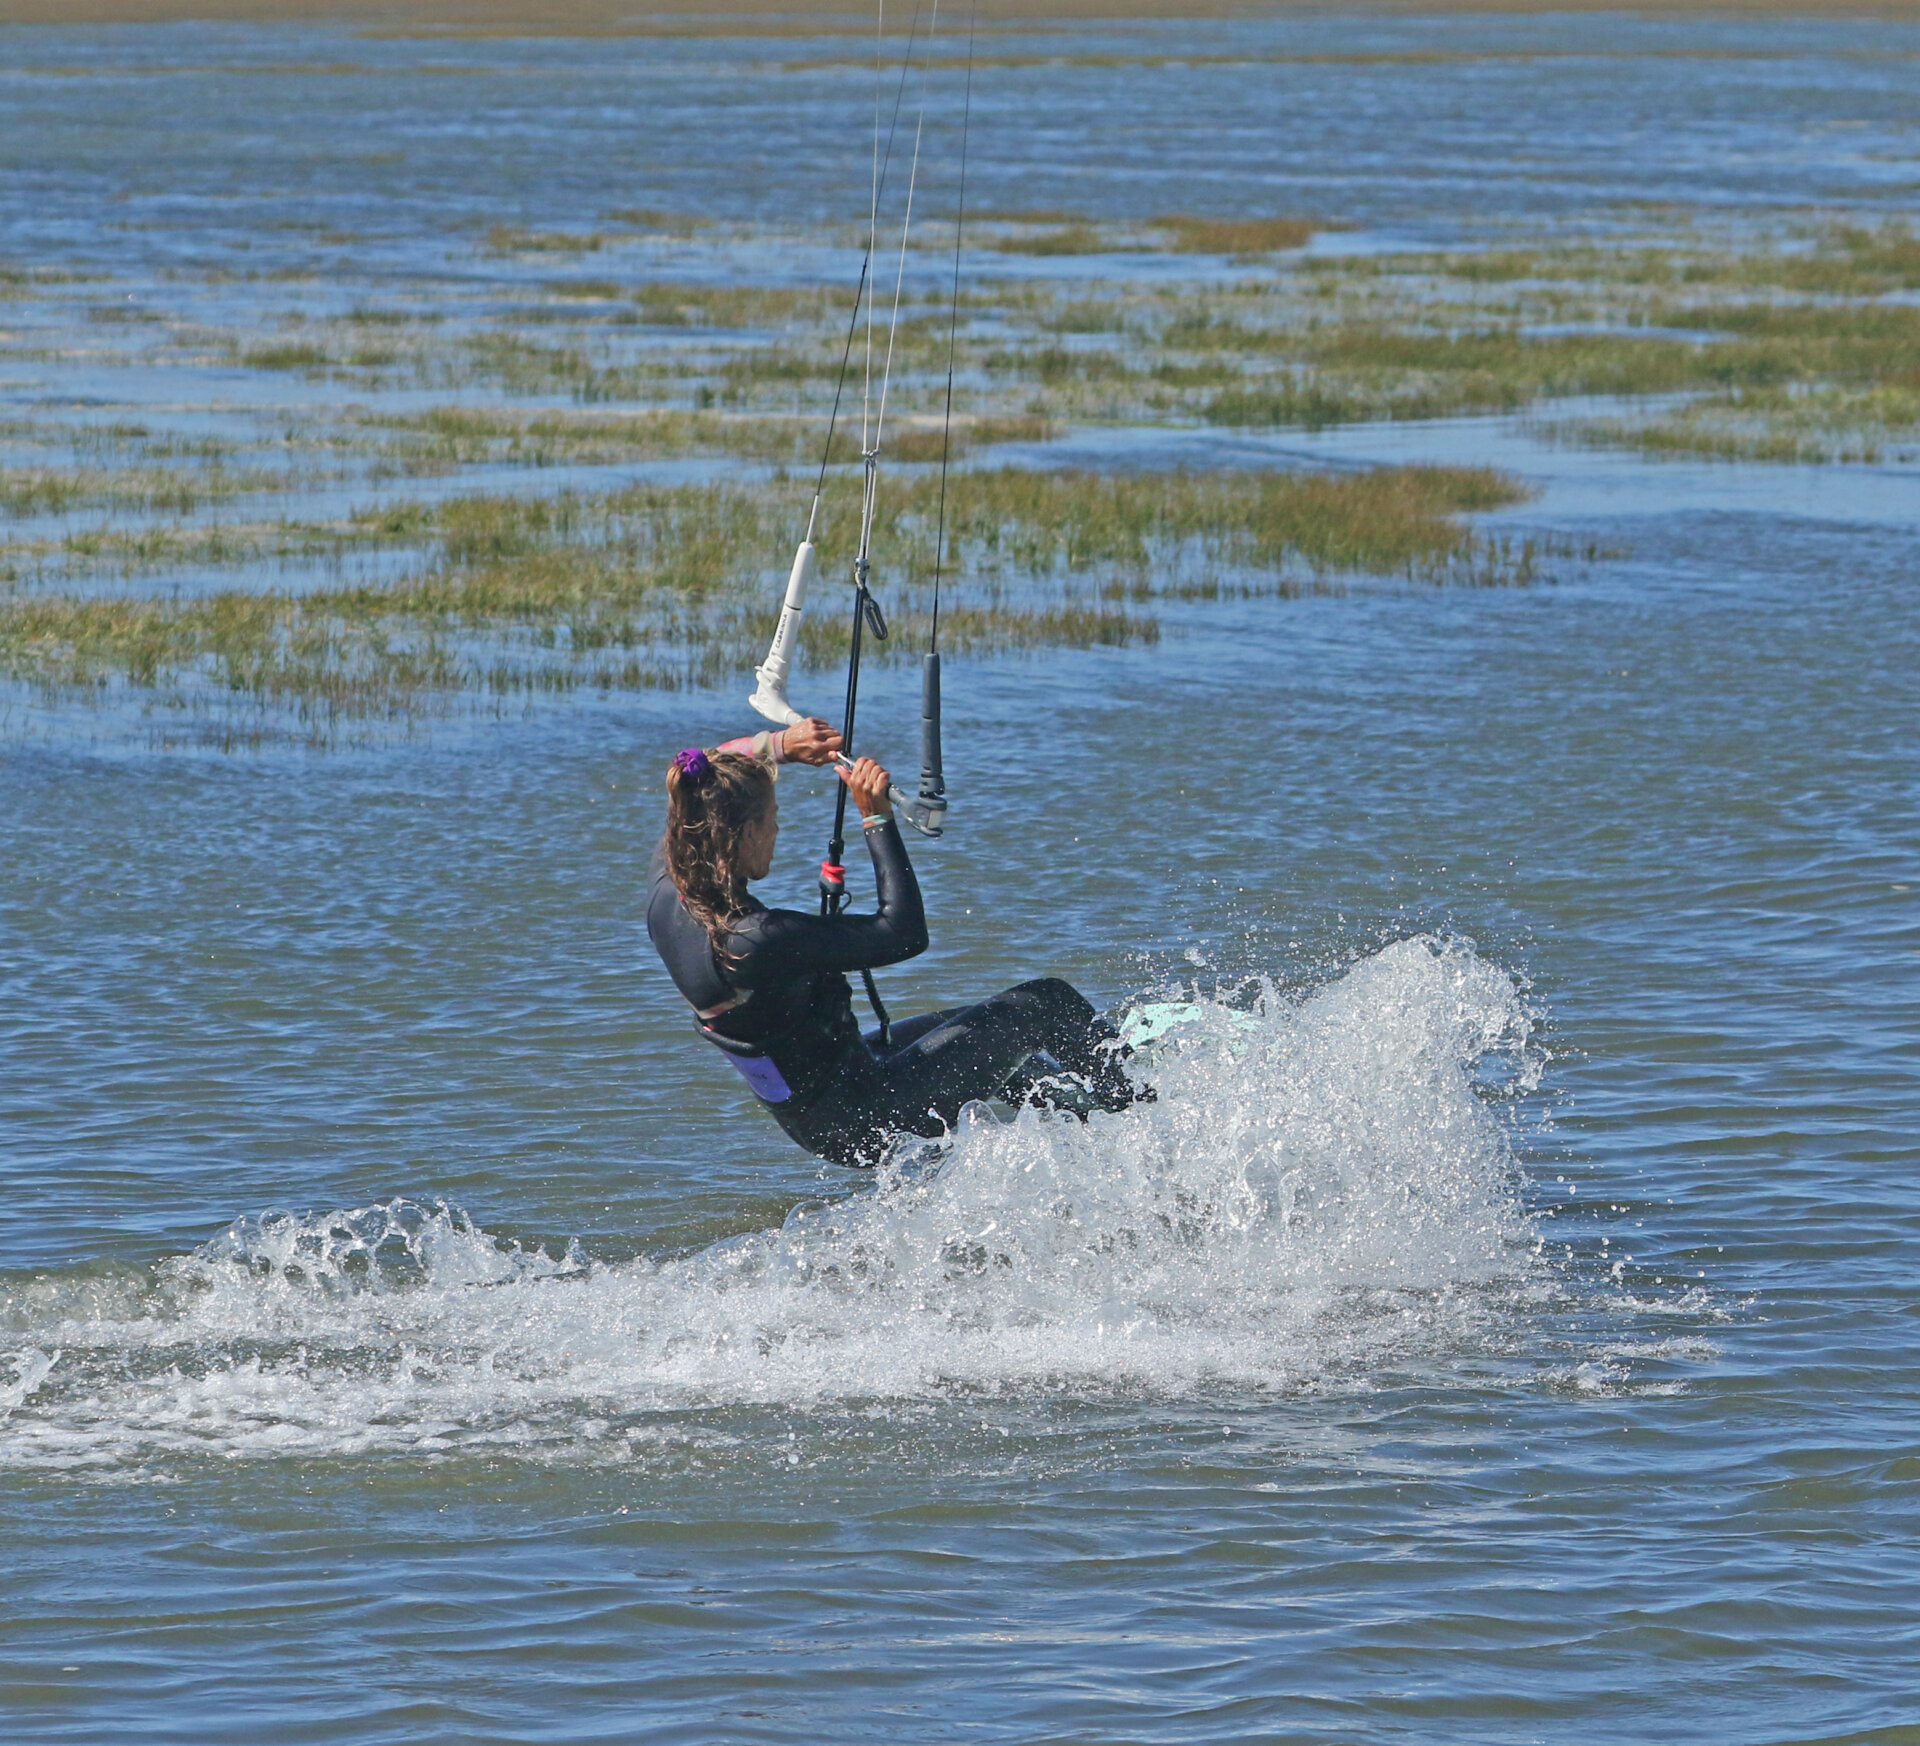
The Carve Pic B.
As the kite rises, you must drop your weight low, sinking as much of your heel side edge into the water whilst hinging your hips. This way, you can keep your upper body upright and carve the board upwind. Really try to turn the board, rather than twist your body, so that you and the board turn together. Dropping your weight and carving upwind will increase tension on your lines. As such, you’ll need to further feather the bar out so the kite doesn’t lift or pull. You can see that as Karine drops and carves, her hips are still parallel to the board's centre line; they’re turning in unison. She’s still slowly steering the kite and has broken at the waist to push the bar out.
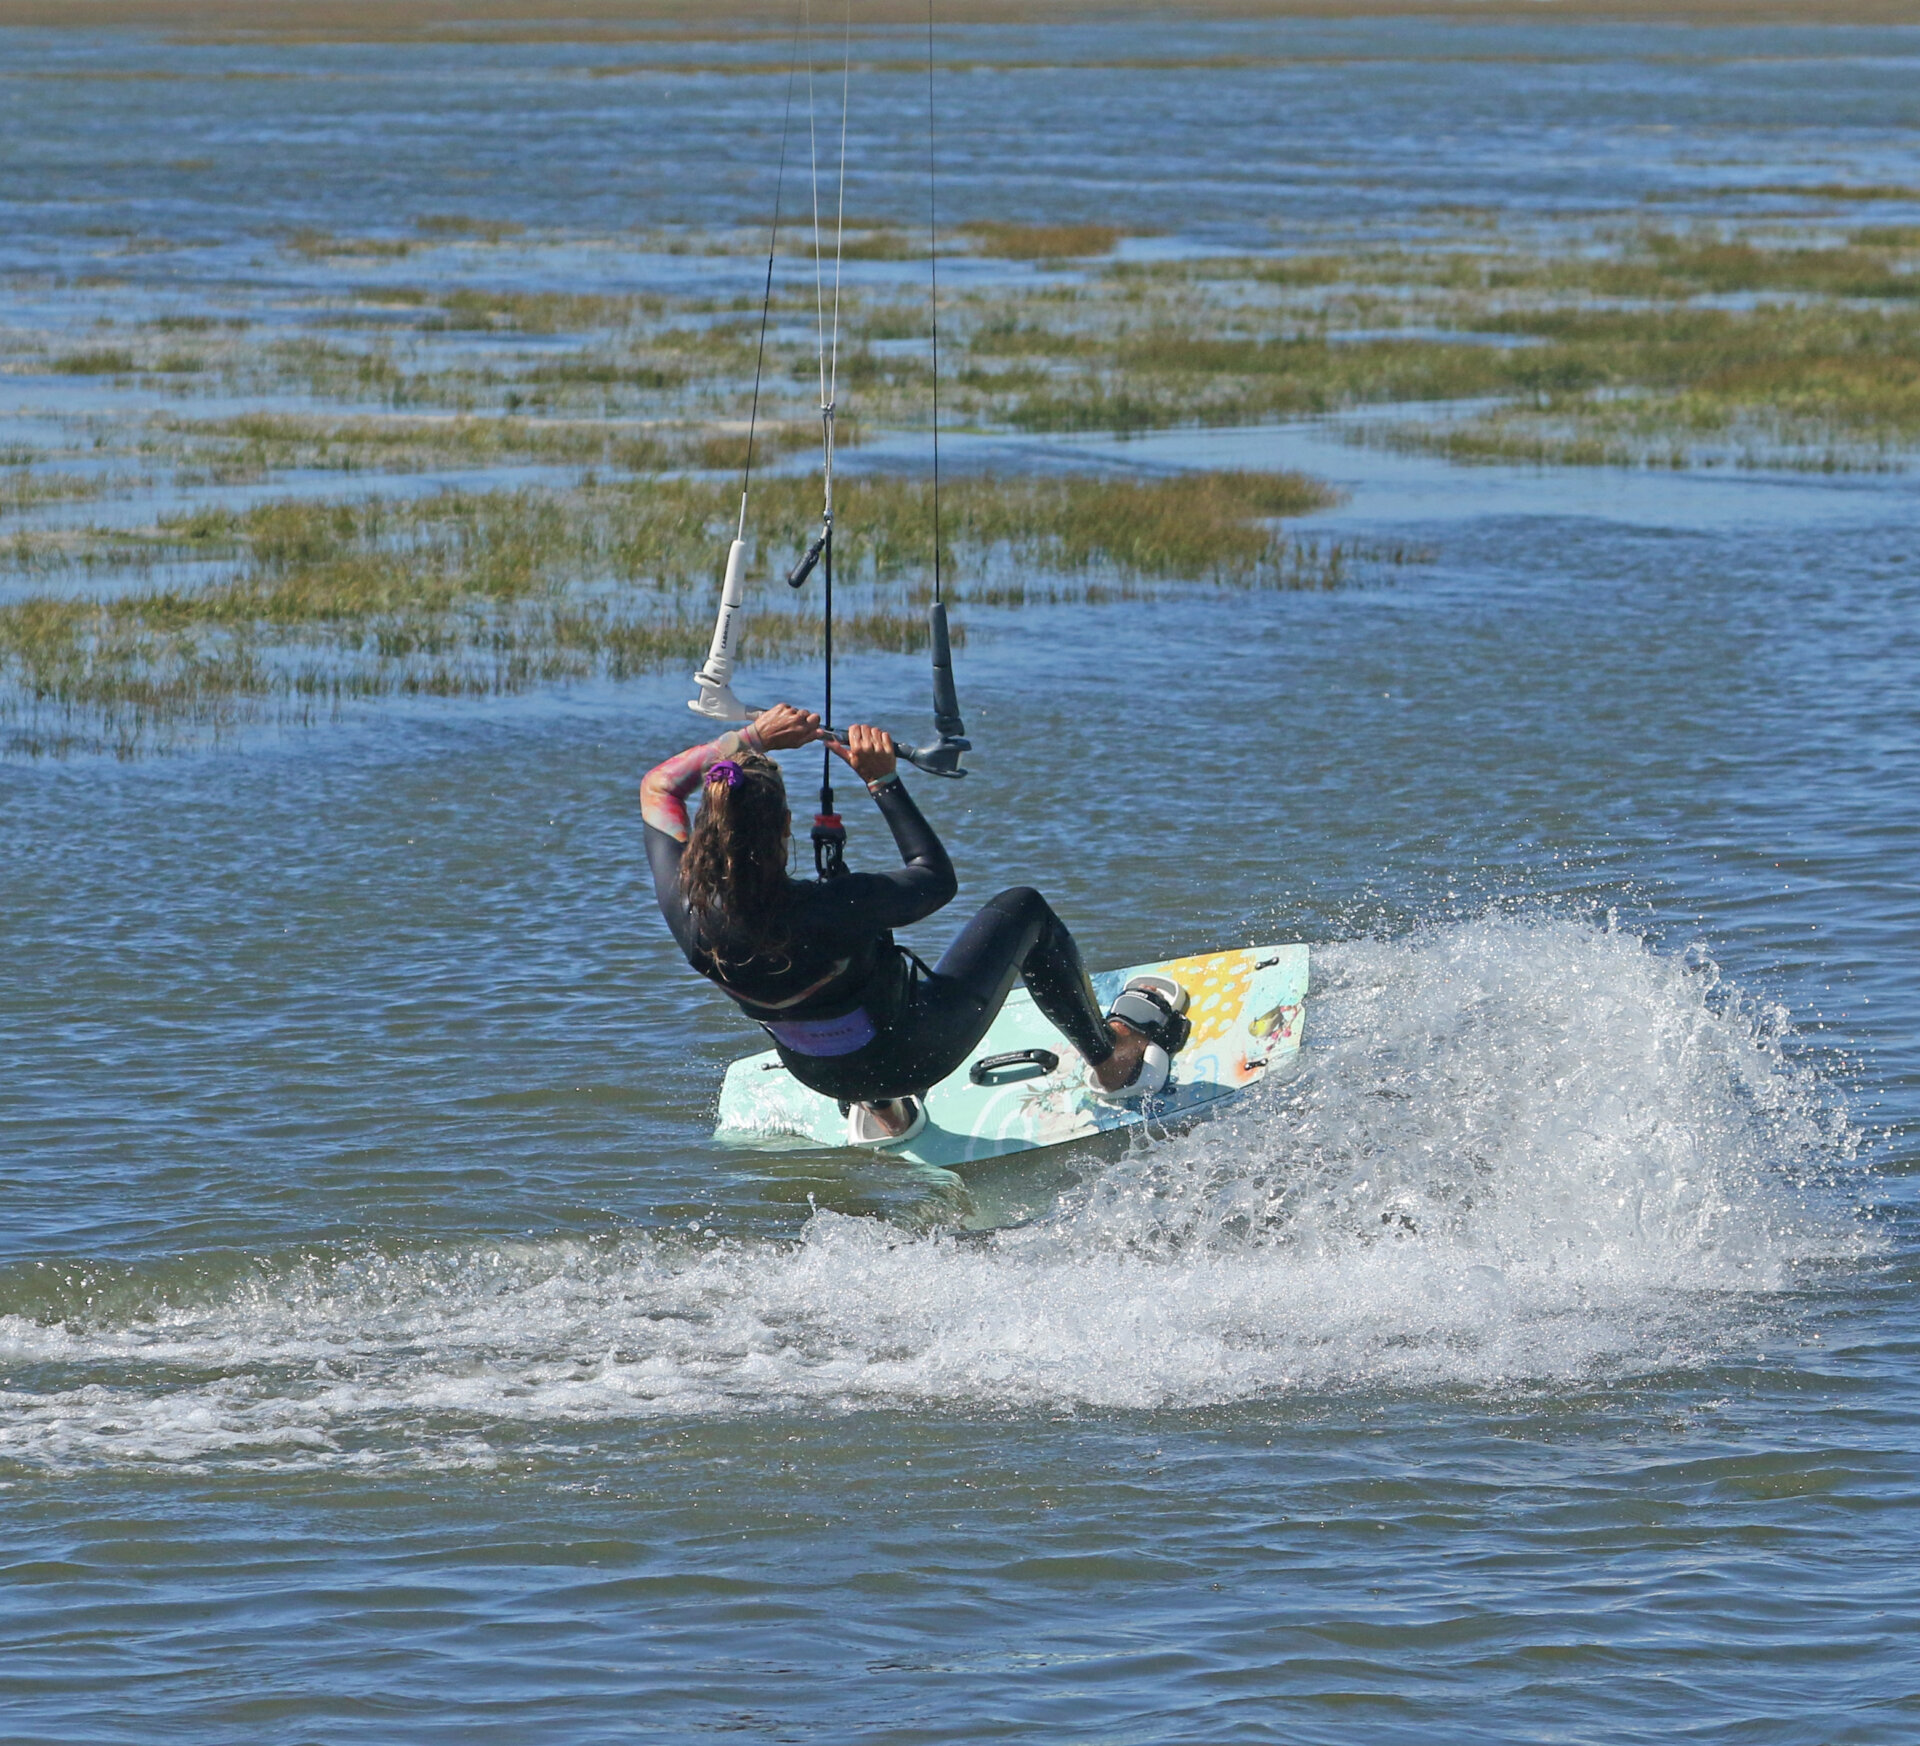
Keep Carving Pic C.
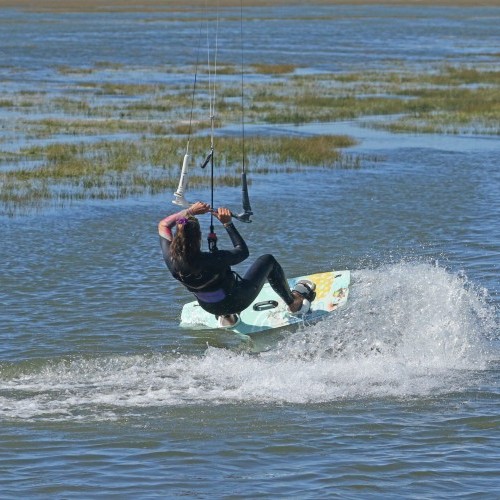
The crux of the move. You need to keep carving so that you turn your board's nose through the wind's eye. Your aim is to keep the kite moving slowly, tracing the edge of the window so that it passes through 12 o’clock without pulling you. What you do here will vary depending on wind strength, how quickly you moved the kite or even the sweet spot position. You don’t want to get lifted, and you don’t want to get wet. If you have a lot of power or moved the kite too quickly, you’ll need to sheet out further. If you steer the kite slowly, you can squeeze the bar in a touch. This will give you just enough support to continue to carve, driving against the board so that it passes through the wind. Karine is upright, still steering her kite softly across, and now that it’s at 12, she pulls gently on the bar for support whilst continuing to carve on her heels.
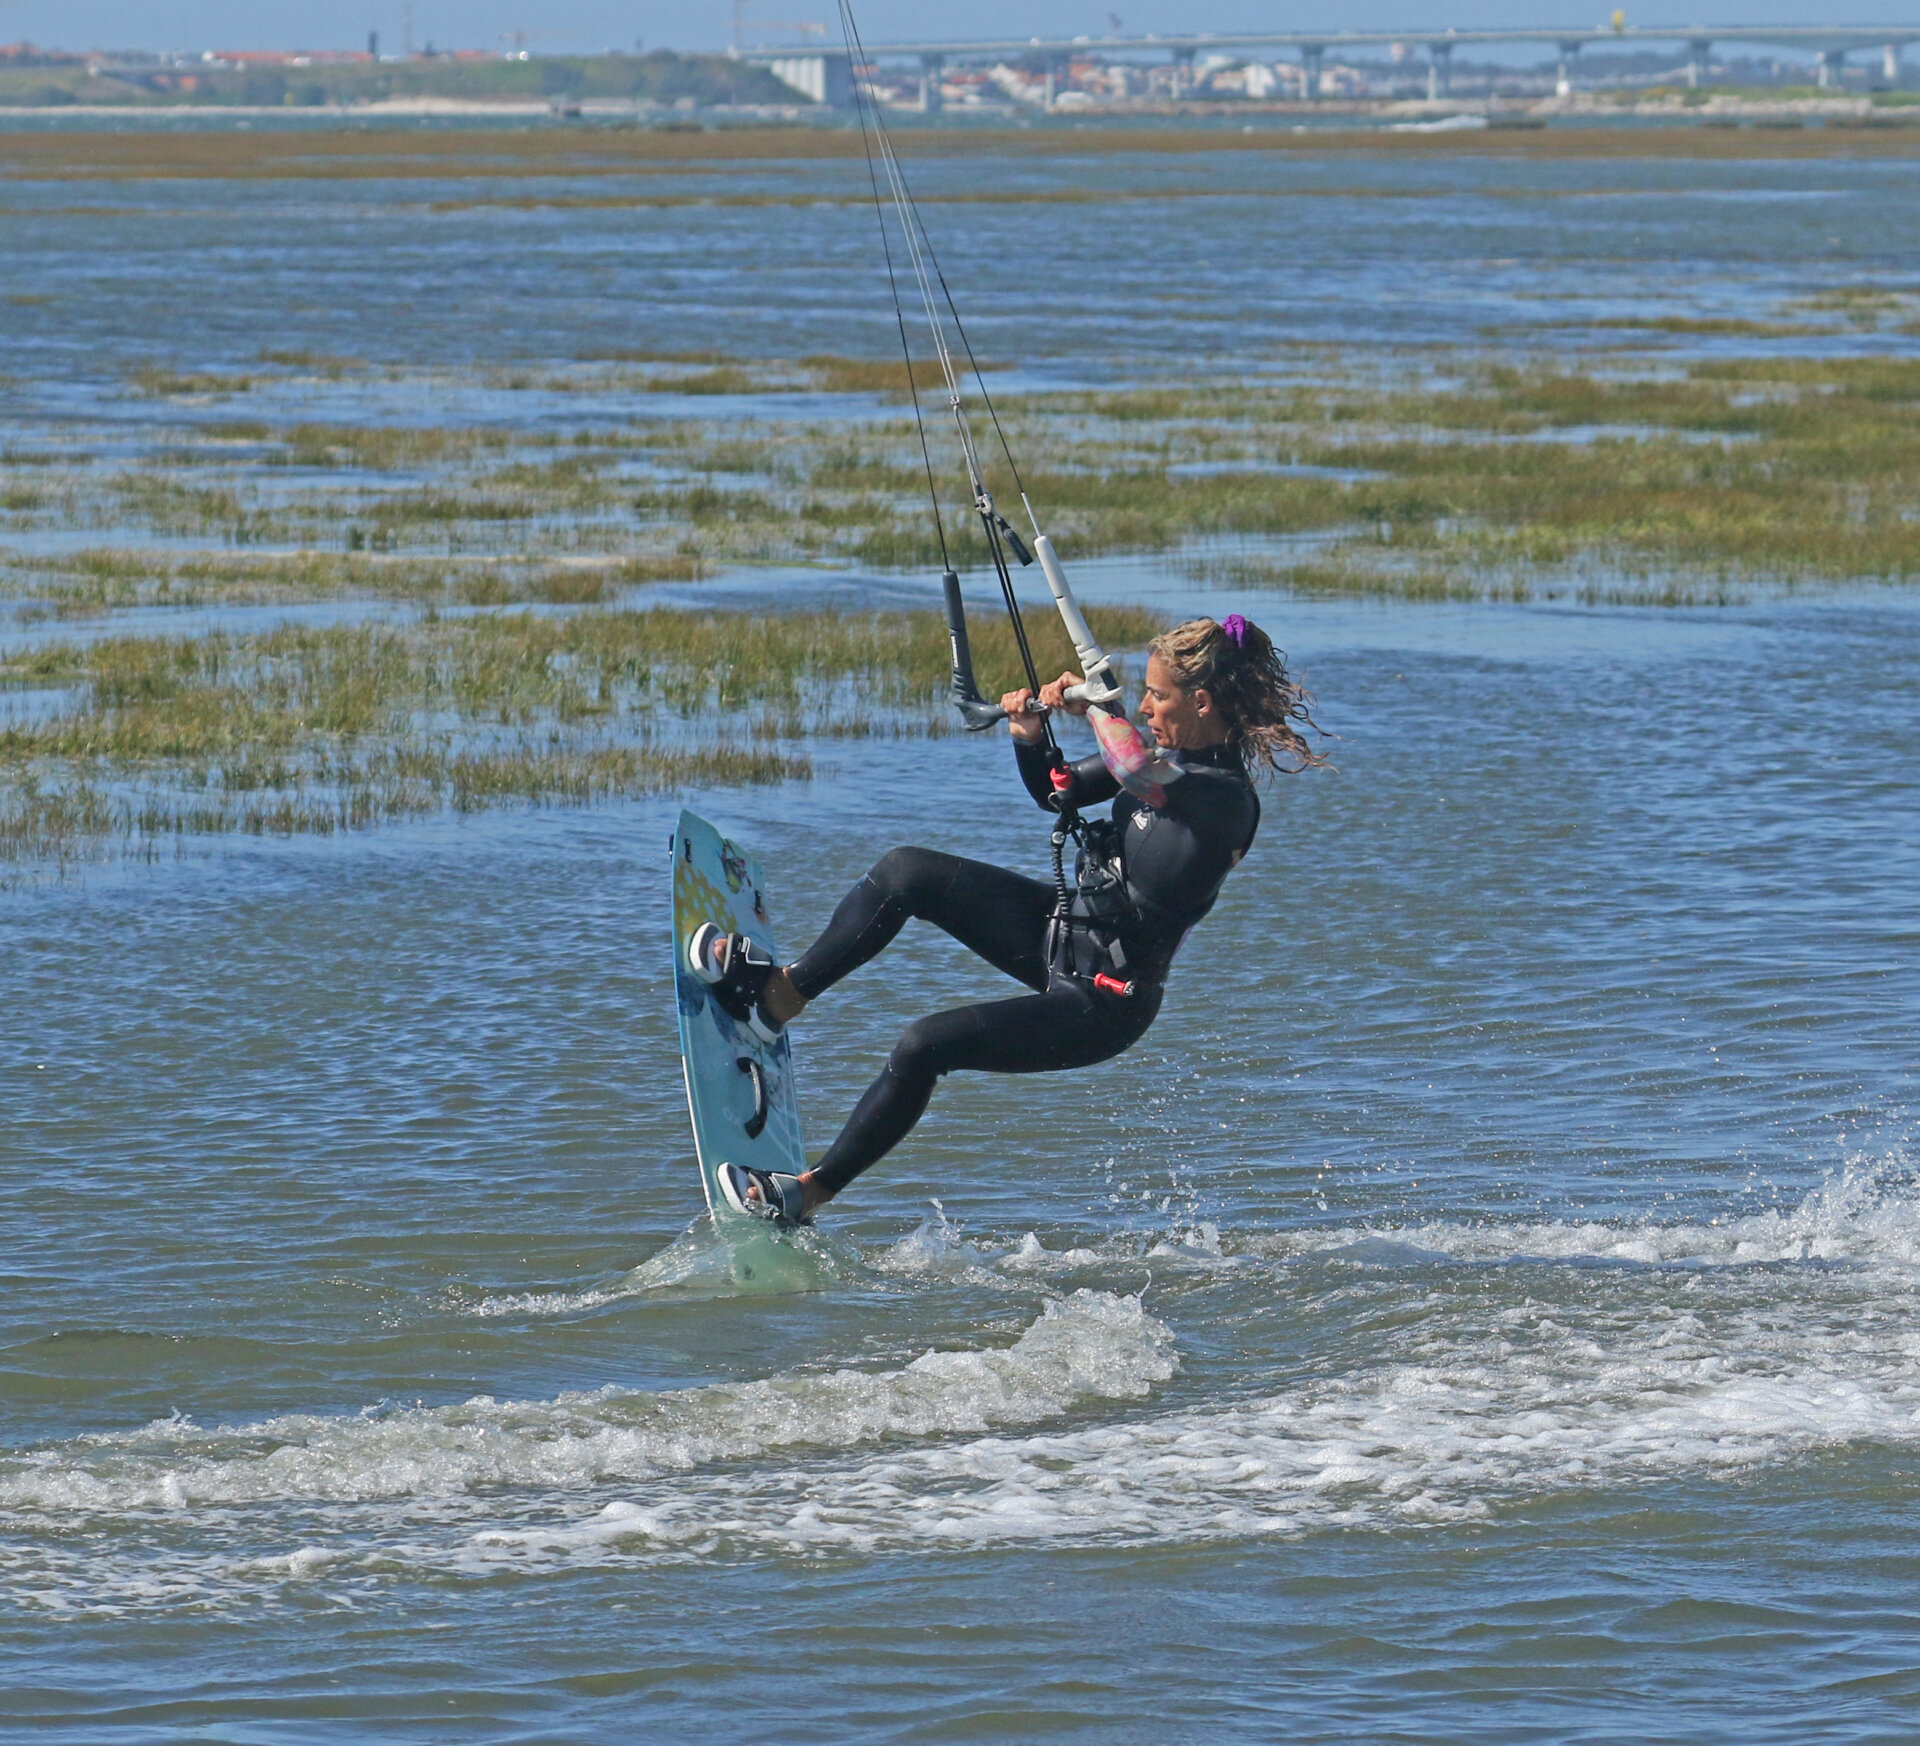
Weight Shift Pic D.
Once you’ve got the nose through the wind and heading back, it’s about shifting your weight onto your original front foot – in this case, Karine’s left foot. Using the support you benefitted from to get through the wind to hold you, bend your front knee and move your hips towards the nose of the board. Turning your head to look at the front of the board. You can be quite dynamic here, as your aim is to sink the nose and plant it in the water. Karine is supporting herself with the kite and has thrown her weight forward, digging her nose in. It’s worth noting that she is still gently steering the kite across the window. At this point, it’s preferable to have the kite just past 12 as it will help you shift forward.
Step Through Pic E.
As soon as the nose goes down, you need more from the kite to help you step through. The action is not unlike bringing the board through to go toe side, it’s just that you’re stationary! Pull the bar in to get more power from the kite and keep steering the kite. As you feel it lift, bring your rear leg up and through, pivoting around the sunken nose. Here, Karine has her nose under and has pulled her bar in, and as the kite lifts her up over the board, she steps her rear foot through.
Dive & Go Pic F.
To claim it, you need some forward momentum. This part of the move should already be in your armoury. Dive the kite and prepare for the pull. To exit smoothly, you need the pull to come from the side of the window in which you want to travel. It'll do the job if you’ve drifted the kite across the past 12. Karine’s kite is diving and pulling her out of her duck tack.
Top Tips
It’s worth trying to learn this in two stages. First, work on getting your carve, as once this is in the bag, you can think ahead and throw yourself forward into the pivot. The carve must be just that, a carve. If there is any sliding, it’ll be game over. So practice carving as far as you can, moving the kite up to 12 o’clock and letting the bar out as it drifts.
Once you've carved the carve, it's all about timing. Wait too long, and you’ll sink; go too early, and you won't make it around.
As with all moves, it’ll start off as a bit of a blur. The more you practice, the more time will slow down, and you’ll get a better feeling for where you are, where the kite is and what it is you should be doing.
Common Problems
If you are “losing” the tail as you carve up, it’s because you’re subconsciously going into slide-turn mode. This means that as you carve, you are bending your front knee and moving your weight forward too early. With your weight on your front foot, the tail will slide out as you push. Keep your hips centred and concentrate on carving the board so that you push through your back heel while sinking as much edge as possible.
If you’re falling downwind of the board, it’s because the kite pulls you. Be sure to drift the kite up to 12 and let the bar out as you go. Break at the waist as you turn so your upper body stays upright.

If you get pulled over the board as you pivot, nearly making it but ending up on your front, this is because the kite is diving from 12 and pulling you downwind. To exit, you want your kite diving into the new side of the window, so drift it further before pivoting and diving.
Keystones
- Relax the edge to add some speed
- Drift kite up and feather bar out, stay centre
- Drop weight and carve up through wind, body upright
- Shift weight forward and bury the nose
- Turn head and step through, diving kite
This technique article was in Issue 105 of IKSURFMAG.
Related


By Christian and Karine
Christian and Karine have been working together as a coaching team, running improver to advanced kitesurfing clinics since 2003.
