
Inverted Grabbed Back Roll
Technique / Intermediate

Introduction
Ladies and Gents, once again, it's time to ramp up the volume on our well-worn record delighting in the Lego-like creativity of kiting - combining skills, adding a new one, the scintillating pleasure of our incredible sport. Today it's all about spicing up your back roll, and the inverted one at that. If you've mustered the effort to flip the poles whilst rolling around, adding a grab with the potential to bone it out has to be the next condiment on the menu. You'll have all the visceral joys of inverting a slow rotation whilst adding even more visual flair.
As a precursor, the inverted back roll will help. However, if you're feeling courageous and are happy with grabbing a back roll, this could well be within your reach. Your aim from the off is to perform a slowly rotated sent back roll. Adding both the inversion and grab, with your chosen branding pointing up to the satellites for longer than a fleeting moment in time, is based on this slow roll. One quick word from Mum and Dad, deep water, please!


No more beating about the bush; let's do this thing! There's no better way than to look at the key moments and how you're going to nail them.
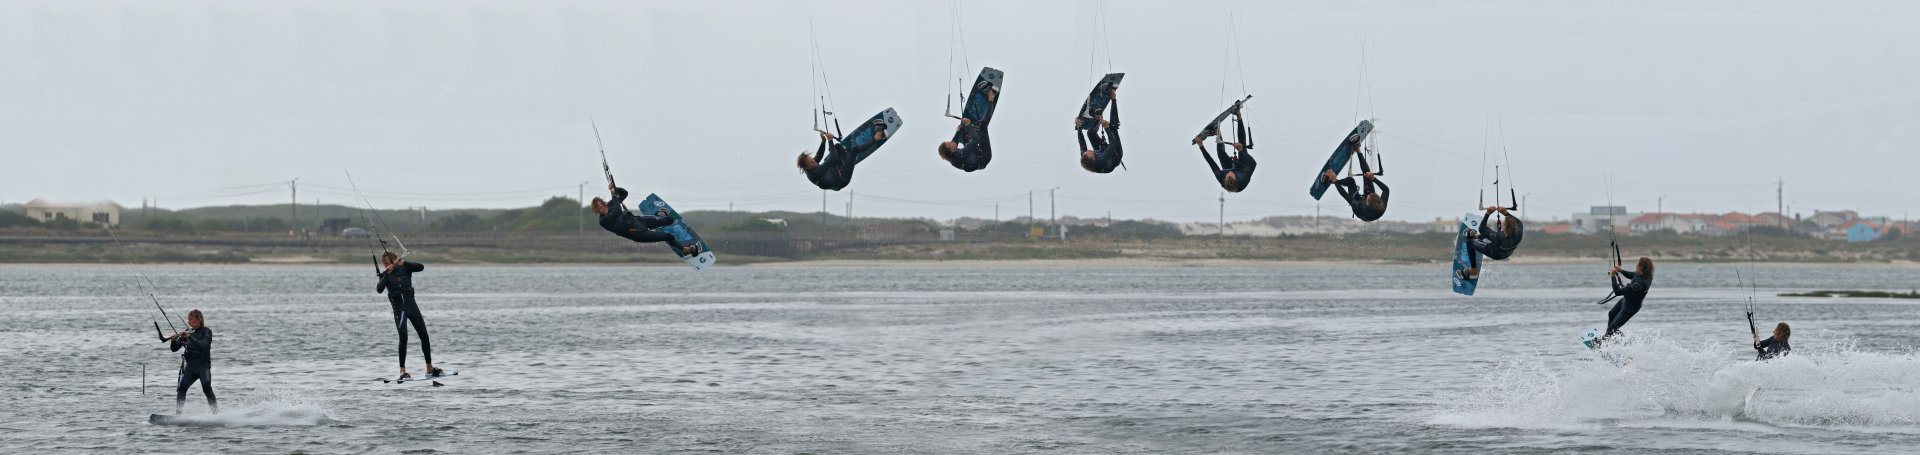
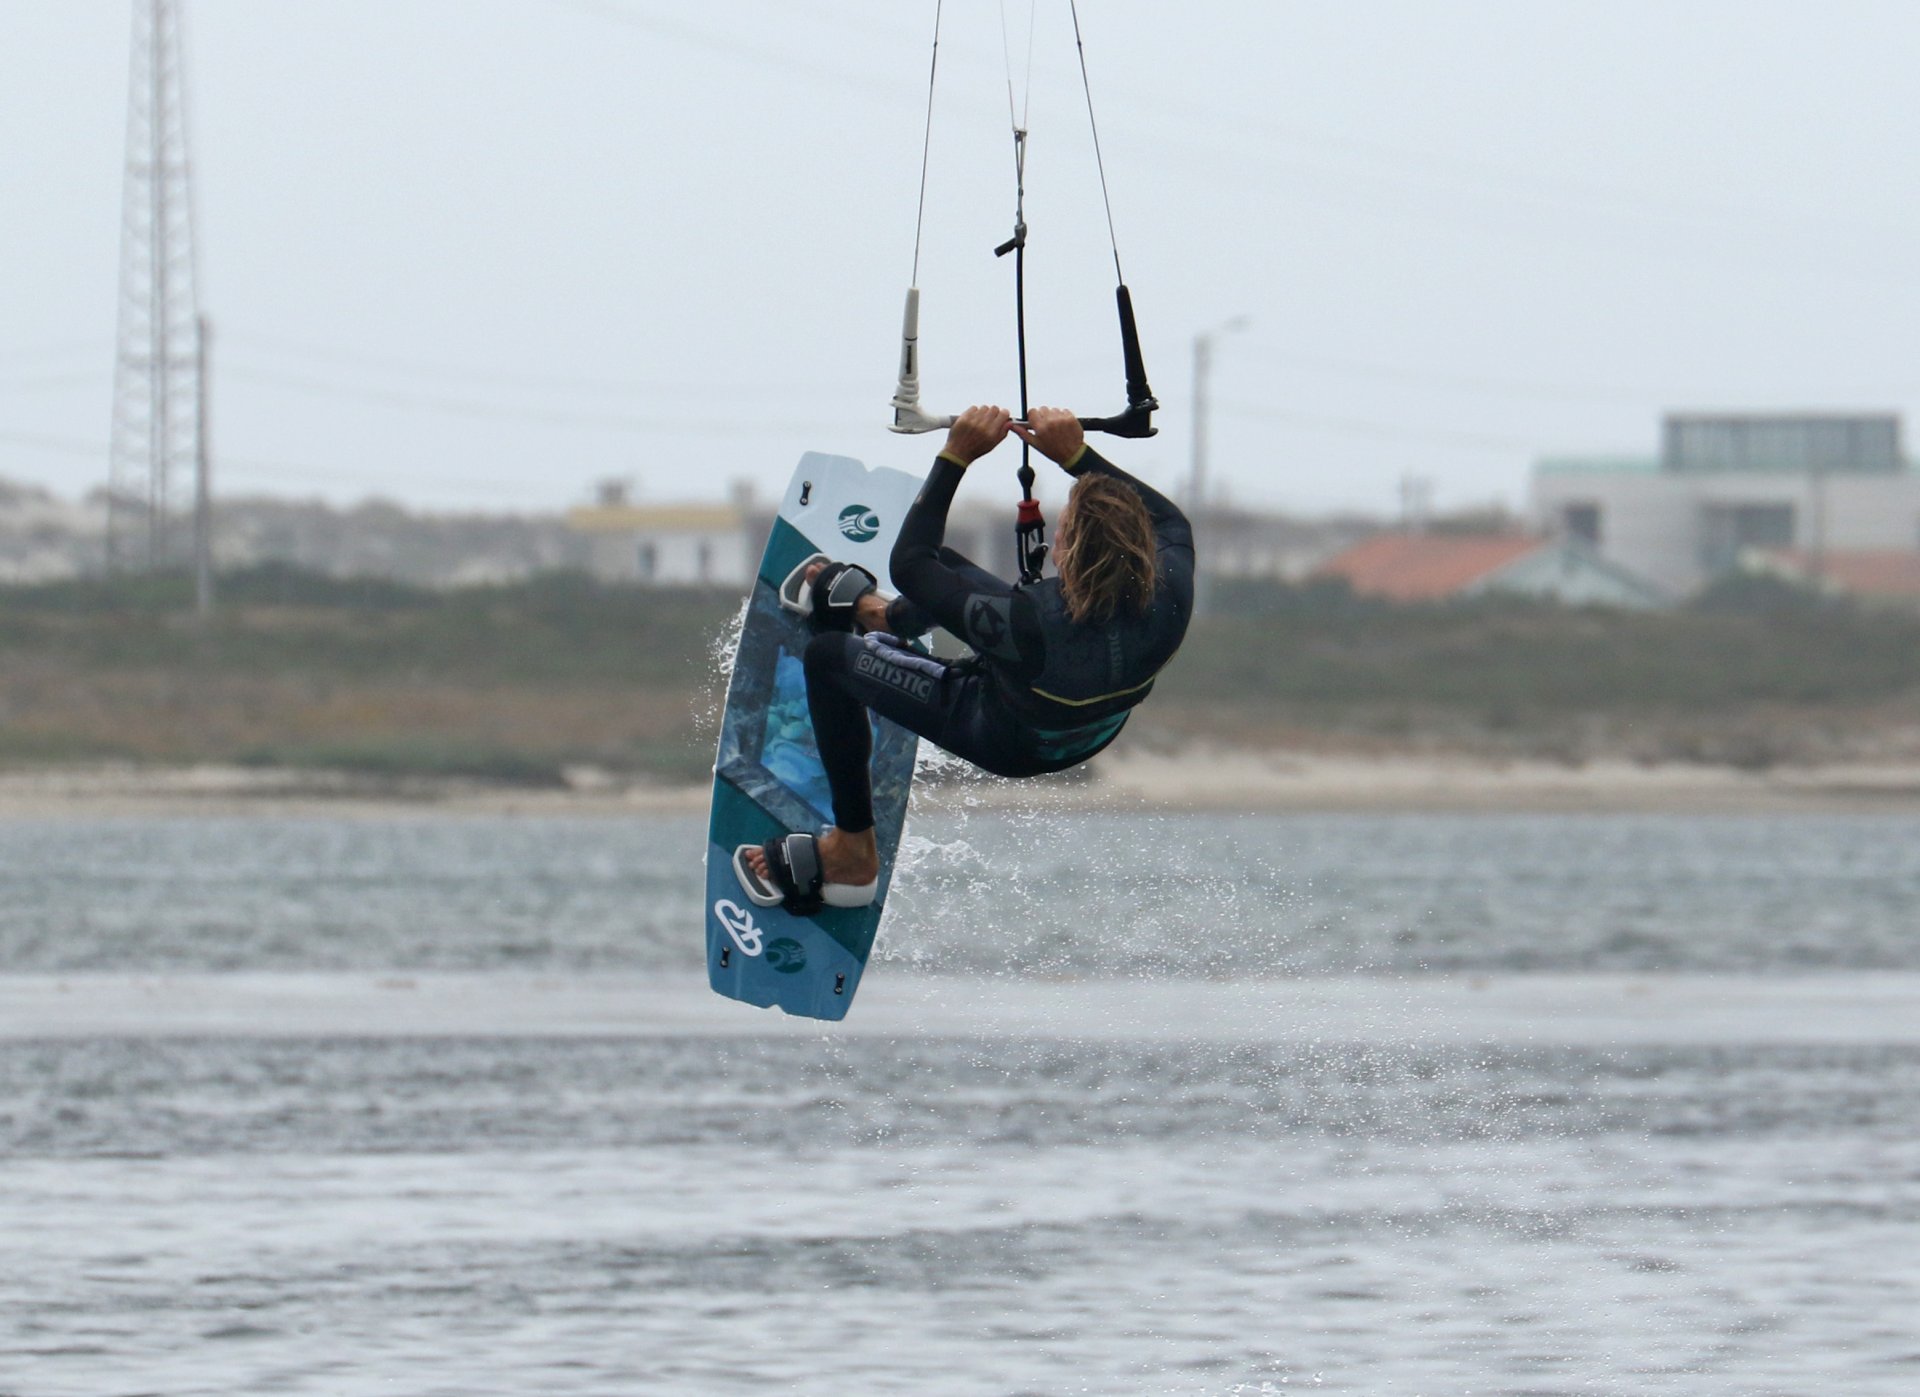
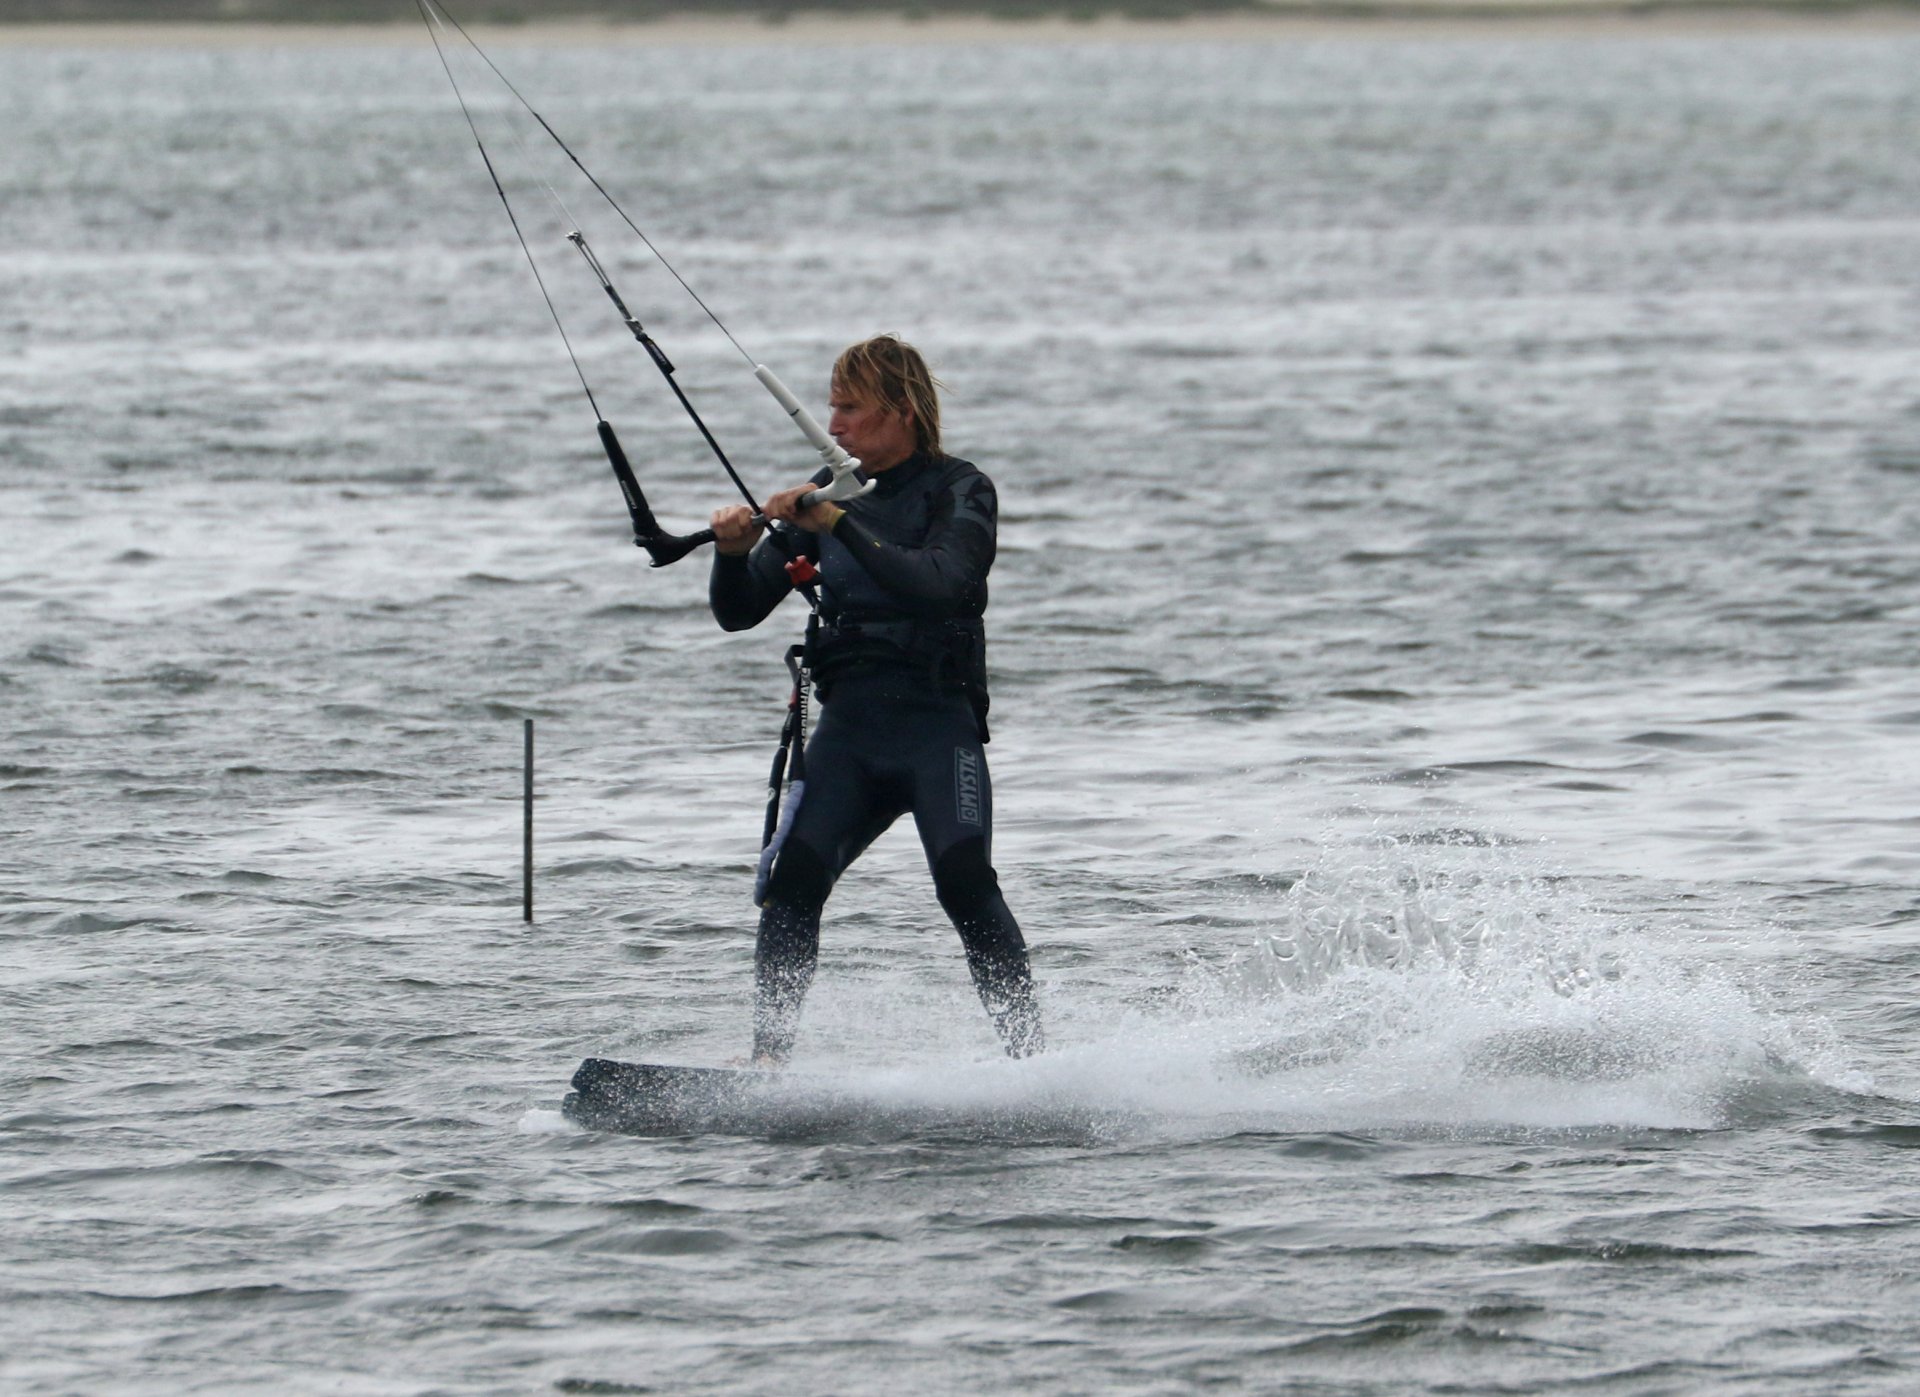
Your Approach Pic A.
At the end of the day, this is a sent back roll, and as such, you need to align the stars to give yourself some height and enough time to play out the full choreography. You should approach on a good upwind edge, driving against both heels to get plenty of board in the water. Not only will this put tension on the lines and hopefully lead to a more vertical jump, it will also aid in your slow rotation. If you come in leaning back with the nose high, you'll carve into your take off and increase your rotation speed - the exact opposite of what you're after! From a solid position, you can give the kite a good send without the risk of your back leg going soft and spinning you even quicker. Don't wang it with reckless abandon, but do be positive enough to get some air. Here, Christian approaches on a good edge, with plenty of board in the water, and he's been positive with his bar action, sending the kite quickly. Your aim is to get the kite past 12 o'clock and then stop it there.
Lift Off Pic B.
The most important part of this move; get the lift off right, and all the rest will seem a whole lot less difficult. This will only be possible if your approach is on the money. Your job is to take off upwards. This may sound obvious, but we assure you that the most intuitive movement when thinking ahead toward the inversion is to soften your back leg and roll back over the tail in an attempt to kick your front leg up. Although this can and will invert you, unfortunately, it will also spin you. Keep your shoulders parallel to the water as you kick off and level the bar to stop the kite moving too far back. Resist the temptation to throw your head around. If you keep it looking forwards in the same direction that your nipples are pointing, you'll find the holy grail, a slow rotation. You can see that Christian has kicked off and up, fully extending his back leg. His shoulders are upright, his board is lifting off the water horizontal-ish, his bar is levelled to stop the kite in its tracks, and his head is looking forward. In fact, there is very little rotation so far. Things are going well.
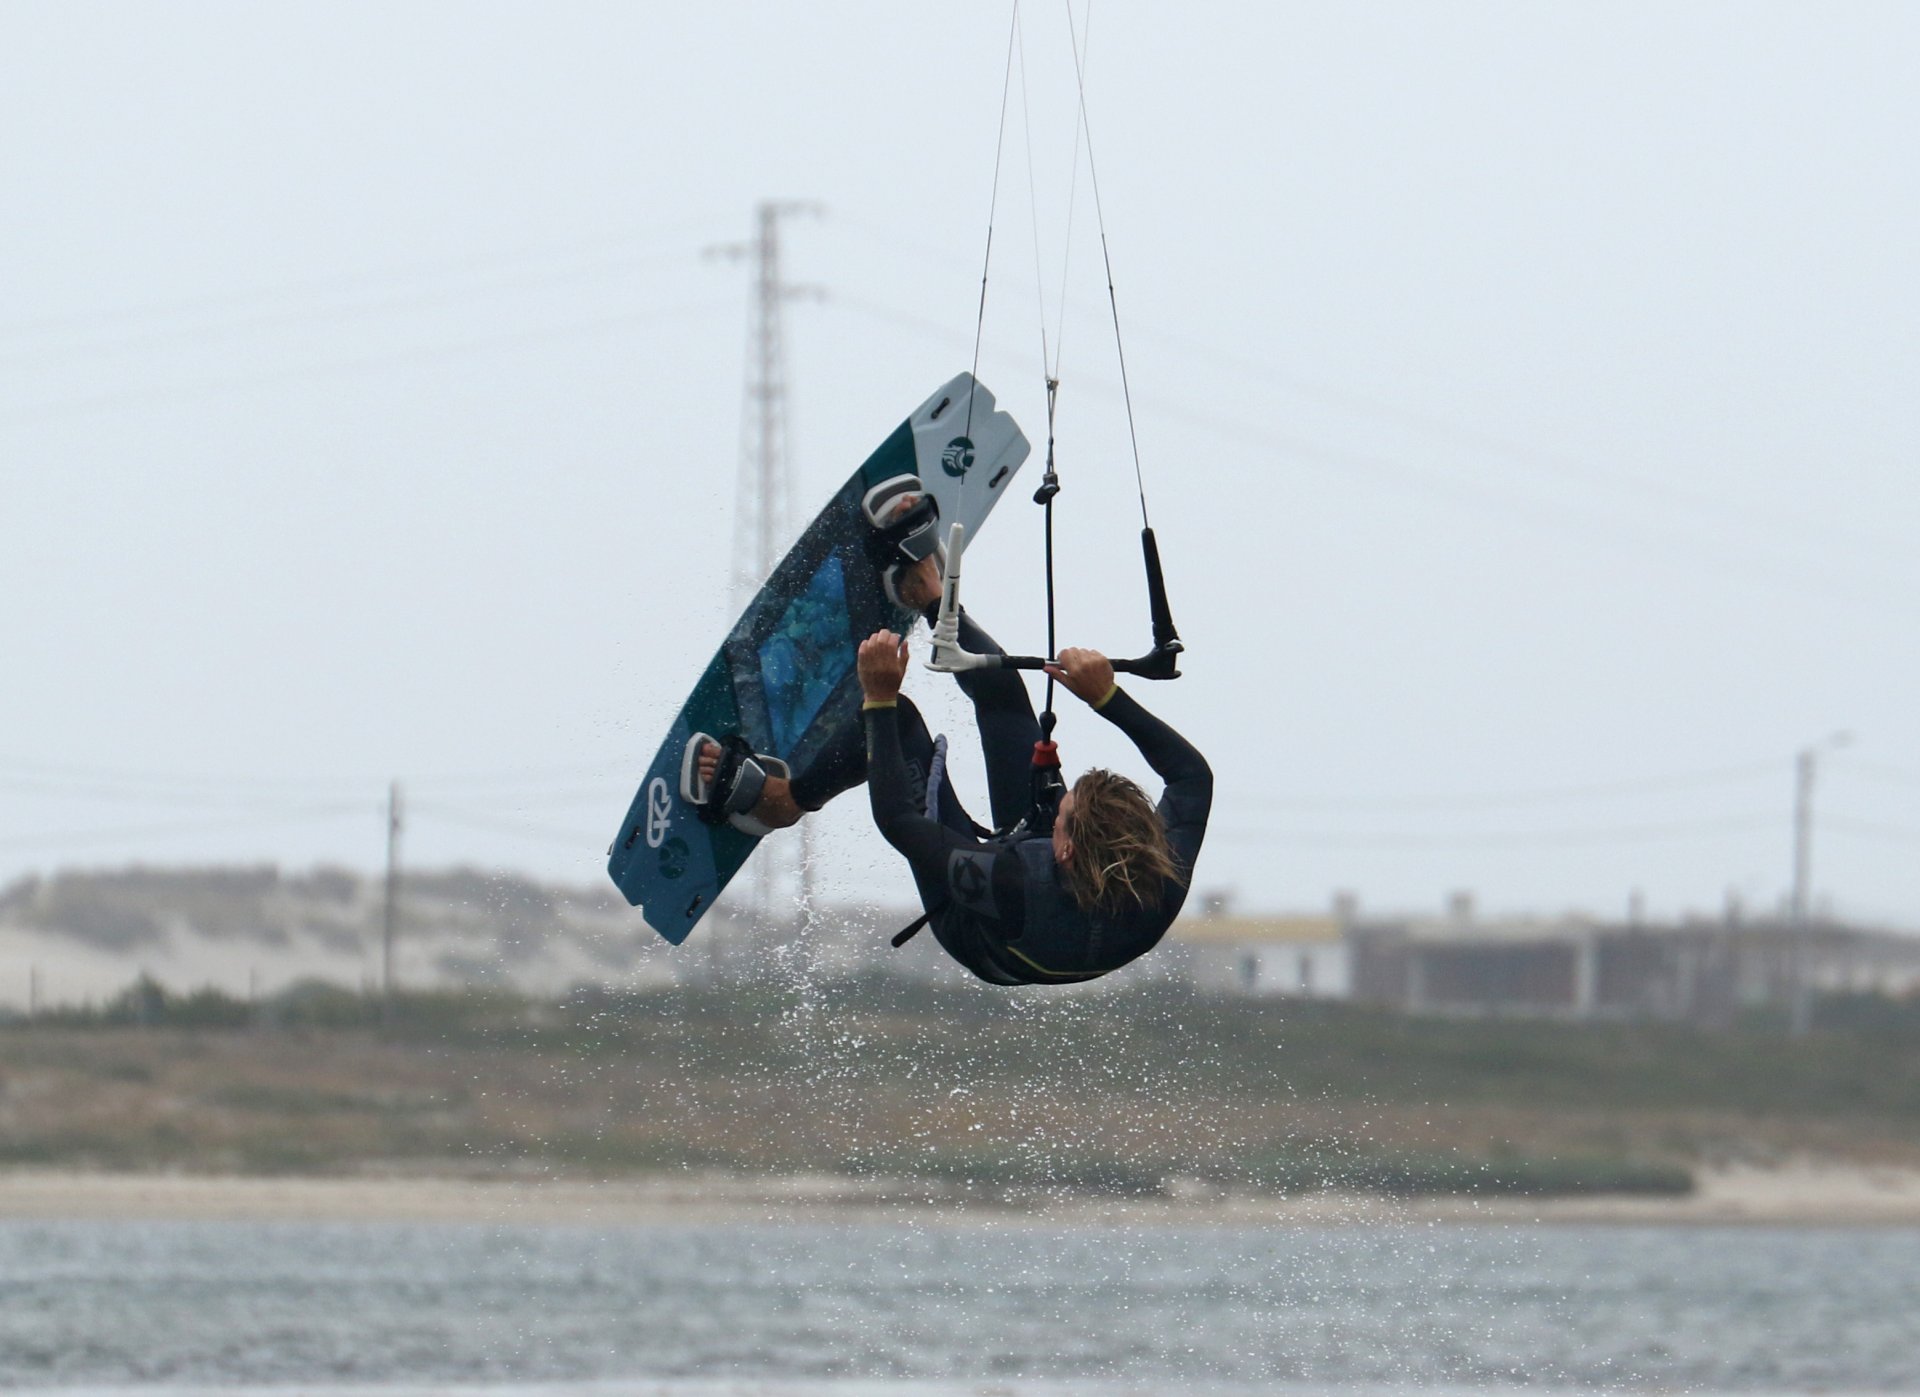
Topsy Turvy Pic C.
Once you're on the way, you have full licence to fire up your inversion. It's worth pondering that whilst all this is going on, you want to keep your kite slightly behind 12, as this will help your slow rotation and mean that you can actually momentarily stall it once you've got the grab. Keep both hands on the bar at the moment whilst keeping it in close. Bring your knees up and rock your shoulders back, using your hands, bar and harness hook as your fulcrum point. With your bar in, the kite will lift your hips and make this more achievable. For a bit of extra help, you can actually push your head and shoulders away from the bar by extending your arms, using your triceps. As you roll back, look up and enjoy the view, the sky, clouds and of course, your beloved kite. This will tilt your head back and further encourage your legs up. In Pic C, you can see that Christian is fixing his gaze skywards. With both hands on the bar, he's tilting his head back, pushing against the bar and lifting his legs. Note how his head is still facing forwards, keeping the rotation slow.
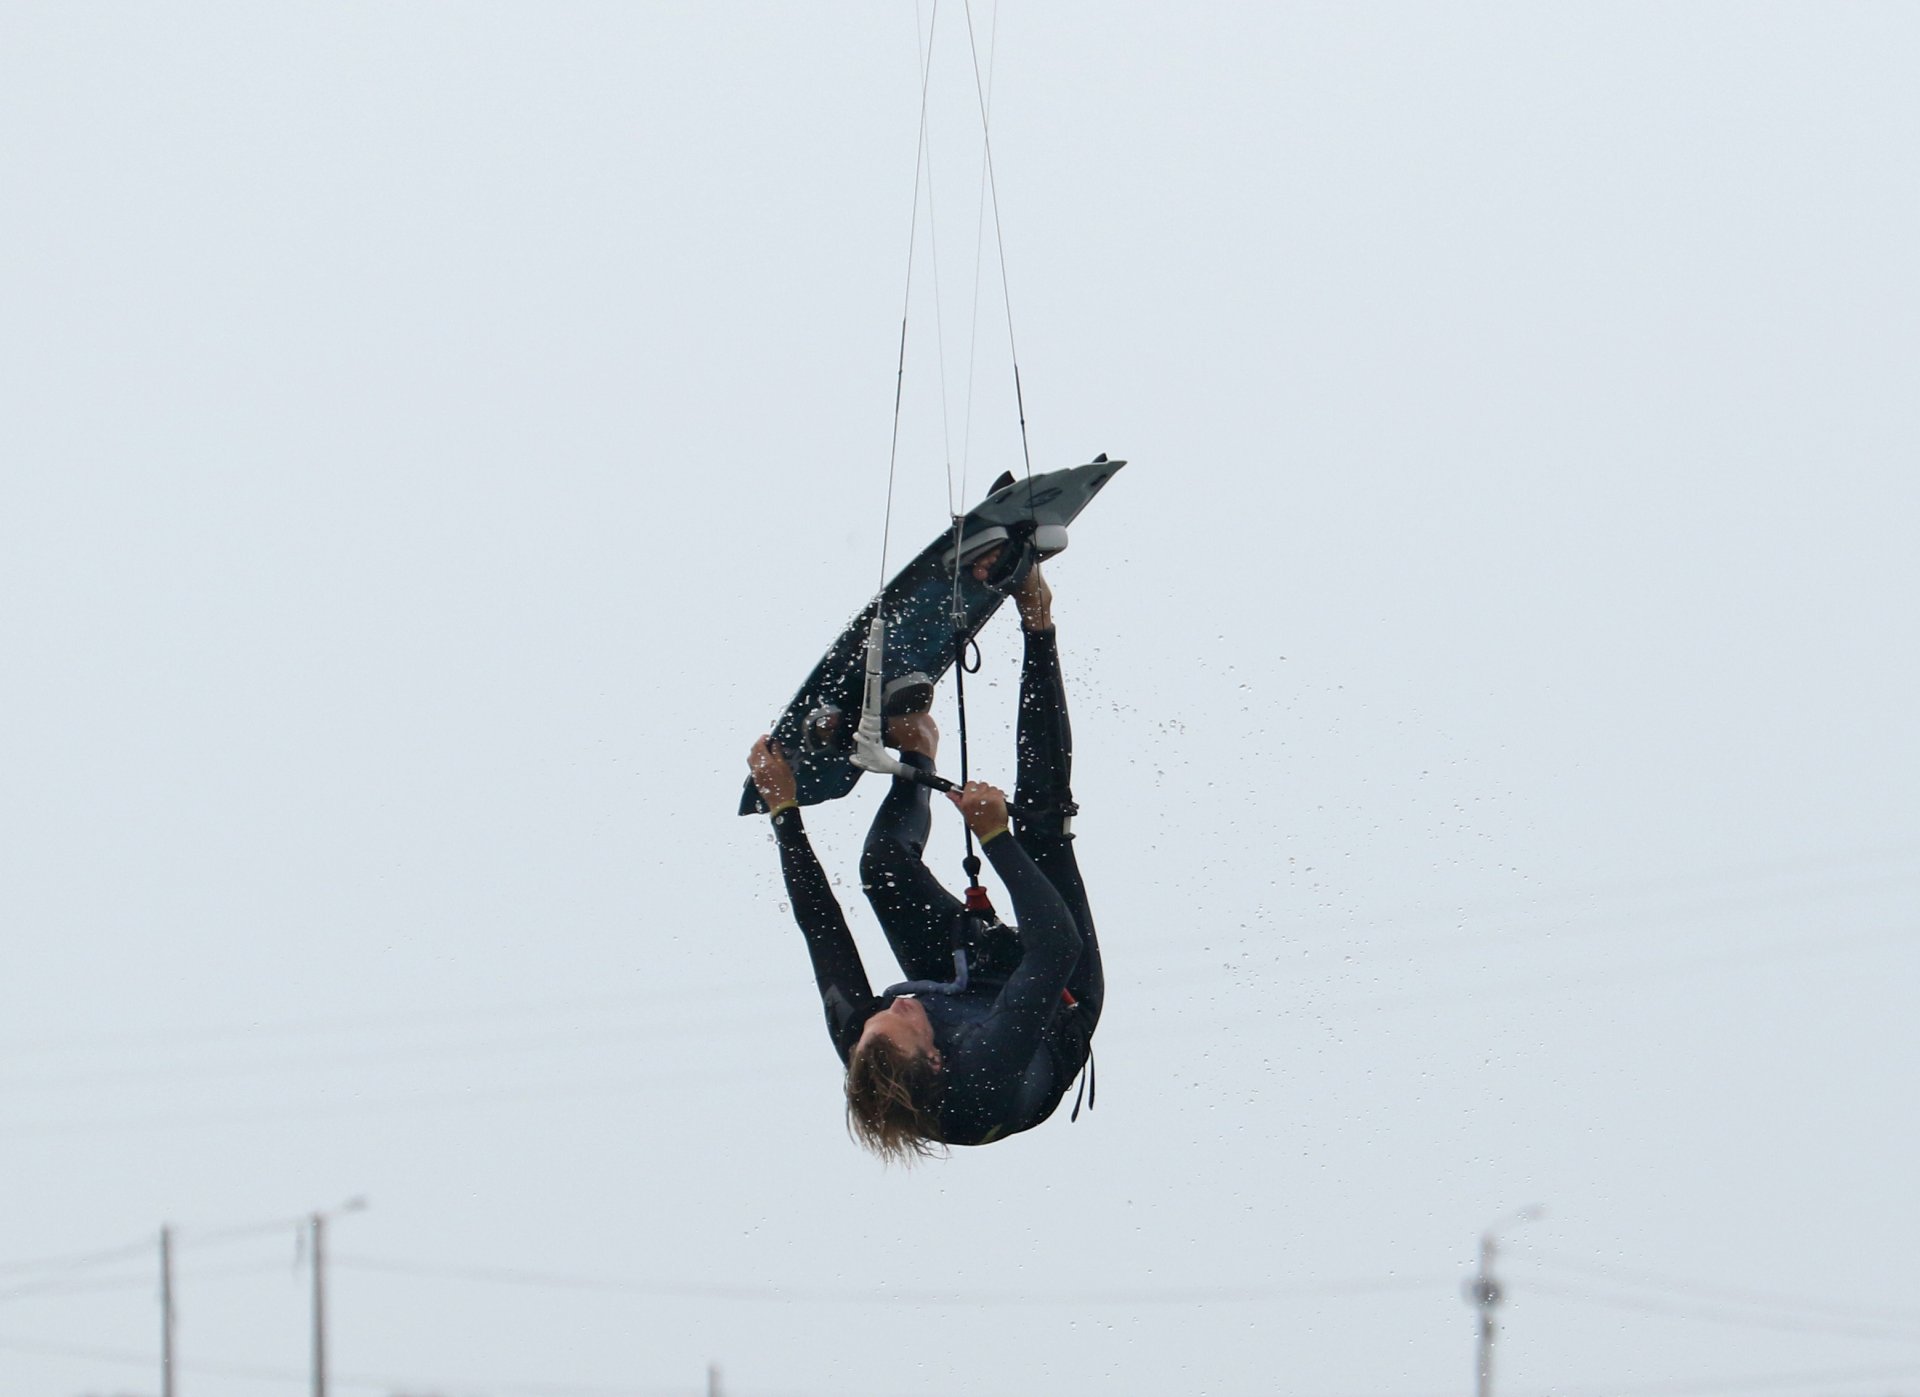
Gravity Pic D.
There is a point when the world flips. Once your feet are high enough and your head back enough, you encounter a new world order where balance is restored, and your board is happy to continue on its upwards trajectory. Now that you no longer require huge effort to invert yourself, you can switch your attention towards what's coming next, your grab. To make it as achievable as possible, pull your back knee in towards you and release your back hand. You want to bring the board in close rather than reaching and twisting your body to make it. In Pic D, Christian is happy that his kite is parked just behind 12 o'clock. This gives him the freedom and confidence to release his back hand. As he does so, he keeps his bar in on the sweet spot to keep tension and lift. He bends his back knee, bringing the tail of the board in towards him.


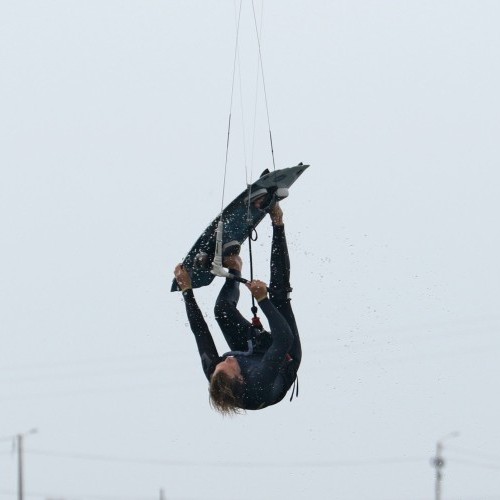
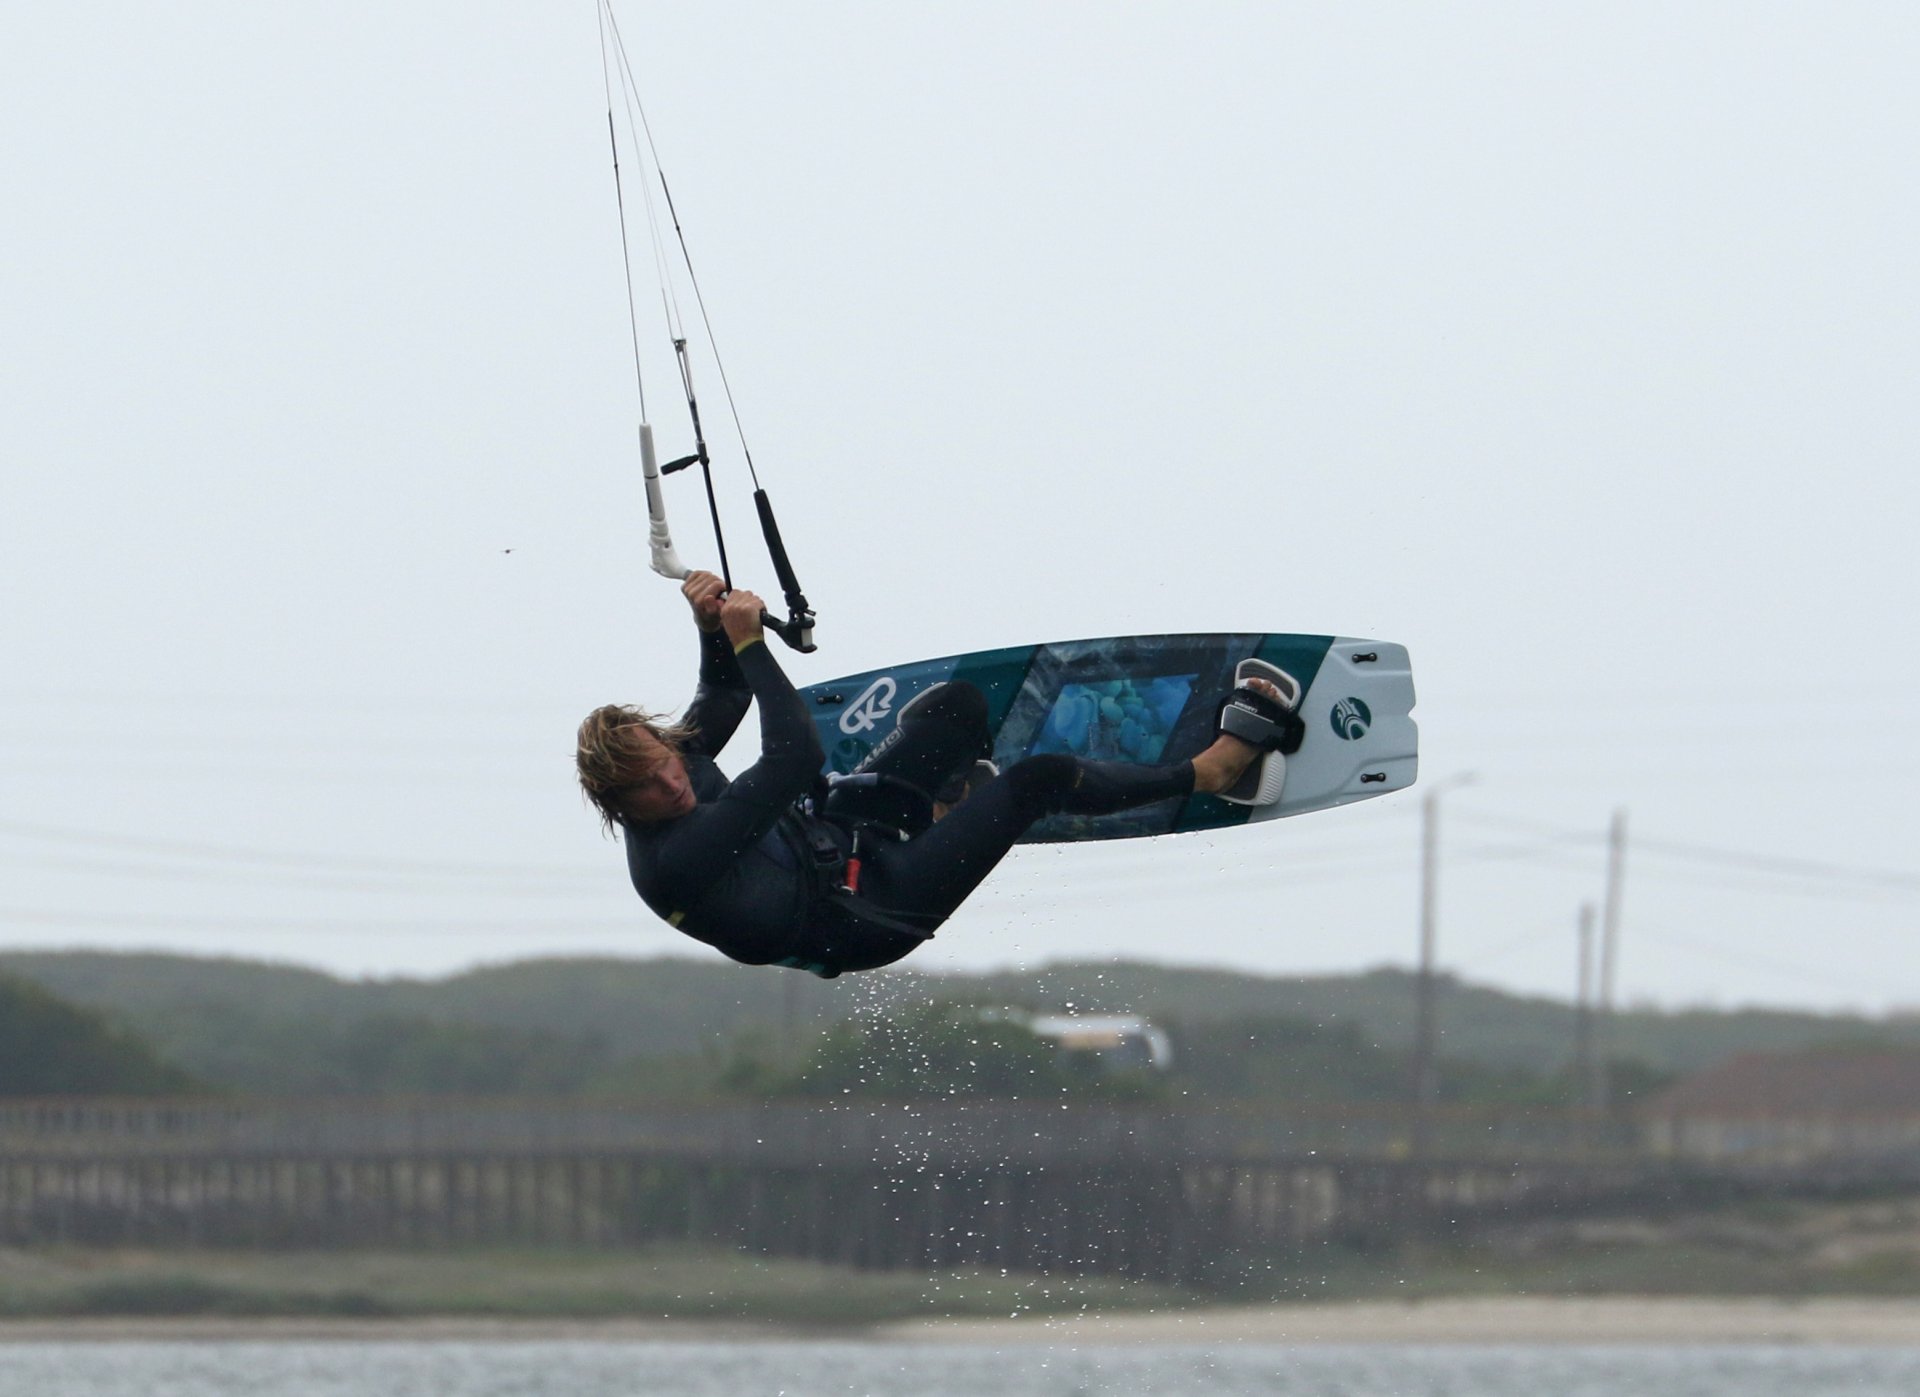
Grab & Hold Pic E.
Your moment of truth. As your board rolls, go for the grab. You're looking to grab the board towards the tail on your toeside edge, as this is the easiest point to reach if you're not known for your morning yoga. Once you've got hold of the board, you can pull it in and extend your front leg to give it the full bone out. Aim to rock your head back and keep your hips up with the bar in. If all goes to plan, you might even play a couple of notes as your board hits the lines. Keep looking up at the heavens, which will momentarily stall your rotation and give you even longer to pose. Having held your kite back slightly, this is the perfect moment to steer it slowly forward, which will give you that little bit more time as the kite lifts over 12. Here Christian seizes the moment, eyes gazing up to the stars, board held in close, front leg boned, hips higher than shoulders, and head still perpendicular. He's steering the kite forwards and will hold this position for as long as he dares.
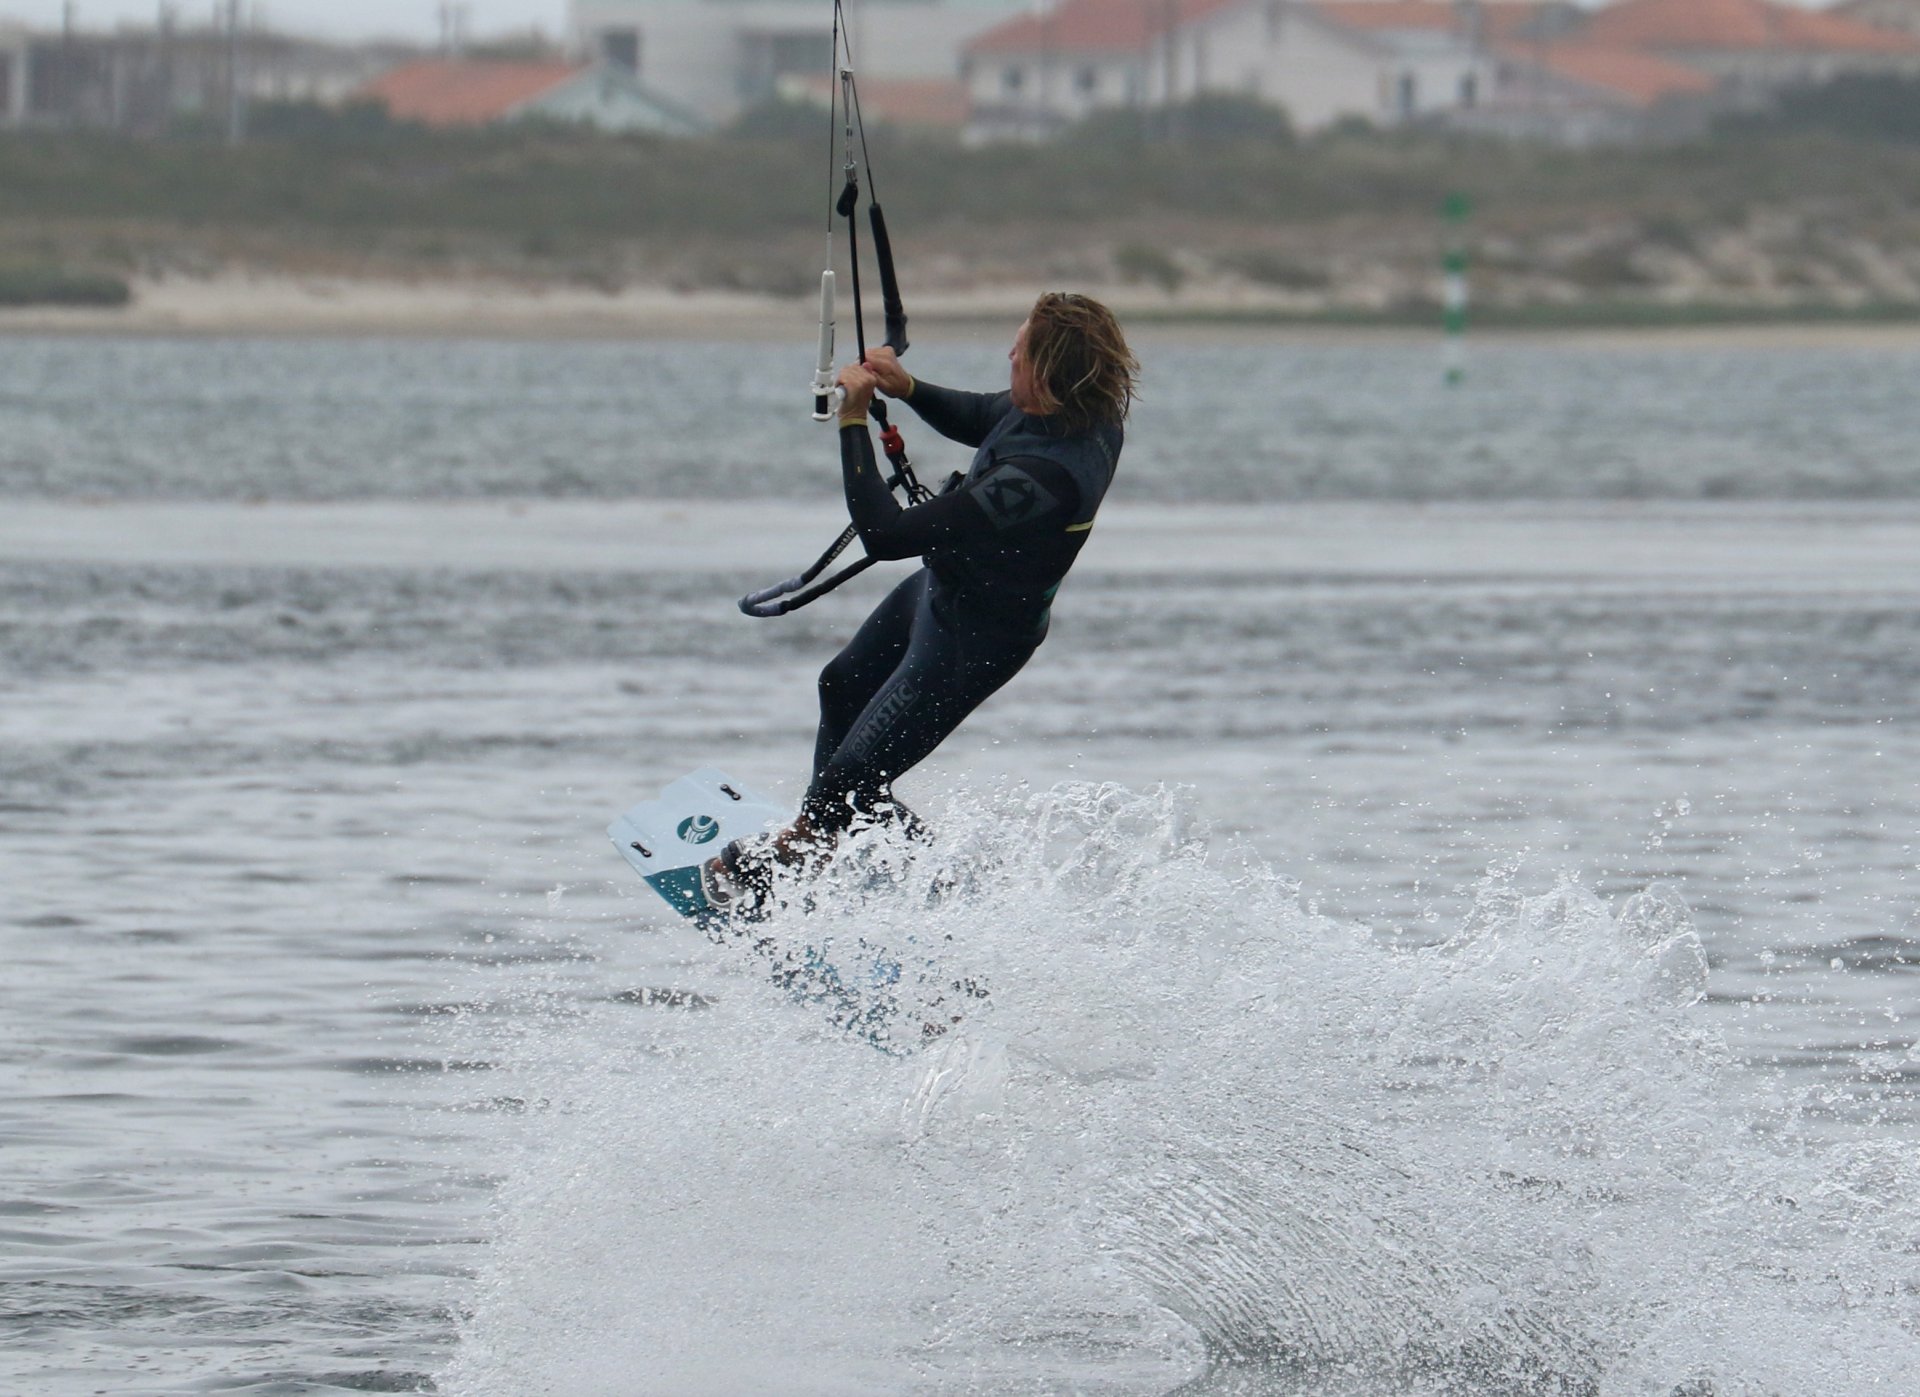
Release & Look Pic F.
Once you feel yourself coming down and the lift from your kite waning, it's advisable to ponder your future and think about unravelling yourself from this new status quo. Having stalled your rotation, you'll still have a way to go. Now is the time to look for your landing, which will be somewhere behind you! Lift your head and turn to look over your front shoulder. This will slowly start you rotating again, and by lifting your head, you will bring your shoulders up and feet down. To help with your rotation, continue to steer the kite forwards. As the kite pulls on your harness hook, it'll help pull you around. This may feel a bit odd as your feet and board get left behind whilst your upper body turns, but rest assured if the head and shoulders turn, the rest will catch up. In Pic E, Christian has lifted his head and is looking over his front shoulder, steering the kite gently forwards.
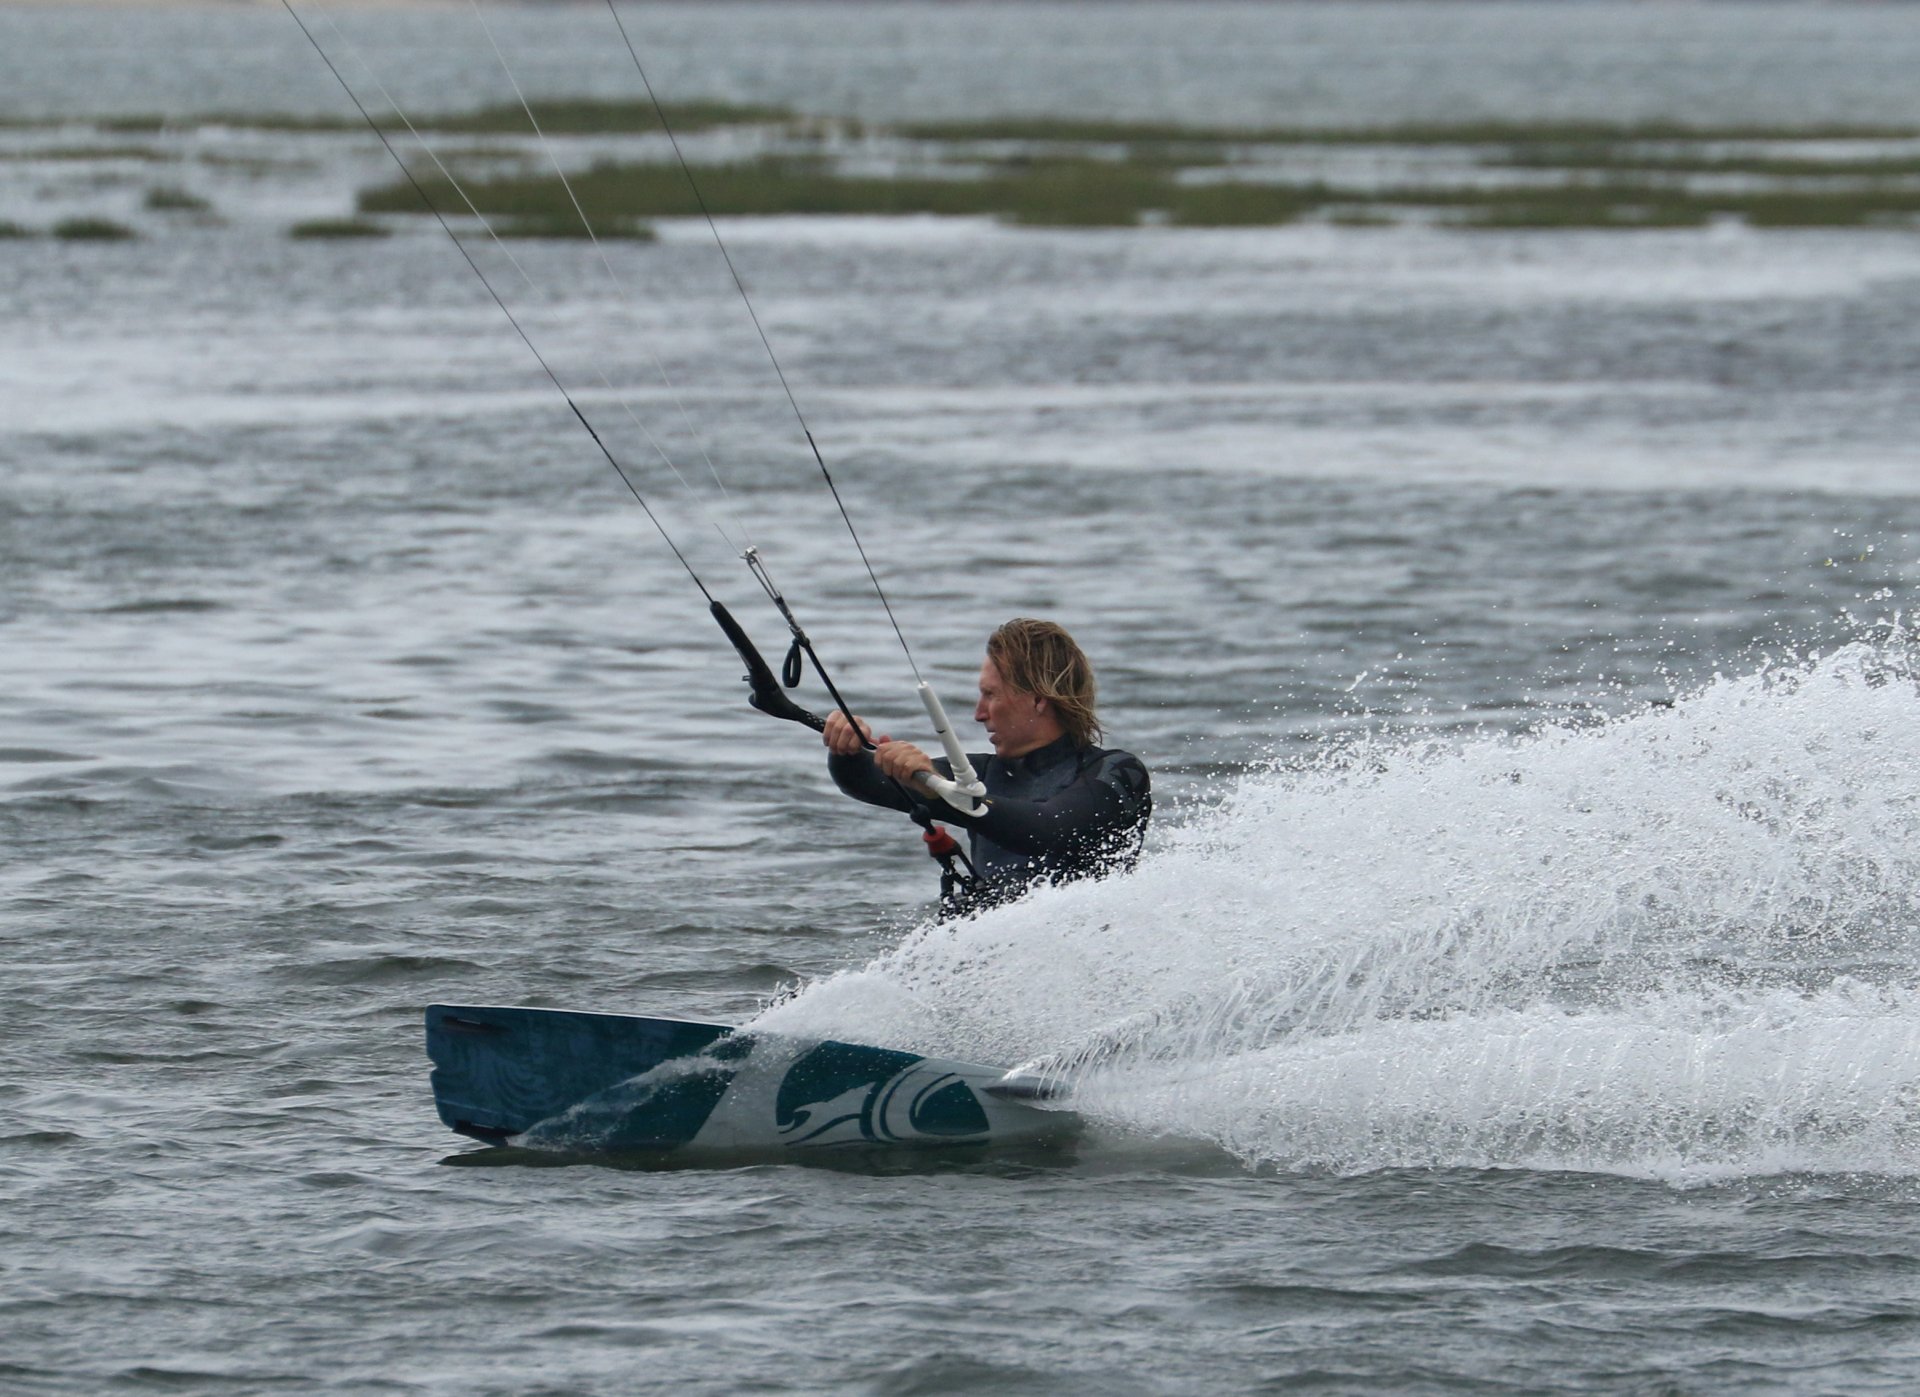
Touch Down Pic G.
And as if by magic, your legs will swing under you. As you come around and can finally see where you'll land, you can dive the kite. Once again, the pull of the kite will pull your hips forwards and swing your legs under you. Be prepared to land tail first, and be aware that it's more than likely you'll land with your weight on your heels. As long as you're pointing off the wind, it will be soft. Don't be in a rush to carve back up, but get yourself balanced and settled first. Here Christian has landed over the board but with his weight on his heels due to the late rotation. He's focused on downwind and can therefore regain balance and composure before heading back upwind.
Top Tips
Your take-off is everything here. Get it right, and you'll rotate slowly and have time to invert and grab. Nothing beats the time honoured method of concentrating a bit of time on your base move, a slow sent back roll, before adding on the remaining ingredients, inversion and then the grab. Concentrate on leaving your kite ever so slightly behind 12 as you rise and rotate, which will then mean that you need to give a bit more input on the bar to redirect it once you're at the apex. Have a look at the sequence to get a feel for the move from take-off to touch down.
Common Problems
Missing the grab. This is the result of rotating too quickly into your back roll. Make sure that you take off upright, rotating only with your board and hips. Keep your head looking forwards and bar level. If you throw yourself into a spin, you'll really struggle to grab and invert.


Struggling to get your feet back under you and complete your rotation. It's tempting to get greedy, stalling your rotation and holding your grab for longer. If you leave it too late, it will be tricky. However, it can also happen because you're not steering the kite forward enough to pull you downwind and around the last bit. If the world stops for too long, give yourself an extra boost with some front hand steering on the bar as you gaze over your front shoulder.
Keystones
- Good send with lots of board in the water
- Take off with shoulders level, bar level and head centred
- Two hands to start inversion
- Back knee in, head back and grab
- Bone and stall, then look and dive to complete
This technique article was in Issue 93 of IKSURFMAG.
Related


By Christian and Karine
Christian and Karine have been working together as a coaching team, running improver to advanced kitesurfing clinics since 2003.
