
Surfboard Toeside Upwind 360
Technique / Intermediate


Introduction
There’s definitely something rather joyful about water level tricks on a surfboard. Not only does it make a change from the potential impact of anything air based, giving those tired muscles and sore body a rest, but such surface fare also makes the most of conditions that perhaps don’t line up for anything altitude based, giving you the opportunity to hone your skills and develop your technique even when the wind wants you to stay down. The surfboard toeside upwind 360 ticks all the required boxes, with plenty going on to keep both mind and body challenged. As a bonus it’s also not a foolish way to prepare yourself for similar foil antics without the distraction of standing on a ladder.
Descriptively, what you’ll be doing is getting the kite to 12 o’clock whilst carving the board up and through the wind from toeside, before down looping the kite and turning the rest of the way so that you come out of the move travelling in the same direction, still toeside as if nothing happened, without even a twist in your lines as evidence. The only prerequisites are a solid toeside and some experience with downloops. Let’s see what’s involved!


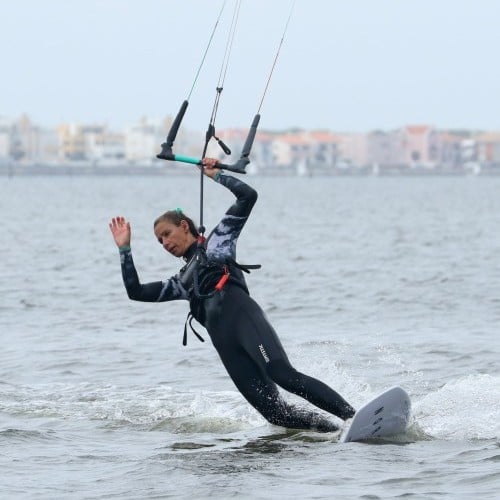
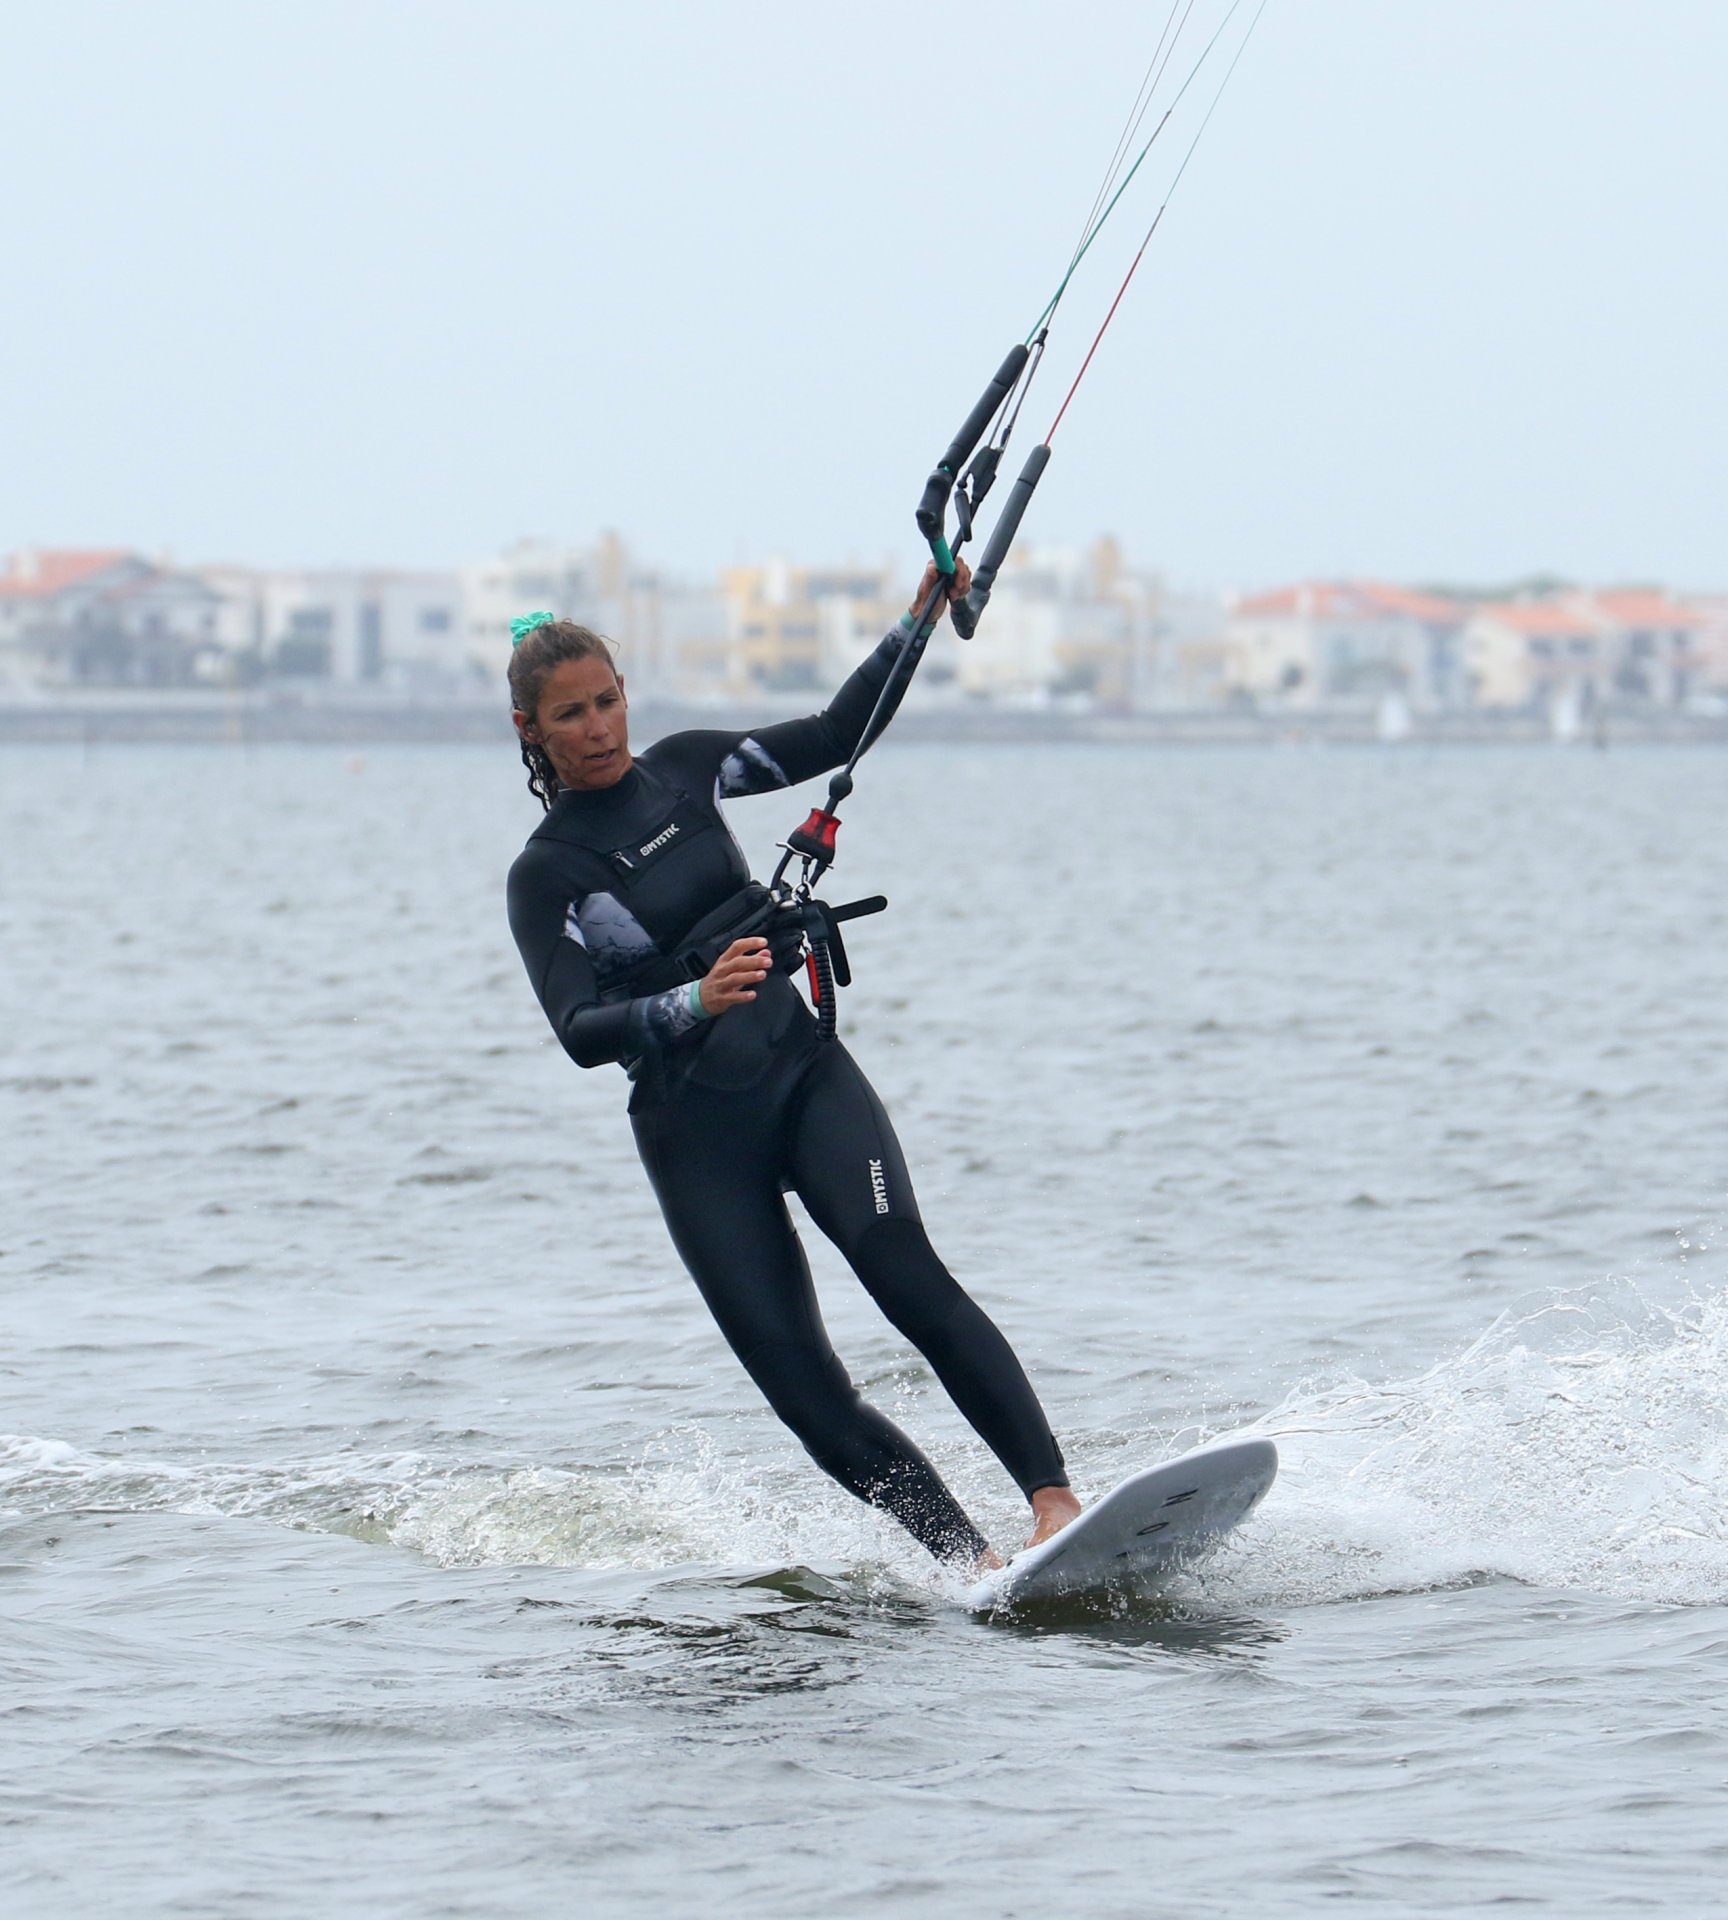
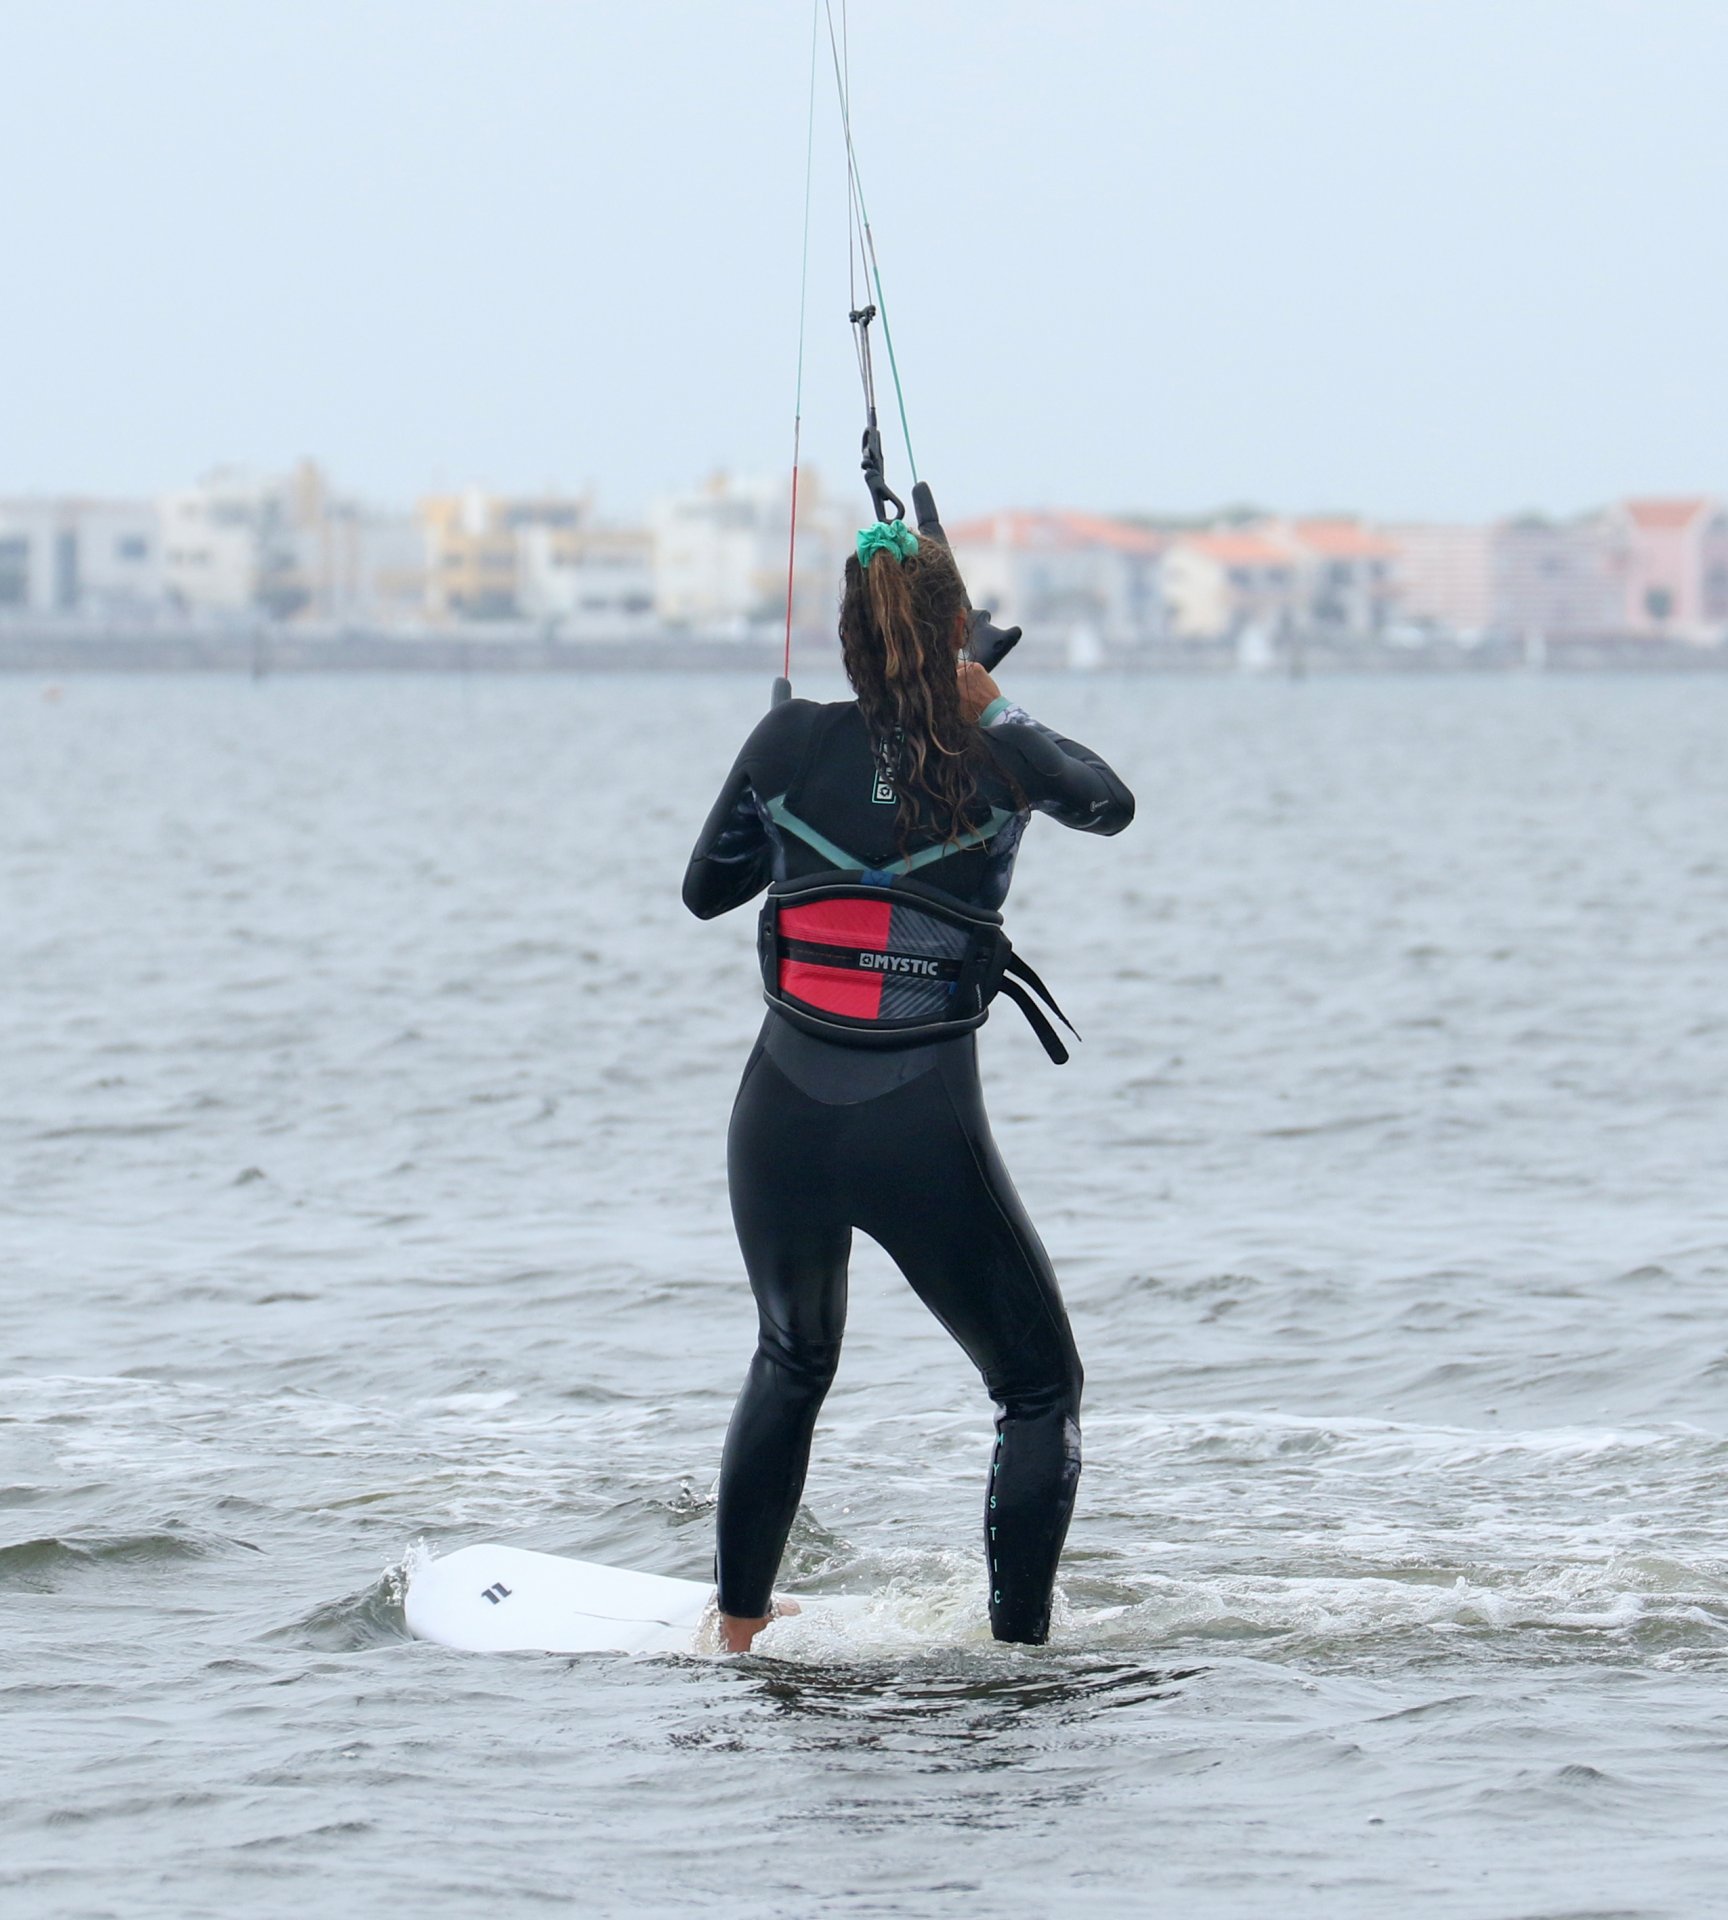
Set Up Pic A.
As always, your approach is everything. Whether you carve to toeside or change your feet, give yourself room to get into a comfortable toeside riding position before you choose to attempt anything. This means you’ll need the bar trimmed in enough so that you can ride with two hands on it. You’ll want to have wiggled your feet slightly over the centreline of the board so that you can get some weight forwards onto the front foot and therefore have the back foot positioned somewhere over the front fins. With the bar trimmed in you’ll have plenty of depower on offer, which you’ll need to carve up and with your feet positioned centrally you’ll be able to balance on the board momentarily when needed. You’ll need a bit of momentum to help you carve, and you need to be over the board, so you don’t want to be edging hard upwind. Karine has come in flat on her board, and her first task is to drift the kite up to 12 o’clock. With her back hand butted up next to the depower main line, Karine uses her hand to slowly drift the kite up. As it starts to move, she releases her front hand, which enables her to feather the bar out, preventing the kite from lifting her off the board or pulling her downwind.
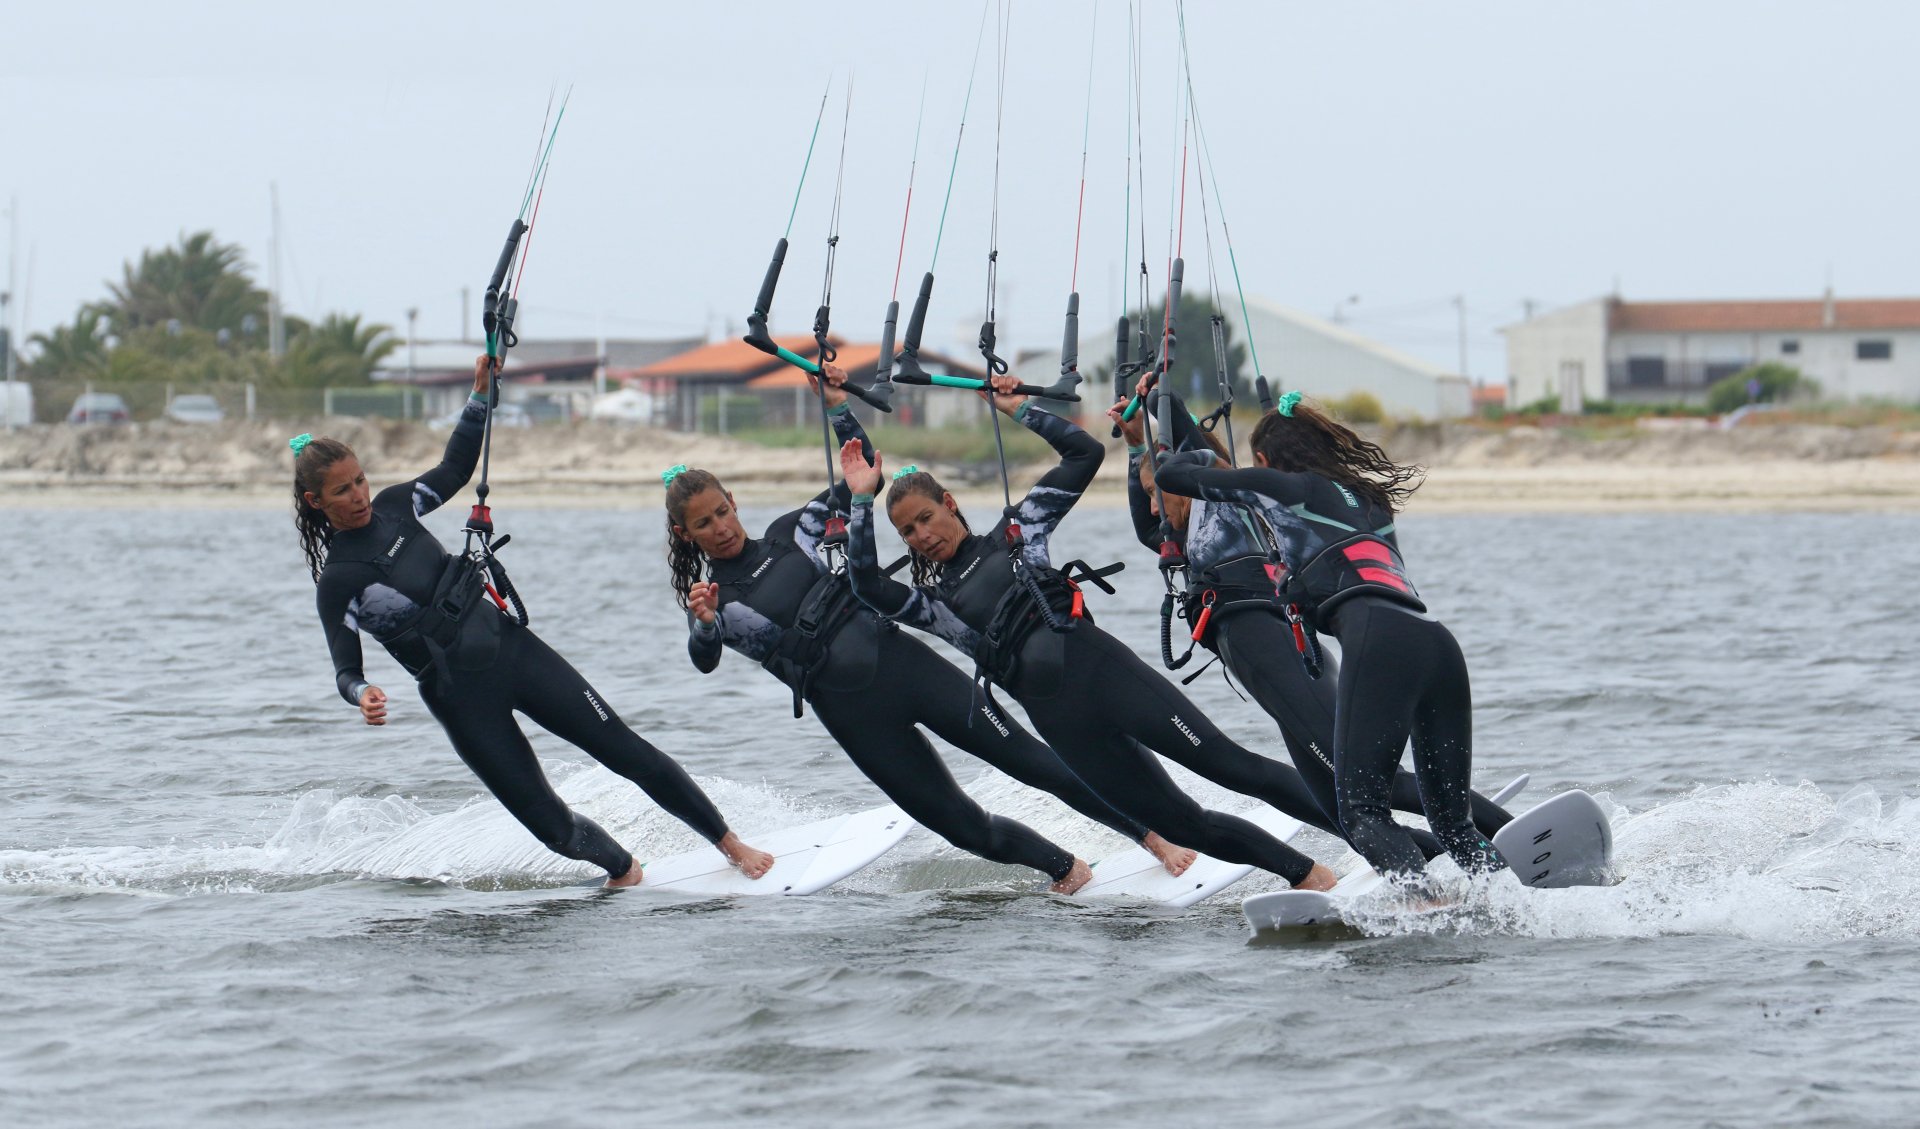
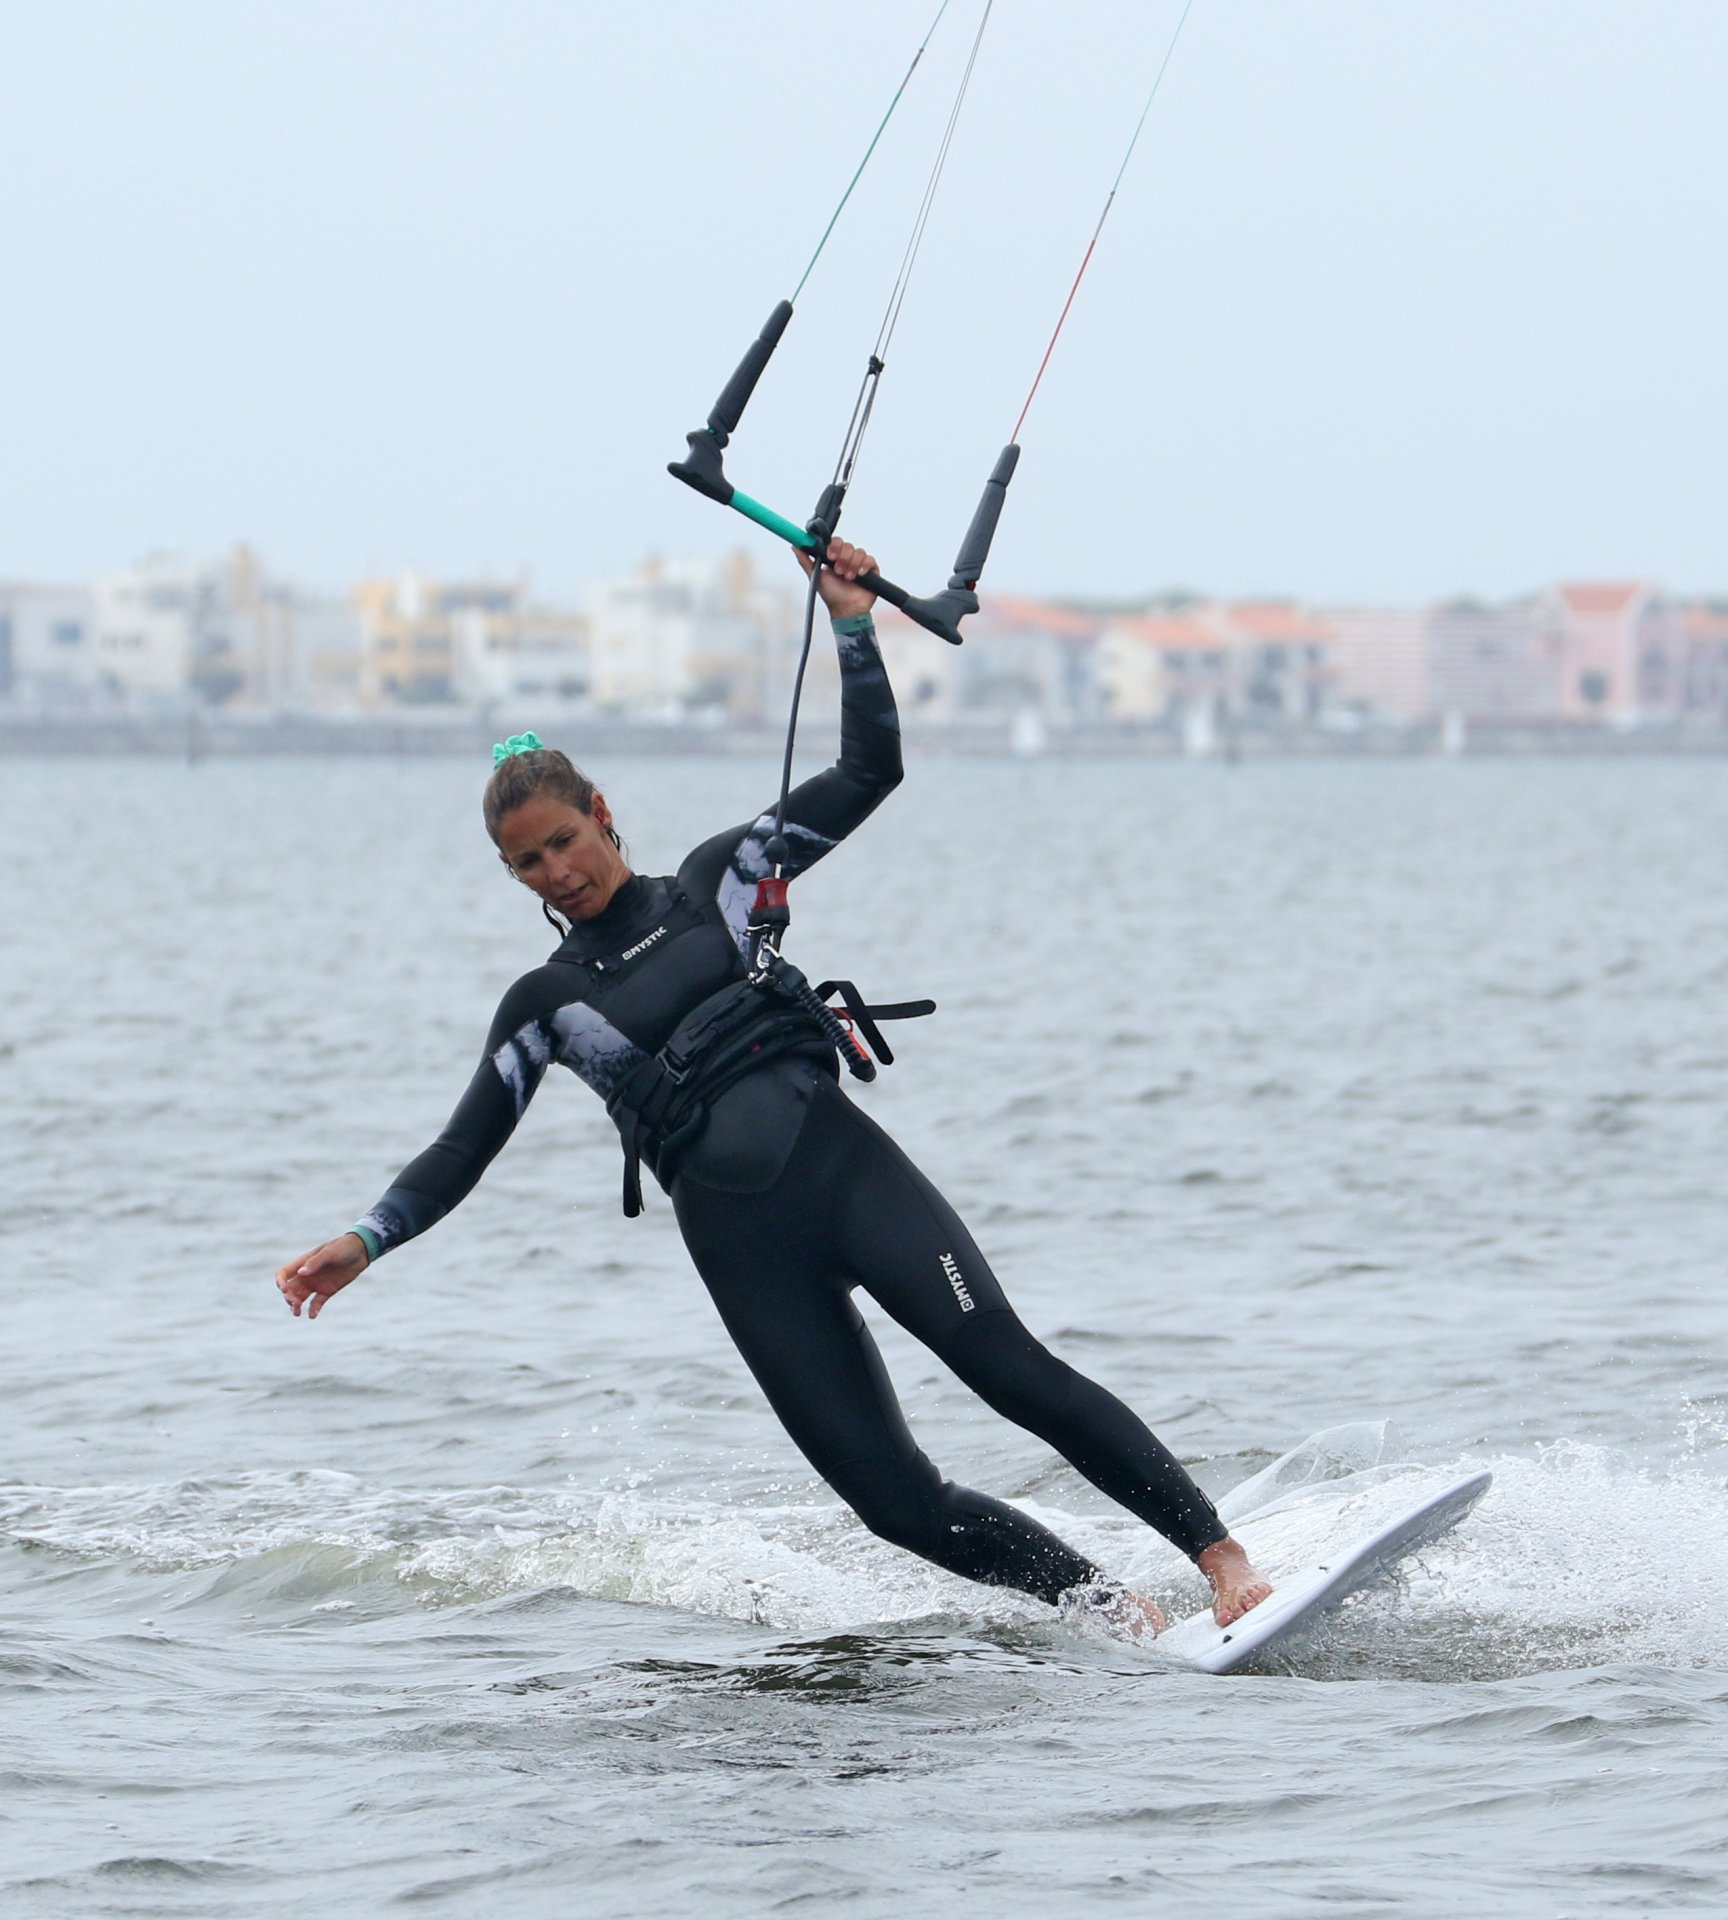
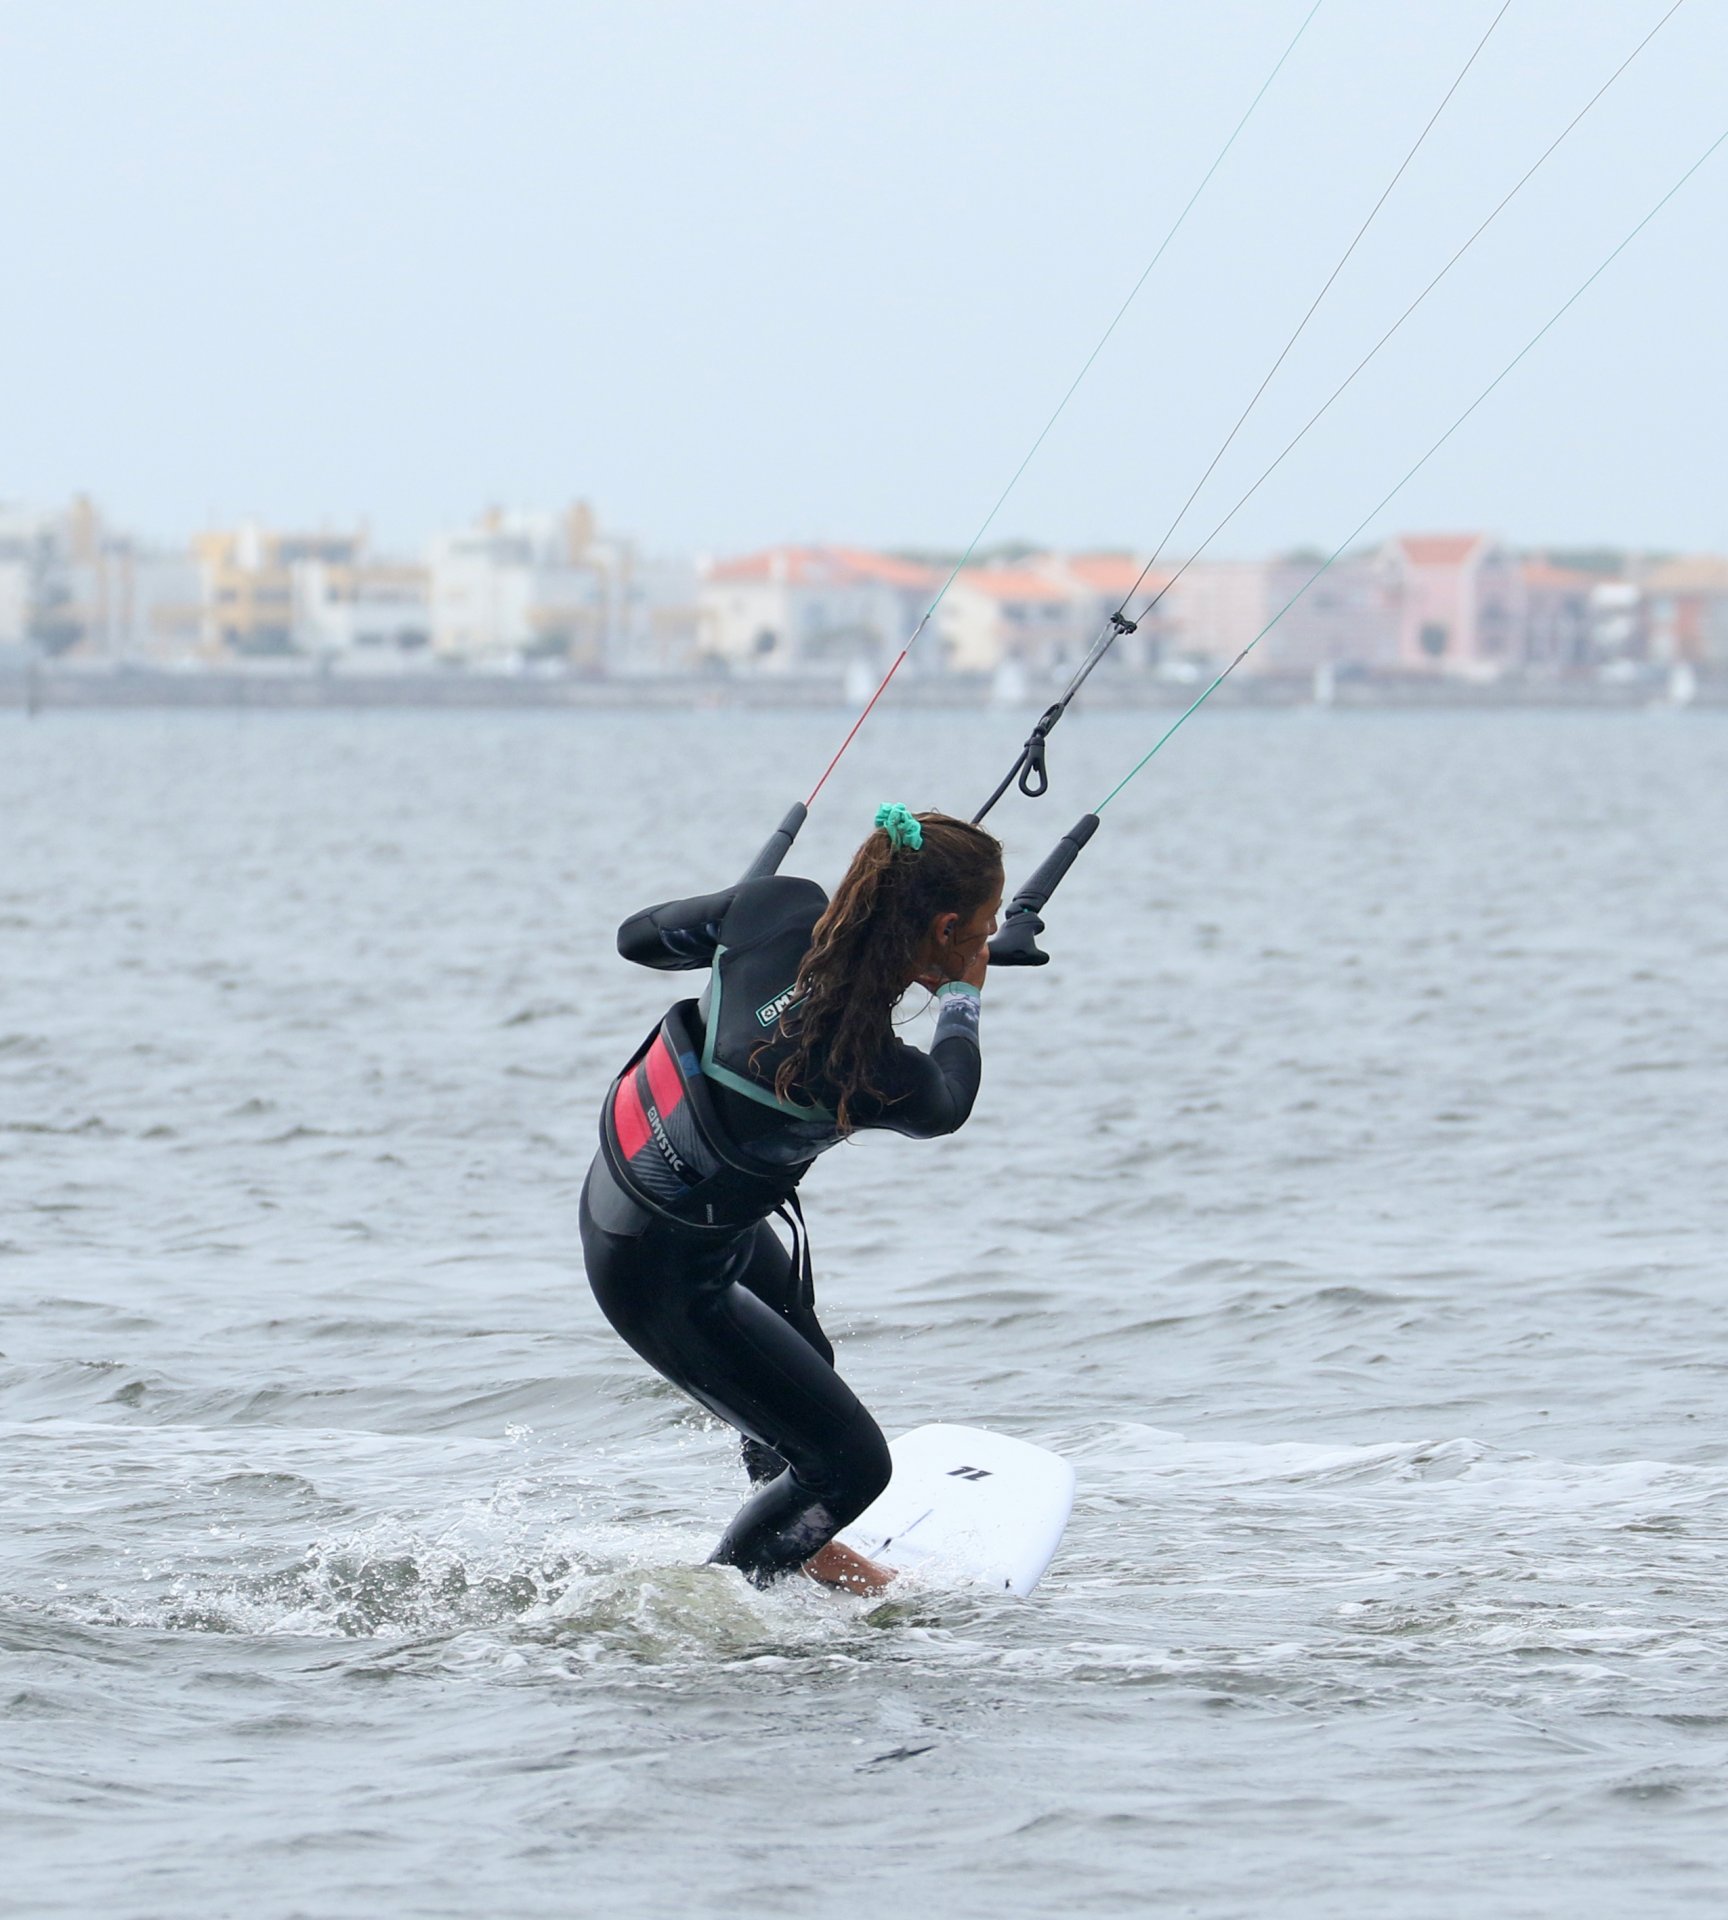
Tail Carve Pic B.
Once the kites moving up it’s time to get your board carving. You’ll initiate this by dropping your weight onto your back foot, flexing your ankle and pushing your back knee down towards the water. Drop your front free hand into the centre of the arc that you’ll carve around. This will give you a point around which to turn. As you carve off the tail push the bar away to dump all power. Looking at Karine you can see how she’s carving around her hand, as if she grabbed a fence post whilst running past, swinging herself around it. She’s dropped onto her back foot, which encourages the board to carve on its tail rocker. If your back foot is too far back, you’ll sink the tail and stop. With her bar out, the kite offers no resistance. Final but valid point is that Karine is looking forwards to where she’ll go, which keeps her body open. It’s a carve, so you’ll travel in a sharp arc. If you look back over your shoulder, twisting and closing your hips and shoulders you’ll sink the tail and almost twist yourself off the board, rather than carving with the board.
Rail Carve Pic C.
As the board starts to carve up it’s important that you stay over it. The simplest way to do this is to get more weight onto your front foot, which you can achieve by bending the front knee and flexing the front ankle. Much as you would carving downwind, initiating back foot heavy and moving forwards, the same applies here, but you’ve got far less time. With both ankles and knees driving you will be able to keep your upper body upright. You can see how Karine is straight from knees to shoulders. This effectively means that once the board has carved enough, she’ll be back over it. If you break at the waist, you’ll fight with the kite by powering it up and you’ll be in no position to get your weight over the board once it’s underneath you.
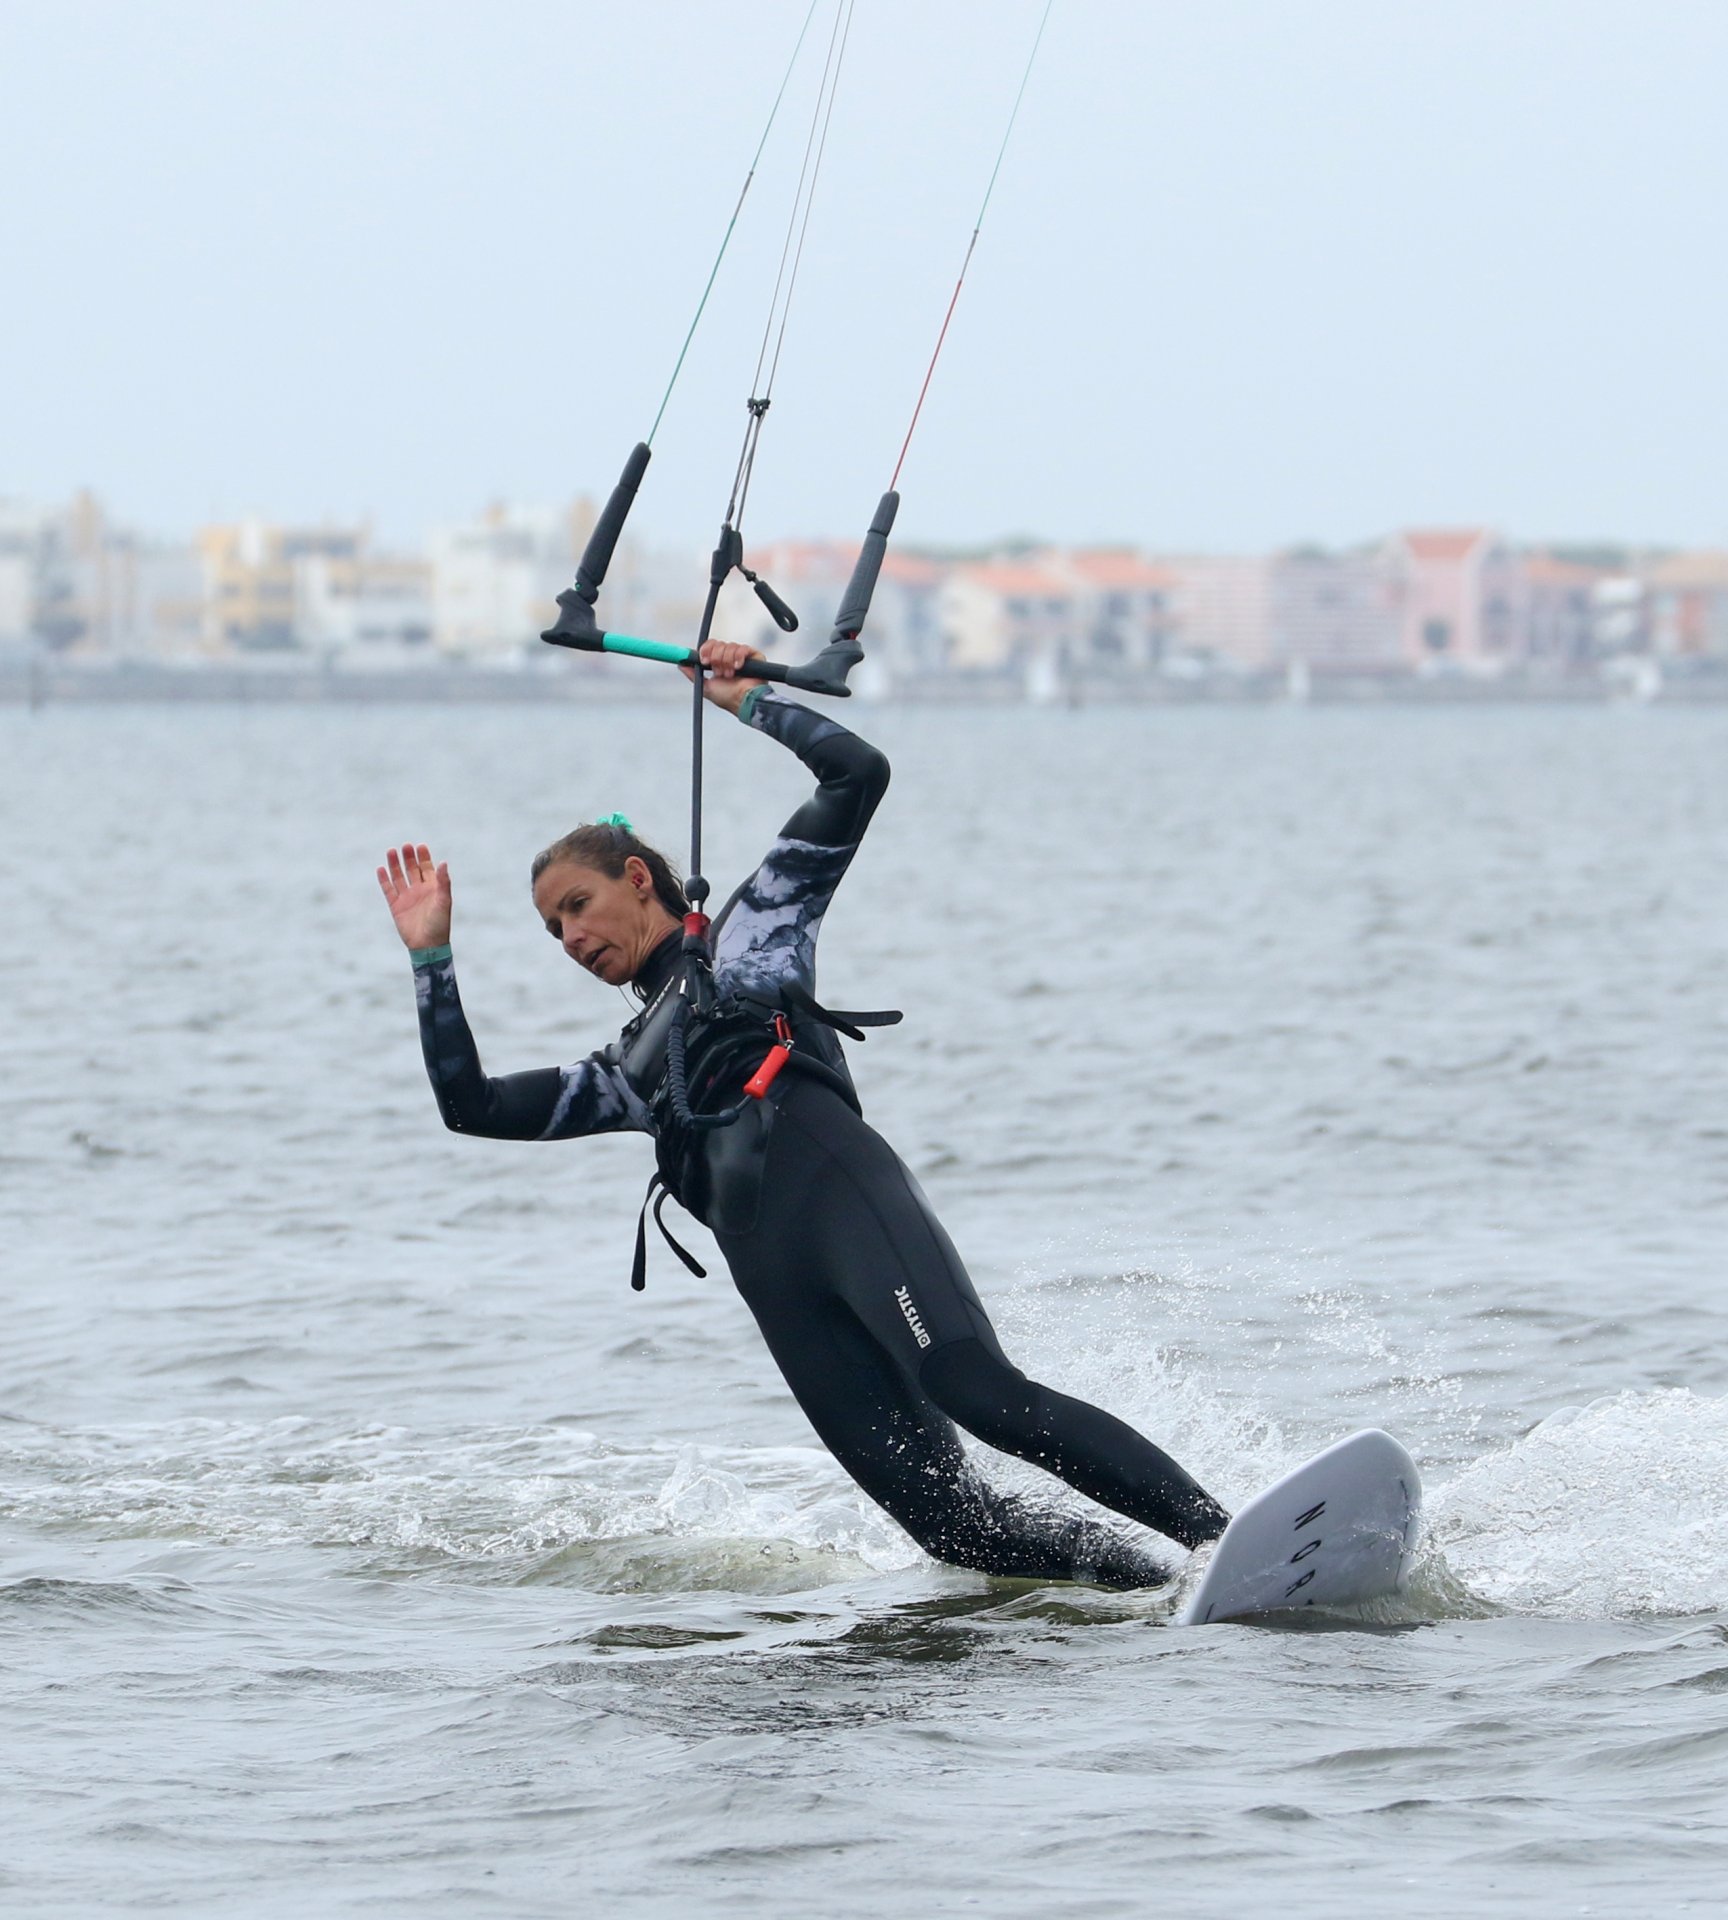
Support Pic D.
Once the board comes around into the wind it will slow to a near stop. Without movement, it’ll offer you no buoyancy to stand on, and as such it’s time to call on the kite again. Reach up to get your free hand on the bar. You can make this simpler by pulling on the bar to bring it down a tad. As you put tension on the lines the kite will offer you support, on your hands and on your harness, taking the load off your feet and relieving the board of some of your weight. Once both hands are firmly on the bar you can literally lean on them as you pull the bar in. In the Pic you can see how Karine is supporting herself on the bar, leaning on it and pushing herself upright onto her two feet.
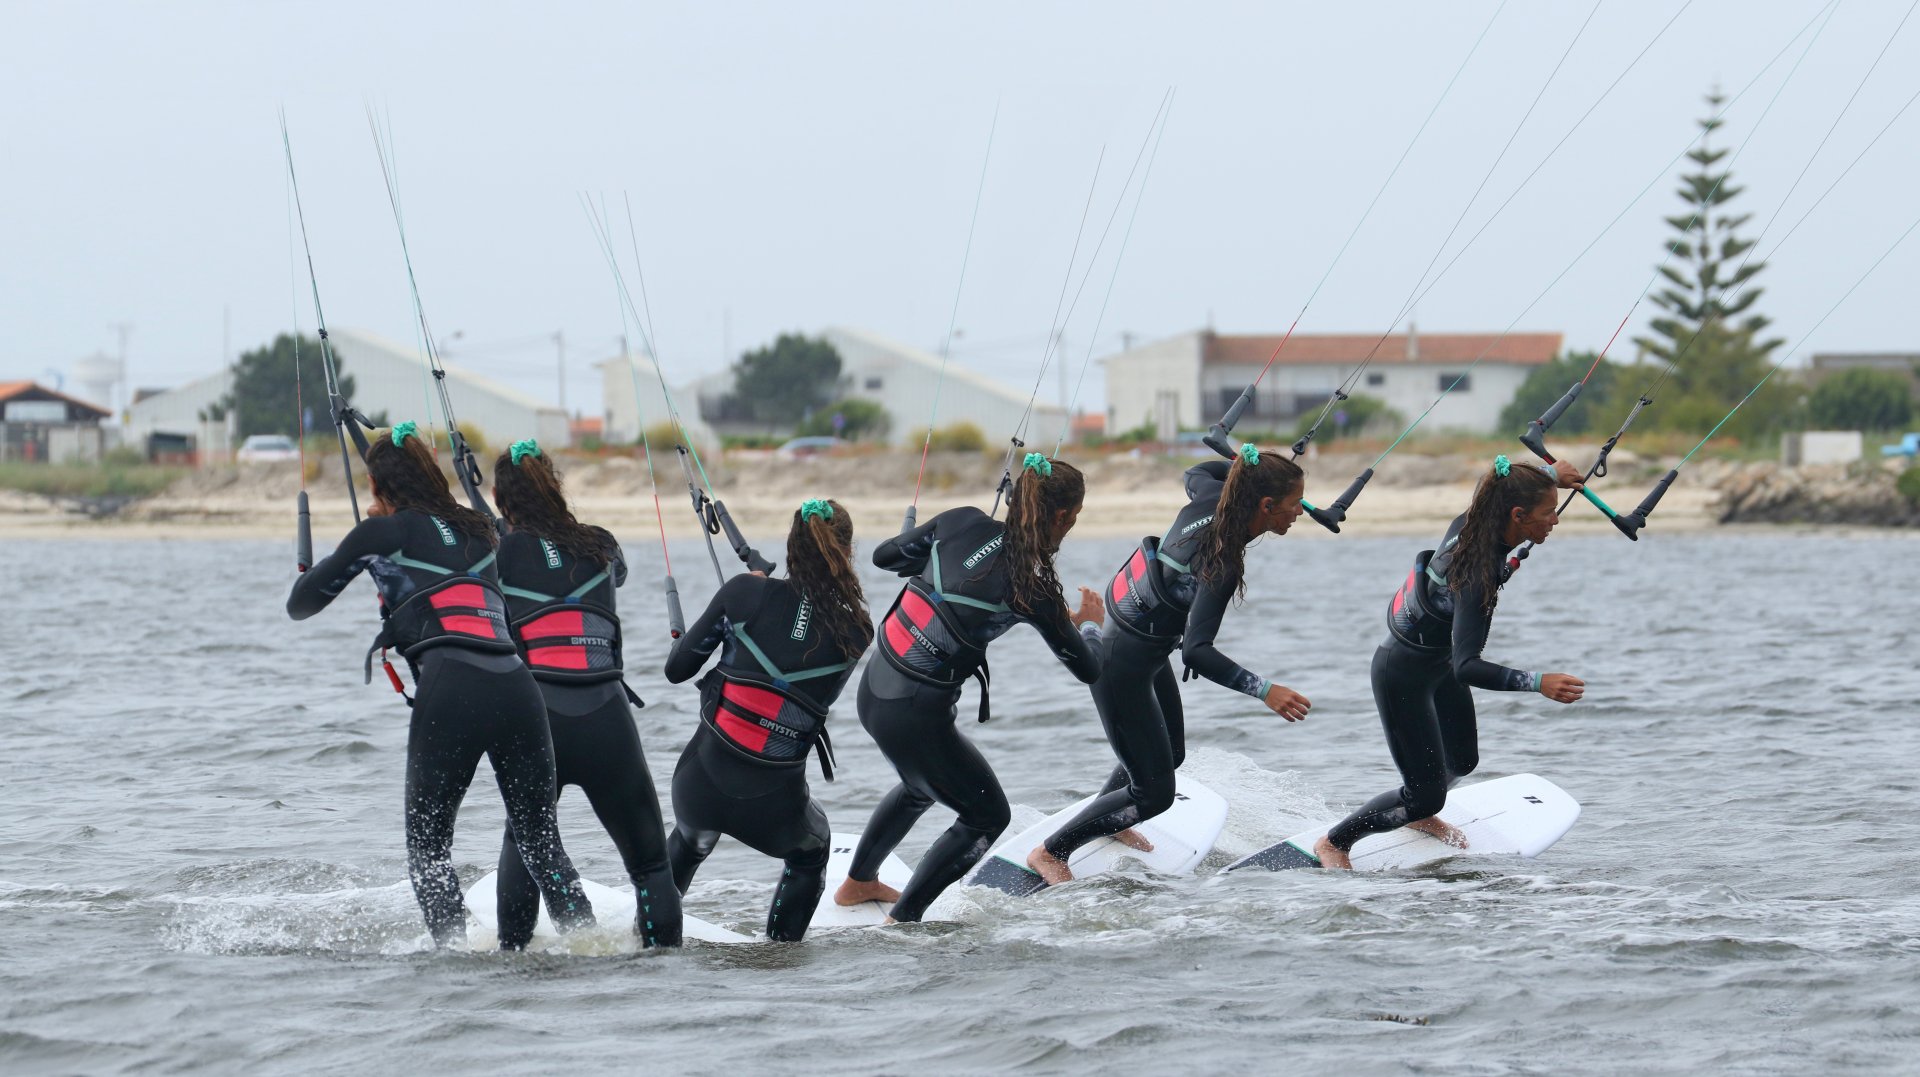
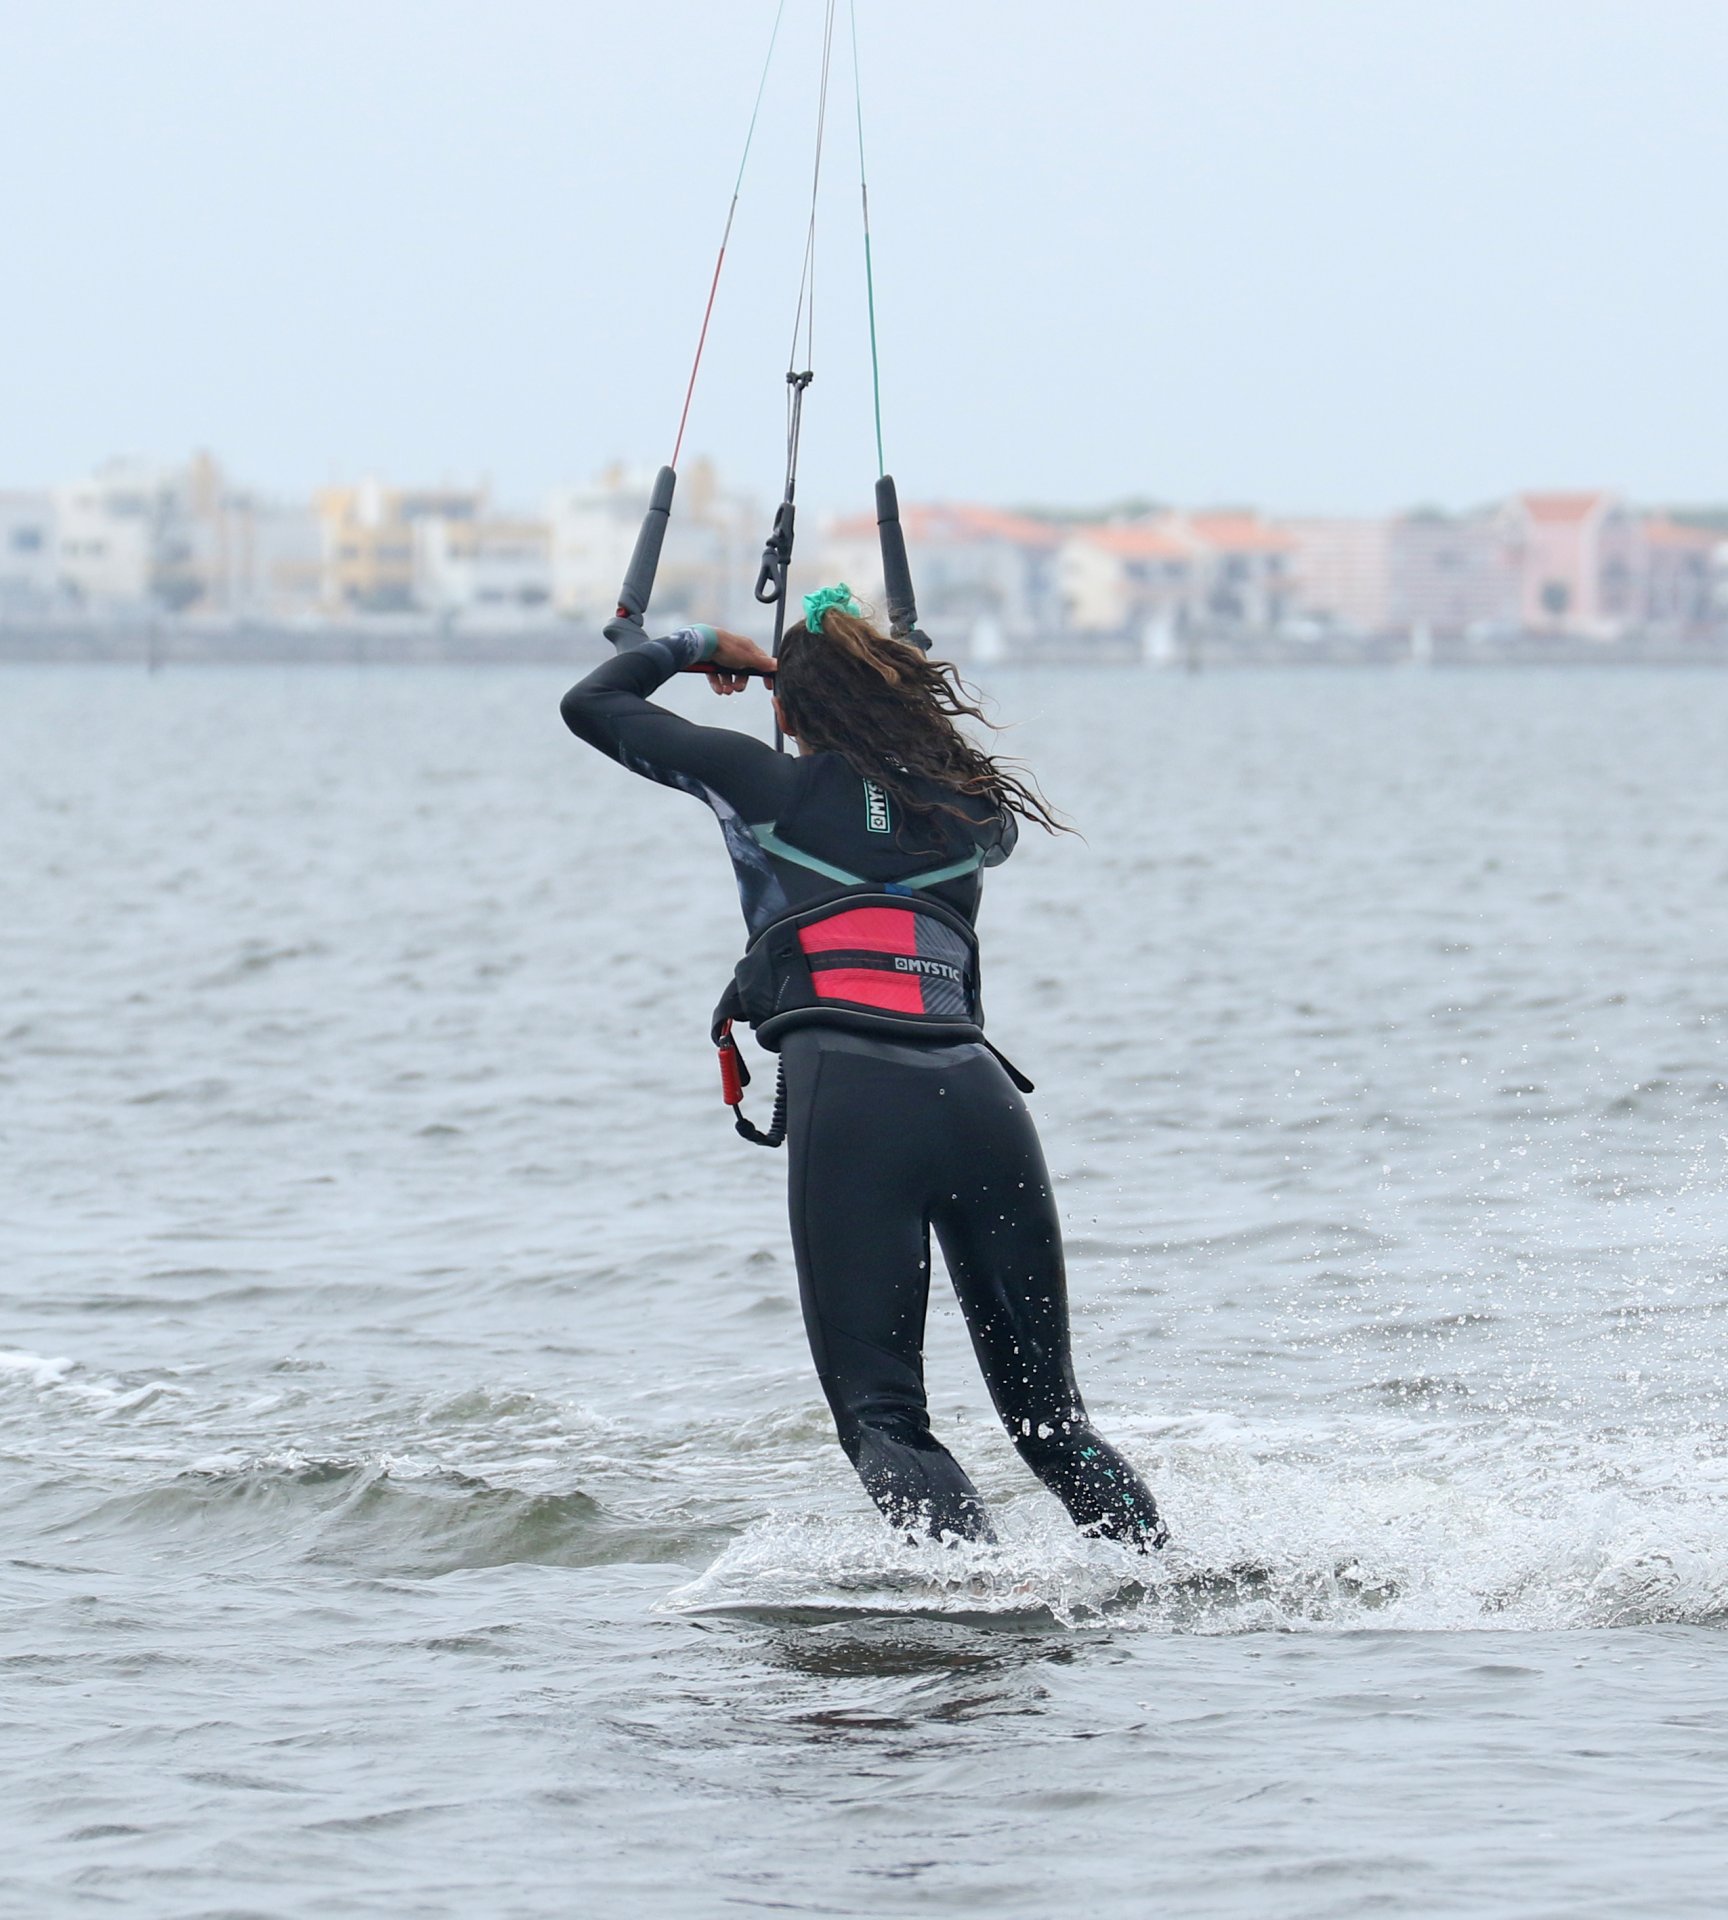
A Moment’s Breath Pic E.
With support from the kite, you’ll be amazed how you can push yourself back up onto the board for a split second’s breath. However, the support will be short-lived, and if you hang about, you’ll soon be sinking with your ship. As soon as you’re on the board you need to get the kite looping. Your intention is not power, it’s pull in the direction that you want to go. This means looping the kite from 12, and tightly so that it doesn’t have the option of overpowering you as it turns. To do this use both hands to give the bar an almighty push-pull. Beware that if your kite has drifted across to the other side of the window it has the potential to generate power by the bucket full, another good reason to learn this in a more moderate breeze. Here Karine is perfectly poised with her weight on both feet, she’s pushed herself up onto the board. However, her board is pointing the wrong way! She immediately gets the kite downlooping, pulling hard on her front hand, which incidentally is the one that has remained on the bar the entire time, and pushing with her back hand. You can see that in anticipation of some pull she is dropping her weight onto her heels and lowering her derriere.


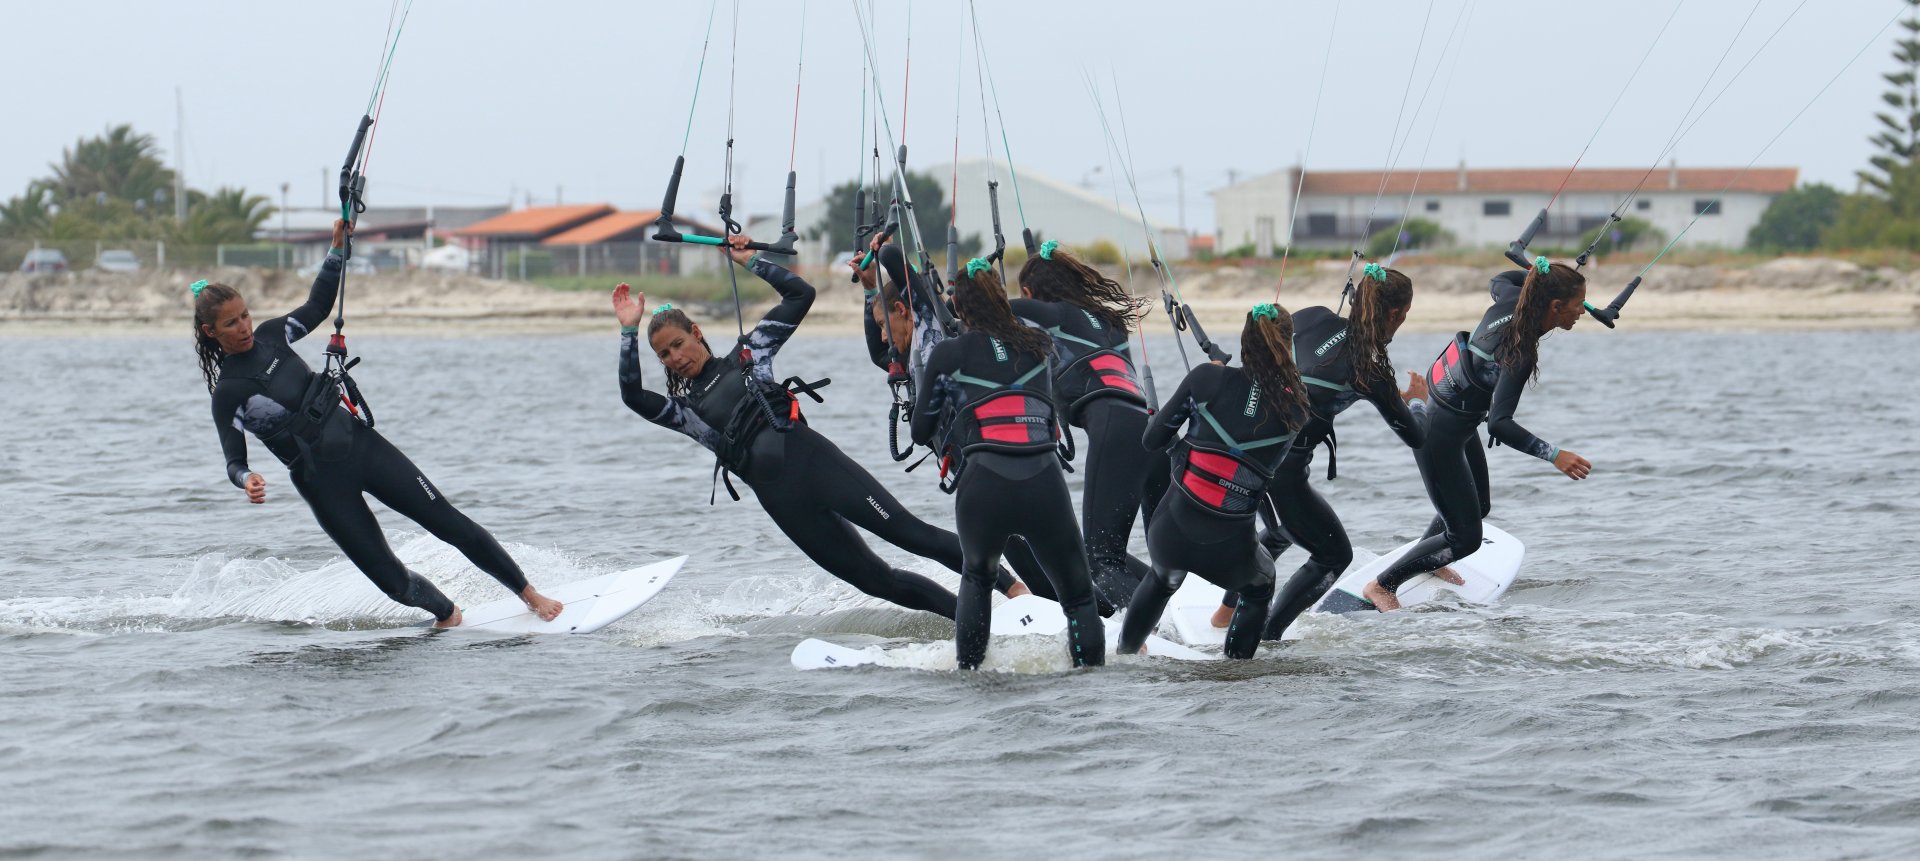
Pivot vs Carve Pic F.
Your aim now is to manhandle your board to turn the rest of the way so that you can carry on in the same direction that you entered the move. There are two possible methods, carving or pivoting. We’d recommend the pivot as it’s cleaner and makes the move look more deliberate. However, both possibilities share the exact same body mechanics and board control. The kite will decide your fate. The quicker, smaller and therefore less powerful the loop, the tighter and more pivoty the final furlong. No matter what you do, if the kite swings low through the downloop and generates 20 horses of pull you’ll be carving out and holding on for dear life. The important part is to be ready and anticipating. The crux of this is changing your weight distribution on the board. In the previous image, you were able to stand up because you moved your weight onto your front foot. Now you need to shift it back over your back foot and the tail of the board so that you can sink the tail, keep the nose high and let the kite do the rest of the work. Karine has bent her back leg and moved her hips over the tail, sinking it. Now, as the kite comes through and moves across to the other side of the window it pulls Karine, and the board naturally follows. If there’s too much power you’ll be forced to release your front hand and carve out, otherwise steer the kite forwards and stop the loop. Your only remaining job is to finish the pivot or carve by getting your body back into a good toeside position before riding off into the sunset.
Top Tips
Flat water. Whether this be between waves or a protected spot, you’ll initially find it unbelievably less difficult to carve the board into the wind without chop slowing you down prematurely.
Make sure you have the momentum to take you through the move. This means coming in with the board flatter than you may consider prudent and also releasing enough power so that you can carve up and away from the kite.
Keep your body upright. Admittedly in pictures, this move may look like you’re battling the laws of physics, but actually, it all flows, as long as you carve from your ankles and knees, not your waist.
And finally, the more lifty the kite, the harder the move. You can, however, counteract this by trimming the bar in close.


We’ve broken the sequence into two separate images, the two halves if you like. It’s a good way to approach this move, as if you think too far ahead, you’ll get yourself in a pickle. Go check them out along with the videos.
Common Problems
The kite can make this more difficult than it need be, so it deserves your attention. If you have too much power you can’t carve. If you don’t move the kite enough you can’t carve. If you move the kite too quickly you can’t carve and if you move the kite too much you can’t carve as it’ll pull you off the back of the board. Make sure the kite goes slowly but surely to 12 o’clock.
If you’re not getting far enough around the first part, it’s likely that your back foot is too far back or not across the centre line of the board. If you sink the tail, you’ll stop. If you can’t engage the rail you won’t turn.
The most common issue is getting around and then getting pulled over the front of the board. This is because once you can stand up, you’ll have a lot of weight on your front foot. Make sure that you transfer all your weight back onto the tail of the board as you commit to the downloop.
Keystones
- Feet centred, weight forward.
- Flatten board and drift kite to 12.
- Drop hand, bar out and carve.
- Weight forwards, push down and stand.
- High downloop and weight back.
This technique article was in Issue 87 of IKSURFMAG.
Related


By Christian and Karine
Christian and Karine have been working together as a coaching team, running improver to advanced kitesurfing clinics since 2003.
