
Roll Tack
Technique / Intermediate


Introduction
Many moons ago we covered the Duck Tack. Although similar to this both visually and practically, there are a few differences to the Roll Tack which we’ve found have made this the choice when coaching guests on clinics and achieving a much higher rate of continued success. Whether this is down to boards, kites, them or us we can’t say, but what we do know is that doing it this way will get your hit rate right up there:)
Many of the elements for the roll tack are similar to the tack, so we’d suggest that you get the standard tack nailed first, before moving on to this one. In the normal tack you’ll be in a better position to concentrate on the kite, whereas here you may end up slightly disorientated.


Let’s have a run through of the key parts involved here, so that you can visualise and walk through them separately.
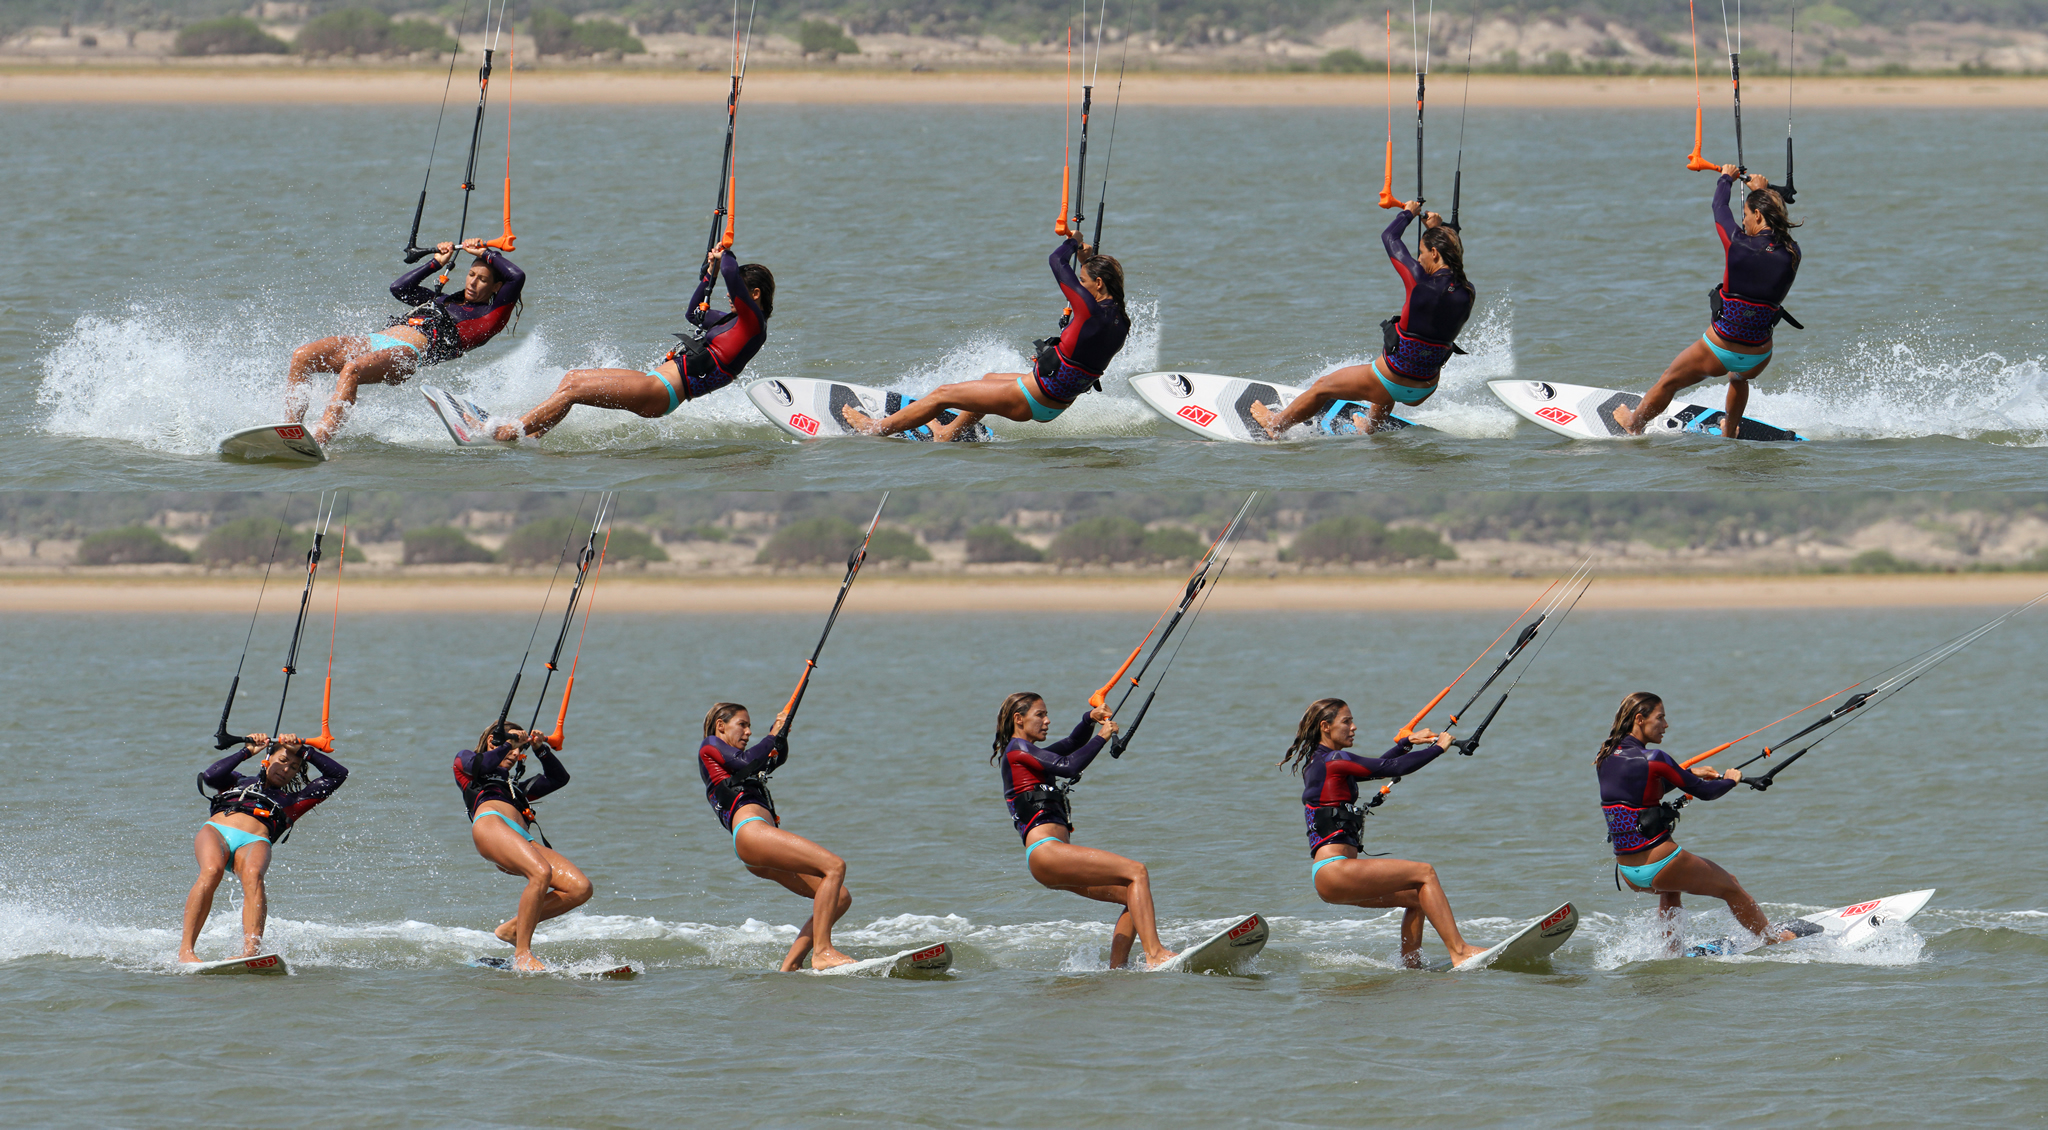
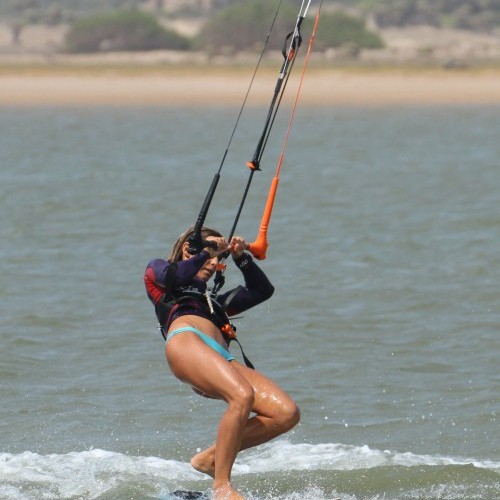
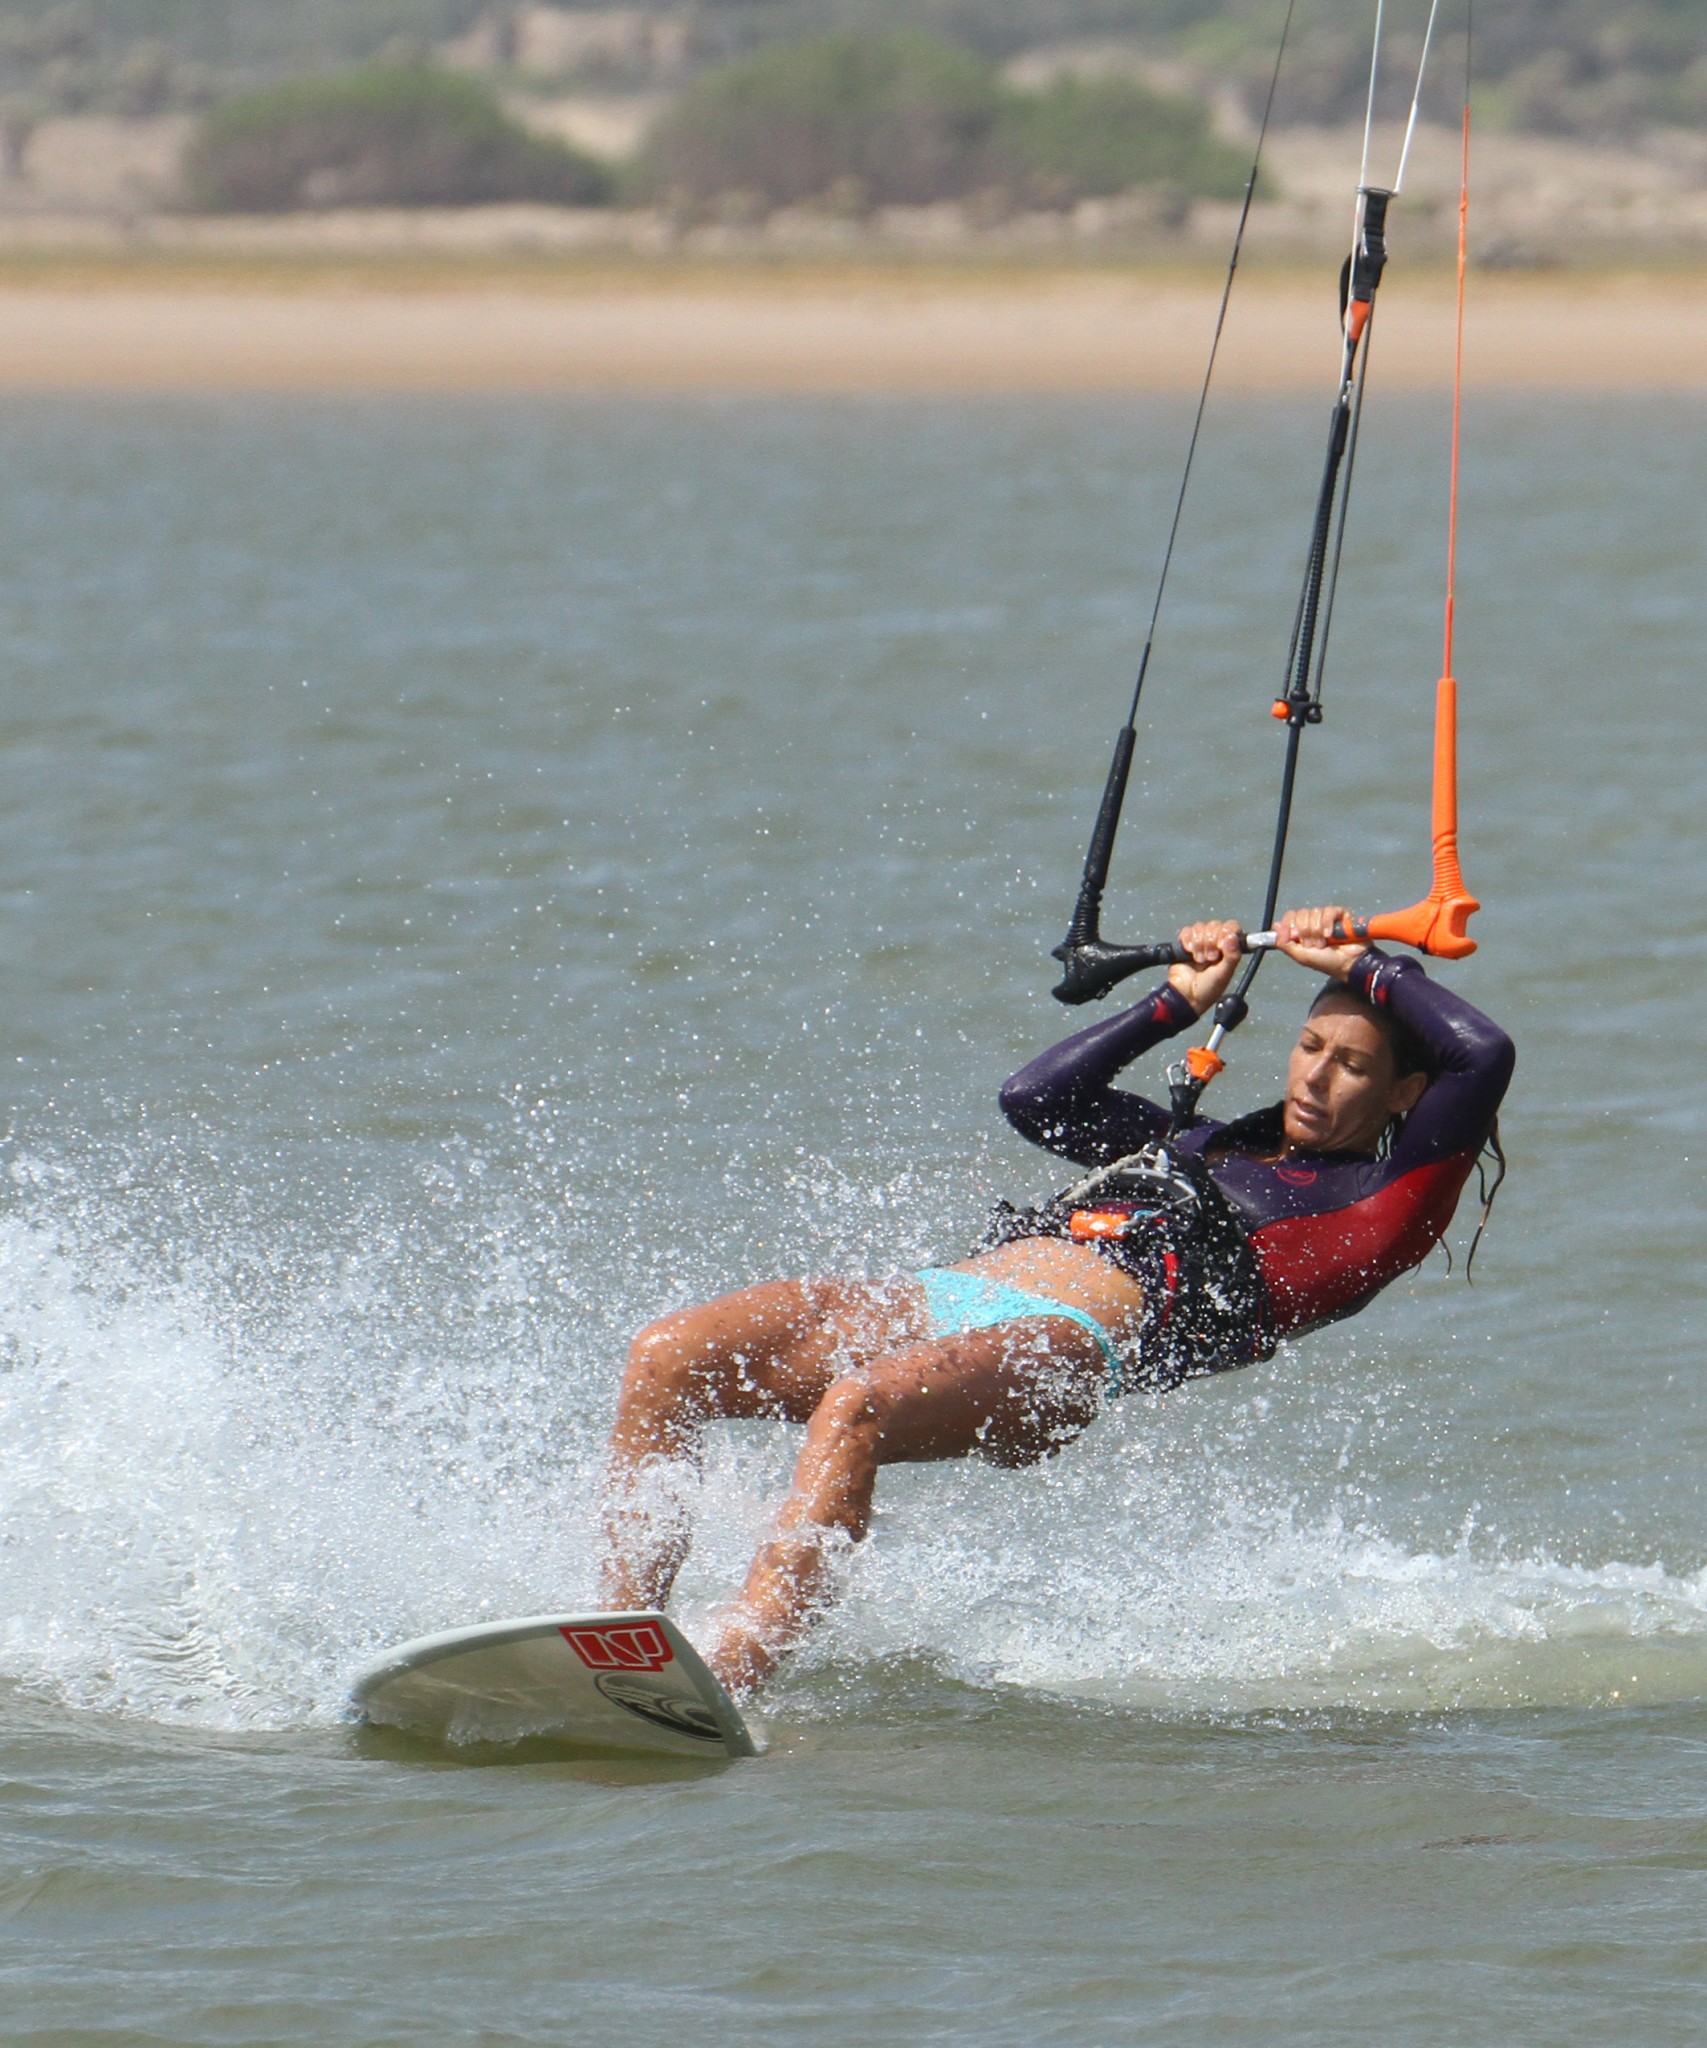
Pic A. The Approach
This should be identical to the tack. Get the approach wrong and no matter how well you do the rest you’re not making life easy. You have time to sort the elements here so there is no need to multi task or rush. Karine is coming in on an edge, her feet are not too far back, and are both on the upwind side of the board. She has slowly moved her kite up to 12 o’clock and once it’s there she has pushed the bar away from her, up towards the stopper. Because she’s on an edge the board will continue to move and from here she can start her carve.
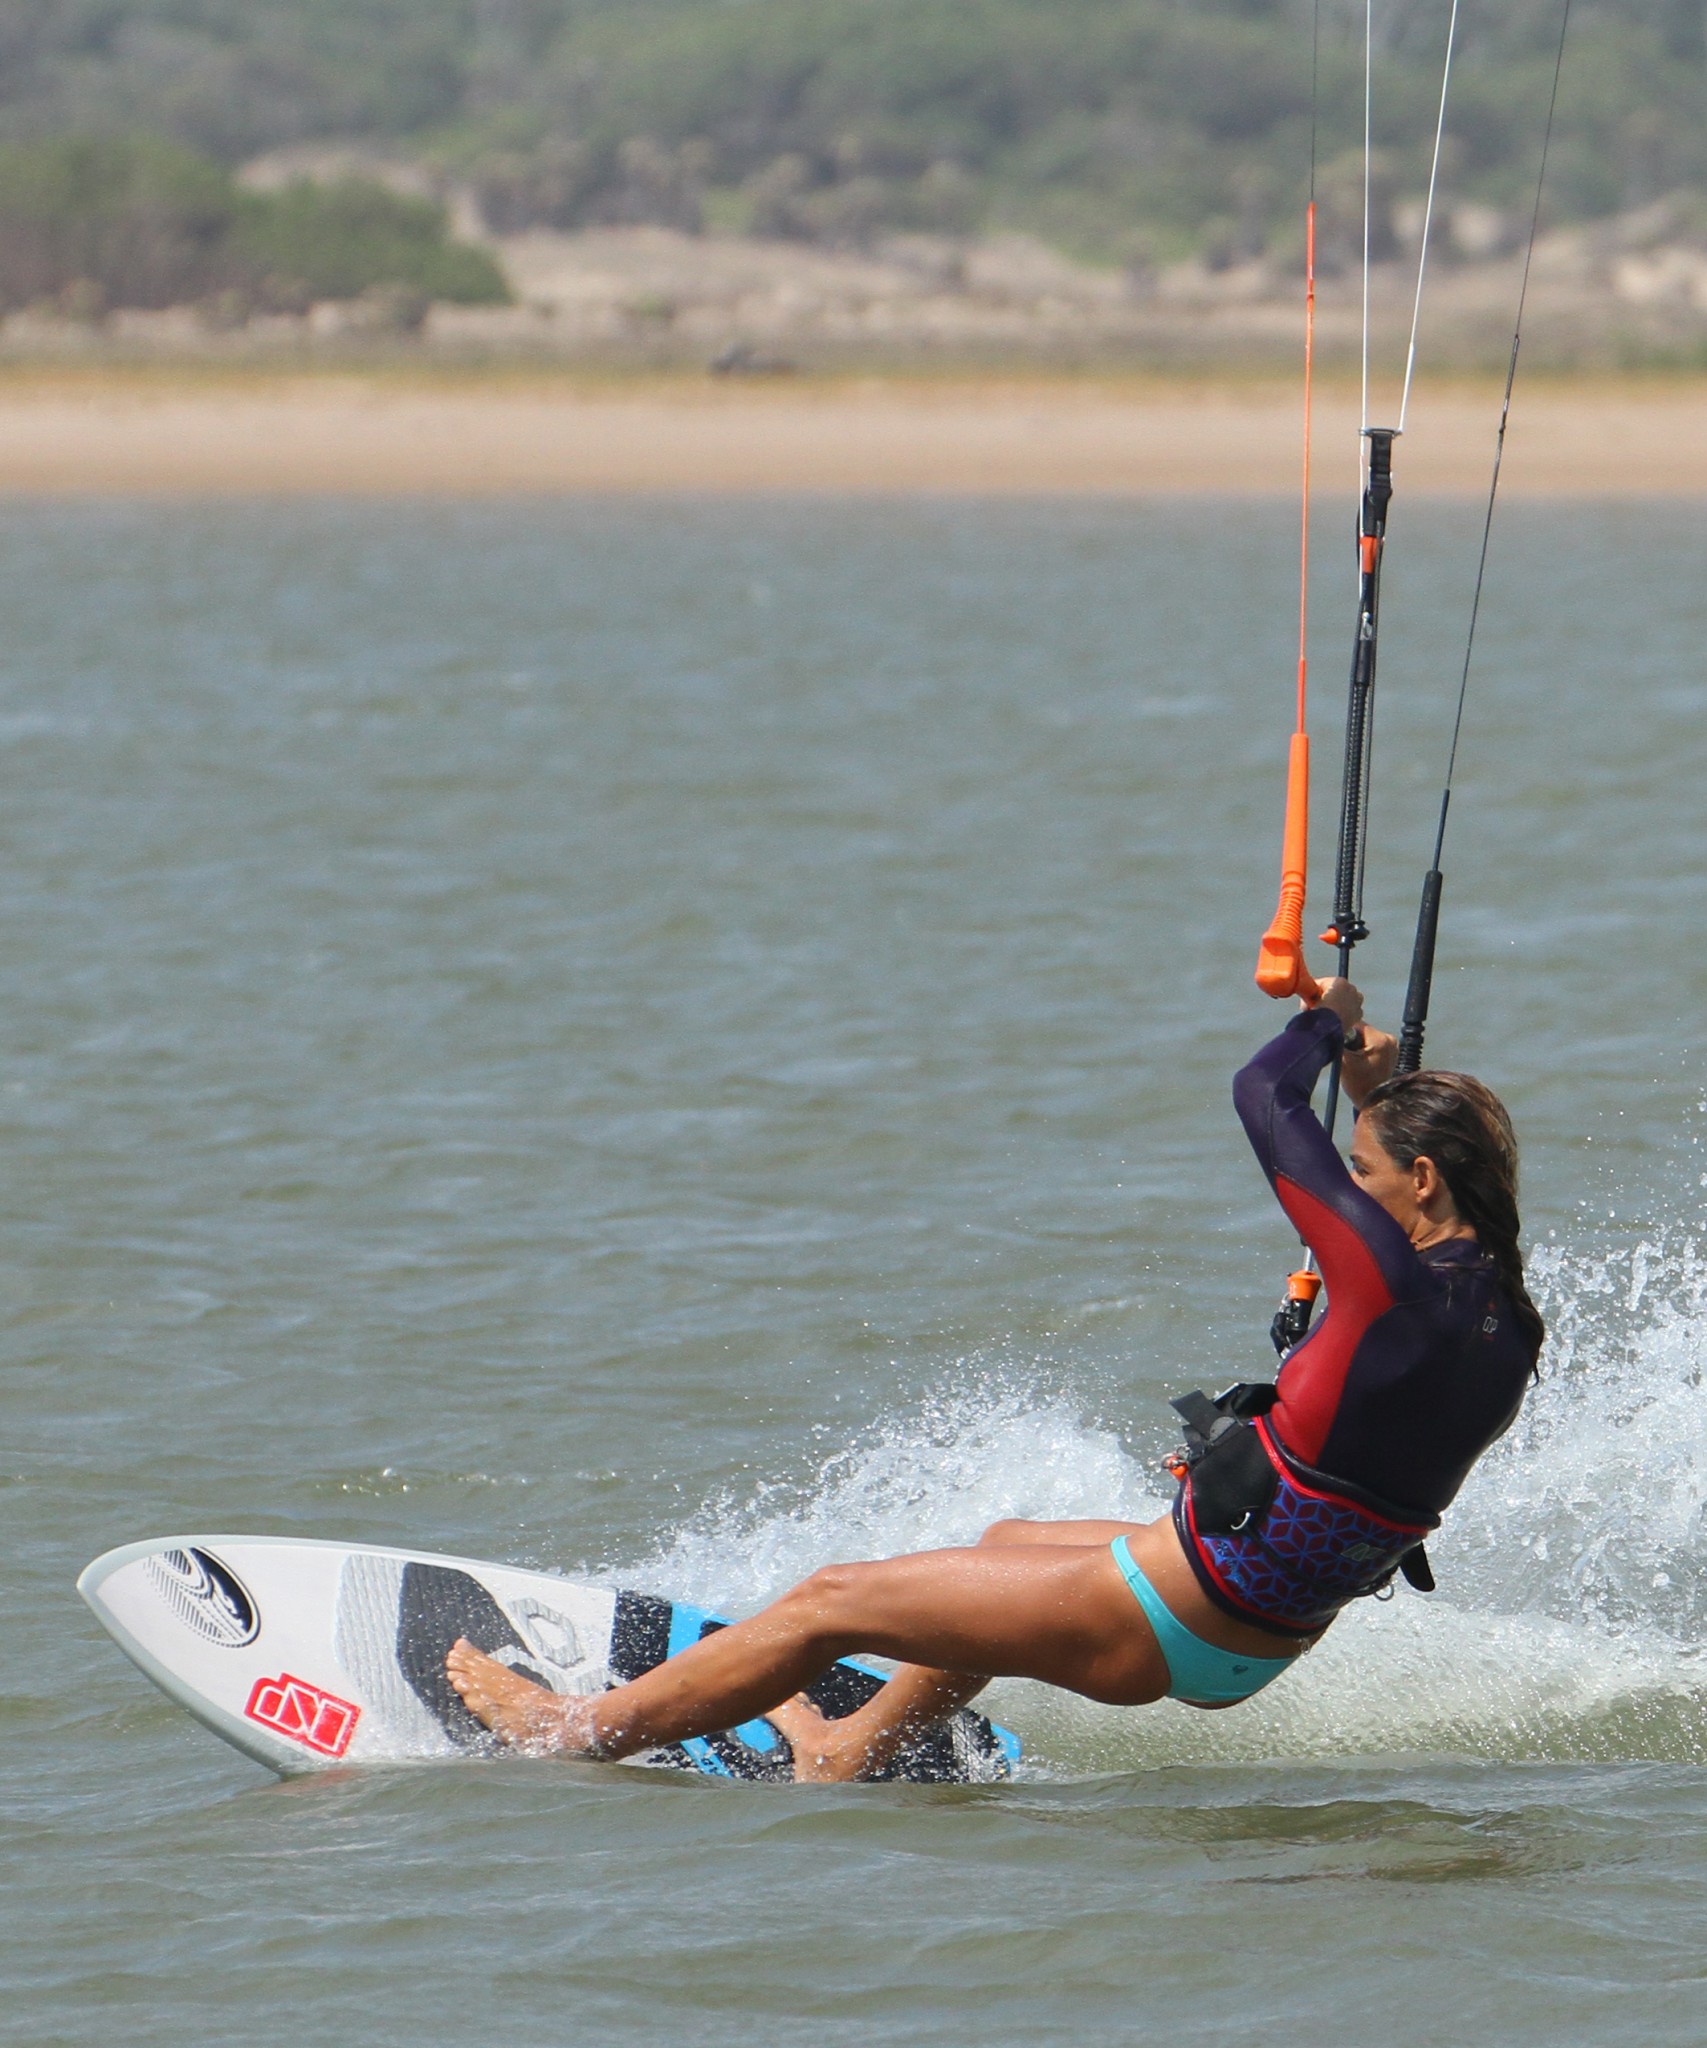
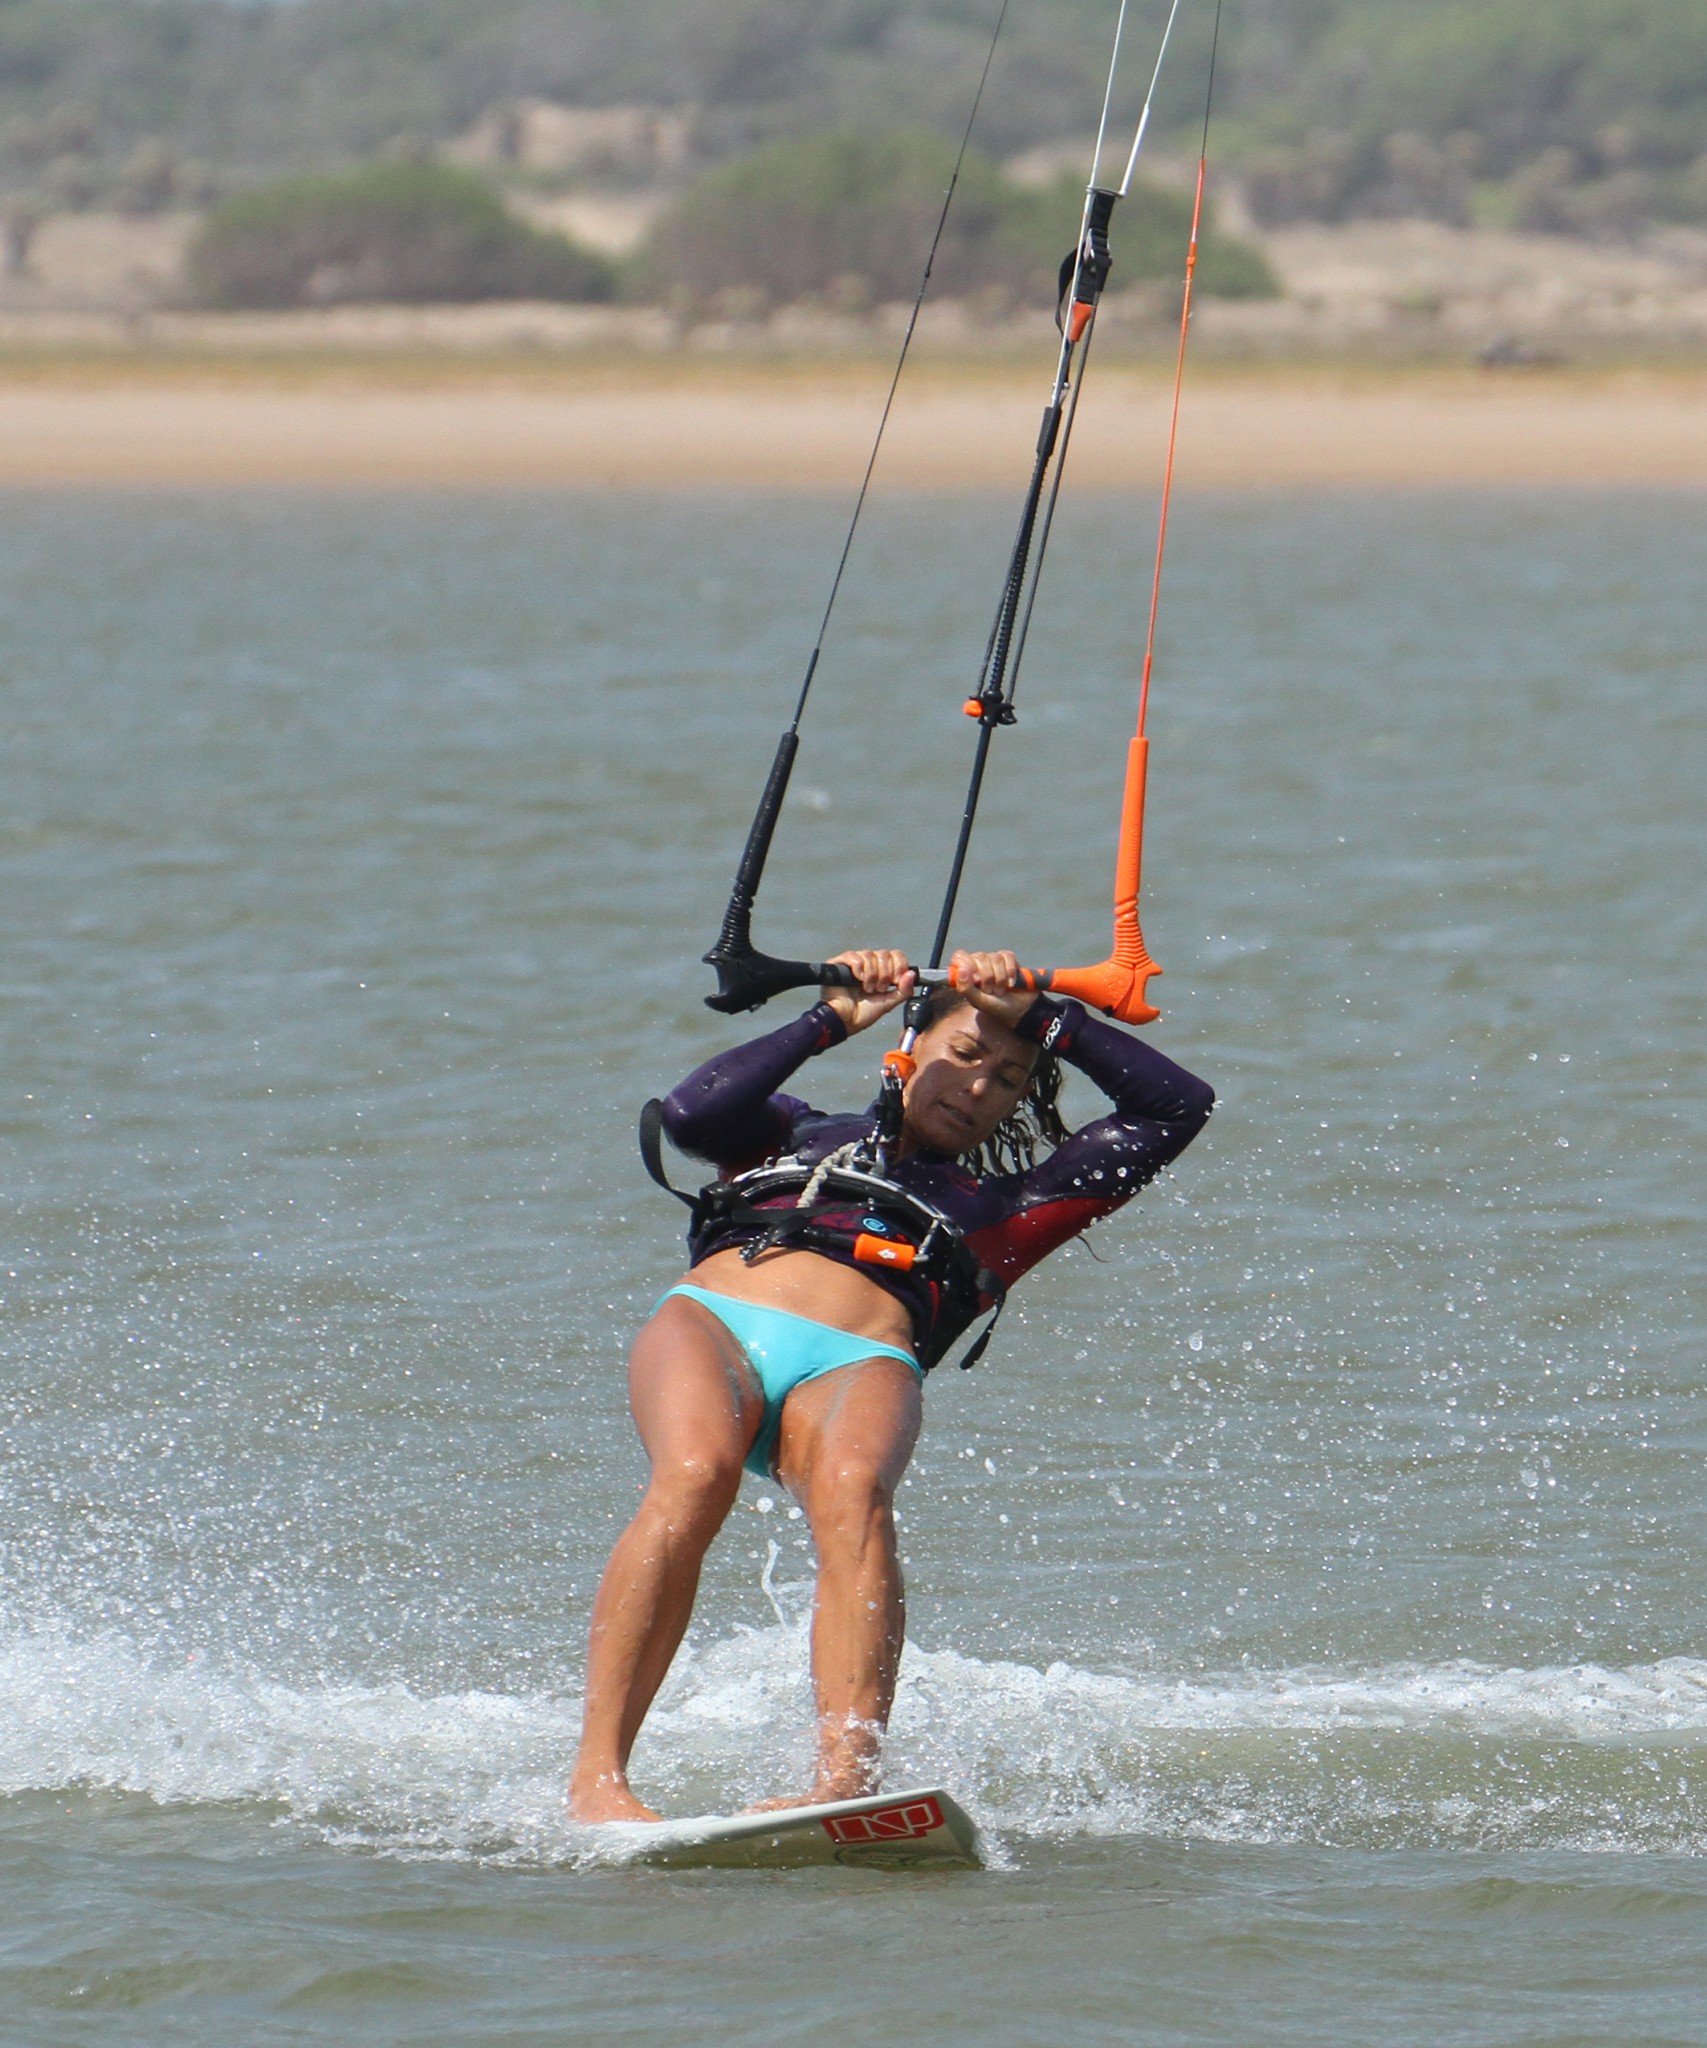
Pic B. The Carve
After getting the kite up to 12 and letting the bar out, this is probably the single most important part of the roll tack as you need to carve the board much further through the wind than a tack. You need the board already facing upwind in the other direction to pull these off time and again, and it’ll only get there if you put it there. With her bar out, the kite will not pull, and as such Karine can carve further up and through the wind. If you look at Karine’s feet and ankles, they are driving against the rail of the board, carving it up. Both her knees are flexed and turning to point upwind. Yet again this keeps weight on the whole the rail, carving the board up whilst maintaining some speed and momentum. If her front leg was straight she’d be pushing too much through he back leg and the nose would rise, slowing the board. If her front leg was too bent, all her weight would be forward and the fins would slide out. It’s all about finding the balance, and foot placement is a big part of this, which will change from board to board. Finally, Karine’s head is still fairly perpendicular to her shoulders, she has not thrown it over her front shoulder, as this would pull her away from the board.
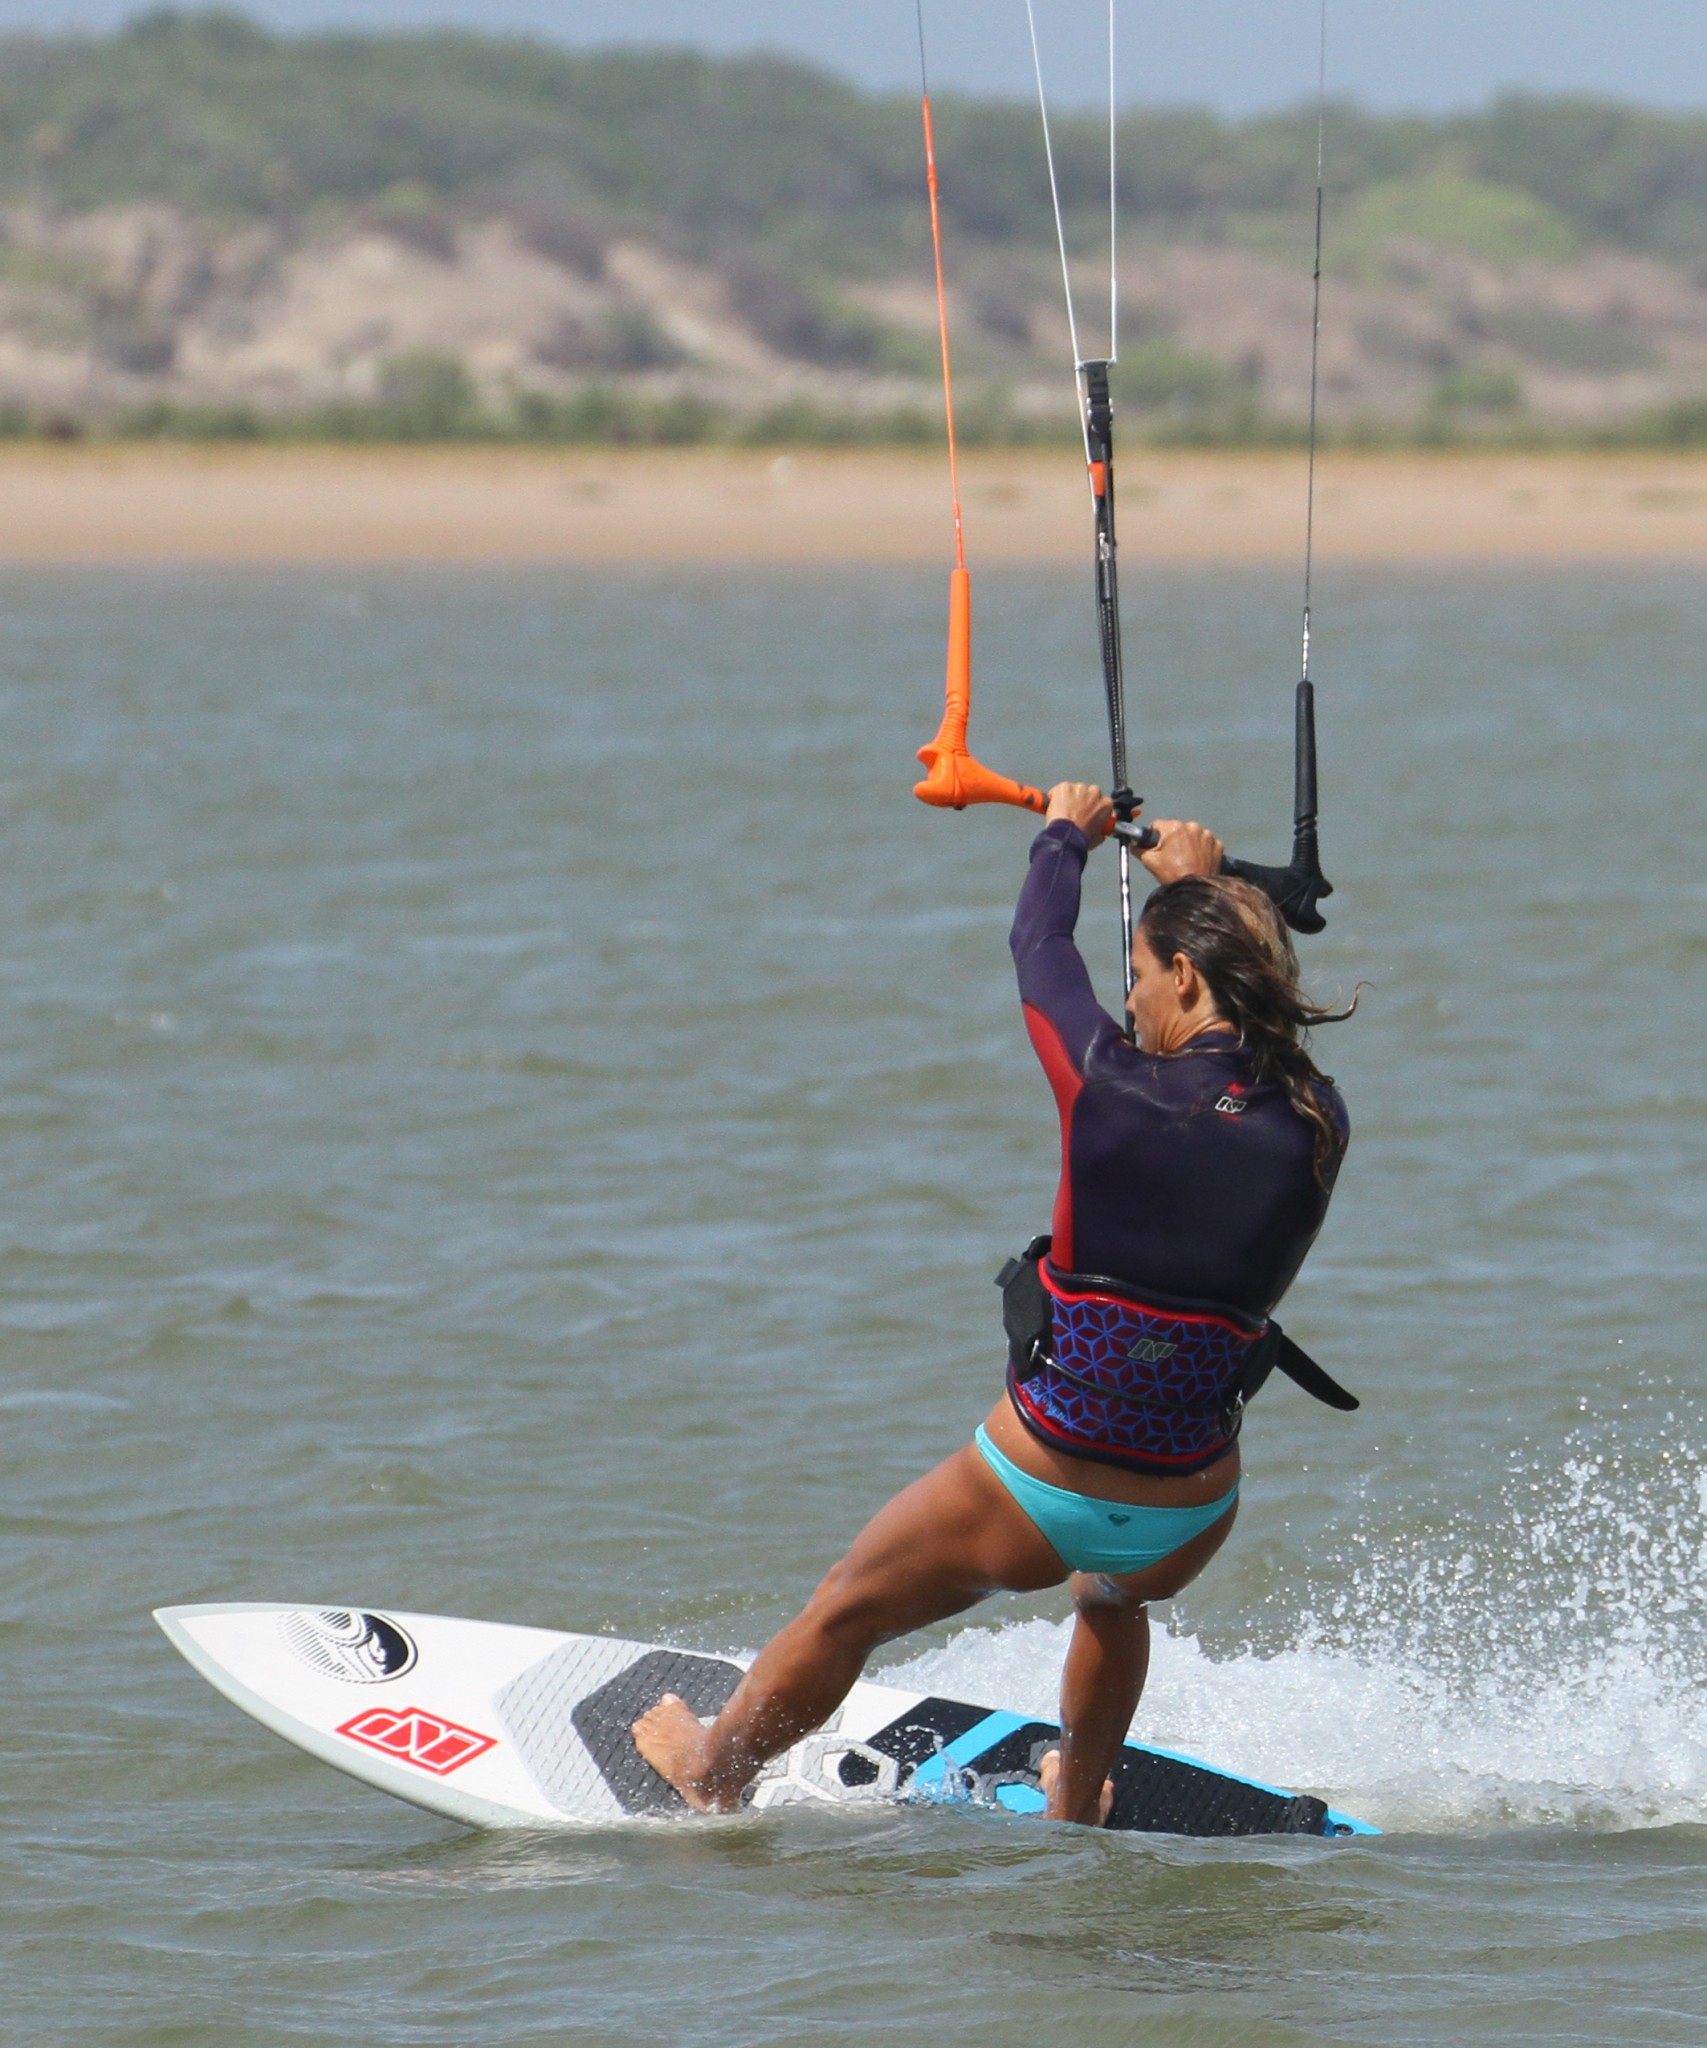
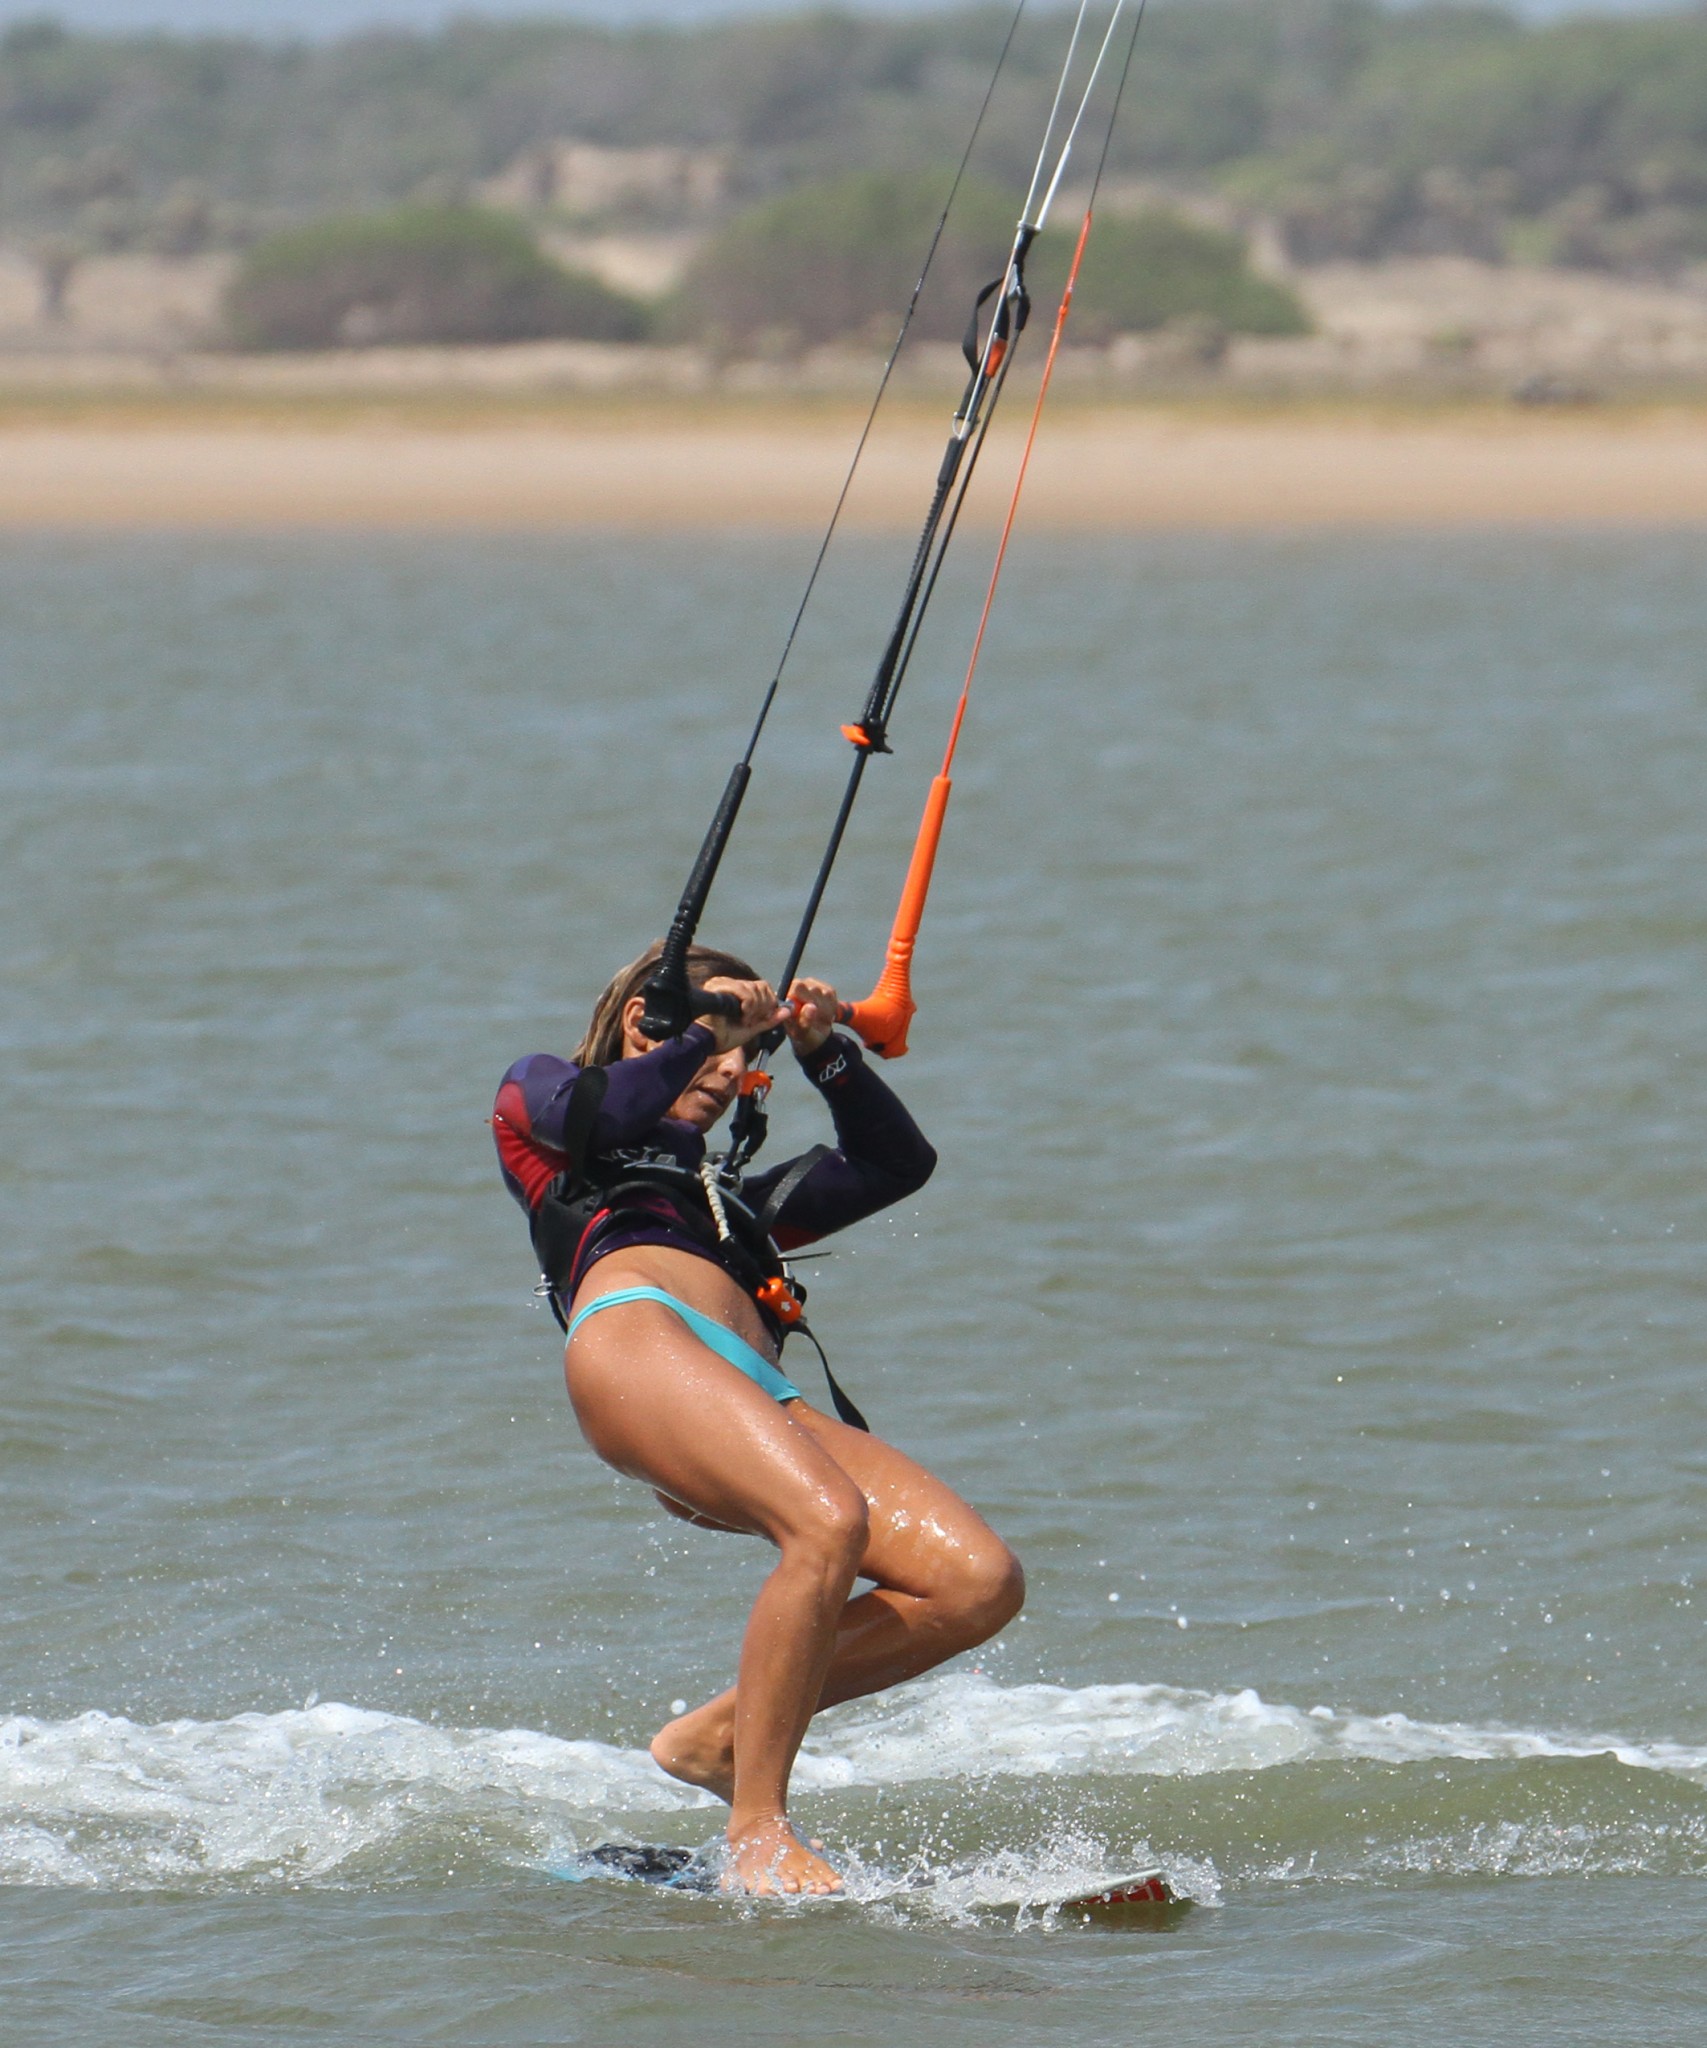
Pic C. Timing
Knowing when to “go” in the roll tack will make a massive difference, and although you’ll only discover it fully through times tried, if you get the carve far enough it’ll become more obvious and instinctive. We could say once the board stops it’s time to go, but the board could stop too early if you don’t carve it far enough. However, assuming that the previous steps are working, there is a point when you need support, and that is the time to pull the bar in and get support. Here Karine is still moving but she’s felt herself drop and to combat this she pulls in on the bar. Not only is pulling the bar in necessary to stop you falling, it’s your cue to get moving. One final thought here, you can see that as Karine pulls the bar in she is pulling more with her back hand/ new front hand. This should be fairly natural, due to your body lean, but it is important for the next stage.
Pic D. The Step Up
Contrary to popular belief there is no spinning involved here, as you’re effectively following the board. Your foot movement is very similar to what you’d do in a foot change after or before a carve/ gybe – you’ll be stepping your back foot up pigeon toed, so that your big toes almost touch. Just like in a normal foot change you need to get all your weight onto your front foot before you can lift the back one up. This means that you must move your weight forwards, and if the kite is pulling slightly that way it will help! However, if the board hasn’t turned enough the kite will pull you off the side of the board. You can see that Karine is still pulling on her right hand, and she’s looking at the board so that she steps forward and up to the correct spot.


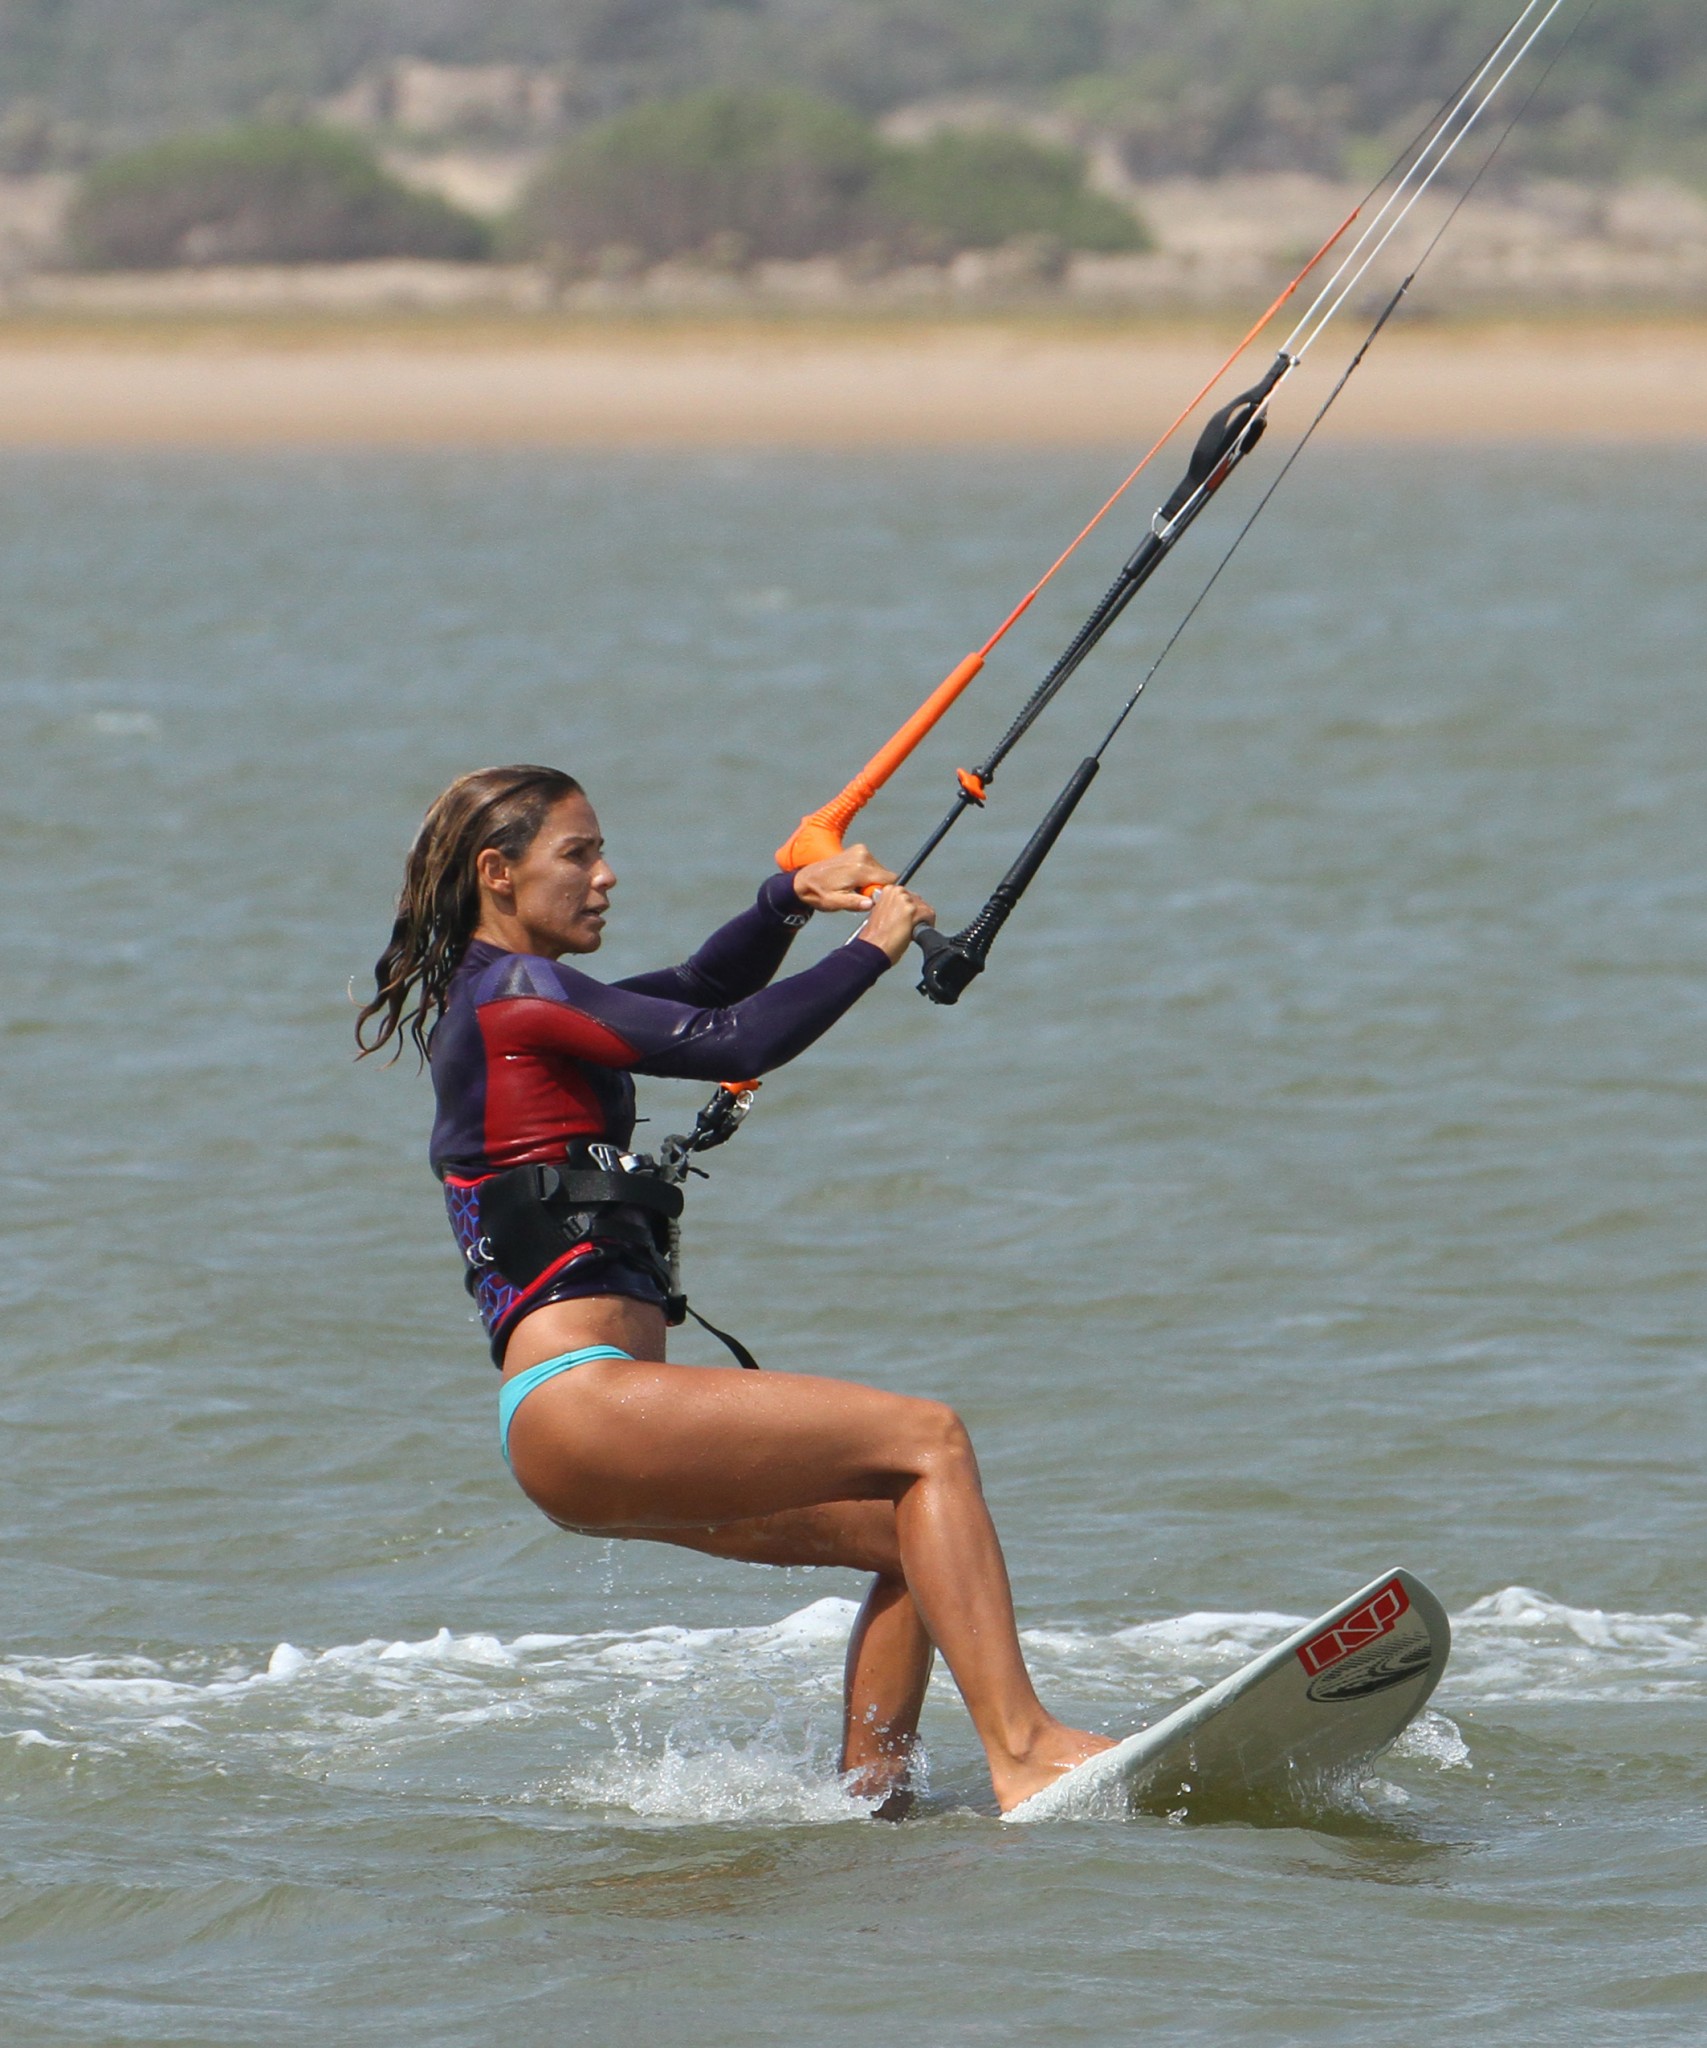
Pic E. The Step Back
Once again with the kite pulling and the board turned sufficiently through the wind, you should be pulled forwards onto your recently planted new front foot, in Karine’s case her right foot. As the kite pulls, Karine shifts all her weight onto this foot, which enables her to lift her other foot and place it back down the board. Often people get to this point, but because the kite is not moving they have no support and hanging off the bar won’t help.
Pic F. Done and Dusted
With both feet where they belong and the kite diving and pulling, Karine can now move her weight over her back foot, lifting the front of the board, and then push the nose of the board off the wind with her front foot. Job done.
Top Tips
We’ve tried to cover all the points as we’ve gone along here, but if you were to break it down into the things that matter, it will always come back to approaching on an edge and moving the kite up to 12 o’clock with the bar out. In this position you’ll be able to drop your weight upwind of the board and carve it sufficiently far. Once you pull in for support the kite must be moving slowly down in the new side of the window, so that it’ll pull you forward for your foot change and support you as you step back.
So have a good hard look at the sequence and videos to see the timing as it should be.
Common Problems
First off is not getting the board far enough through the wind, so kite up and bar out. If you can’t get the board carving, make sure that you drop your bum down towards the water so that you can drive the board upwind. Surfers talk about sitting in a chair, but you still need to drive against the rail.

No support at the end. You’ve left the kite at 12 whilst changing your feet, so make sure you pull a bit on your old back hand to move the kite across to the new side of the window.
If you’re getting pulled off towards the back of the board you’re pulling on the bar too early…
Keystones
- Kite up to 12 and bar out
- Sit, break at waist and carve through the wind.
- Bar in for support, more on the backhand
- Move weight over front foot and step up back foot
- Weight new front foot, step back and dive kite
This technique article was in Issue 60 of IKSURFMAG.
Related


By Christian and Karine
Christian and Karine have been working together as a coaching team, running improver to advanced kitesurfing clinics since 2003.
