
Double Front Roll Grab
Technique / Intermediate


Introduction
To self-quote from an earlier article – “It’s an unwritten fact, that to really prove yourself as an accomplished front looper, you must learn to slow your rotation down, so that your complete 360 matches perfectly the time you spend in the air. This, of course, shows great control, adds oodles of style, and concerning this next move, teaches you how to land from a non-completed, almost stalled rotation. It’s also very true that there is more than one way to claim any double rotation, and one is to merely throw yourself into whichever spin you fancy with all the enthusiasm of a hungry mosquito.” This still holds true today, although it’s no longer considered a loop but a roll, as it means that you don’t need momentum for two complete rolls to claim this. To further up the ante, we’ll be adding a grab, which will potentially open the door to a whole roomful of tricks. Hungry? Let’s do it!
To make the double front roll with a tail grab an achievable reality, you should look at it as one rotation on the way up and another on the way down. Sounds simple enough? You already know that you can get around the one, so if you can speed up your first rotation, you’ll leave yourself with enough time to throw the second one before touchdown. This may be all well and good, but let us throw in the one thing that’ll make all the difference – kite control. Doing the right thing with the kite when flying it with one hand is what will give you the time, float, confidence and consistency in this move. This is, of course, assuming that you’re already a happy, grabby front roller!


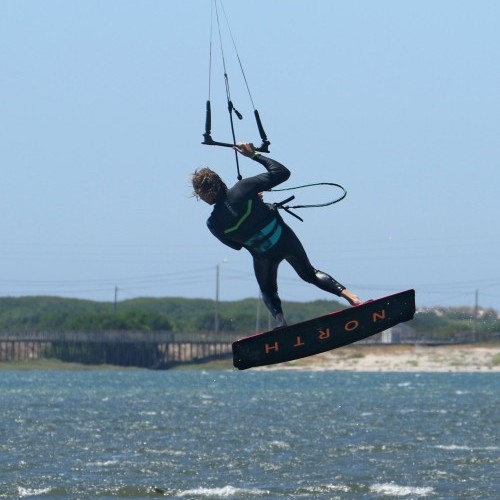
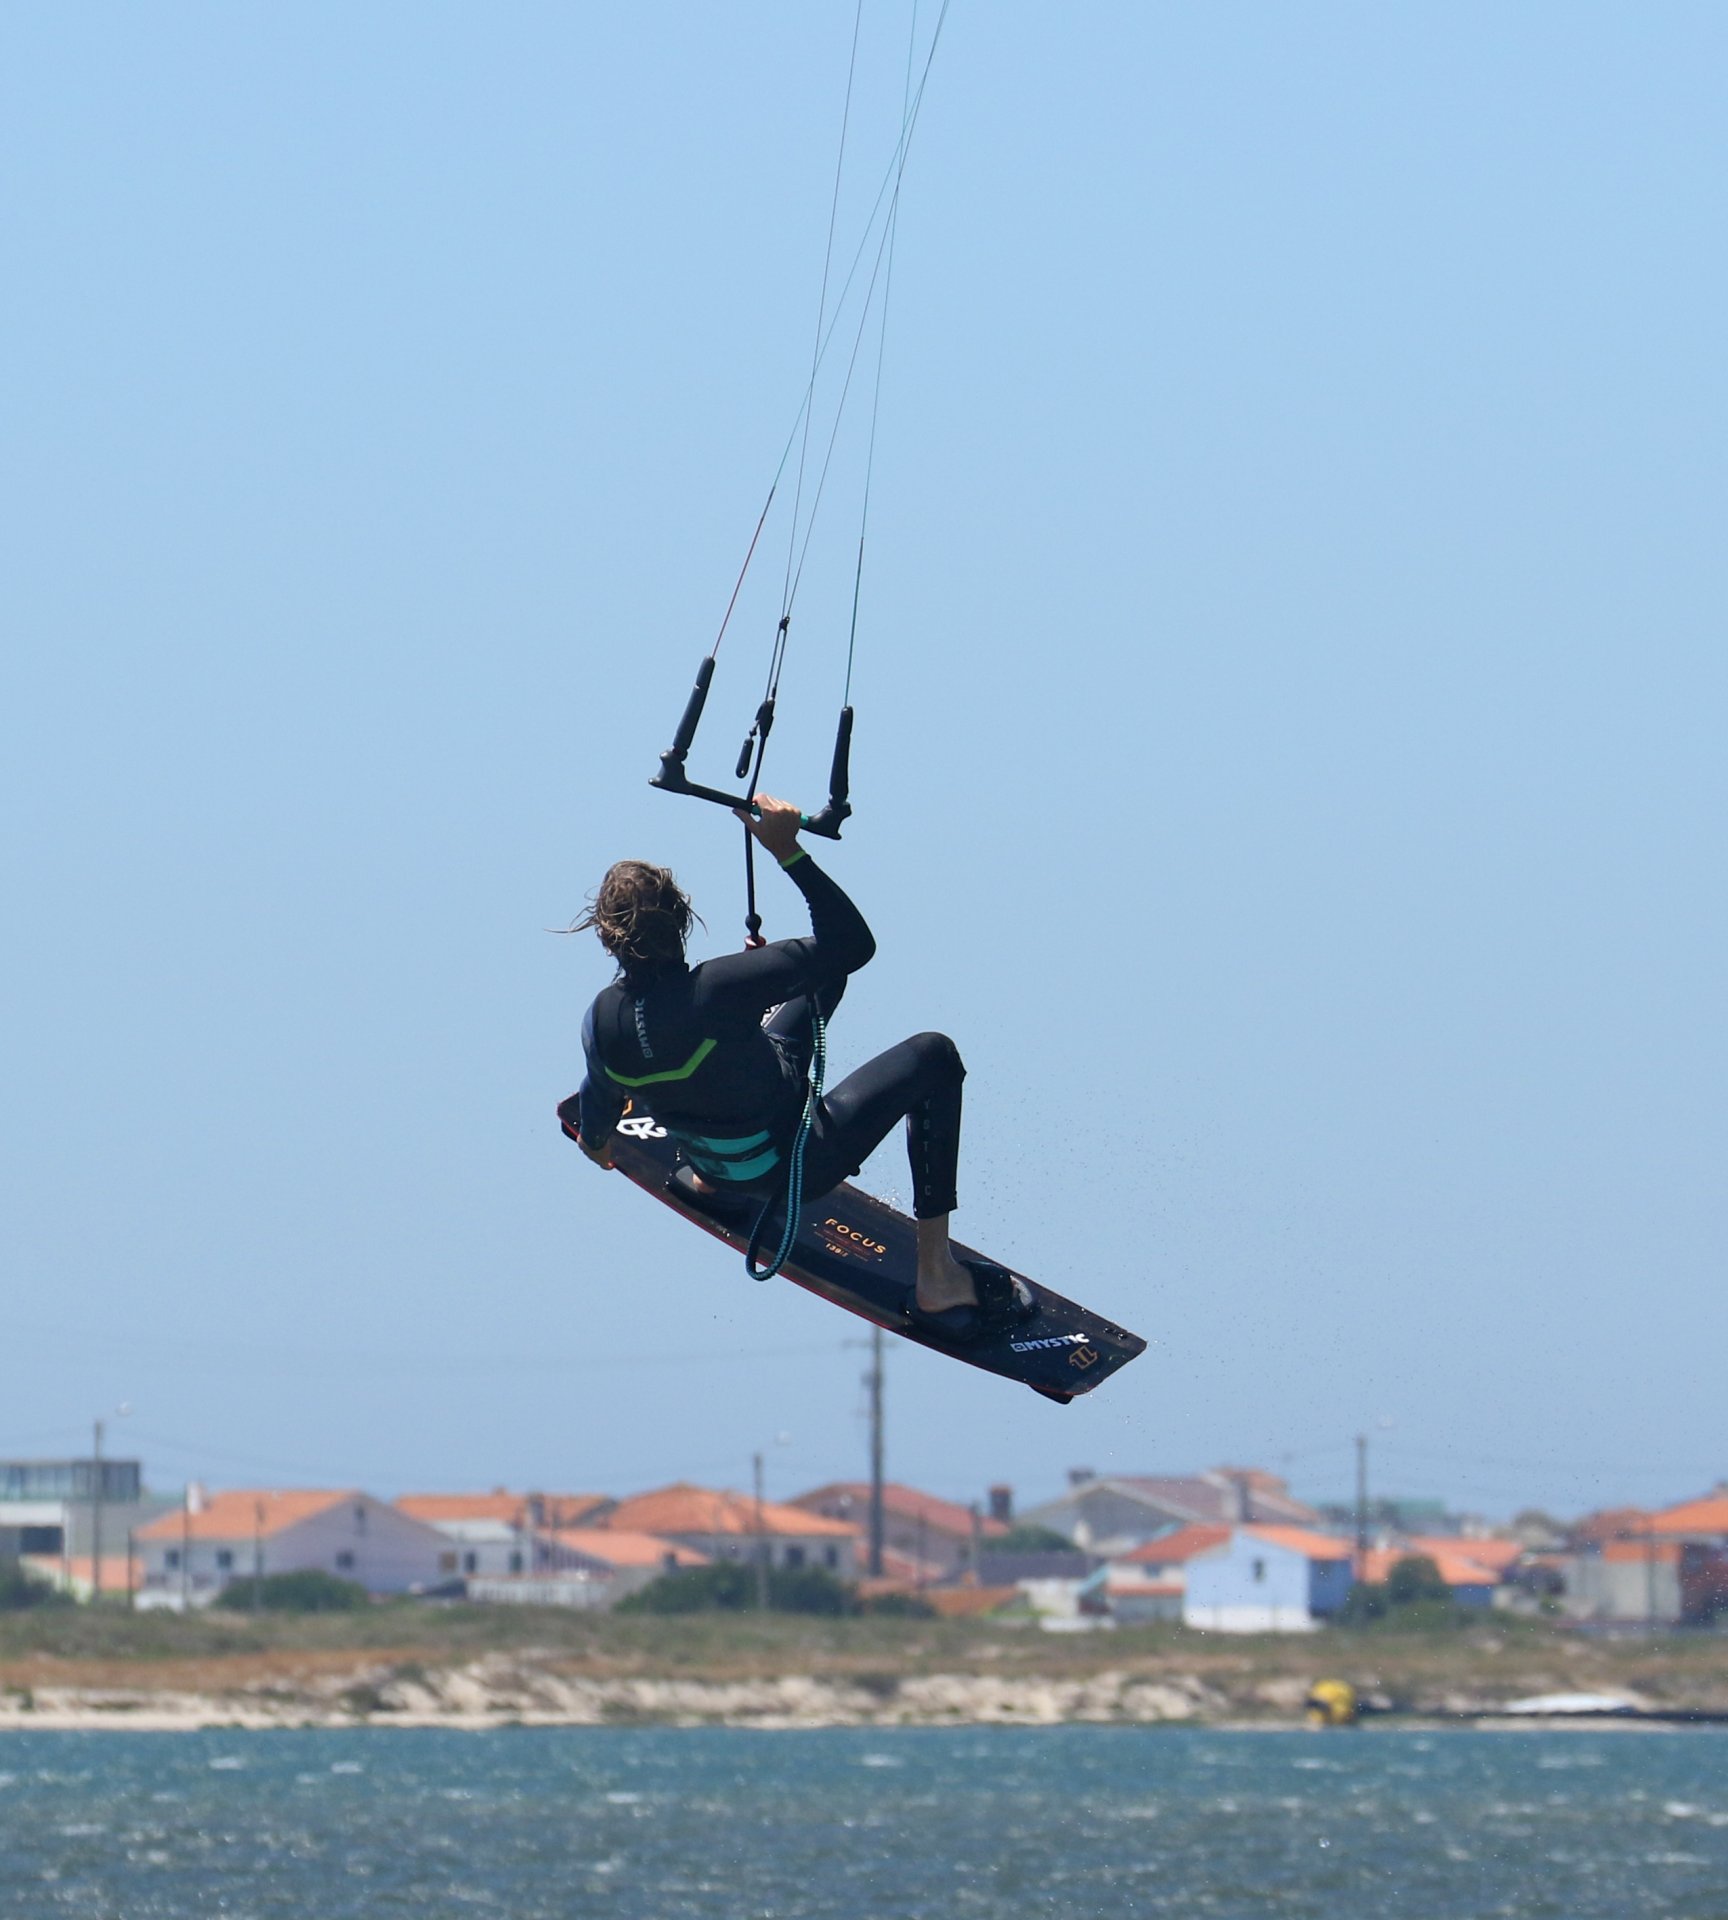
The Launch Pic A
You don’t need to go massive, but you do need a decent amount of hang time to make this work. Set up as per a usual front roll. Kite around 1 or 11 o’clock, good solid upwind edge, enough power that you’re feeling excited but not overwhelmed, and plenty of space with some deep water underneath you. You know from doing a single front roll how important the stamp is to get us rotating, but here you need to give special attention to the kite and our edge. Why? You want to go up and be supported rather than shoot off under the kite downwind. This means holding your edge for as long as possible, which means sending your kite and kicking into your front roll correctly.
First, the kite. You’ll want to give it a good send, but whilst doing that, you want to make sure it goes up over 12 o’clock to maximise lift and cut down on drift. This means feathering the bar out when you send it. You don’t want to dump power, but you want to be able to keep committed upwind on your edge until the kite is high. If you just hold your bar right in as if someone’s trying to steal it from you, the kite will not travel as much around the edge of the window, and you’ll get pulled earlier. Word of warning, though: If you dump too much, the kite won’t lift and will travel way too far back. Something to practice!
Next, your front roll. It’s always been about stamping yourself upwind of the board through your back heel whilst trying to get your head down to the nose of the board as the front knee lifts. Same again here. However, if you throw yourself into the rotations as if your life depends on it, you’ll give away your edge at the most crucial time. You need a more aggressive stamp, but in the same direction as normal – against your edge.
The kite and your kick work in harmony. Have a look at Christian, he’s kicked hard and extended his back leg and body up and thrown his shoulders down into the loop, not across. This means a lot of up. He’s also already steering the bar forwards to stop the kite from going any further back, knowing that shortly he’ll be releasing his back hand.
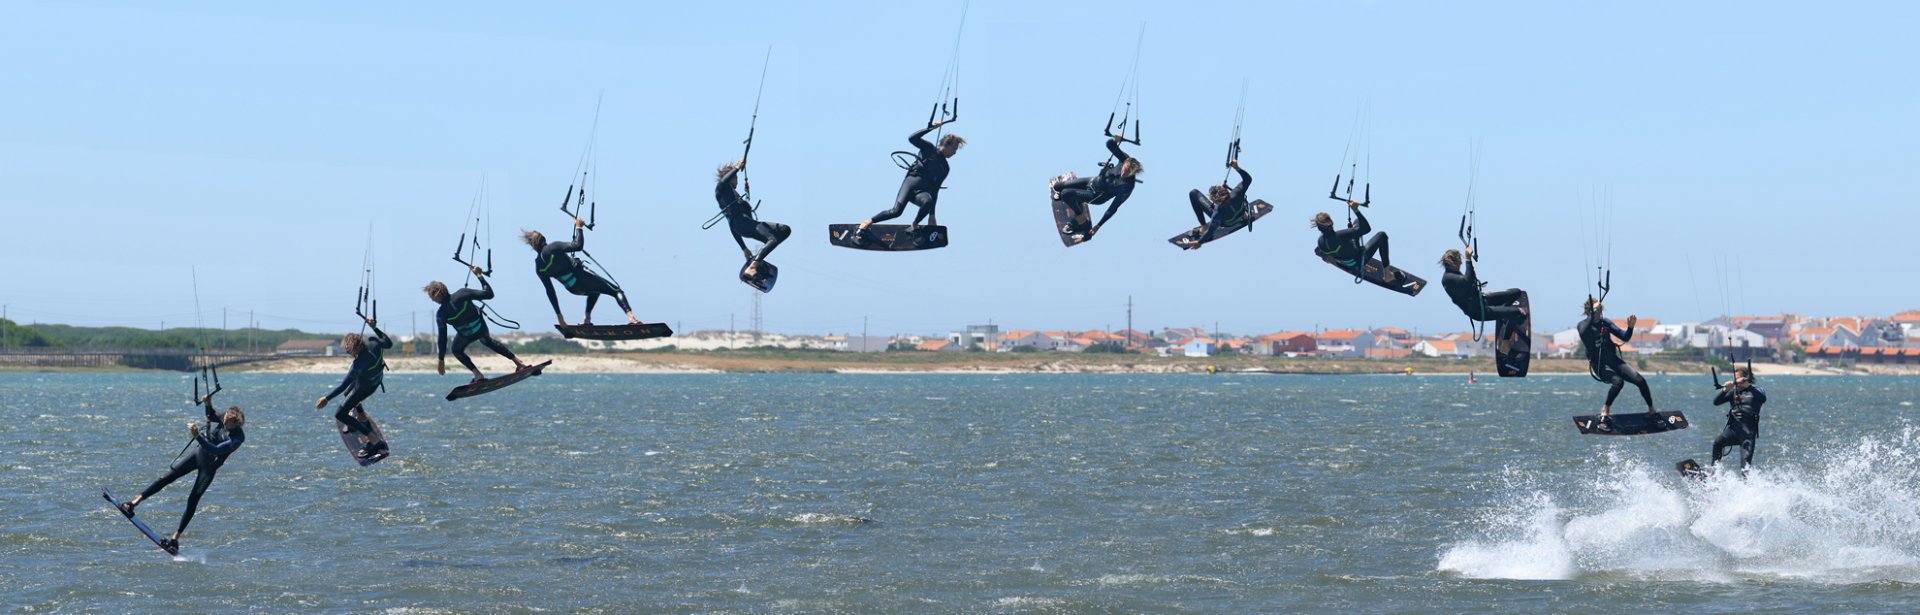
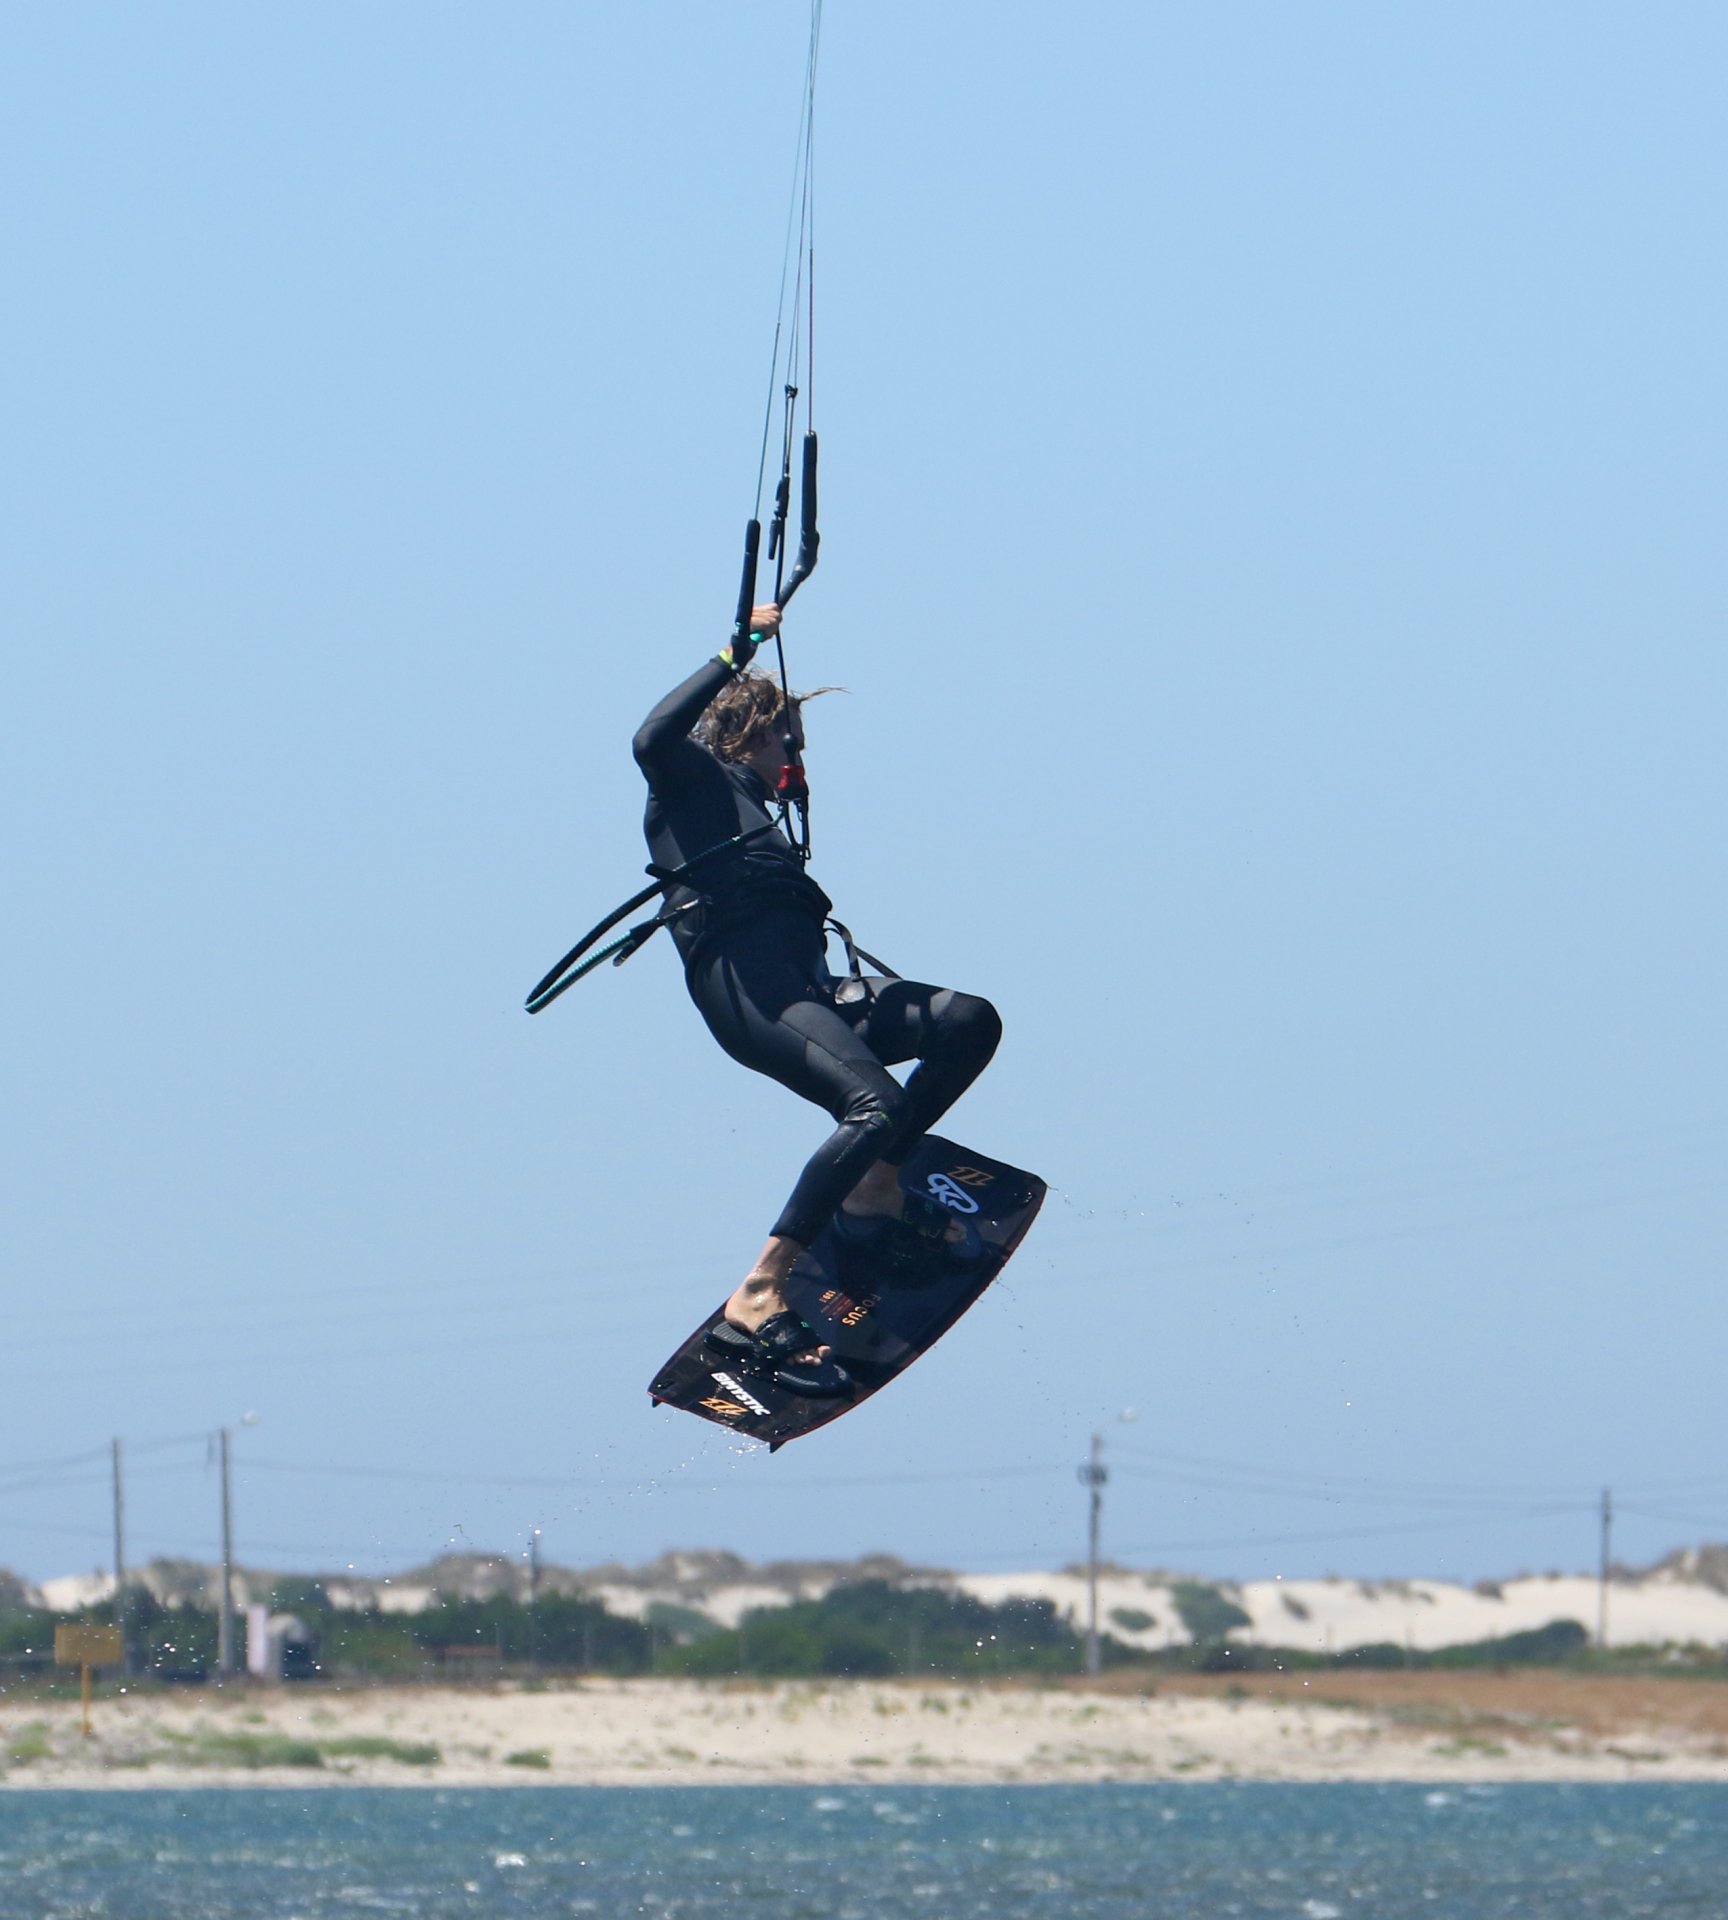
Tail Watching Pic B
Grabbing should be as per usual. By that, we mean both the timing and the method. In a front roll, there is a natural order. As you start to rotate and lift your legs, the back leg will come towards you as you start to face upwind, as a result of the shoulders going down and forwards to the nose. This gives you the perfect opportunity to release your back hand and look at the tail where you’d like to grab it. You can see in the photo the natural “tilt” of the rotation and how the tail of the board offers itself to Christian. Make sure you keep the bar on the sweet spot, as you don’t want to lose any support.
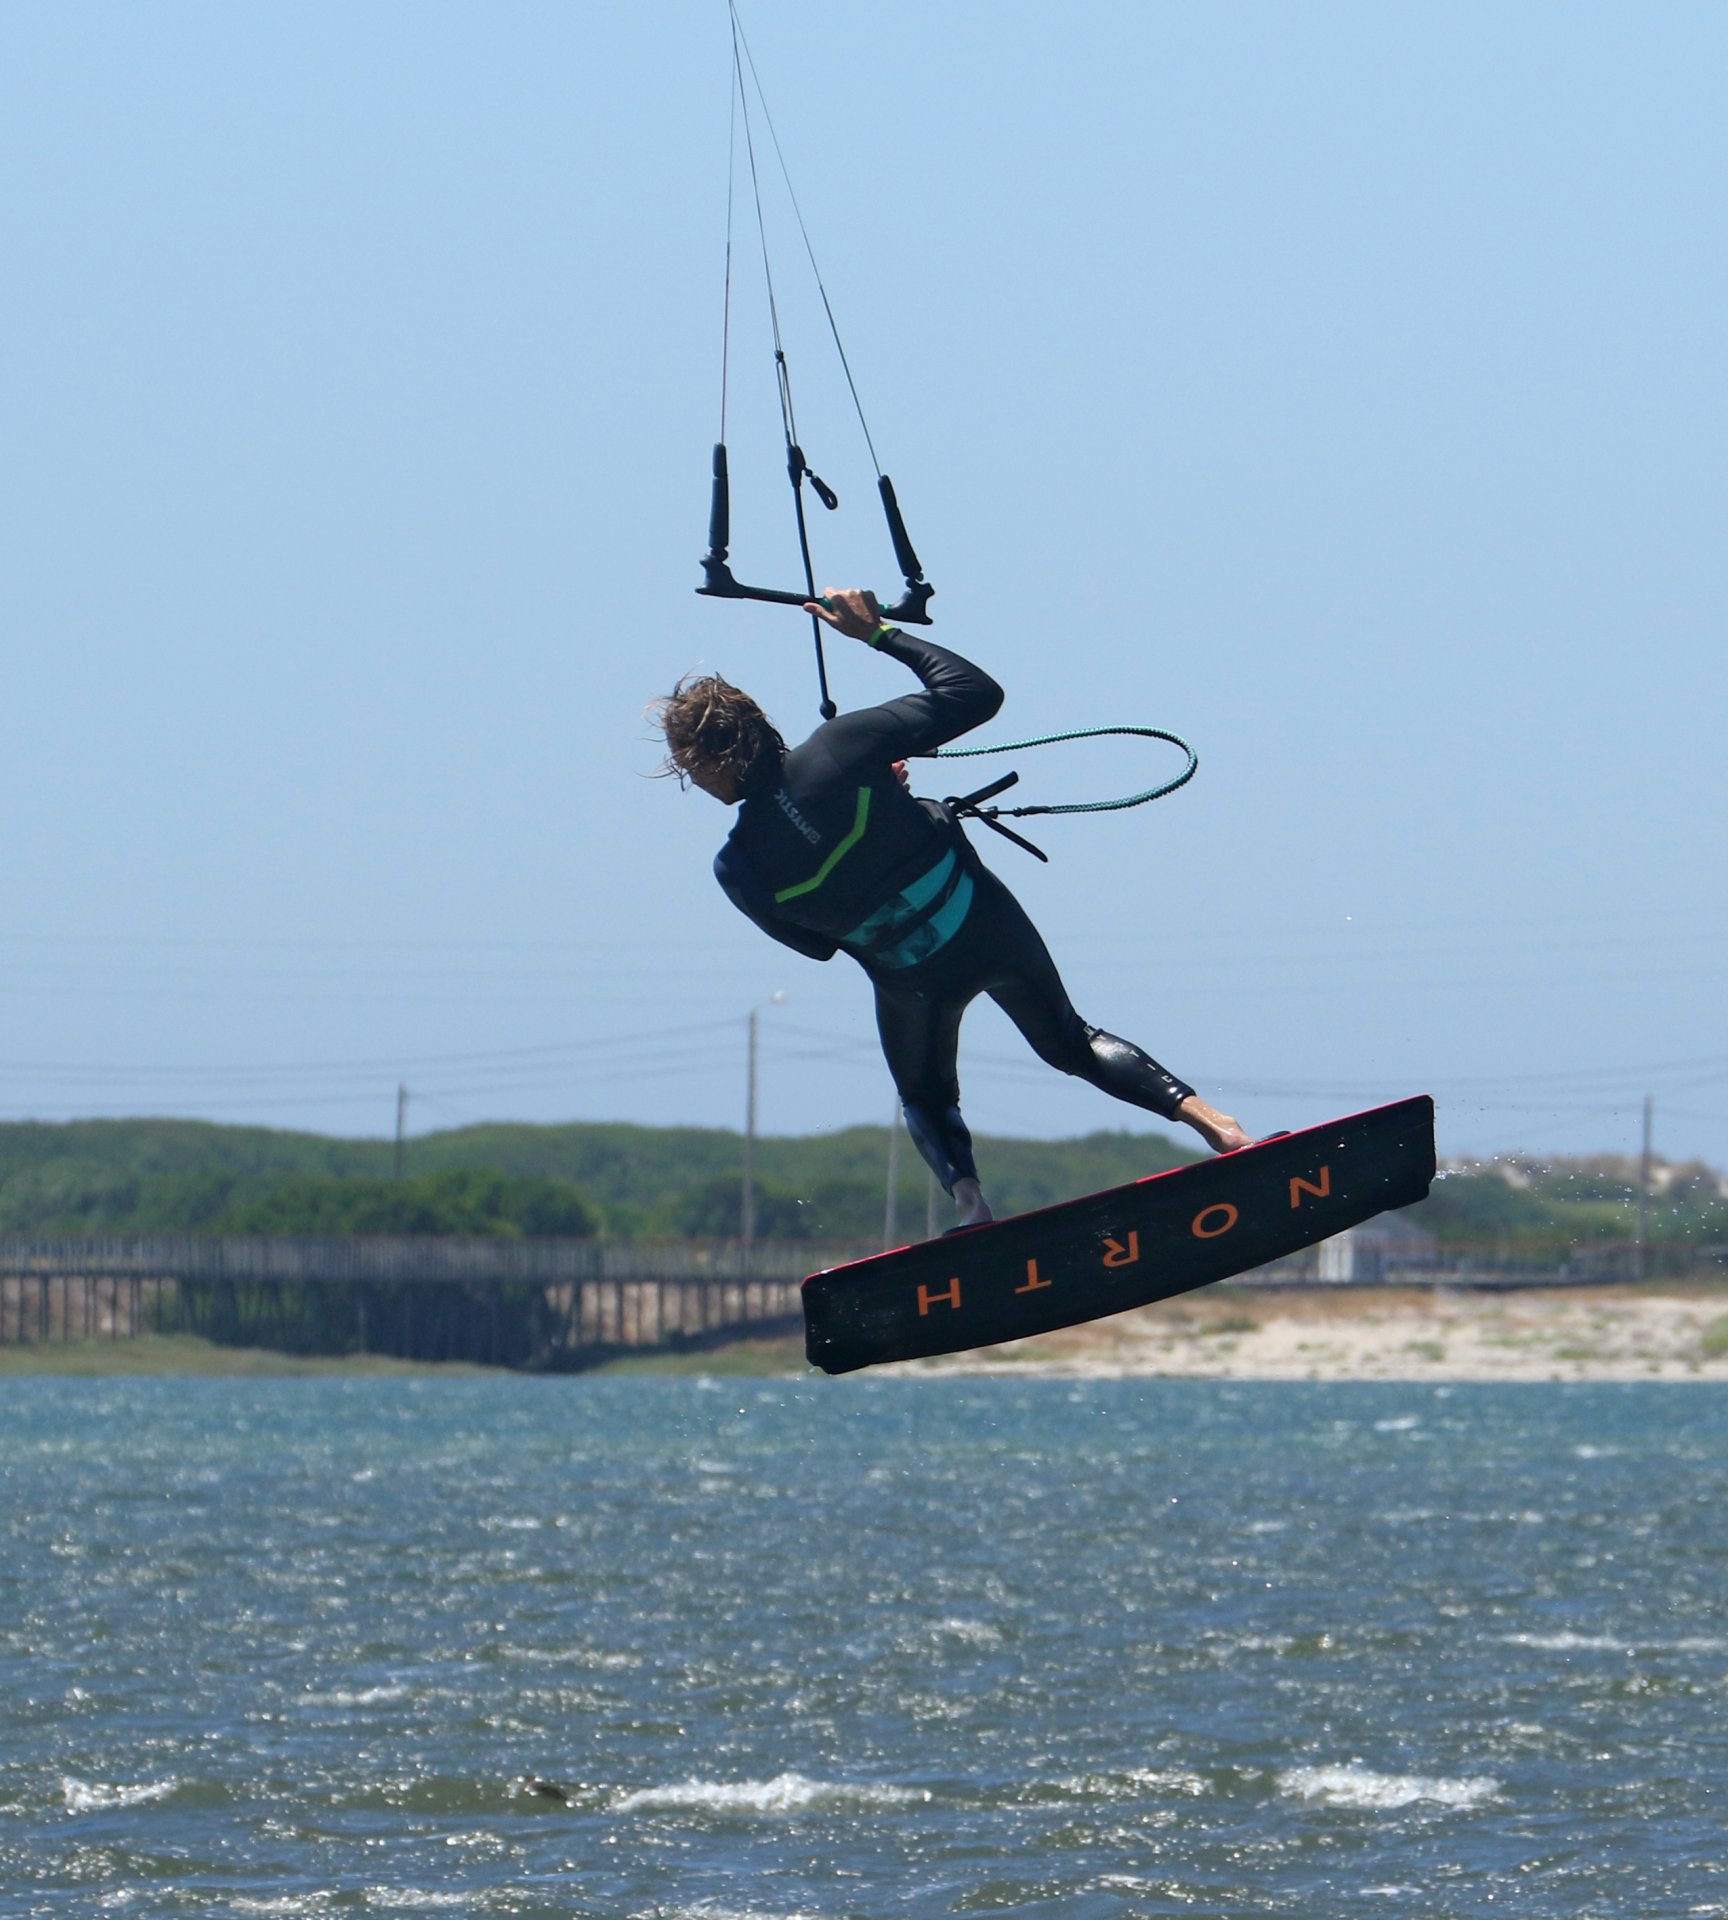
Head in the Game Pic C
Once you’ve got the grab, it’s time to turn all of your attention to rotating, getting your head in the game both literally and figuratively. On the literal side of things, you should look over your back shoulder. This won’t speed up your rotation, but it will prevent it from slowing down, and that’s a big plus. Figuratively, you need to think about the kite. If you gave the kite a decent send and it’s a 10 or smaller, it’s probably still behind you. You must get it moving forwards over 12 as this will help you into your second rotation and give you more hang time. You can see that Christian has his grab, his knees are up, he’s looking over his back shoulder, and he’s steering the kite forwards with his front hand. It’s worth noting that Christian is actually using his thumb on the opposite side of the bar to help steer. This way, he can steer the kite forwards without sheeting in or out.


Slowly Unravelling Pic D
As long as your head is turned and the kite is not behind you, you will rotate into a second roll. However, inertia will be lost, momentum waning, and you’ll be slowing down. In this picture, Christian is about a quarter of the way into number two, he can see upwind as his head is still turned, and he’s peering hopefully over his back shoulder as everything slows down. However, rather than wistfully contemplating his kick into the move, he instead focuses on how to finish.
Leading Out Pic E
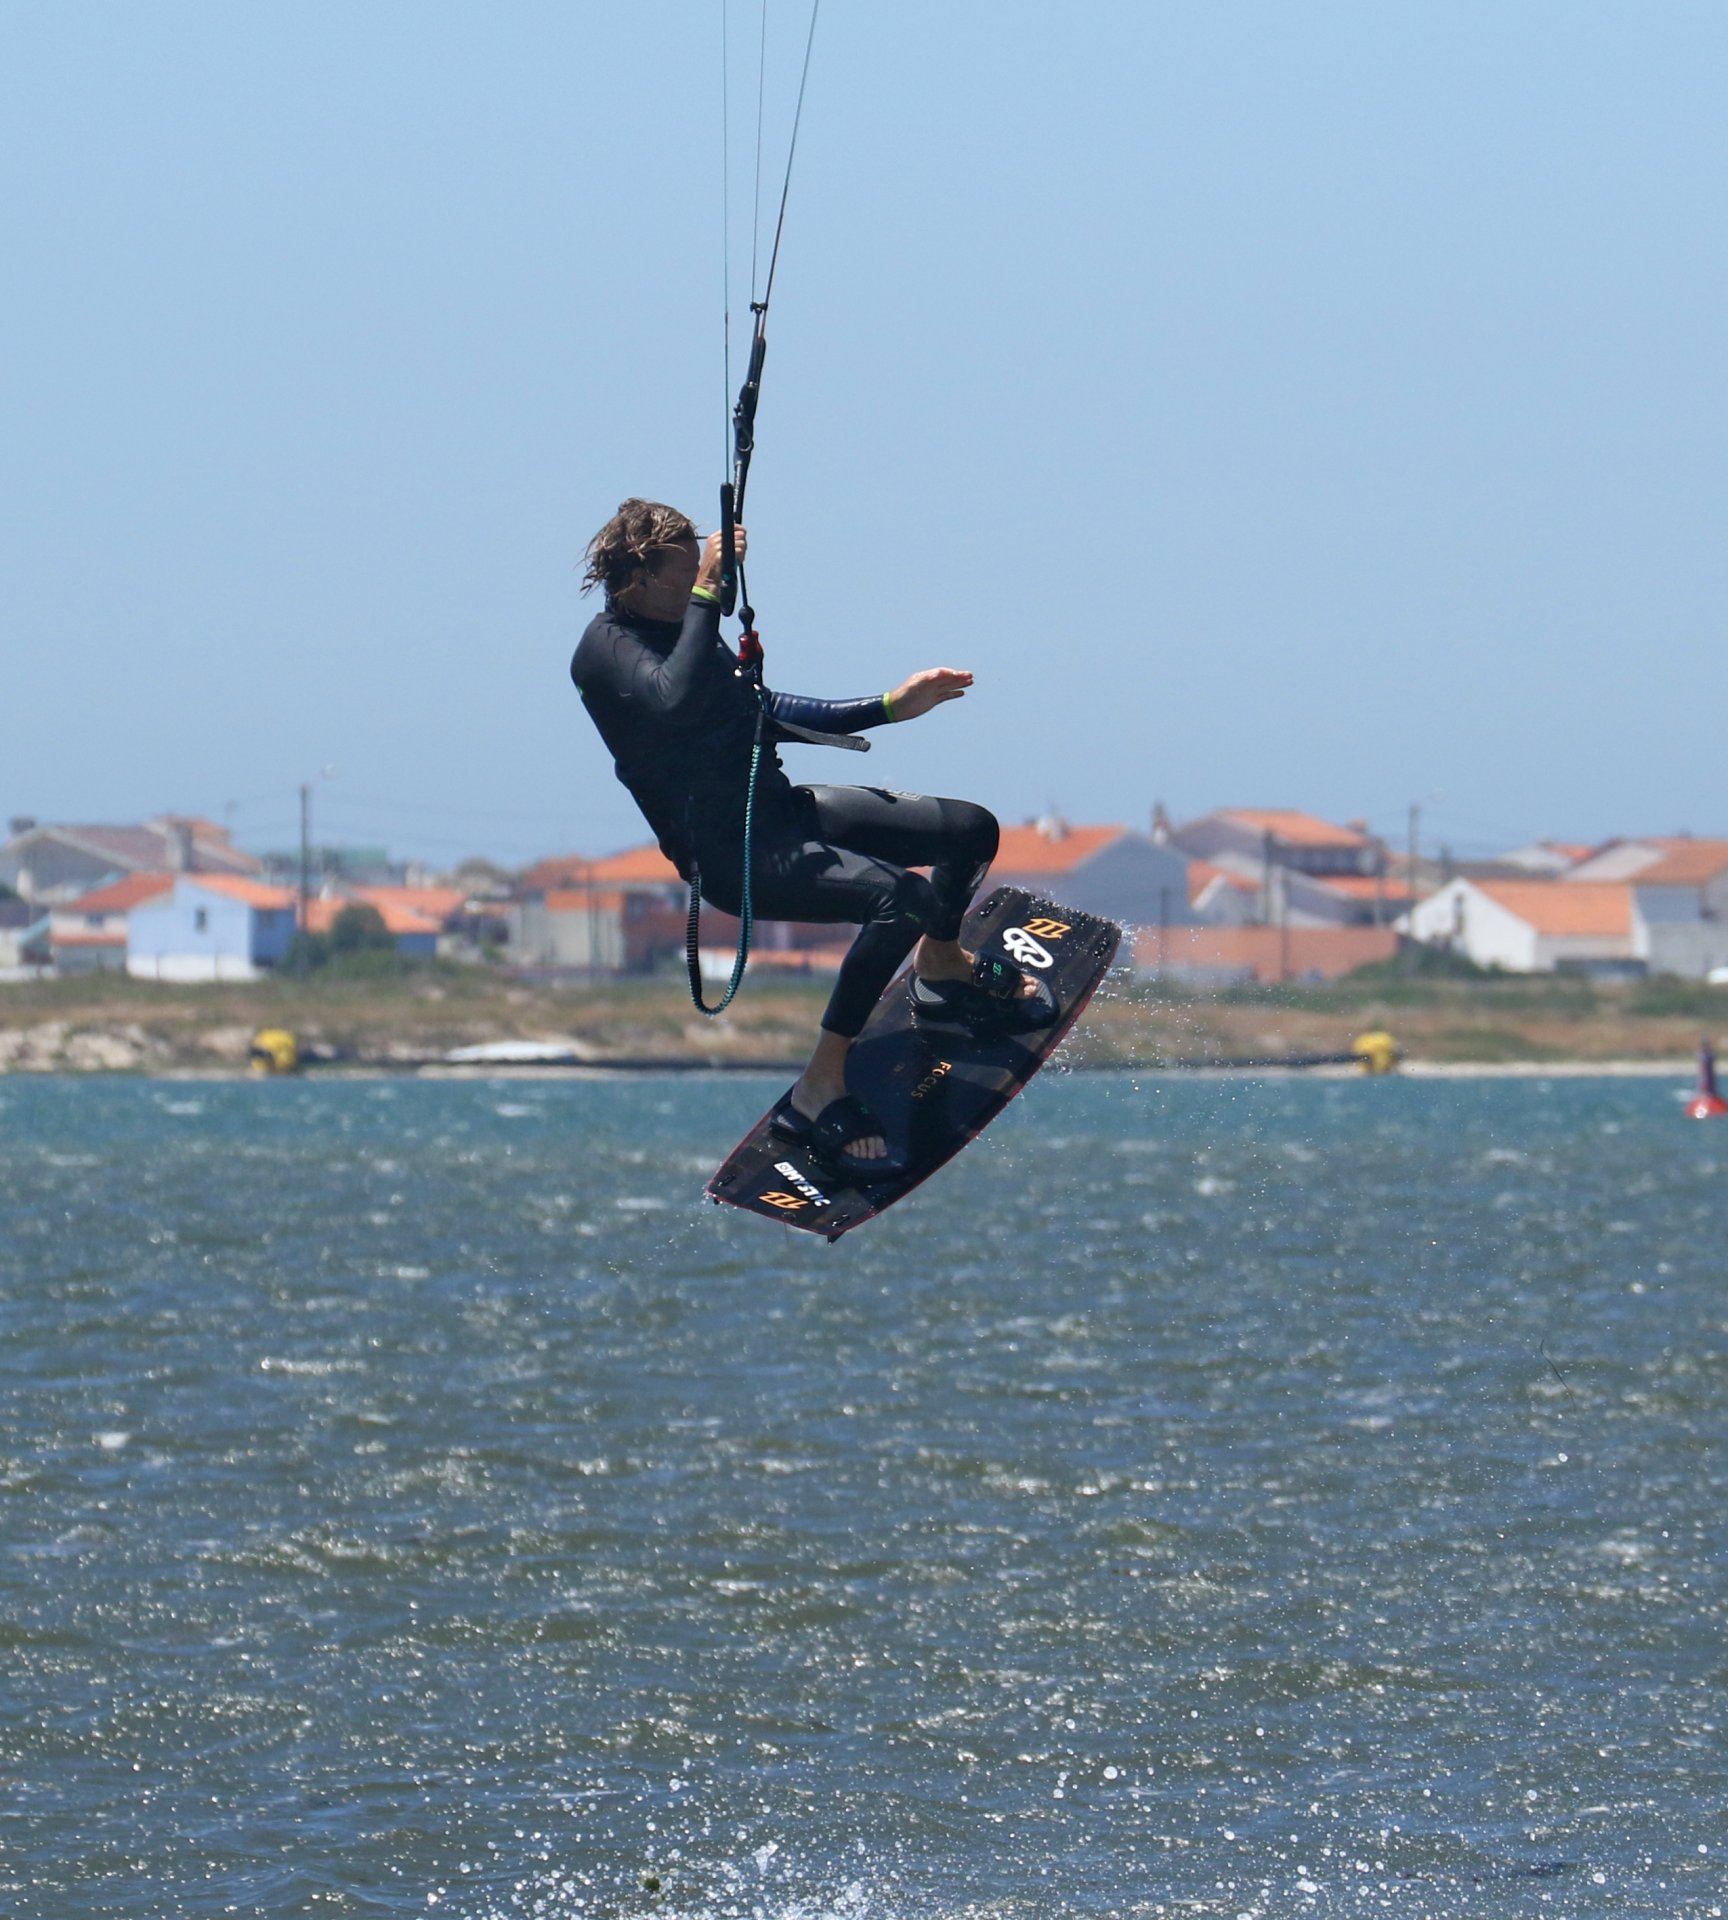
And this, ladies and gents, is where we come all the way back to the wonderful stalled front roll we cited in the intro. You’ll use the very same skills to finish this off. The one difference being that you won’t have actually stopped, and you want to make sure that you don’t! Your first objective is to get some pull from the kite. If it’s diving, it will pull you downwind, and with this pressure on your harness hook, you’ll have a point around which to turn. Your second objective is to show yourself the way. Where the head goes, the body follows. Here is no different. Get your eyes on the prize, focus on whereabouts you think you’ll land, and lead with your head. You can see that Christian’s board is pointing into the wind, as is his bar. However, his head is looking forwards and down, forcing his back shoulder down, which balances everything perfectly around his harness and the pull from the kite. It’s probably a good time to release your grab!
Bring It Through Pic F
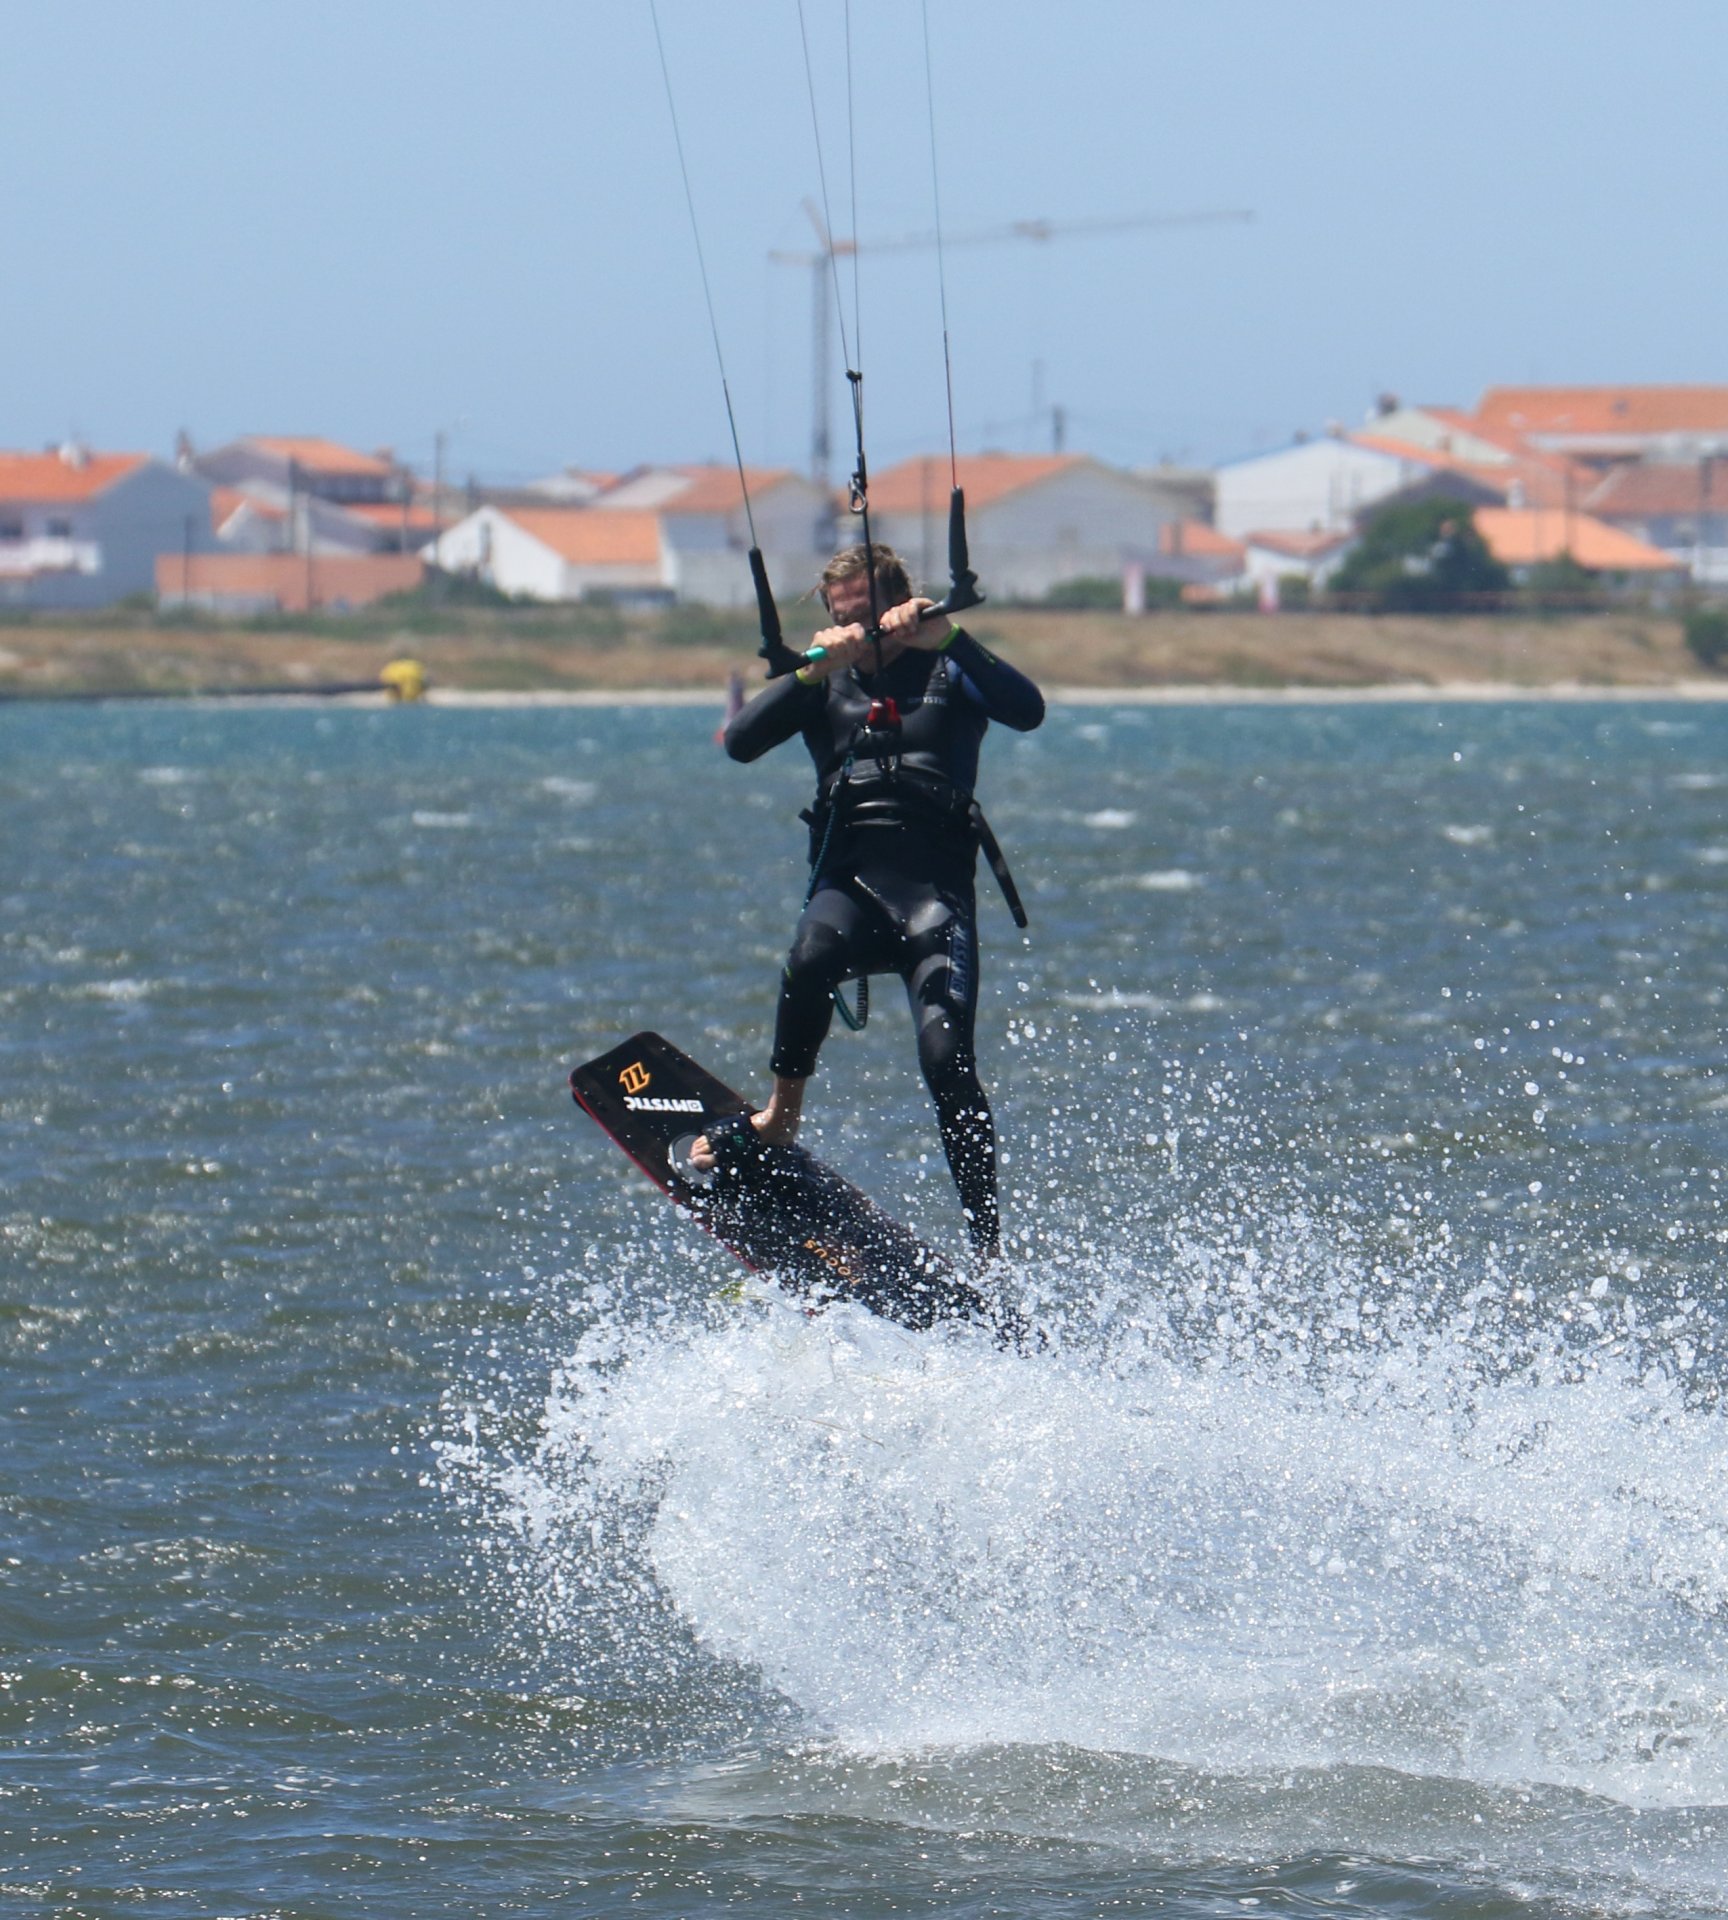
And the result. With the kite pulling and the head leading, you can pull your front leg and the board through from upwind until they’re beneath you and ready for landing. The action is similar to bringing the board through for toeside, as you’re not using your upper body, just twisting your lower body, hips, knees, feet and board. Action Man would be proud. Looking at Christian, you can see that his lower half is all lined up and pointing downwind. He’s dropped his undercarriage and will land on and over the board, nice and flat!
Top Tips
The best place to start is making sure that the doubles are in the bag and working well. If it’s been a while, start with some singles but rather than controlling your spin, give it everything and keep the bar on the sweet spot throughout. You’ll find yourself over-rotating. From here, you can then be more aggressive with your send and your kick-off. The height paired with the extra momentum should get you most of the way around.
Then add the grab as you would for a single front. The difference of only having one hand on the bar is that you won’t feel where the kite is as obviously as if you had two hands on the bar. Hopefully, from the timing you got from using two hands, you can now commit to pulling the kite forwards with one hand, which will give you the ability to come all the way around and stomp it.


Have a look at the sequence and videos to get the move etched in your psyche!
Common Problems
If you’re getting most of the way around but landing on your back, hip or bum. This is a sure sign that you’re either not keeping the bar in or not getting the kite back above you after take-off. With the kite left behind, it is easy to get the spin as you’ll pivot around the lines, but you’ll have no float and no forward momentum, so really concentrate on flying the kite forwards.
If you’re missing the grab. This can be a positive as it means you’re concentrating on getting the kite forwards. However, there is ‘the’ perfect moment to grab, so make sure you seize the opportunity when it’s gifted to you. Once that moment is past, you won’t be able to see the tail, and it’ll be more difficult to grab.
If you’re getting height and float but then stalling the second rotation. Chances are that you’re letting the bar out as you come around the first loop. This is a habit that many kiters get into, dropping out of a loop rather than pulling out of a loop with the power from the kite. Once again, concentrate on keeping the bar in throughout the loop and commit to diving the kite to complete the second rotation.
Keystones
- Solid edge, good speed, positive send.
- Level bar and kick super hard upwind.
- Drop front shoulder, lift legs, grab tail.
- Turn head, keep bar in and steer forwards.
- Look, lead and dive kite. Bring legs through.
This technique article was in Issue 88 of IKSURFMAG.
Related


By Christian and Karine
Christian and Karine have been working together as a coaching team, running improver to advanced kitesurfing clinics since 2003.
