
Back Loop from Blind
Technique / Intermediate

Introduction
Some time has passed since we last covered a move that fits into the loosely labelled hooked-in freestyle category. Not everyone is keen on unhooking for various reasons, whether it be the conditions they ride in, the kit they own, the potential consequences, or even that it just doesn’t rock their boat - but that doesn’t mean that freestyle moves are off limits. These tricks are close to our hearts as they remind us of good times and some unique moments. Chris Valentine, the pioneer of kiting in Venezuela (even though he hails from Bognor) had an unbelievable repertoire of such moves and beat many a dangle passer in the Nationals. And Ali Barret pulled a plethora of hooked magic in comps when he was injured. Usually, this would be a Karine classic, but seeing as she must ride in boots as she slowly heals her foot, we’re afraid that you’ll have to put up with the other half of us…
To confirm what you’ll be attempting, this will be a back loop using the kite, taking off from blind and landing heelside. Suffice to say that riding blind is a must, back loops will help, and straps will be loads easier than boots as you need to be able to adapt your position for take-off. And just to be picky the take off is crucial, as it must be from blind – we’ll discuss this further on in the article.


It just wouldn’t be the same if we didn’t first look at the individual parts of this move that can make or break it!
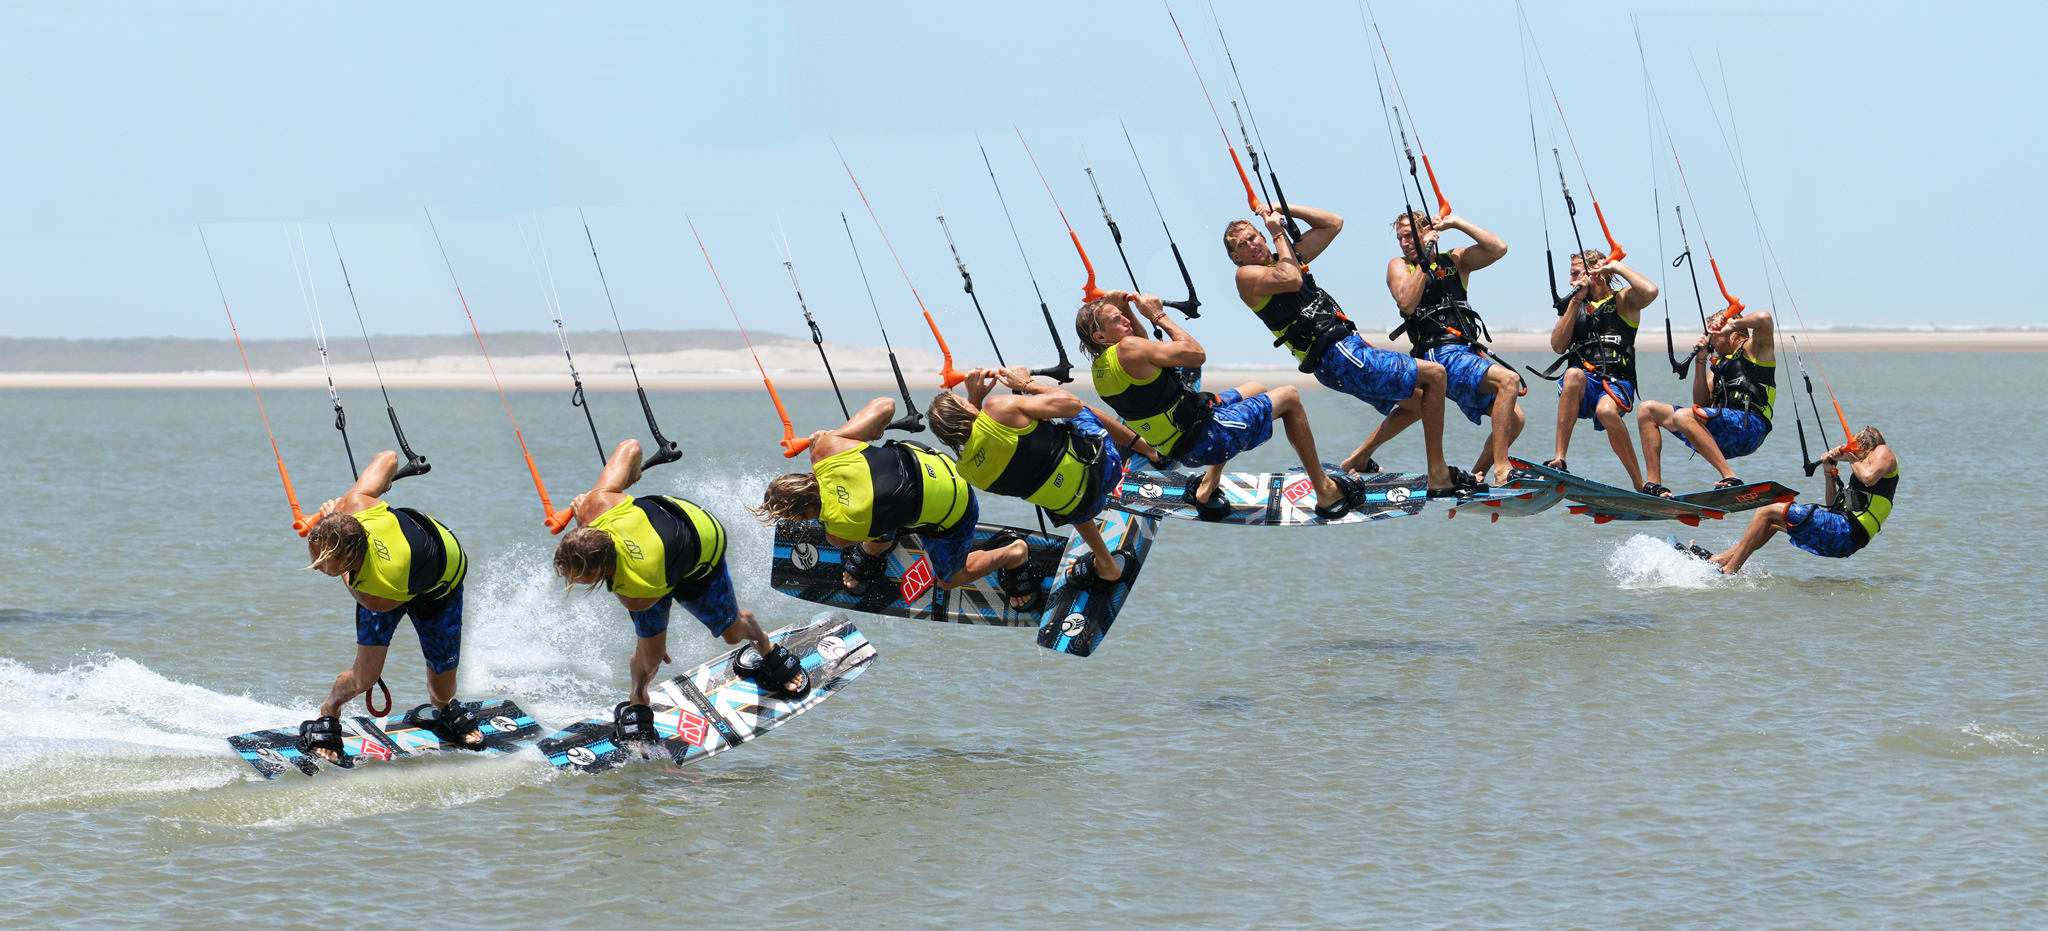
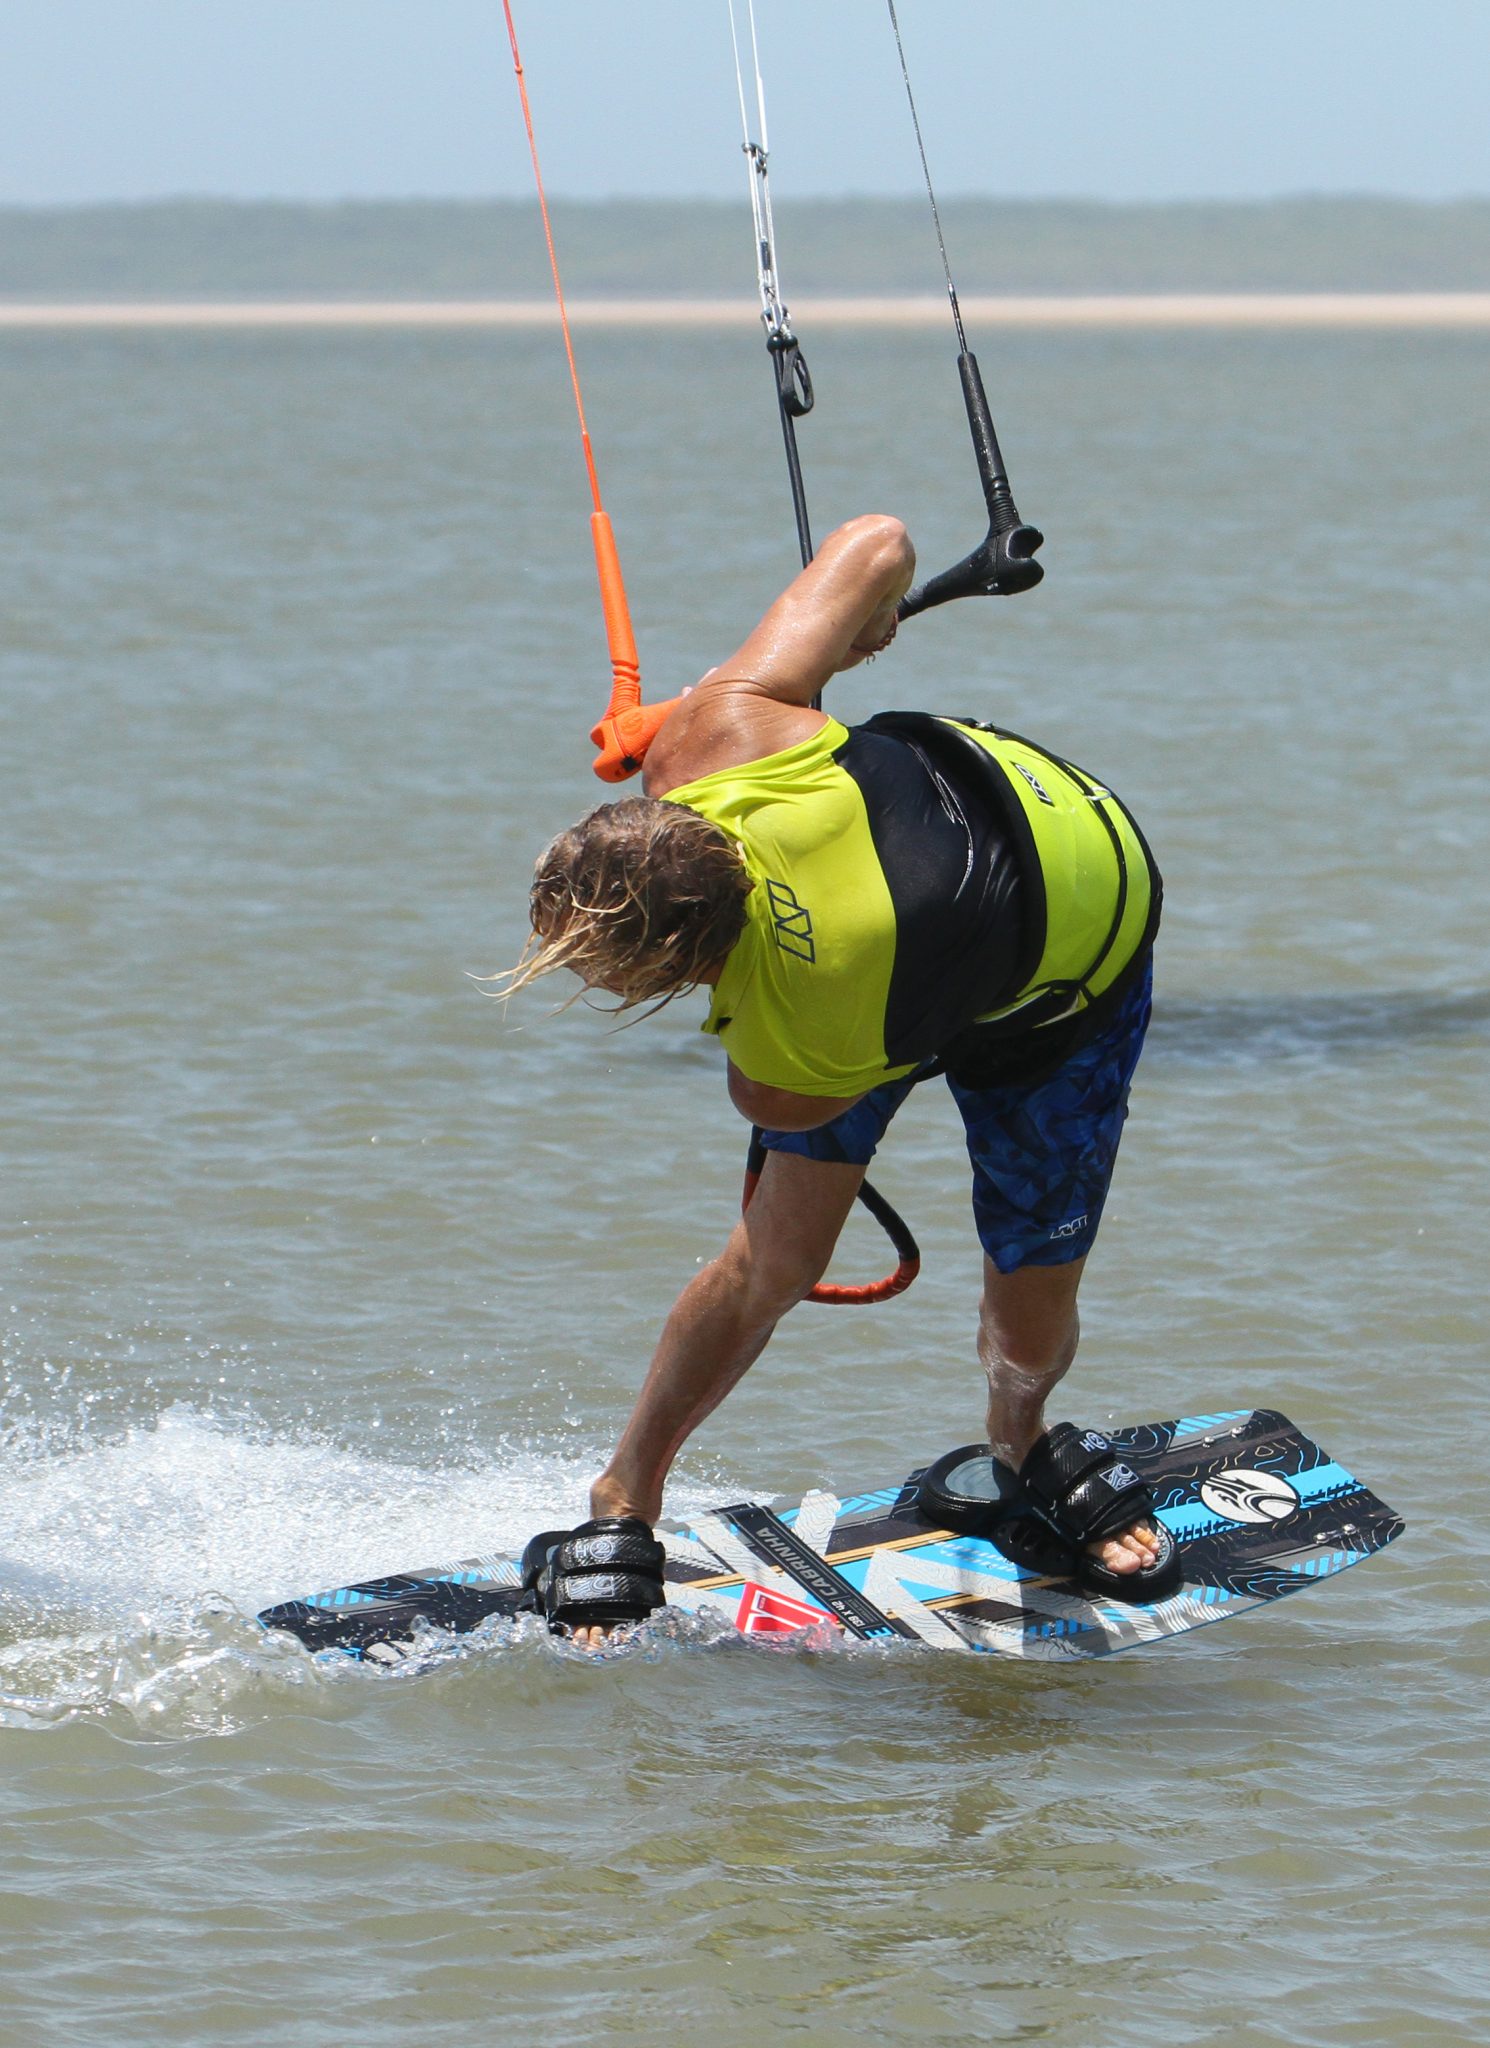
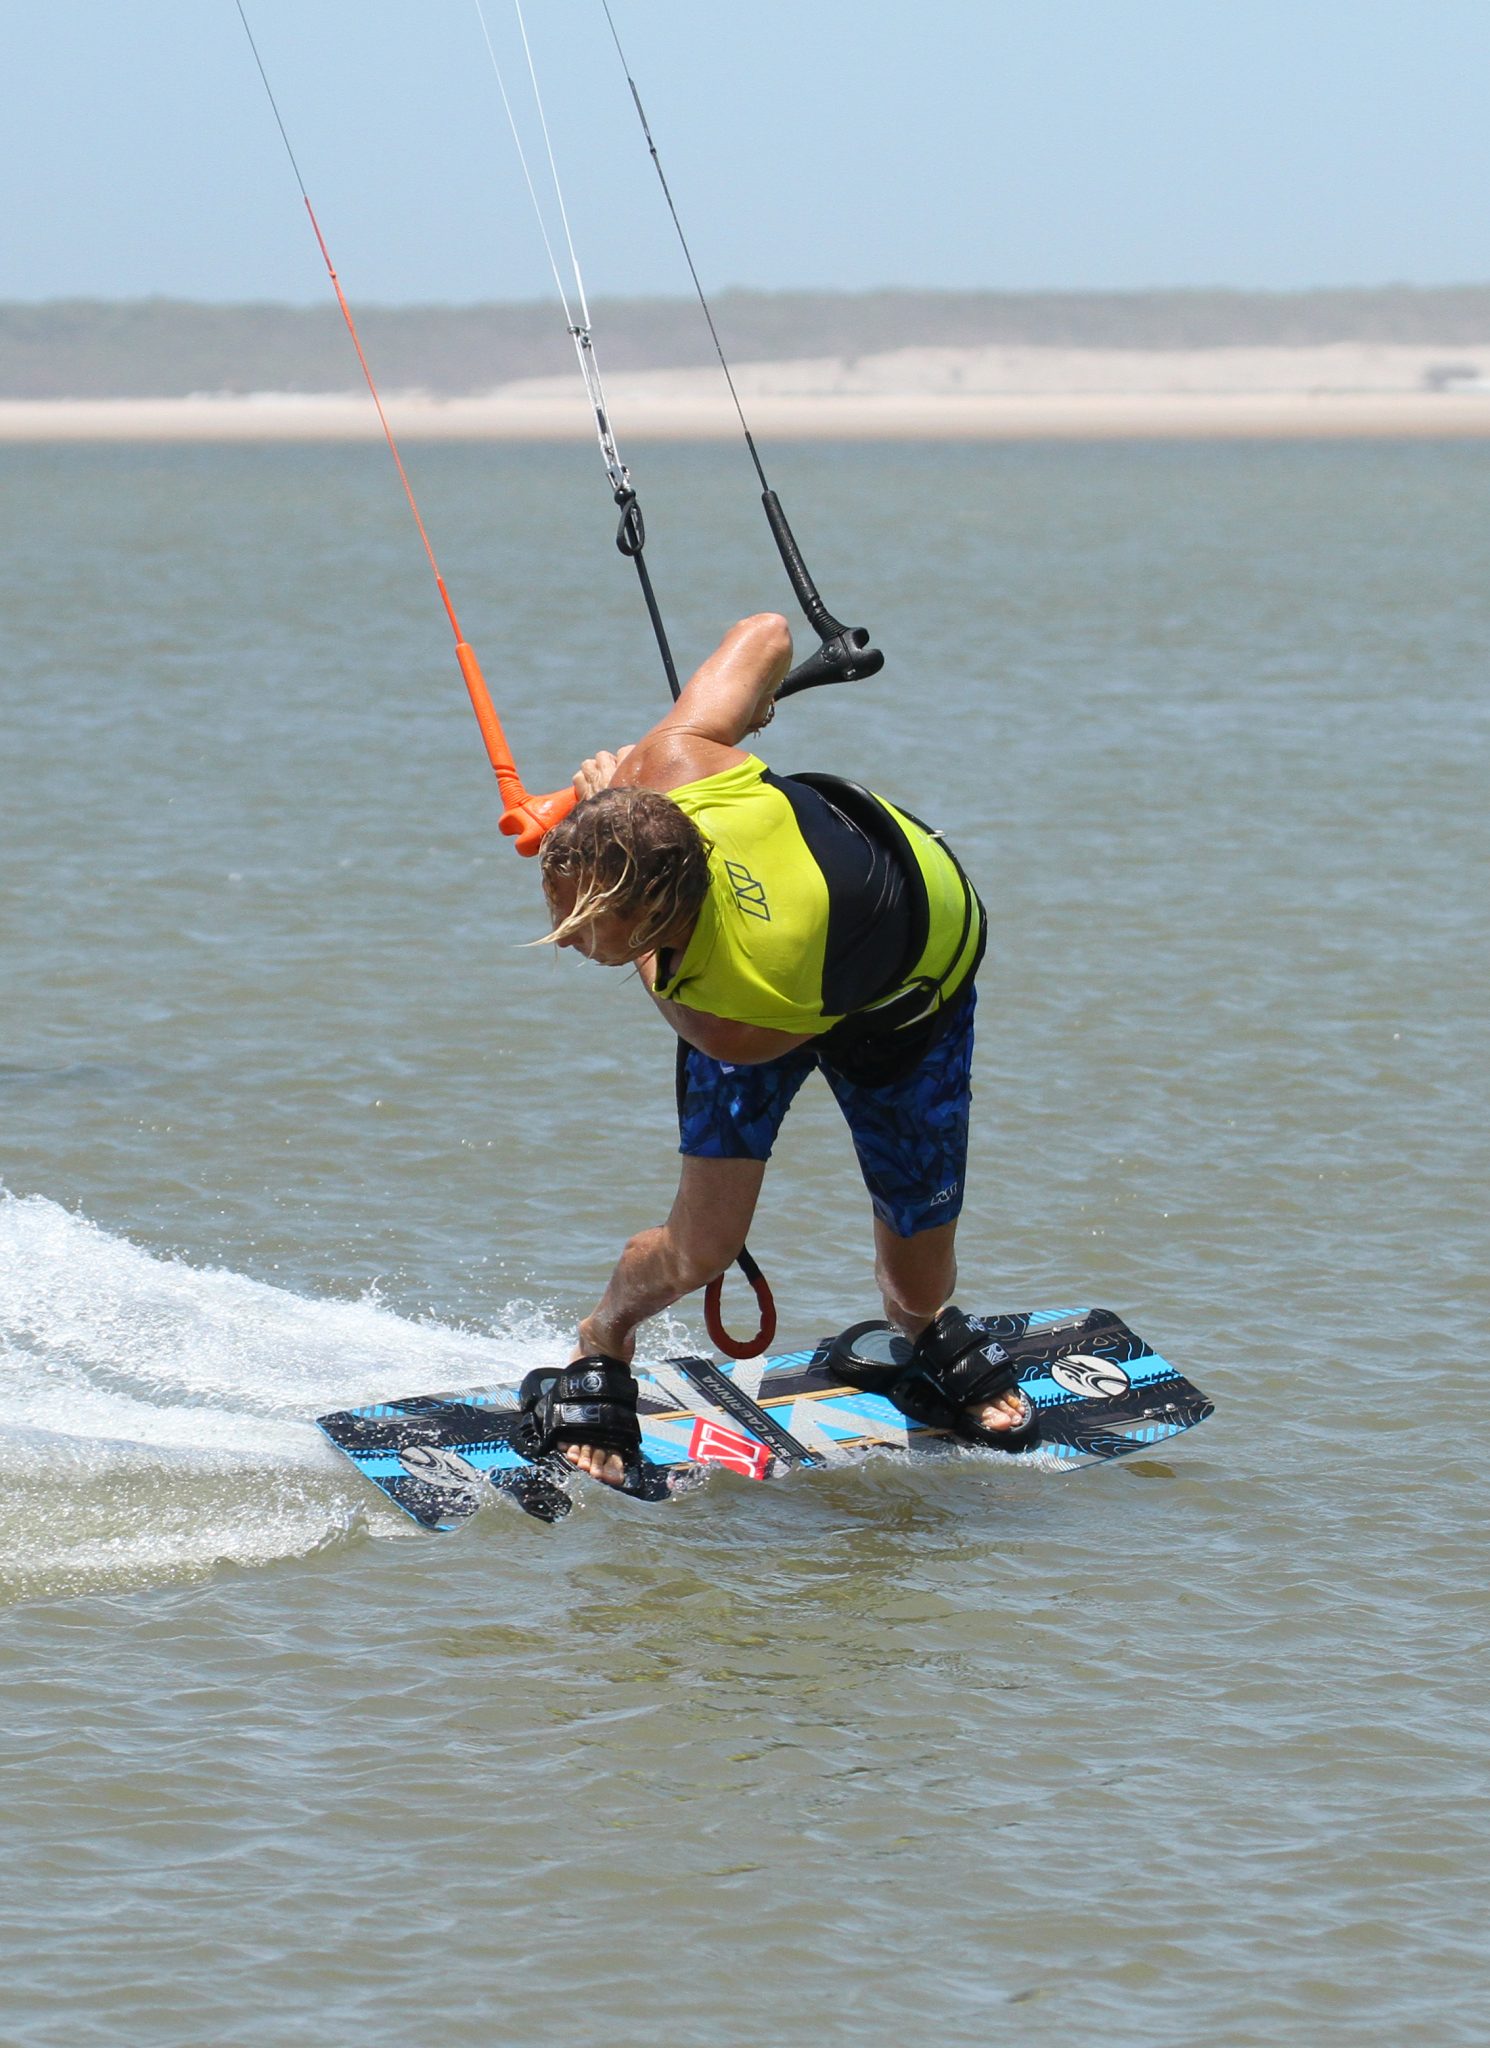
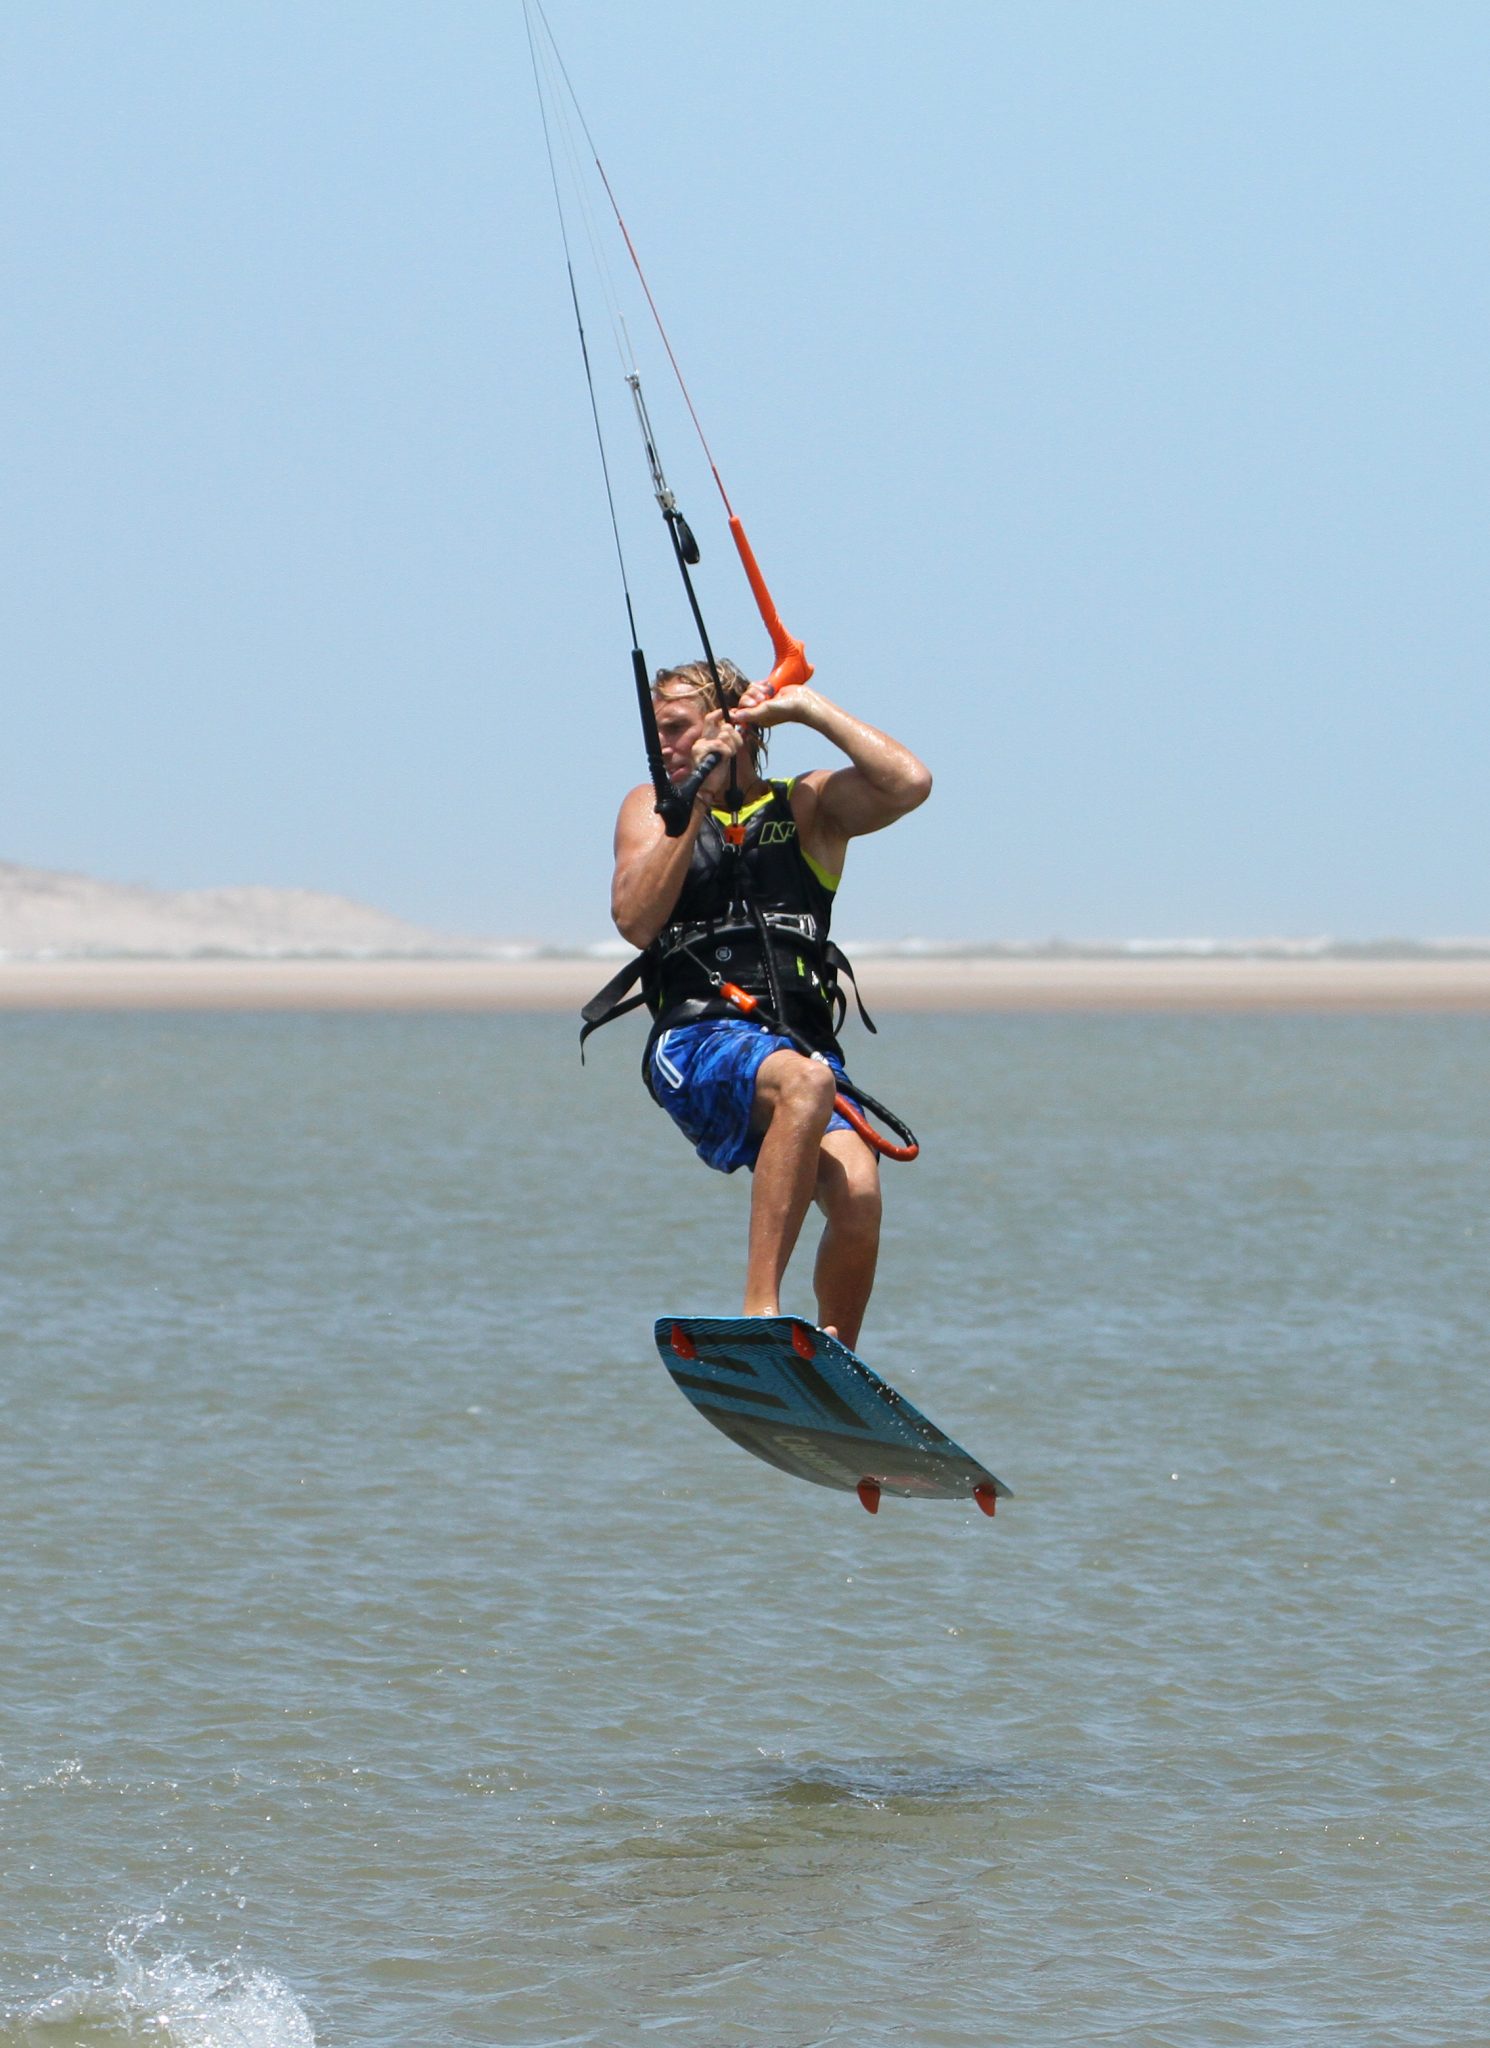
Riding Blind – 2 Hands Pic A.
There’s a lot here, so bear with us. You’re intending to perform a jump, so a modicum of speed is essential. The simplest way to carry momentum into this is to pop to blind with a bit of velocity so that you can use it for your take off. The tricky bit for most is getting into an effective blind position with both hands on the bar. We’ve all seen the rider that casually cruises across the bay, steering the kite with both hands while looking totally at ease. No doubt if you’ve tried to emulate this relaxed look it’s resulted with you tied up in a hernia inducing knot. How to make it more comfortable? You’ll never reach the bar while blind unless you trim your sweet spot down towards you, so this is THE place to start. Twisting your shoulders down and around will have the magical effect of lengthening what would normally be your free arm. Grabbing the bar near the end, not centred will also help, and loosening your straps a tad so that your new front foot can twist in the strap should avoid anything going “ping”. Looking at Christian you can see how his leading foot is twisted in the strap, his left shoulder is rolled down and around, his head is up and facing downwind, while the bar is in close and he’s got his back hand near the end while his front remains centred. This way he can maintain an edge, speed and tension in the lines. His kite is around the 11 o’clock mark.
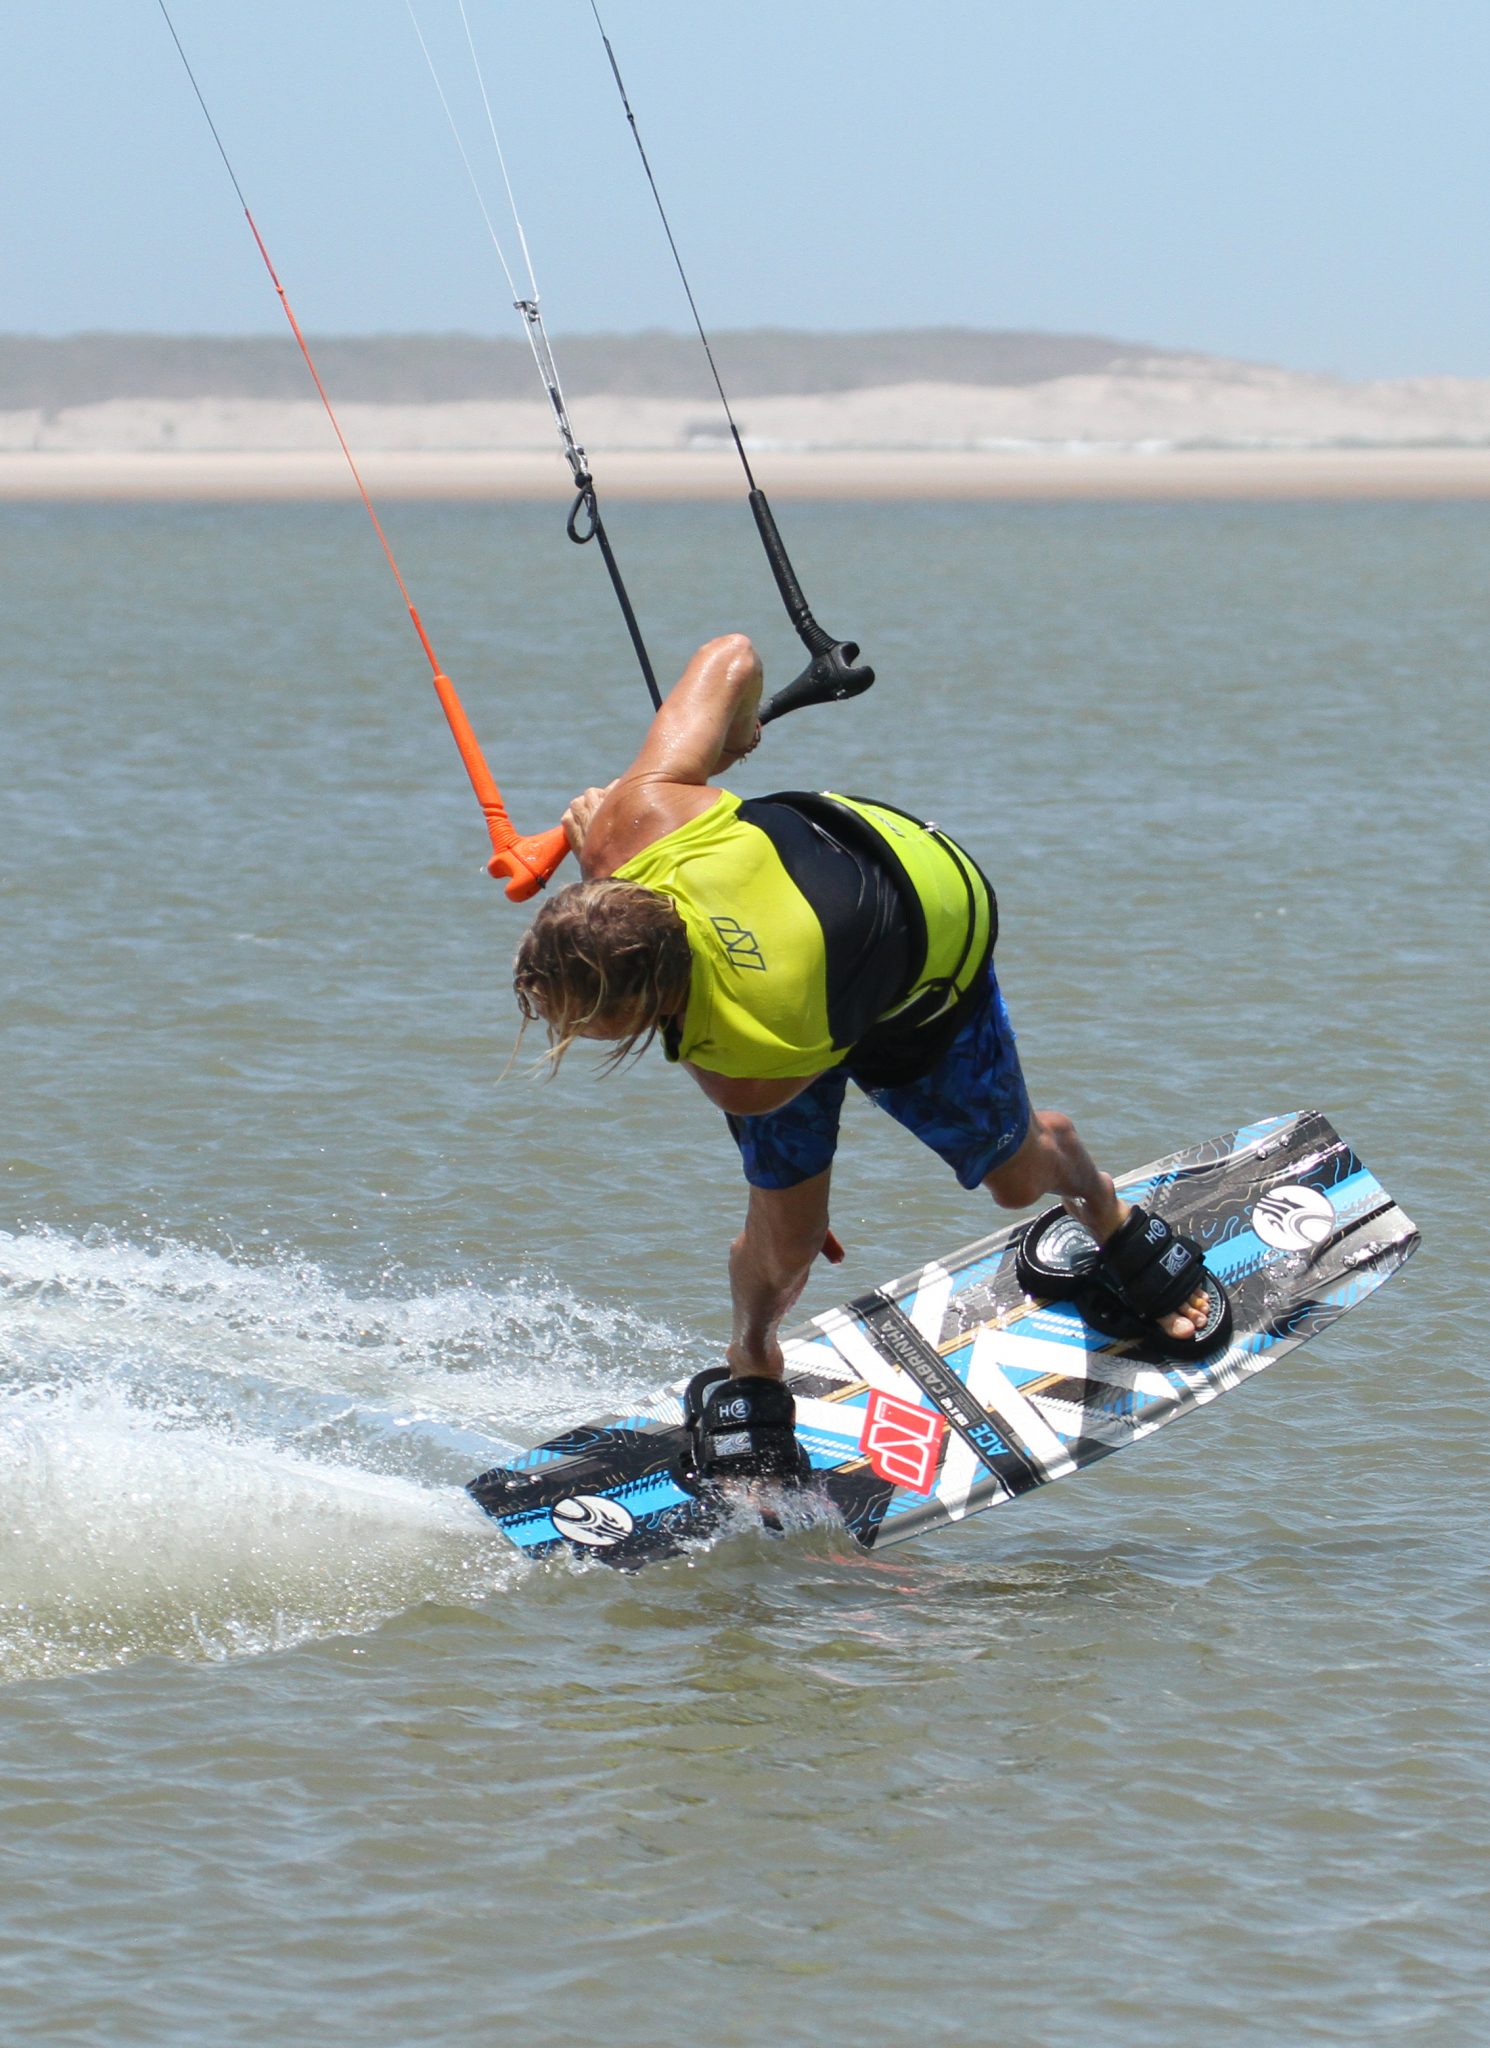
Prep & Send Pic B.
Once you’re in position, edging, balanced and have both hands on the bar, you can contemplate the takeoff. Much like a normal sent back loop/ roll you will still need to give a little bit of pop to help you get off the water before the kite travels too far. This means that you need to alter your position ready to pop while you send the kite. Your aim is to get more weight onto your back foot. You need to do this while sending. If you do it before you’ll carve up and slow down. To move your weight, ultimately your hips you can extend your back leg, pushing your hips over the tail of the board. At the same time, you should be steering the kite, a tad more gently than for a normal jump, but sure enough that the kite moves positively. This is another reason to have your sweet spot close. You can’t easily push and pull with opposing hands from this position, so you’ll be relying on back hand pull. If your sweet spot is out, you’ll stall the kite and get yanked off your edge. Here you can see Christian pushing his hips back, straightening his front (left) leg slightly while pulling to steer the kite. He keeps his head up to keep weight on the edge. If you drop your head, you’ll over weight the back of the board and drag rather than resist.
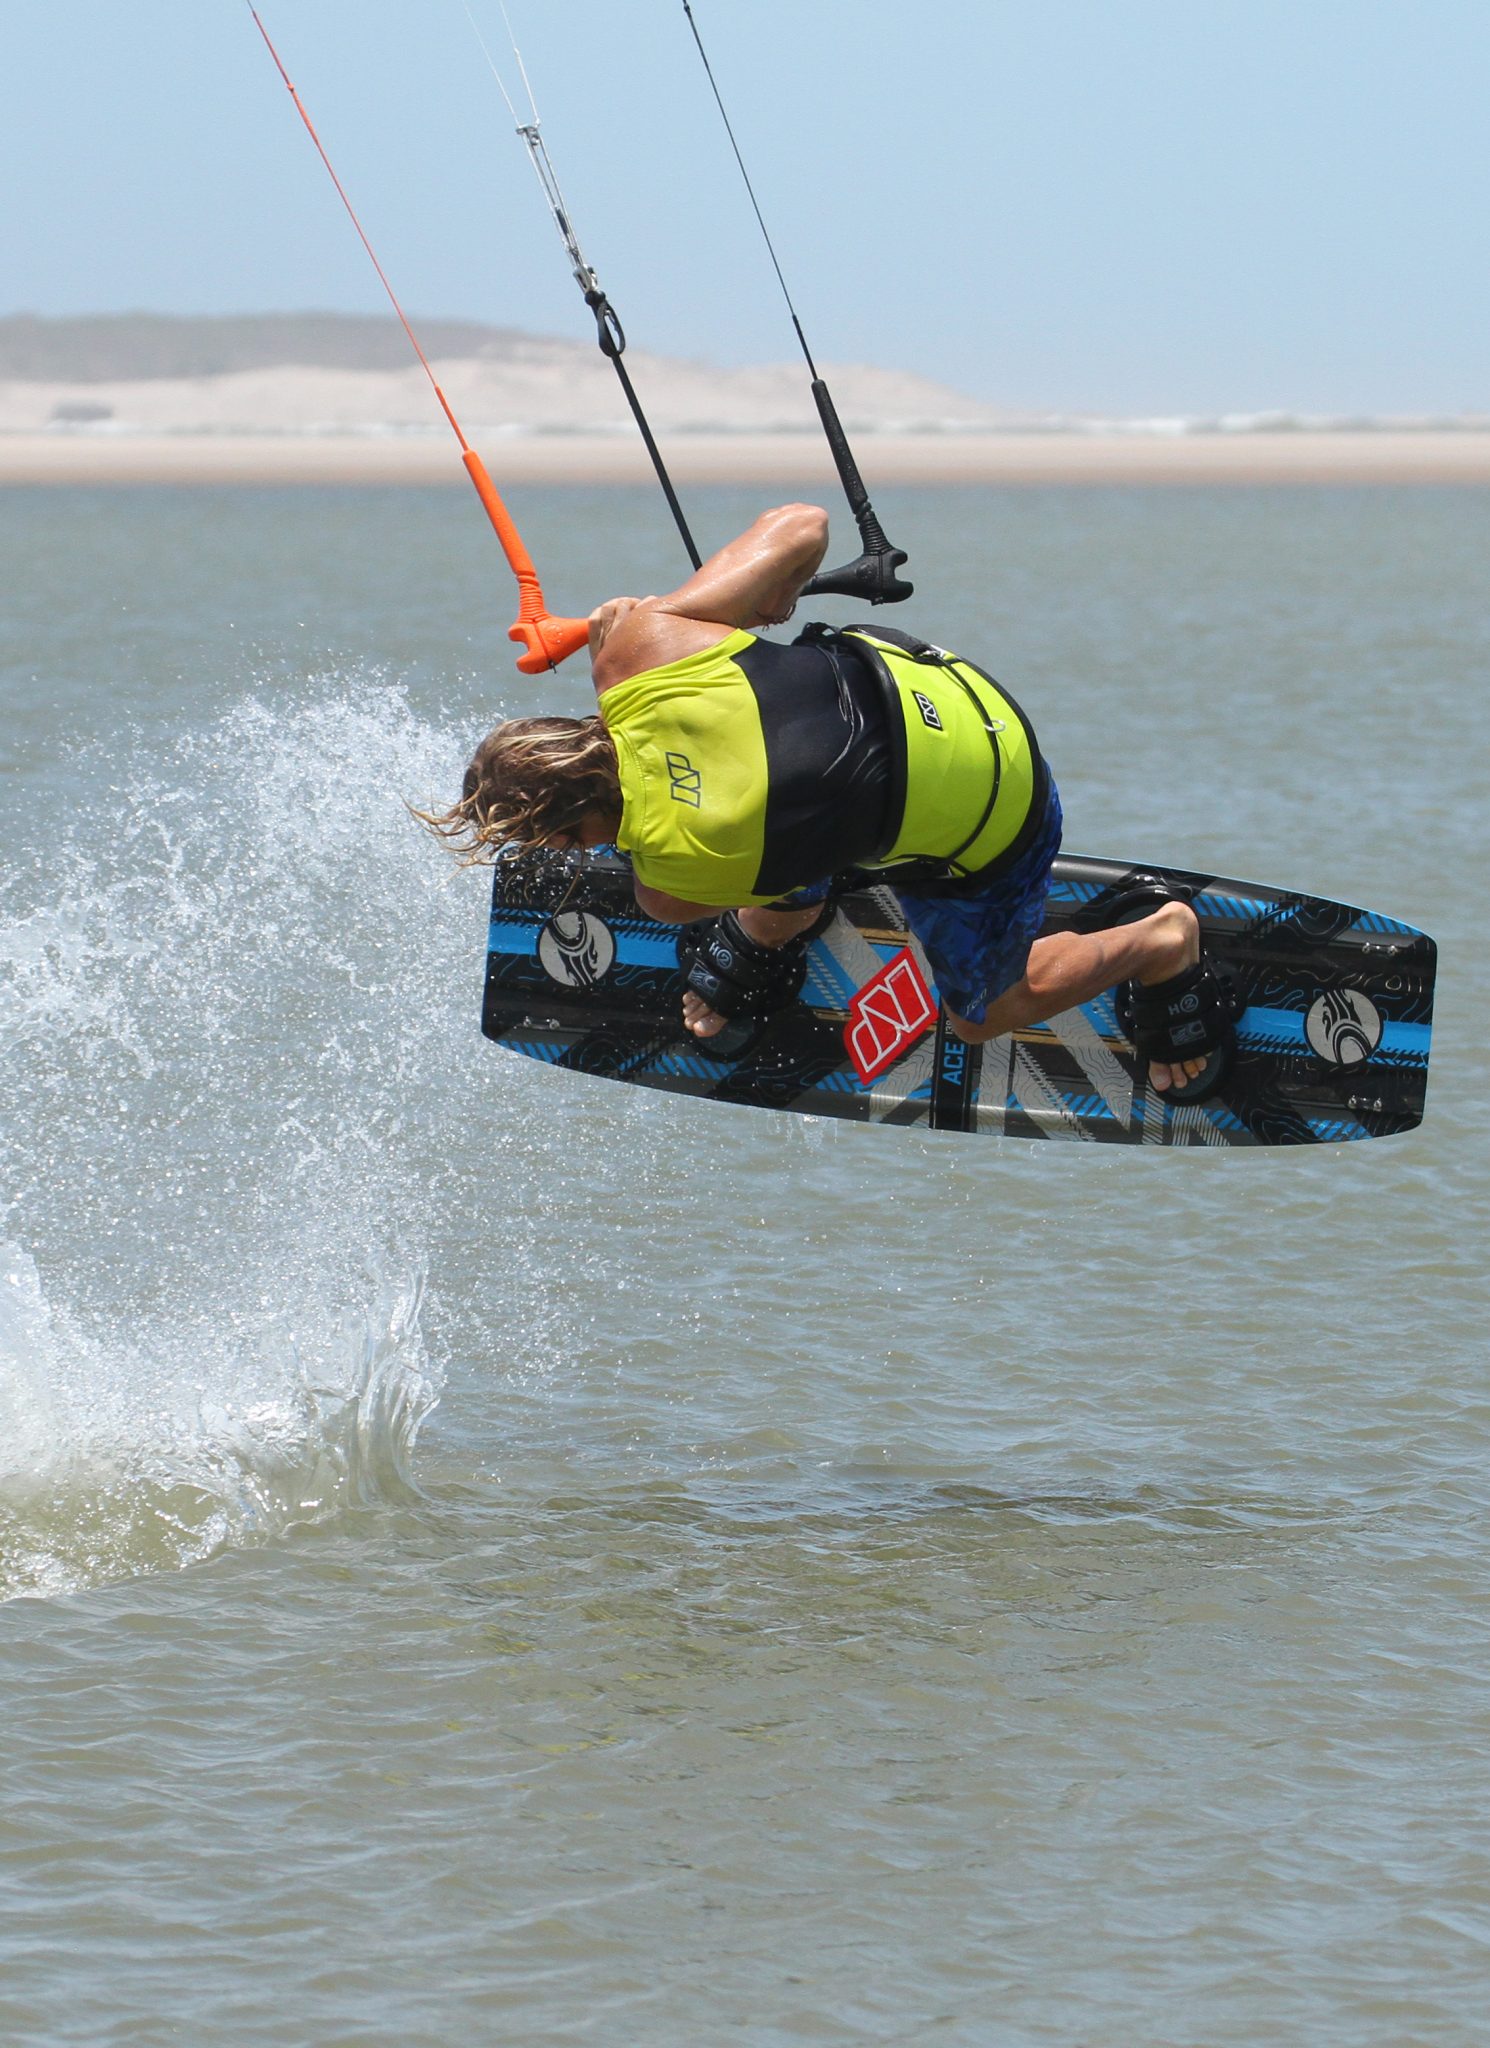
The Launch Pic C.
This is the defining moment which will certify your move as the genuine article or dodgy imposter. As per pretty much every other take-off, the nose, or leading end of the board should be lifting first, as can be seen in the pic. If you’ve accomplished the previous steps, you have a good chance. However, muscle memory from all your previous moves will kick in, and your body will undoubtedly try and use what would normally be your back foot, in Christian’s case his left, to pop from. If you allow this to happen, you’ll push the board down into the water and then pop from that foot. If, however, you keep your leading leg extended and hips over the tail you can pop up off your trailing foot only, claiming a bona fide launch. Here Christian demonstrates a proper launch, carving and popping up off his trailing leg as the kite lifts. This is made simpler by the fact that the kite is moving past 12 o’clock. If you overpower yourself or stall the kite, it won’t travel so far, and you’ll be more likely to take off from the wrong foot.
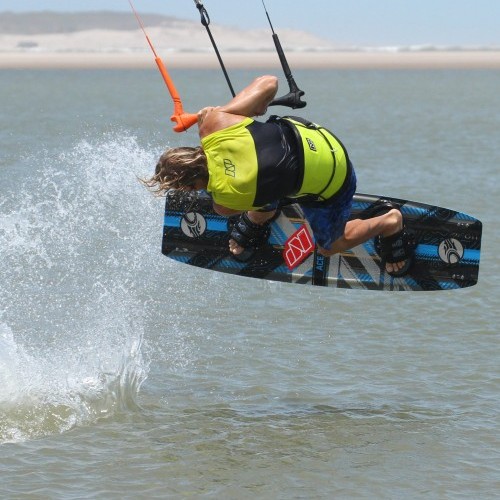
Rotate Pic D.
Seeing as how you were fighting to stay twisted in your blind position, unravelling yourself and initiating your rotation should be fairly simple as long as you’re on the way up. Your mission is to stop the kite going back any further and start redirecting it forwards while making yourself small so that you can rotate. To get the kite forward, you need to pull on your front hand and to rotate try and look at the bar. Christian has the bar in and is pulling on his front hand, looking at his hands, and he’s brought his knees up to aid with his back loop.


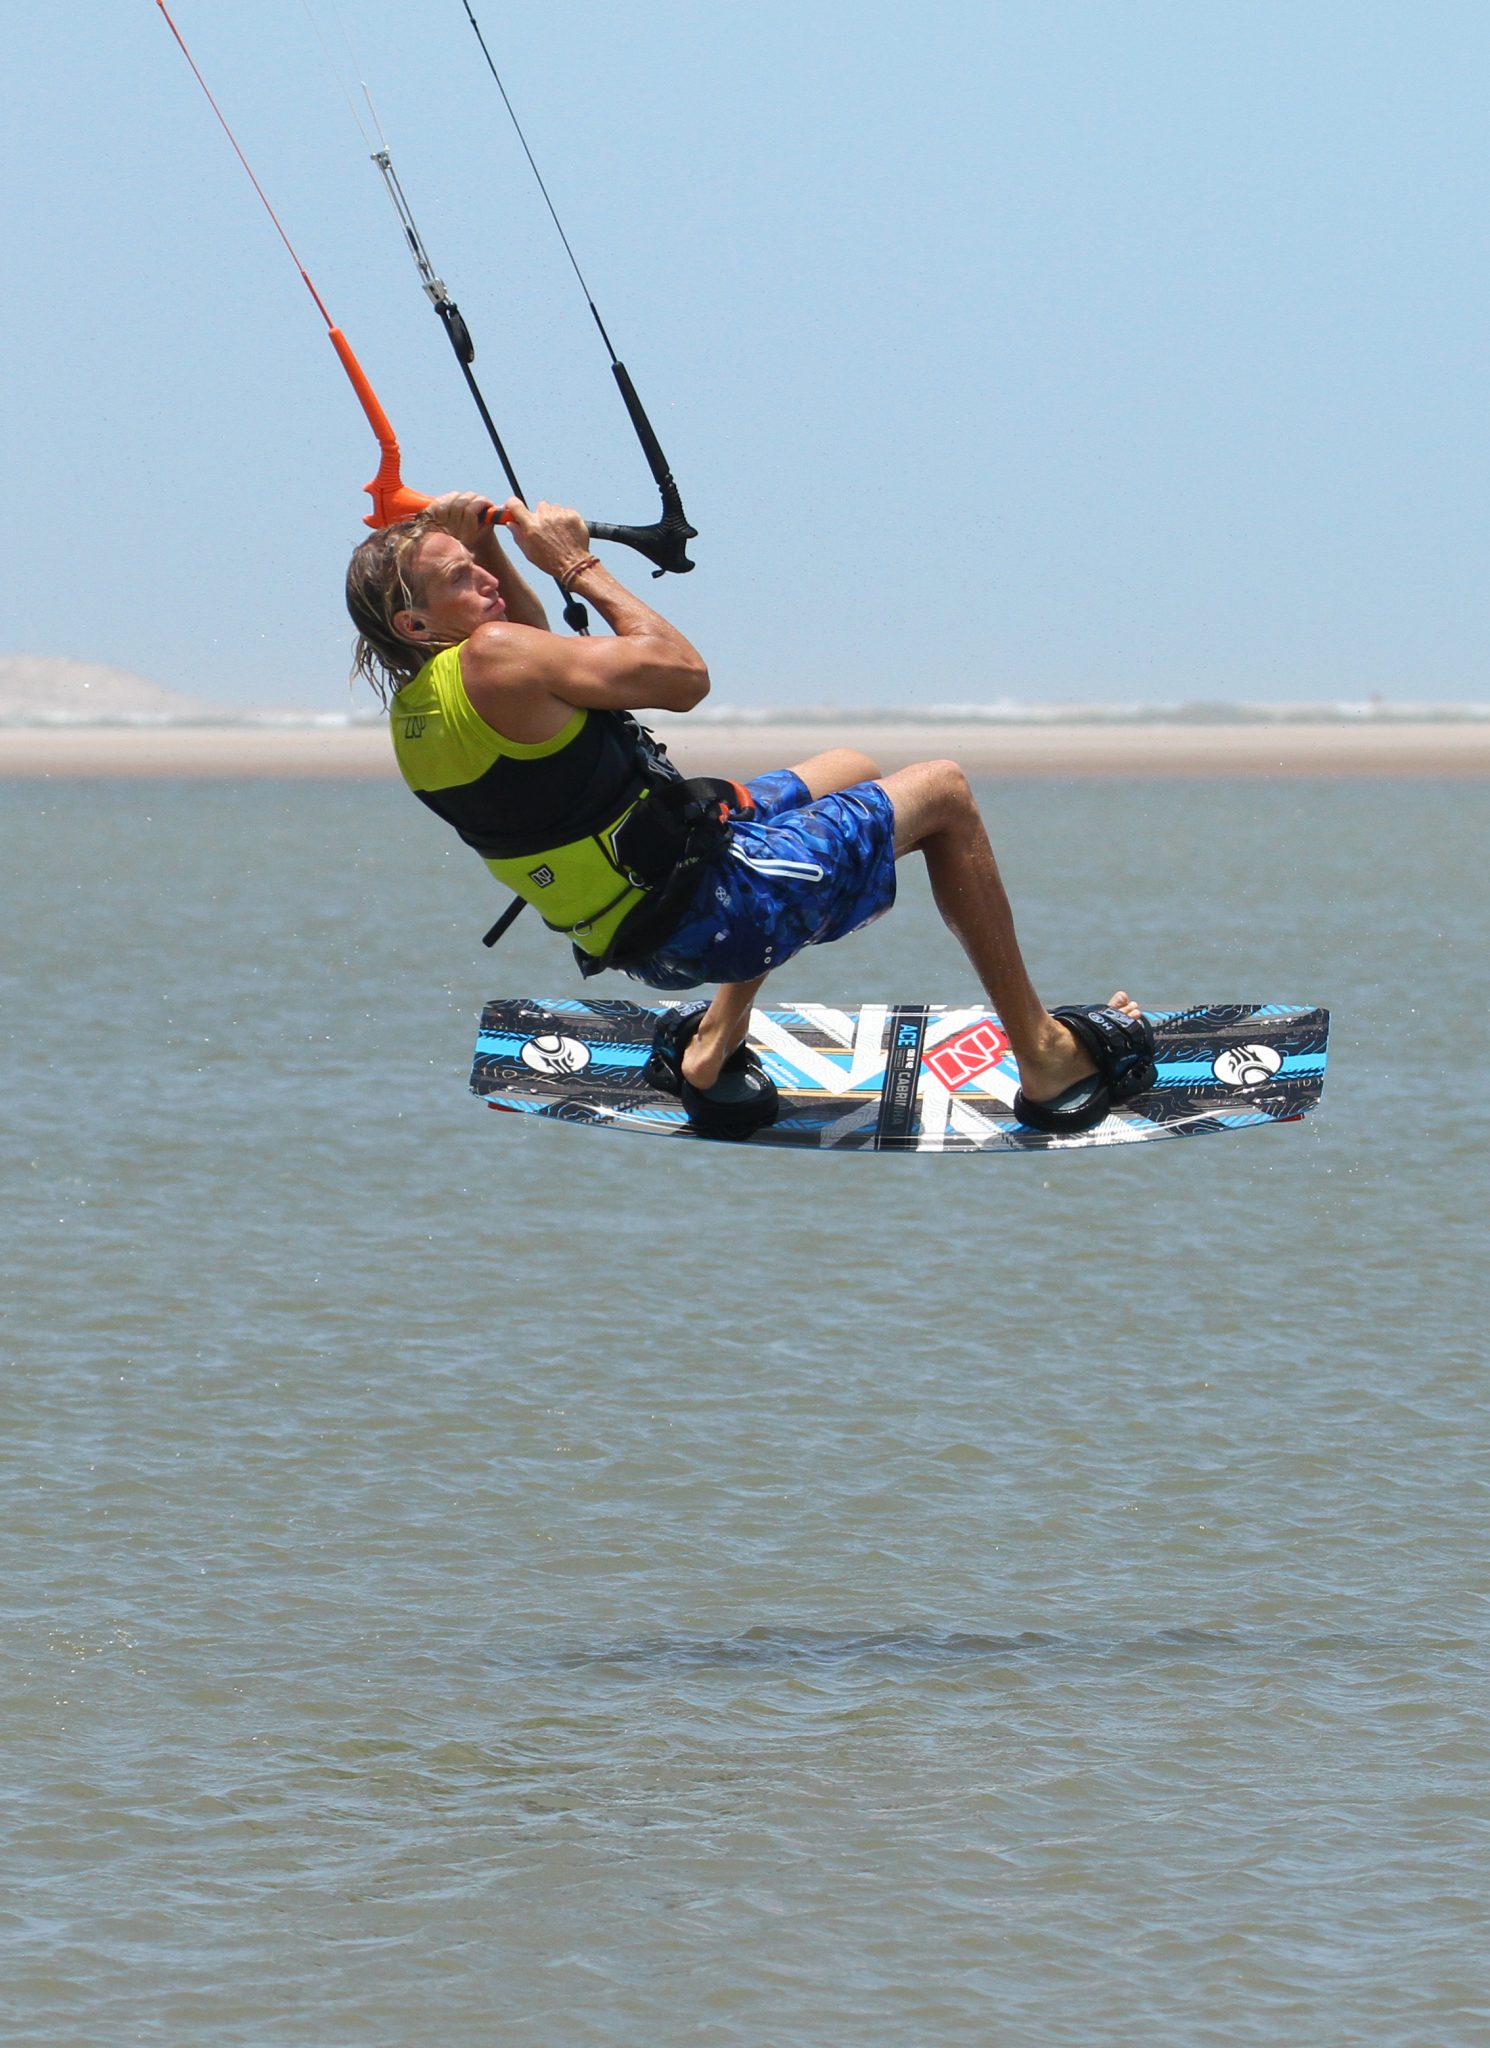
Happy Place Pic E.
Once you’re half way around things should start to feel quite familiar. The main difference is that without a hefty kick and carve upwind you will be rotating slower than normal, so you need to keep things moving. Christian is looking over his front shoulder so that he keeps rotating, while bringing his knees up and steering the kite forwards. Now that he’s more balanced he can use both hands to control the kite. What’s difficult during this move is that because the board started from blind it gets left behind, so it takes some effort (as shown by Christian’s kite face) to bring it back to where it should be.
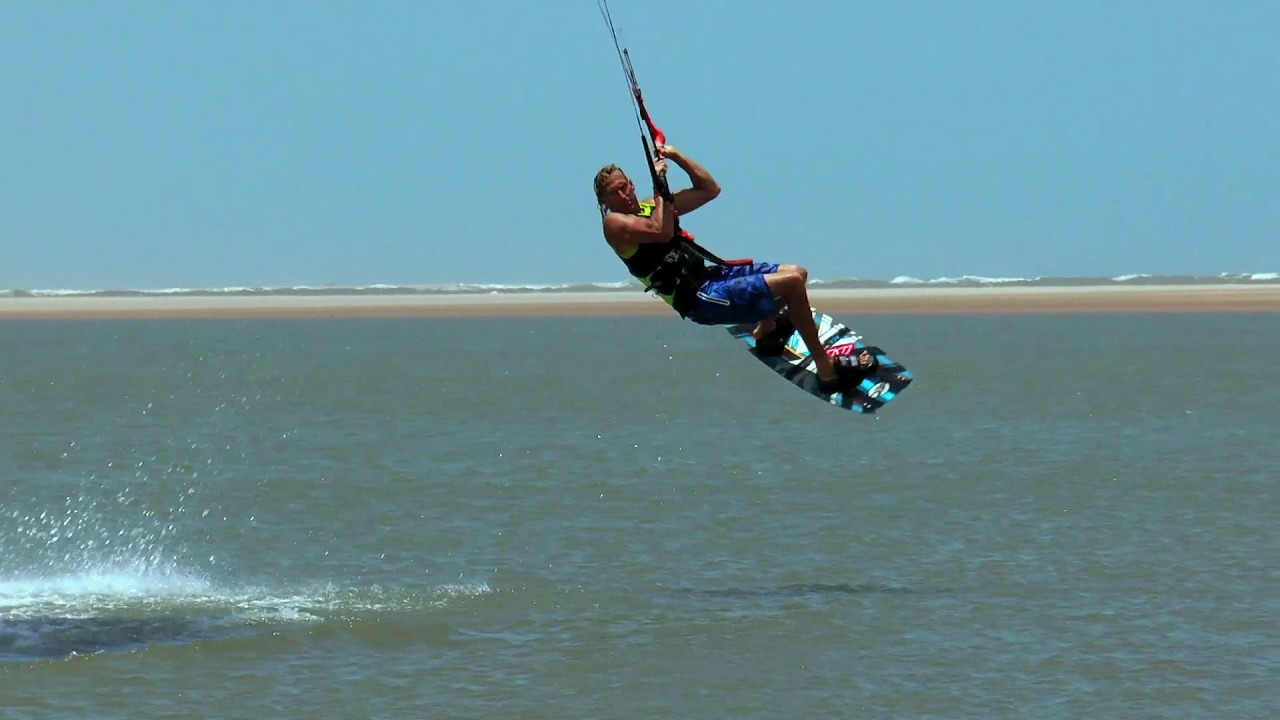
Landing Set Up Pic F.
The final steps. If you’ve got this far the rest should be easy enough. You’re aiming for a bog standard downwind landing, flat board and some pull from the kite. The chances are that the board is still playing catch up, so don’t lower your undercarriage completely, rather keep the legs slightly bent so that you move as one when the power from the kite comes. You can see that Christian is diving the kite and looking where he intends to land although the board still needs to turn a tad further.
Top Tips
There is no denying that flat water will make this a lot easier, you’ll be able to carry more speed and edge more efficiently. Seat harnesses, especially those with a low hook position won’t make it any easier to contort either but you will be able to get the bar nearer.
If you struggle with the position at first, aim to pop into blind and then get into the move asap.
And finally, work on your blind position. It’s the building block upon which all the others are stacked. Think of the position as coming from your shoulders, not from reaching and stretching for the bar. By rolling your body nearer to the bar, you can reach it.


Now have a good look at the sequence and videos to get a handle on what is happening and when.
Common Problems
If your board is skipping as you send the kite. This will happen whenever your sweet spot is too far. To get both hands on the bar, you’re having to pull it in towards you, and as such you’re stalling the kite. As a result, the kite doesn’t go up to 12 as you send it, but it chops a bit off the top of the window and tries to pull you downwind. So Trim.
If you keep turning upwind too much, and therefore losing your speed and not being able to pop. Lift your head. It’s easy to try and drop your weight by putting your head down. Unfortunately, this makes you bend excessively at the waist, so you can’t drive against your edge, so you bend further still. Keep your head up, which means that you can move your hips to change weight, keep your edge and pop.
If you’re popping off the wrong foot. Make sure you move the kite enough as it’ll help you roll back onto the tail of the board.
And finally, if you’re not getting enough rotation make sure to keep yourself small and compact so that you bring the board with you. Really try to force your head and shoulders around, so that they lead you.

Keystones
- Trim and speed
- Roll shoulders
- Push hips back as send kite
- Pop off new back foot as kite passes 12
- Keep small, redirect kite
This technique article was in Issue 62 of IKSURFMAG.
Related


By Christian and Karine
Christian and Karine have been working together as a coaching team, running improver to advanced kitesurfing clinics since 2003.
