
Toe to Heel Carve
Technique / Beginner

Introduction
The Toe to Heel Carve has the potential to become one of your absolute favourite moves. Ignored by many as a practical solution to changing direction, this bad boy unquestionably opens the doors to a world of plumage, throwing down buckets, photo opportunities and soaking your kite buddies. However, before we oversell the future, you need to set the fundamentals of a controlled Toe to Heel Carve solid. Once nailed, the polishing can begin.
It's quite likely that you've already got some form of Toe to Heel in your armoury. In the early stages of toeside, the kite had that rather annoying habit of sneaking up and encouraging you to transition when all you wanted was to go straight. It probably and gradually became second nature, sneaking your weight back whilst gingerly steering the kite and pivoting around to follow it. Well, today, we're going to revisit and revamp that nightmare of old into the most delightful, flowing and, of course, intentional carve. Game on.


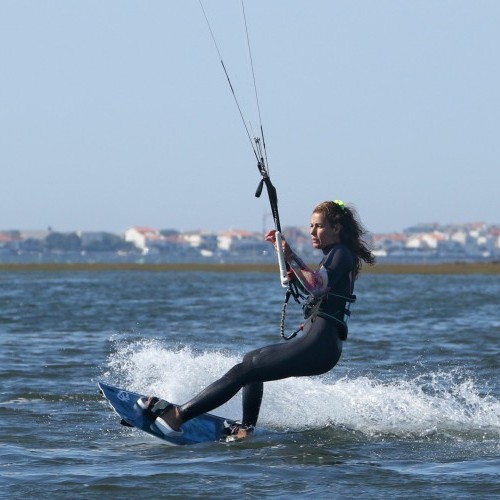
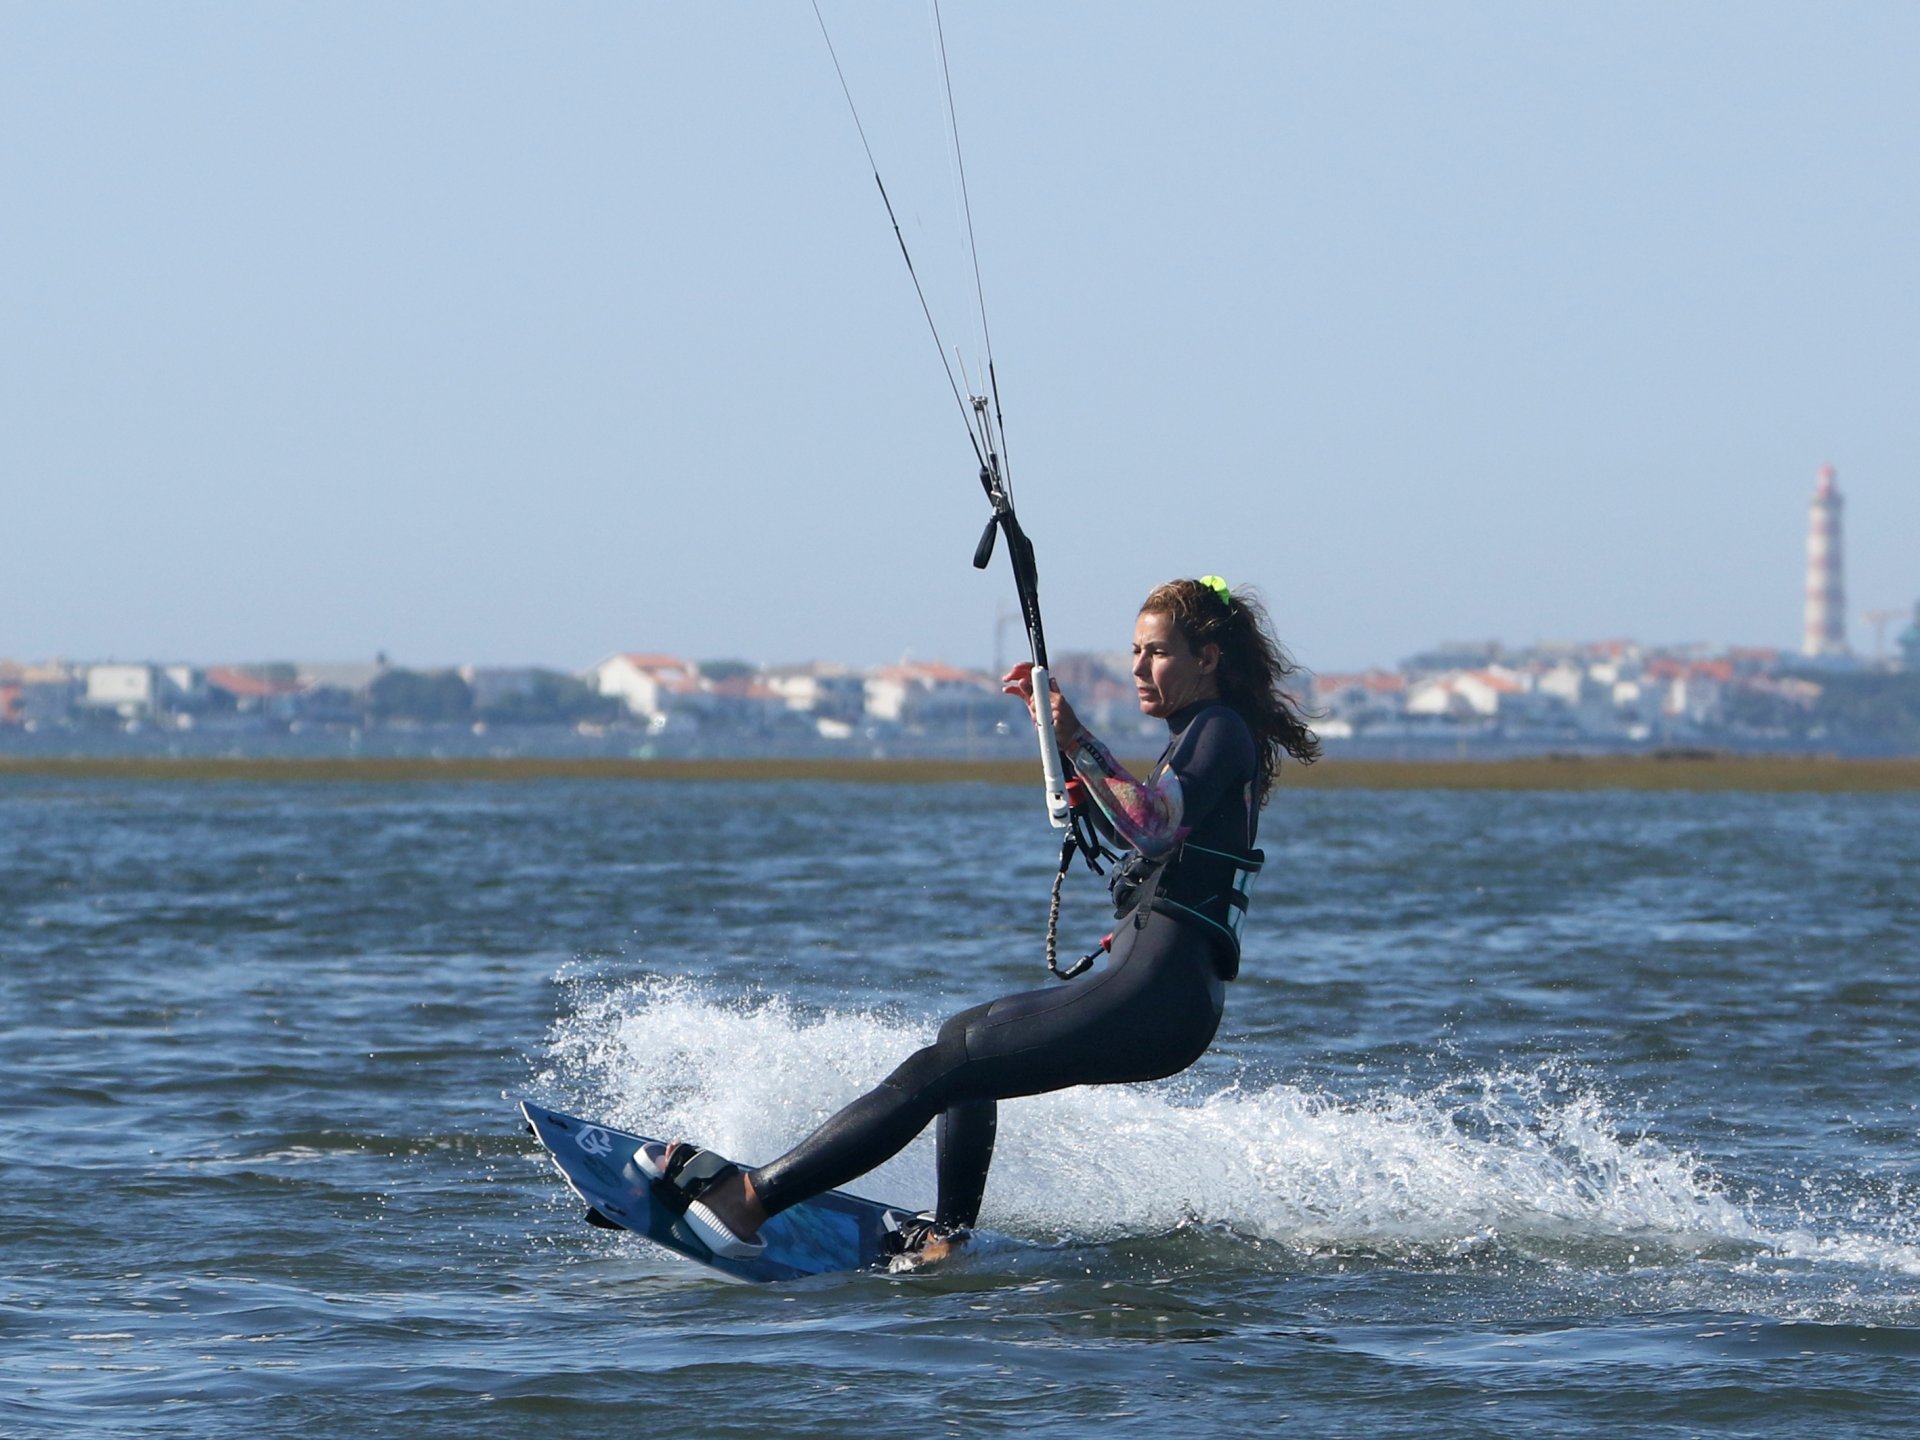
Set Up & Approach Pic A.
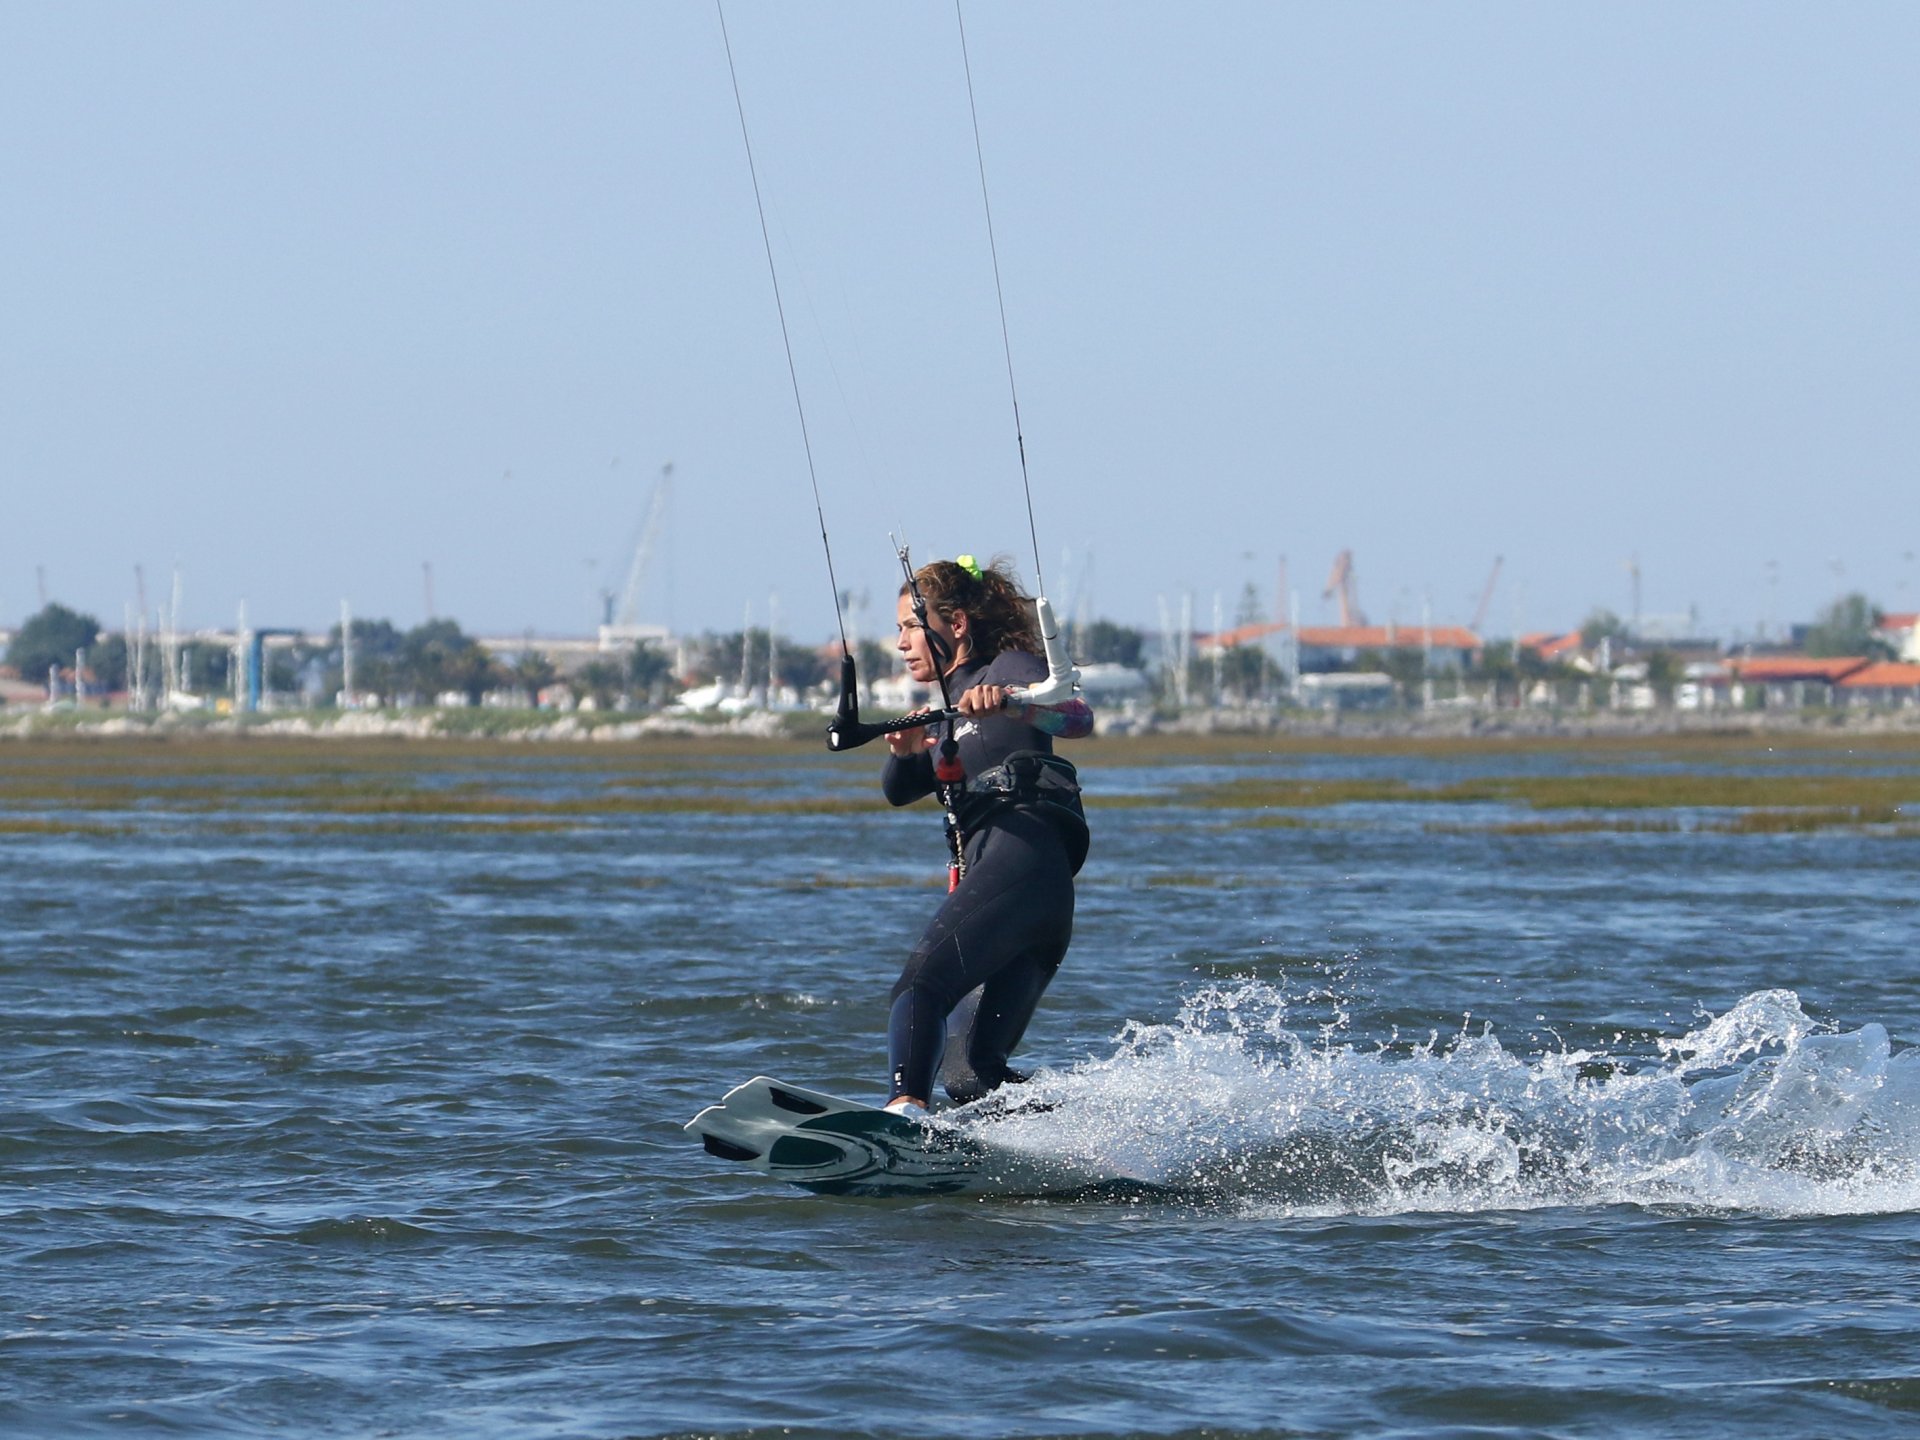
Your now well-honed toeside, of course! We've given toeside a lot of attention recently, and if you haven't yet watched How To Fix Your Toeside, then go and have a look. Any and every toeside side trick, transition and manoeuvre need the same solid toeside to start. This means you'll have your bearings on a good upwind edge, the board is happy, your body is ready, and you'll have tension in the lines and, therefore, control of your kite. You're set. Have a look at Karine in Pic A. Comfortable and open toe side position. She's got both hands on the bar (check your trim), her kite is parked no higher than 1 o'clock, and she's had a good look to make sure that it's safe to turn.
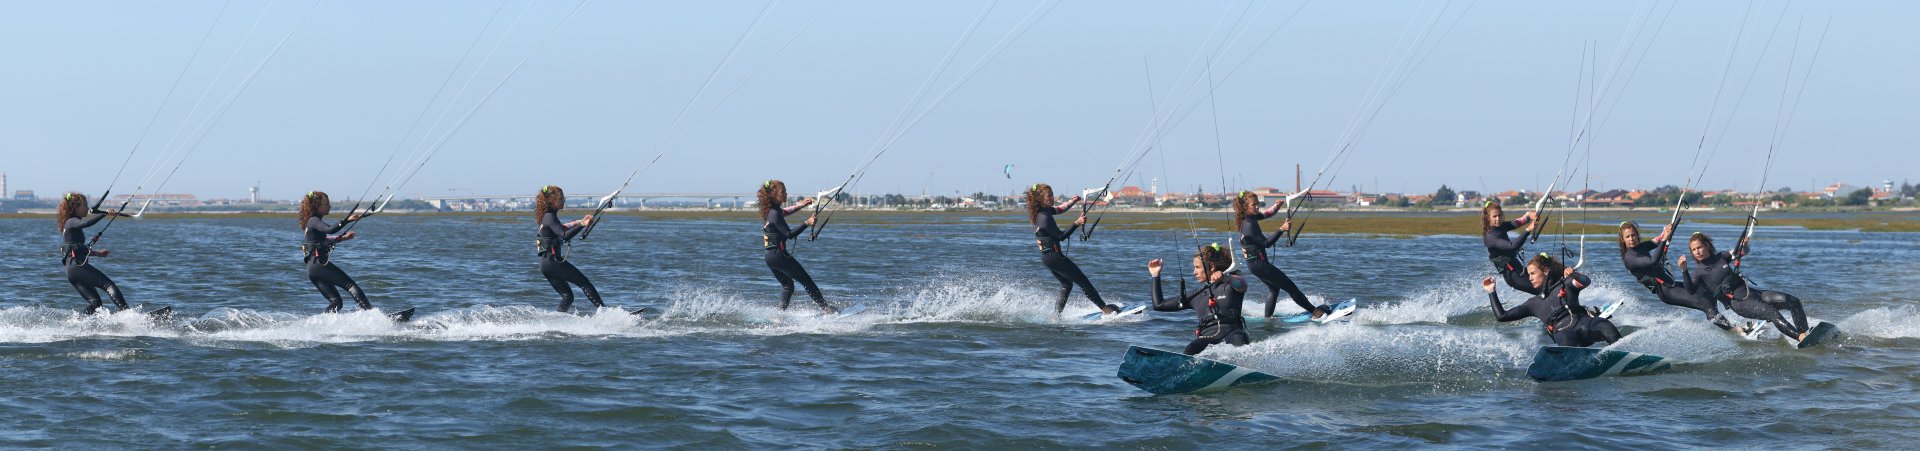
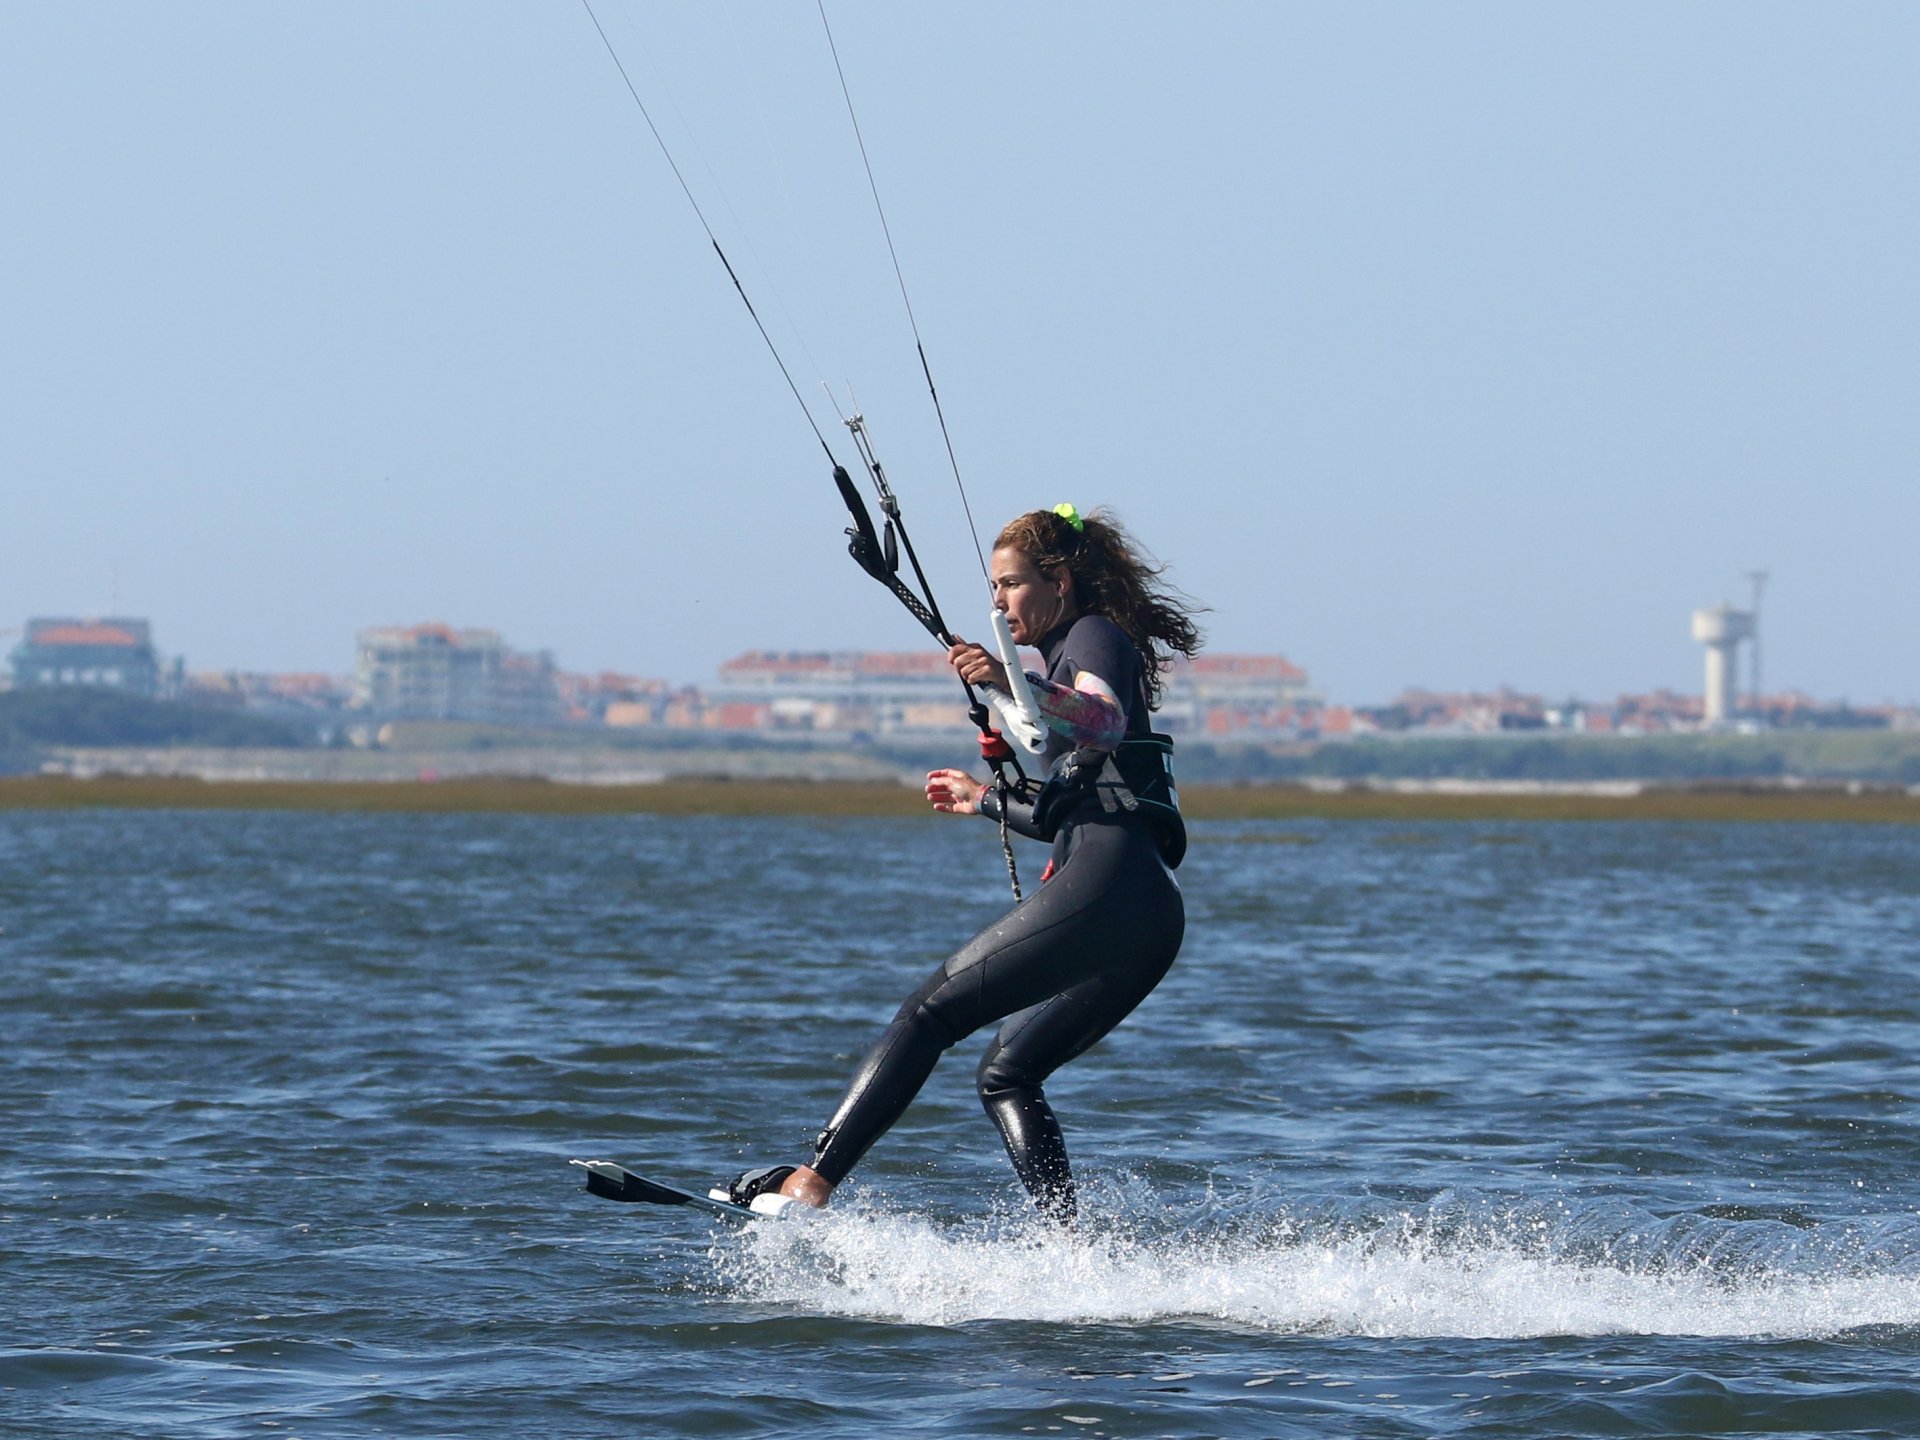
Kite First Pic B.
The sequence for your toe to heel carve is kite first, then board. The reason for this is that from an edge, you can steer the kite, whereas if you flatten your board off, you can't as you'll lose tension. It is possible to turn back to heelside with both hands on the bar; however, we're opting for the one-handed approach as it means you can control where and when you shift your weight and therefore gives you the freedom to carve rather than be pulled about by your kite. This does, however, mean that you need to steer your kite with one hand. Make sure that your back hand is right up against the centre line and extend your thumb along the bar. Now you're ready. Just like Karine in Pic B, you can release your front hand and then start to steer the kite. Your aim is to progressively move the kite from 1 or 11 across to 11 or 1! You don't want your kite to go up over 12 but rather cut a tiny bit off the top of the window. Use your wrist to turn the kite as you would whilst body dragging, and avoid pulling the bar in past the sweet spot as you turn. You don't need to be aggressive, but you do need to get the kite turning. Karine is turning the kite with her hand and wrist whilst edging upwind and looking forward.
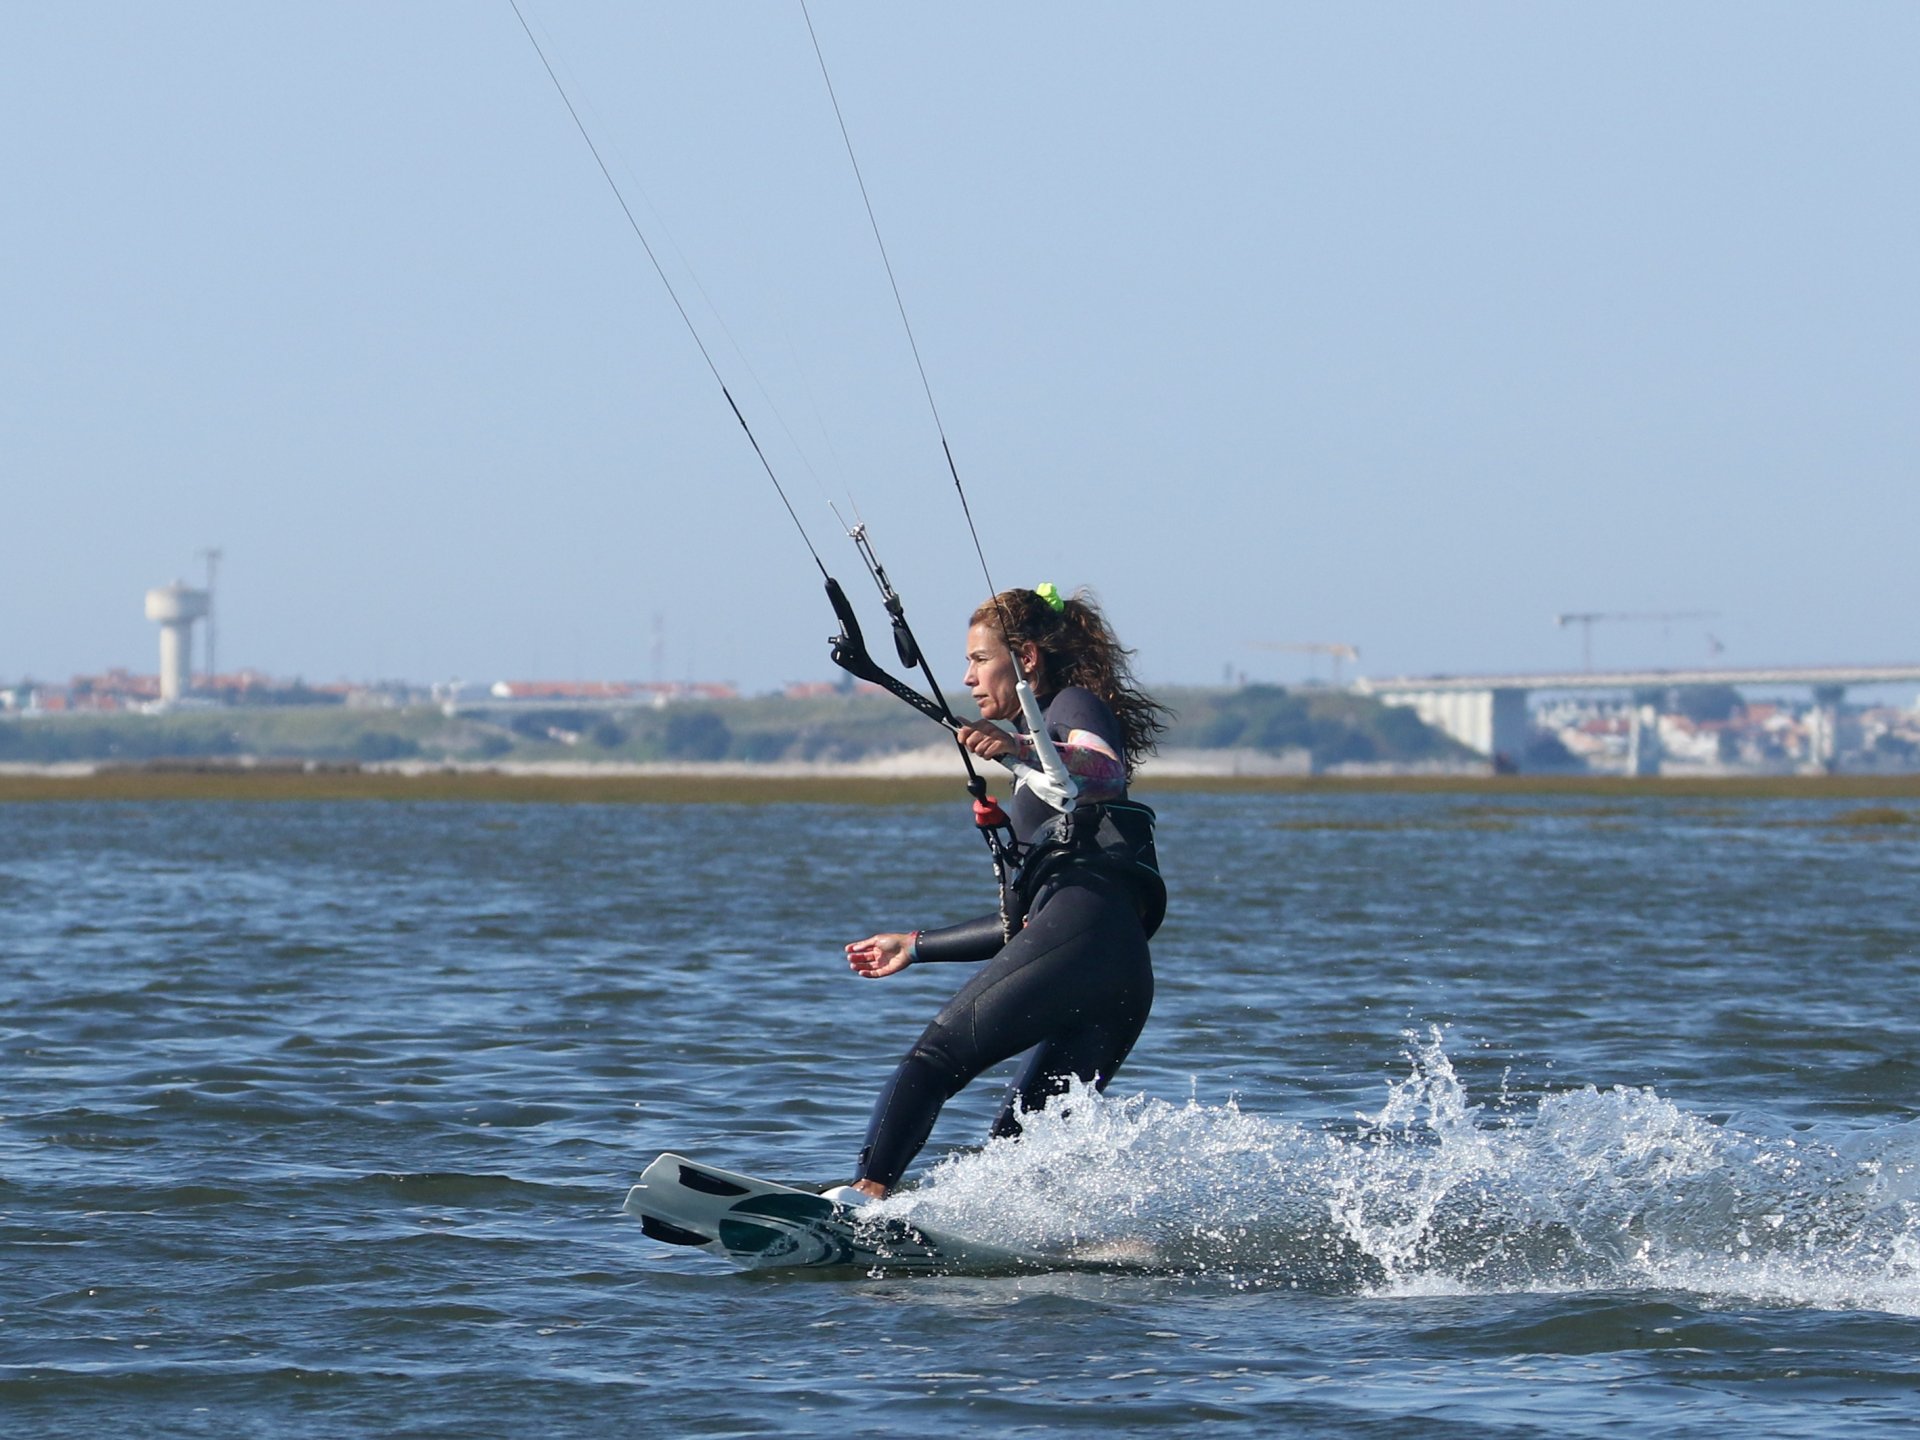
Hips Back Pic C.
Now that your kite is moving, you need to get ready to carve. At the moment, you're edging with most of your board. To carve, you need to get your weight over the tail. Move your hips and bum back over your trailing foot, which will position your weight over the more turny tip of your board. In Pic C, Karine has moved her hips back - only her hips. There is no need to lean your body back; leave your shoulders where they are. As you do this, it may add some resistance, and the kite may try to lift you off your edge. You can counteract this by sheeting out slightly, but make sure you keep steering the kite. Your objective is to stay on your edge in this position until you feel the kite start to move the other way. As it does, you will start to feel a downwind pull on your harness hook. This is your cue to…
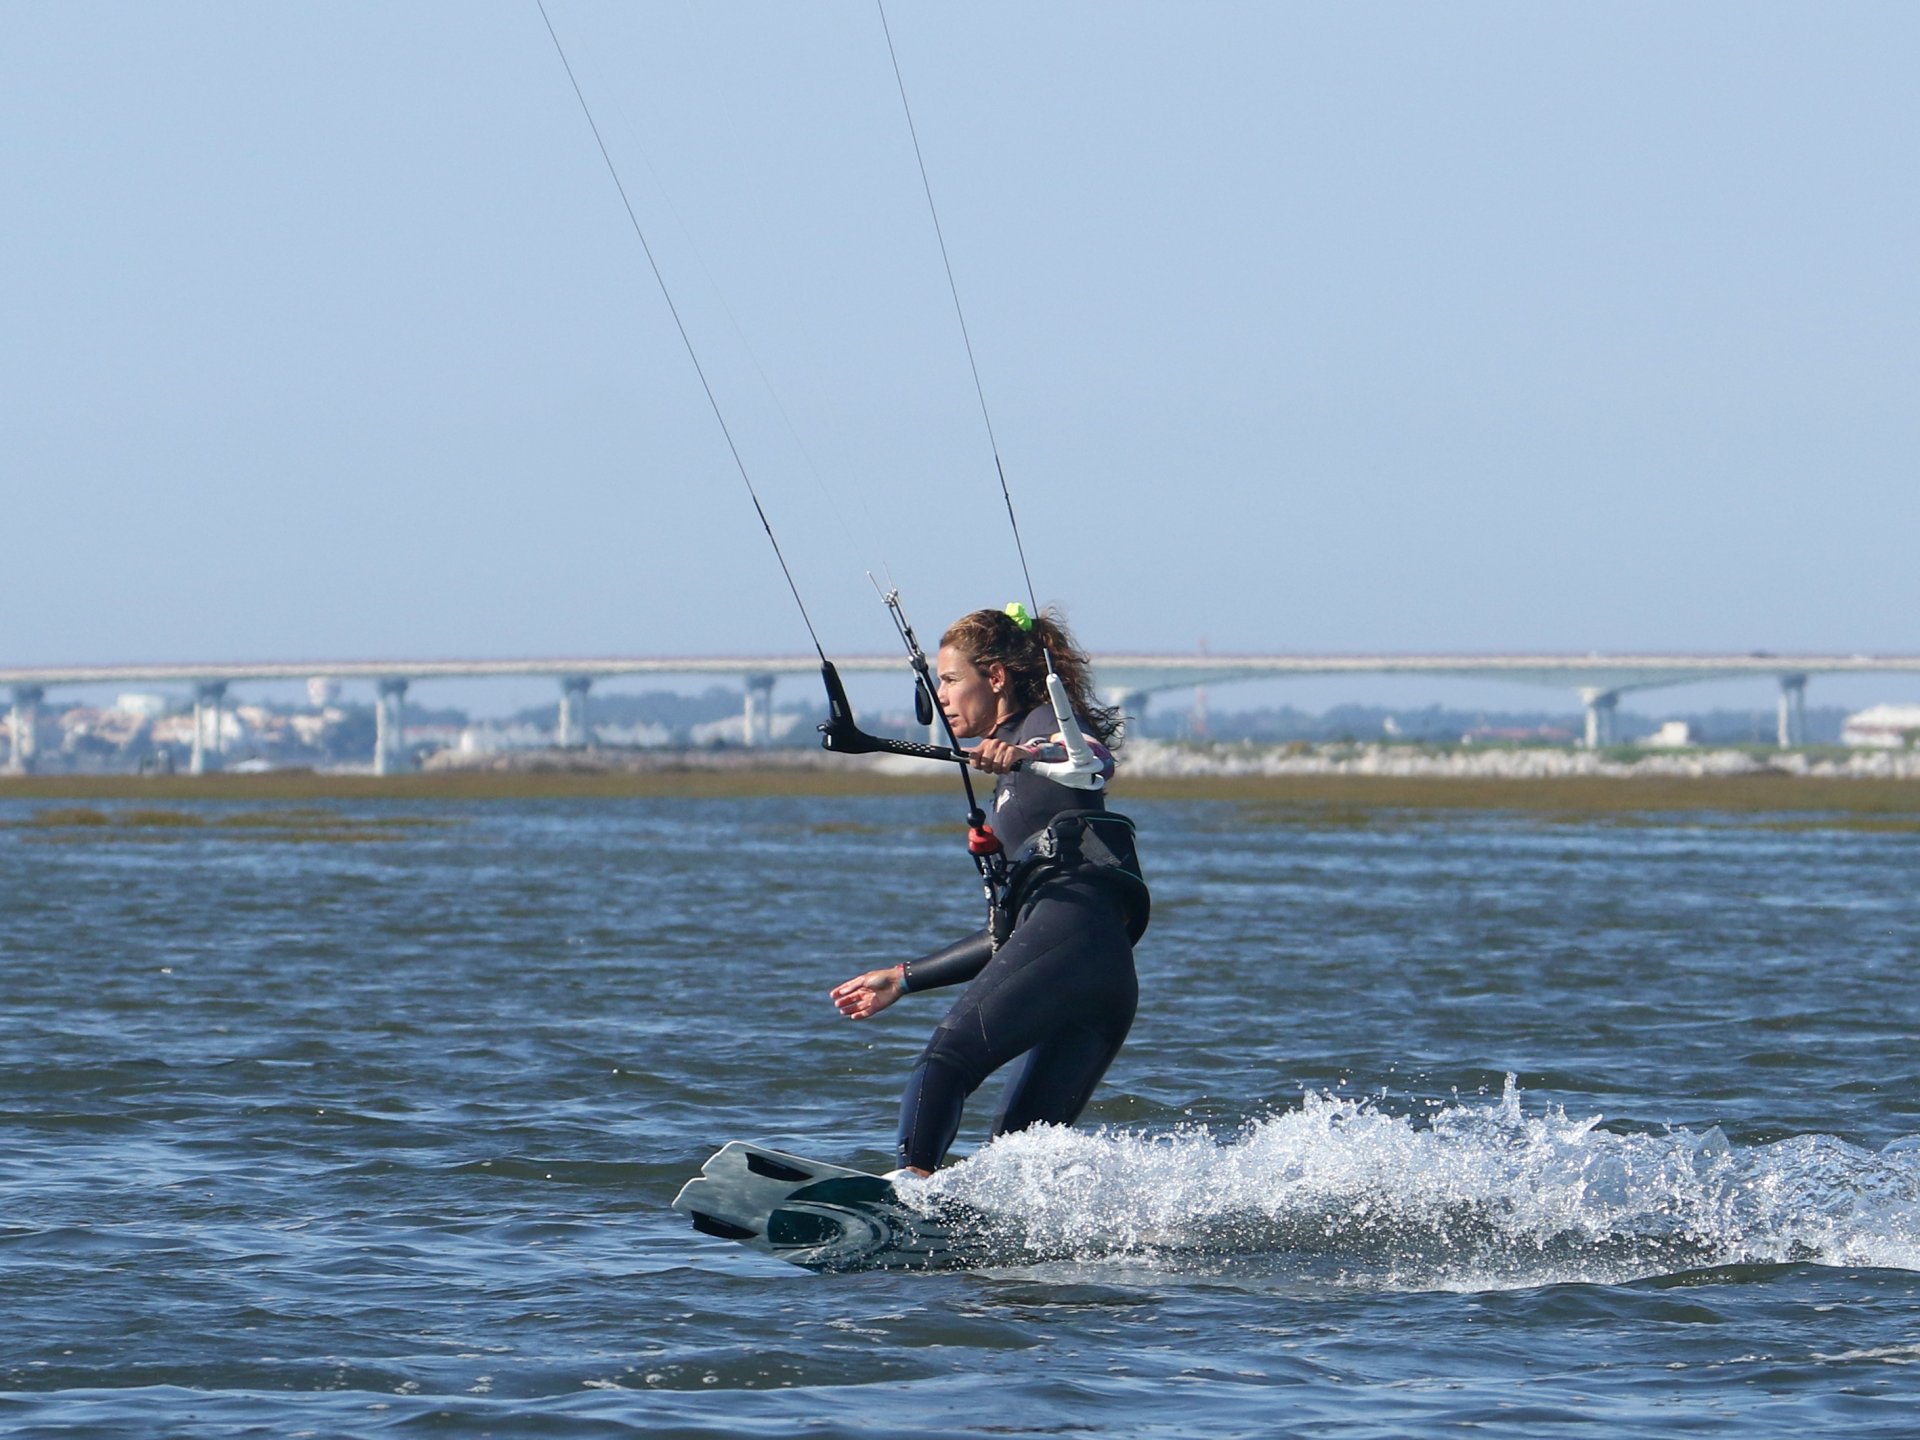
Flatten Pic D.
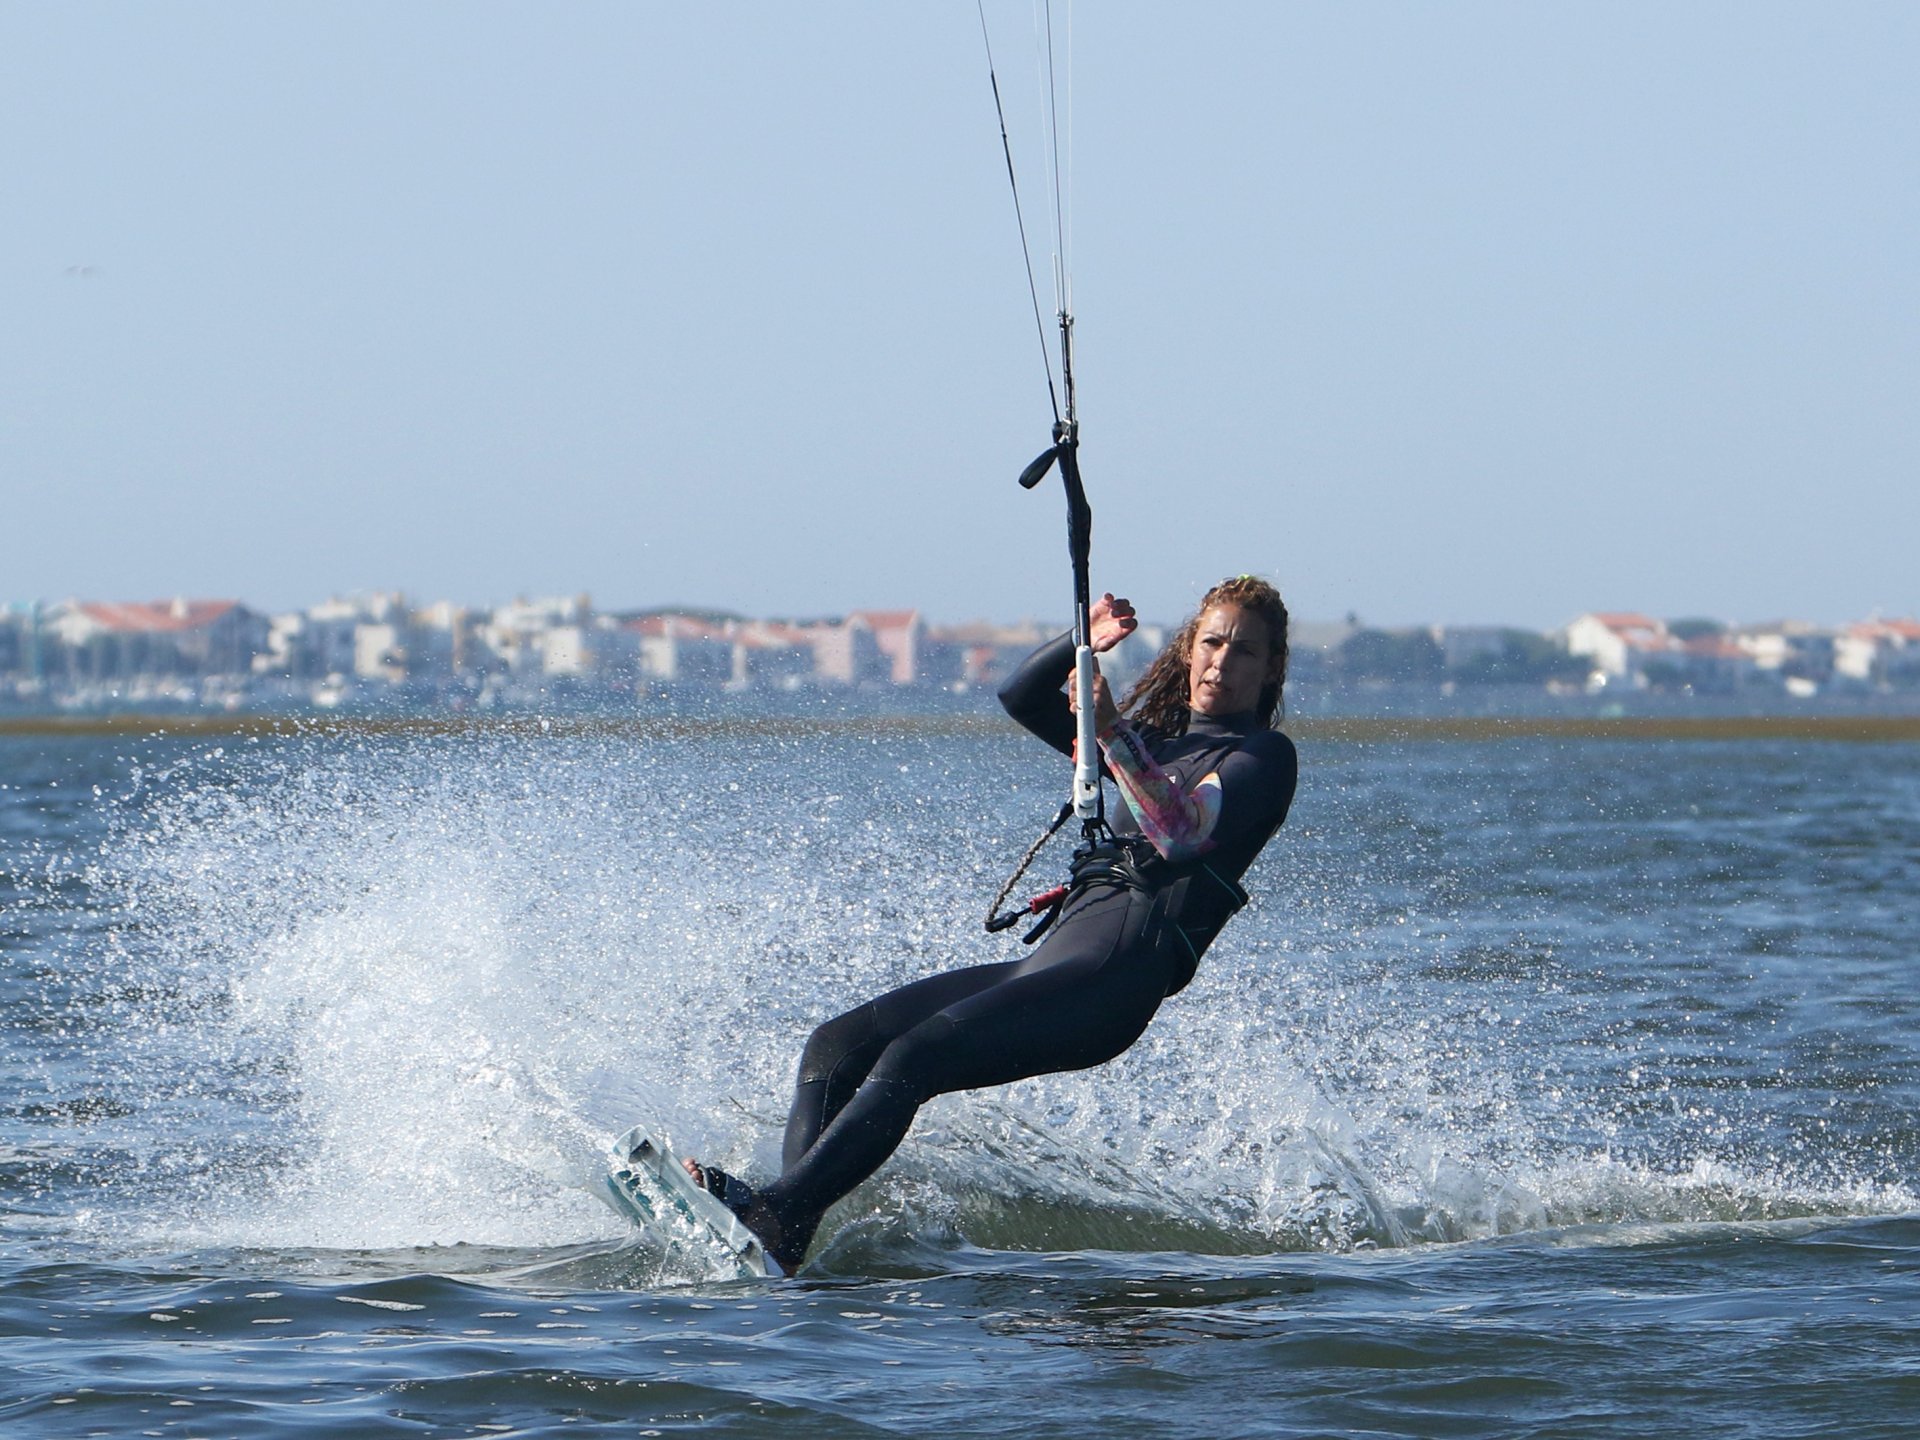
Bringing your weight over the board so that it flattens is the start of your carve. You're going edge to edge, but there's no avoiding the flat bit in the middle! This is actually a good thing. As you flatten, your board will start to turn. As well as initiating your turn, this will take some tension off the lines, which will encourage the kite to turn across the window. It'll only go up over 12 if you're edging. This part and the timing involved are what allow you to control your carve. With practice, you'll get a feel for steering input, but for the moment, the important thing is to get your kite to turn so that it's no longer facing the direction of travel or moving up but rather even further so that it's going towards where you intend to go – back the other way. Once it is, you can flatten and move across the board. In Pic D, you can see that Karine is still steering the kite. Her derriere and weight are over the tail of her board. As such, the nose is lifting, she's on the tail, and she's all set to carve.
With your bum back but shoulders up, you can now compress down onto your back leg, rolling your weight onto your heels. This will engage your heel side edge and get the board carving for real. There's no need for anything radical, but you do need to be dynamic. As you engage your edge, turn your head and look where you're going. With the kite cutting across the window and your weight back, the kite will pull you around. How hard you turn will depend on how much weight you can get onto your back heel. Looking at Karine, you can see there's a split between the upper and lower body. Her upper body is balanced and upright, looking at, and controlling the kite. Her lower body is dynamic, dropping and putting force through her board.

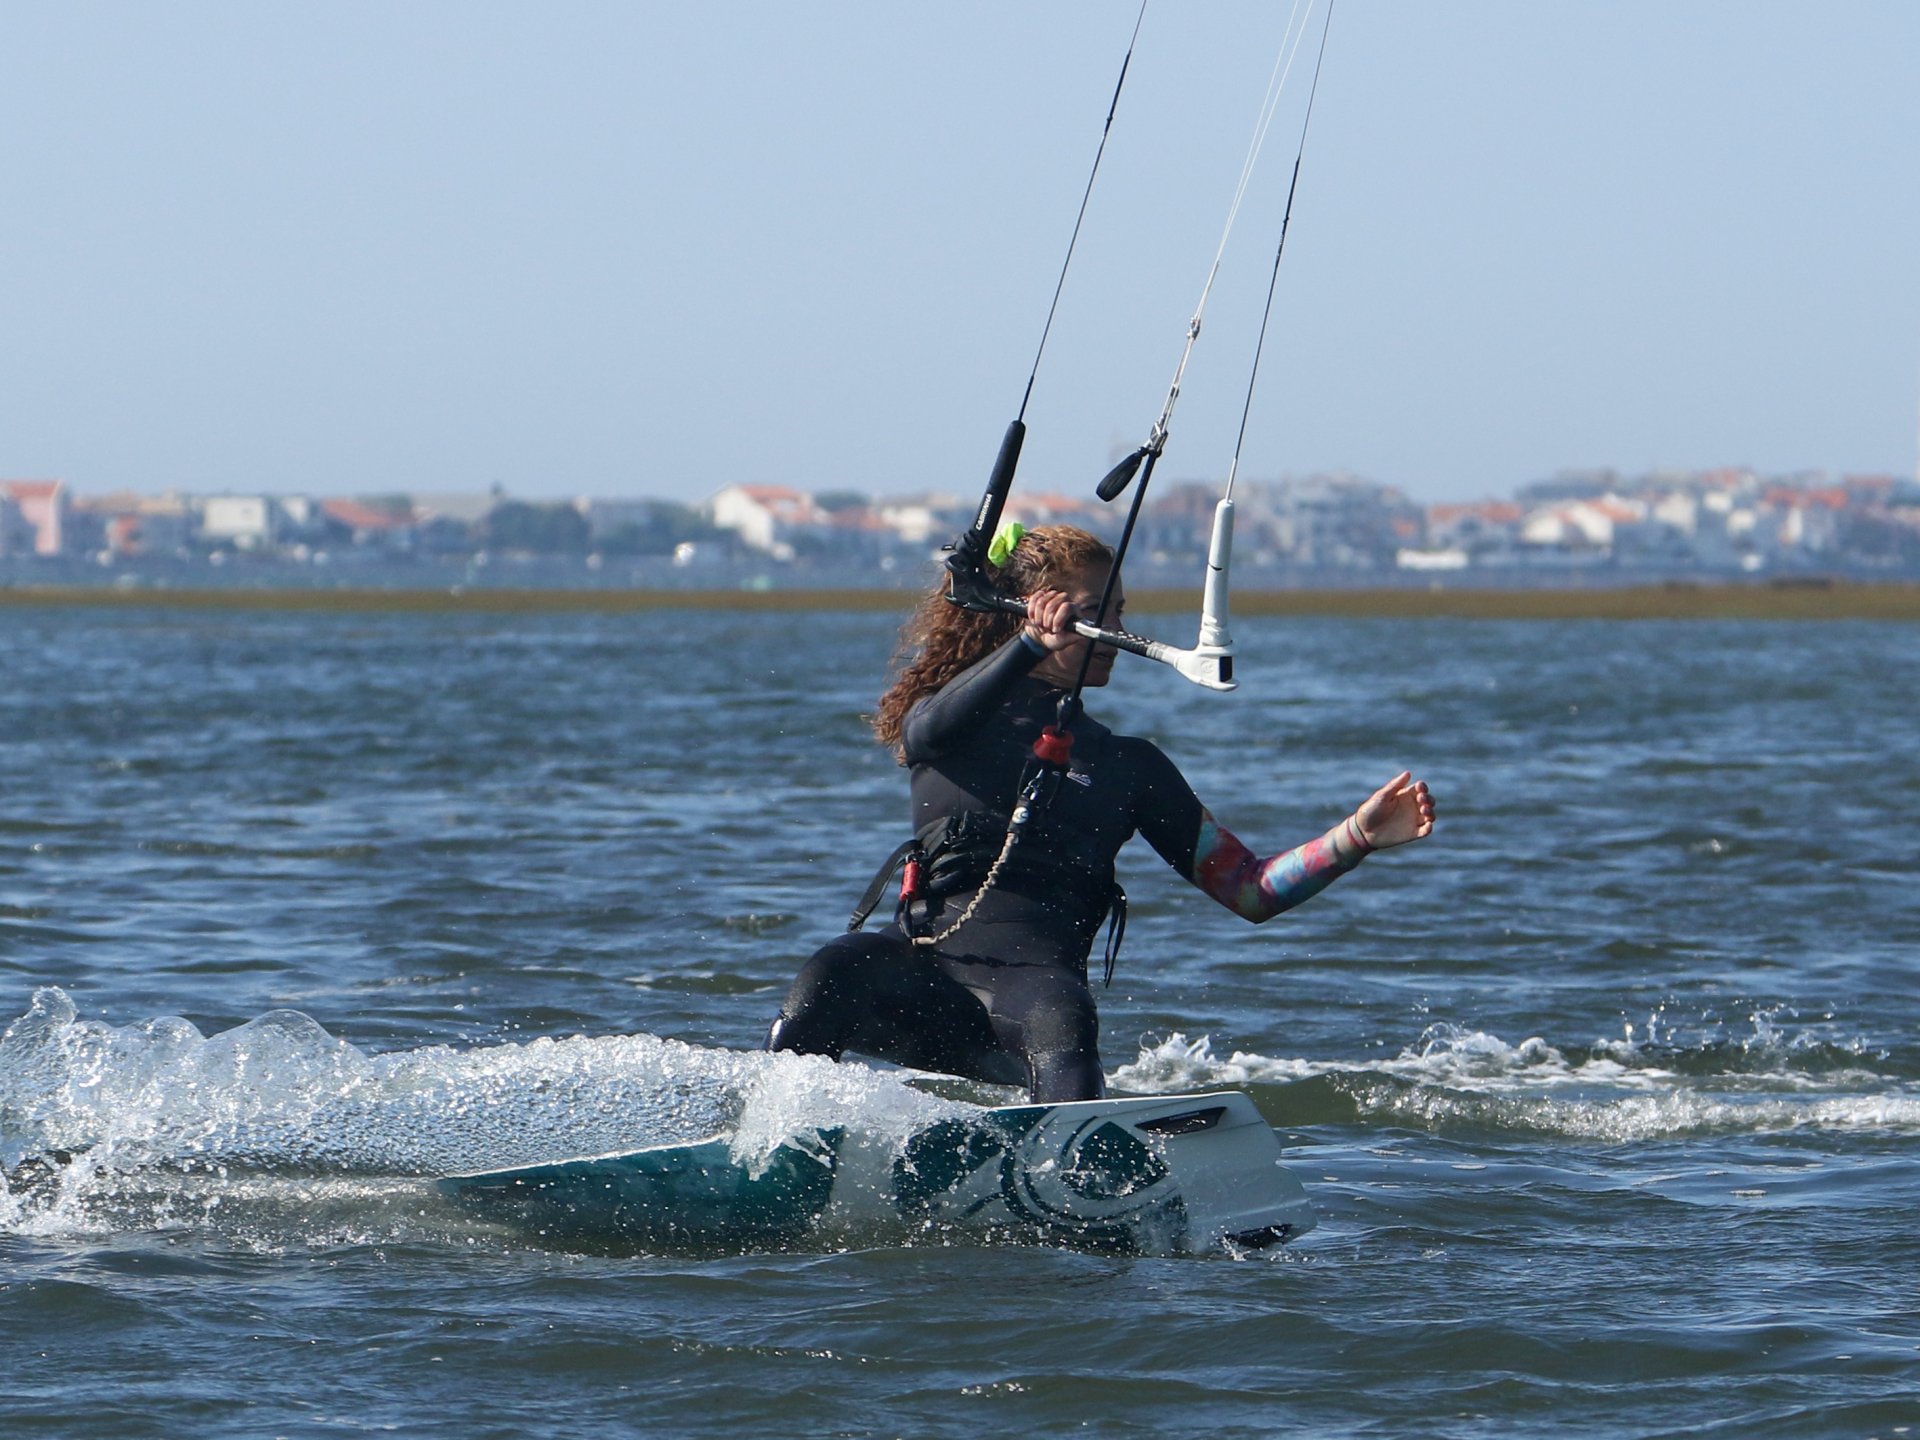
Back Hand On Pic F.
With your edge in and the board turning, your aim is to steer the board round and through the carve until you're heading back in the other direction. Continue to turn your head and reach up with your free hand to grab the bar. This will force your upper body around and bring your weight forwards, putting more board in the water and tension back on the lines. Once comfortable, you can start to resist with your back leg, pushing against the board, which will encourage it around. By this stage, your kite should have flown through the window and will be heading towards the edge on its new tack. Karine has more edge in the water, she's reaching up and looking forward, whilst her back leg is extending to turn the board further.
Finish The Turn Pic G.
Your defining moment! Finishing the turn means getting back into your upwind stance. There are two things that will really help. The first is your head. Look where you want to go, and you'll soon find that the rest will usually follow. The second is the hand swap. Now that you've replaced what was your free hand, you can release your new front hand. This has two main benefits. Firstly, as your kite surges through the window and you edge against it, it will power up. By releasing your front hand, you'll be able to sheet out more easily and therefore resist the kite's intention of pulling you off downwind. Secondly, you can twist and face upwind sooner, which will allow you to finish your turn quicker. As a bonus, if your kite is heading down too low, you'll be in a great position to lift it. Karine is looking upwind, she's back on her edge, hand leading, loads of board in the water and kite under control. Once everything feels hunky dory, you can place your front hand back on the bar.
Top Tips
It's always better to start gently! However, if you turn the kite too slowly, it'll end up high, and you'll have no power to carve, which is not the end of the world. In fact, it'll be much like the unintentional turns of old. Don't be afraid of setting your kite a bit lower than 1 or 11, as this will help you turn the kite before it ends up too high. Then you can build up, giving it a bit more each attempt.
The arc of your carve will depend on how hard you steer your kite. The slower that you steer it, the longer the arc. As long as your kite cuts the top of the window. If you're lacking in power, then feel free to cut more window and steer your kite more aggressively. However, this is about line of flight. Remember that you want to turn your kite quickly but then straighten it up so that it flies across rather than dives.
To get a feeling, you can go slowly and use two hands, but beware of your sweet spot, as with two hands, you are less able to sheet out and more likely to stall the kite.

Common Problems
Kite goes up and lifts you. Two possibilities. Firstly, if you're too gentle steering your kite, it won't turn but will drift up to 12. If this is the case, start a bit lower and steer the kite with a bit more meaning. Secondly, if you're getting a lot of lift, it's because you are edging for too long. Turn the kite and flatten off as soon as you feel it pull.
Falling onto your bum or back. If you get the sensation that the kite pulls you over and you're not turning through your carve, this is often a result of leaning back onto your back foot with your entire body. So as soon as you turn your head, you'll have no weight on the board and leave it behind. Remember, you should just force your hips and bum back and drop your weight onto the board. This way, you'll be balanced over the board, and your input will make it turn.
Kite stalling through turn. Normally the result of pulling the bar in to steer rather than using your wrist. Practice steering the kite with one hand whilst avoiding pulling the bar towards you.
Keystones
- Kite just below 1 or 11 o'clock
- Positive steer with back hand
- Drop bum back
- Flatten and roll
- Turn head and swap hands
This technique article was in Issue 93 of IKSURFMAG.
Related


By Christian and Karine
Christian and Karine have been working together as a coaching team, running improver to advanced kitesurfing clinics since 2003.
