
Air Gybe Tweak
Technique / Beginner

Introduction
Here's a nice little add-on to give your jump transition a point of difference. Nothing too shouty, rather some subtle substance that will feel fresh and look on point! Adding some flare onto your air gybe should be within reach of anybody who is happy getting off the water and changing direction with a modicum of control.
The game plan here is to scissor your legs so that your board twists to toeside whilst you hang under your kite, before un-scissoring for a heelside landing. As such, this will potentially be less tricky when taking off on your strong side, as you'll effectively be twisting to your usual toeside in the air. That said, there's no reason why you shouldn't adapt this to either side. Without further ado, let's dive in and see how this works...


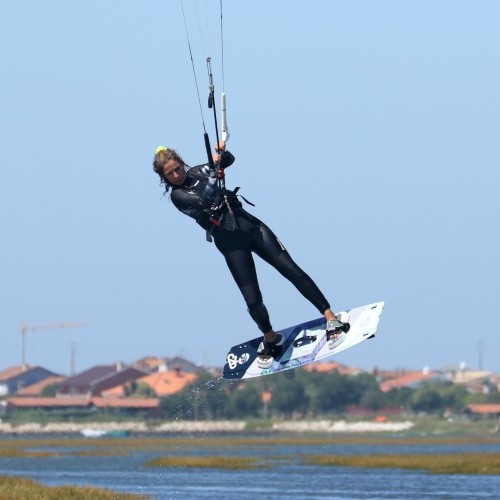
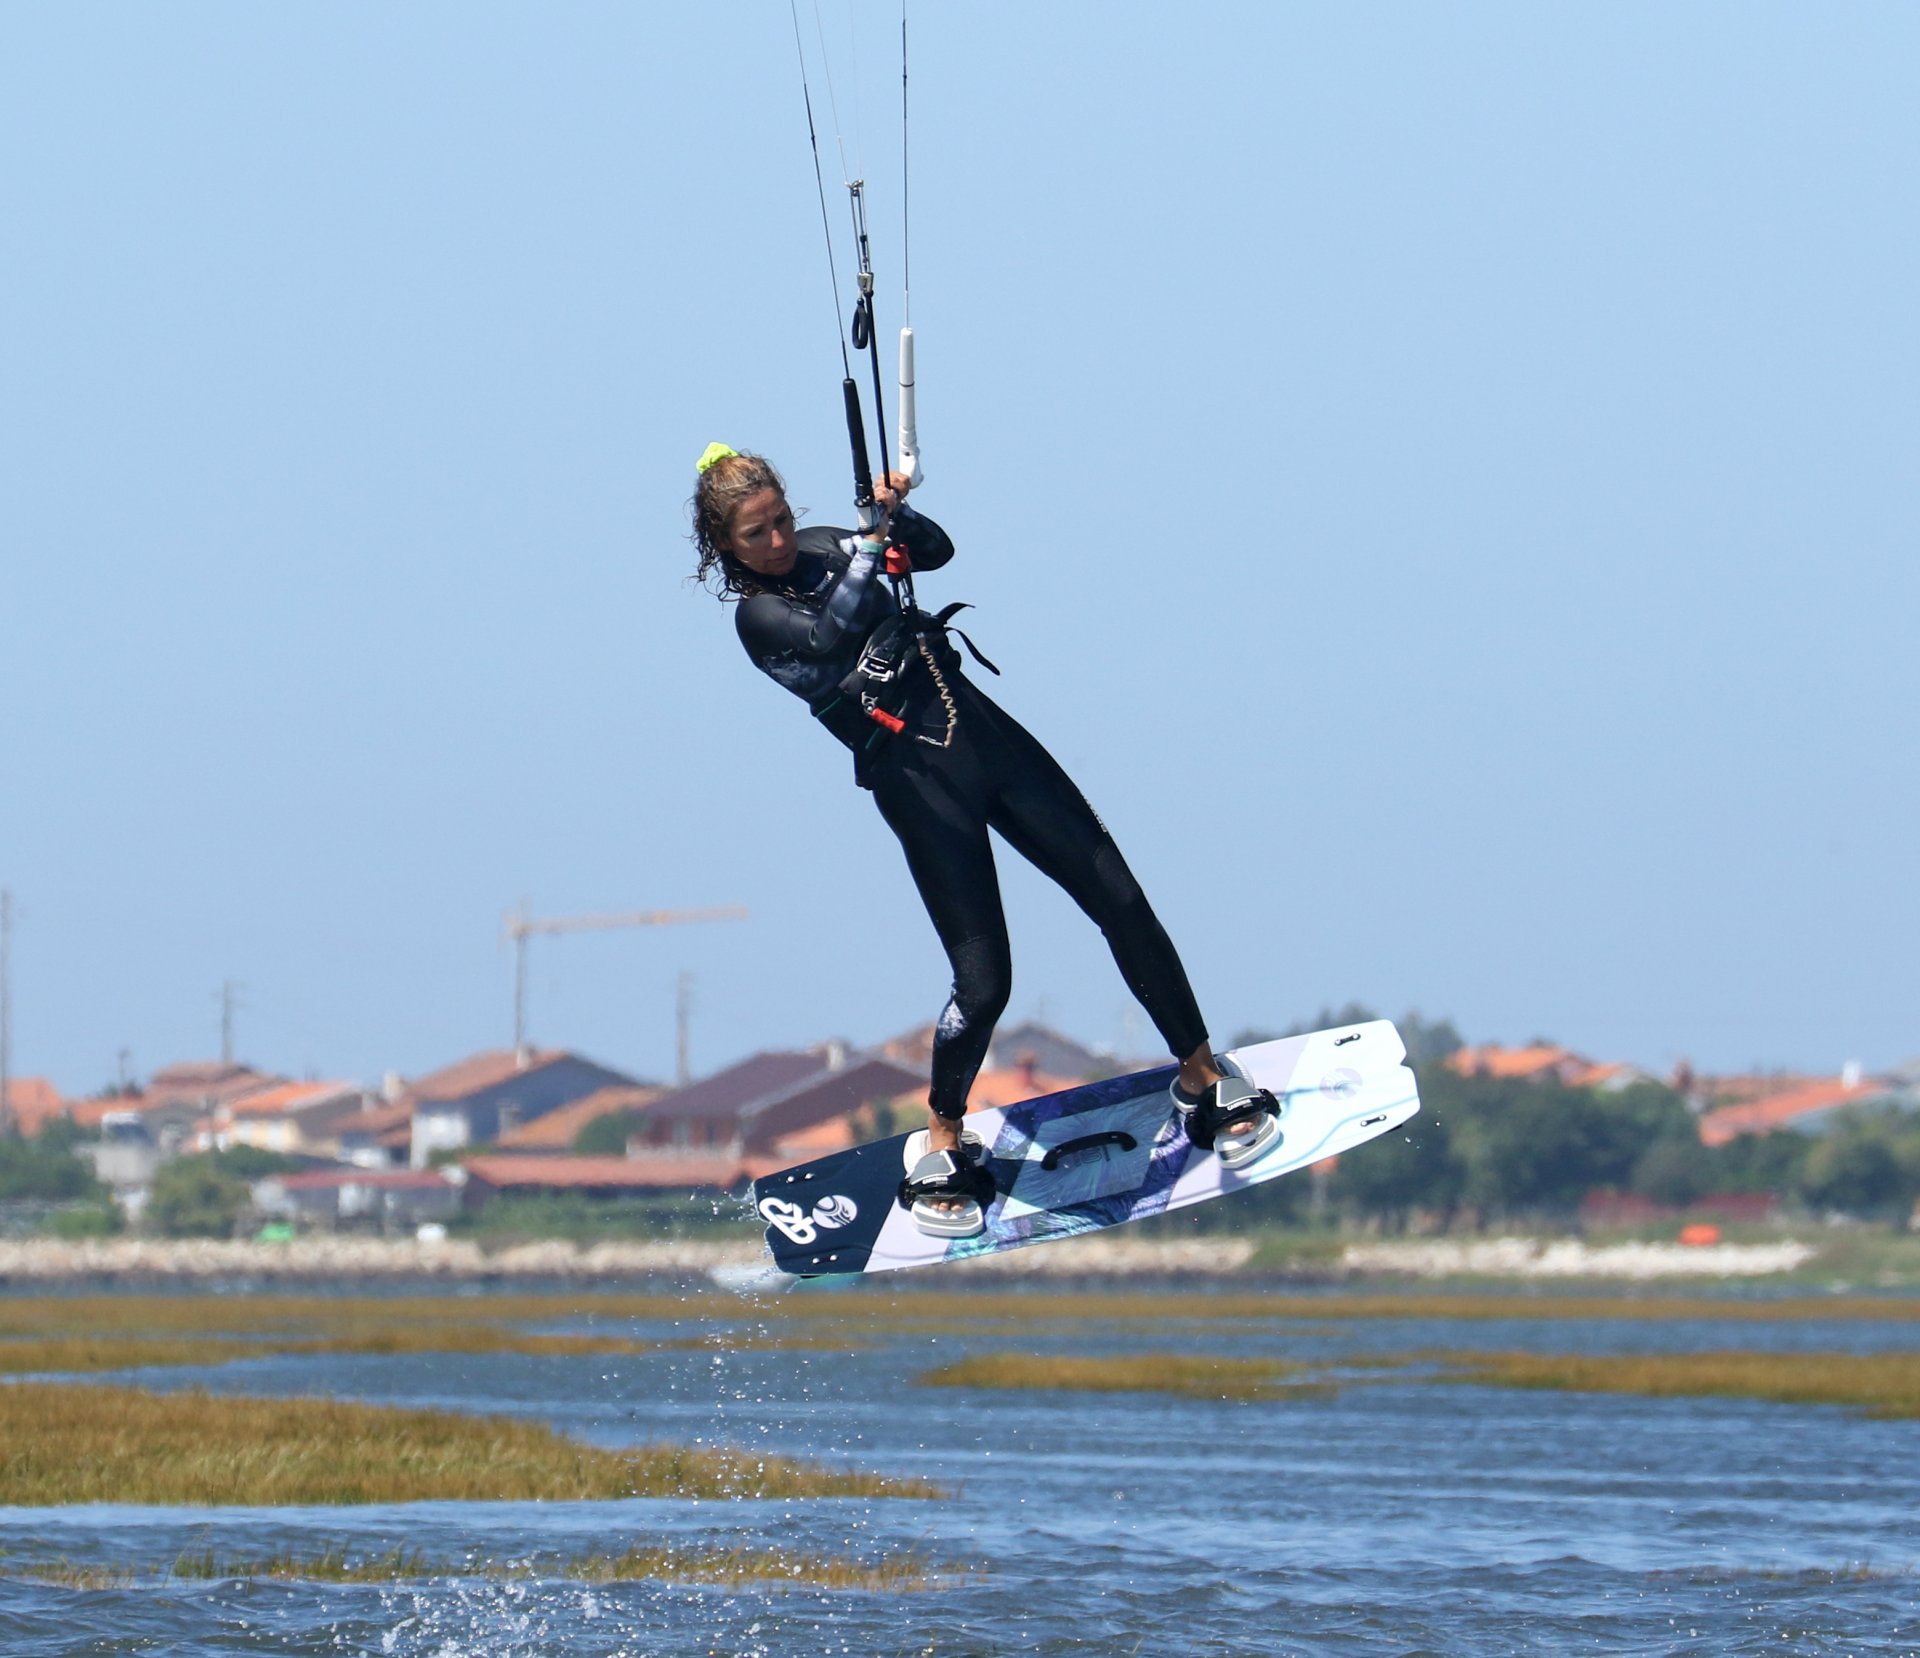
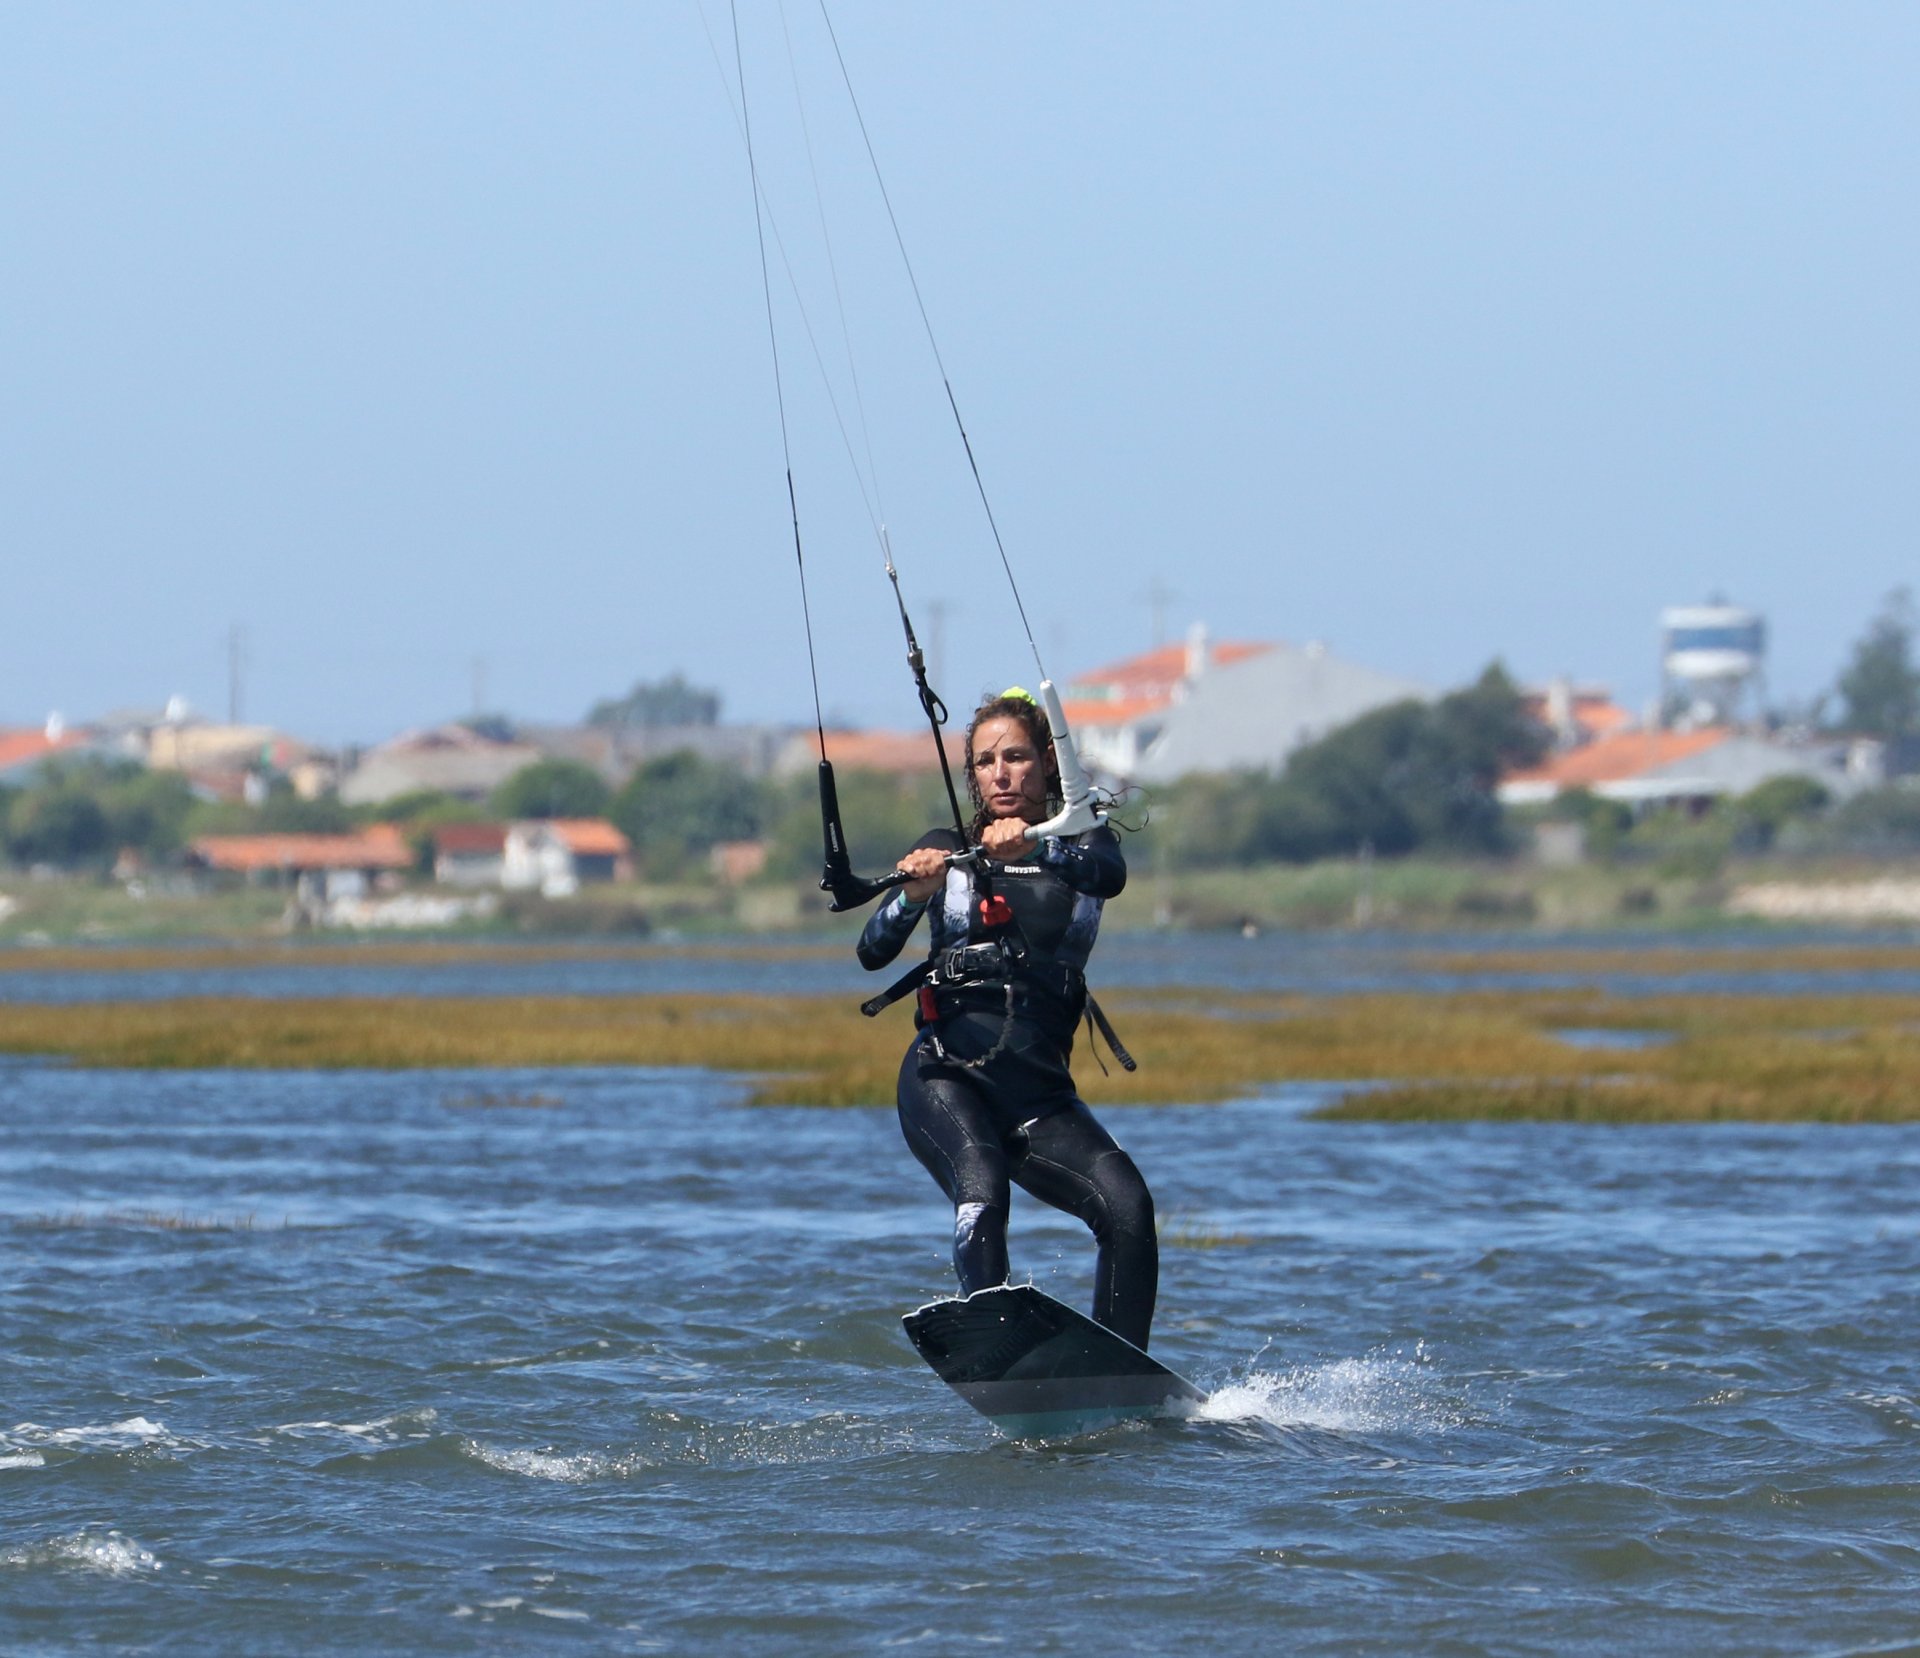
Approach and Send Pic A.
This should all be as per your usual bog standard air gybe. You're intending to change direction, so you need to cap your speed. Race in, and you'll have a lot of kite flying on your hands. Your best bet is to come in on a strong edge and, if need be, let your bar out a touch to slow down. You still need lift, so don't be shy of sending your kite from either 1 or 11 o'clock. The crux is for a short sharp send, so be positive with your bar, but send it for less time so that your kite doesn't fly too far past 12. In the photo, Karine is on a good edge, and she's slowed down by breaking at the waist and letting the bar out. However, she's still given the bar a decent pull/push to get the kite travelling for some lift.
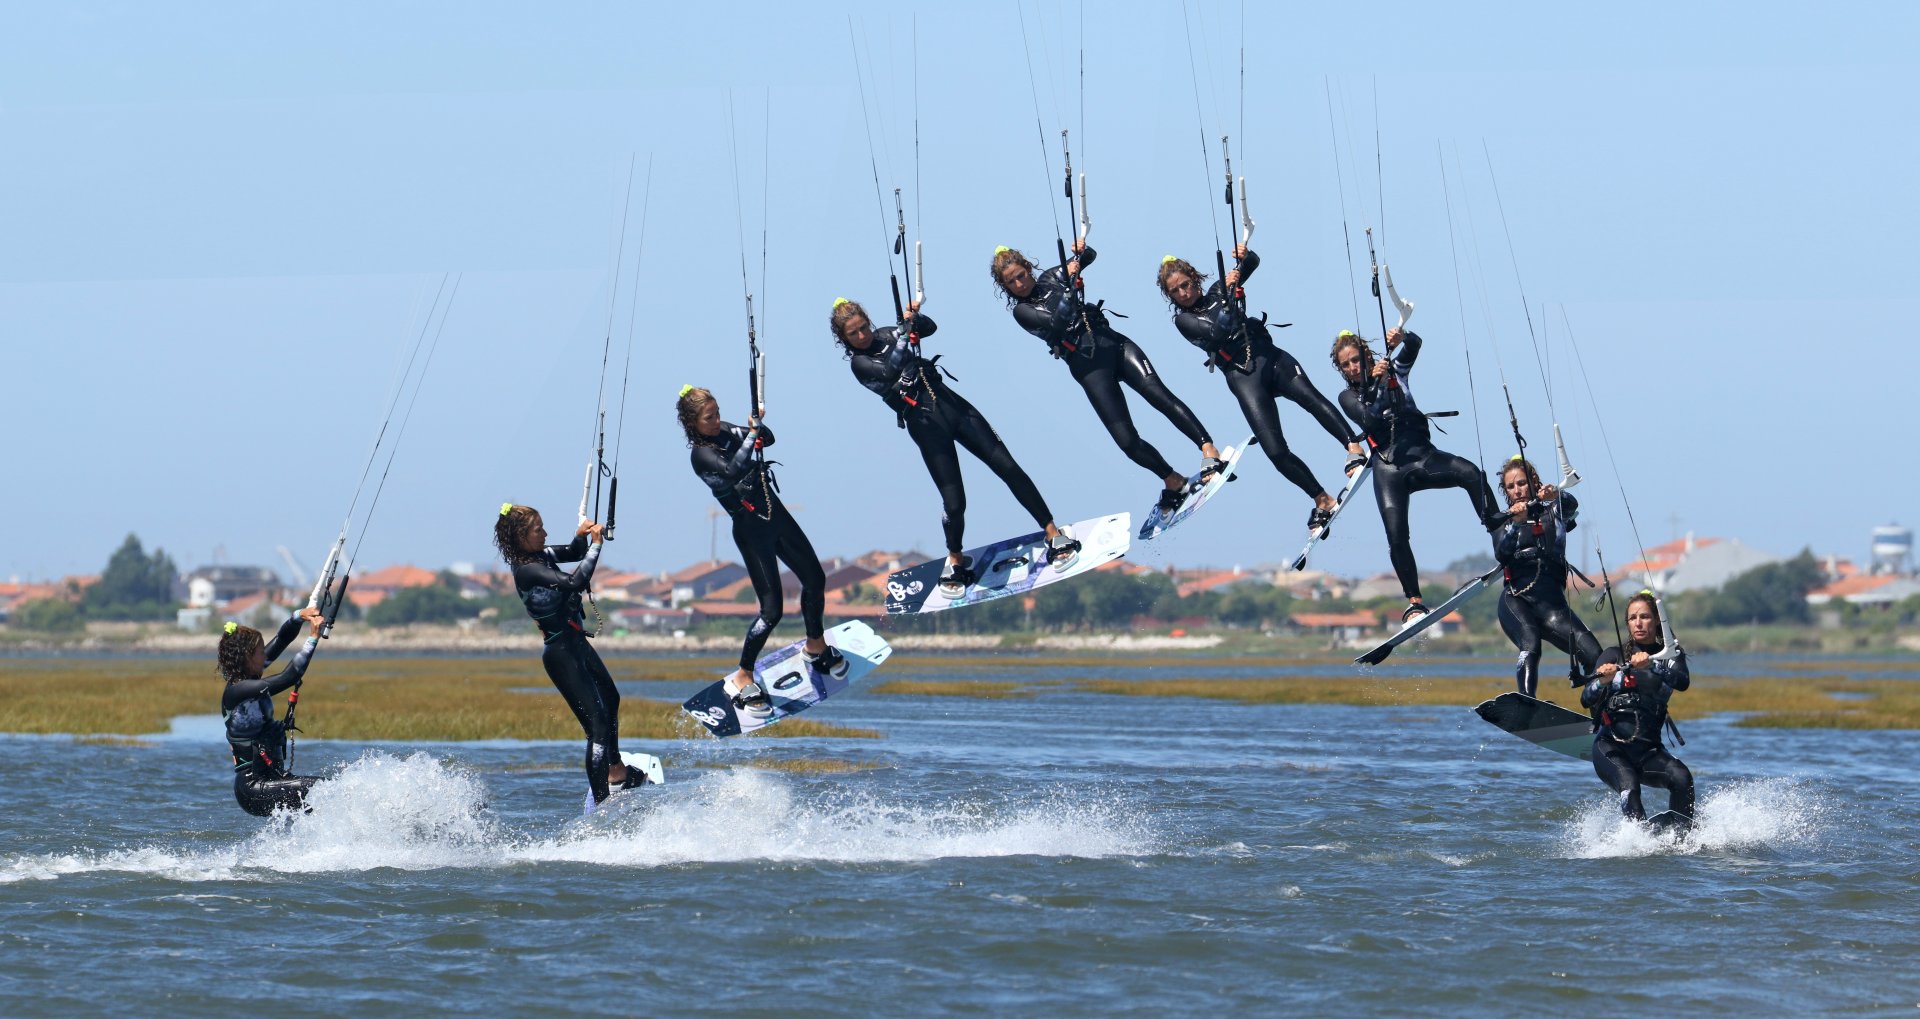
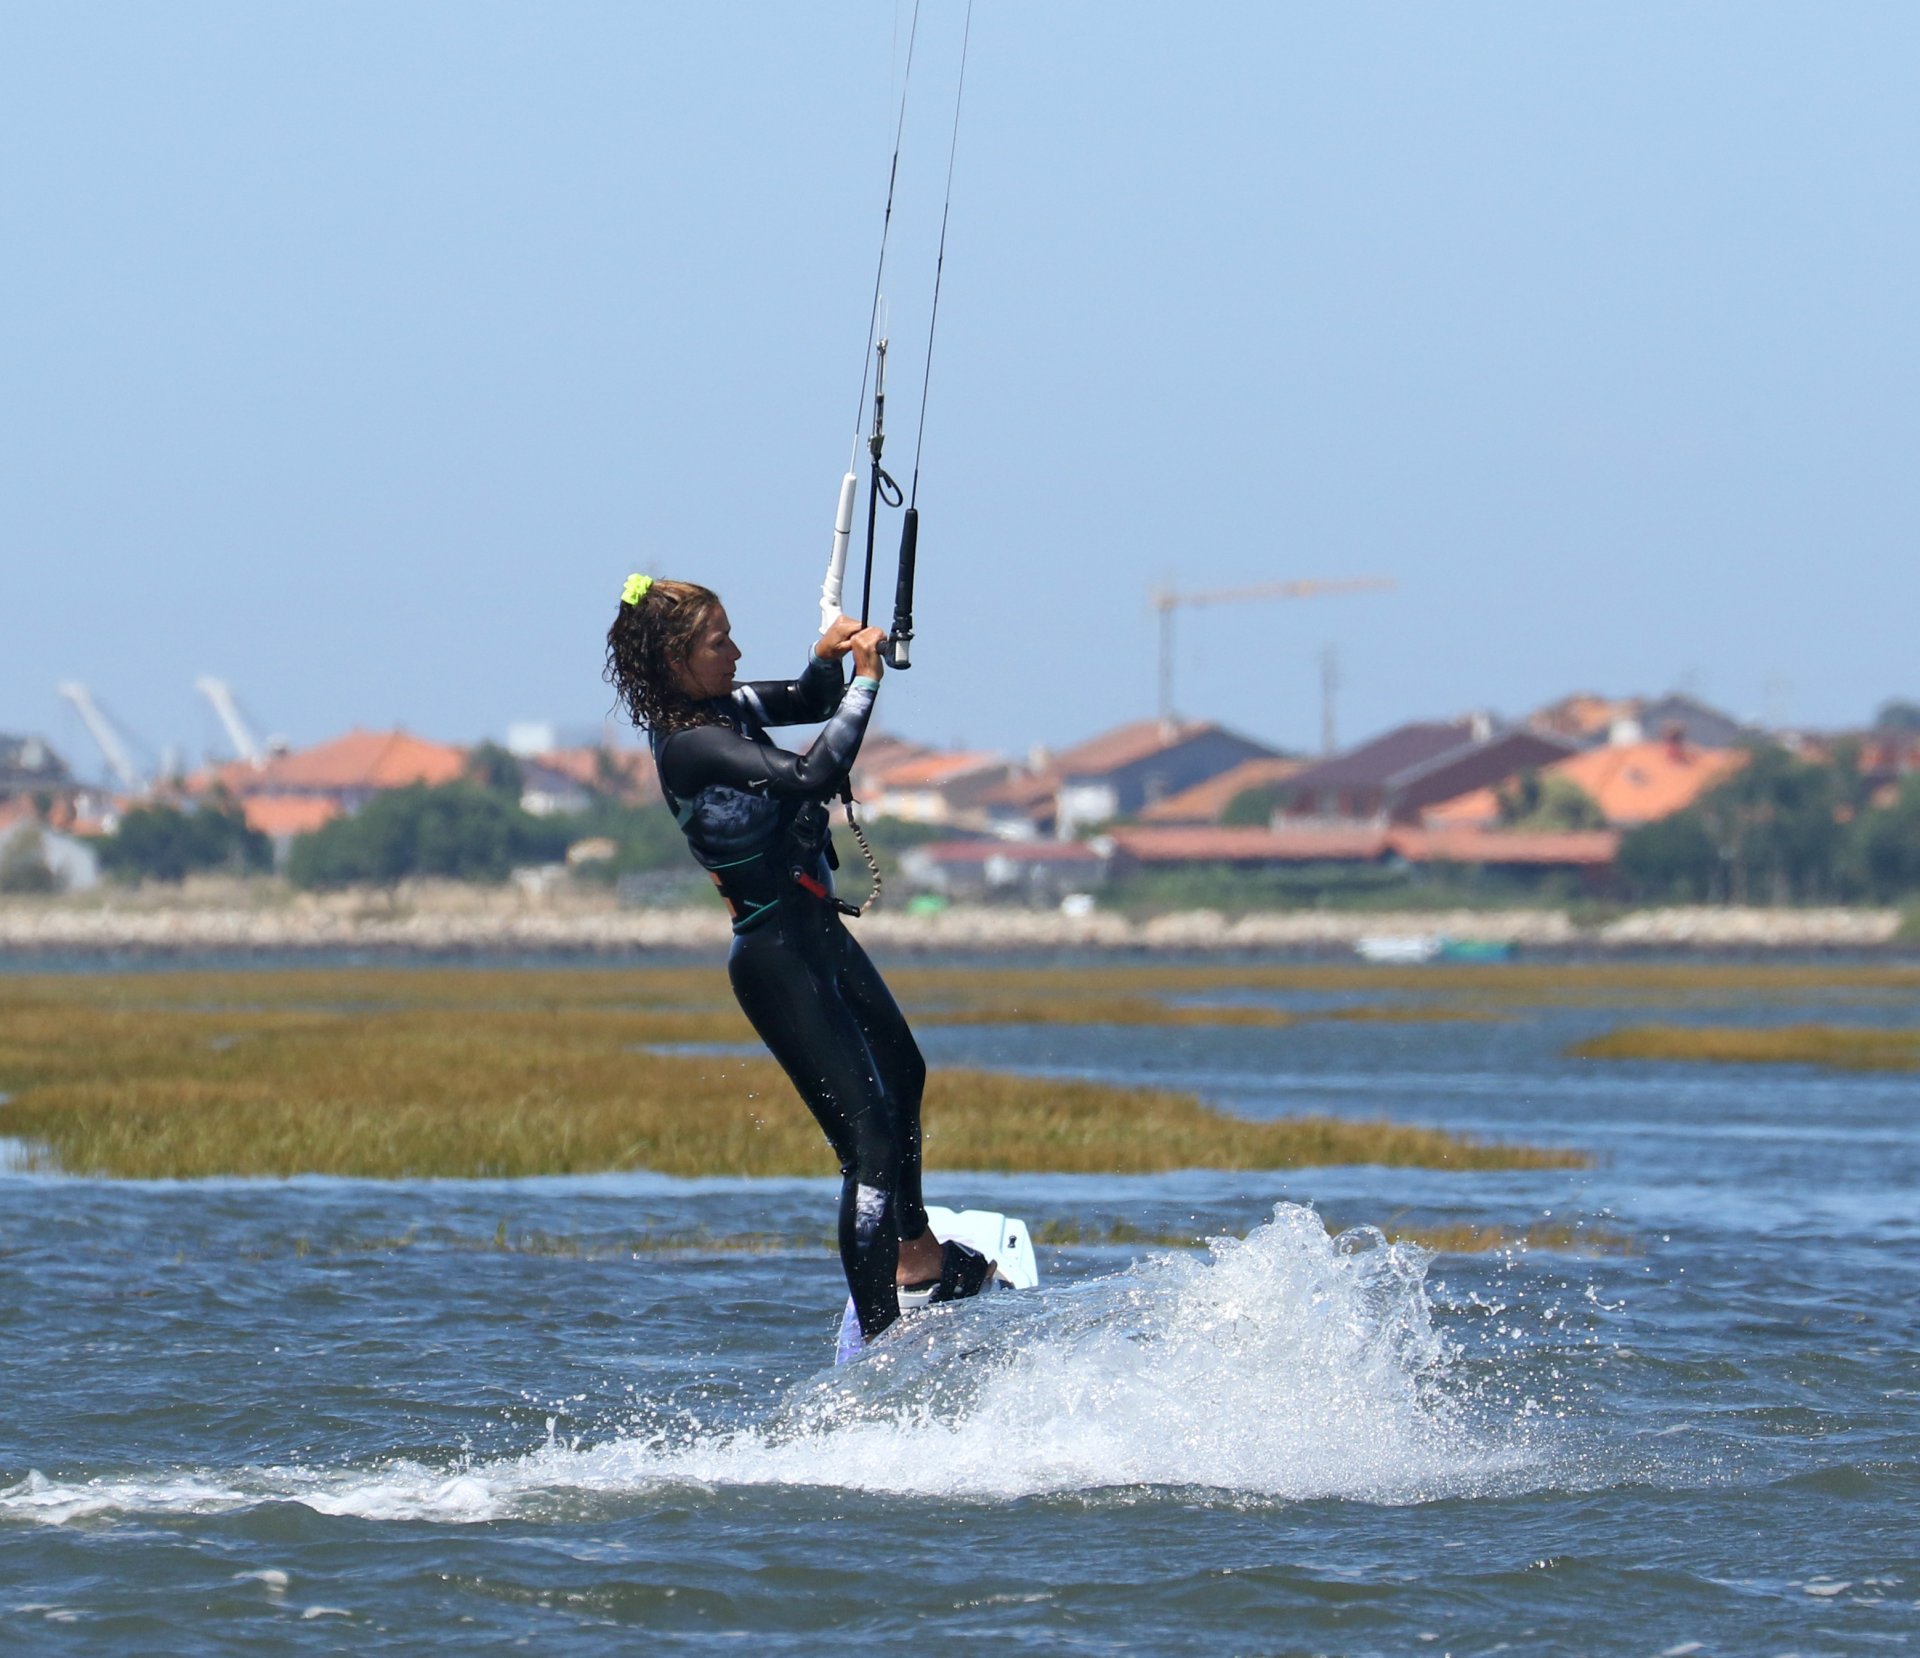
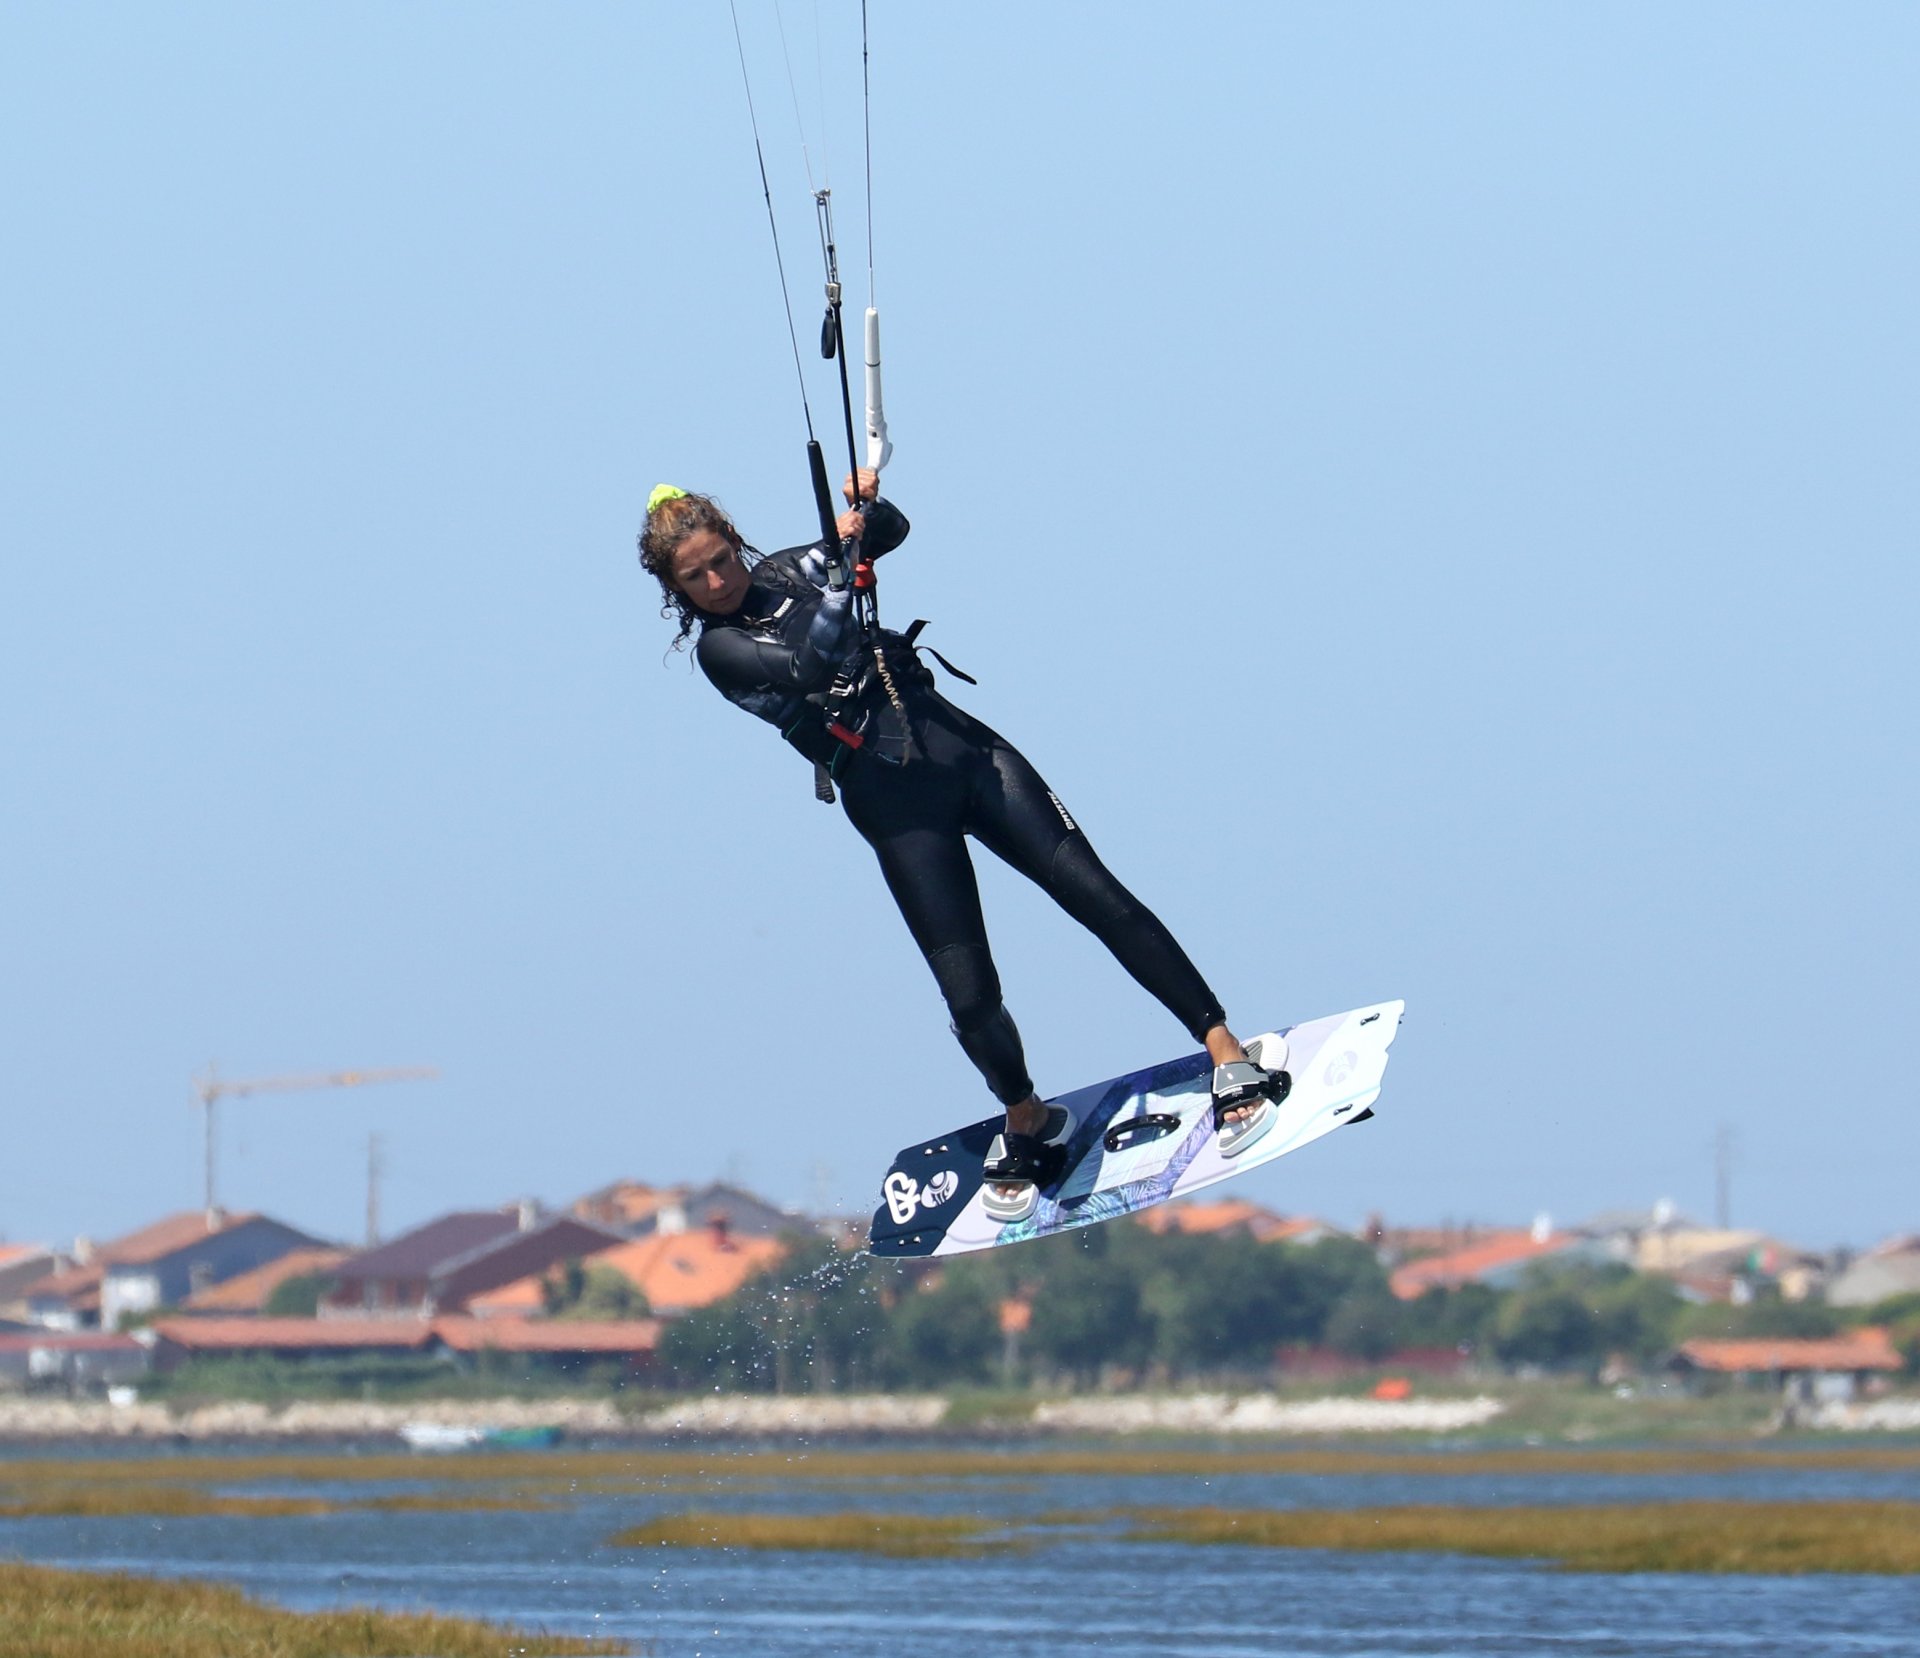
Take Off Pic B.
As with all things kite, get the take-off nailed, and your likelihood of success is fantastically enhanced. Your aim on take-off is to help yourself up, control the kite and get balanced. Once done, you can concentrate on what's to come. To help yourself up, you need a hefty stamp off your back leg, kicking against your edge. As soon as you kick, you can pull the bar in for some extra lifting power. As you pull the bar in, make sure you level it. This will stop the kite moving any further and ask it to hover around somewhere above you. Whilst keeping the bar level, make sure that you're level. You can see how Karine's shoulders are level with the bar, as are her hips and head. This way, everything is balanced, and you'll be travelling up in harmony with your kite, a perfect platform from which to move on.
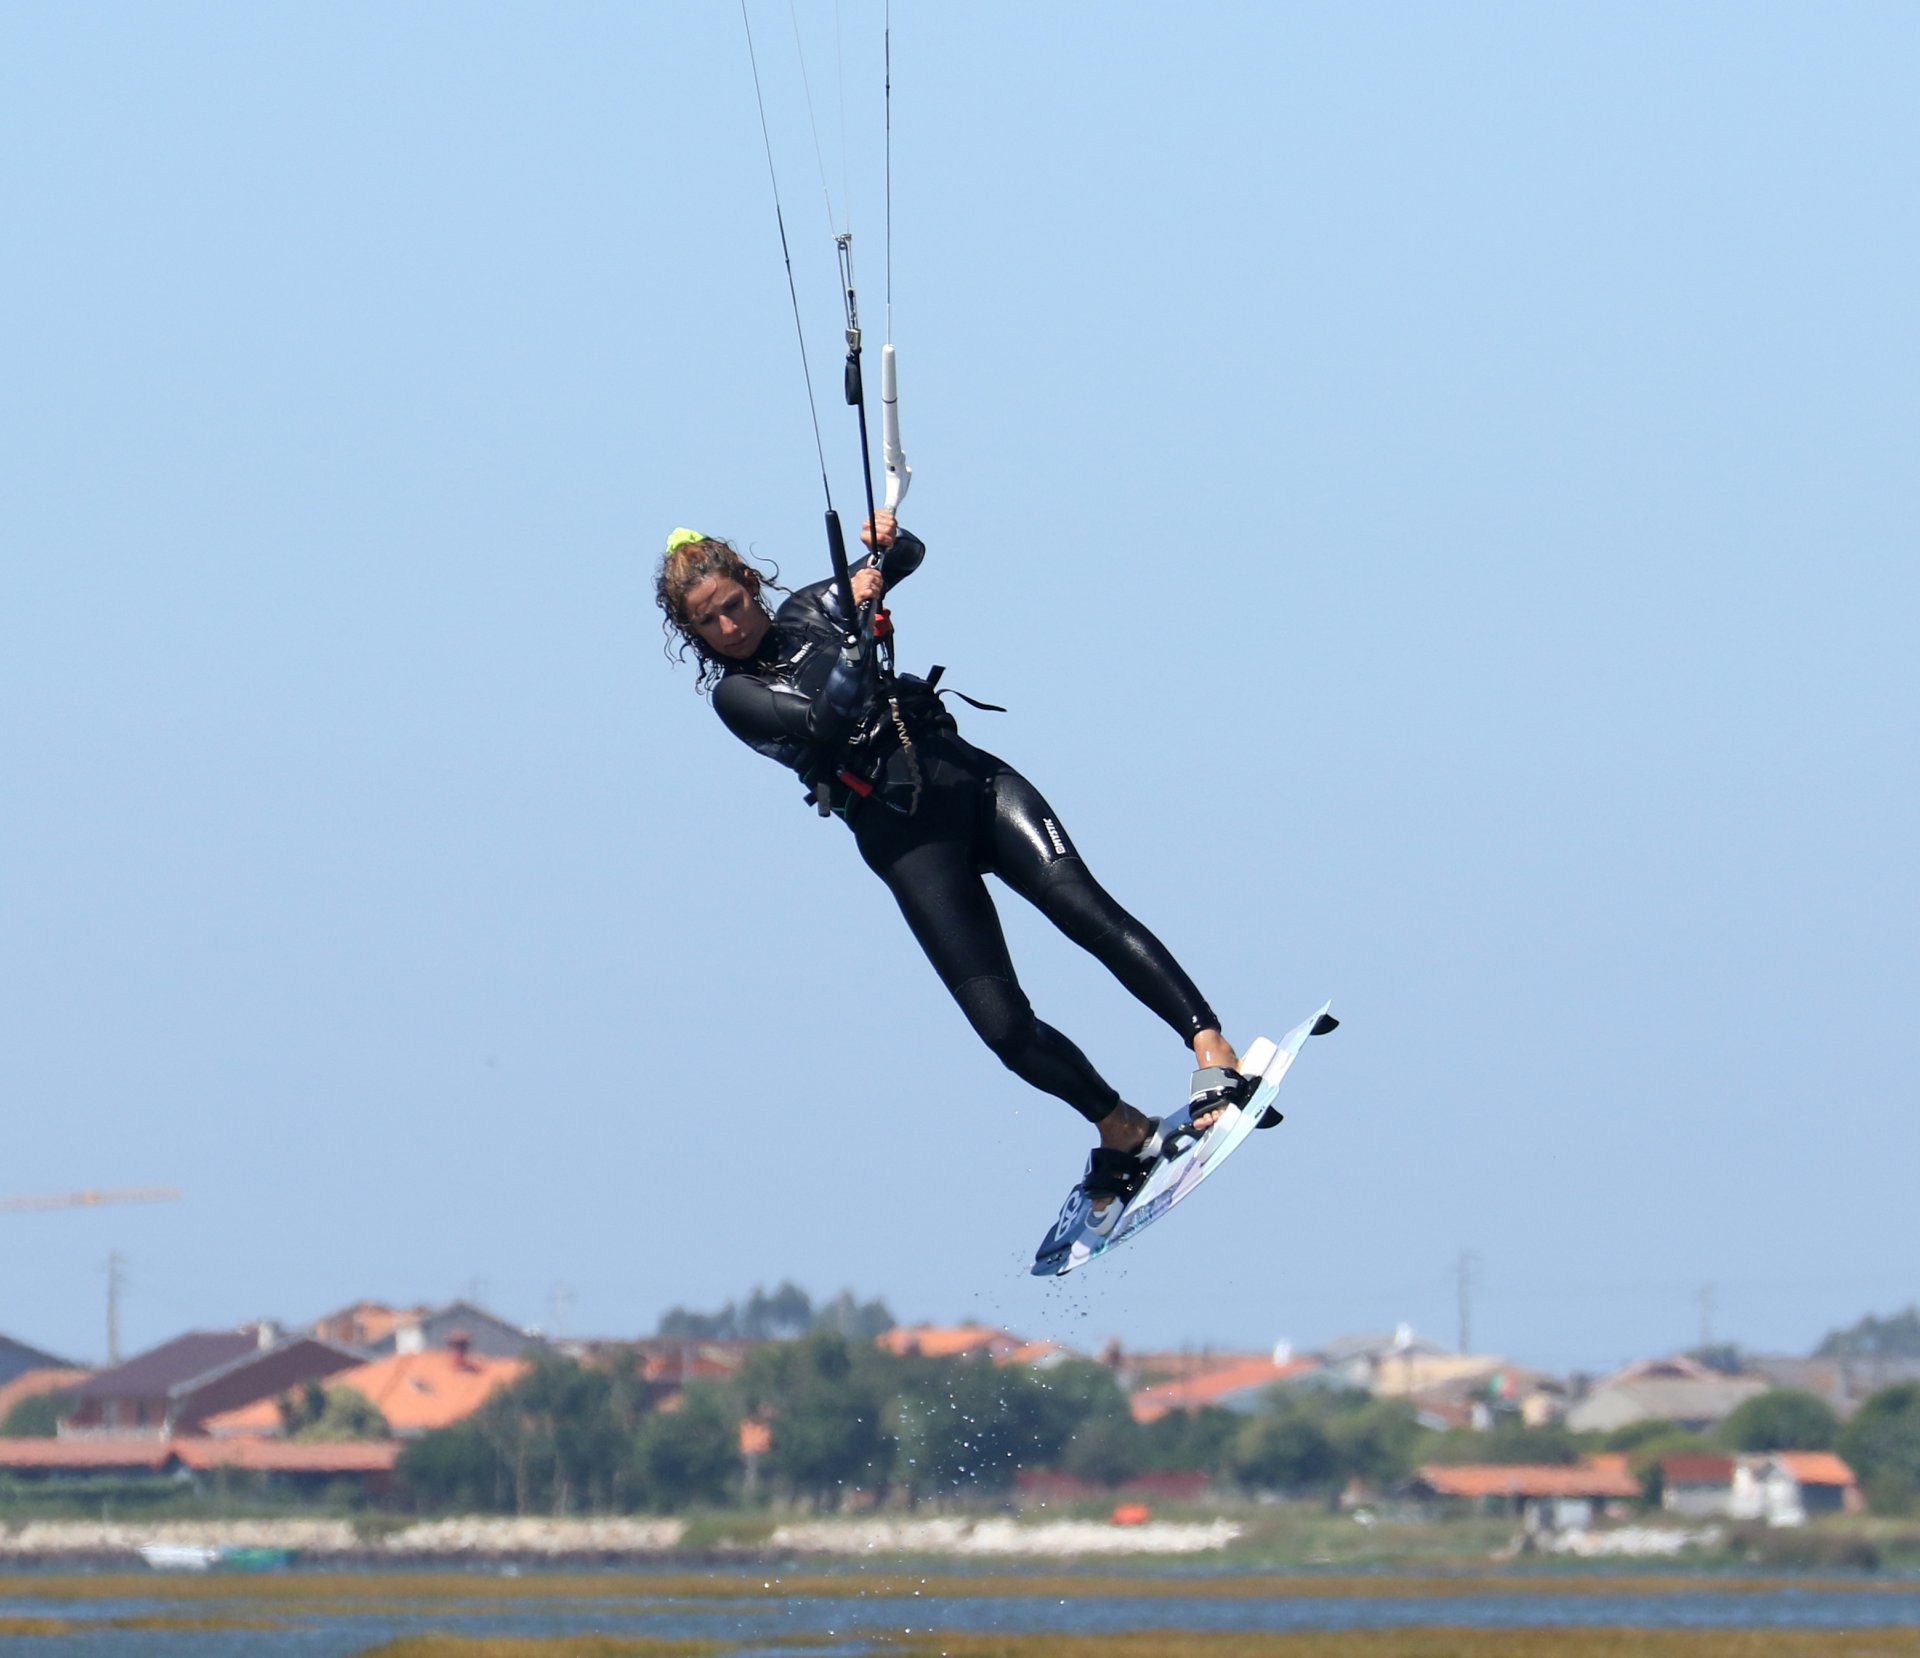
Pendulum Pic C.
As you lift off in an air gybe, there is always a little bit of pendulum. You've stopped the kite, but you most likely still have a smidgen of forward momentum. In this move, it's a bonus. The pendulum will want the lowest part of the "weight", that's you, to swing out; that'll be your feet and the board. To control this, you want to lean your head and shoulders in the opposite direction, back from whence you came. You can do this by dipping your back shoulder and keeping your head on that side. However, concentrate on keeping the bar level as you dip. Looking at the pic, you can see how Karine's board is swinging out from underneath her, whilst she is leaning to the inside with her head and shoulders, countering the swing, whilst her bar remains level.
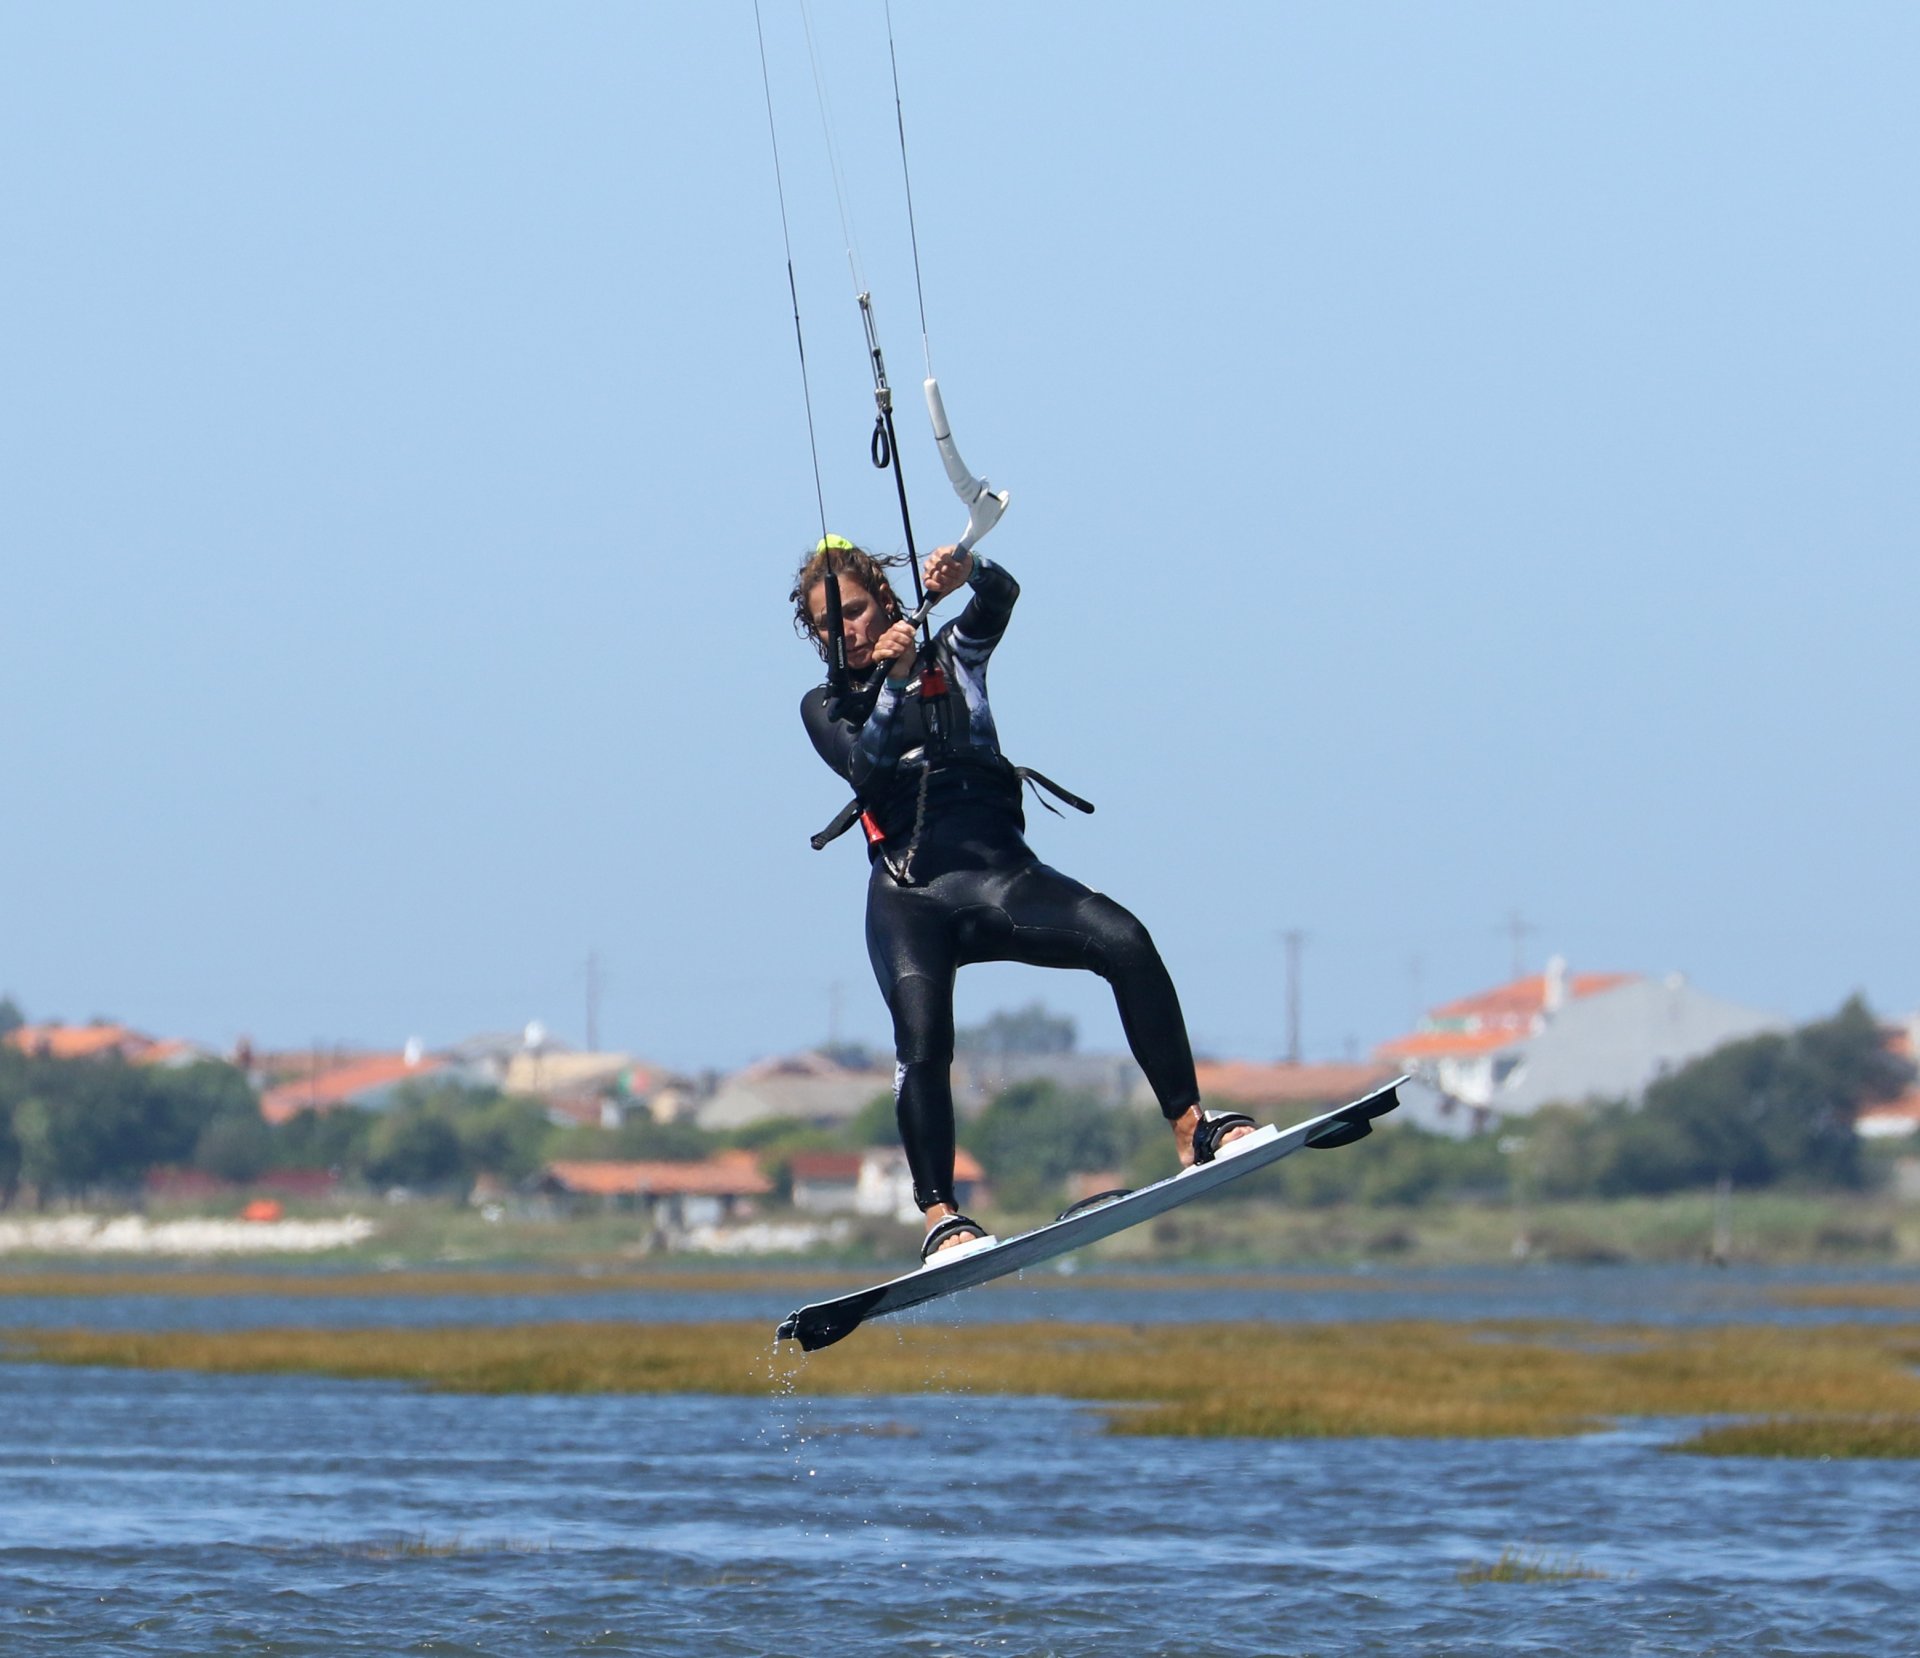
Front Foot Pic D.
Once you're leaning and your lower regions are swinging, it's time to get your tweak on! Front foot first. To get things moving, pull your front foot forwards and twist your hips in an effort to point the nose of the board back in the other direction. This will only be possible if you keep the bar in. Keep your front leg straight, and use your core to twist the board around. You can see that the toes of Karine's front foot are lifting. This is because she's pulling the board around with her front leg. Concentrate on keeping your front leg straight as you'll naturally bend your knee and bring the back foot up as you try to pull.
Scissor Pic E.
Now's the time for some multitasking. As you bring the front foot forwards and around, scissor your back foot under and away from you. Imagine you're trying to wipe your foot, pulling it behind you and then extending it further still as your hips twist. With both feet in the mix, it becomes a scissor action, front foot forwards and back foot back. The further you can accentuate and exaggerate this movement, the more visual your tweak. This added to the board swinging out under the kite will give you a new and unusual feeling and a cracking new look to your jump transition. Once you've got it, try and hold it. If you look at Karine here, she's held her tweak and is on her way down. As such, she's already started to dive her kite.


Landing Gear Down Pic F.
Whether you dive whilst still scissoring or not, you will need to lower your undercarriage and prepare for landing soon enough. As you start to descend, relax your hips and legs. This should pretty much automatically untwist you so that the board comes across in front of you. Make sure to give the kite a good dive so that it flies down through the window rather than drifting around the edge. You'll need to let the bar out onto the sweet spot to do this; otherwise, you'll get nothing from the kite. Here Karine has relaxed, and the board drops in front of her. She's eased her bar out onto the sweet spot and given the kite a good dive.
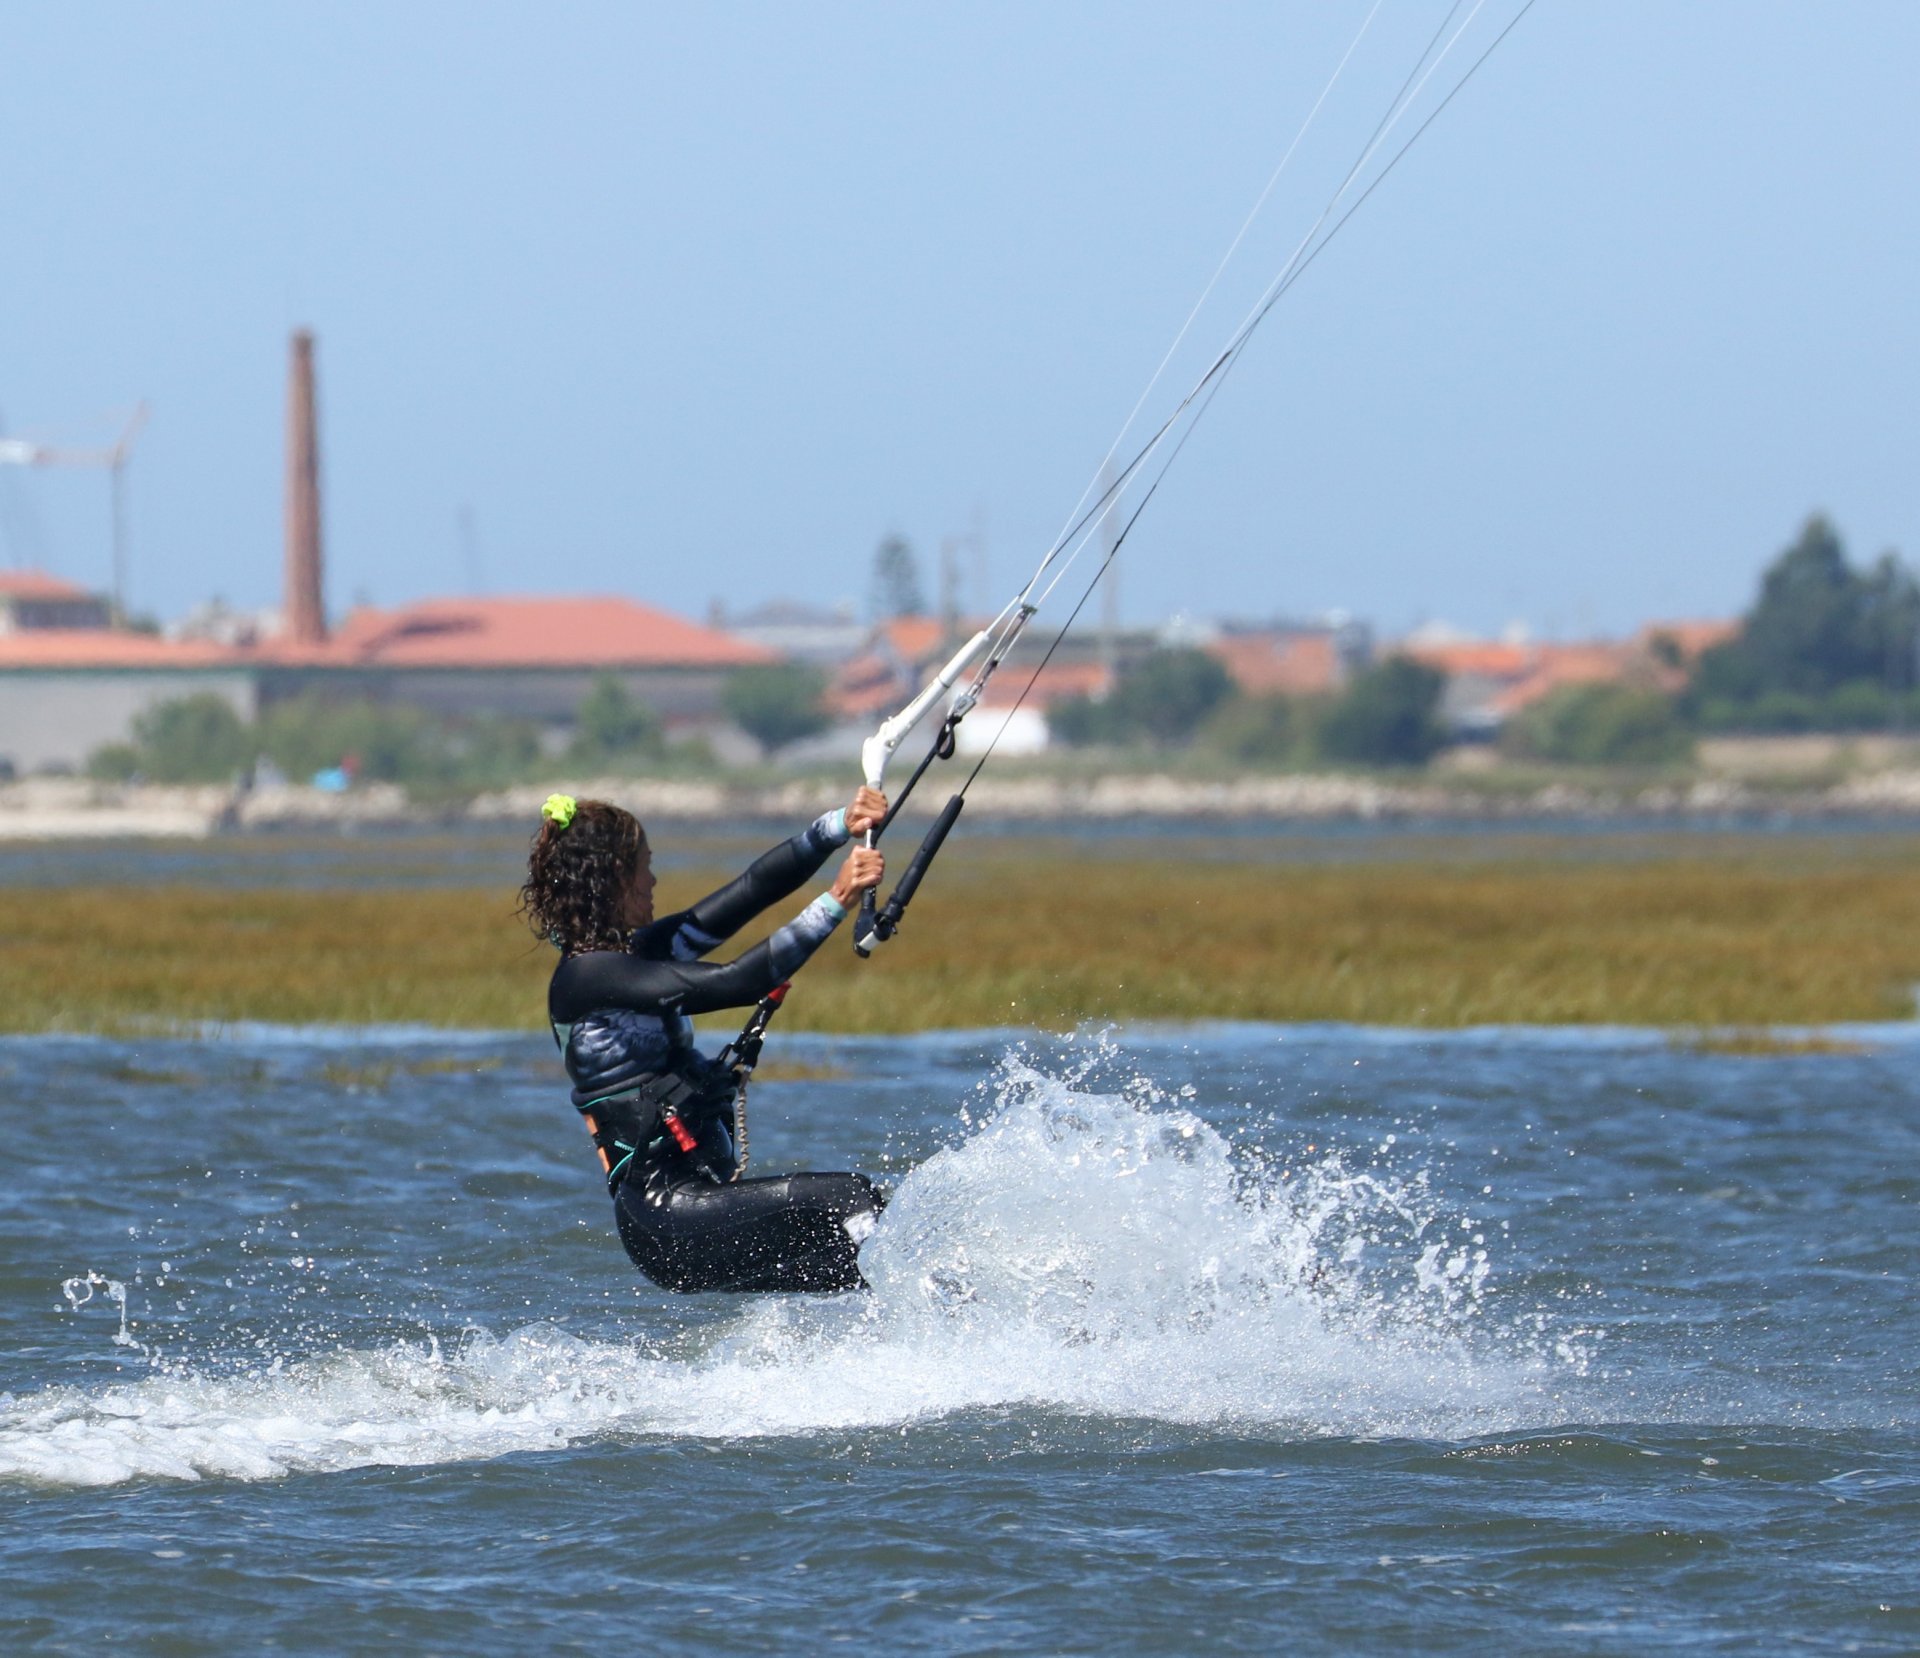
Touch Down Pic G.
And the result is... a gentle tail first downwind landing. As the kite pulls, keep the power on and go with it. Twist your board to point downwind and look where you're going. As the board touches down, make sure to level your bar to stop the kite diving. Once you're settled, carve back onto your edge, ready for another go.
Top Tips
Build it up in stages. Start by getting used to leaning the head and shoulder, concentrating on keeping the kite above you. At first, when you try this, you'll find that the kite drifts around the edge of the window because you're leaning. Once you're happy, move on to bringing the front foot through, and then add a full back foot scissor. Although you don't need much height or time for this, initially, a bit of hang will help you think through it. And lest we forget. This is a transition, so please make sure that you've got space to turn!
Now have a look at the sequence and watch the video...
Common Problems
As alluded to above, it's easy to let the kite travel too far as you swing. A little bit is fine, but too much and landing will be tricky. Make sure you give a hefty stamp against your edge on take-off to kill forward momentum. And make sure that you level the bar to stop the kite drifting too much. The killer here is if you turn your head to look back from where you came, as this encourages the kite to keep moving. As such, even as you lean, don't look back.


Legs bending when scissoring. This is a result of lifting the front foot through. Think of it more as if you're kicking a ball, extending your leg. If your back leg is bending, think the same, push your foot back rather than pulling it underneath you.
Landing on an edge. Generally, the result of the kite drifting, so see above, or not enough time. Go for a slightly higher and floatier air gybe.
Keystones
- Slow down, short but sharp send
- Kick and level bar
- Lean head and shoulders
- Scissor feet - tweak
- Relax and dive
This technique article was in Issue 94 of IKSURFMAG.
Related


By Christian and Karine
Christian and Karine have been working together as a coaching team, running improver to advanced kitesurfing clinics since 2003.
