
Hooked Pop from Toeside to Heelside
Technique / Beginner

Instructions
To continue our quest of all things toeside, it’s time to throw the pop from toeside into the mix. Now that you’re getting more comfortable, having dialled in your toeside and added the pop to toeside, it’s surely time to have a tasty way to get back to heelside. Not only that, once you master this, you’ll have popping from toeside on tap, which will open the door to an unfathomable number of moves, tricks and challenges. What’s more, here you’ll be learning how to get off the water without using your kite from your toes, but then the getting back to heelside part is already pre-programmed in your very being. So, let’s not beat about the bush and get straight to it.
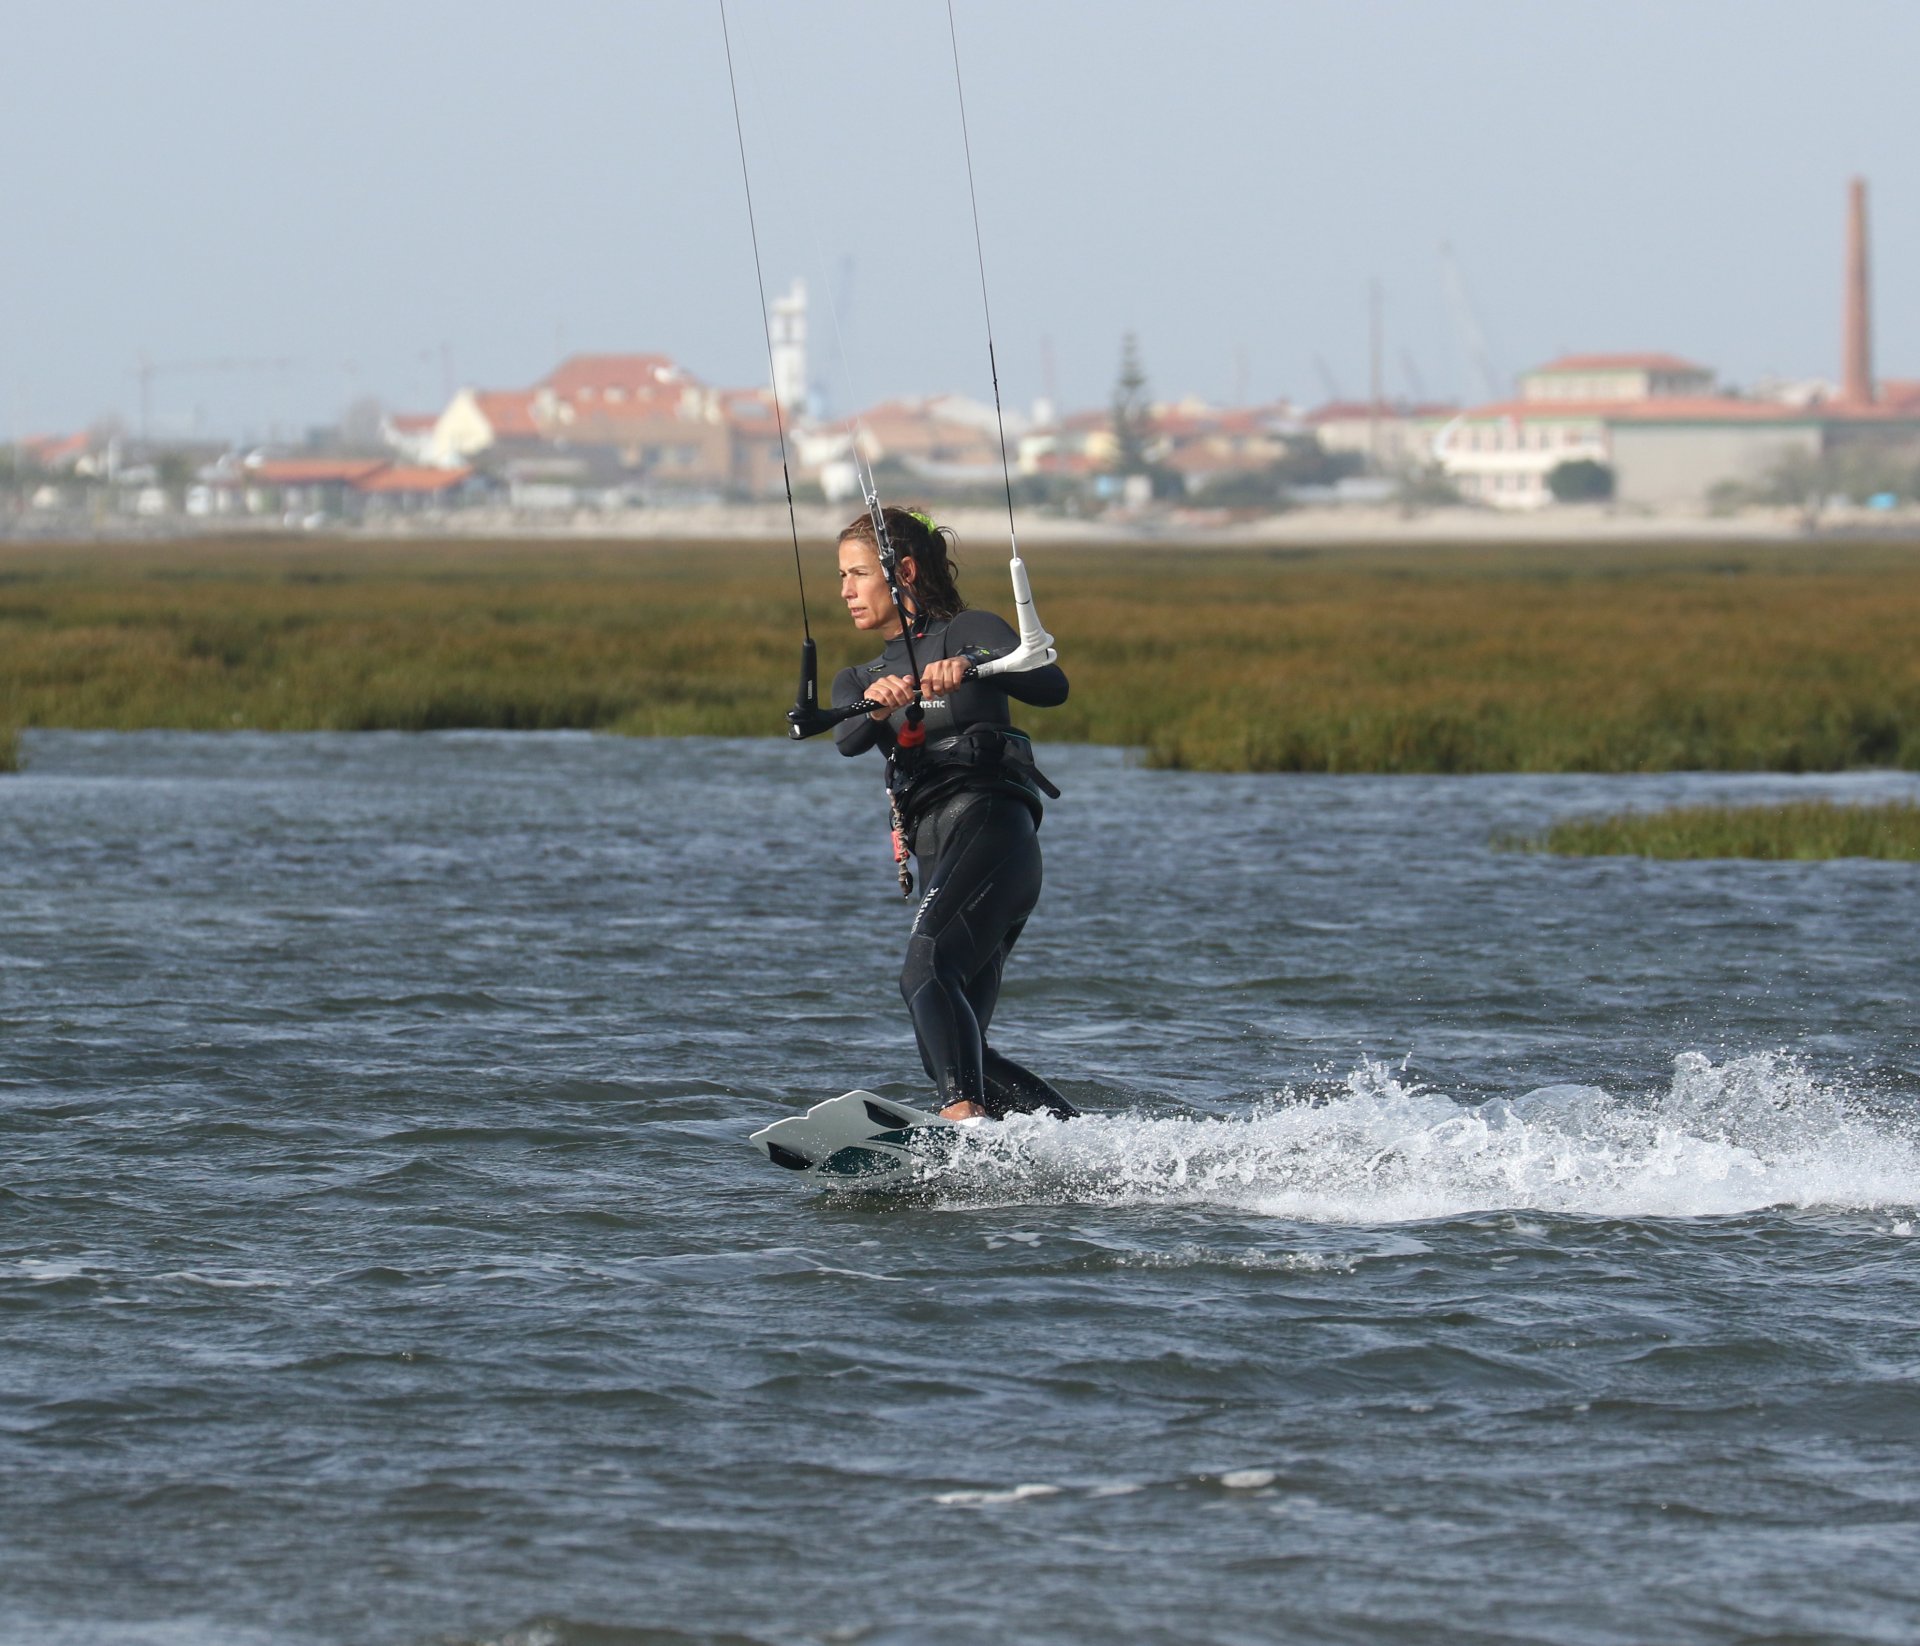
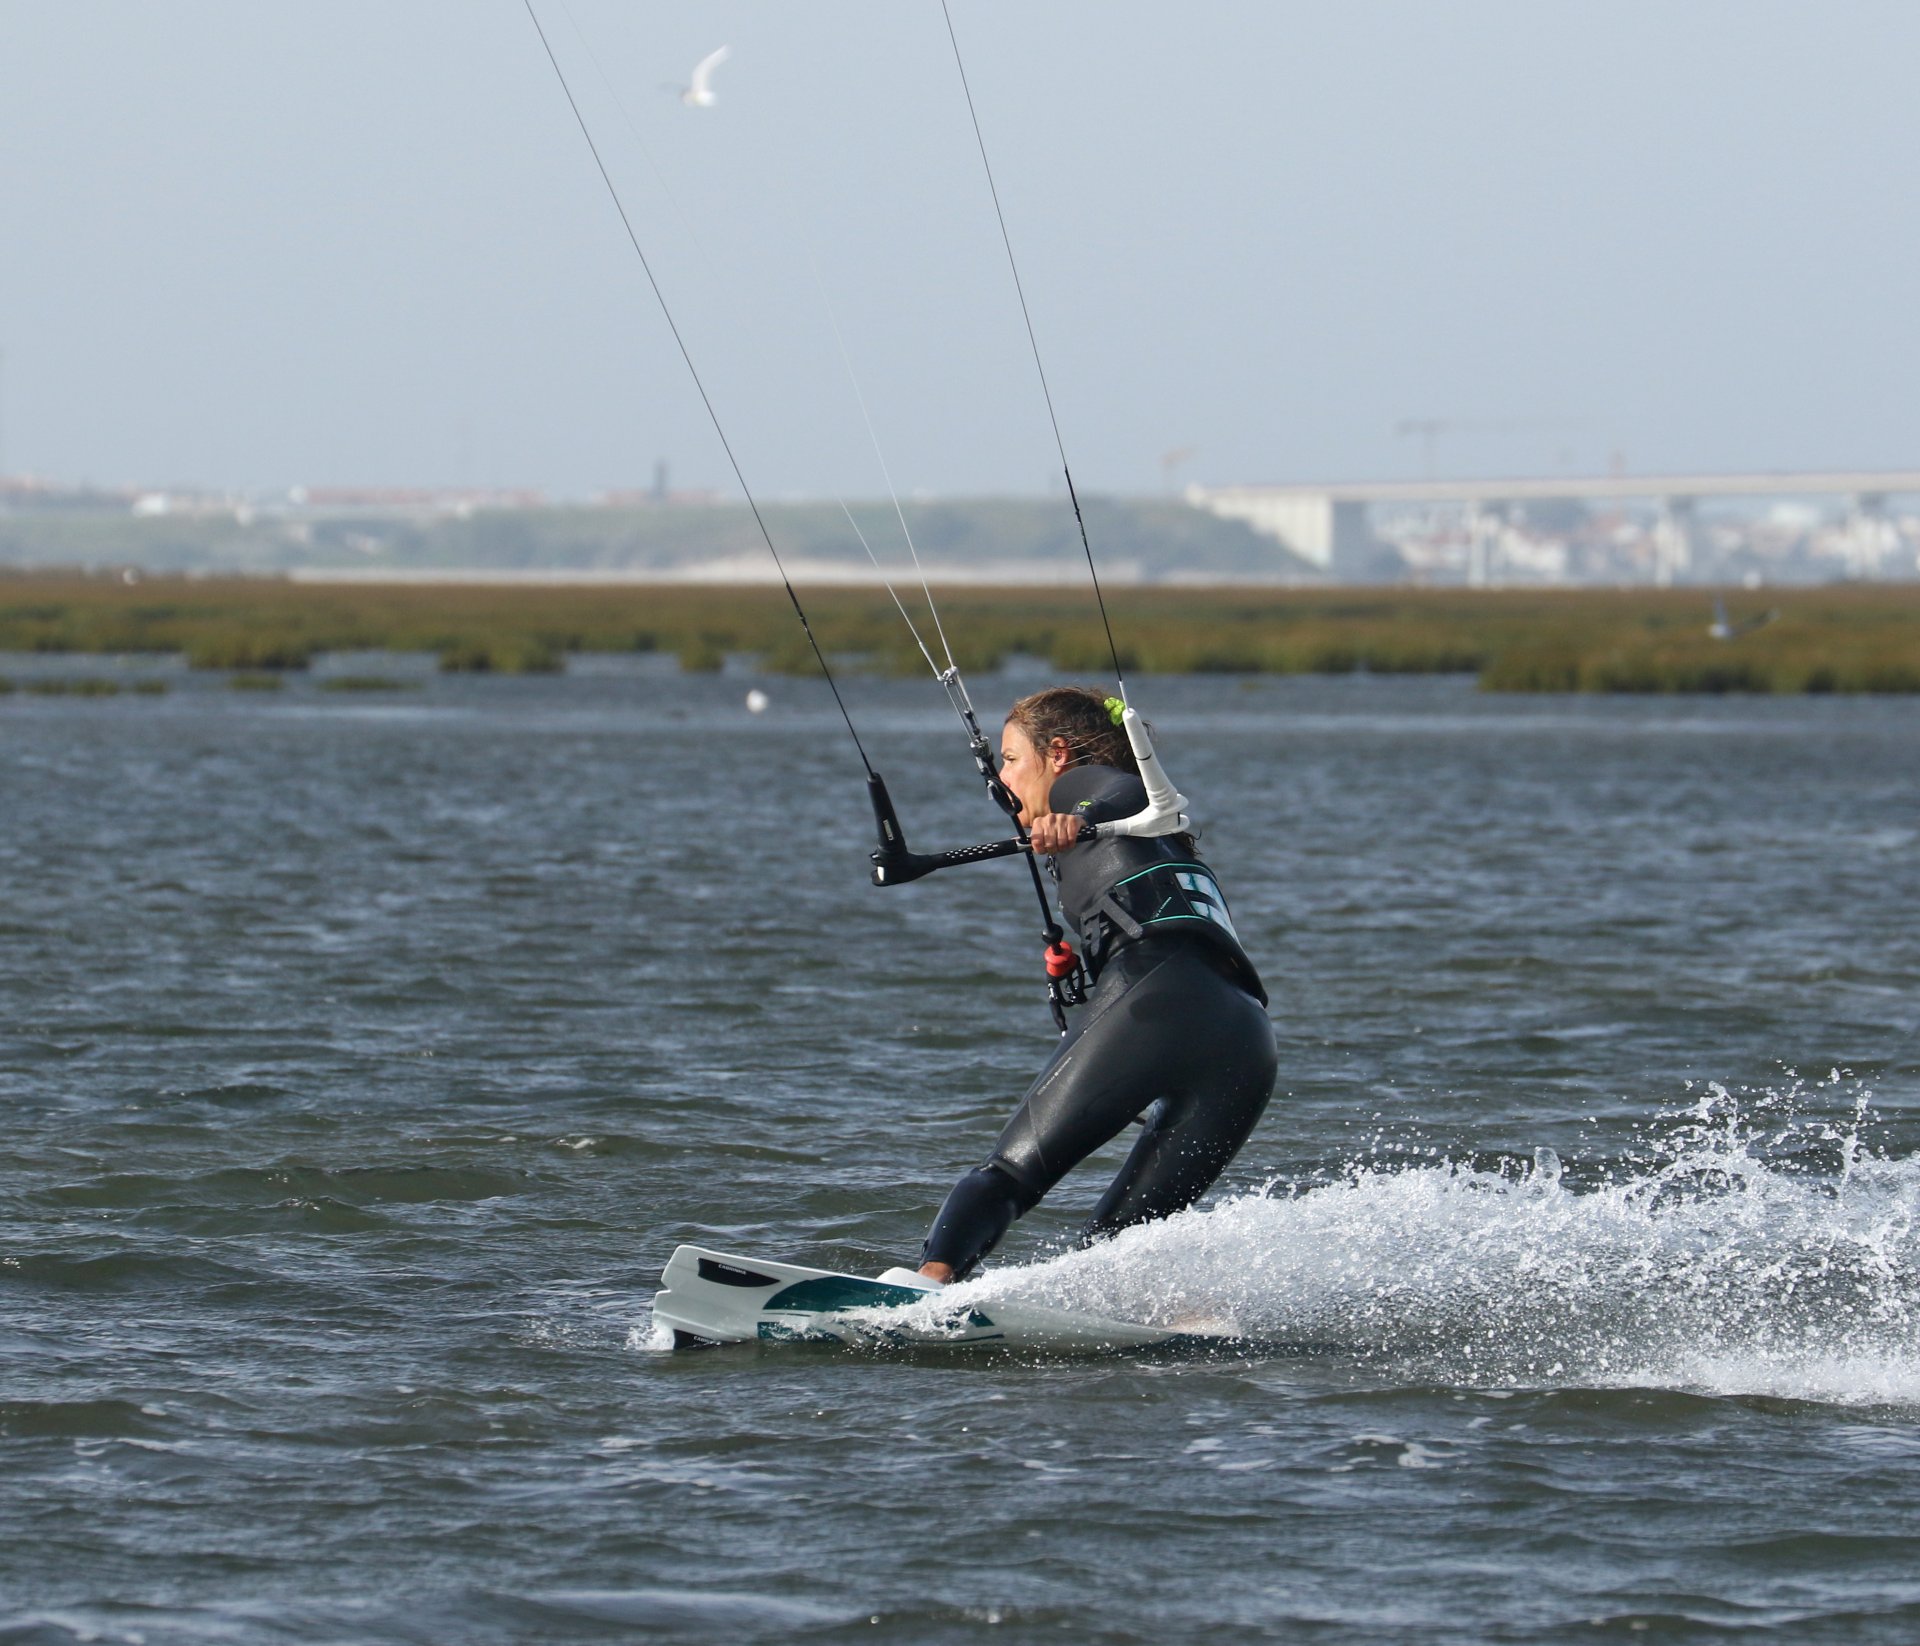
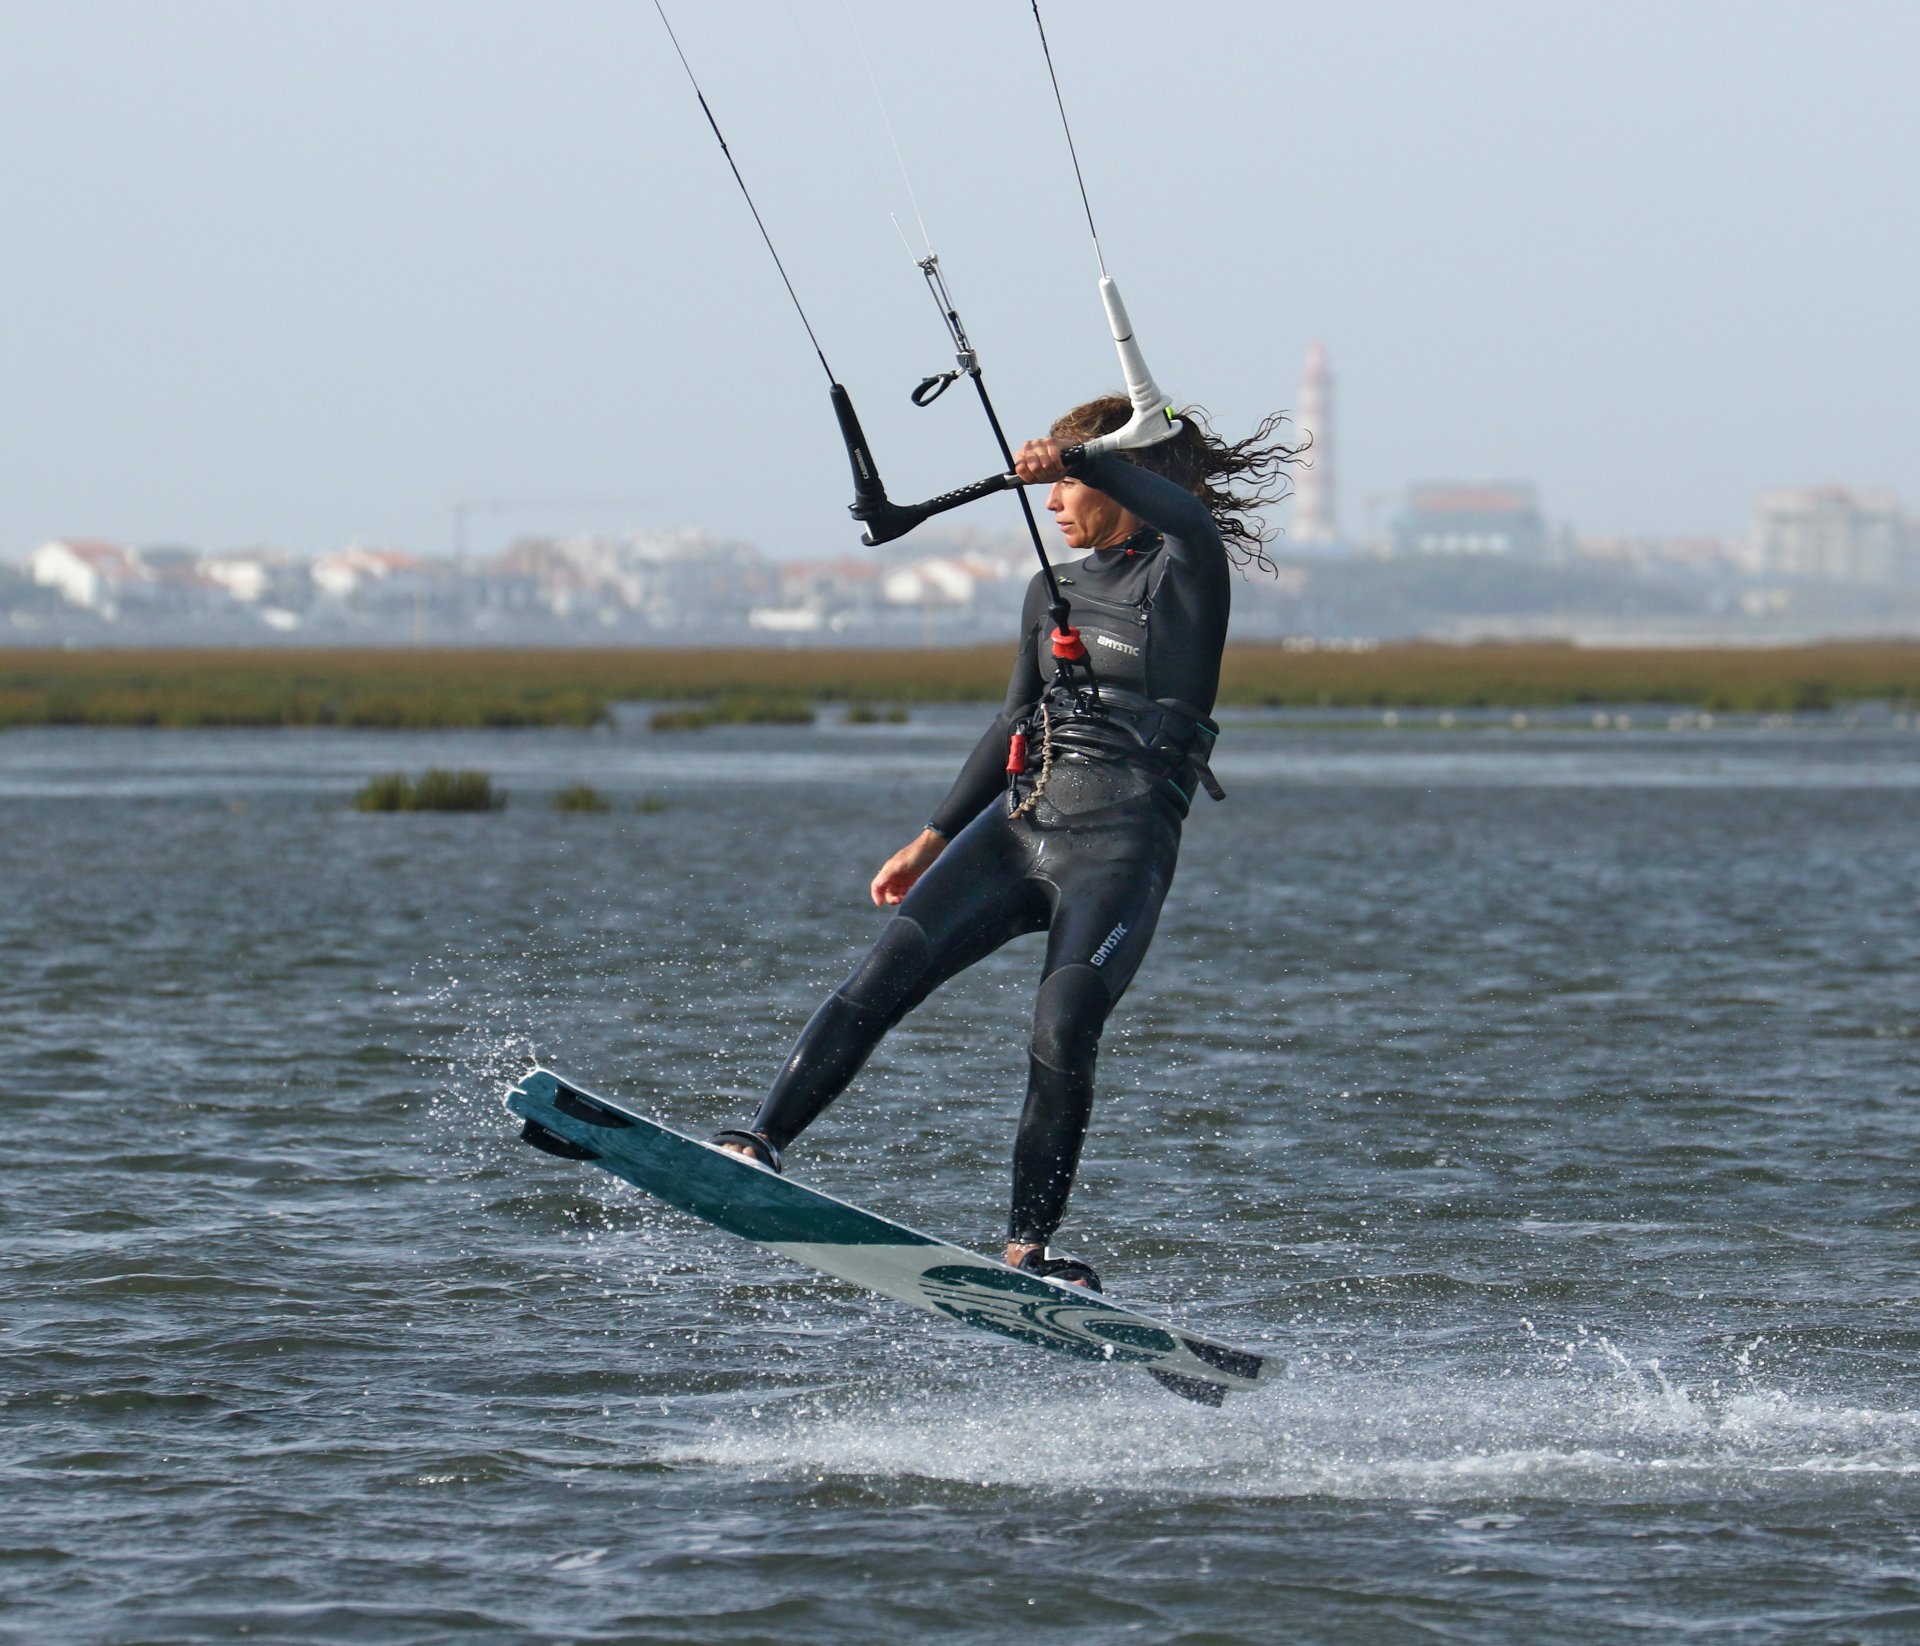
Ready Position - Your Toeside Pic A.
Hopefully, you’ve read the previous few articles and watched the “how to fix your toeside video”. If so, you know what we’re looking for. A quick recap of your stance never hurts. Bar trimmed in enough that you can set up and gain speed using two hands. The chest and hips face forwards, shoulders up, your weight committed upwind, and hips forwards so you can now apply pressure against your edge with both feet. This comes from your ankles. The more you flex your ankles, the lower and more forward you can drive your knees. With your knees driving you, edge against the pull from your kite and put tension on the lines. The more you push, the further upwind you can drive the board. Karine’s hands are centred on the bar, she’s looking forwards, her chest and hips are open, facing the nose of the board, her knees and feet twist forwards, as she flexes her ankles and drives against the toeside edge of the board with the balls of her feet. For the pop, your kite wants to be parked somewhere just above the mythical 11 or 1 o’clock.


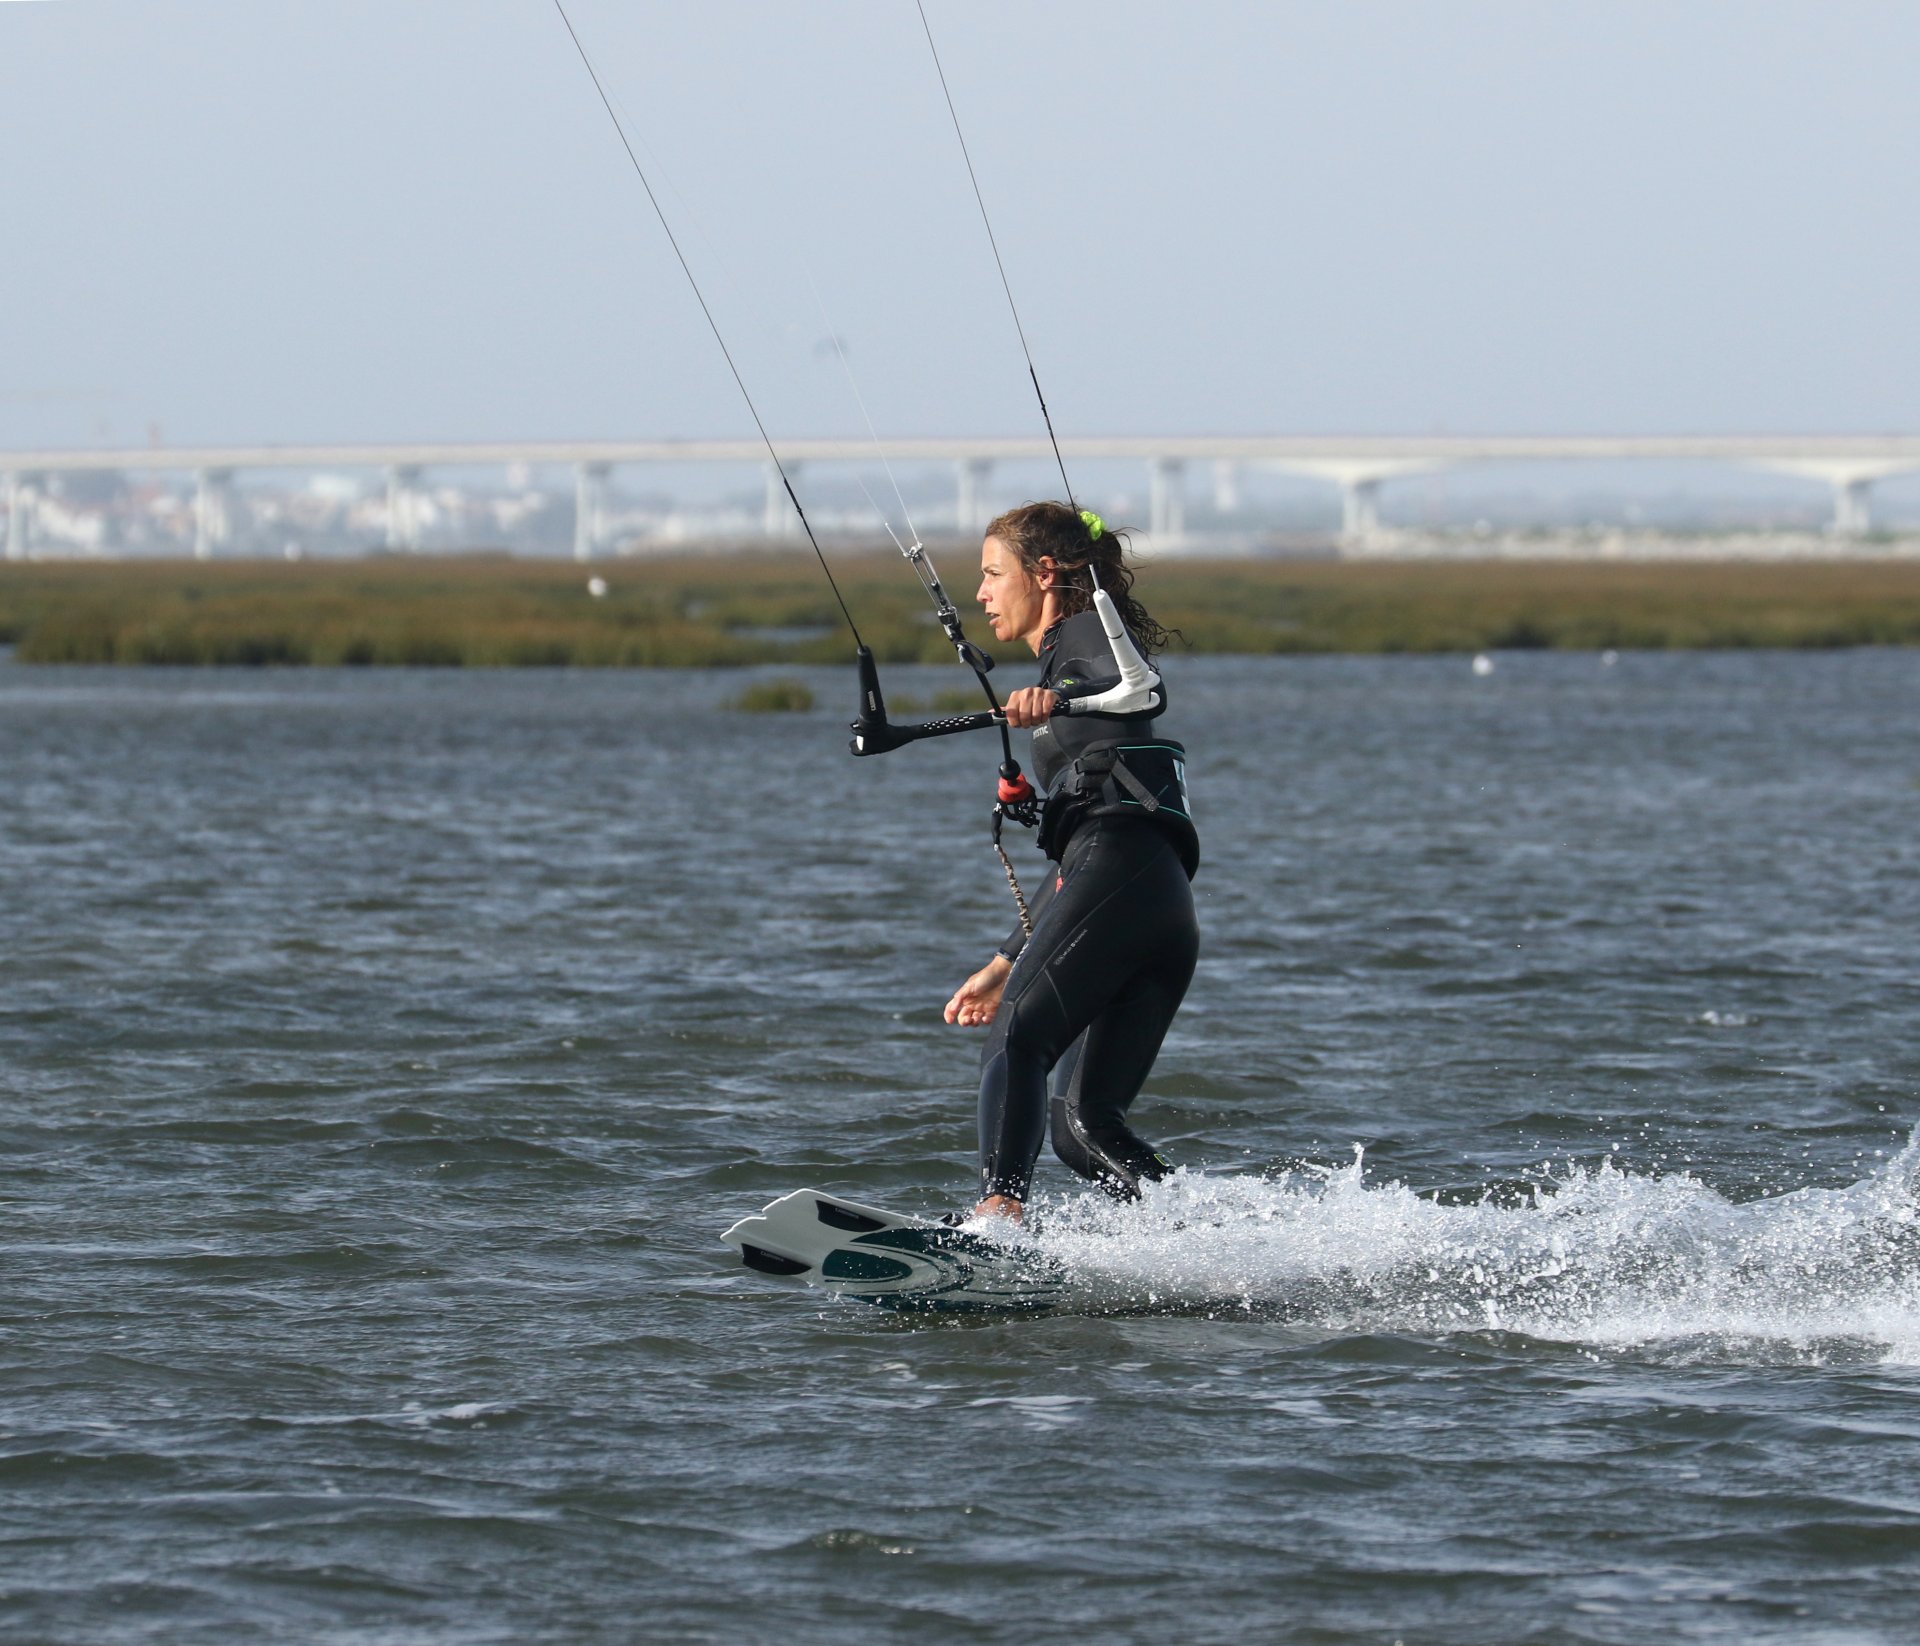
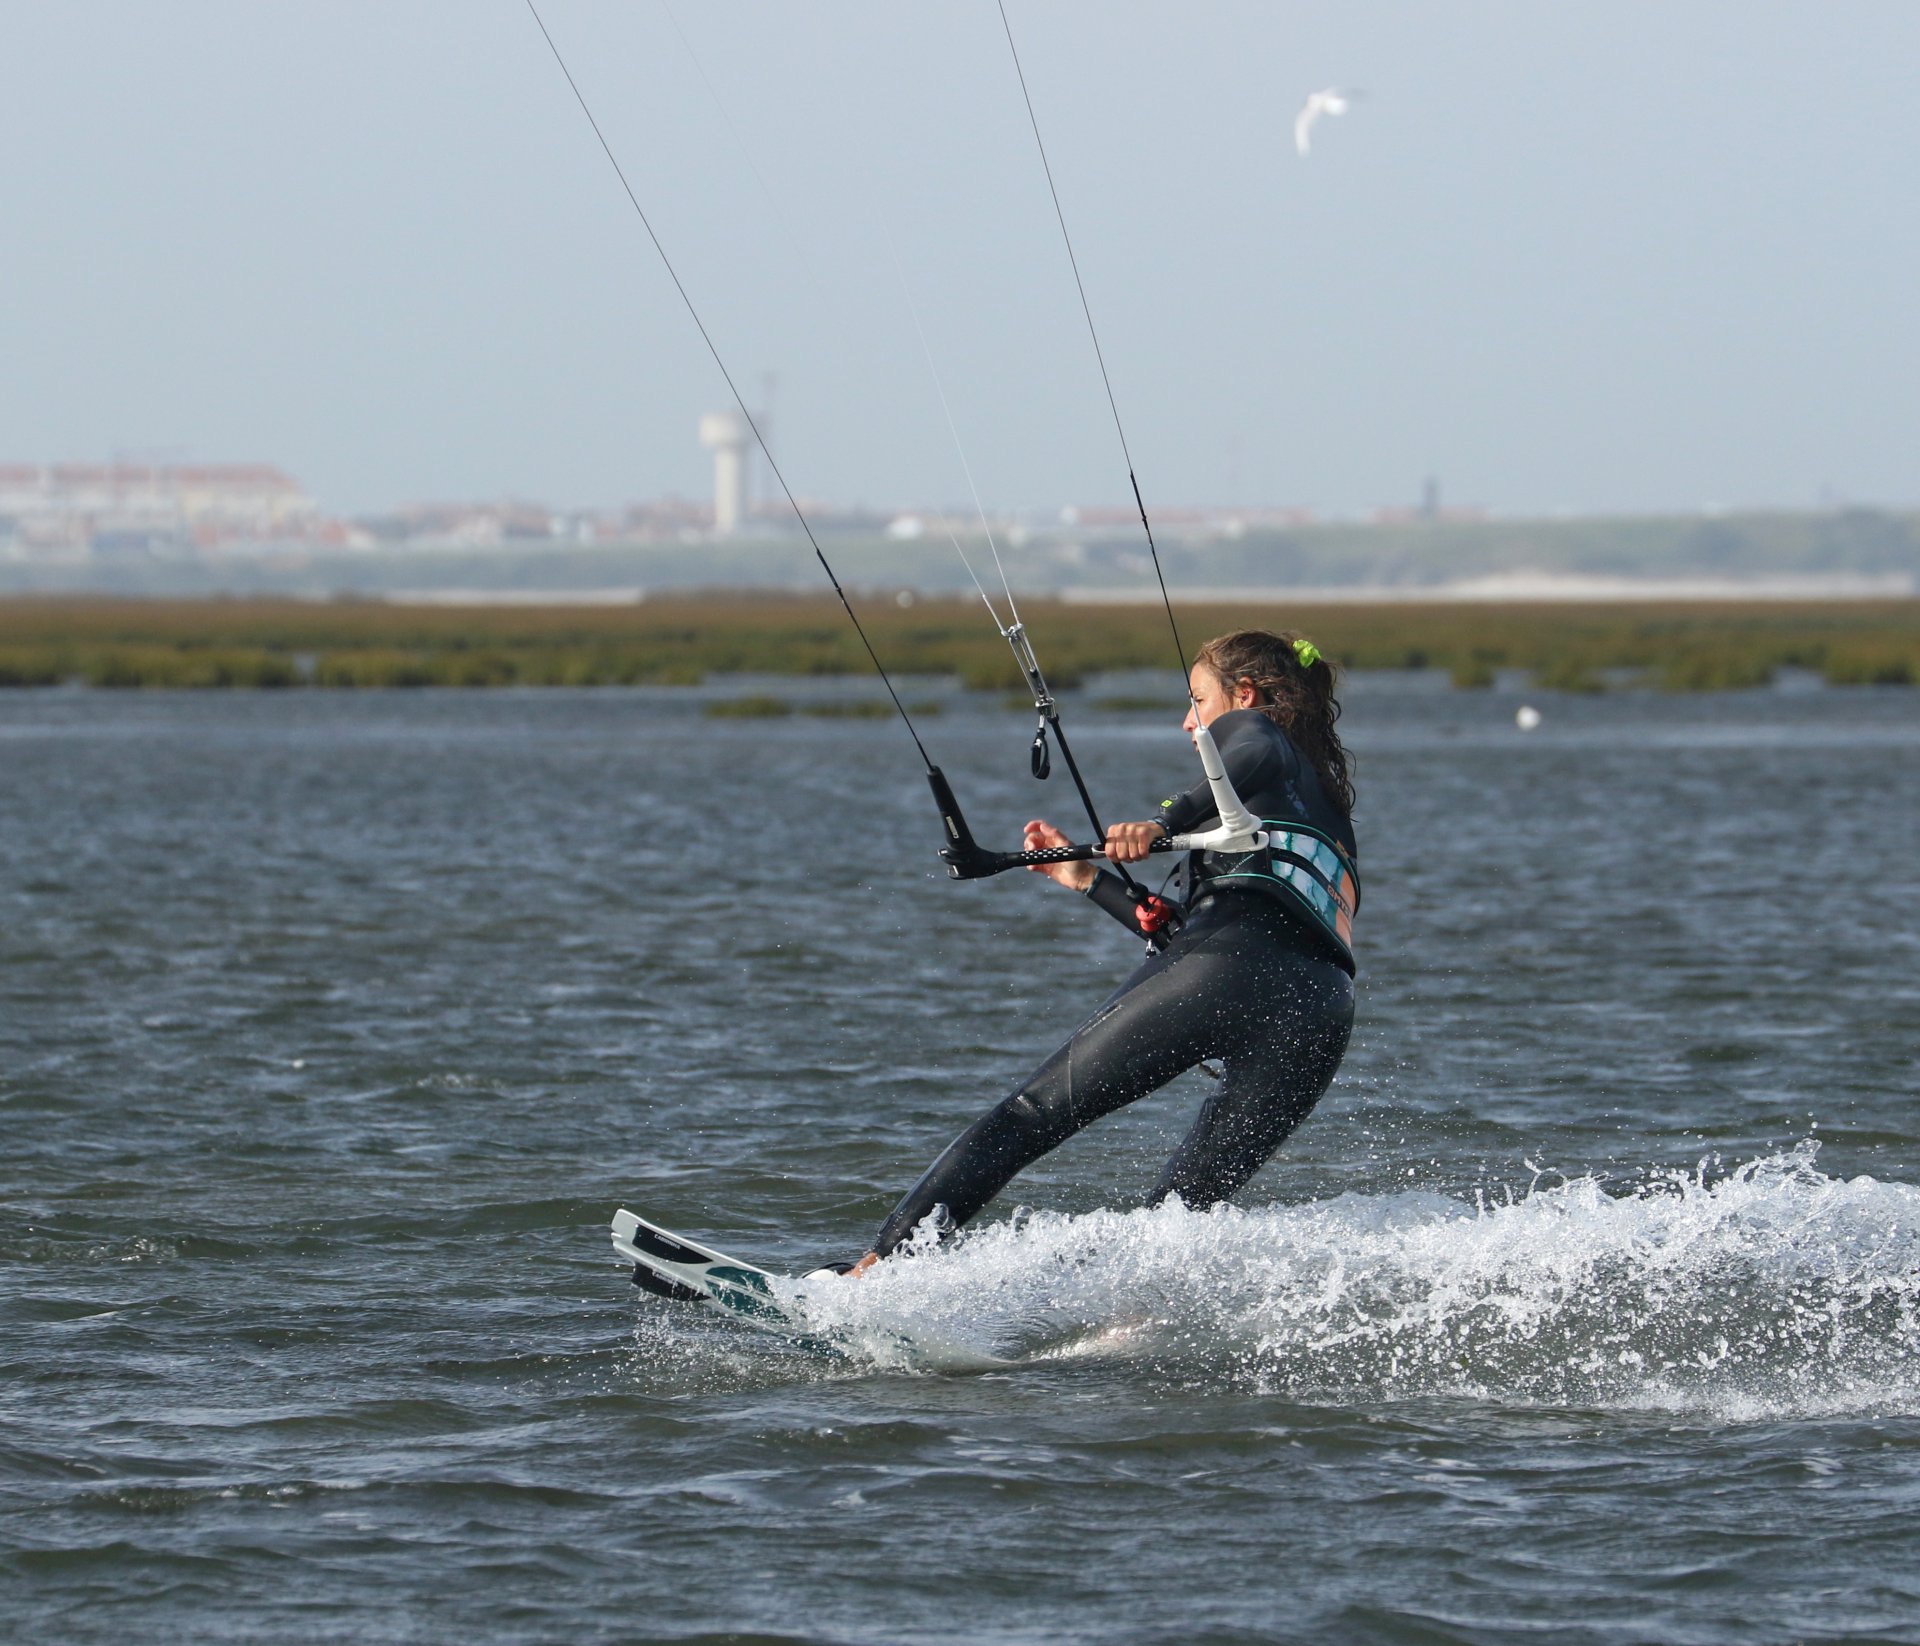
Relax Pic B.
No different to a cheeky pop on your heels, you’ll find it unfeasibly difficult to pop from a strong upwind edge. The position we just revisited is all about resistance and tension - miraculous when your aim is to head upwind. However, it means that every sinew in your body is driving against your edge. With all that pressure locked in, you’d need herculean strength to stamp against it. Don’t get us wrong, for your set up, it’s picture-perfect, but you can’t pop from here. Best way to lose tension? Relax. 🙂 That’s exactly what the plan is; relax your edge. This way, you can stay in position, keep your speed, but release some of that tension. If you look at Karine, she’s standing up more, effectively extending herself over the board. She’s released her front hand, enabling her to sheet the bar out a fraction so she doesn’t need to edge as hard. She’s gone into cruise mode, still on an edge but not firing upwind, relaxed and balanced. In essence, you’re edging without driving; you can even relax your kite face! Depending on how much you relax your edge, your board will change course to more across the wind or slightly off the wind. It doesn’t need to be much, just enough to take the pressure off.
Carve and Compress Pic C.
The reason you relax is so that you’re ready to give it your all. You’re going to carve into your takeoff, and as with all things carving, it’s about compressing and extending. You’ve just done the first extend, and now it’s time to compress. At first, your carve doesn’t need to be anything near radical; it’s just about putting tension back on the lines and building resistance with the board so that you have something to stamp against. To carve back onto your edge, you want to use as much of the board as possible, this means keeping weight on both feet. You need to drive the board back onto its edge. Just like a fine toeside, it all starts with your ankles, flexing them so that you can get your knees across and turn the board. If you look at Karine, she’s released her front hand from the bar, dropped her weight, pushed her knees across the board, dropped her shoulders forwards, and, as such, the board turns up on all its edge. The final thought here is to sheet the bar out so you can turn away from the kite. If you pull in on the bar, the kite will pull you, and you won’t be able to carve. Think of this stage as a progressive carve rather than an aggressive change of direction. In simple terms, you’re merely carving back onto your edge.
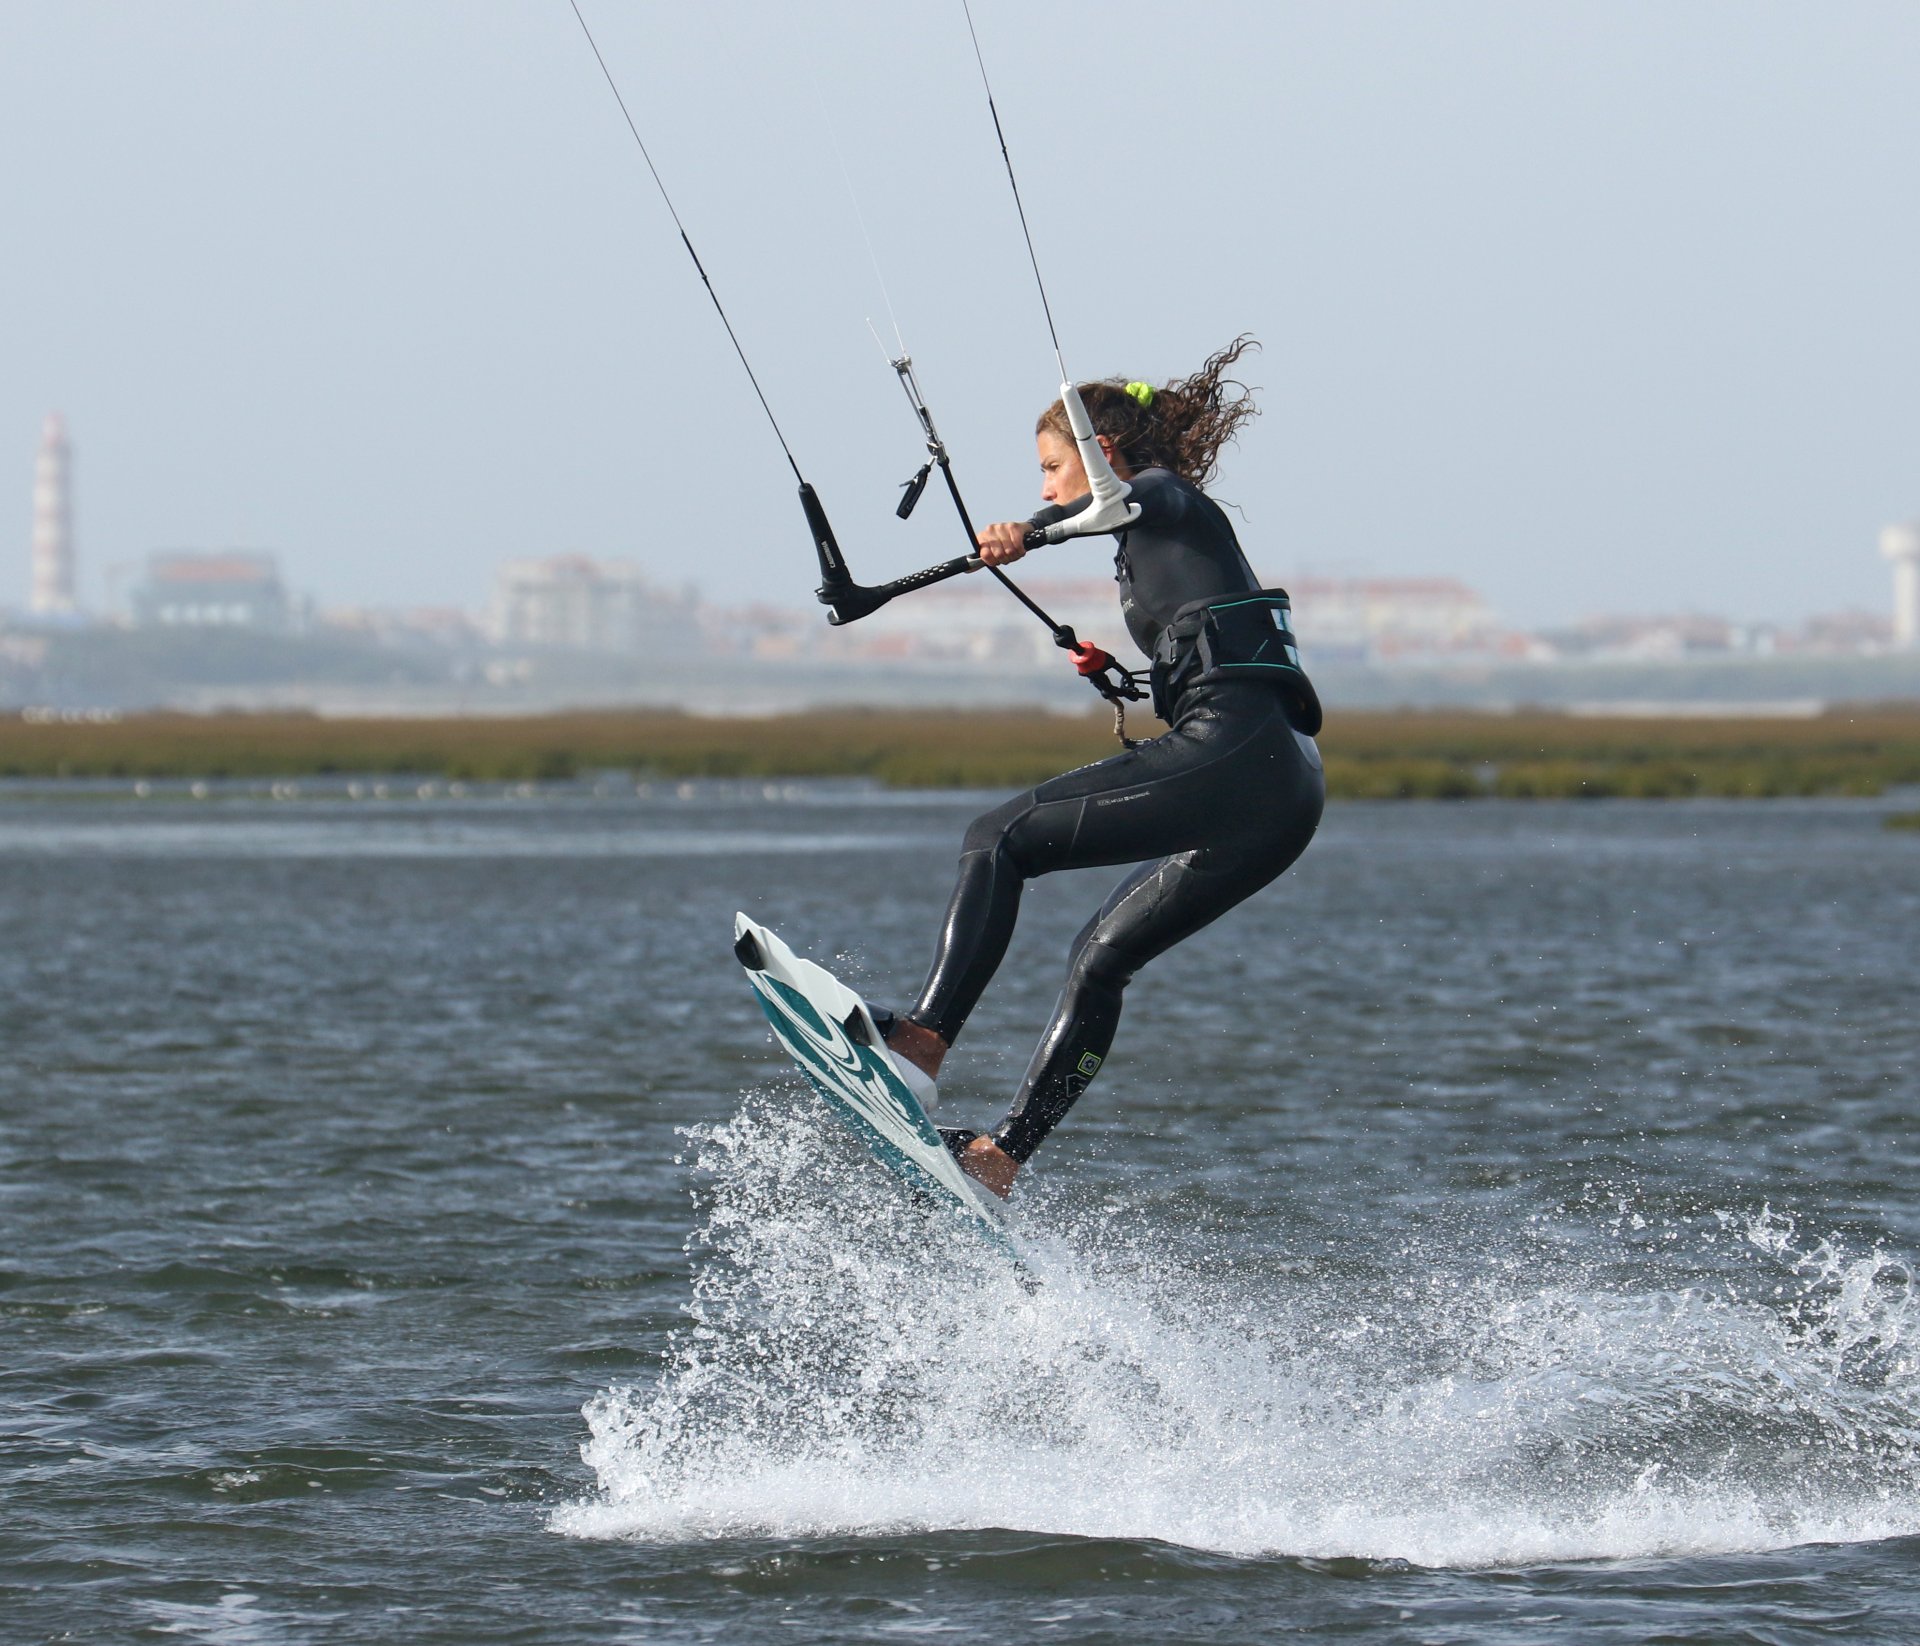
You Decide Pic D.
A pop happens because you say so! Heel or toe, you can’t wait for it to happen – you make it happen. Popping is all about dynamism, the sudden stamp, extension and explosion. Your aim is to kick against the board from your strong toeside position. The beauty is that with weight on both feet, you’re free to stomp with all your might with both legs. Whereas if all your weight is directed solely over your back foot as you carve up, you’ll need ridiculous strength to pop. Yes, once again, it’s about technique, not brute force. Timing is crucial. As soon as you are carving, the tension is replaced, and you can pop. Wait too long and you’ll either be overpowered or stop. To launch yourself, you’ll use both legs. You will automatically detonate the front leg a fraction of a second before the back leg (because there will be a bit less weight on it). As your front leg extends, it throws your weight back onto your back foot and the tail of the board, which will enable you to stamp off your back leg with virtually no weight on it. In the pic, you can see that Karine’s front leg is extending. This suddenly pushes her weight back so that she can…
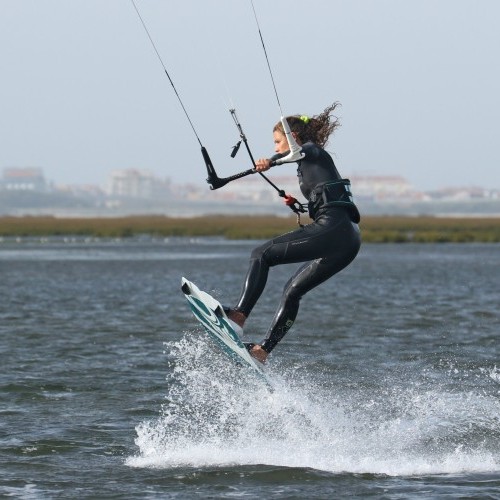
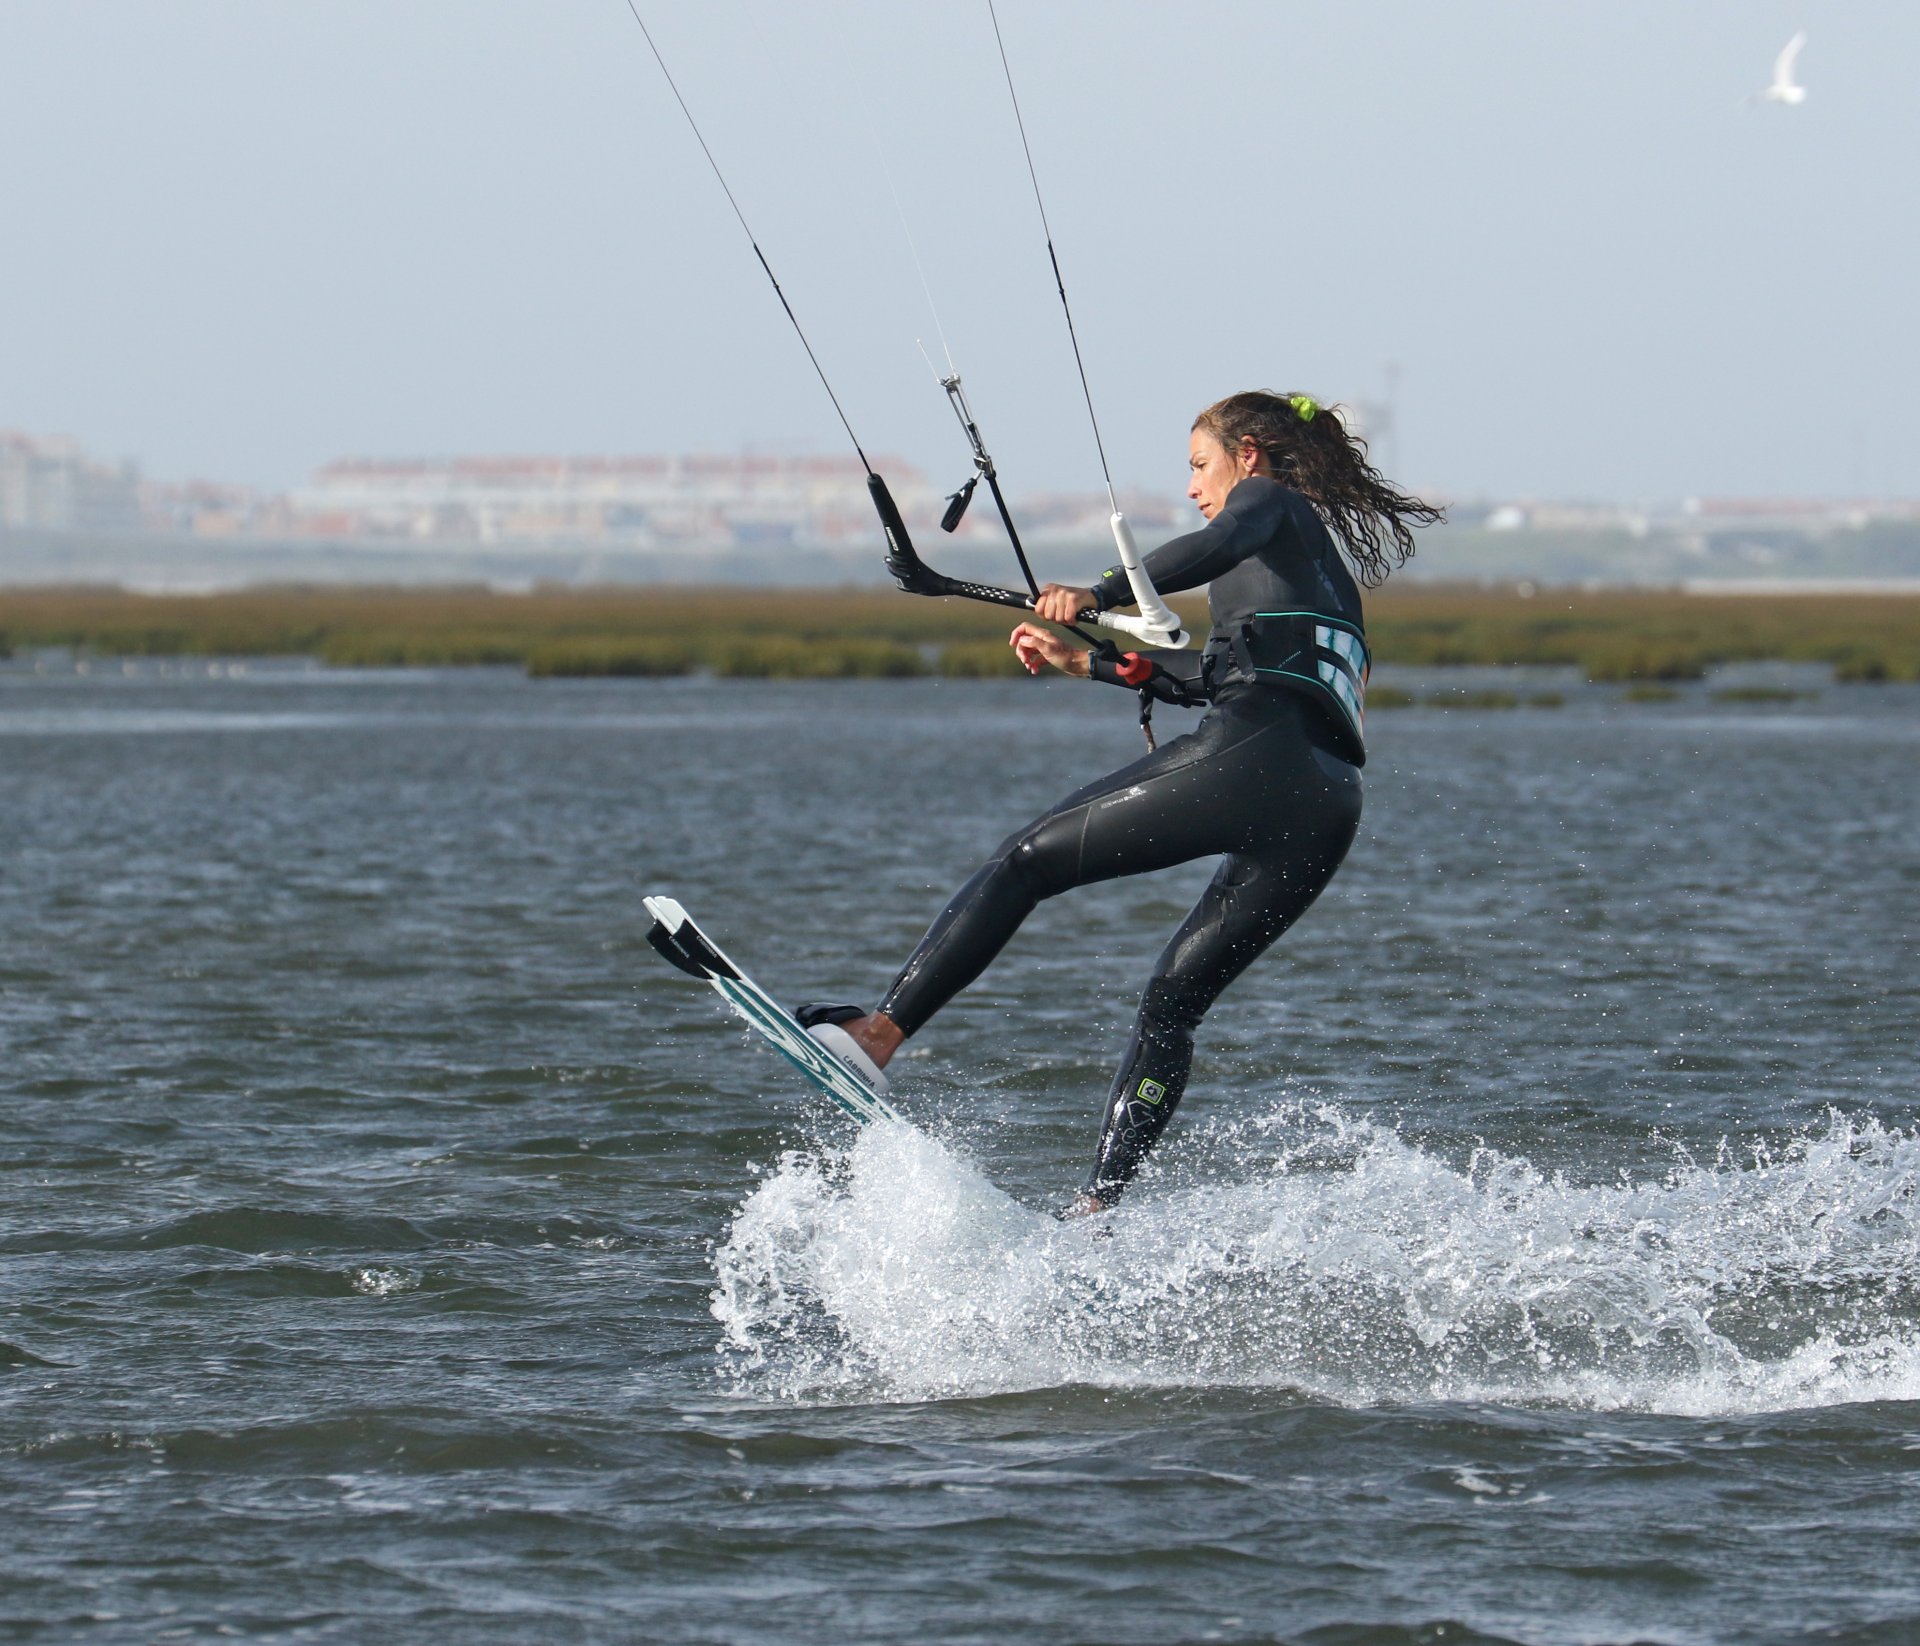
Stamp & Extend Pic E.
We’ve said it before, but this is the popping equivalent of a heartbeat. As you kick off with your front leg and your weight shifts back, you have a split second when it’s easy to stamp before you feel all the tension from the lines and board. You’re trying to stamp against your back foot rather than your toes. To be explosive, you need a hefty launch pad, and a couple of pinkies definitely won’t cut the mustard. The great thing is that with your weight back and this heartbeat one-two kick-off, the nose of the board will rise steeply, which will give you confidence for the next bit even if you only get it a few centimetres off the water. Here Karine has stamped hard, extending her back leg, corking the board off the water. As she extends and rises, she gives the bar a little tweak in for good measure. This can give you a little lift, but more importantly, it will pull you up over the board.
To Heel Pic F.
Once you’re up off the water, it’s all about keeping your balance so that you can get back to heelside. This means staying over the board so that you can land on the board. Although you’re aiming to get back to heelside, you don’t want to land on your edge, but flat. Having pulled the bar in slightly on takeoff, the kite will pull you towards it. The caveat here is that if the kite has moved up to 12 o’clock, it won’t. Steady yourself on the bar and think of lifting your rear leg up. You’ll find that as it rises, you’ll start turning. Bring your free hand forward to give you a sense of direction. Realistically your body is screaming to get the board back around to its preferred orientation, your harness is desperately trying to untwist you. In fact, it’s almost as if gravity itself wants you to land heelside. As long as you’re balanced and over the board, it will be “almost” automatic. Have a look at Karine, and you can see she’s got her eyes on the prize, looking where she wants to go. Her head and shoulders are forwards over the board. As she lifts her back leg, the kite is pulling on her harness hook and untwisting her. Karine is also bringing her free hand forwards. A heelside landing is most definitely in the post.


Stomp It Pic G.
And as if by magic! The final part of the jigsaw - landing. Once your rear foot starts to move forwards, you can drop what was your front leg. This is about to become the tail, and as long as it lands first, your board will touch down softly, even if you haven’t made it all the way around. Karine is over her board and ready for landing.
Top Tips
It’s worth pondering here that this is a pop, and therefore it will all happen very quickly. The first thing you should do is practice on land with no kite or board. A simple 180 from toeside to heelside. Keep your shoulders facing forwards before springing up and turning. With your chest open, only your lower body has to work to change stance.
Once on the water, practice relaxing your edge and then carving back up; a mini zig zag. This way, you’ll get an idea of the necessary change of direction and a feel for the resistance returning as you carve back onto your edge. At the end of the day, this move is carve and go!
Find some flat water, and start with your kite a tad higher. This may mean that you land with little speed, but it will give you the confidence to go for it.
Just like popping to toeside, you only need to get the board off the water. Relax your toeside edge and then move back onto it, stamping immediately. Once you’ve got the movement, you can then relax more and carve longer.


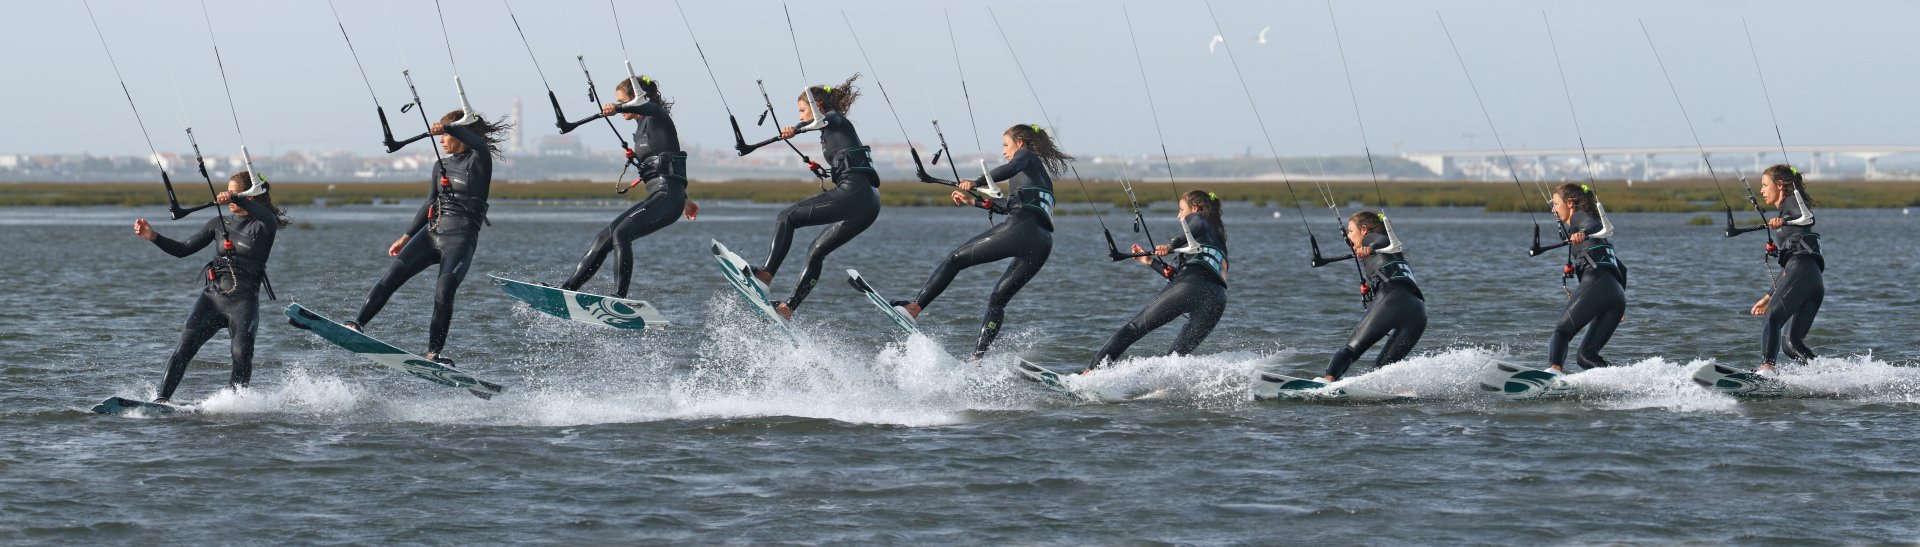
Have a look at the sequence to see it step by step, and then check out the video for a full how-to.
Common Problems
You can’t get off the water. Not relaxing your edge. It’s tempting to try and pop whilst riding toeside, but without relaxing your edge first, you’ll find that there is just too much pressure going through your back leg, and as a result, nothing will happen.
If you get left behind and land heavily on an edge, it’s because you’re not over the board. The most common reason for this is that you’re leaning your shoulders back towards the tail of the board before stamping. As the front leg extends, only your hips should move back. Keep your shoulders forward by breaking at the waist.
It’s working, but no matter how much effort you put in, you’re only just getting off the water. This is almost the reverse of the last problem. If you only concentrate on staying forwards and over the board, it can be very difficult to stamp aggressively and fully extend your back leg as your weight isn’t above your back foot. Make sure you drop your hips as the front leg kicks and fully extend your back leg. Don’t rush to bring your back leg up.
Keystones
- Stand up to relax edge
- Drop hand and carve with ankles and knees
- Stamp with both legs, heartbeat pop
- Pull bar to stay over board
- Bring rear foot up and through, push front leg down
This technique article was in Issue 92 of IKSURFMAG.
Related


By Christian and Karine
Christian and Karine have been working together as a coaching team, running improver to advanced kitesurfing clinics since 2003.
