
Back Roll Transition One Foot
Technique / Beginner

Introduction
You know how we love our transitions, and we know that you love them too! So, we've got another one for you to add to your list of funky ways to change direction. This one is a variation on the very foundation of great transitions, the Back Roll Transition, or if you've been in the game as long as we have, the trusty BLT. Adding a one foot to this gives you something a wee bit different to display to your peers whilst challenging you to sharpen up your skills. We highly recommend that you should already be the proud owner of a certified BLT, and if you've taken your foot out in a straight air before, it will help.
Looking ahead, the tricky bit of this move is finding both the time and the moment when you're free to slip your foot out, knowing full well that you'll need to get it back in again! You're in a bit of a catch-22; you need time and control in your transition, and these are not always the best of bedfellows. When you think of time, you can be forgiven for interpreting it as height. The higher you go, the longer you'll be in the air and, therefore, the more time you have. There is nothing wrong here. An aggressive edge and a bit more send, and boom. However, when you add control to the equation, things start to get a bit more complicated. Edging hard and sending with meaning can and often will result in less control on take-off as you'll be ripped off the water, and your kite will be flying fast back across the window.


To give yourself a chance, we'll be looking at the perfect compromise; you'll slow your rotation down and control your take-off! Let's have a look at what you need to negotiate in order to get this nailed.
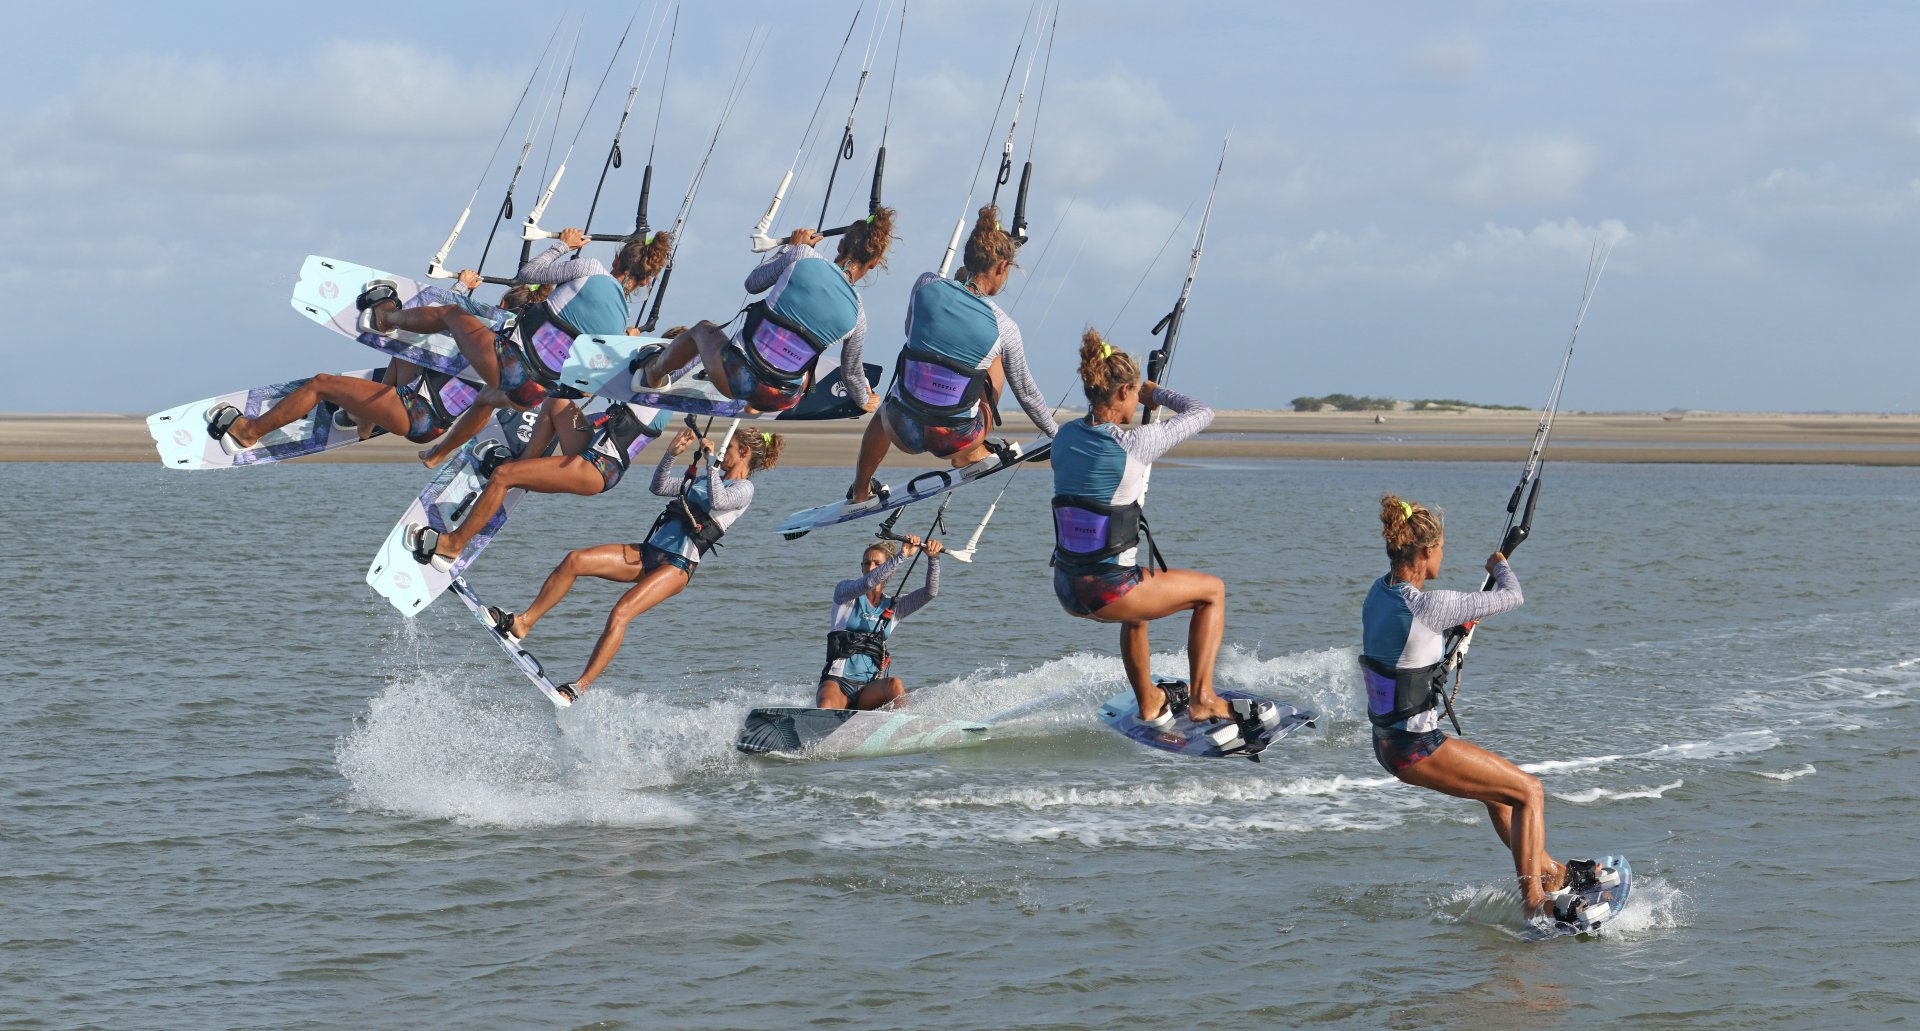
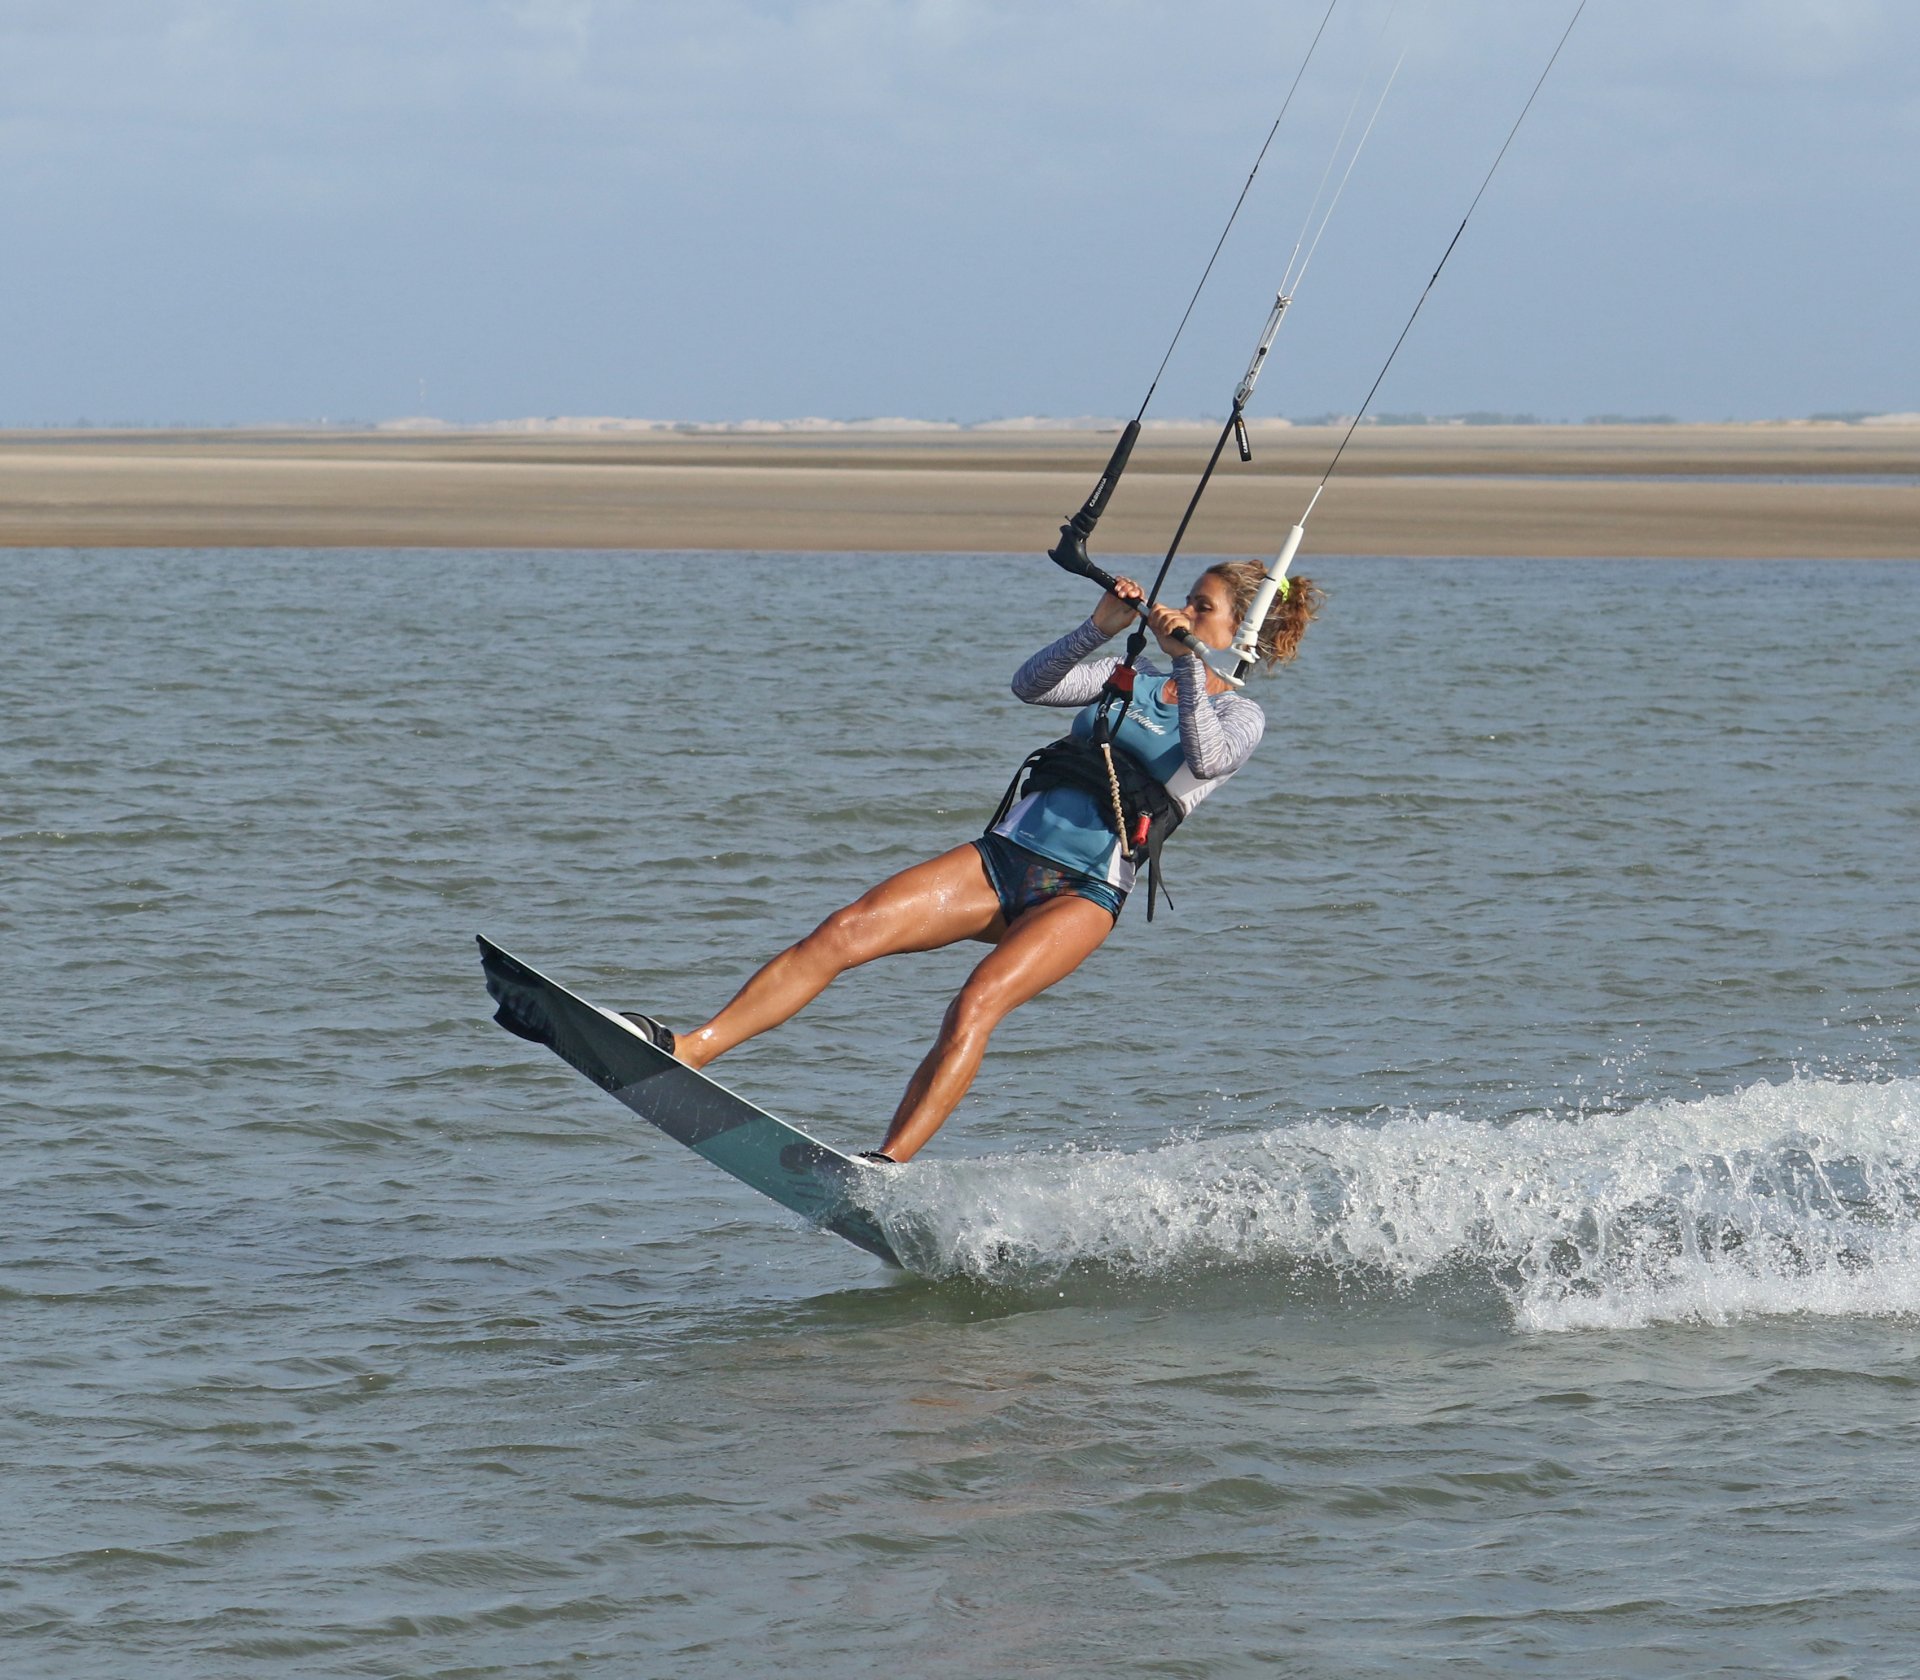
Approach Pic A.
Your set-up is everything. Get this right, and you're on track. Seeing as how you'd like to change direction, you don't want to carry too much forward momentum into your take-off. To control your speed, edge into the move and gently let your bar out a touch so that you're going upwind without much pressure on your legs or bar. This will have the added bonus of flying your kite at the edge of the window, which will give you maximum up. You want your kite flying at the magical 1 or 11 o'clock. This way, your kite is driving forward and not lifting you, so you're able to edge. Resist the temptation to lift your kite to slow down! Once everything is in position, it's time to send. Your send, as you can see in the video, needs to be sharp but short. The idea is that you get the kite moving quickly so that it generates power, but only for a split second so that it only goes up to 12, not past it. Your action will be a very positive pull-push, followed by a levelling of the bar. You can see in the photo that Karine is on a good edge, but she doesn't have buckets of spray - this is because she's not holding a lot of power. With her bar eased gently out onto the sweet spot, she slows down and can then give the kite a positive send up to 12.
Rotation Pic B.
Two words, feather and carve. Your rotation starts before you take off, as does your control over the move. With the bar now level, you can feather it out to follow the power as the kite moves. This allows you to drive the board up towards the wind and carve. By letting the bar out, you can carve with your weight on both feet, which leads to a slower rotation. If you don't let it out, you'll be forced to soften your back leg and lean back, which will make for a faster rotation and less control. Here Karine has levelled her bar enough to stop her send and is feathering the bar out, which allows her to carve up and away from the kite, thus starting her back rotation whilst still on the water.
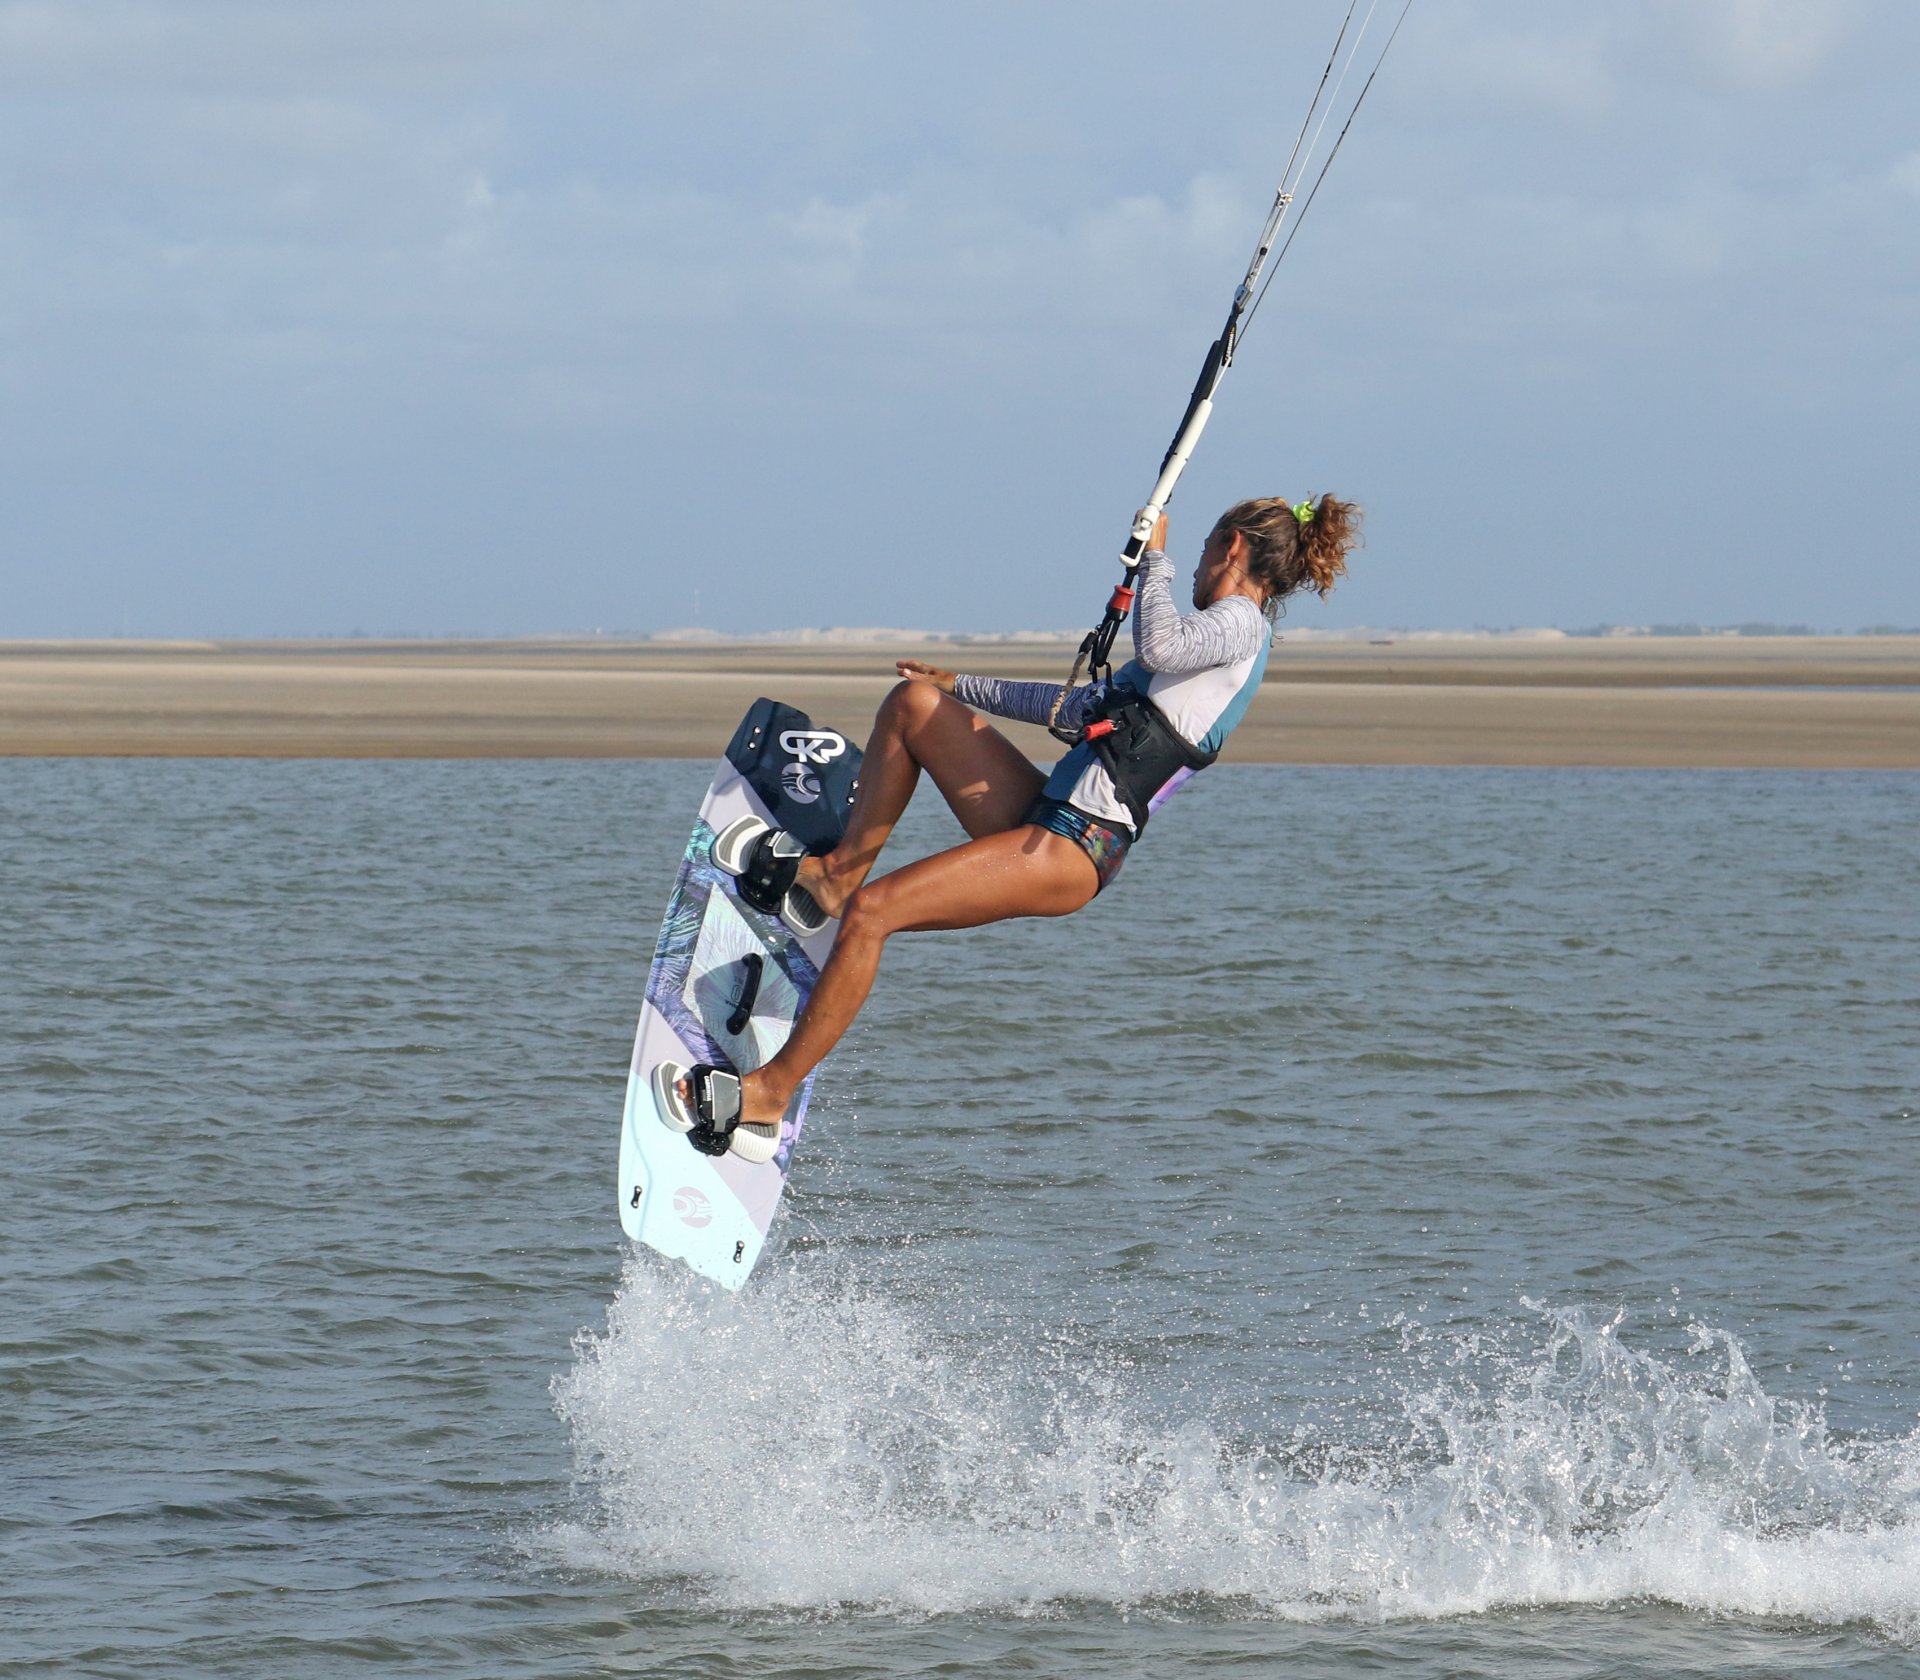
Take Off Pic C.
With the board now carving slowly up towards the wind, it's time to get off the water. To help yourself get airborne, you need to stamp and pull - in that order. Your stamp is against your edge, using the slight bend that you already have in your rear leg. It's an aggressive extension of your back leg. As soon as your back leg has fired, you can pull on the bar for some additional lift. The movements are almost simultaneous, but should you pull first, you'll find it very hard to stamp as the kite will pull you up off your edge before you get the opportunity to extend. It's also worth remembering that you've already started your rotation by carving. This means that as long as you go up, you'll continue. There is no need to throw your head around to encourage any more rotation - it's already happening! Karine has extended up against her edge and has pulled her bar in. She's on the up. Note how she's still looking forward and has not thrown her head around.
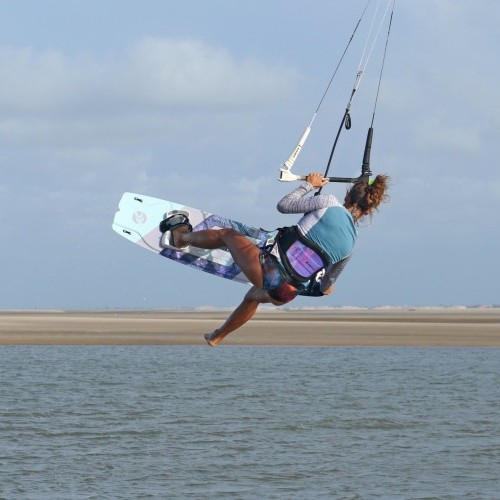
Grab Prep Pic D.
This is where you approach, send and take off, hopefully joining up in blissful harmony and making your life considerably less demanding. If you dumped enough forward momentum, sent the kite around the edge of the window only as far as 12 o'clock, and feathered the bar out to allow you to carve up on both feet before stamping up, then you'll be rewarded with the sensation of time and hang. However, without getting too deep, time is relative, and in the grand scheme of things, you still need to get a move on! You need to grab the nose of your board with your front hand. This will then magically, perfectly, and conveniently morph into the tail of your board and your back hand for landing. To do this, you need to lift the board within grabbing distance so that it's easily reachable. As soon as you've taken off, keep the nose of your board within your sights. Bring your front knee up towards your chest whilst releasing your front hand and extending it towards the board. Here Karine is focusing on her board, aiming her hand at the nose as she lifts it within reach. Keep your bar in.


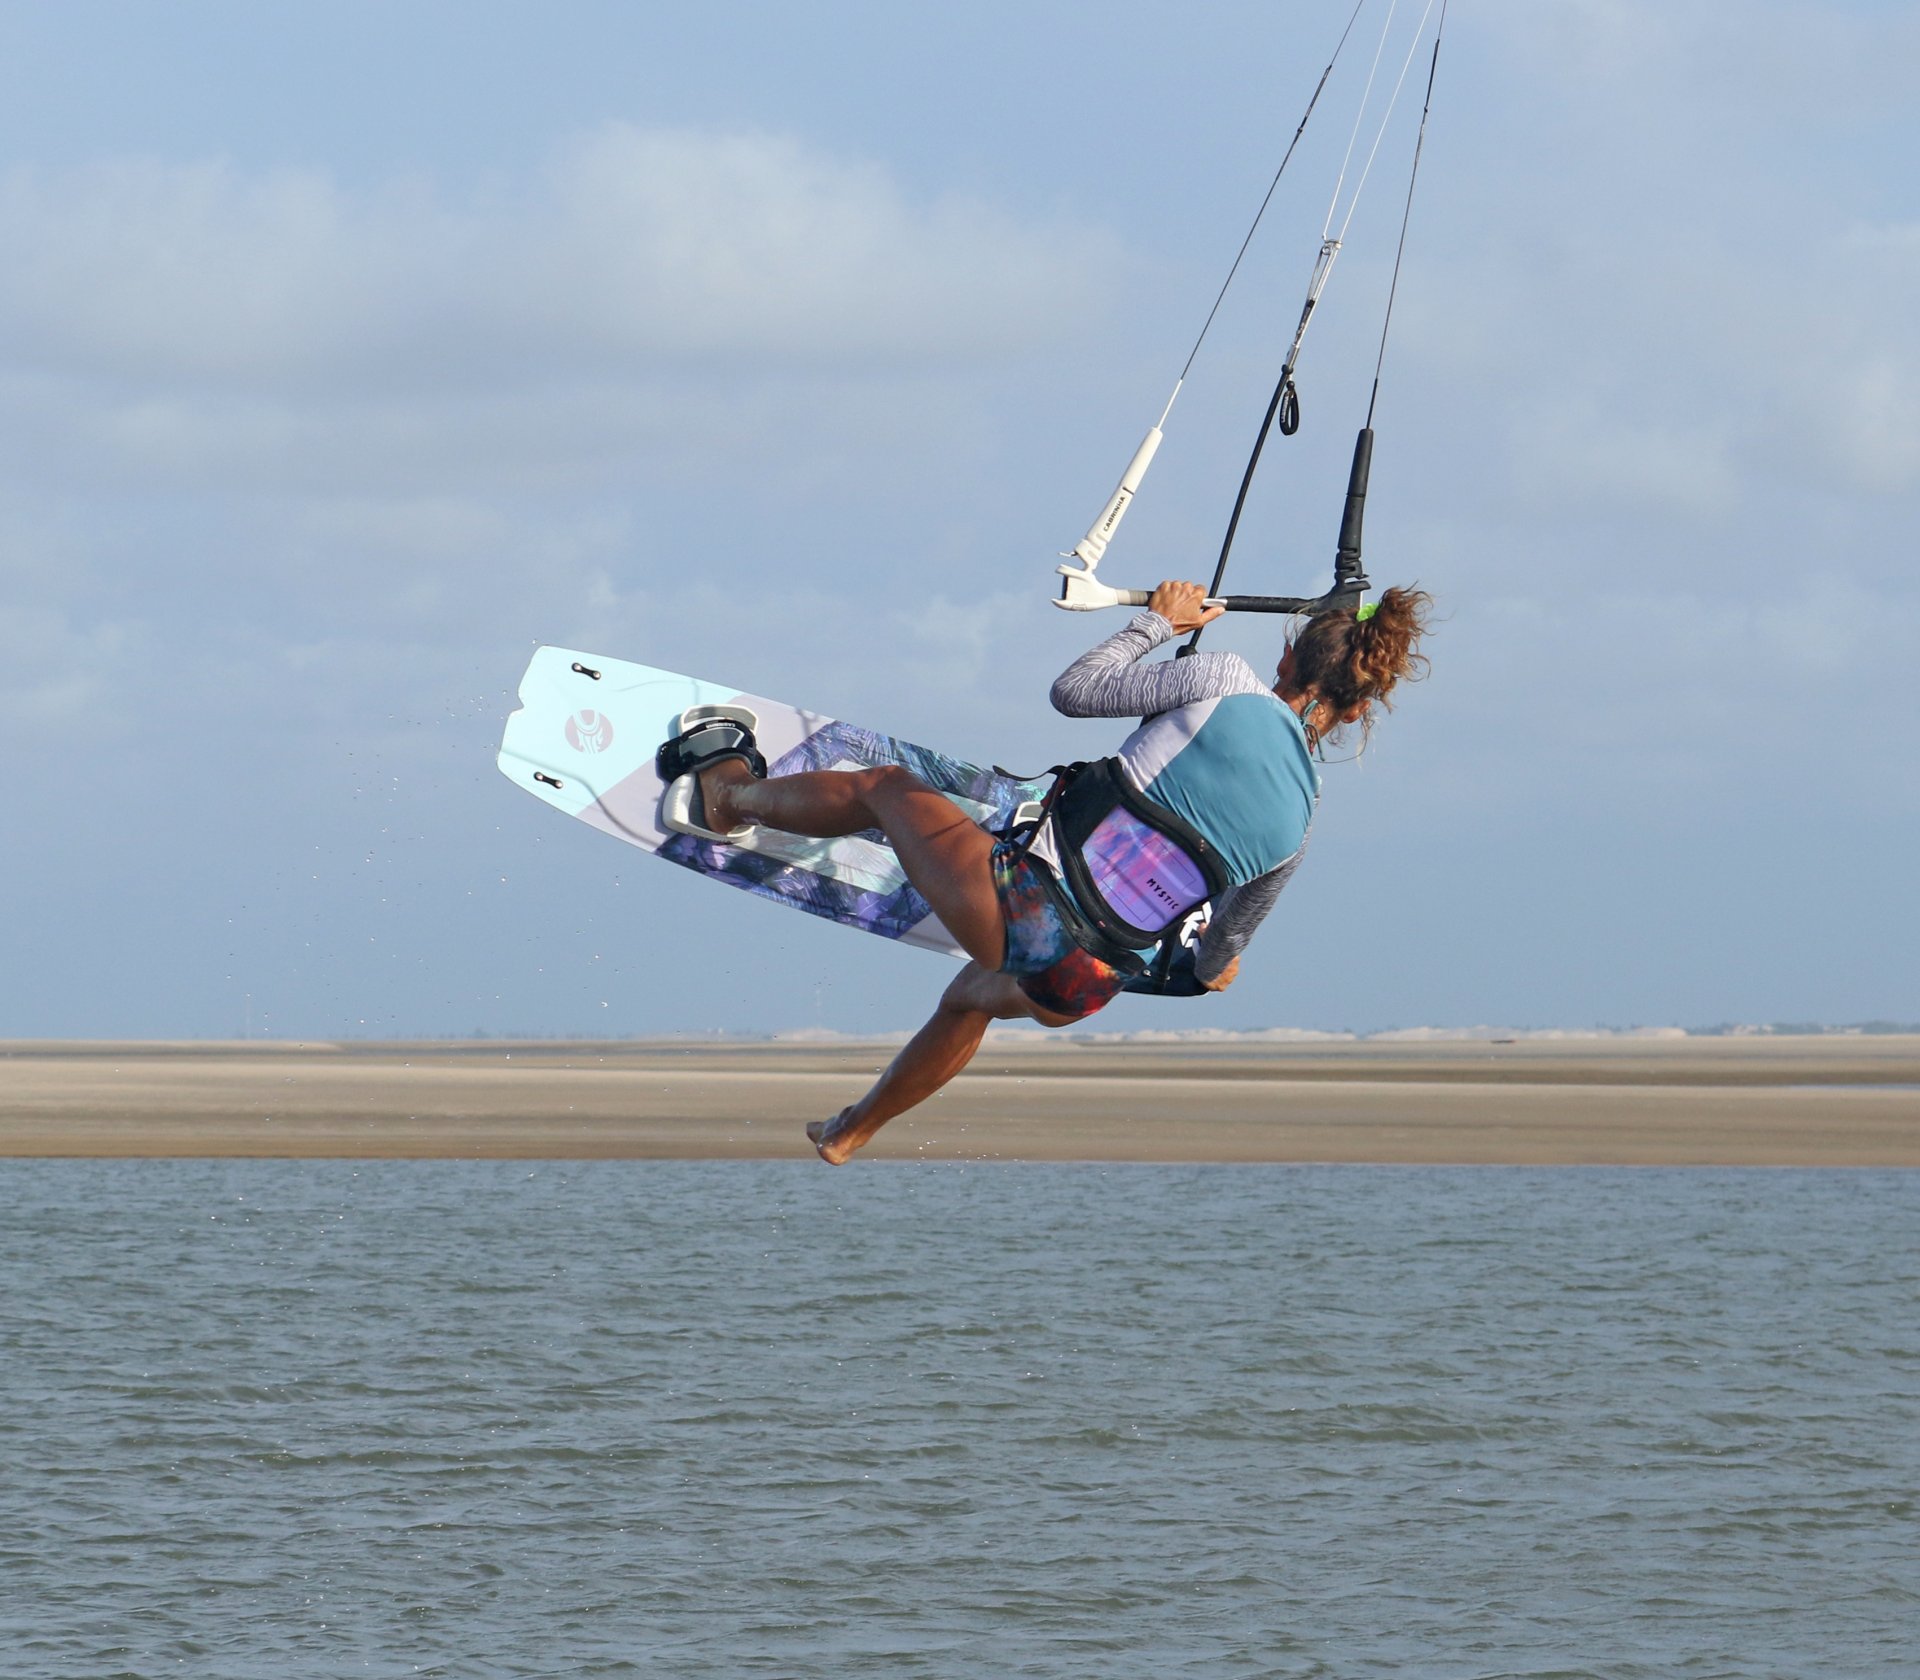
Foot Out Pic E.
The moment of truth; time to set your foot free! Before getting into the movement, we should consider the moment and have a look at Karine and, more specifically, where she is in her rotation. In this photo, she already has her foot out and leg straightened, yet she is only halfway around her back roll. This is key and the result of that slow rotation. If and when you're looking upwind, it gives you the impression of time and the confidence to wiggle your foot out. The other factor which we must not ignore here is the position of your kite. If it's high and above you, you'll be floating, and this again adds to the impression of time. Whereas if it's moving across to the other side of the window, you'll be rushing. This is a result of your short sharp send, followed by that levelling of the bar pre take-off, which you can see Karine has maintained up to this point. OK, back to the foot out. Holding your board up as if it's on edge will allow you to slide your foot down and out. Keep your eye on the strap. Once it's out, you can give it the full Monty by extending your leg to claim bonus style points.
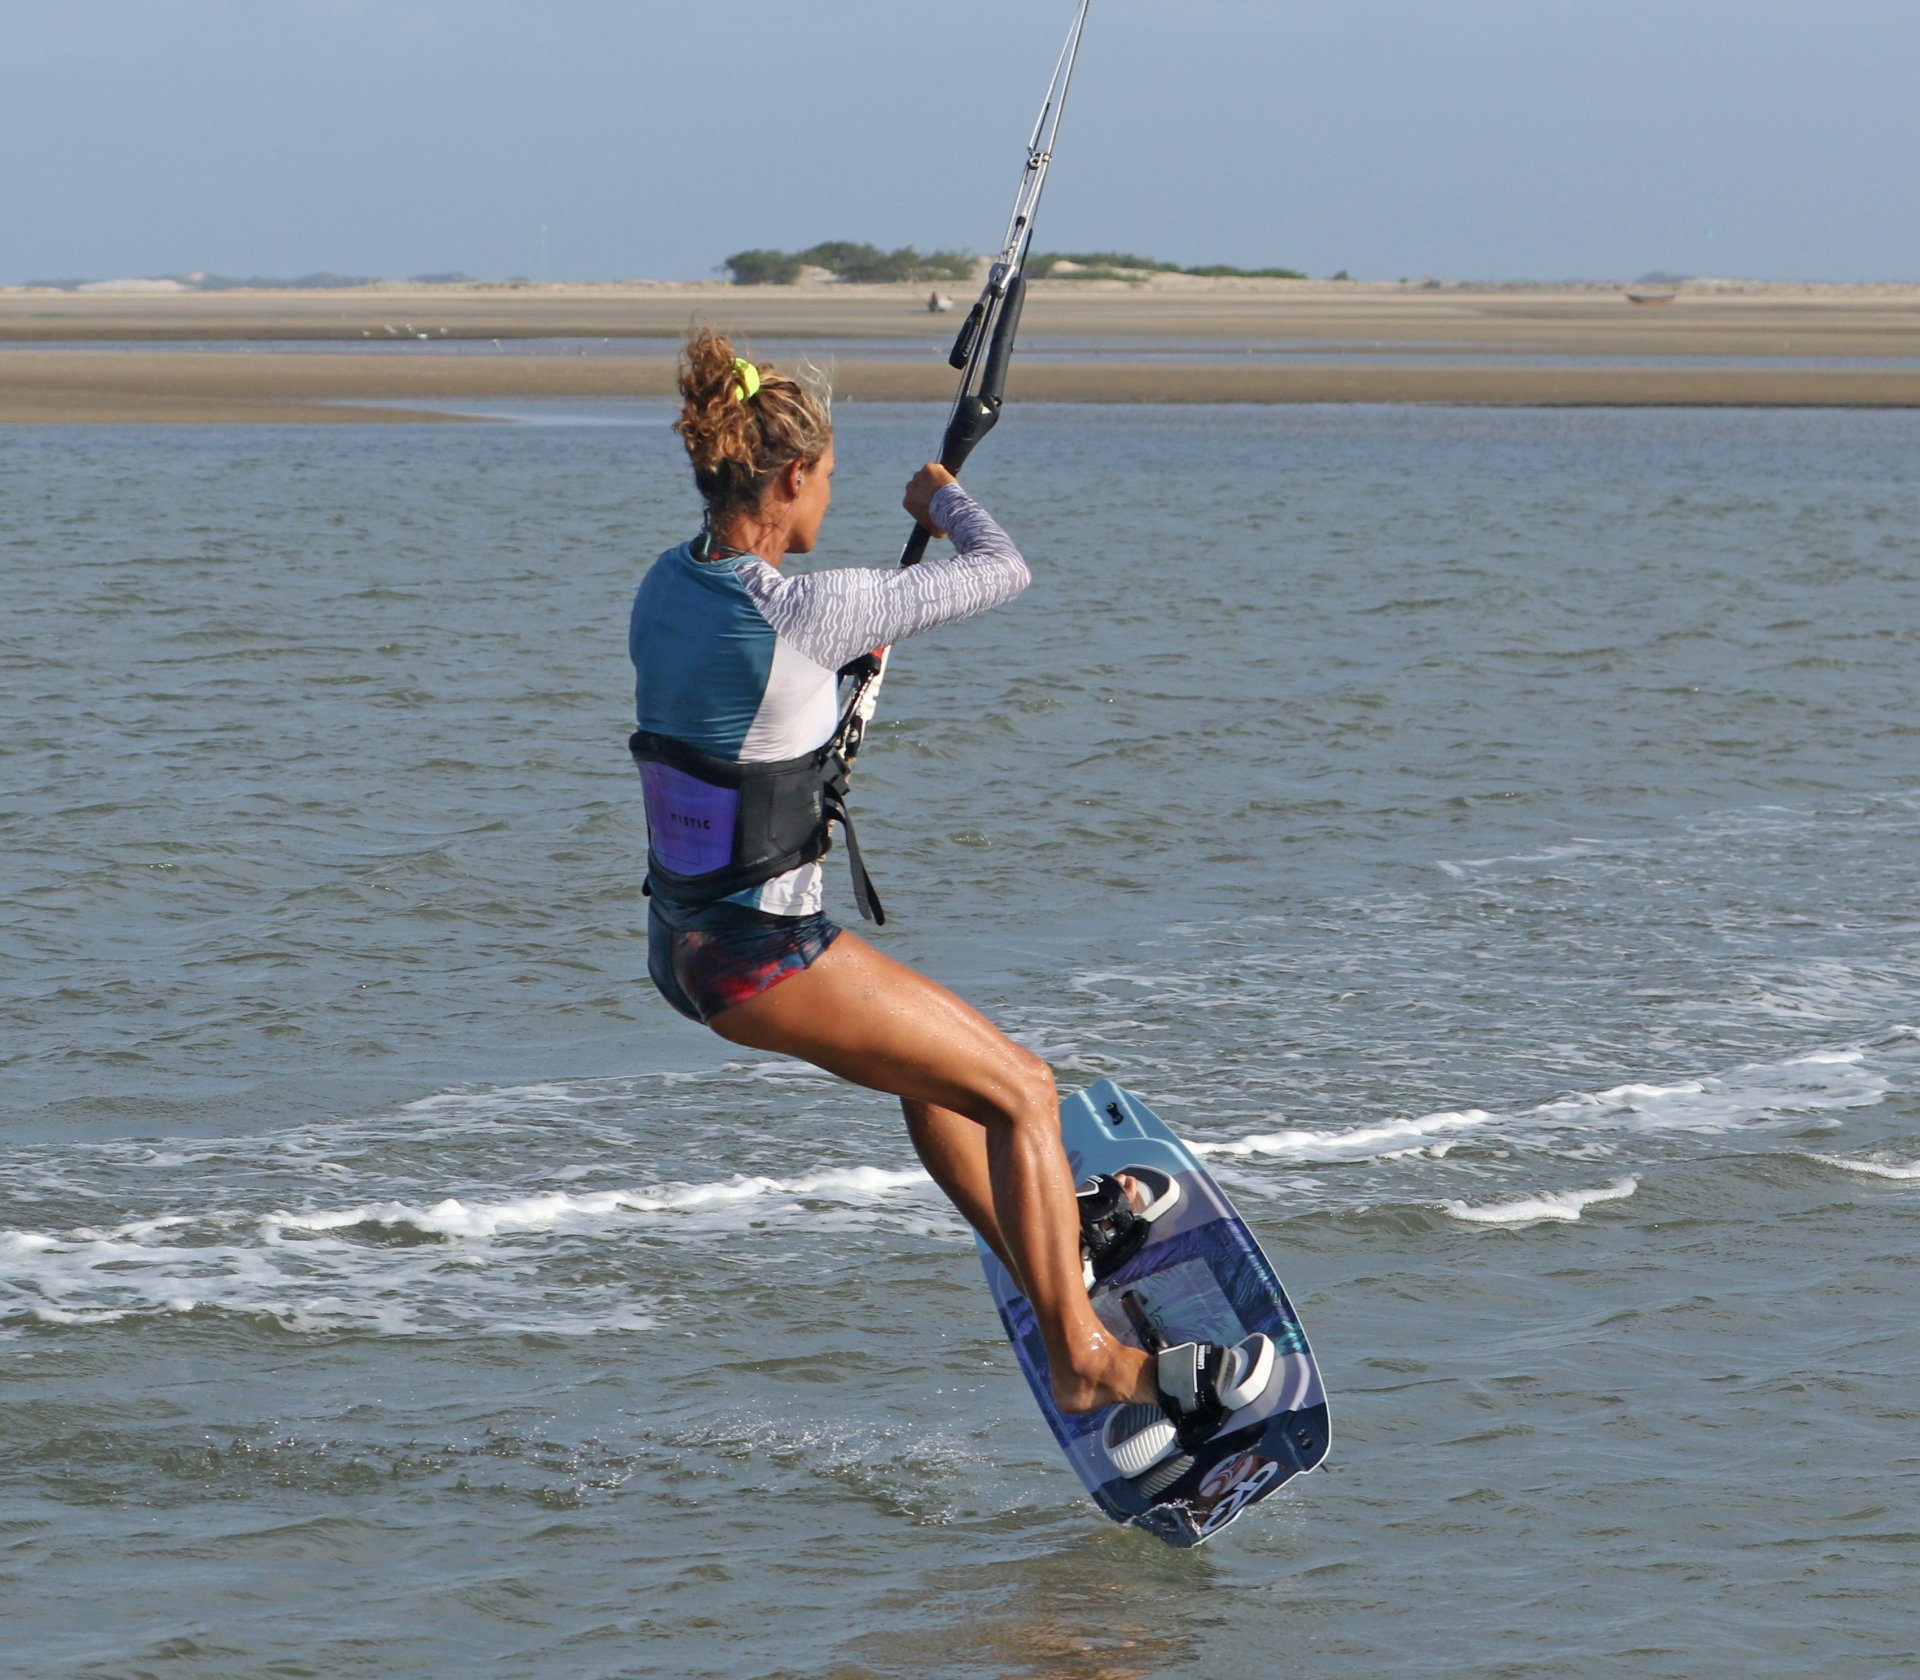
Foot In Pic F.
This is where previous experience of a foot out comes in handy as you've got two jobs now: Get your foot back in and start diving the kite to help finish your rotation and pull you downwind for a graceful landing. As long as you've got your eyes on your strap, you should be able to guide your foot towards it without stubbing your toes! It may not seem like the most sensible option, but as you fiddle for your strap, you need to use your now front hand to dive the kite. This will actually give you a moment longer in the air and help soften your touch down. You can see that as Karine squeezes her foot back into the strap, she is already asking the kite to do its business with her front hand.
Landing Pic G.
This is all about the kite. If it's diving down hard from somewhere near 12, it will pull you downwind with it. This will make landing off the wind simpler. To help get the board pointing in the right direction, drop your legs and aim to land tail first. If the tail makes contact before the rest of the board, it will stop and pivot the nose further off downwind. Here Karine is looking in the direction she wants to land, she's dropped her legs, and the board is touching down tail first. Game on. All that's left to do is get your back hand back on the bar so that you can stop the kite from diving into the drink and then carve back up onto your edge.
Top Tips
During the learning process, there are a few steps that'll help you reach the full money shot of a bona fide one foot out in the midst of your BLT.
On your approach, make sure that your hands are centred on the bar and loosen your foot a bit in your front strap. This will make it slip out much easier.

Try not to rotate your back roll fully. It's better to get only half or three-quarters of the way around than to over-rotate. Practise this without the one foot first.
Once you're happy and ready to take your foot out, for your first attempts, wiggle your foot back on the pad so that it's not fully out. This way, it's easy to slide it back in, and you'll have both feet in contact with the board should things not go fully to plan. Once this works, you'll have the confidence to take it out a bit further until you're comfortable enough to straighten your leg and get some distance between the strap and your foot.
And finally, it's normal to land nose first or across the wind as you get into this. With practice and patience, you'll work towards a soft, flowing landing.
Now have a good look at the sequence and the video to see how it happens step by step and in real-time.
Common Problems
Not enough time! The classic. Your best course of action here is to concentrate on your BLT without a one foot or grab. Work on your approach and take off, feathering the bar out and stopping the kite at 12 so that you can rotate more slowly.


Not getting your foot back in or landing very nose heavy. Generally, the result of the kite drifting too far back during the move. Make sure to stop your kite by levelling your bar before take-off. It can help to slow down a touch more on your approach.
Keystones
- Slow down by easing bar out
- Short sharp send and level
- Stamp then pull
- Lift knee for early grab
- Dive whilst replacing foot

This technique article was in Issue 98 of IKSURFMAG.
Related


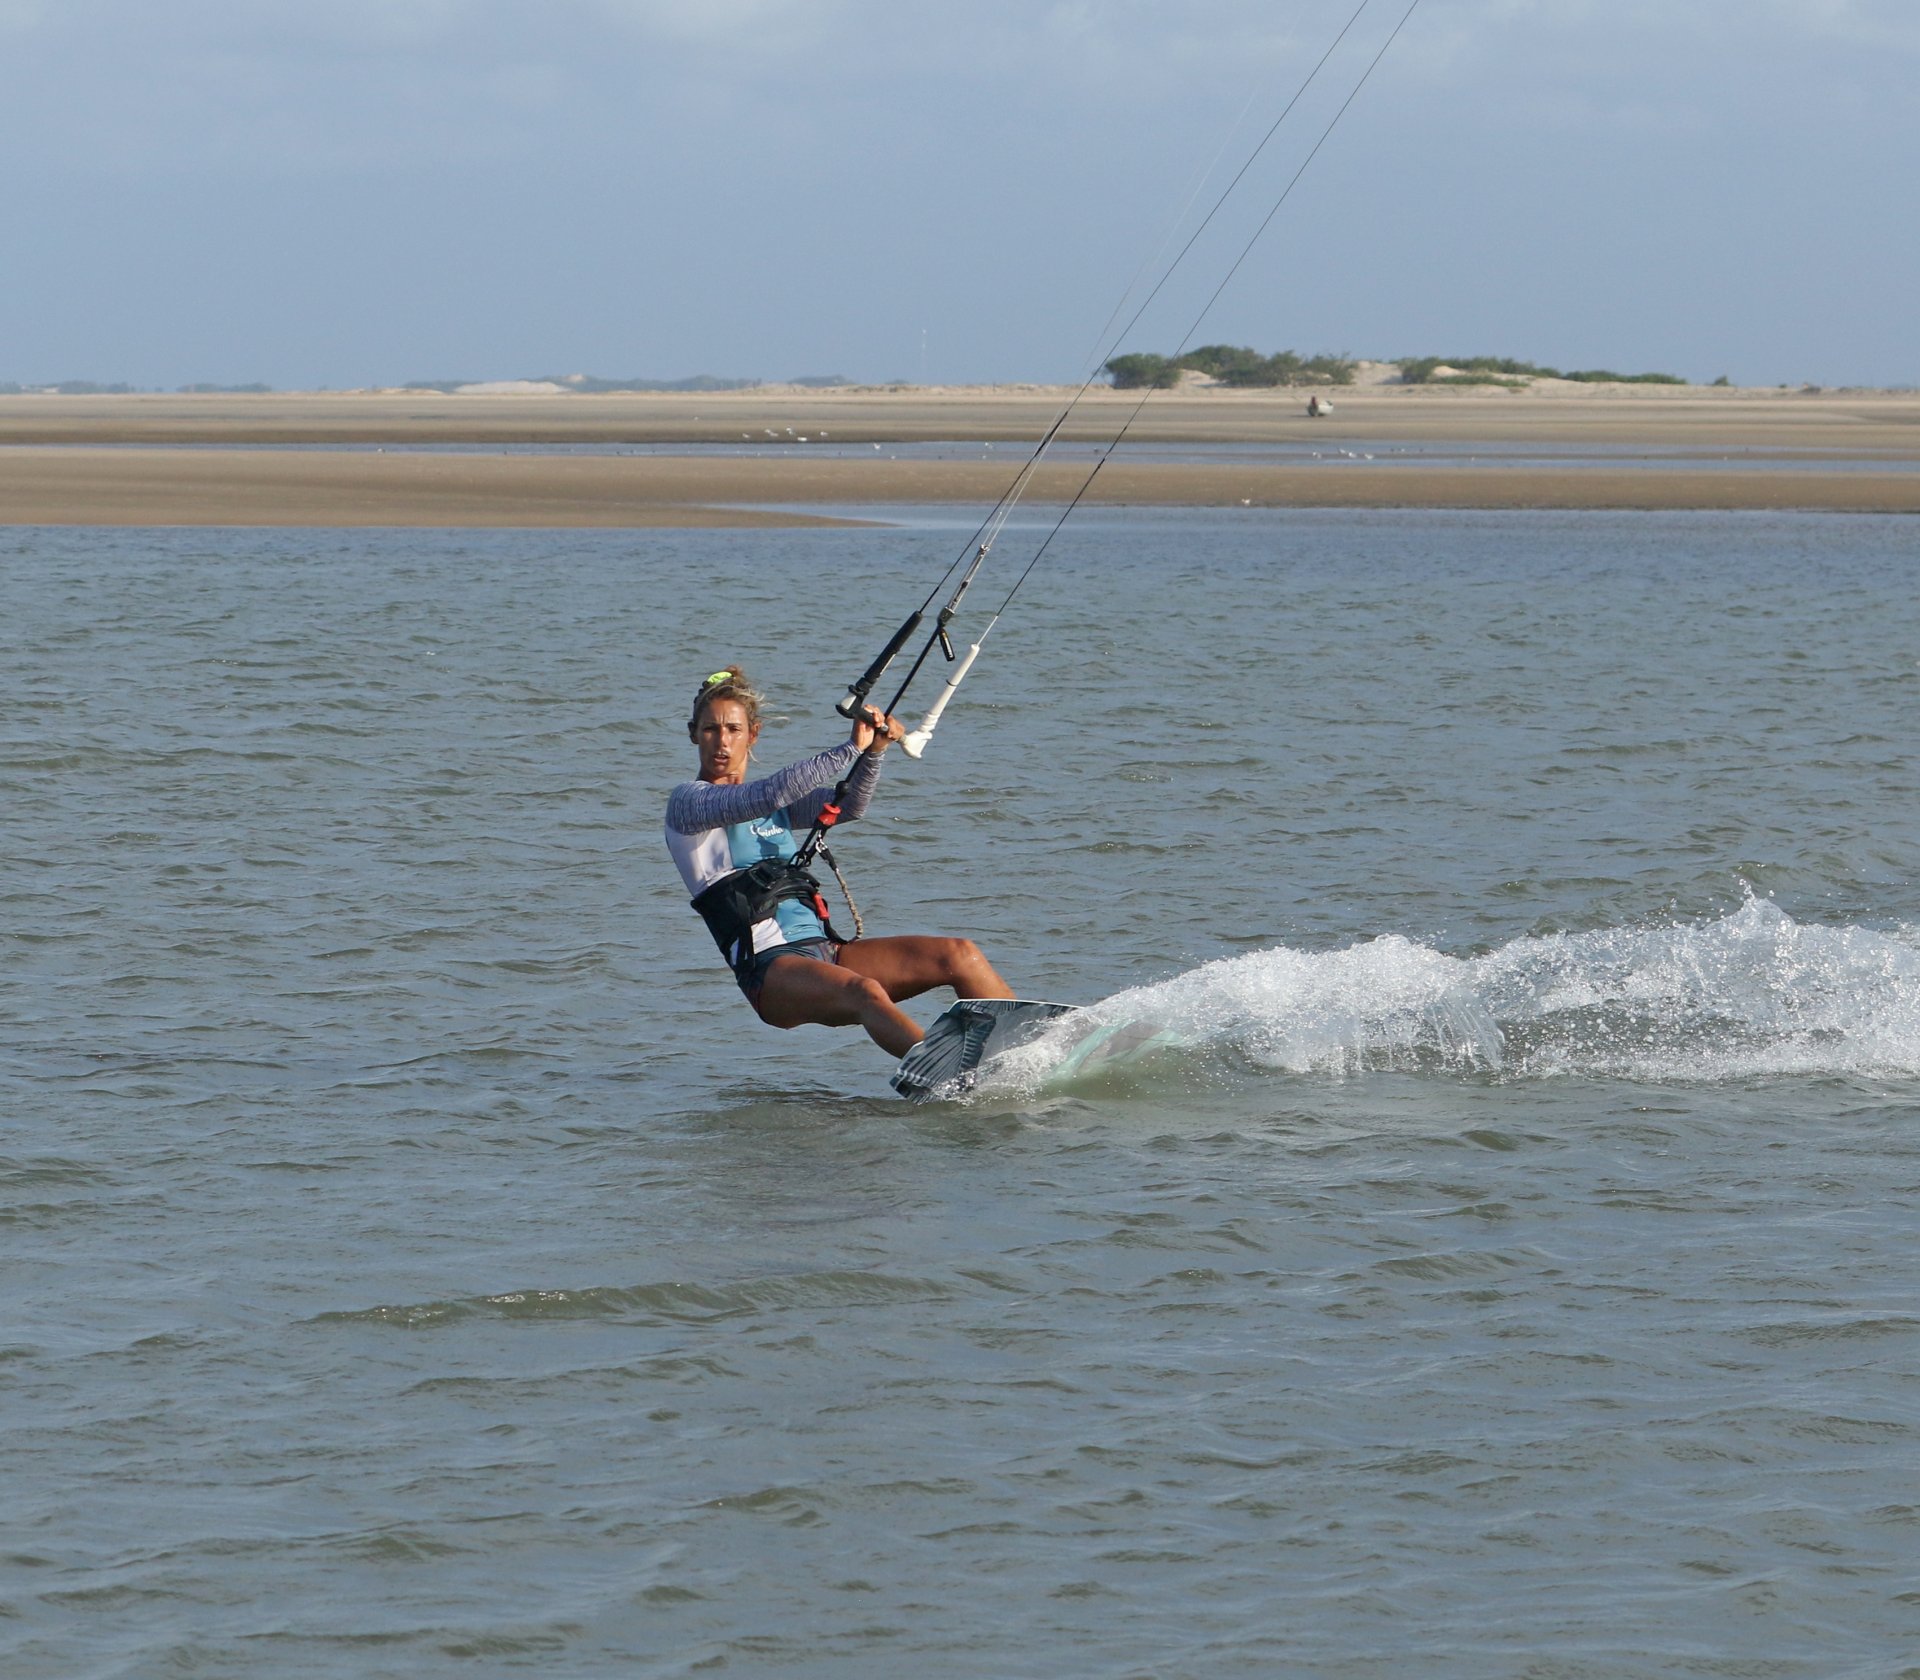
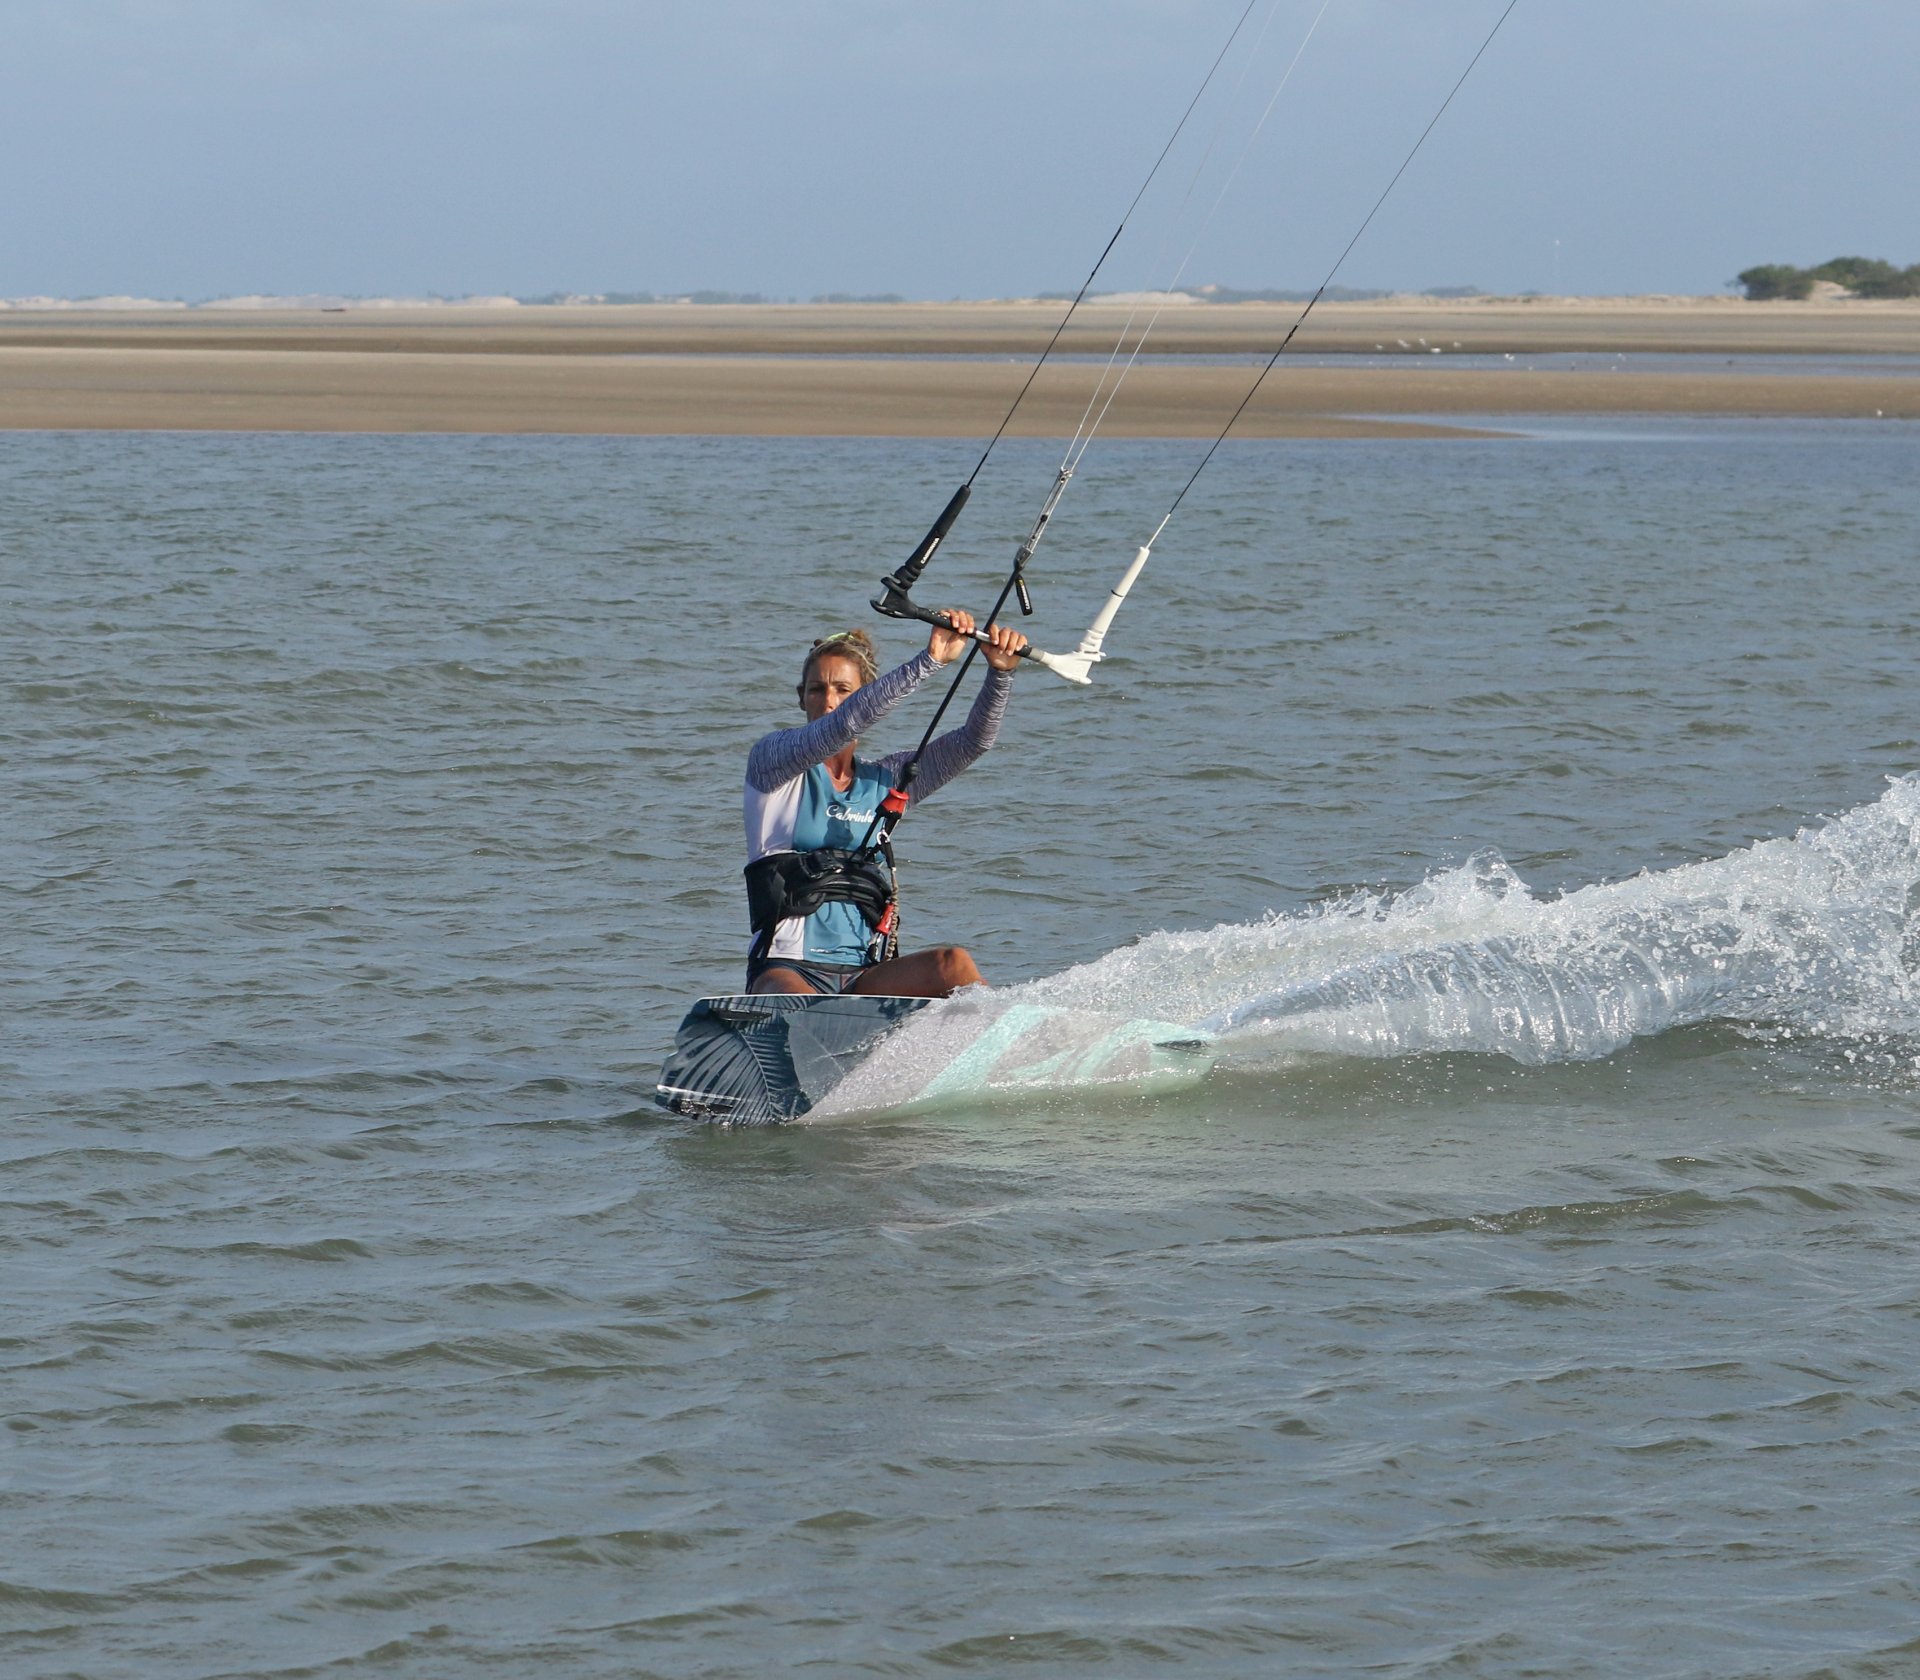
By Christian and Karine
Christian and Karine have been working together as a coaching team, running improver to advanced kitesurfing clinics since 2003.
