

Double Heart Attack
Technique / Advanced


Introduction
Here we go, something for those of you who like a challenge and don’t mind kissing the water occasionally! The Double Heart Attack or in ye olde English, a double S-Bend 3. Either way, it’s an absolute cracker and not exactly for the faint-hearted. As such it’s a pleasure to welcome back Heliarde to the technique pages this issue, and to keep it inclusive there are no boots in site:)
As always with Freestyle moves, it’s worth noting that each move is a progression of a previous move, so at the very least you’ll be wanting to have the S-Bend pass down, and if you can already get a couple of spins in even better. Although this has a 3 at the end, we’re sure that most of you would be happy getting an air pass in there somewhere, so read on and let’s see what is possible.


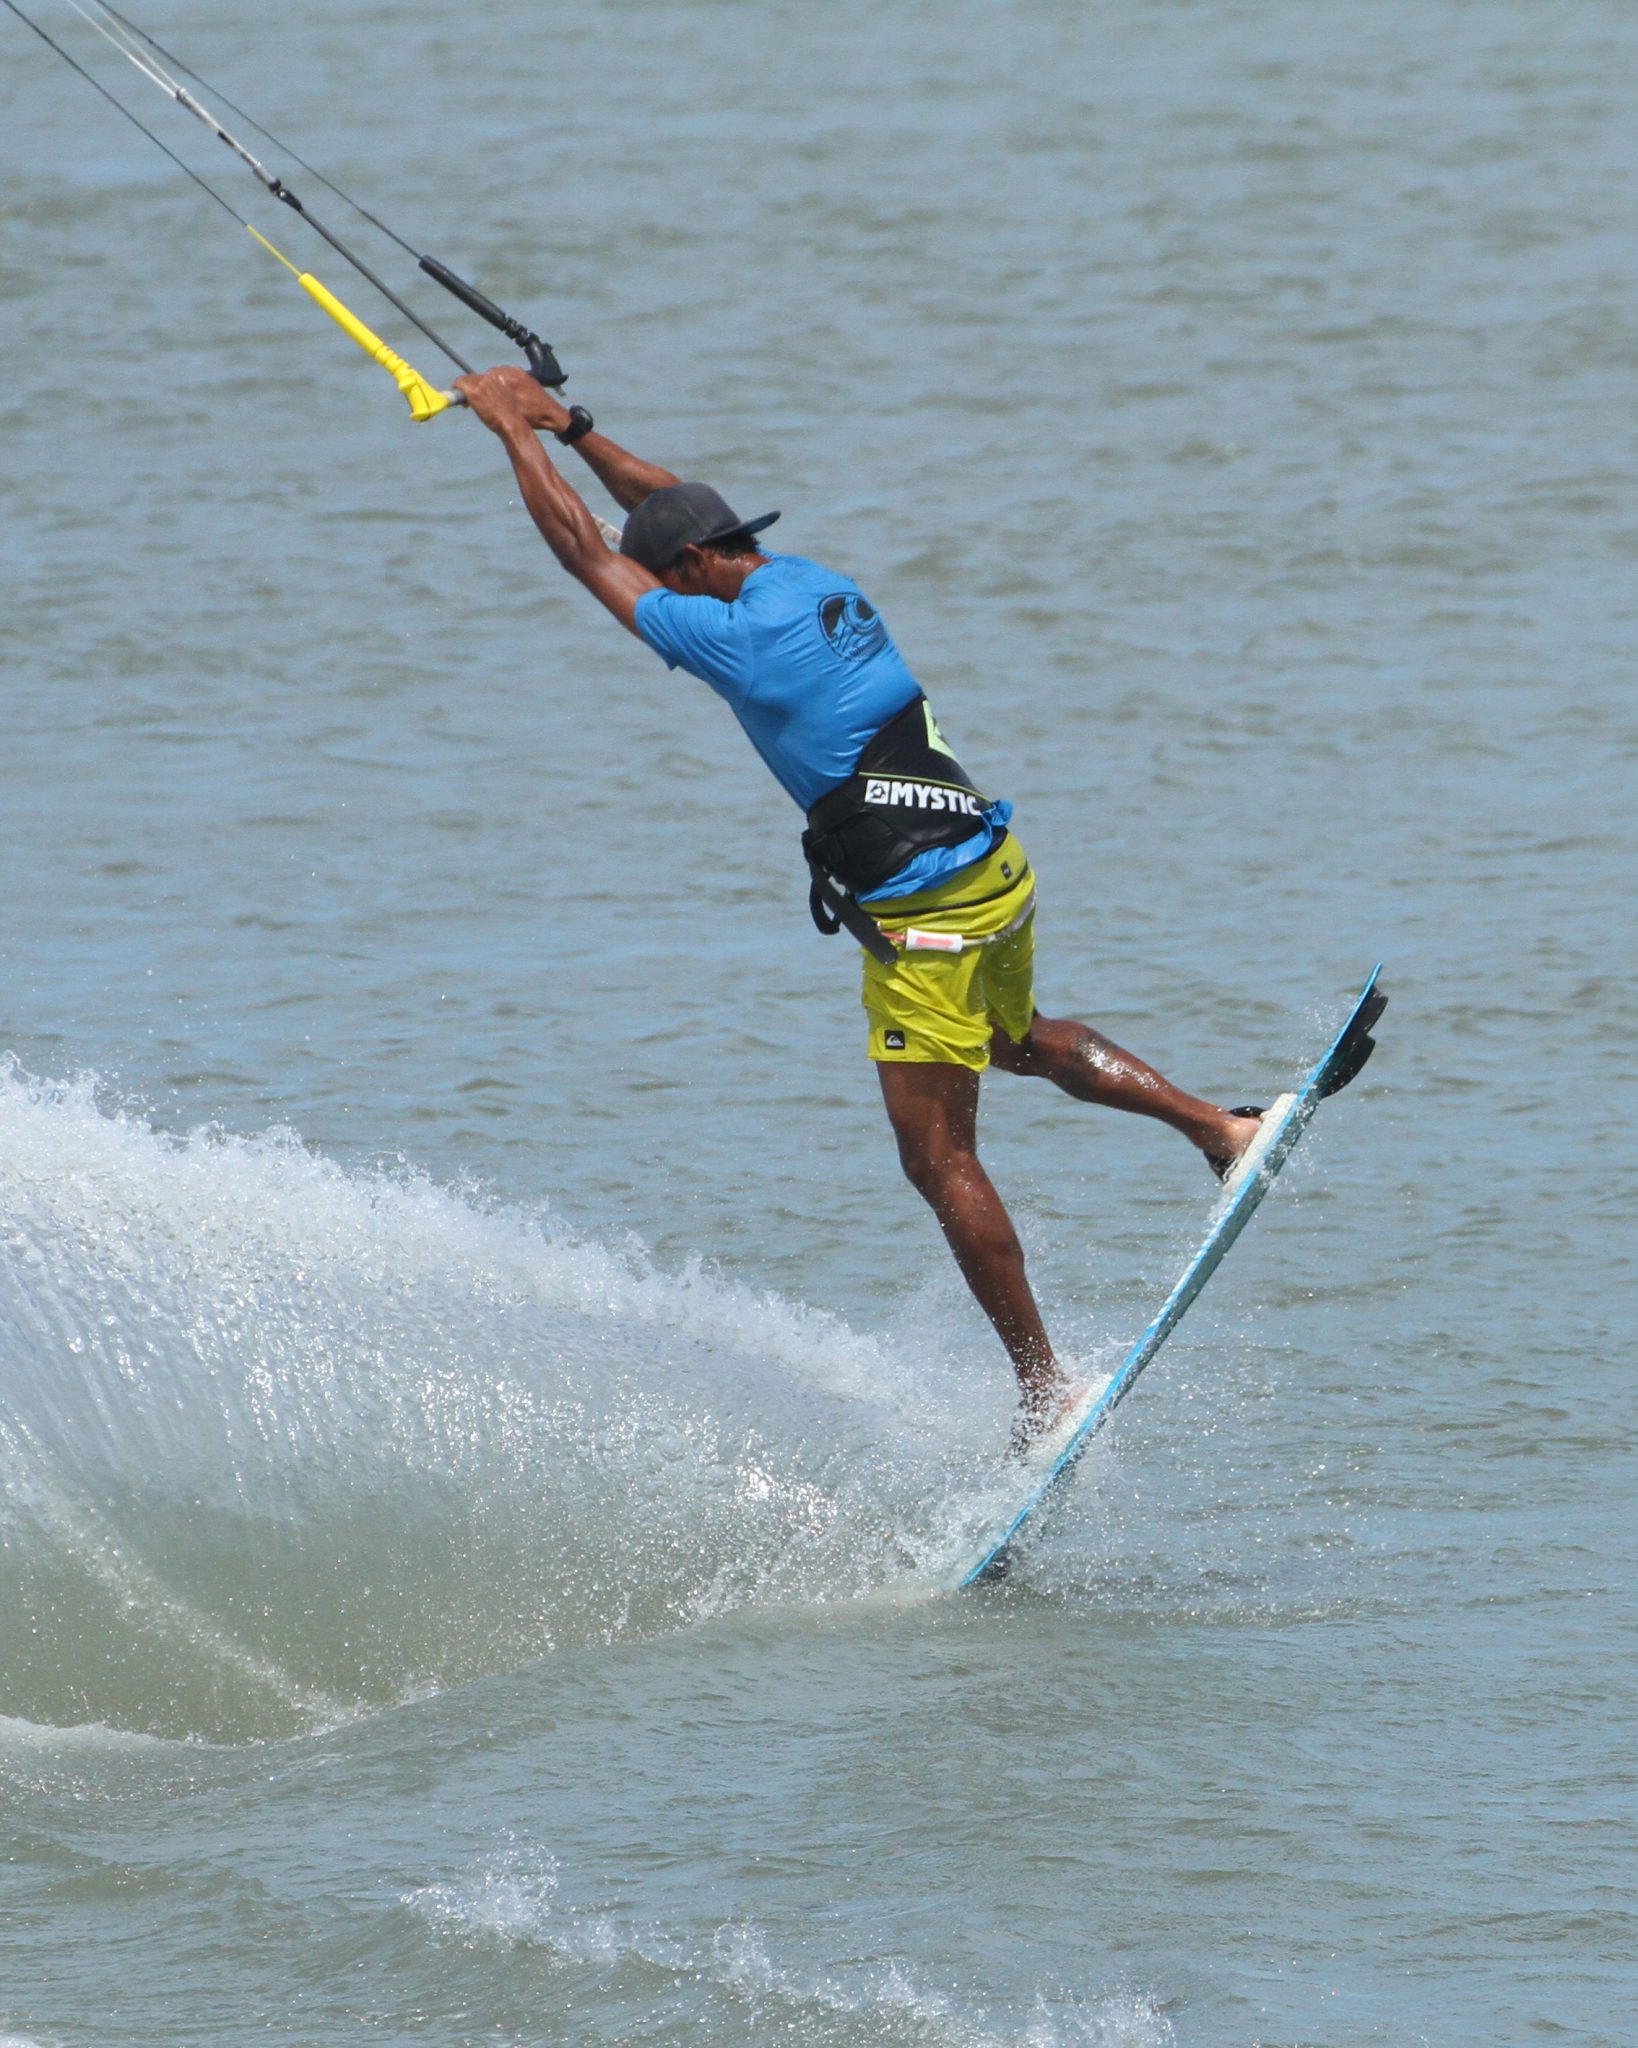
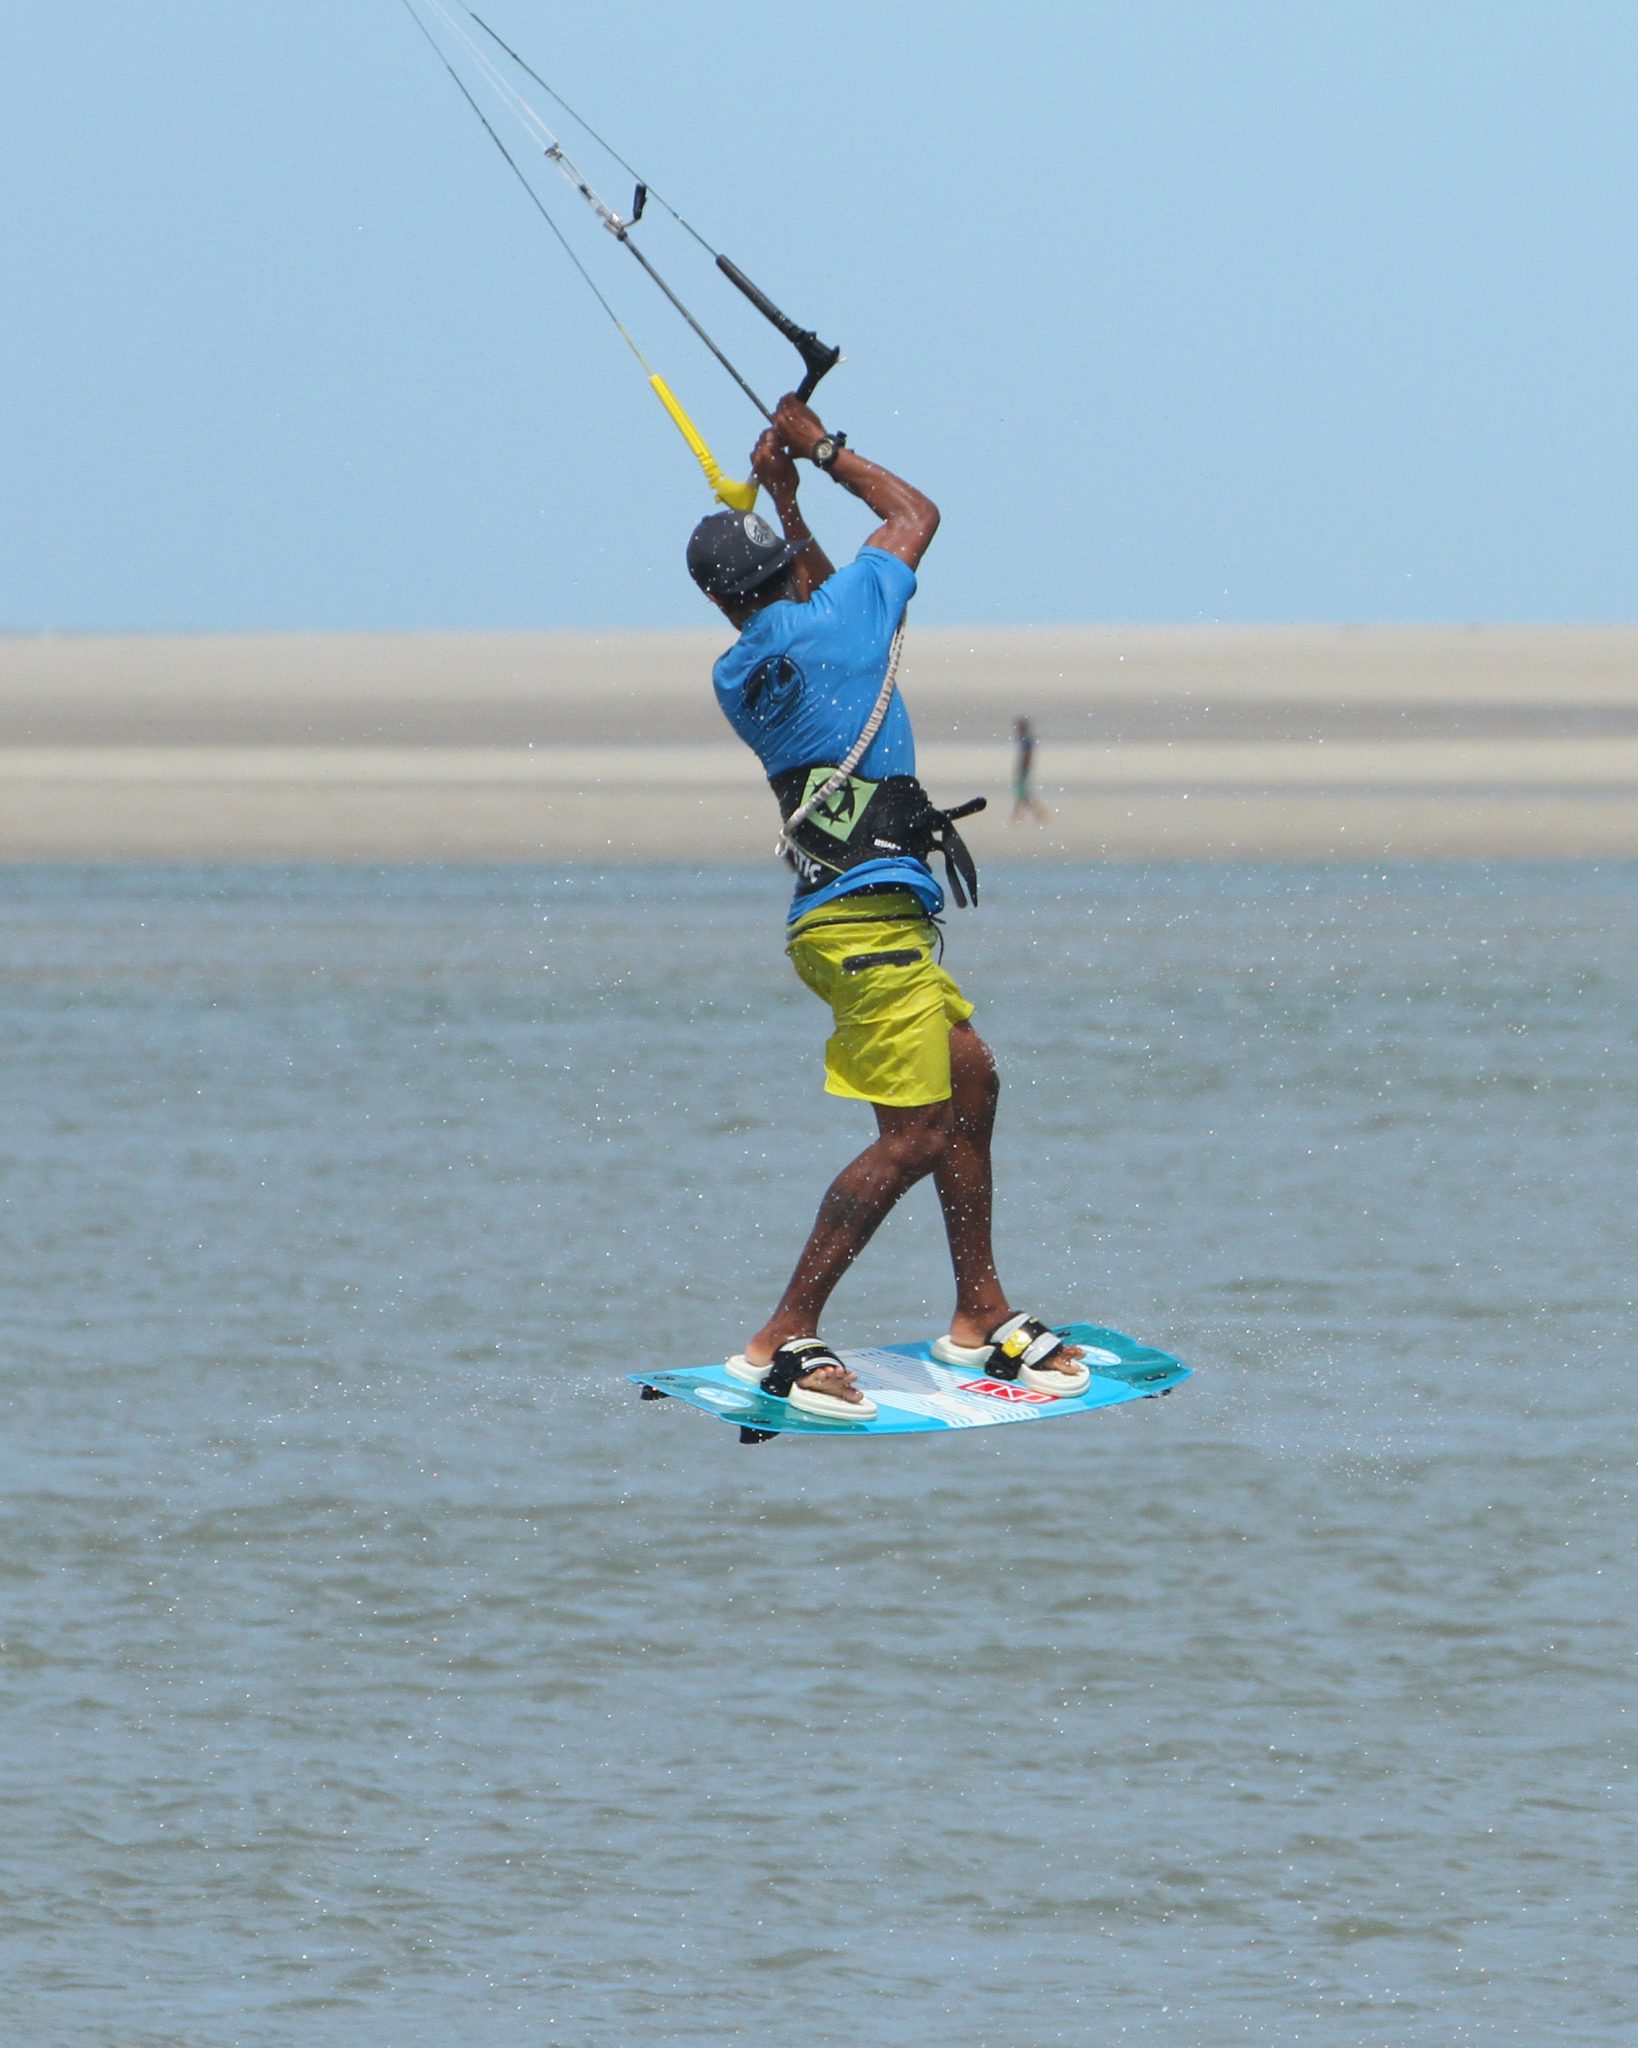
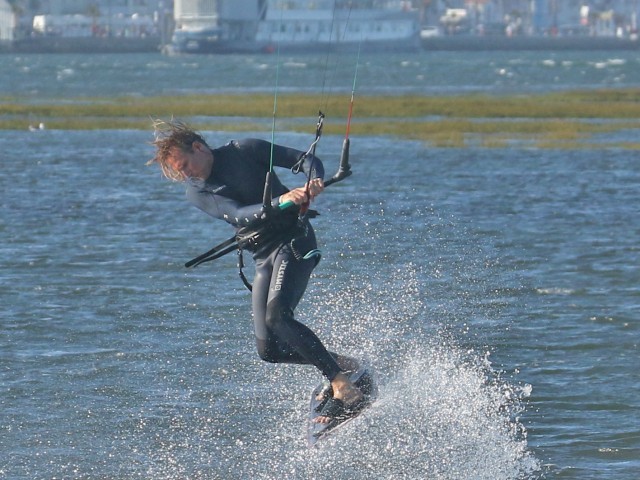
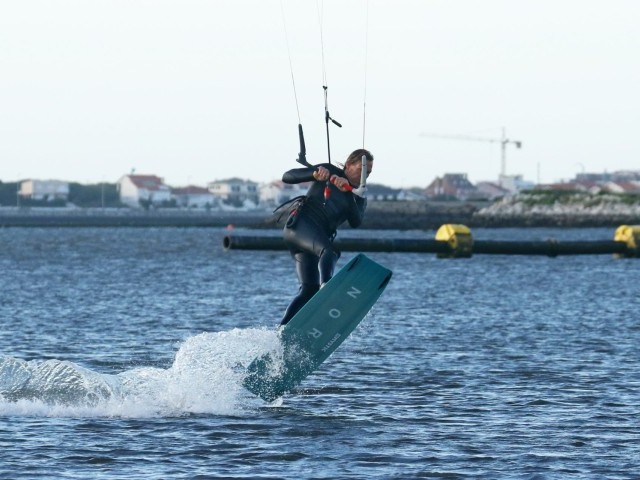
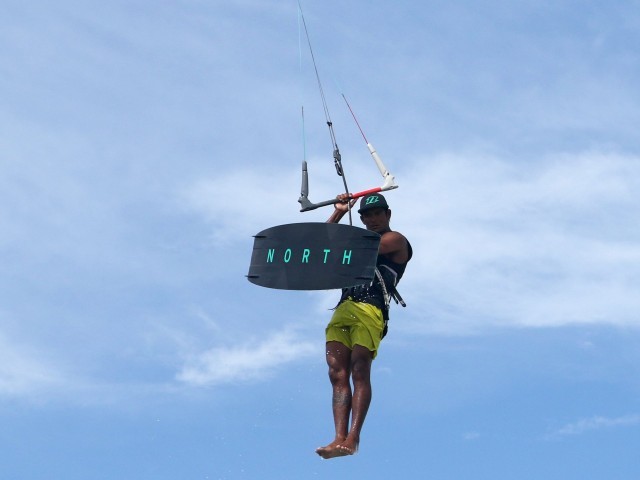
All About Pop - Pic A.
It pretty much goes without saying that if you plan on getting a couple of rotations in and then plan on adding a pass with a full 3, you’ll need some height and a fraction of time in which to complete the aforementioned combo. Two things will help immensely with this plan, oodles of pop and some help from the kite.
The Pop will come from your approach, your kite and your stamp. For a move that requires time and therefore drift in the air, that is to say, you’ll be travelling some, you will need sufficient power. If you trim your bar all the way to your chicken loop, you won’t get this, as a bit of kite stall and the resultant pull is what you’re after.
On top of that for the pop, you’ll need good speed, decent off the wind before take-off to drop the kite back and a solid, hefty carve and stamp, using every ounce of resistance that you can muster. Heliarde reckons it’s all in the breathing – don’t hold your breath but use it. You can see how Heliarde is fully extending popping hard against his edge, while his kite is definitely not super low. A small tweak up as you pop will help.
Final point here is to concentrate on the pop. Don’t start to rotate too quickly as then you’ll sacrifice some pop.
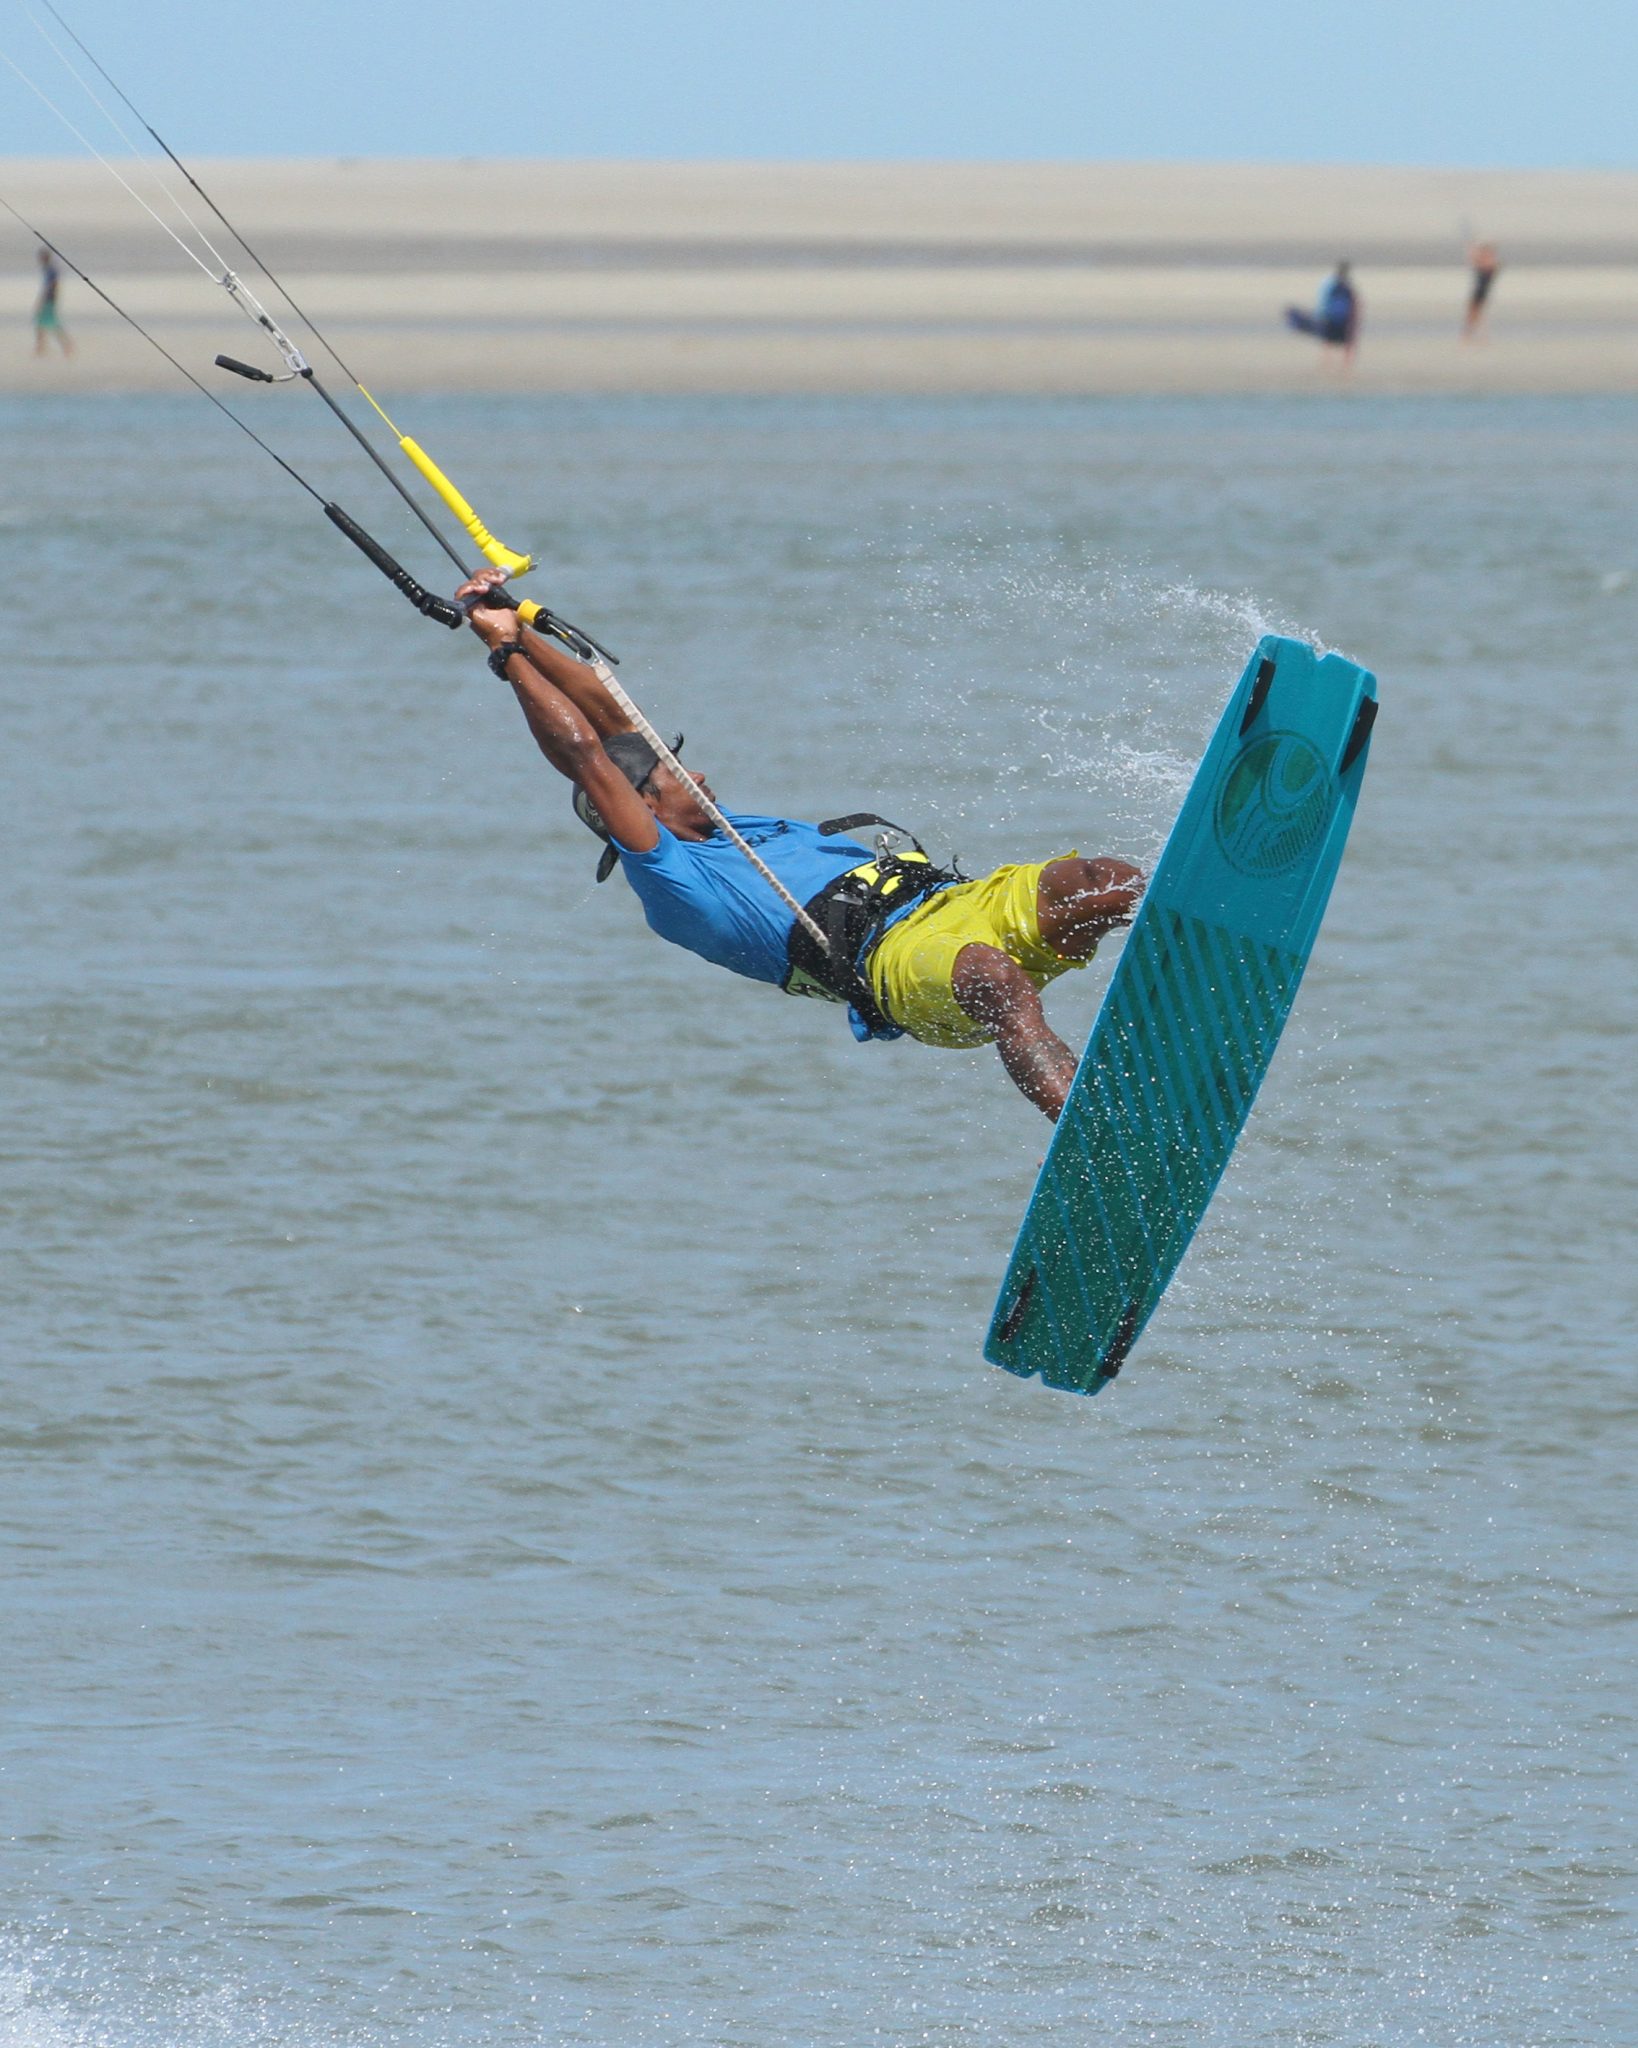
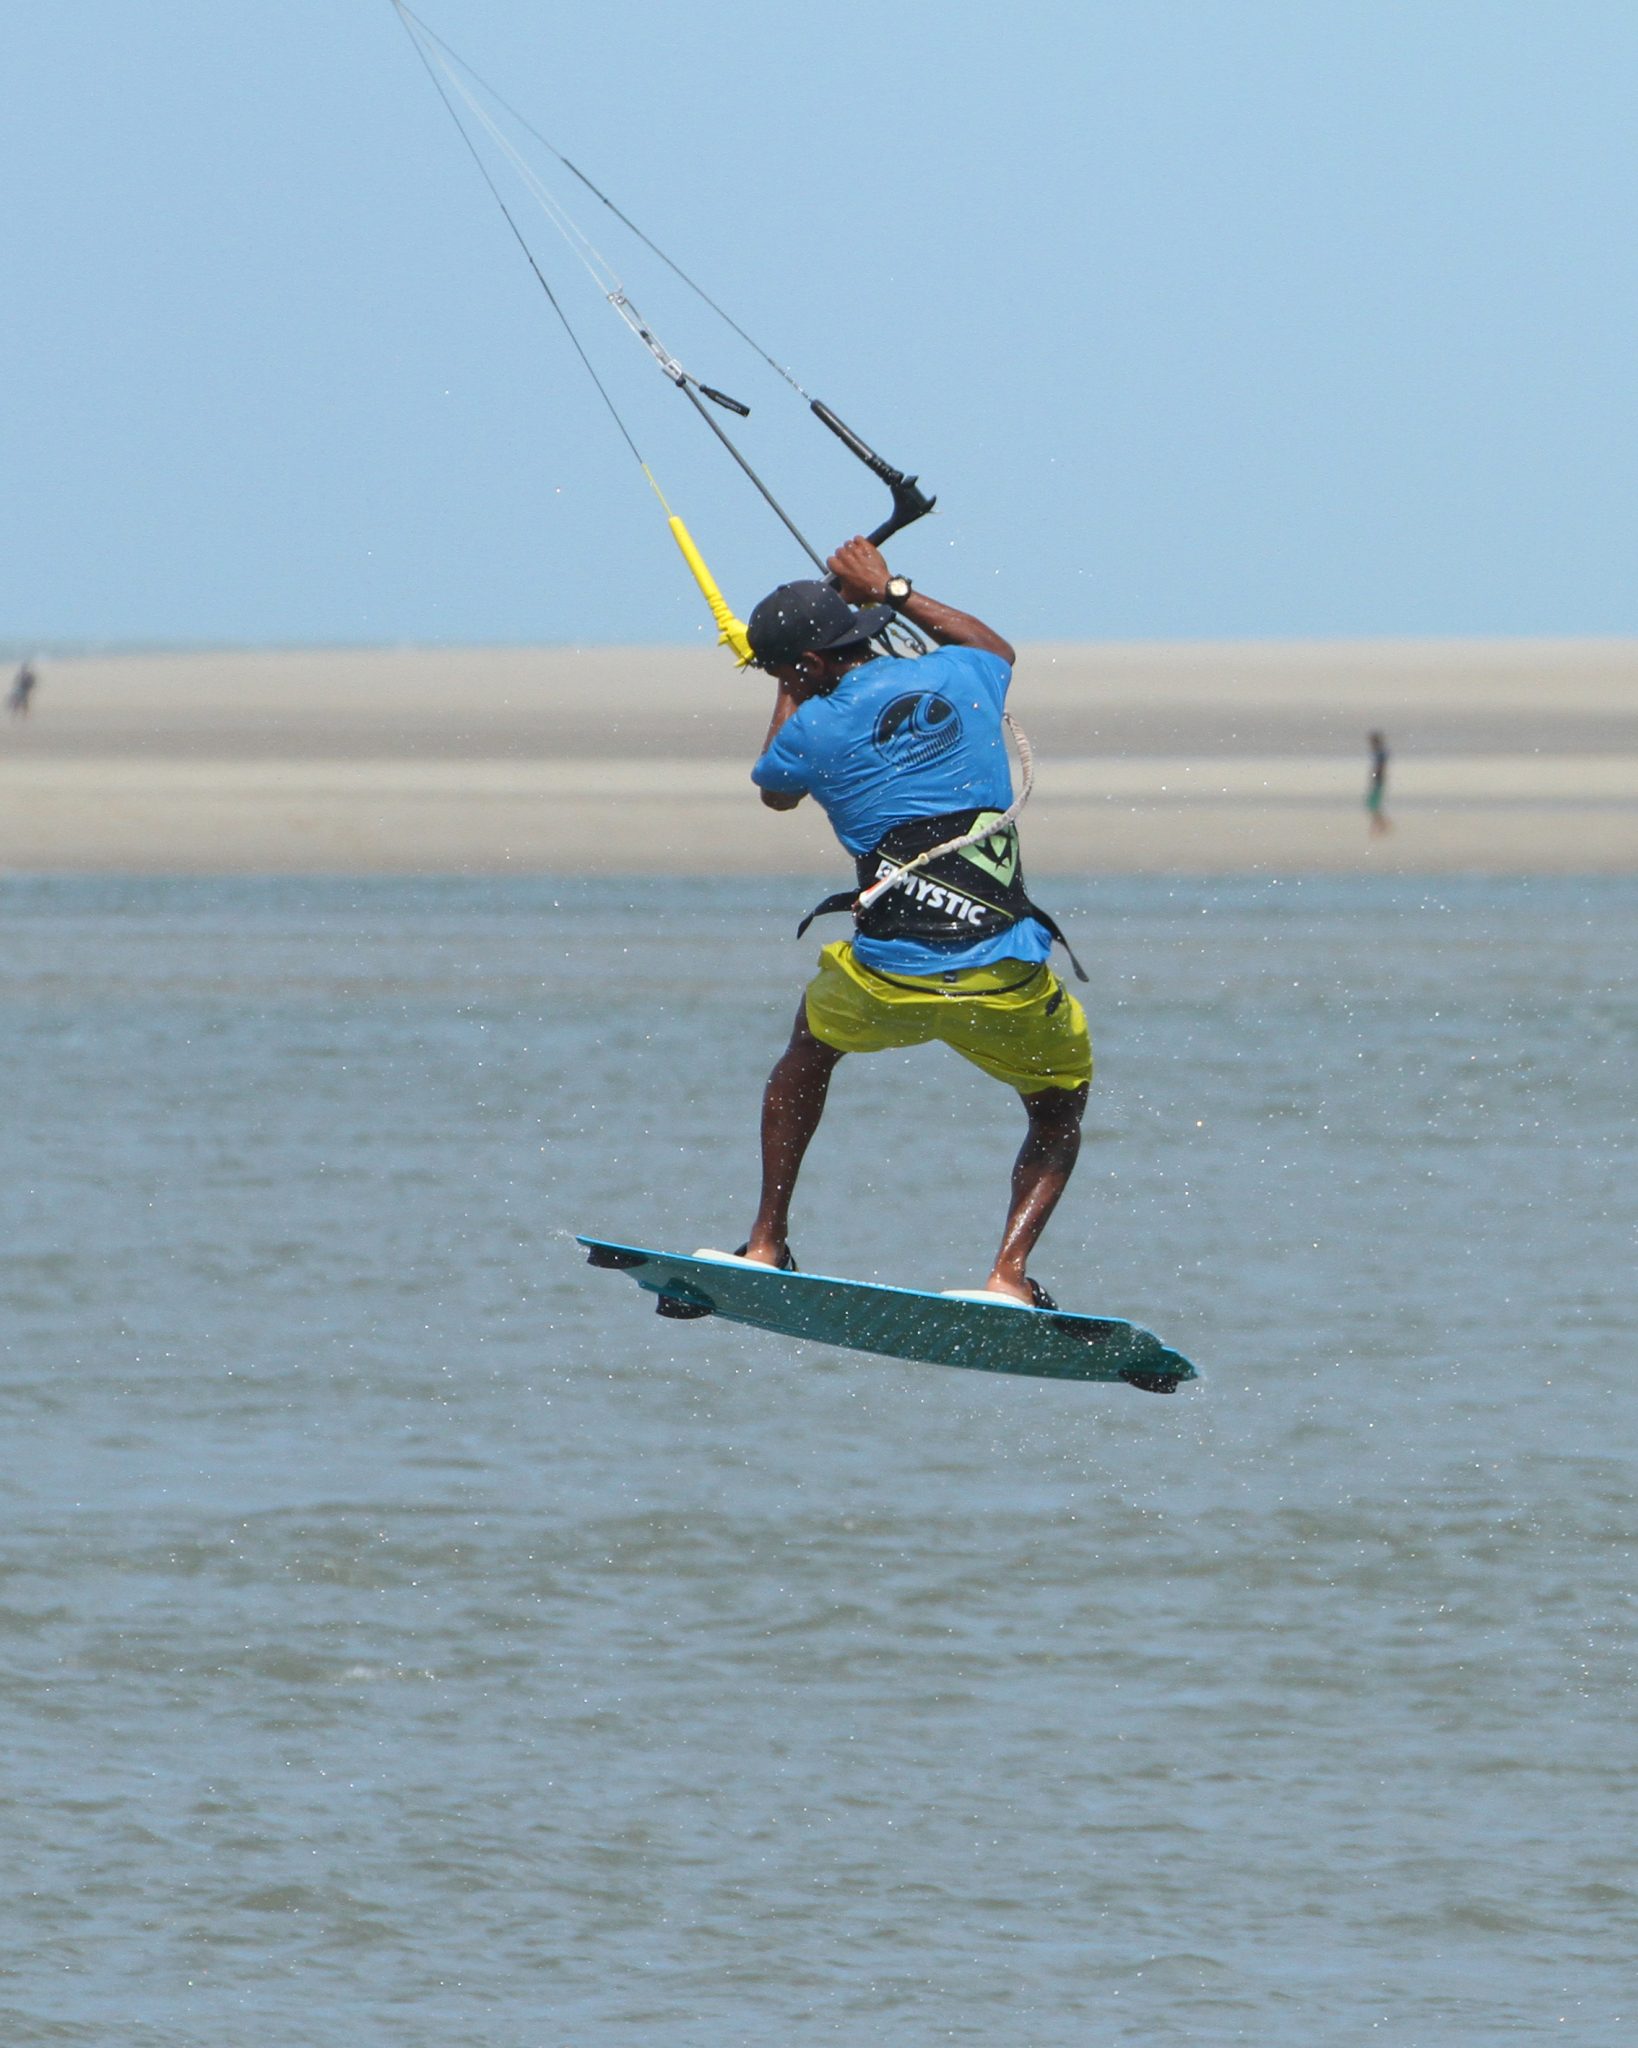
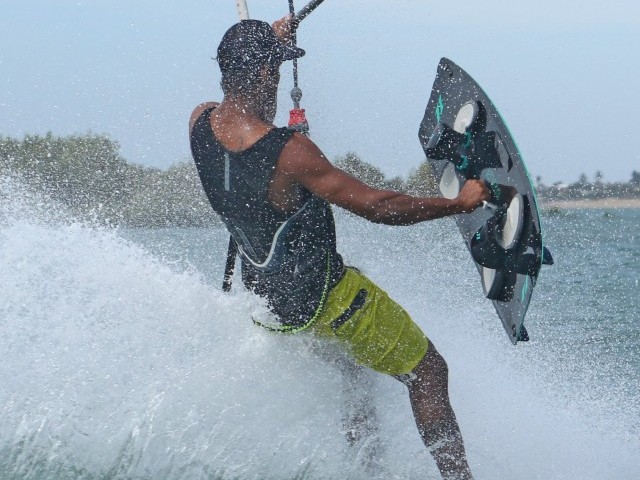
First Bend – Pic B.
This one should be common knowledge if you’ve got this move in your sights. What makes an S-bend an S-Bend, and what also helps with the subsequent pass is that you lead the rotation with your head, hands and shoulders. It’s no problem, in fact, it’s advisable that the board gets left behind, trailing in your wake. This way you can easily lead into the 2nd rotation and then into the pass. If you try and rotate with your hips and pull your front knee up to lead, it’ll all go horribly wrong. It’s worth noting that at this stage the kite is probably at its highest point. It’s not high but as Heliarde lifted it slightly on take off this is where it must stop. Any higher and the rotation will become a spin.

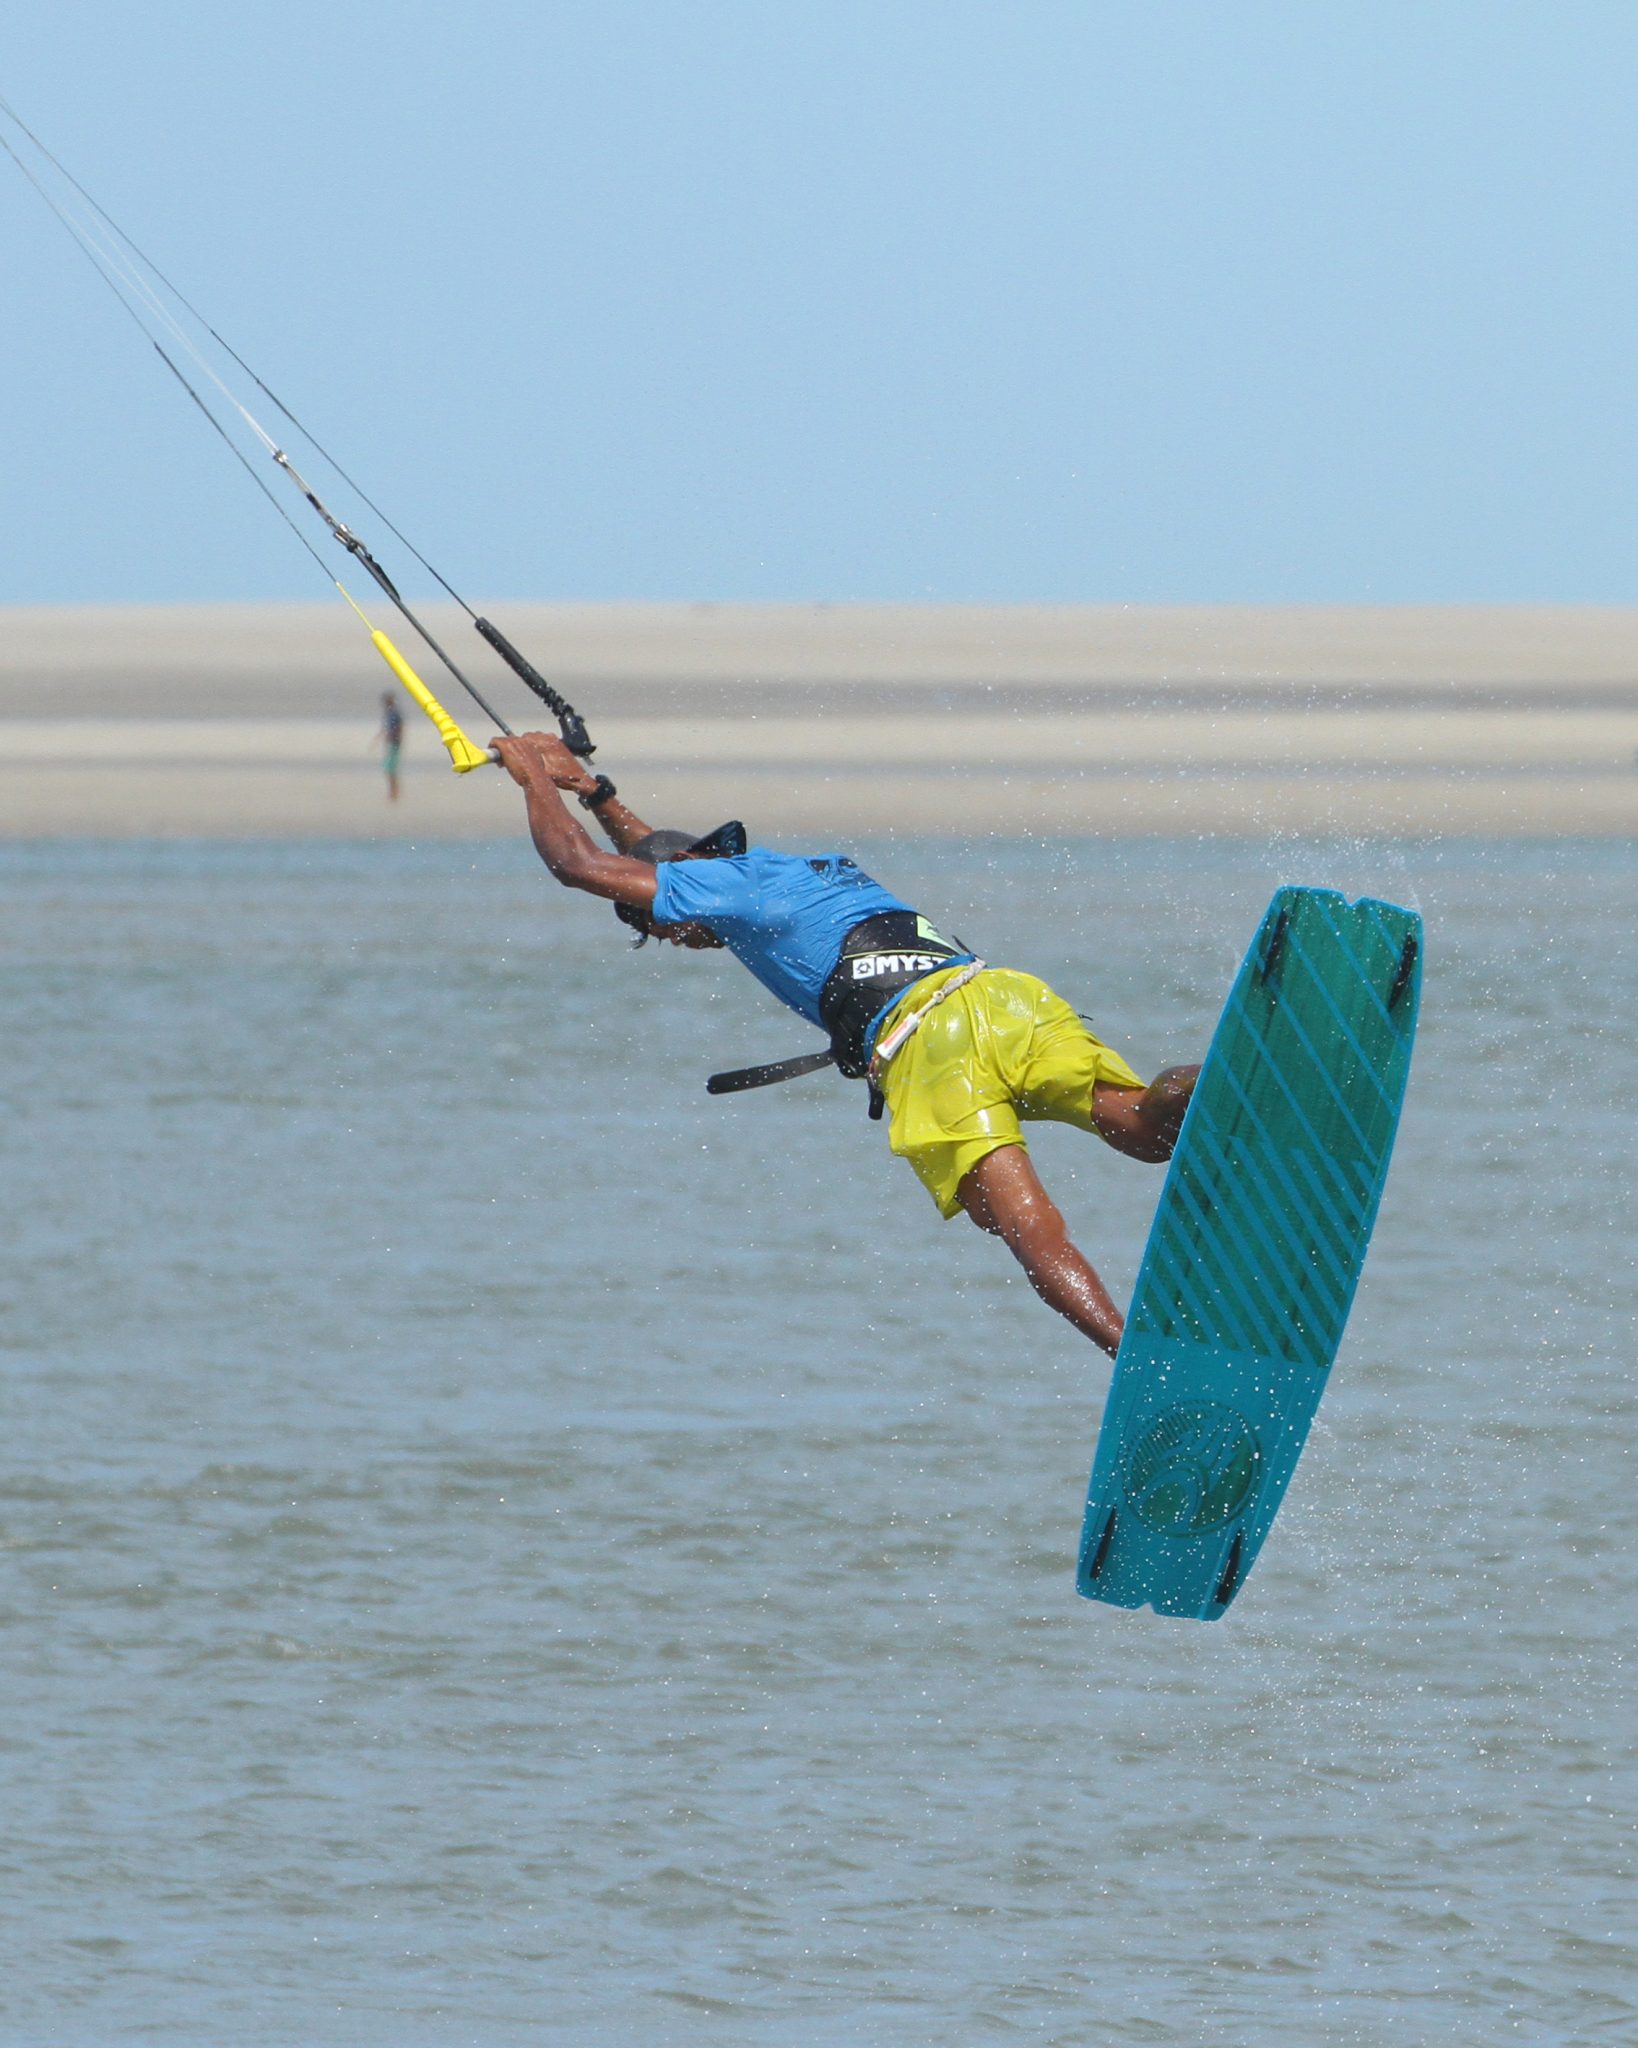
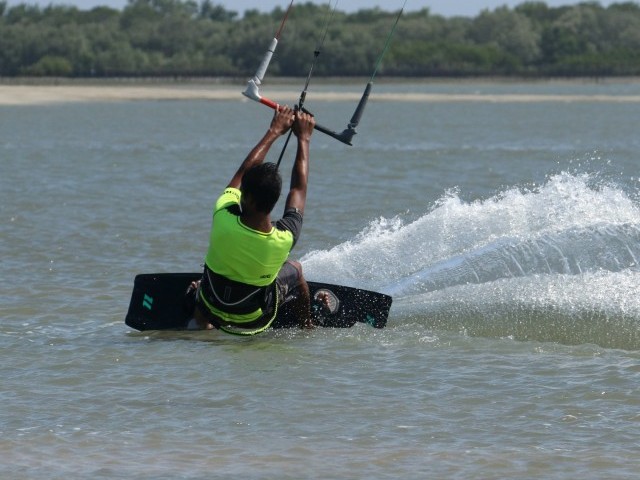
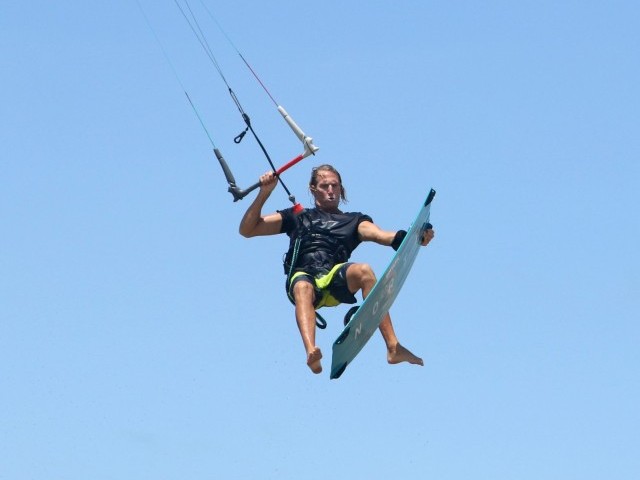
Second Bend – Pic C.
Here we see Heliarde finishing his first rotation, and he’s initiating his second. If you didn’t know this could easily be his first as the position is so similar, just lacking spray. The beauty of leading with the head is that you know you’re coming to the end of your first which means you can initiate the second in just the same way. Here Heliarde has seen that he’s completing number one, so he turns his head and throws his shoulders again. You can see that the bar is level, so the kite is staying put.
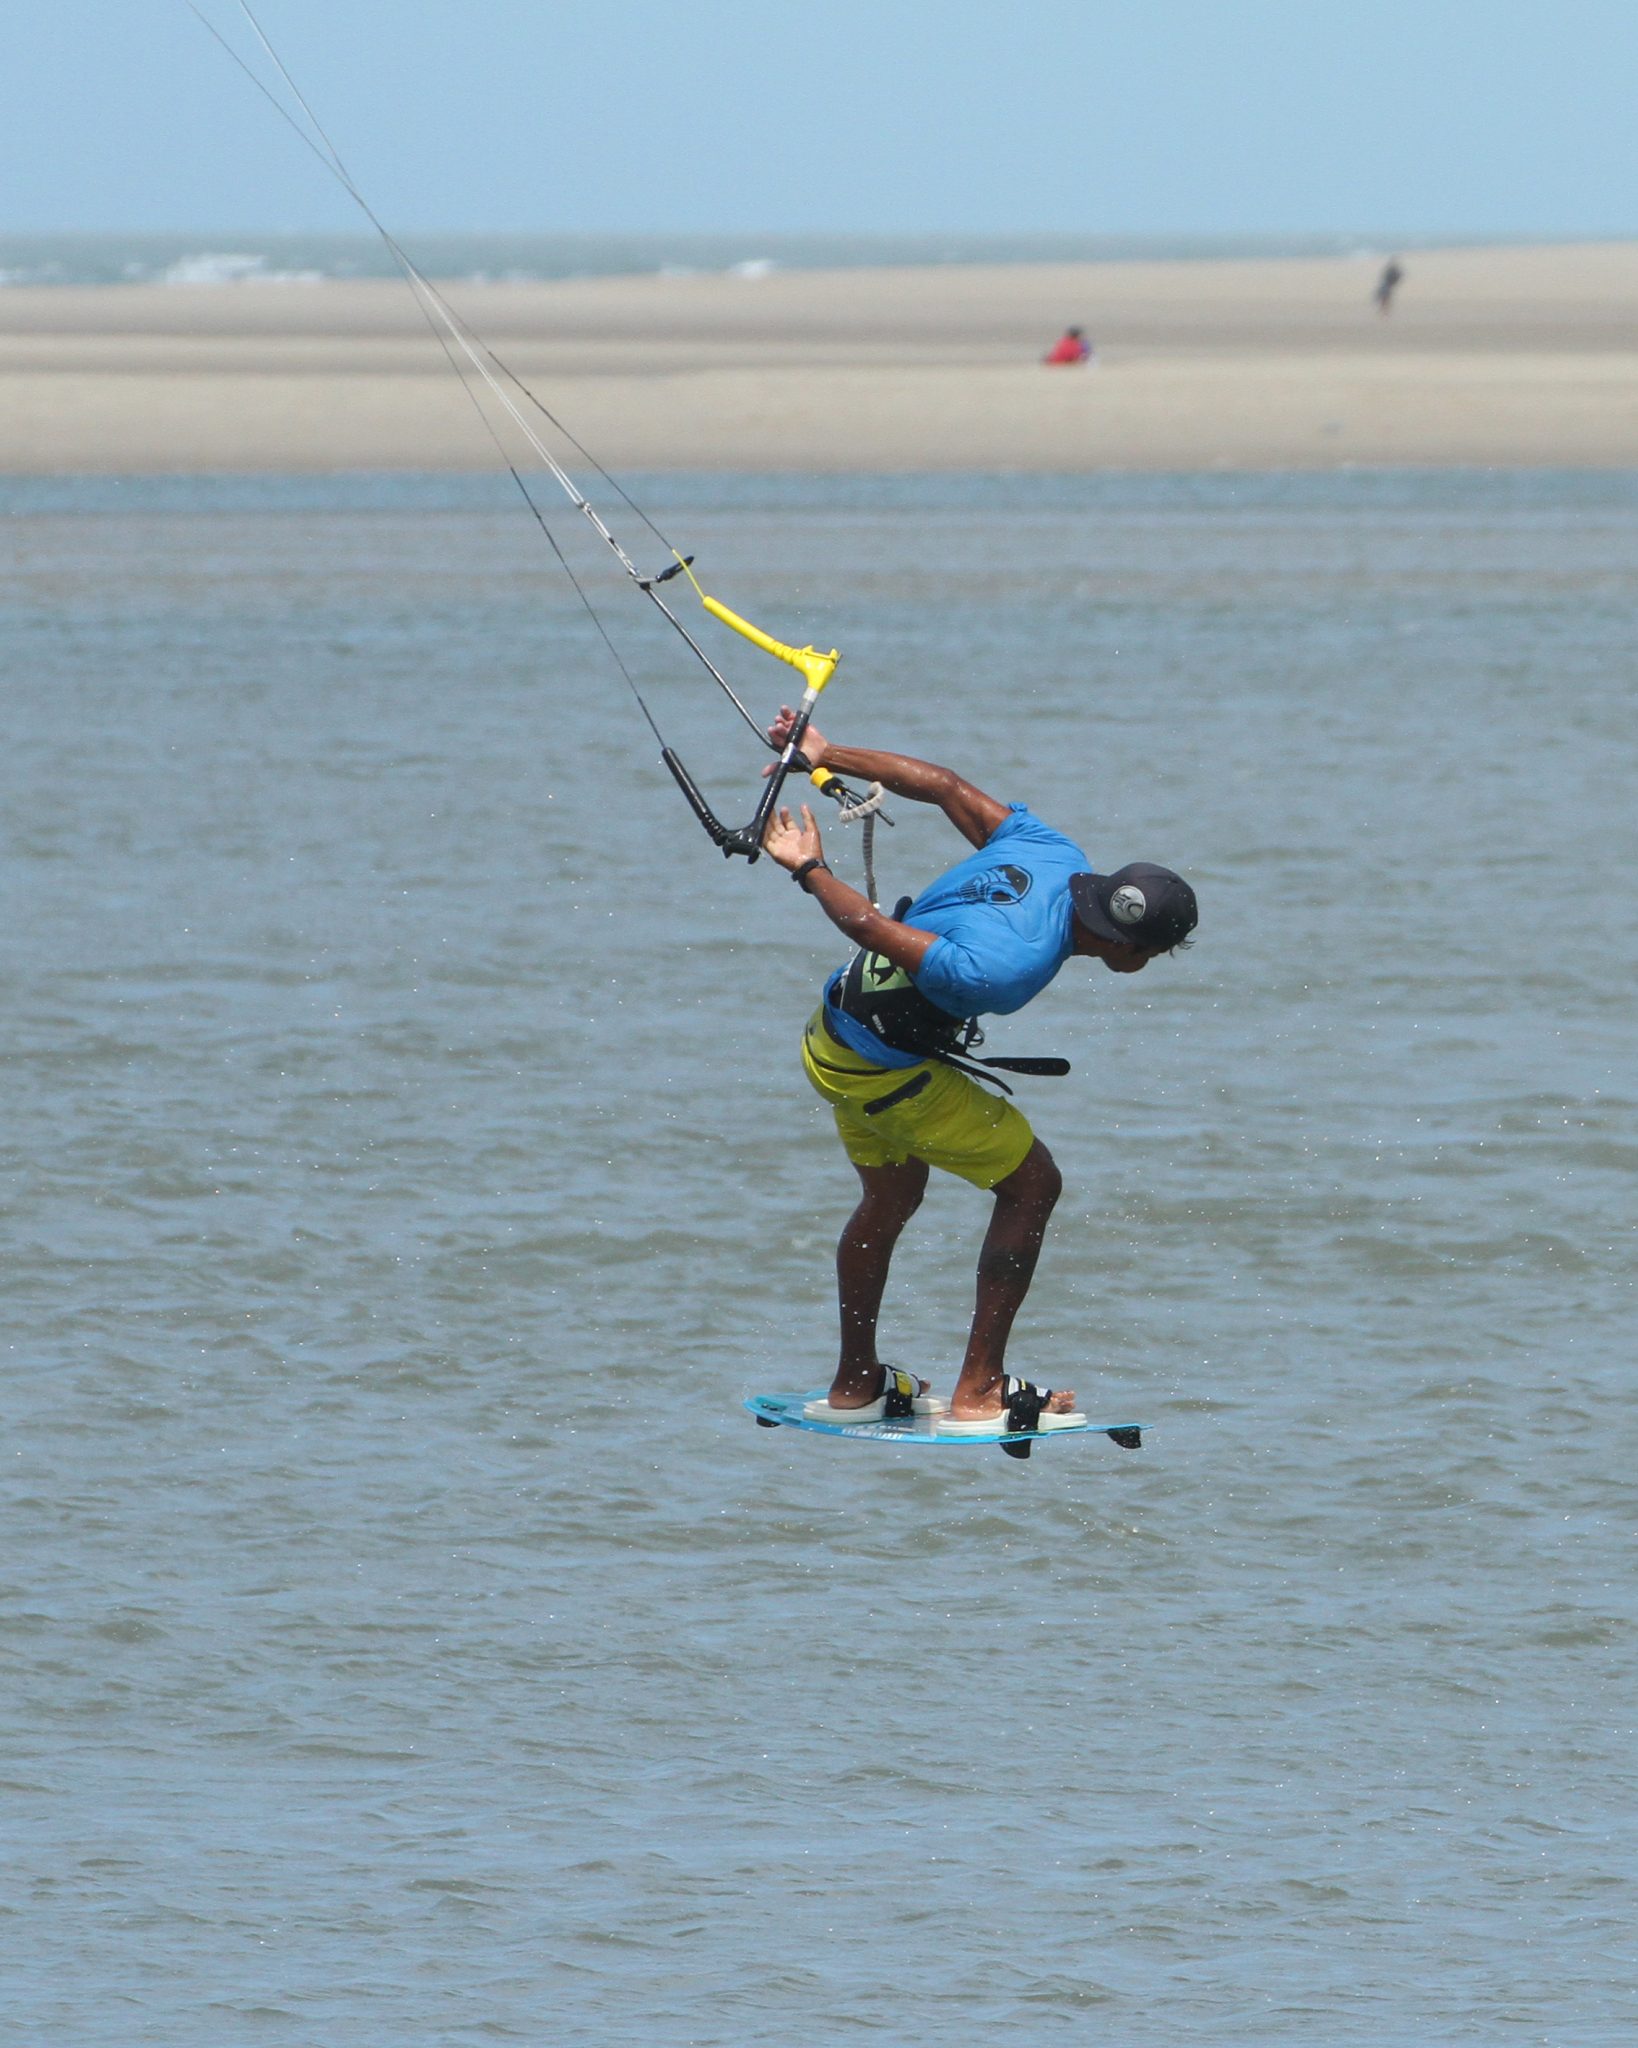
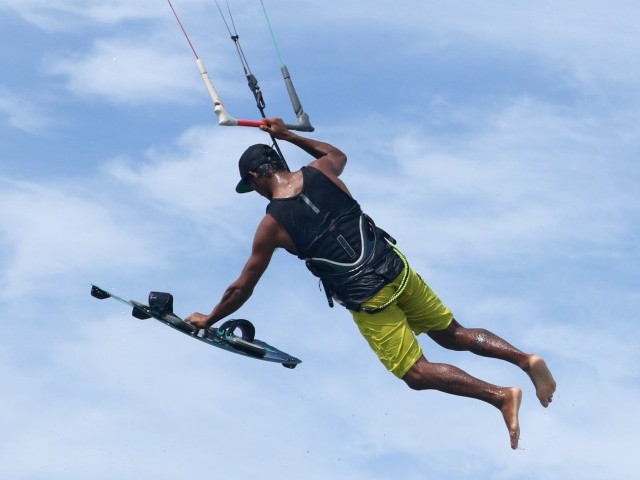
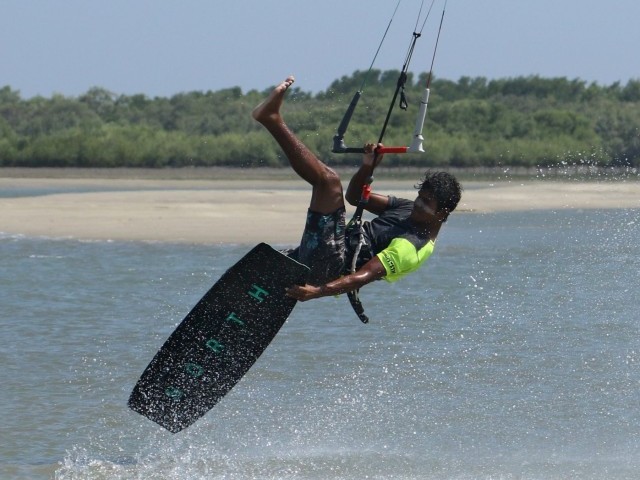
Pass Prep – Pic D.
Again, we see the need to lead with the head. It’s the only way to know where you are and when to strike. As you rotate around number two, you will be losing the pull from the kite that you gained from your pop, and as such your legs will start to drop. This means that as you feel your feet dropping it’s time to get the bar in close, otherwise you’ll have to pull yourself up, which will make everything much harder. As Heliarde looks for his landing spot, he already starts to pull his hands down towards his chest.
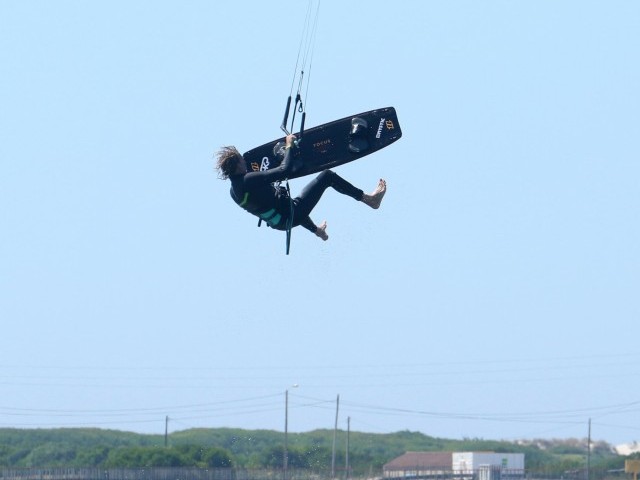
Throwing It – Pic E.
This bit should hopefully be familiar territory. Having spotted your landing, you need to throw your pass. This isn’t just another rotation as you need to be in control and you have to make sure that both the bar and the kite are where you want them to be. Throwing it is the same 3 things as always. A hefty tug on the bar past your back hip with both hands while already twisting the bar. Turning the head aggressively so that the rest of the body follows. And kicking the back knee up and through, so that you lift yourself and the board up towards the bar and give yourself that extra rotation to complete the 3. It’s obvious to the eyes that Heliarde has not waited to finish his second rotation before throwing it, he’s halfway around number two and already giving it the full Fejao...
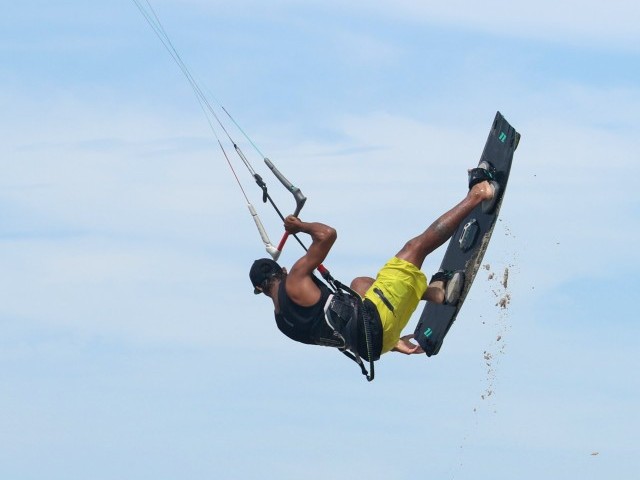
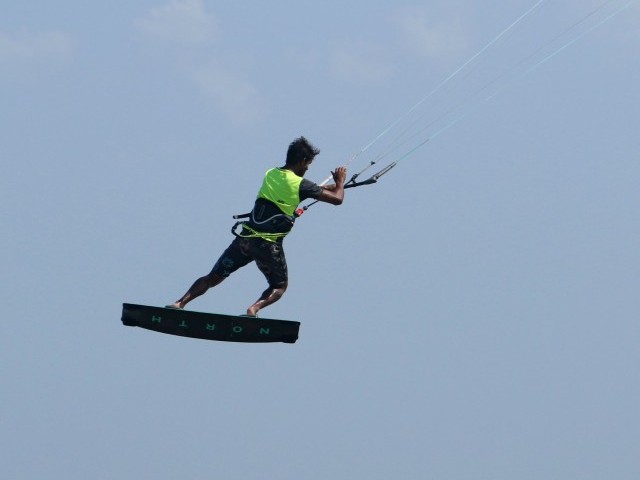
The Pass – Pic F.
The reason and therefore advantage of throwing and twisting early is that you’ll be able to pass the bar earlier in your rotation and therefore have more time to finish as you want. It also means that you’ll roll onto the bar, and as such it’s more about technique and less about grunt. If you’ve ever watched the little young freestyle aces around the world, banging out huge passes with stick thin arms, you’ll know this to be the truth:) Once you release your front hand the kite will steer down slightly. Here Heliarde has his board up from his throw, and he’s rolled onto the bar making the pass easier and earlier. And finally, as he’s passing, he is keeping his head up. This allows him to continue rotating his shoulders and gives him room to bring the trailing (his front) leg up towards his chest. All this makes the final rotation to claim the 3 possible.
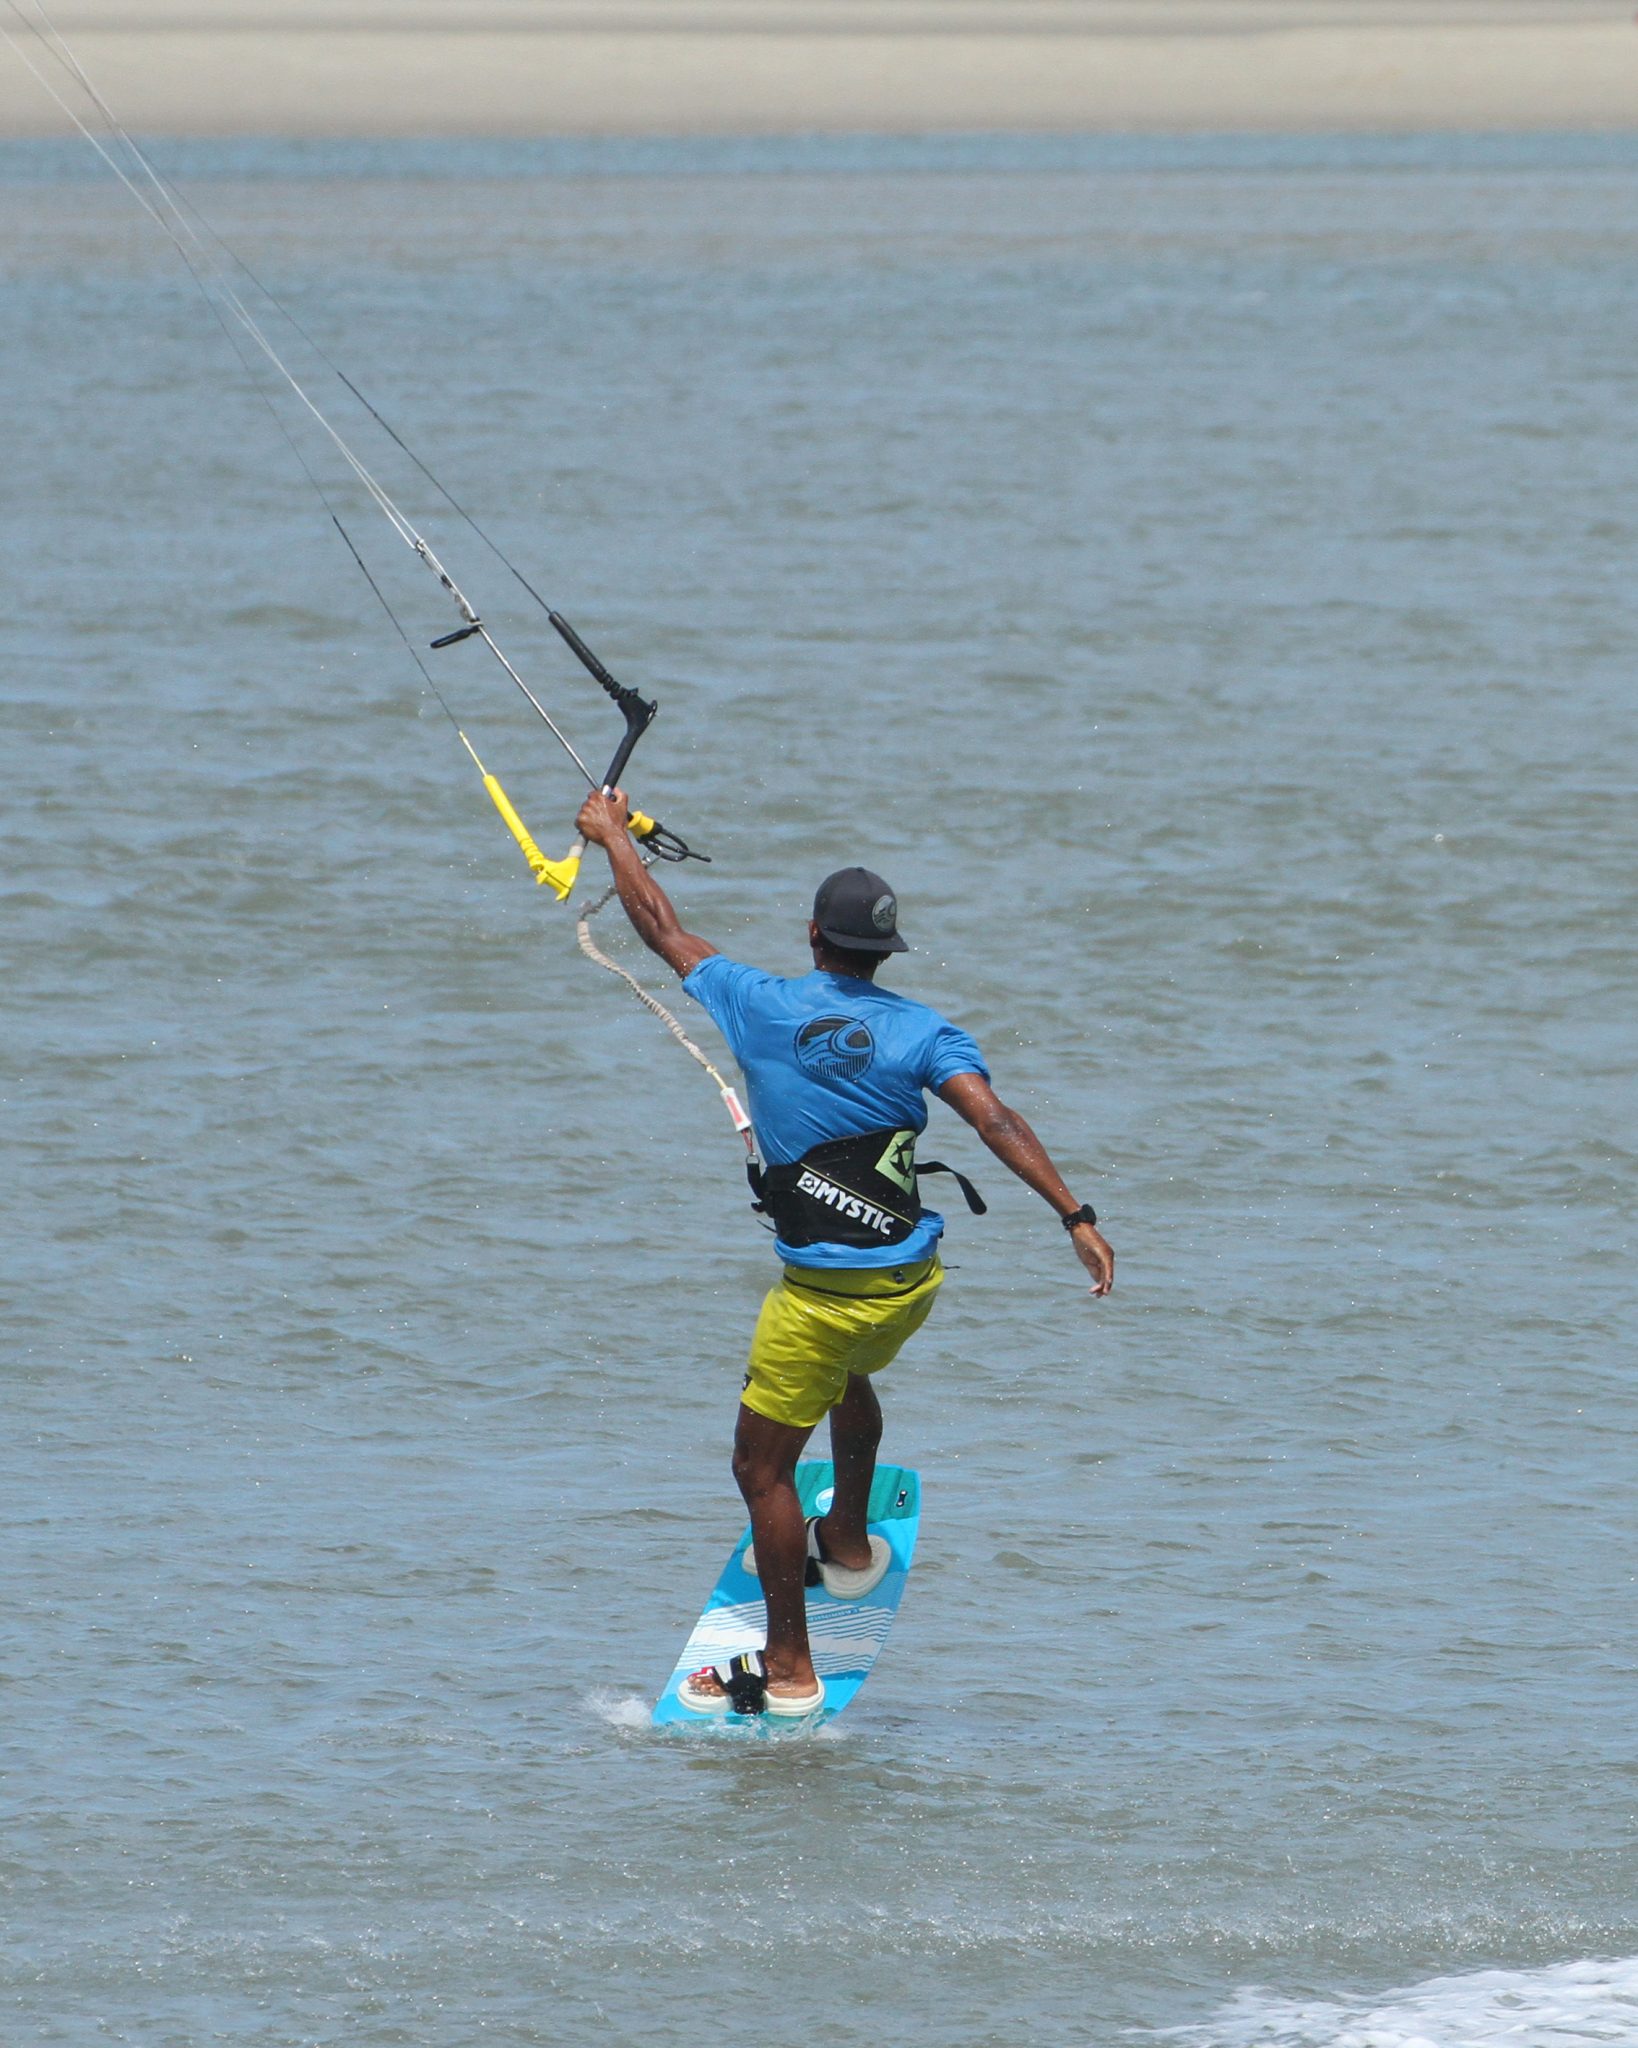
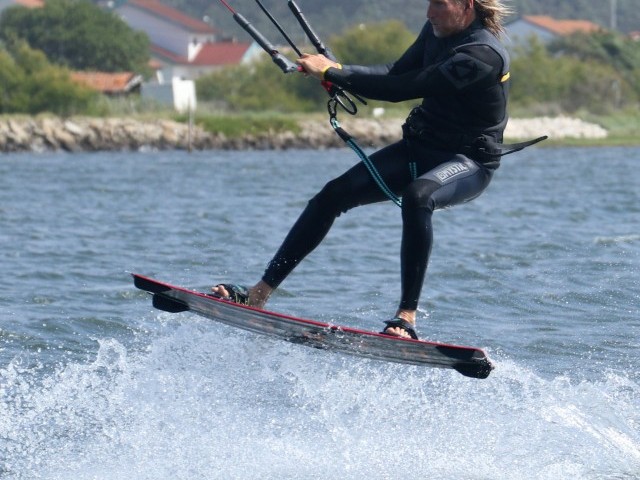
Boom - Pic G.
If everything went according to plan, your last job is to stick the landing! It’s essential to get around enough that you’ll be chasing the kite downwind as just stomping and resisting the compression will be enough without having to hold onto a pulling kite. The kite will hopefully have dipped a touch from the pass, and as such, it won’t be lifting and extending you, which will make the landing much harder. Heliarde brings his front foot all the way through, guaranteeing a solid downwind landing. Job done!


Top Tips
As with so many freestyle moves your takeoff is key. Getting good pop, but also having some controllable pull through the move is key. The base and therefore the foundation for this is really your double S- Bend. If you can happily rotate while controlling the kite, adding the blind, the pass and eventually the 3 should be possible. So, make sure that you practice that as much as possible. If you don’t have to think about the rotations, then adding the “ending” will be considerably simpler.
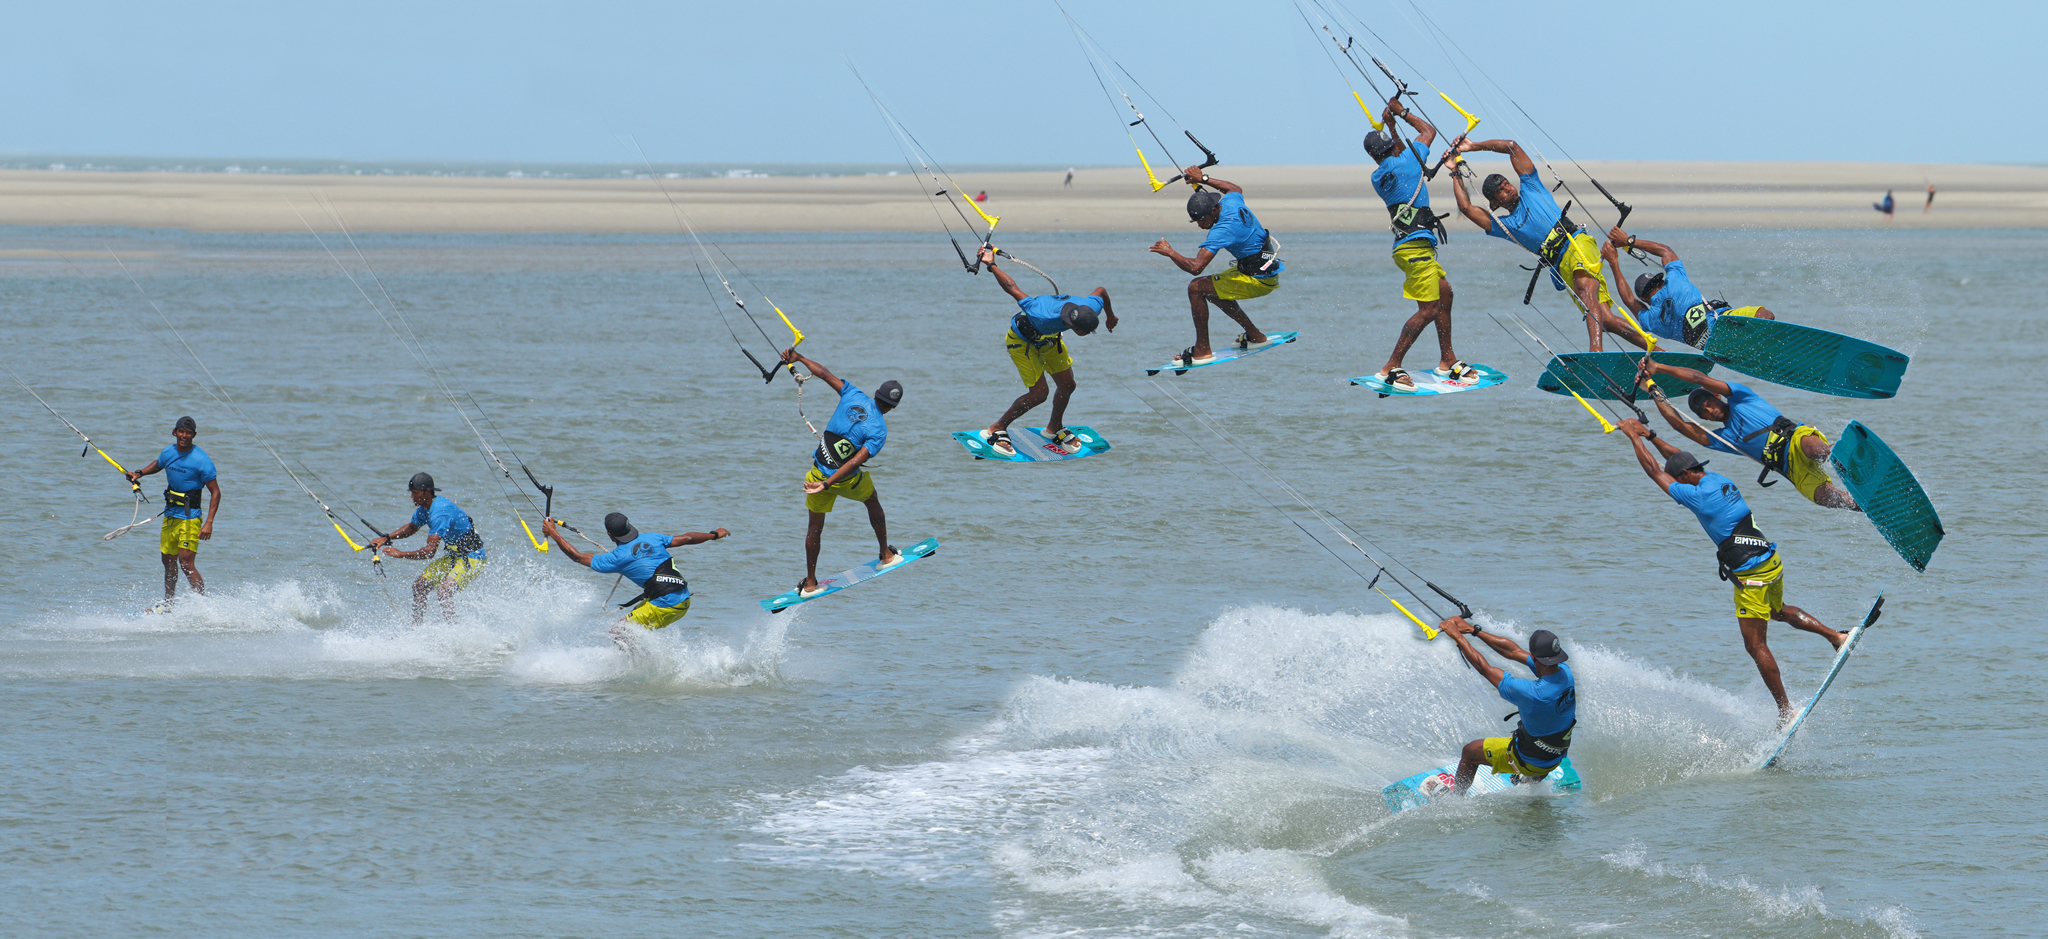
Now have a look at the Sequence and the Videos to see how Heliarde does it in real life...
Common Problems
To execute this move successfully, you need the height, pull and time. More often than not you’ll see plenty of double s-bends, and then there’s just room to skim in a quick blind. There just doesn’t seem to be enough time. This is often a case of power and pop. You need to hold a lot of power to get the flight and time. If you’re used to trimming so that you’re comfortably unhooking, you may need to trim less so that the kite is bullying you slightly more.
If you’re missing the pass, chances are that you’re lifting the kite too much on take-off. As you carve up, you can move the kite slowly for extra lift, but it doesn’t want to move above 11 or 1 o’clock, as you’ll lose forward drive and dangle, making the pass harder.
If you’re getting the height but crashing on your heelside edge post pass. This is a classic of throwing the pass too late. Remember how early Heliarde passed. One and a half and then go.


Keystones
- Powered and aggressive pop
- Lead with head, hands and shoulders
- Anticipate second rotation so that there is no lag
- Pull and throw early during the second rotation
- Keep head up and lift front leg through
Oh yes, and make sure you keep your cap on 😉
This technique article was in Issue 71 of IKSURFMAG.
Related
By Christian and Karine
Christian and Karine have been working together as a coaching team, running improver to advanced kitesurfing clinics since 2003.
