
Back Roll Kite Loop Grab
Technique / Advanced


Introduction
At a time when you could be dressing up a Turkey, tarting up an evergreen or decorating for some yuletide festivities, how about adding some glitz and glam, a fairy light and some tinsel to a timeless classic. There won’t be anything finer to unwrap (Fortnum and Mason’s brandy butter being the one exception) than a fully embellished back roll kite loop with all the trimmings, in this case a tweaked grab. And when Santa can’t travel, who better to call in when in need of some serious style, Heliarde of course.
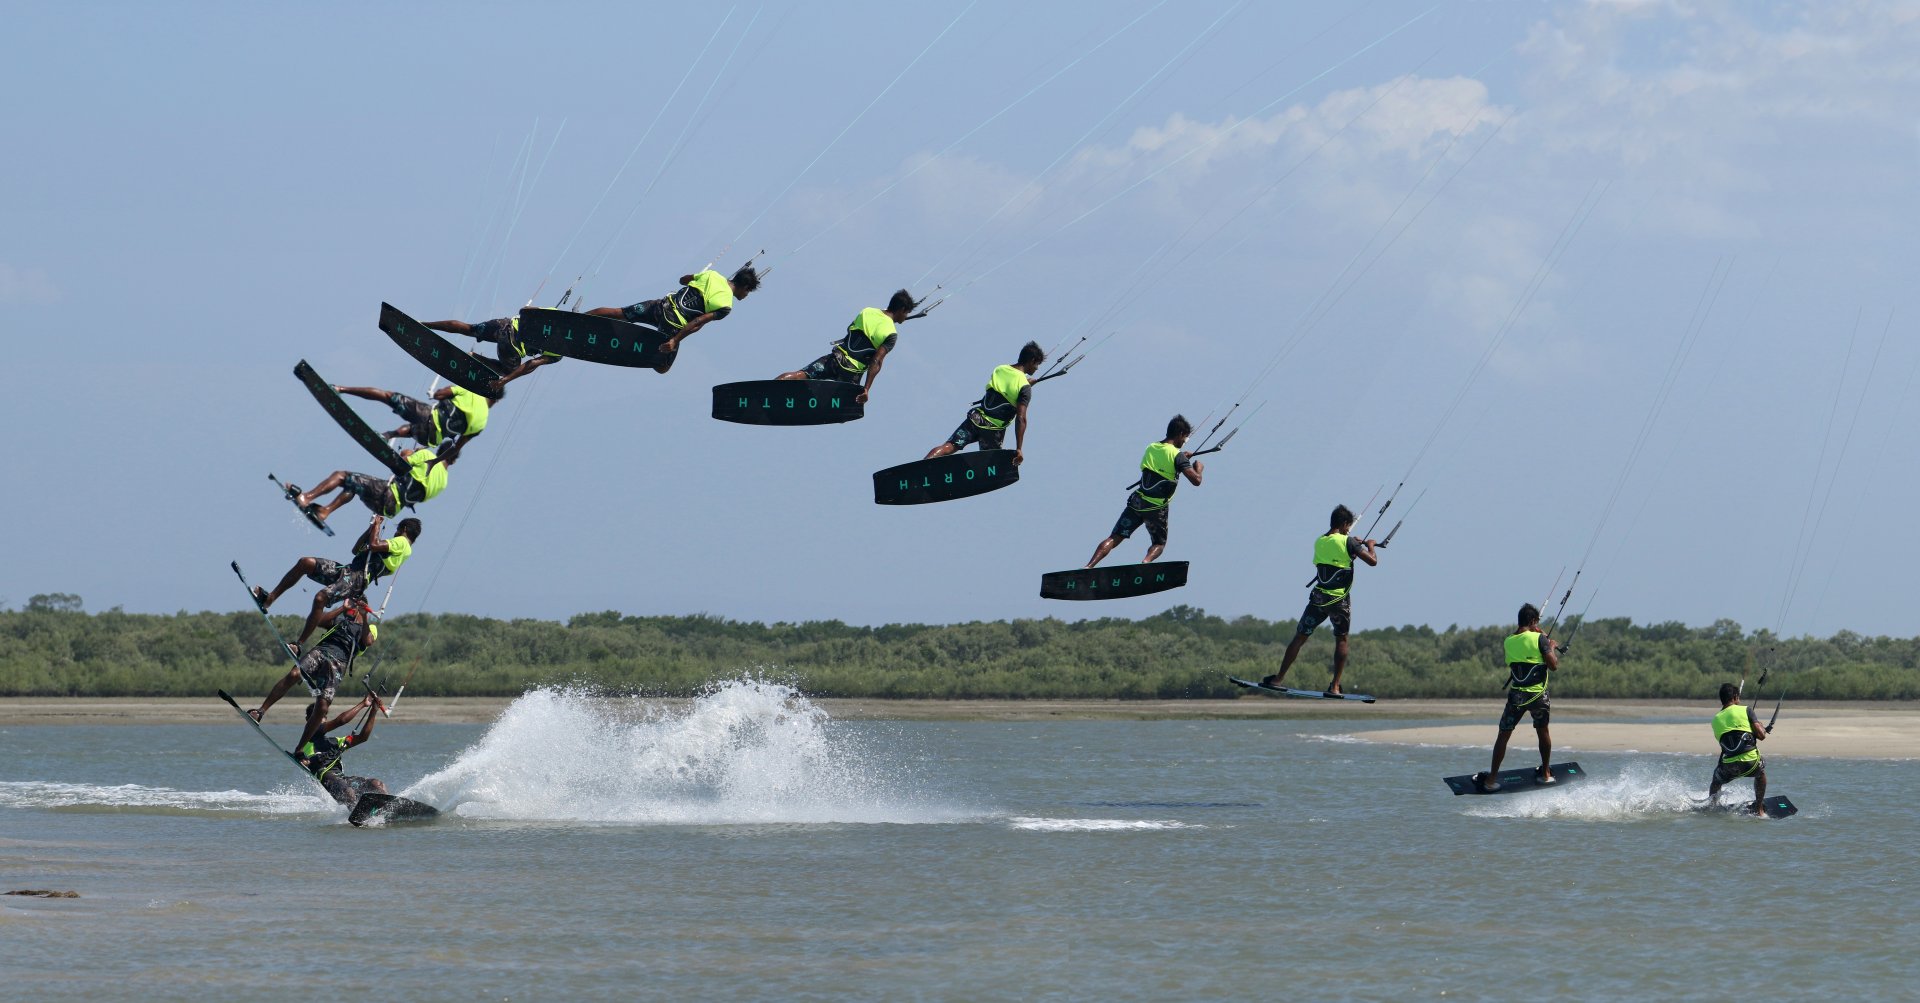
If you fancy pulling the bow on this gift, it will help to have the regular two handed back roll kite loop in the bag already. It’s a much preferred version than the low spinning one handed variant, as controlling your rotation and your legs are key, whilst height and time will offer you the opportunity to grab, tweak and generally look your absolute best. Let’s unbox this one step at a time to reveal exactly what’ll make it a rip roaring success.


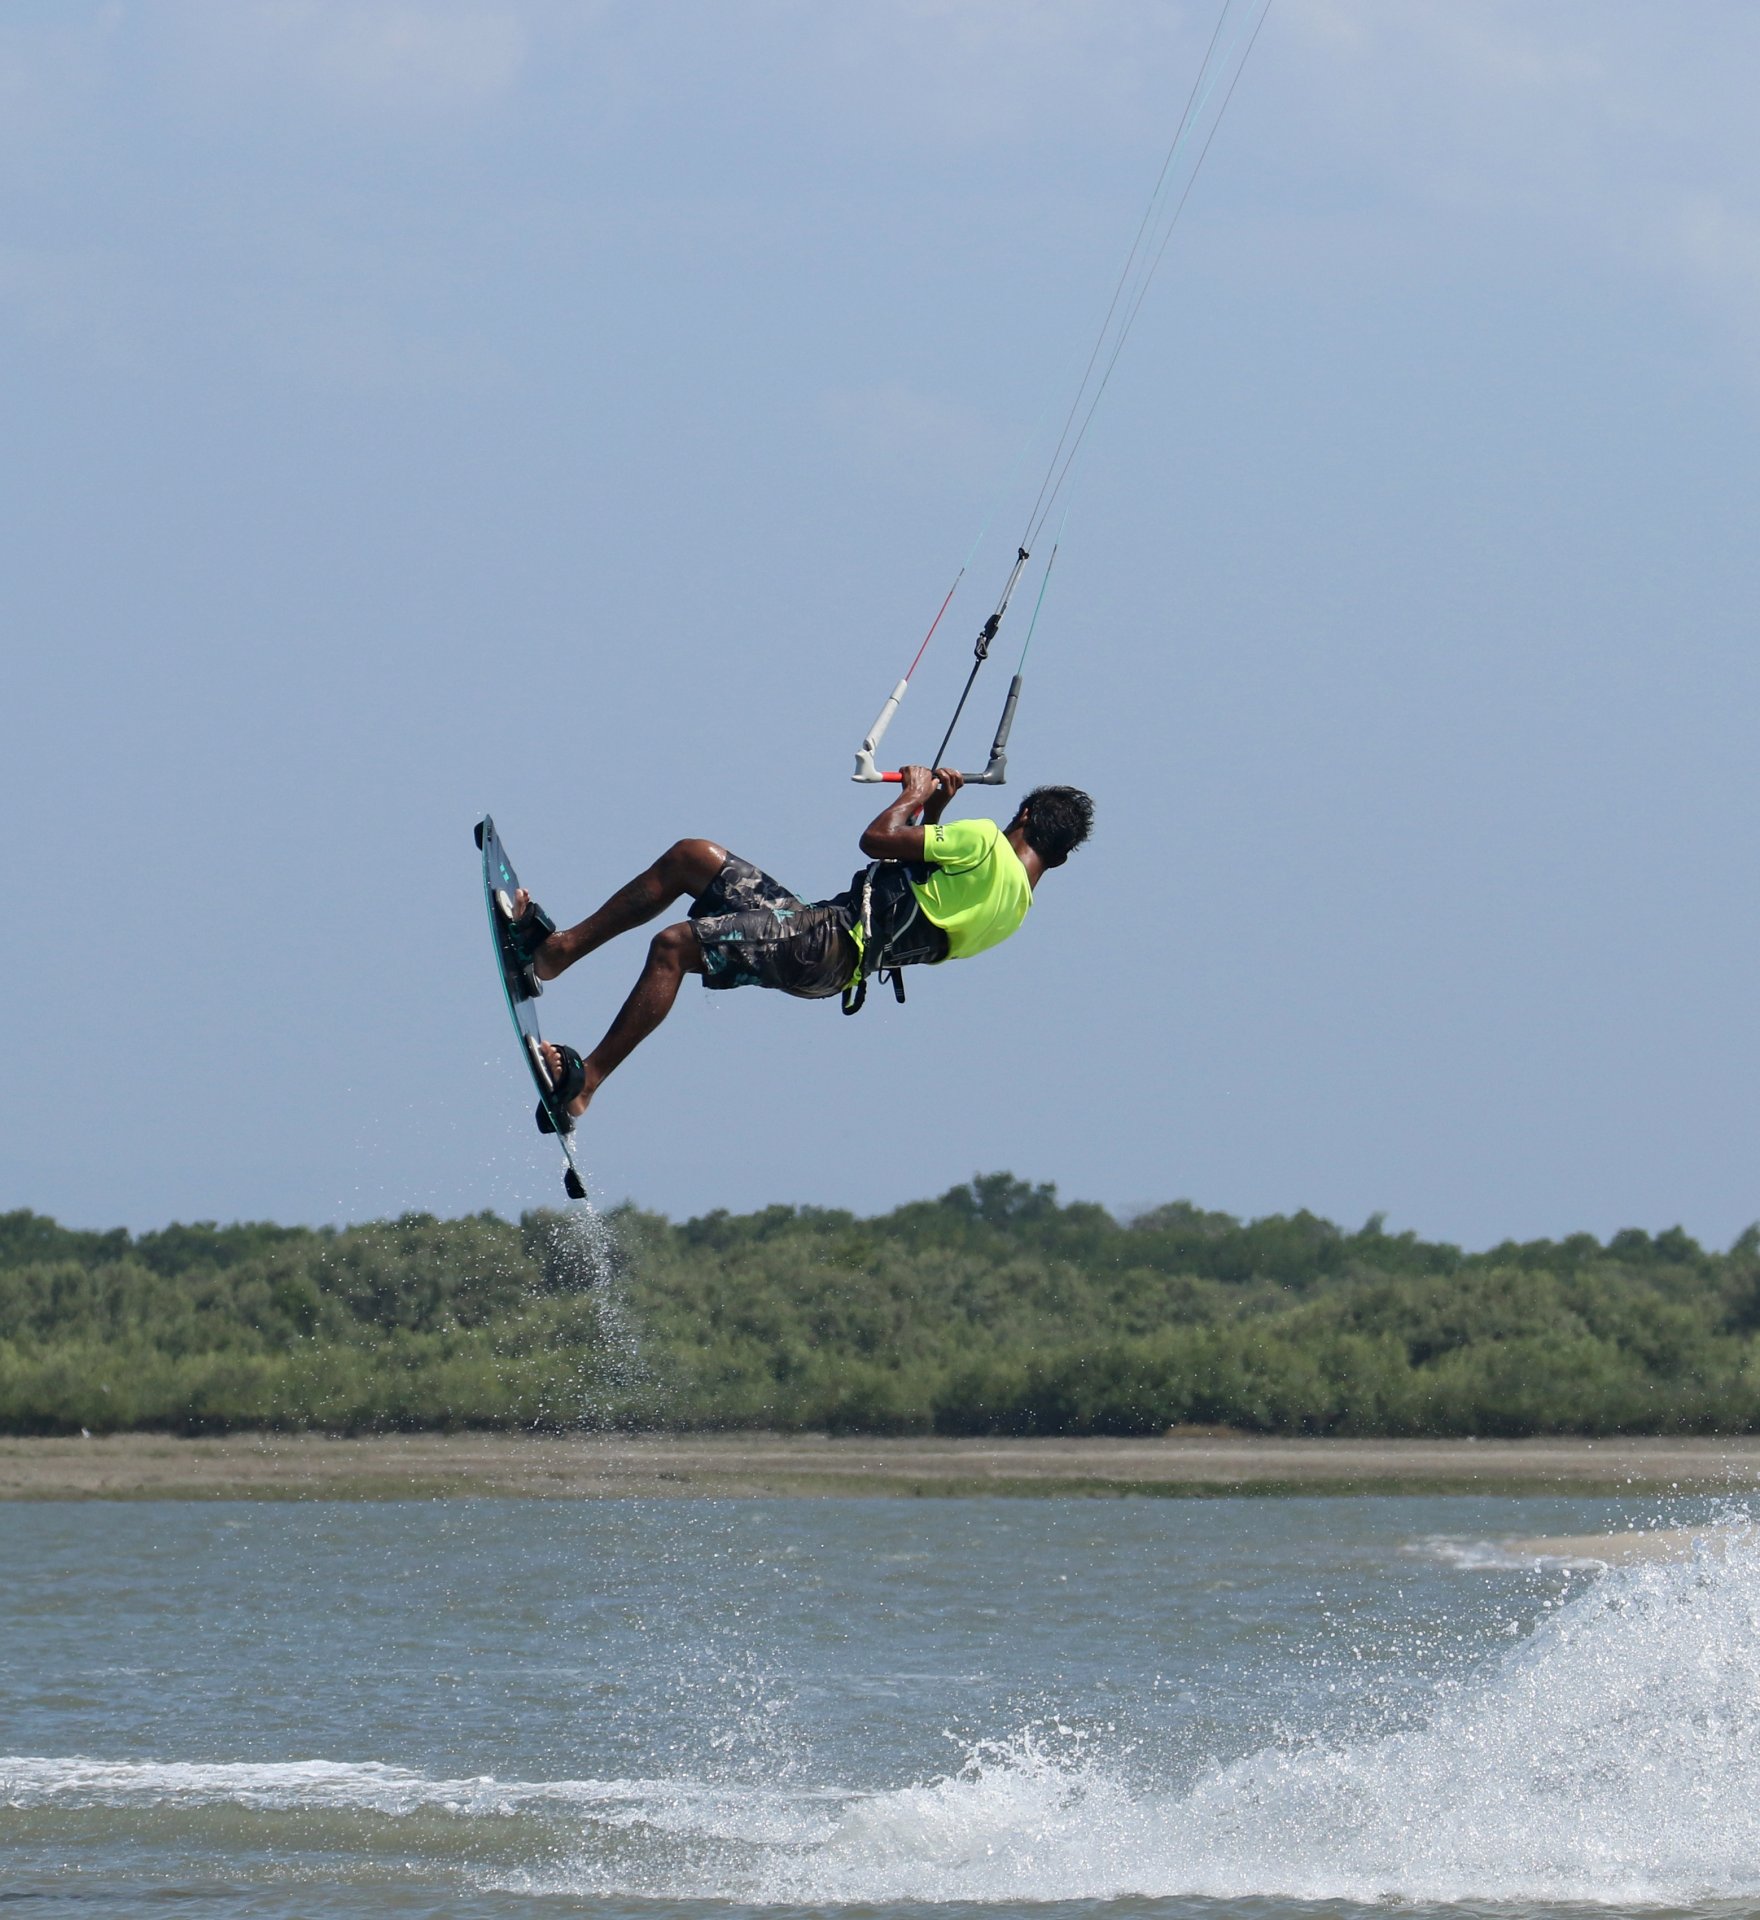
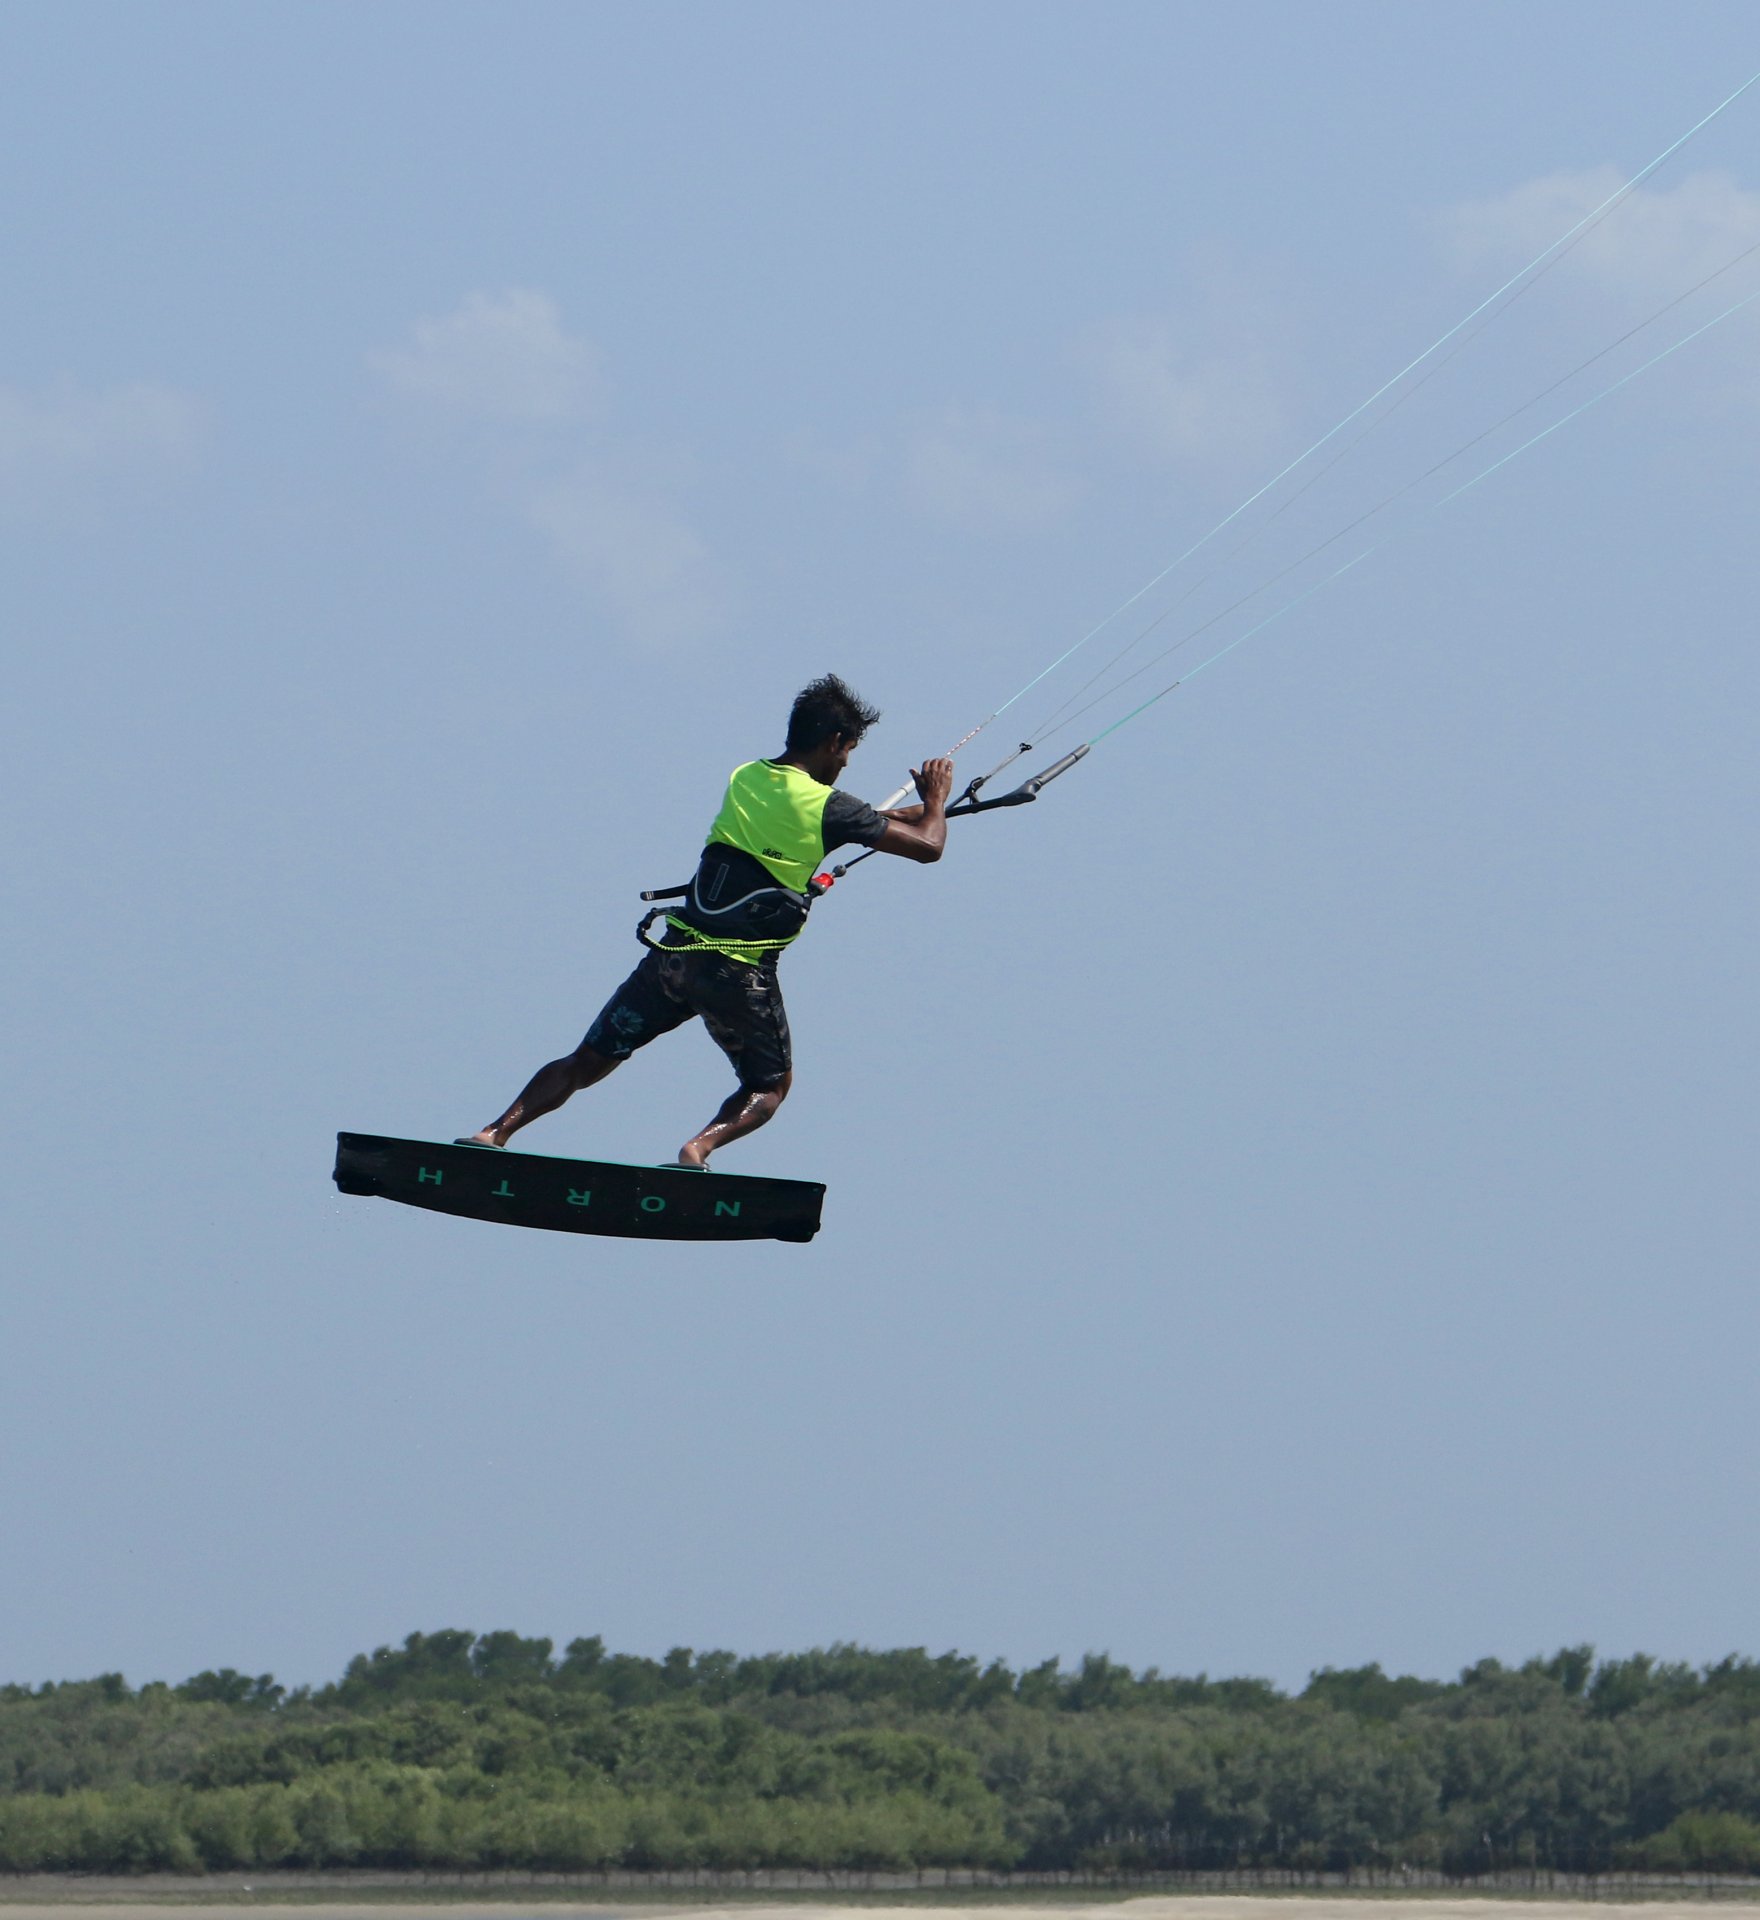
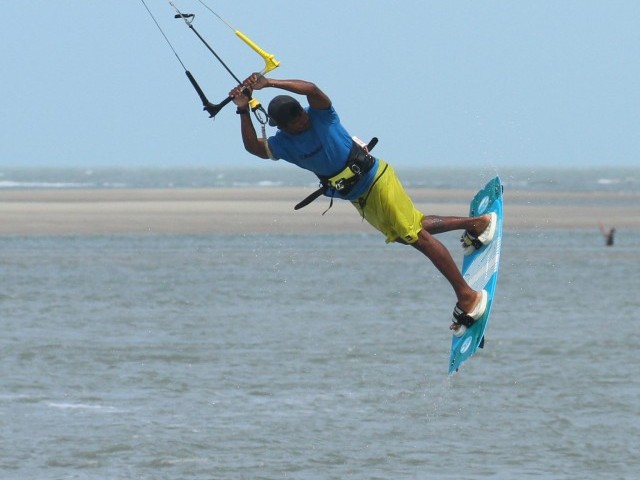
Approach A.
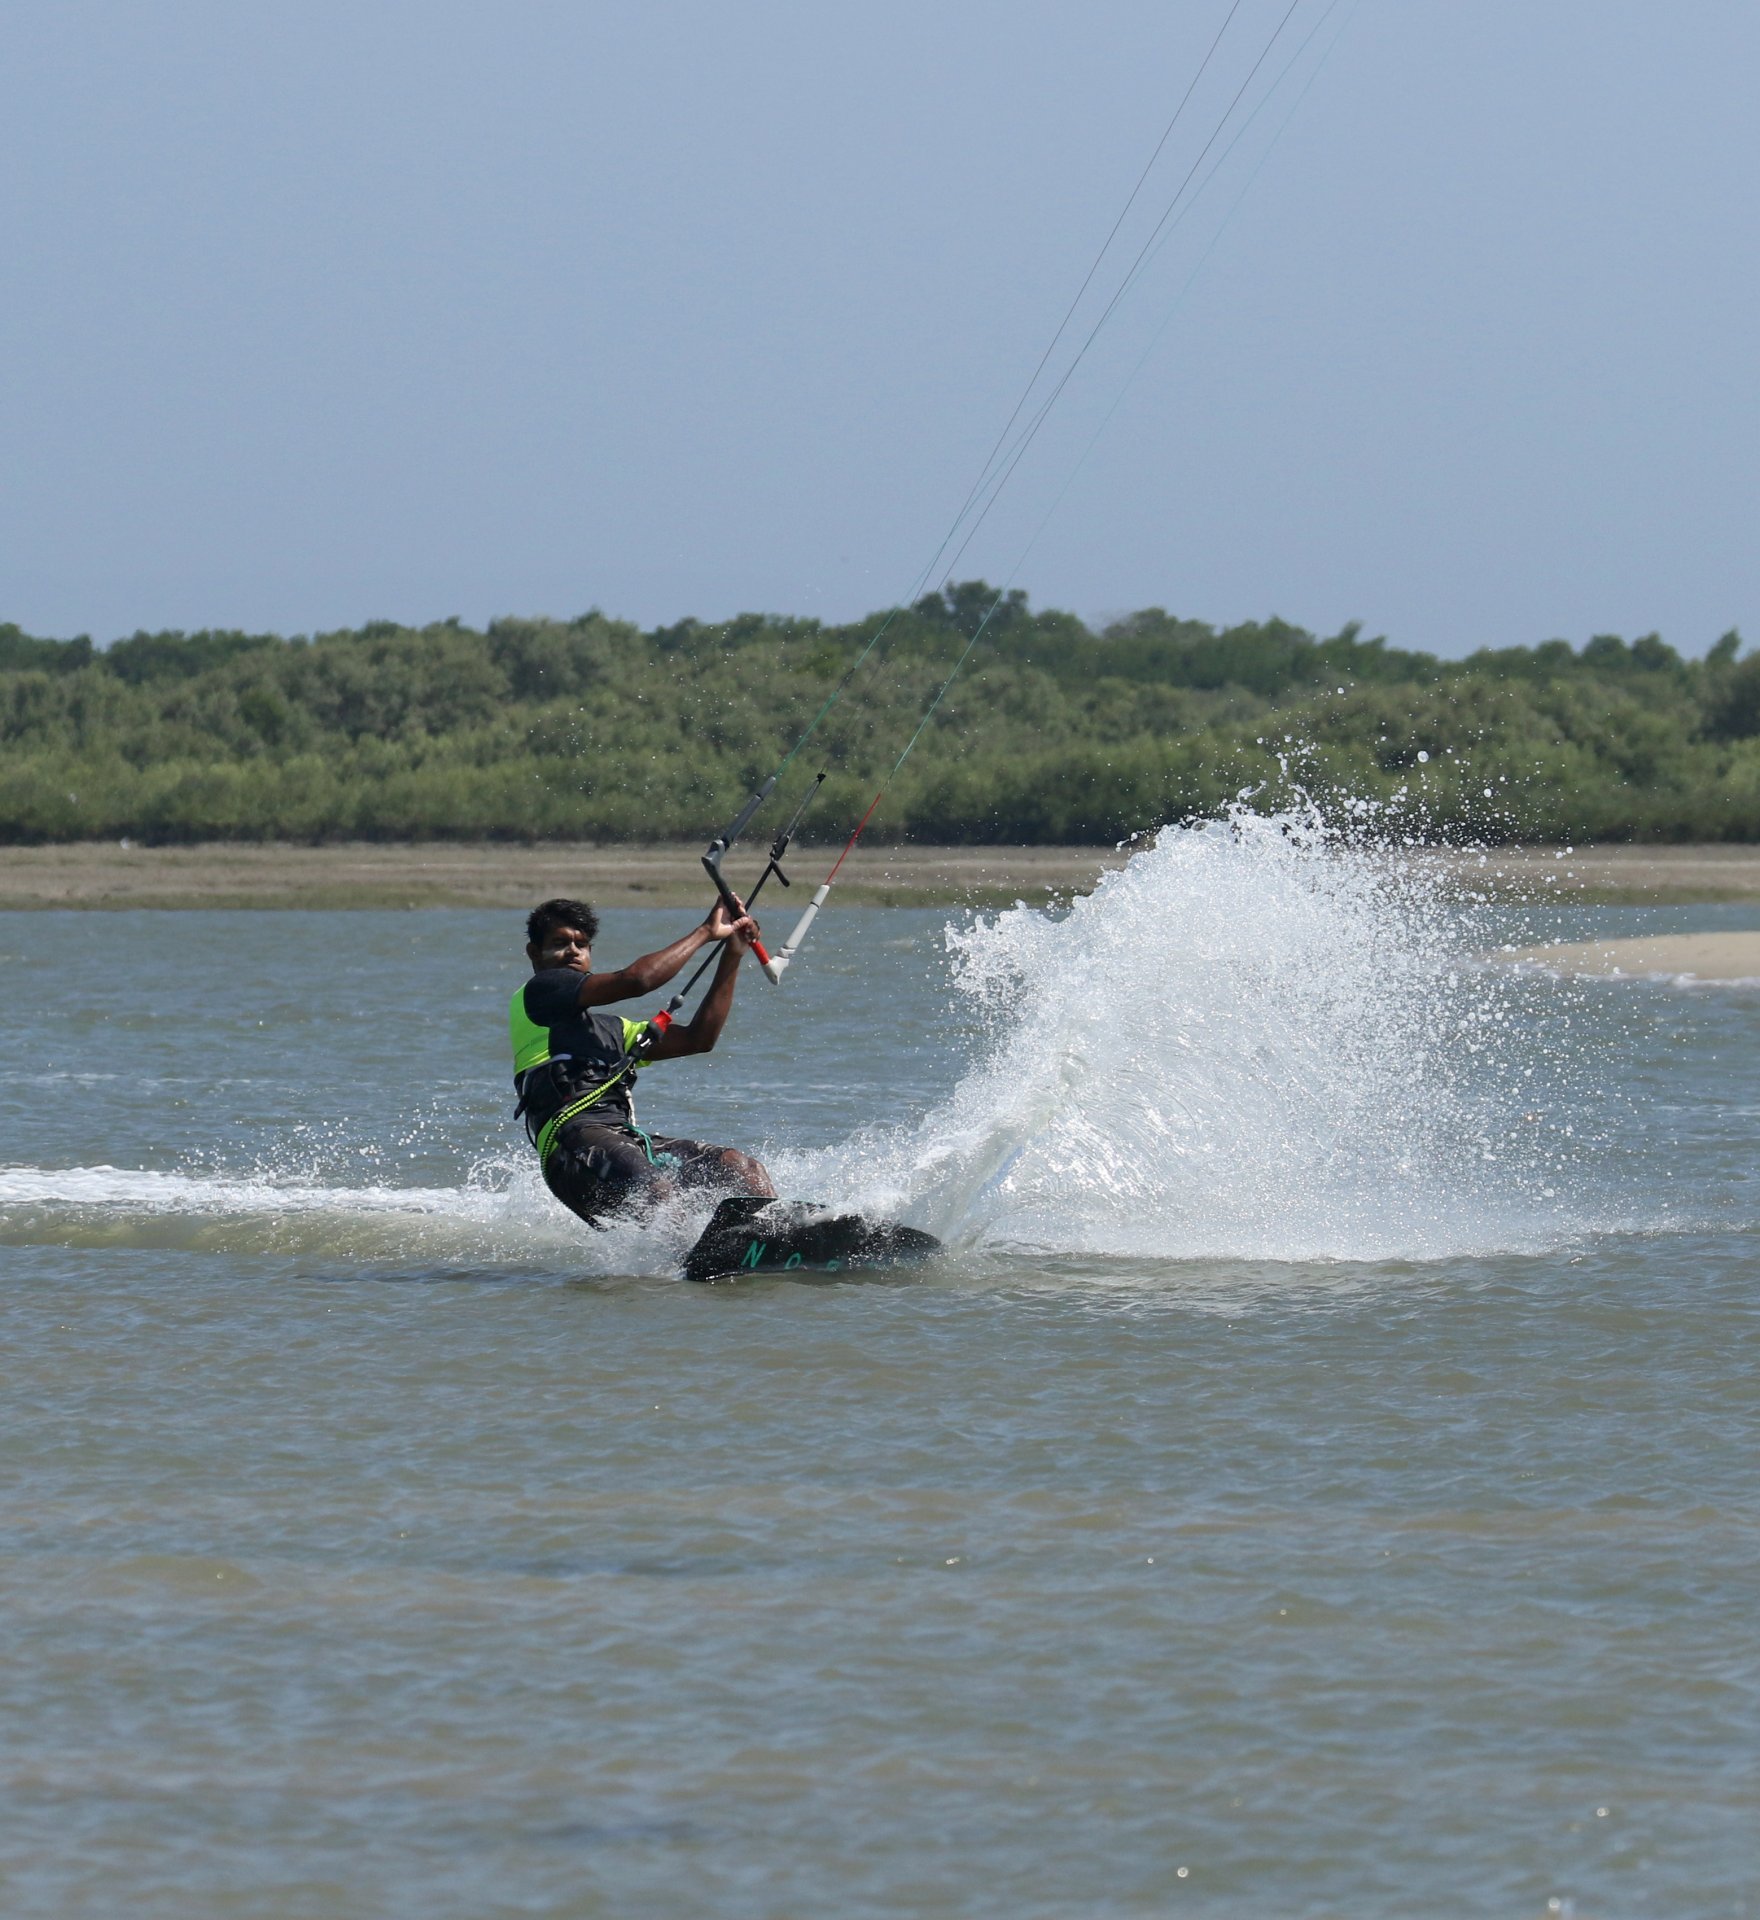
You want to approach this as for a regular sent back roll. Your aim is to go up, it doesn’t have to be massive, two or 3 metres is plenty, but it needs to be controlled. As such you need some speed, plenty of edge, good tension and some power in the kite with the sweet spot positioned out. With your kite at either 11 or 1 o’clock you can then give it a positive send for the required boost. Your rotation will come from you take off, so make sure that you’re in a strong position, resisting well and with your weight low. This will allow you to carve up just prior to leaving the water and set the back roll in motion. And just to be crystal clear, your back roll will be a 360˚, you’re not aiming for any funky inverted stuff here. If you hazard a glance at Heliarde you can see that he’s got one almighty rooster because he’s come in with power and resistance. He’s given the kite a positive send back from 1 o’clock towards 11 and as the kite starts to lift, he’s carving up into wind, using his board to start the rotation. He’s looking forwards, not throwing his head over his shoulder as he wants to rotate slowly.
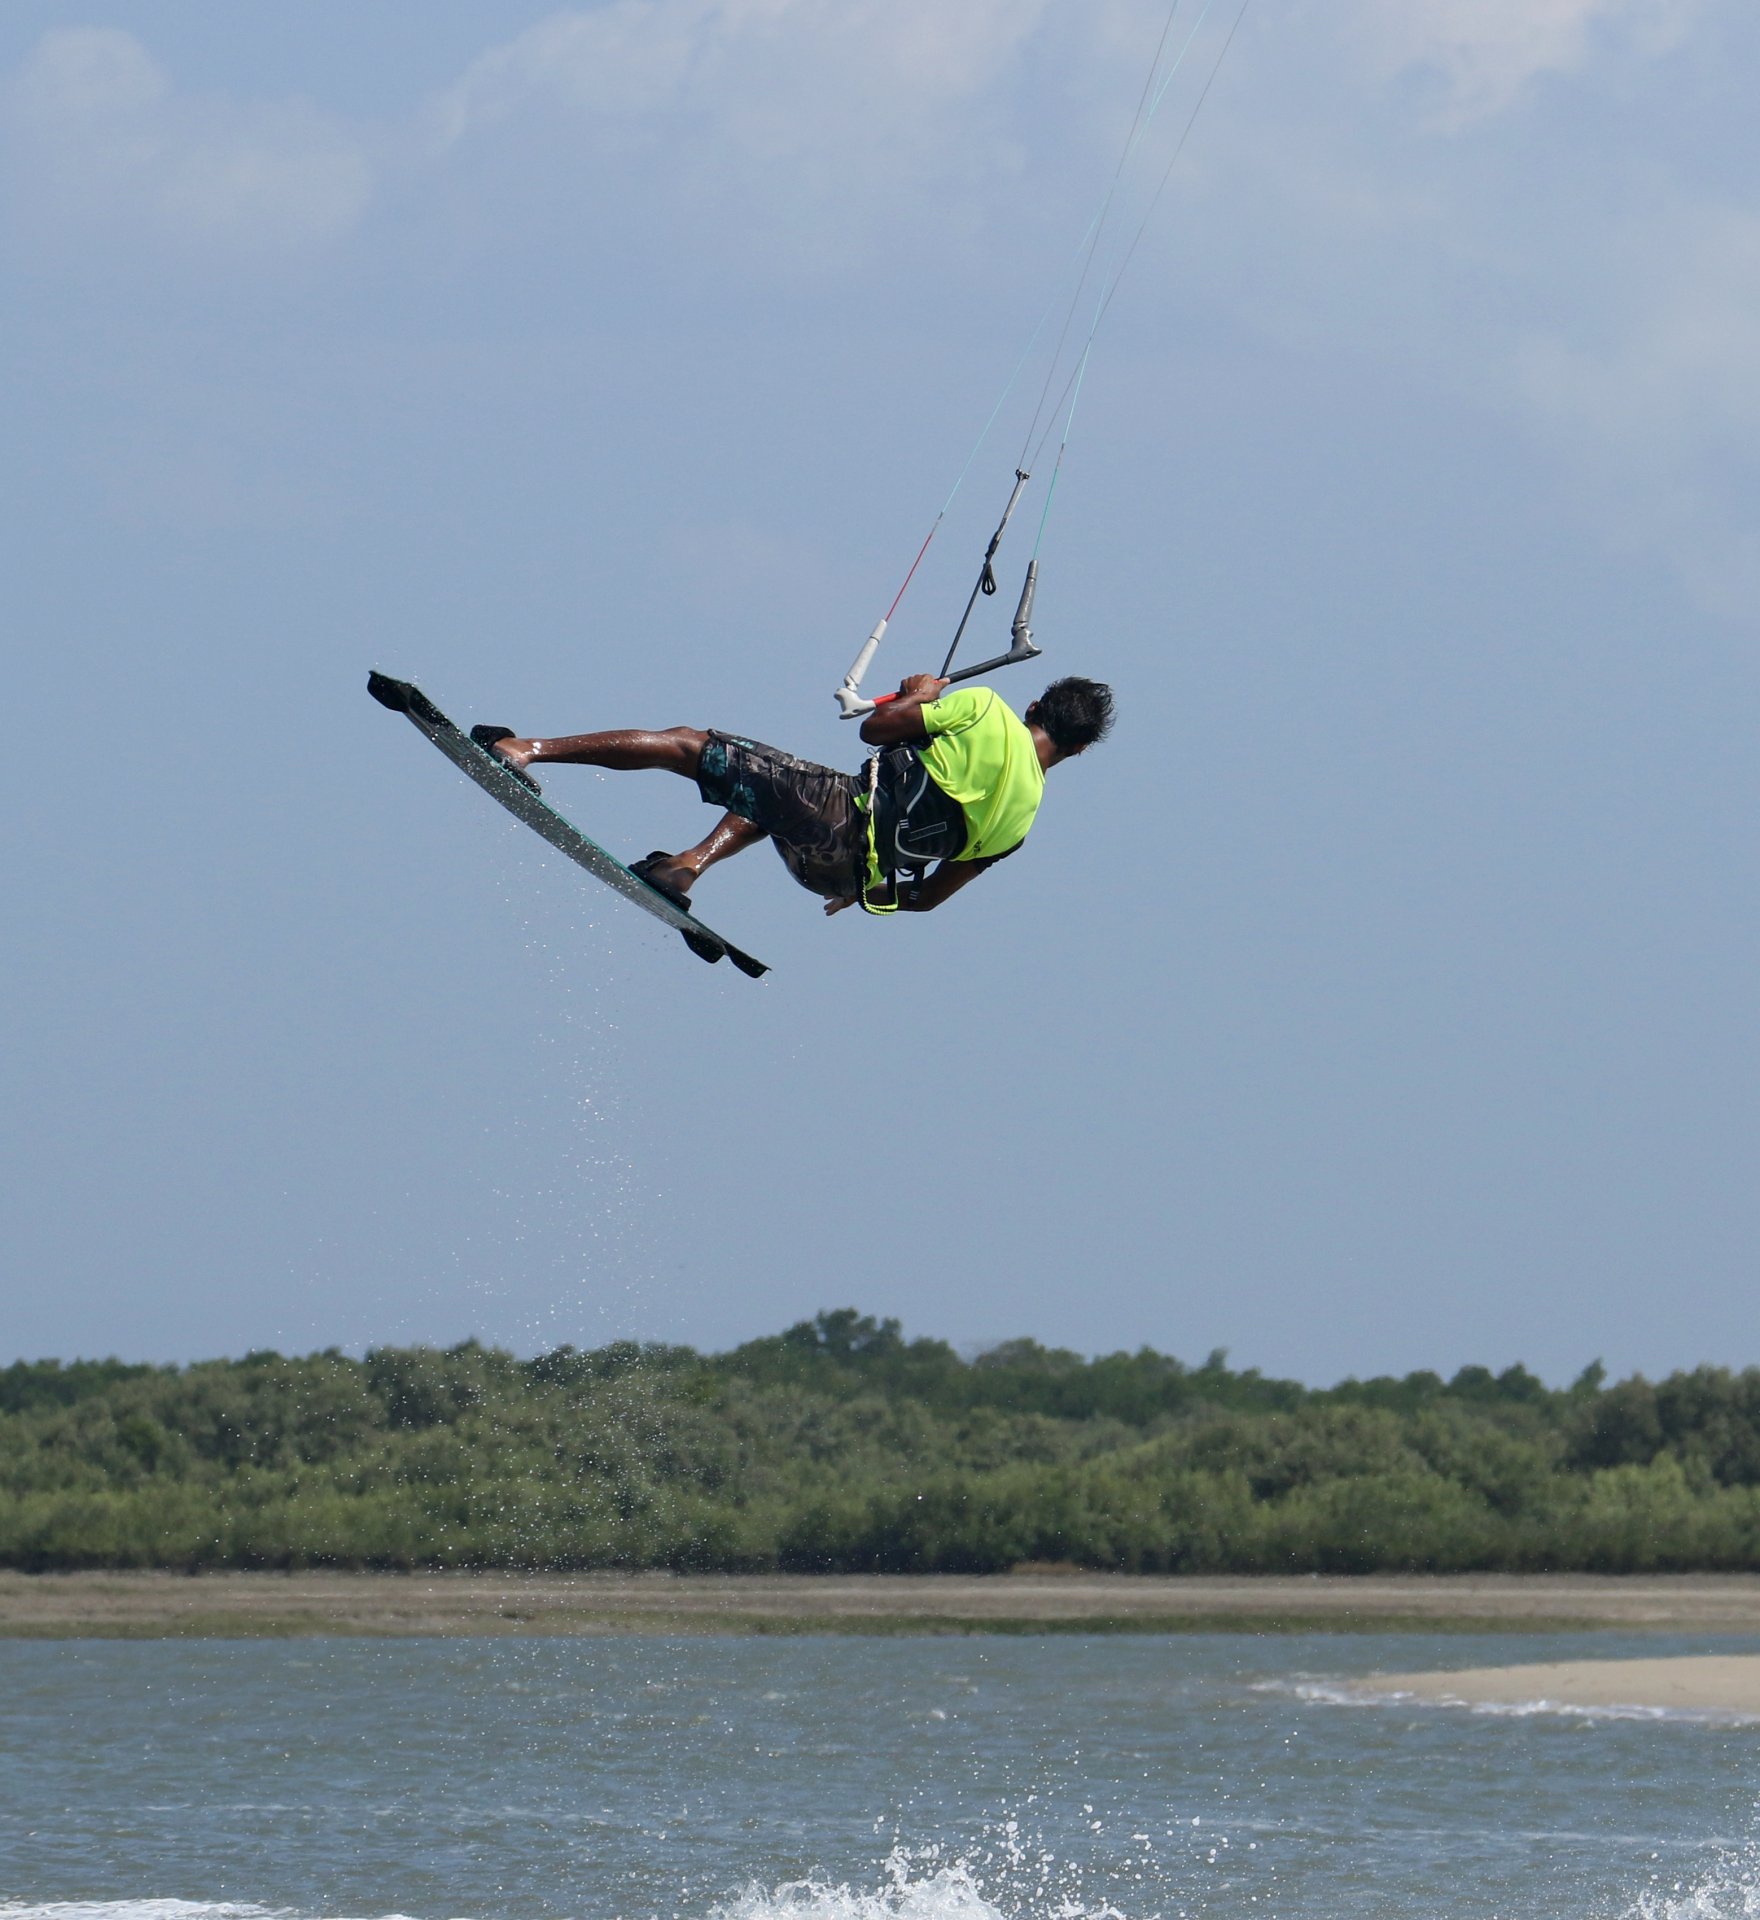
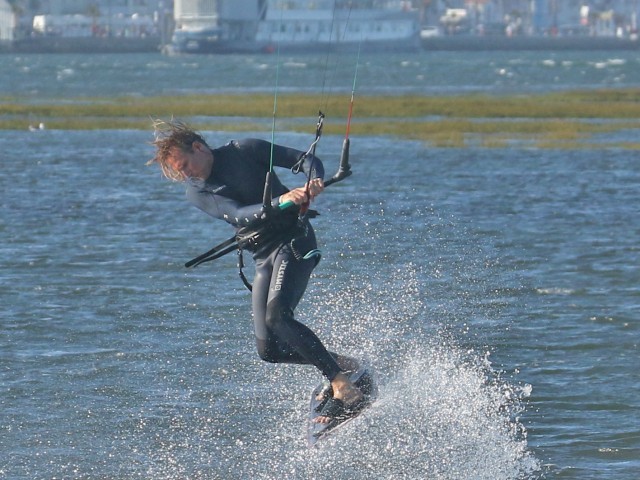
Take Off B.
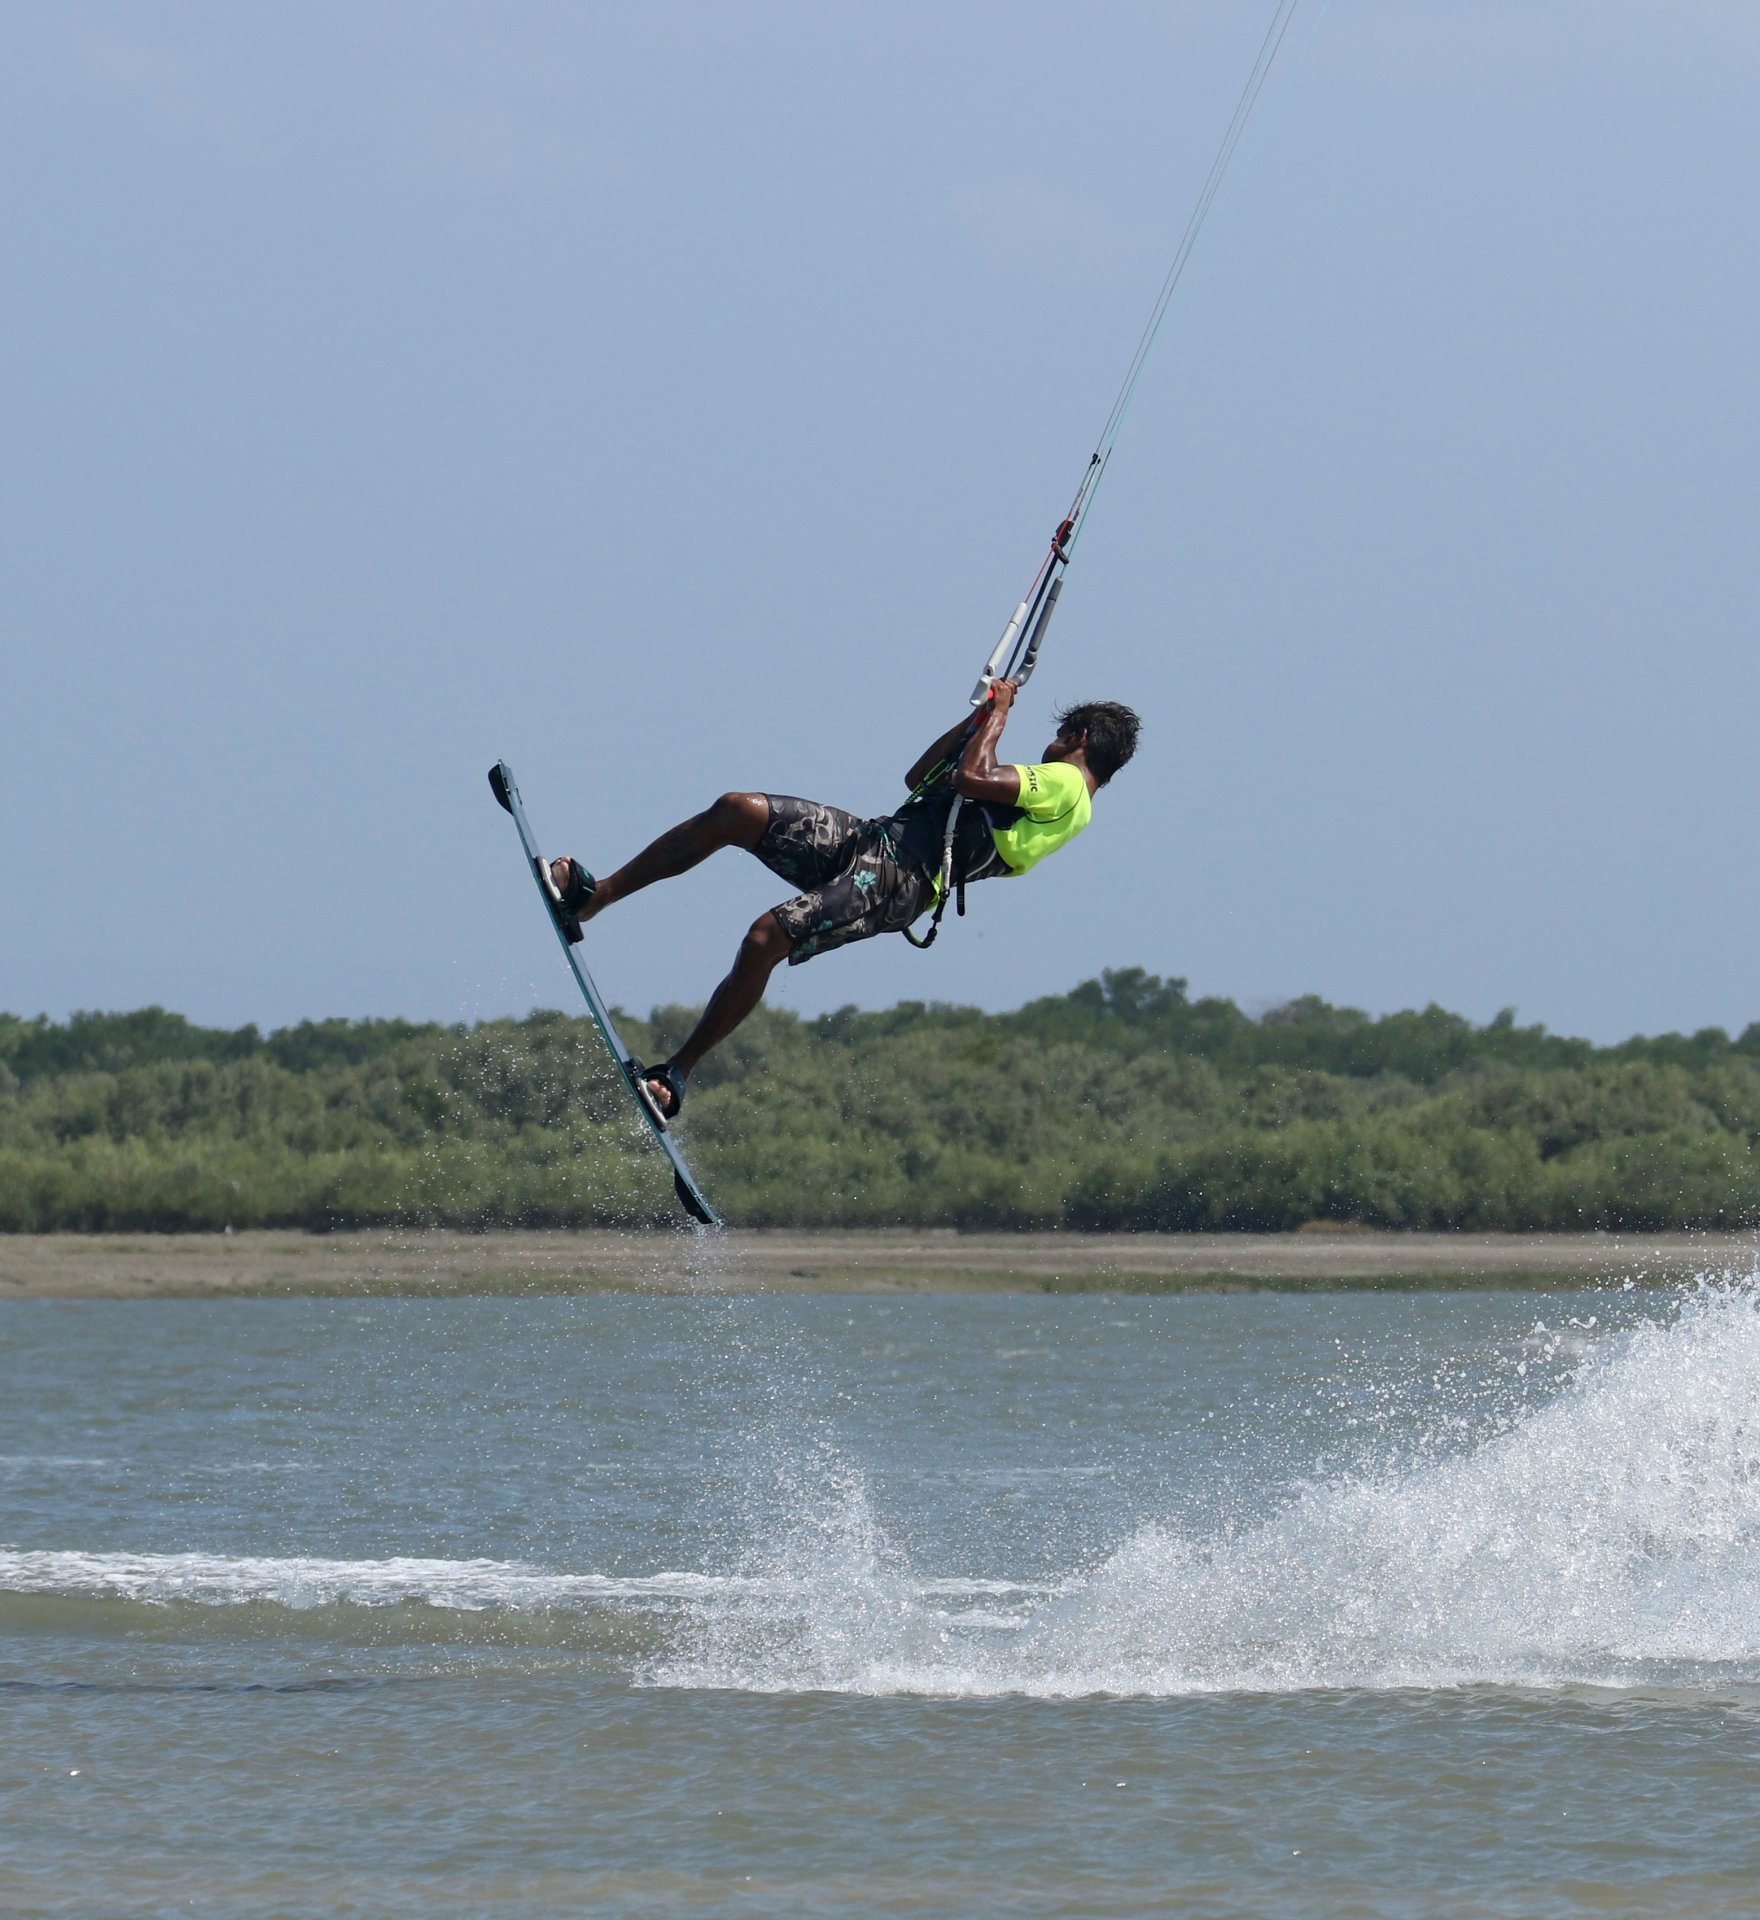
It’s all about the up, getting into the air balanced, comfortable and in control. Just as in a sent back roll the key movements here are the extension and stamp into the move and the subsequent controlling of the kite. If you’re more familiar with a low and fast back roll kite loop, you’ll be accustomed to compressing your back leg and rolling back into a more inverted roll. However, for a slow and high sent back roll you need to stamp off against your edge as you would in a jump. This not only gives you a leg up, it also increases tension in the lines, which forces the kite to fly more towards the edge of the window and will therefore reward you with more lift once it passes over 12. As mentioned, the rotation should come from the carve before you stamp. If you throw your head, you’ll rotate too quickly which will make the timing of both the kite loop and the grab tricky, so keep looking forwards along the line of your shoulder. As you extend up, you’ll want to stop the kite going too far across to the other side of the window. This will make the imminent kite loop more predictable, higher in the window and potentially less violent. Simultaneously stamp and level the bar as you pull in on it for take-off. Another look over at Heliarde and you can see that his back leg is extended from his kick off, his bar is quite level and he’s looking along his shoulder. A fine take off.
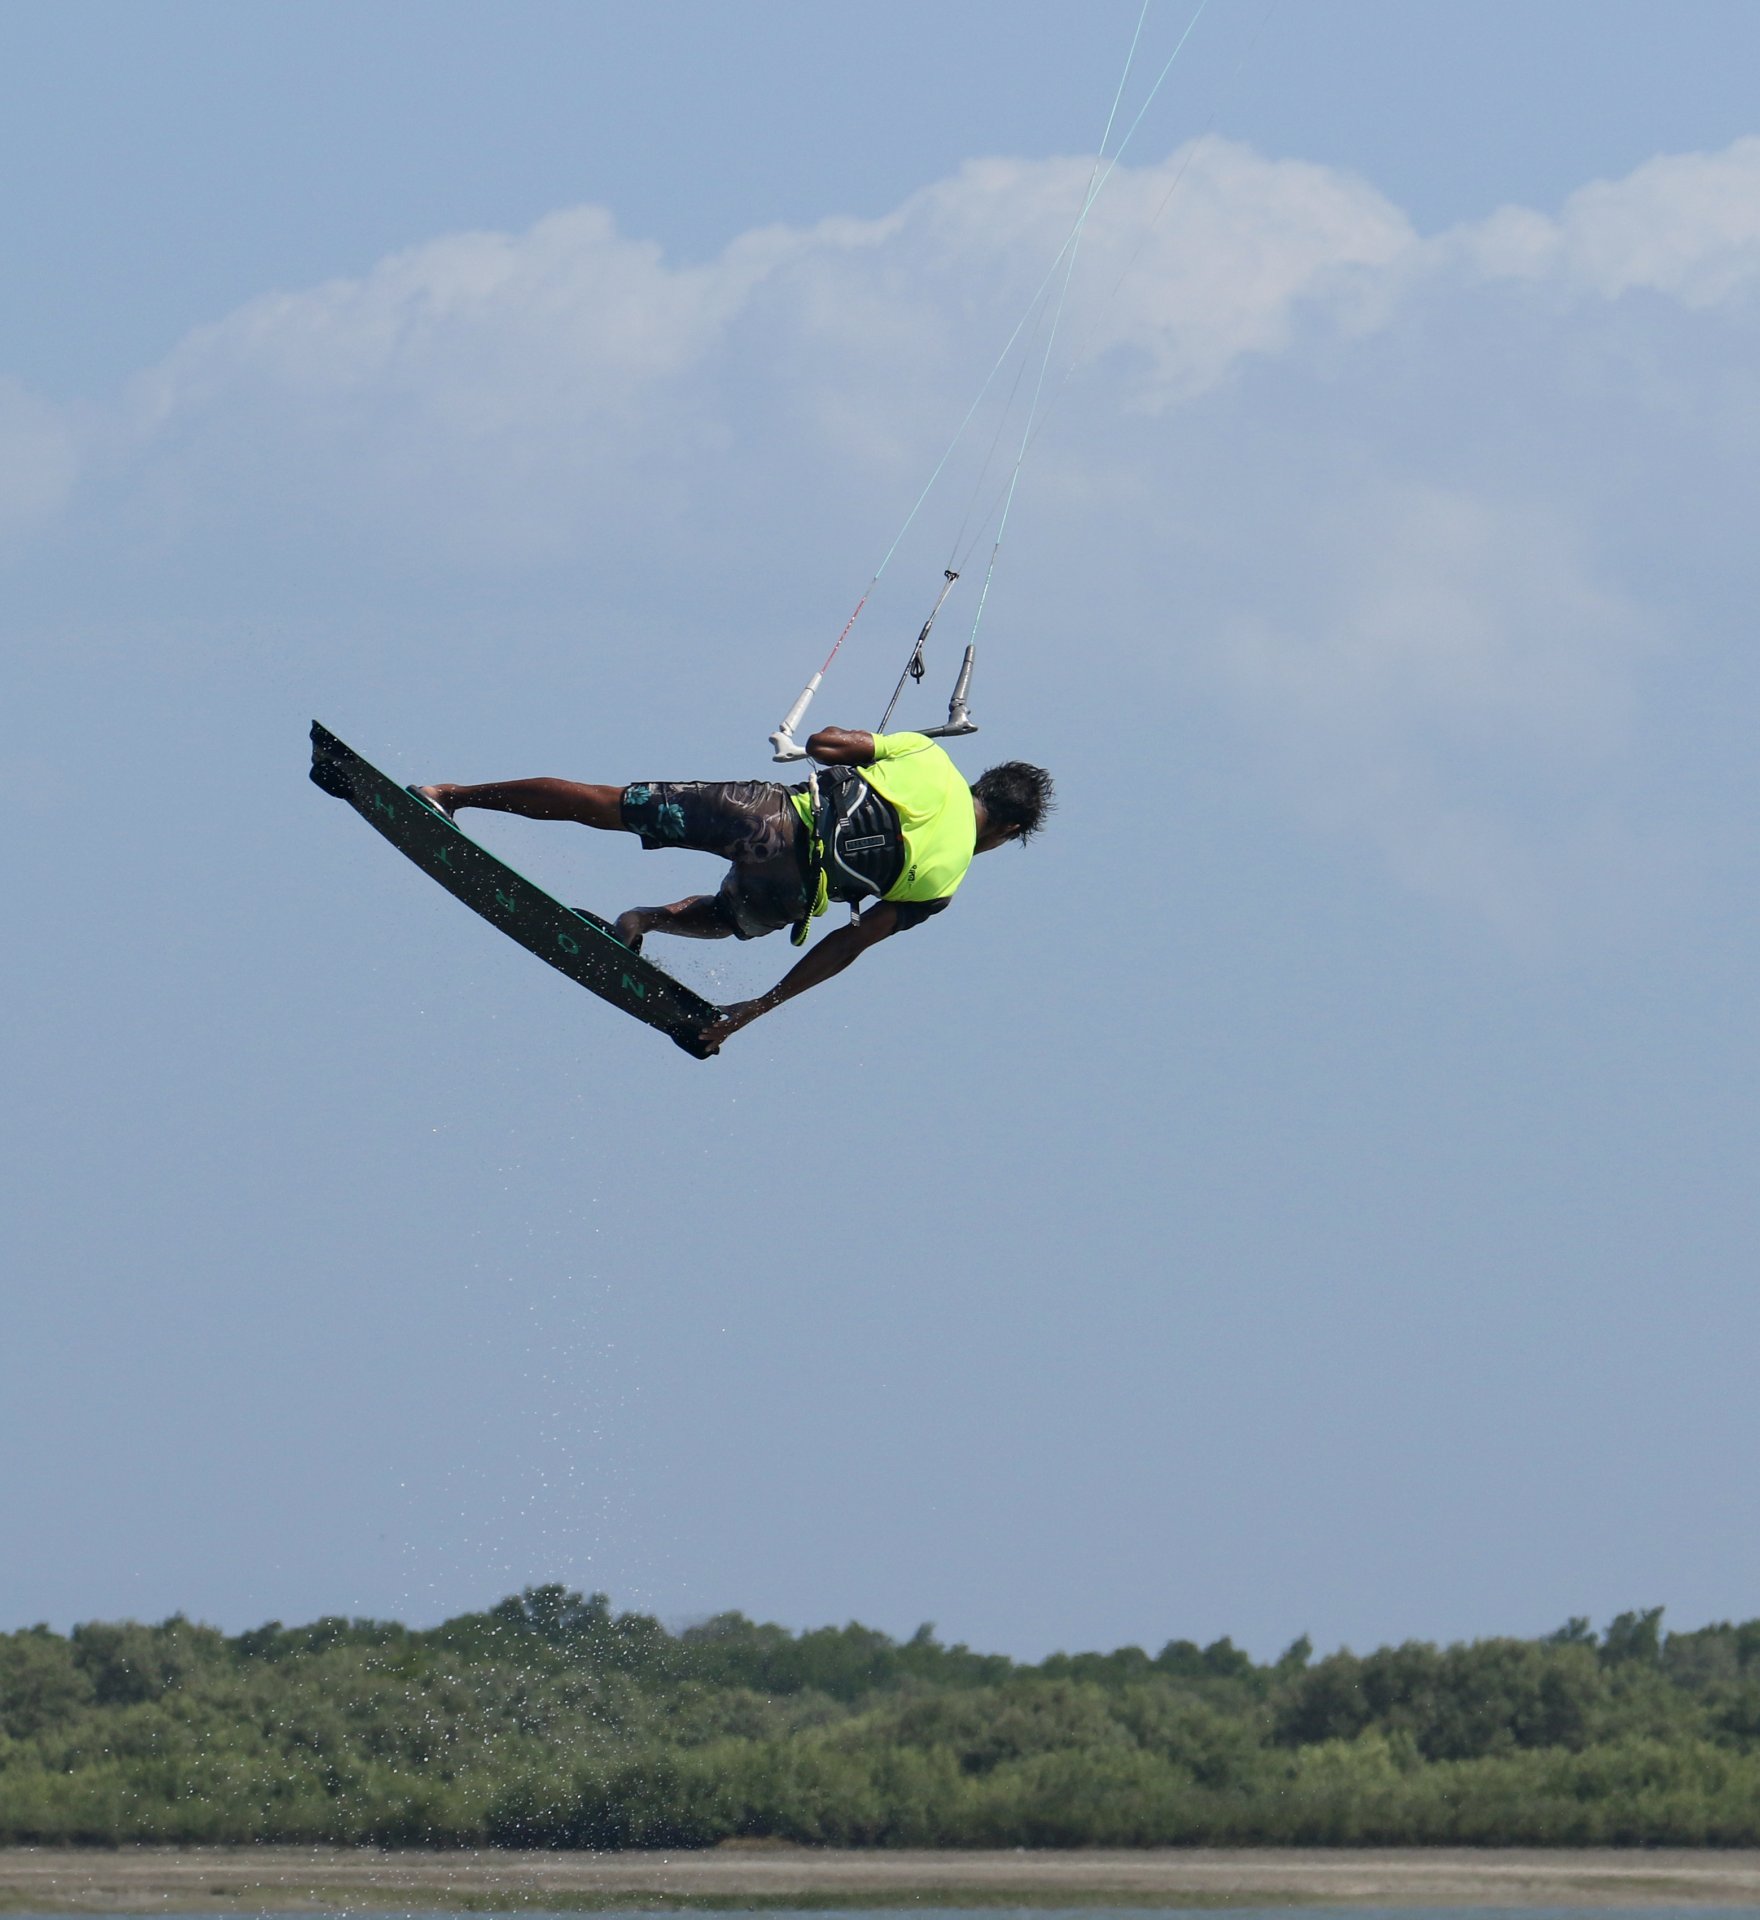
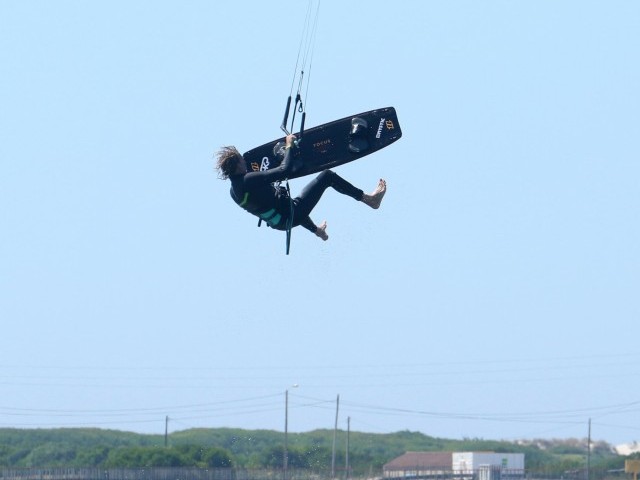
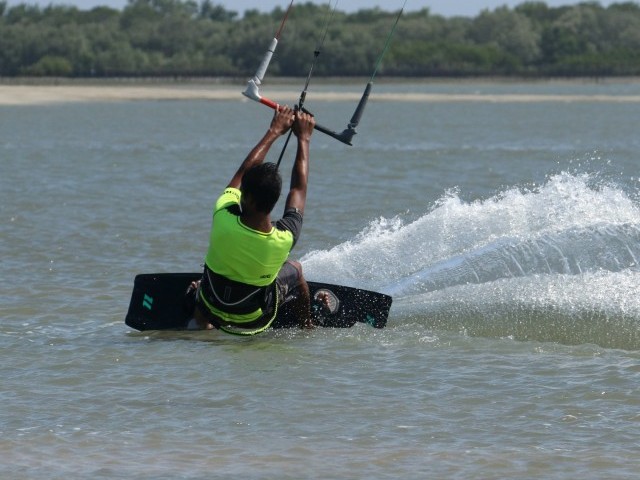
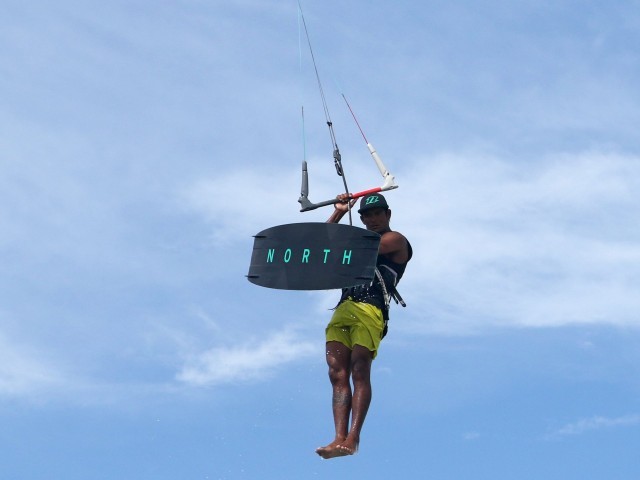
Balance & Timing Pic C.
Essential if you plan on not just surviving the kite loop but also giving it the maximum embellishment. Your balance is a direct result of your take-off. If the kite is controlled and effectively supporting you from above, you’re in a good place. If it’s whizzed over to the other side of the window and you’re momentarily defying gravity things won’t look so rosy. When you’re hanging from the kite and it’s high you have as much tension as possible on the lines and the kite is ready and waiting for your next instruction. However, before you go pulling the trigger you need to make sure that you’ve brought your knees up. As well as helping with balance, it’ll make the grab considerably simpler. Final point here is timing - when to give it the beans? You need to be halfway around, just enough that you are looking back from where you’ve come. If you’ve made it this far the loop will pull you the rest of the way around. If you go earlier, it may not. The big BUT here is that if you go too late things can get uncomfortable, as the loop can over rotate you, so don’t dilly dally either. You can see that Heliarde is halfway around, still on the way up. He’s pulling his knees up and has his kite fairly high. From here he’s perfectly positioned to pull the trigger with a hefty and aggressive pull push on the bar, using both hands to steer the kite and initiate the kite loop.
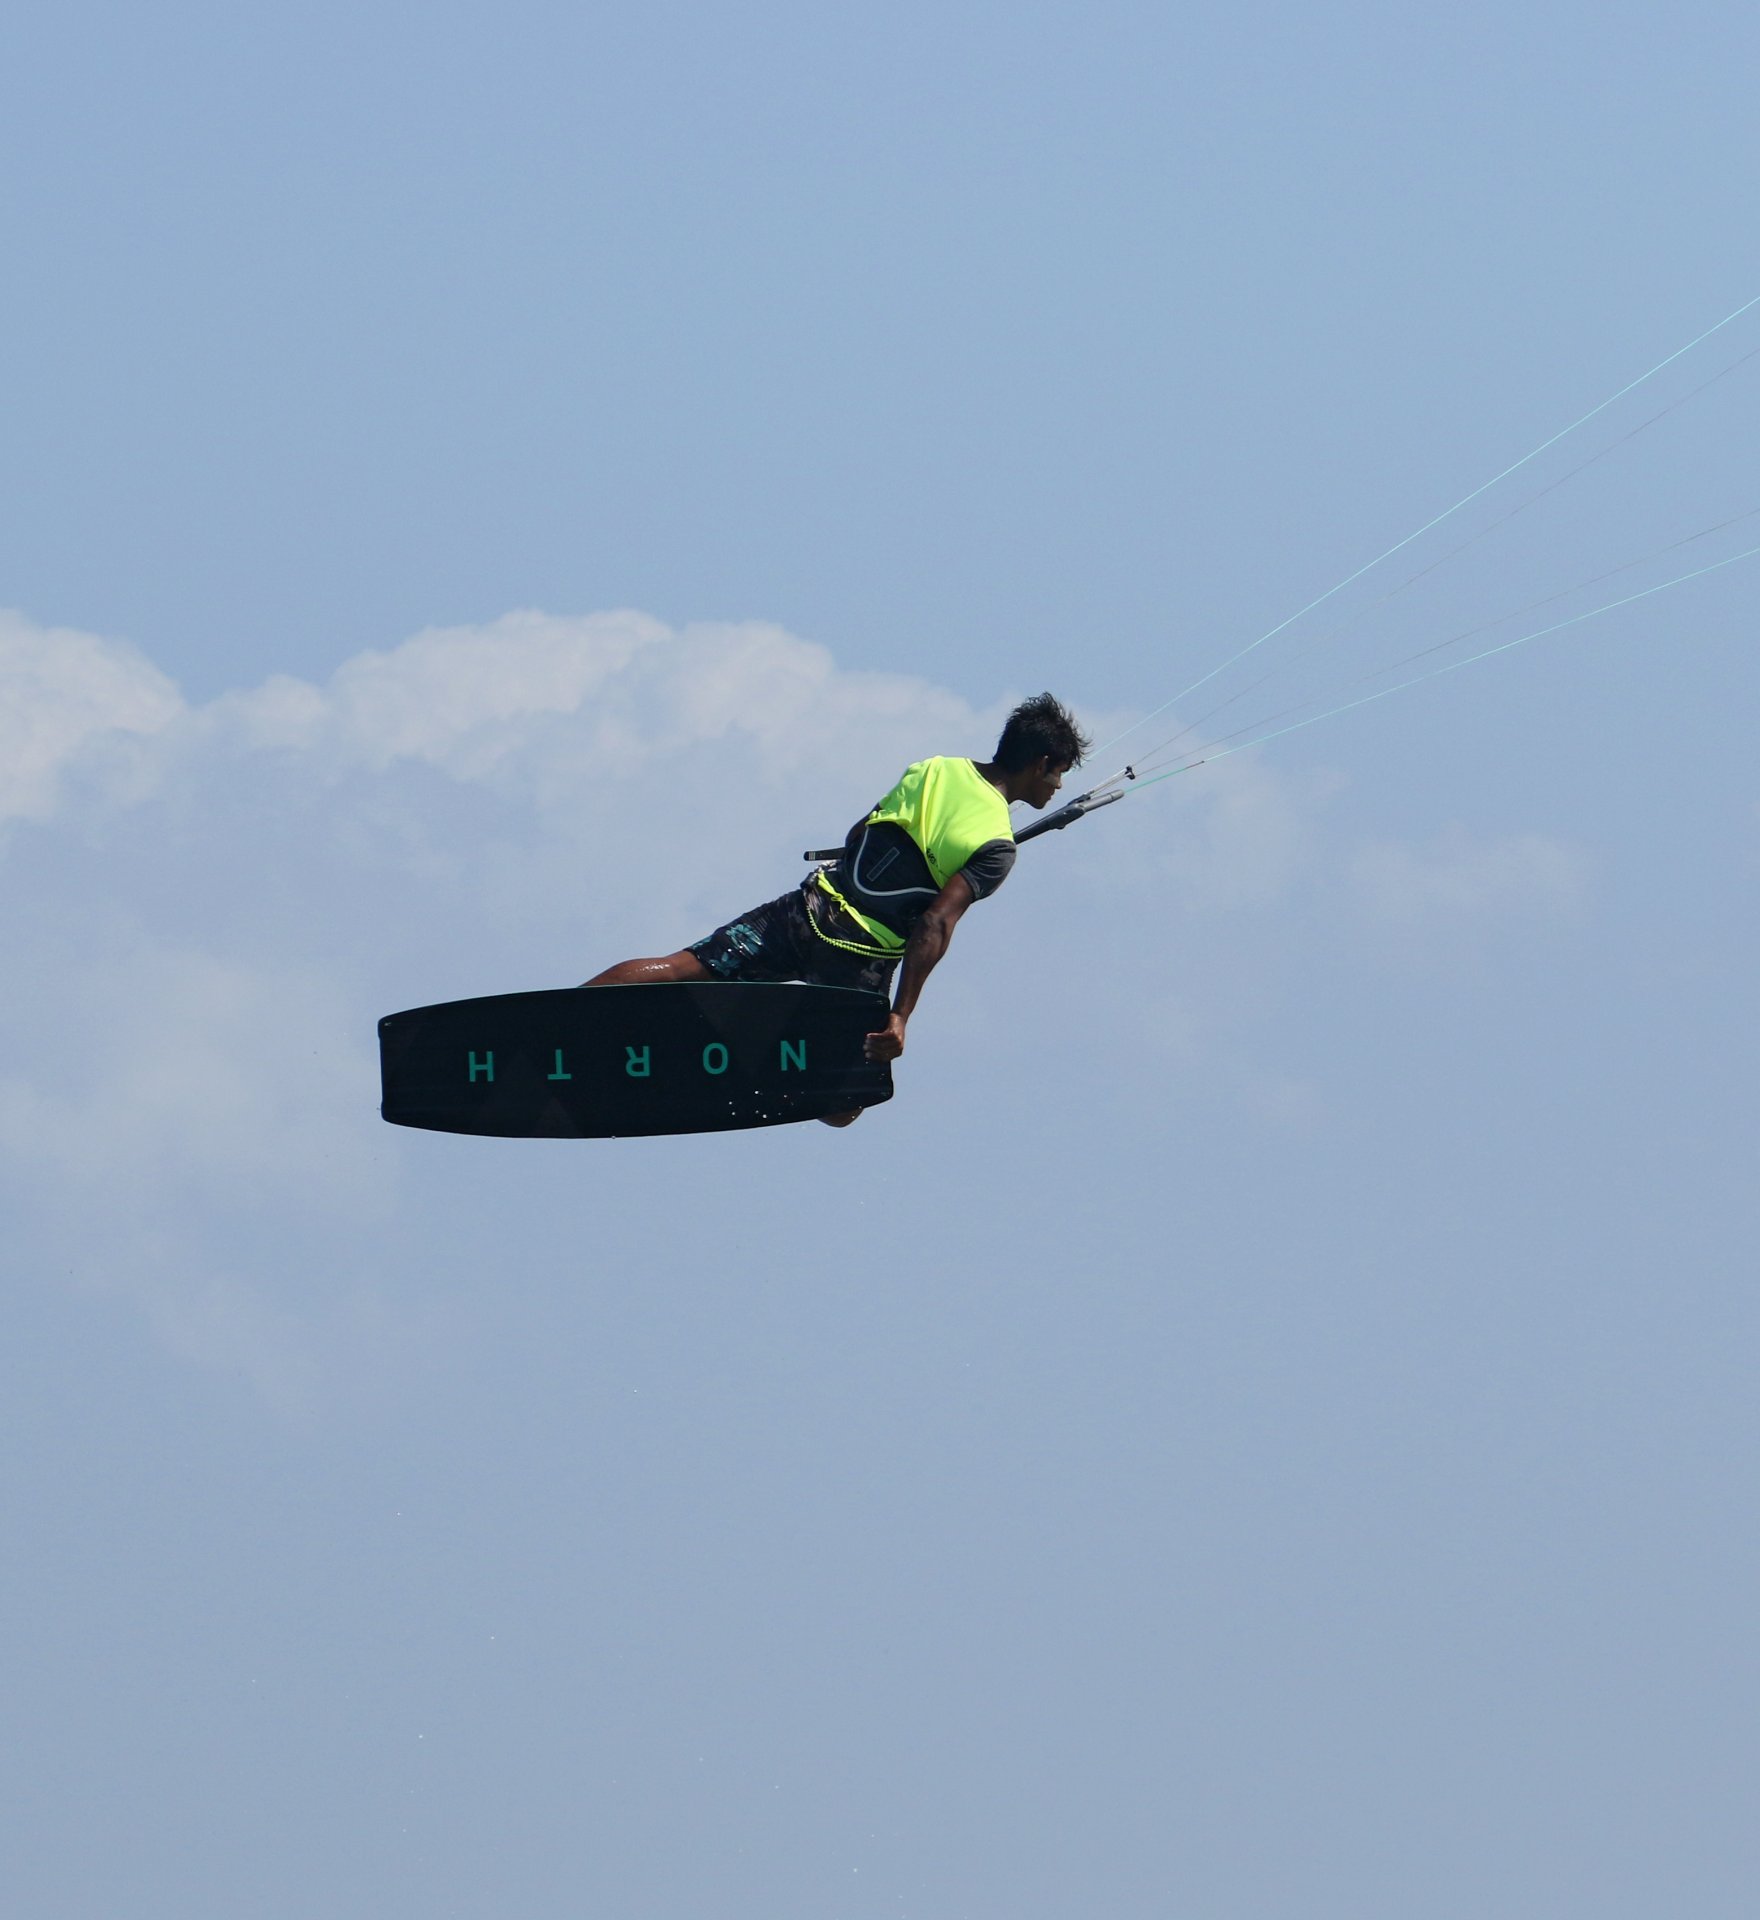
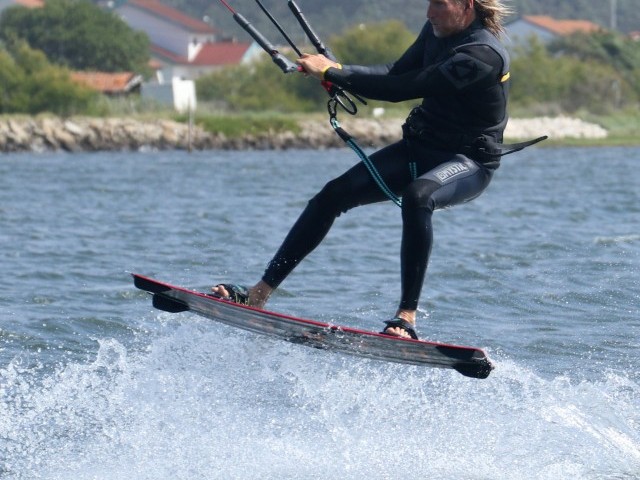
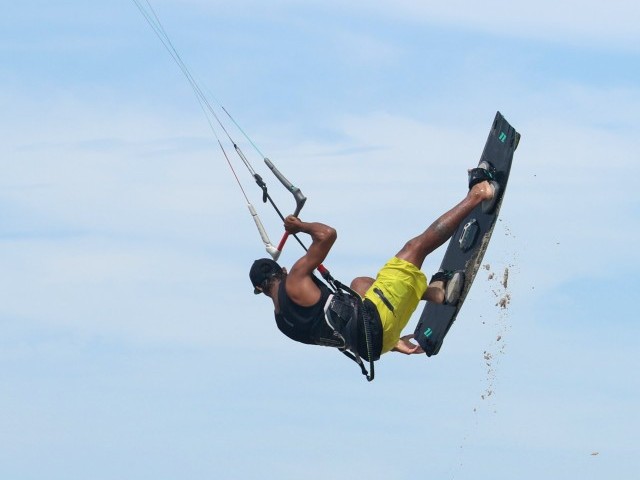
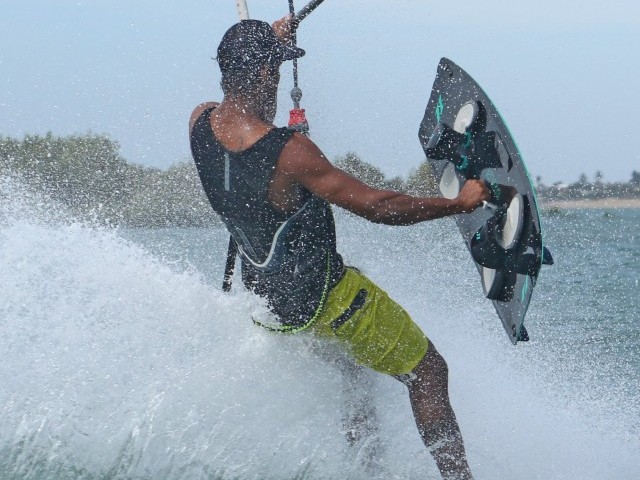
Busy Moment Pic D.
This is when your brain really needs to be in gear, all synapses firing with coordination on tap. In other words, you’ll be multitasking! Two jobs to do with many body parts to control, but oh so doable. You need to get the board where you can grab it and you need to free your front hand so that you can grab the board. You’ll be grabbing the nose of your board with your front hand, so at least there’s no need for a contortionist’s flexibility. To get the board close, bring your front knee towards your chest, this way it come up and forwards and places the nose within easy reaching distance. There’s no need to bring the back leg fully in, and if you’ll be going for the full tweak, even less so. As you’re pulling your front knee up you can release your front hand and extend it down towards the board. However, you’ve got to keep steering the kite into and through the loop. This requires the use of your hand and thumb, close up to the centre of the bar, so that you can crank it, but still control it on or around the sweet spot. You can see how Heliarde is forcefully steering the kite with his back hand.
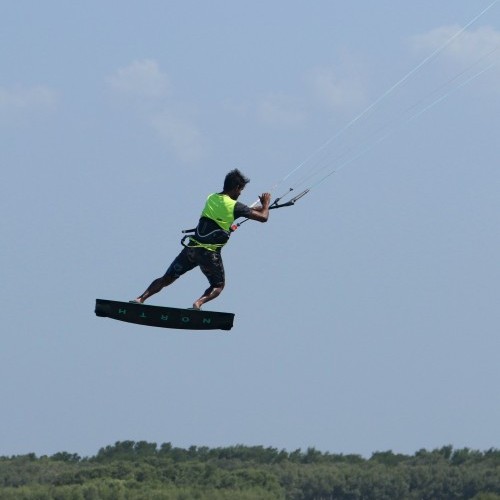
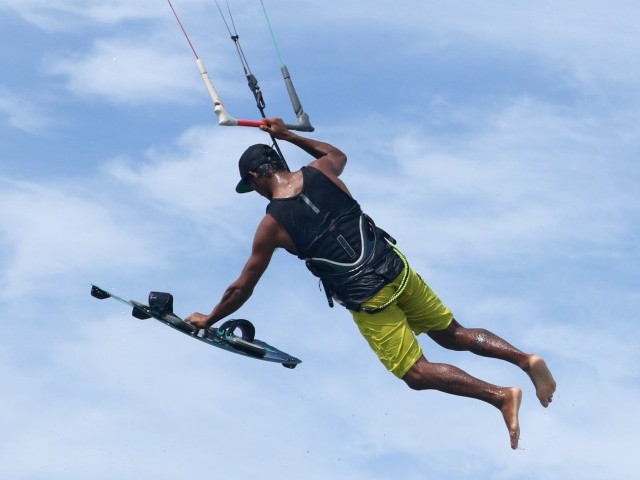
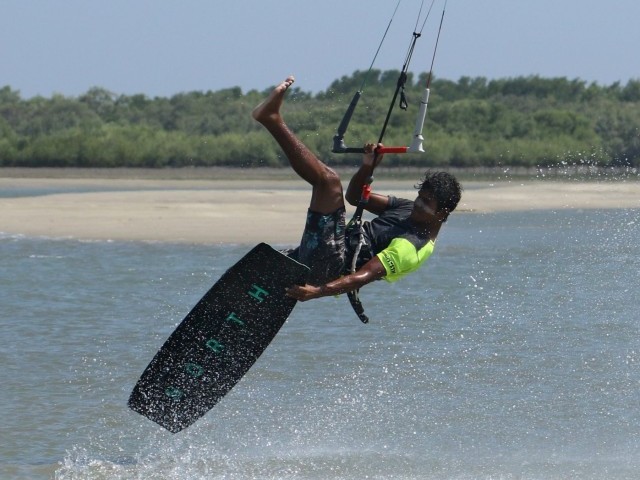
The Grab Pic E.
Looking at the pic it’s almost as if Heliarde is grabbing the tail of his board whilst travelling the other way. It’s a good pointer that the grab is achievable. Stretch your arm down and feel for the board to get the grab. This isn’t really a move where you’ve got time to focus on the board and then hone in on it. At the same time, you still need to keep that kite moving. It’s likely that the power is coming on from the kiteloop, so concentrate on keeping your bar in. It’s too easy to let it slip out, which will then reduce the tension on your lines and slow the loop down.


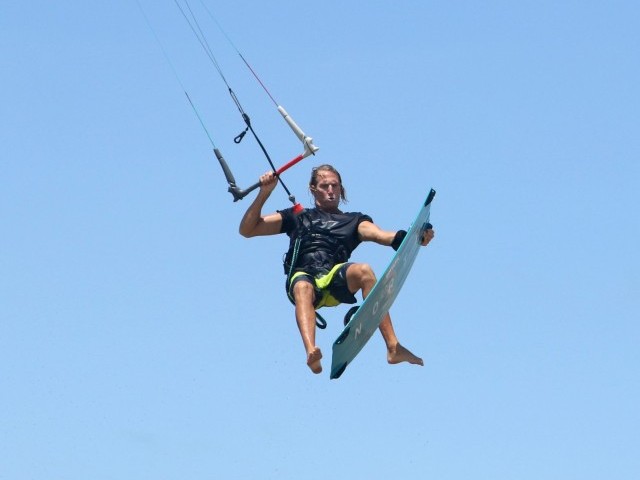
The Keeper Pic F.
Yes, we all want that money shot, and if you’re going to tweak in a loop the golden rule is to look casual. If you relax, the tweak will be all the more natural. As Heliarde would say, breath. As the turbo kicks in and you feel the pull from the kite, it will try and straighten you out. Hold onto the nose tight, keep the bar locked on hard left (or right) and go with it. Seriously though, as long as you keep the kite looping all will end well. It’s worth noting where you should be looking as the kite pulls you around. Easy answer is towards the kite, but that’s assuming your kite’s in the right place. You want to be travelling with the pull, so you’ll be just back of downwind (think very broad reach in the other direction), so look there.
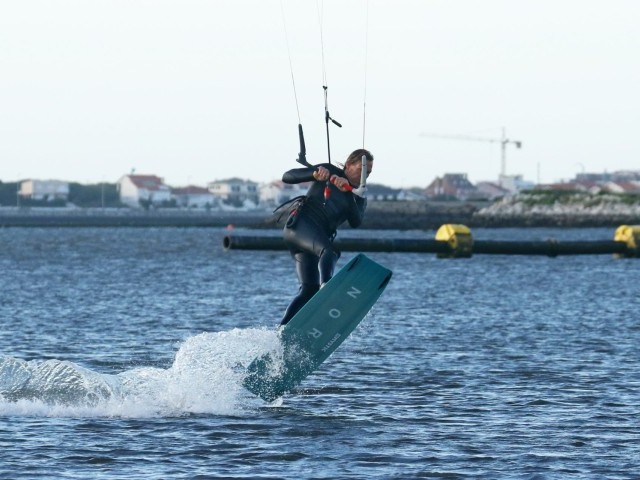
Permission to Land Pic G.
Landing from a kiteloop always feels more hectic than it looks but the same rules apply, regardless. To soften your landing, you want the kite to travel back up so that it can catch you. This is more important the higher you get, but an important skill to practice. It’s only possible if you keep steering the kite all the way around and don’t let off until it’s on its merry way to midday. Once it is you need to let the kite breath, so that it can climb. Ease the bar out, releasing the tension on the back lines that was necessary to steer the kite. At the same time release you grab, get your front hand back on the bar and focus on your landing, which will be downwind or yet again slightly back the other way. Looking at Heliarde you can see that he’s sheeted his bar out, the kite can breathe, and it’ll be rising up to 12, just in time to catch him and slow his decent.
Top tips
To get yourself best prepared for this choose the right conditions. Preferably not on the verge of overpowered, with a fast-ish kite, and when you’re feeling comfortable.
We’ll obviously add deep water in there for good measure. Warm up with some slow back rolls, then some back roll kite loops whilst trying to keep the legs in, and then add the grab late on the way down. After that add it earlier and earlier, this way you’ll always know the kite is going around.
It’s worth noting hand position on the bar again. Many of you may be used to sliding the back hand a tad further down the bar before a loop. Here though you need it close to the centre so that you can get maximum leverage whilst keeping the bar in. It’s worth practicing a few two handed loops with your back hand in this position, gradually relying more and more on your back hand for impetus.

And finally, even once you’re feeling super confident, remember that you can always initiate the loop with two hands and then release for the grab.
Now have a god look at the sequence and videos for your pre-flight check.
Common Problems
If you’re lacking float and time, it’s very likely that your kite is going too far back into the other side of the window. This can be caused by a softening of the back leg and no kick, as well as letting the bar out too much during the send. Either way it can be rescued if you make sure to level the bar just prior to take off.
If you’re struggling to reach the grab, make sure to bring your knees up. The pull from the kite will always extend you, so be dynamic after take-off and use those abs.
If you’re getting pile driven into the water by an unruly kite, it’s a result of the kite not turning. It could be starting too far back, so check that it’s more above you before pulling the trigger. However, it’s also likely that when steering with one hand you’re either not aggressive enough, or you’re letting the kite pull the bar out.


Keystones
- Solid edge and good send
- Carve and stamp whilst levelling bar
- Knees up and 1st slow half
- 2 hands to initiate loop before grabbing
- Hold bar and grab firm to complete the loop
This technique article was in Issue 84 of IKSURFMAG.
Related
By Christian and Karine
Christian and Karine have been working together as a coaching team, running improver to advanced kitesurfing clinics since 2003.
