
Unhooked Toeside Pop to Blind with Surface Pass
Technique / Advanced

Introduction
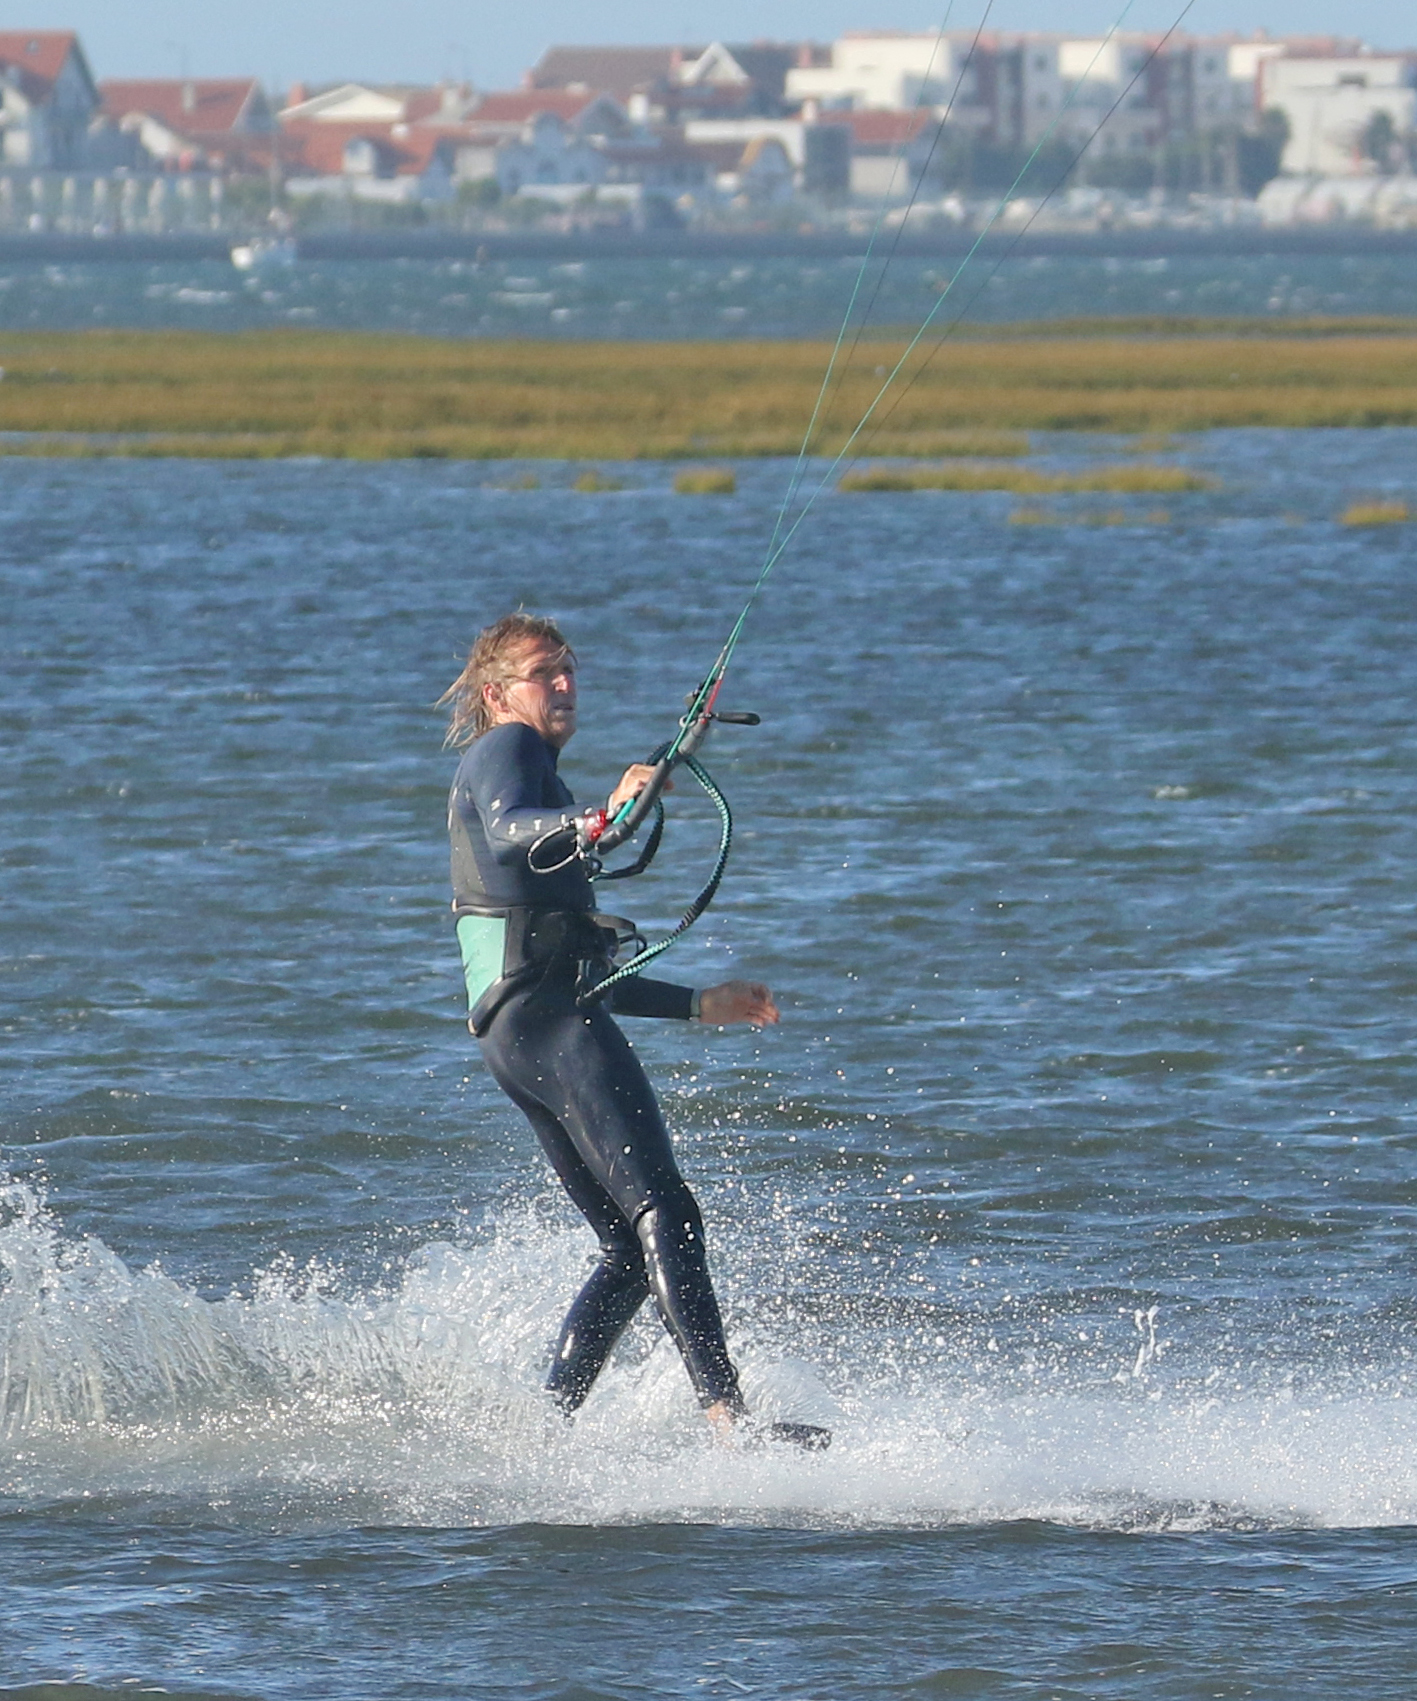
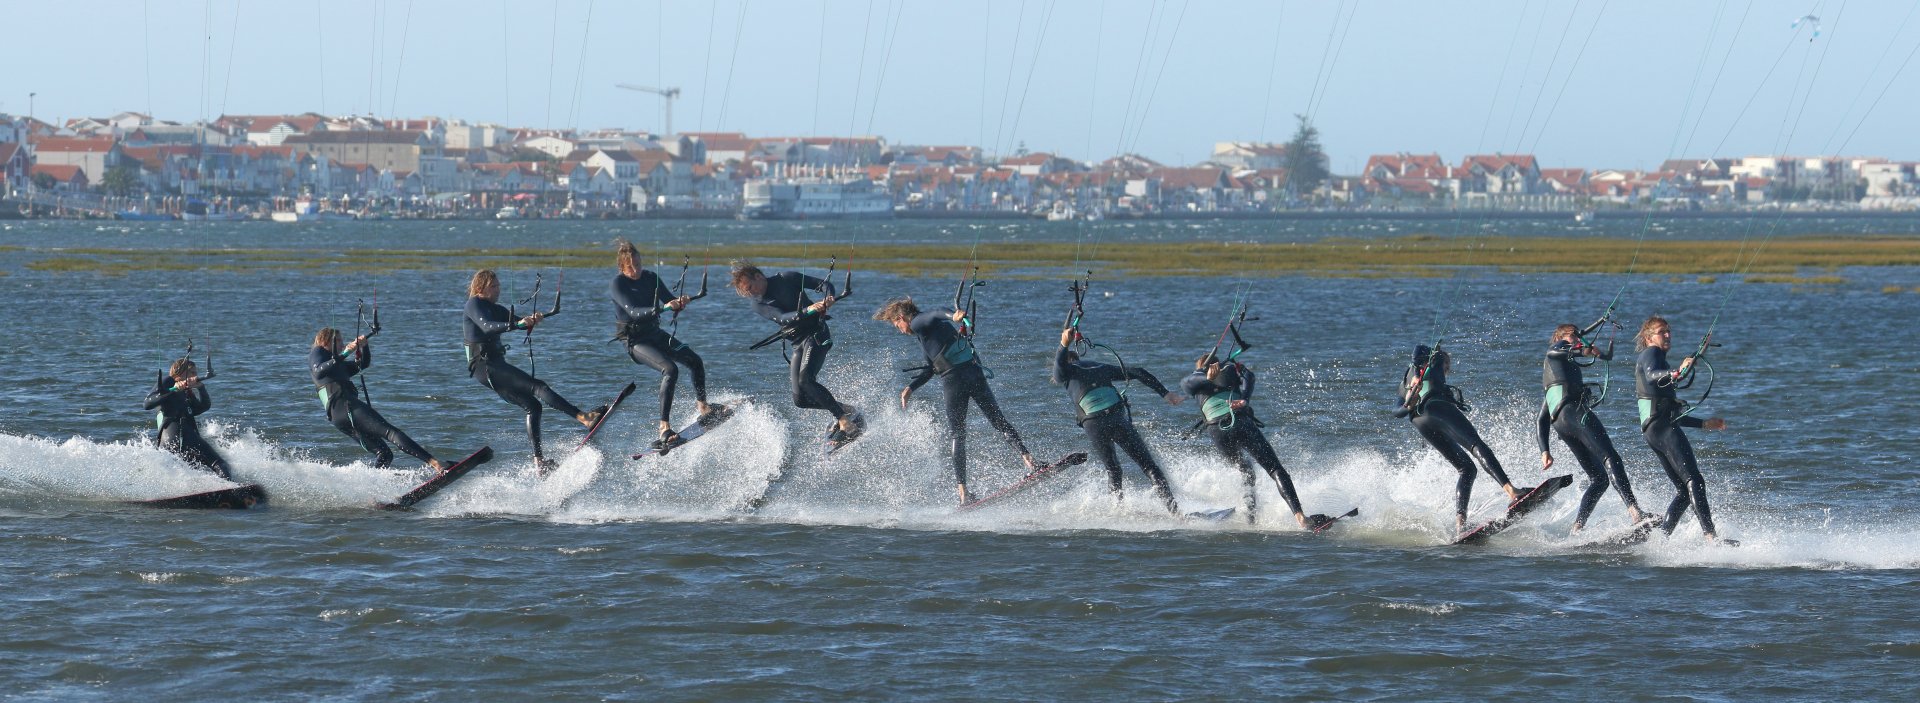
A couple of issues back in IKSURFMAG 87, we enthusiastically dangled a carrot in front of your noses, with the prospect of goodies to come as long as you promised to do your homework on the Unhooked Pop from Toeside. Hopefully, you’ve had sufficient wind and time to complete it! If you have, it’s well and truly time to start on this, the next instalment. The plan is to make the most of your well-honed take off, add on a cheeky blind and finish it off with a jaw-dropping surface pass. Once hammered into the box and claimed with a cheesy grin, you’ll end up as you started, toeside and unhooked.
It all sounds rather brilliant. However, there are a few obstacles to overcome. First and foremost, the little matter of landing blind. Being able to ride blind is not essential, although it will, of course, help. If you’re not particularly ambidextrous or two-sided, it’s very likely that your toeside and blind side are opposite directions. As such, if you’re happy popping from toeside, it may not be your chosen blind side to land on. There are two possibilities; either pop from your good toeside and land on a new blind side, or pop from your not so polished toeside and land on your comfortable blind. The choice is yours, but most of you will probably find it less difficult to pop from your good toeside and learn a new landing than to pop successfully from a not-so-strong toe side. We appreciate that for some, this won’t be an issue, as you’re fortunate enough to have two equally formidable toesides.


Don’t forget to position your leash on your leading hip so that it’s got room to twist around you. If you are going against your usual pass direction onto a new blind and your leash is on your trailing hip, you’ll need to pass it over your head so that you’ll actually unwrap it as you pass!
Let’s get cracking...
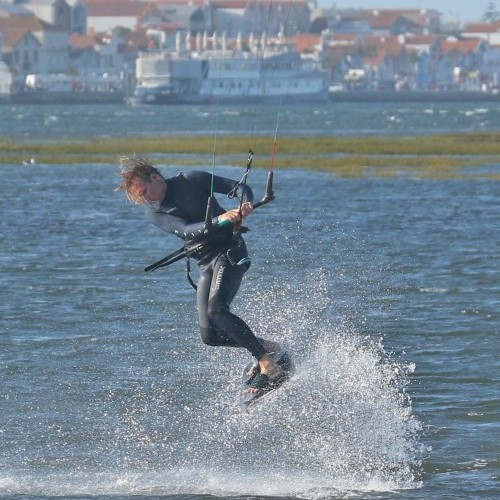
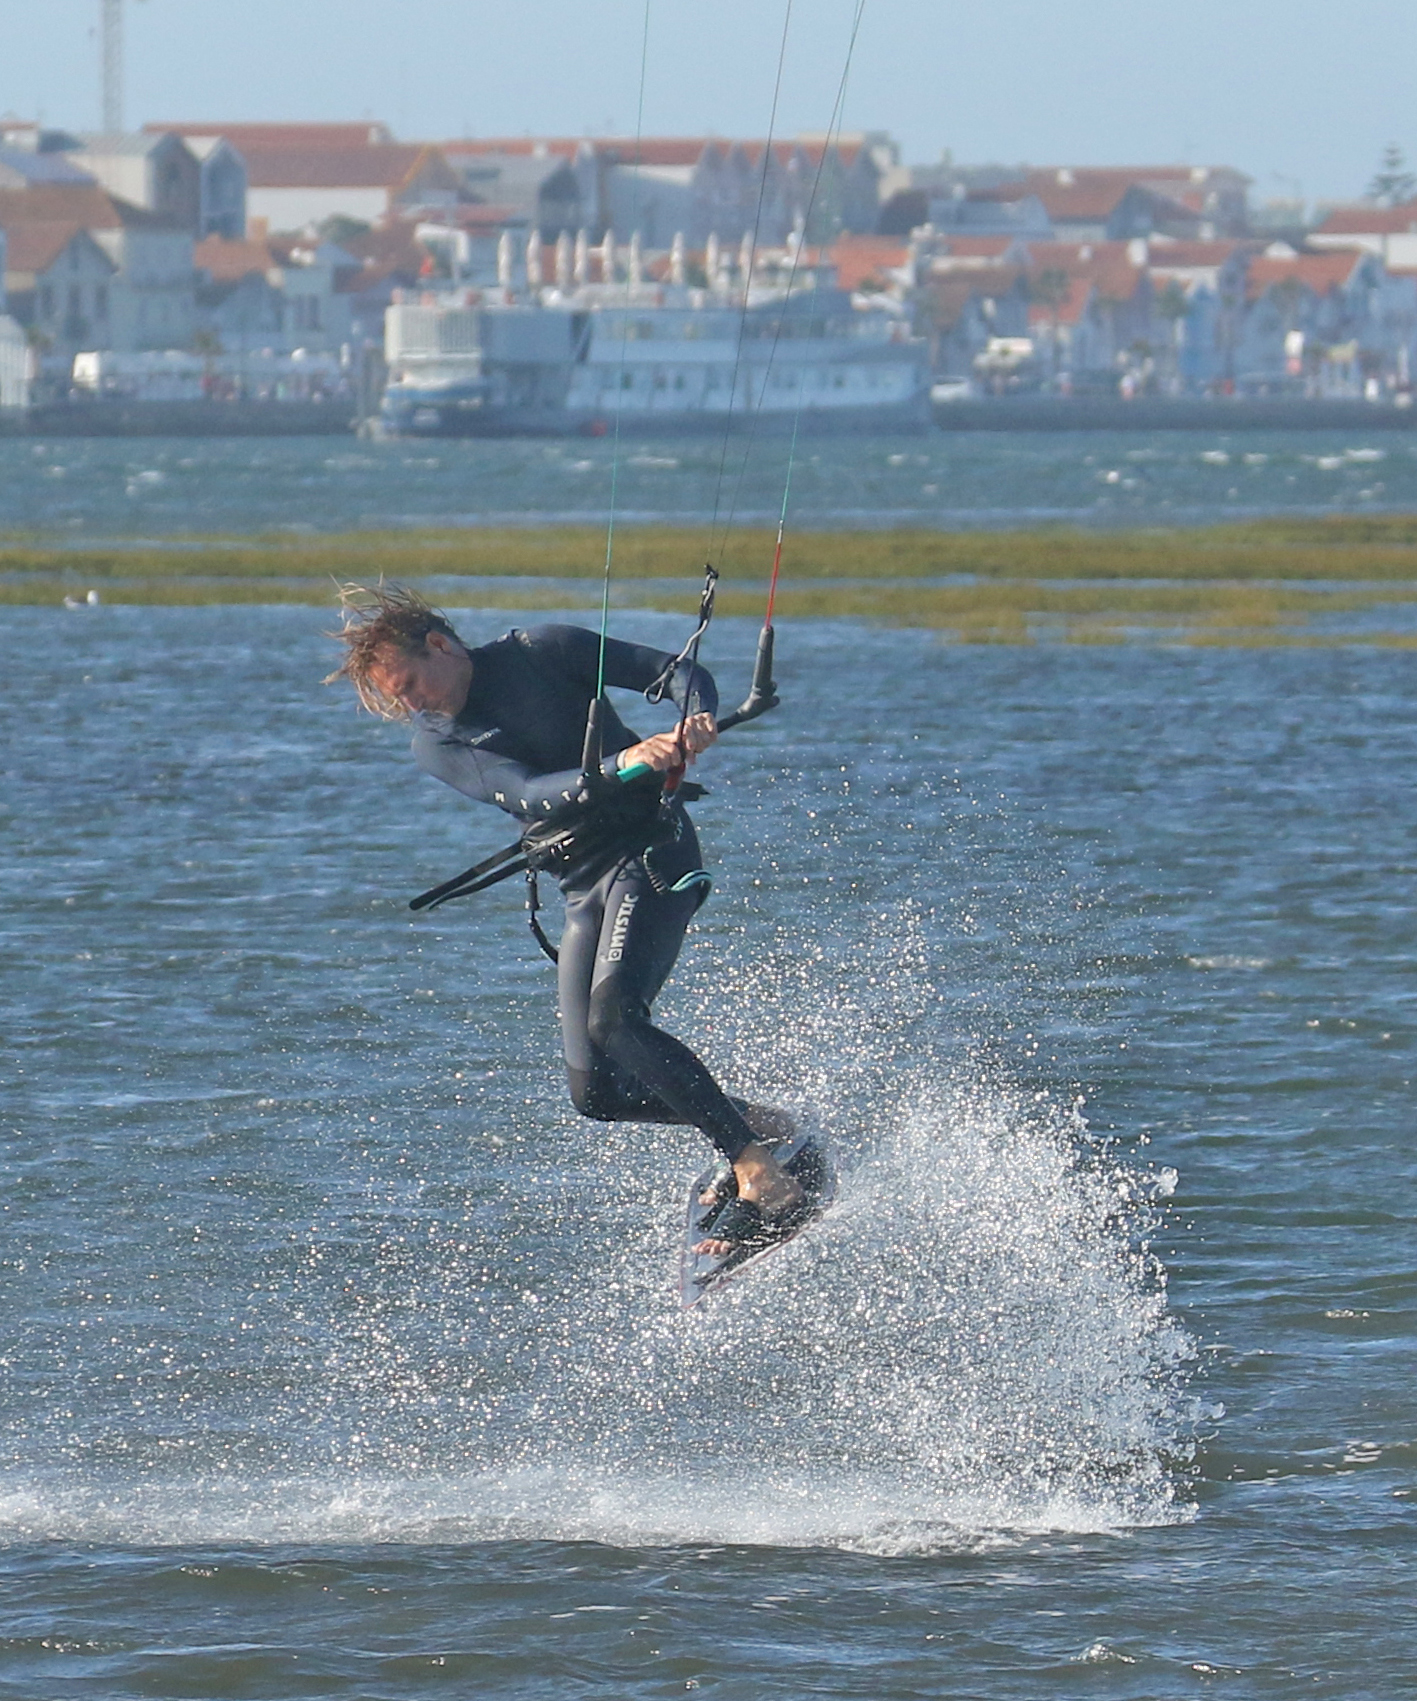
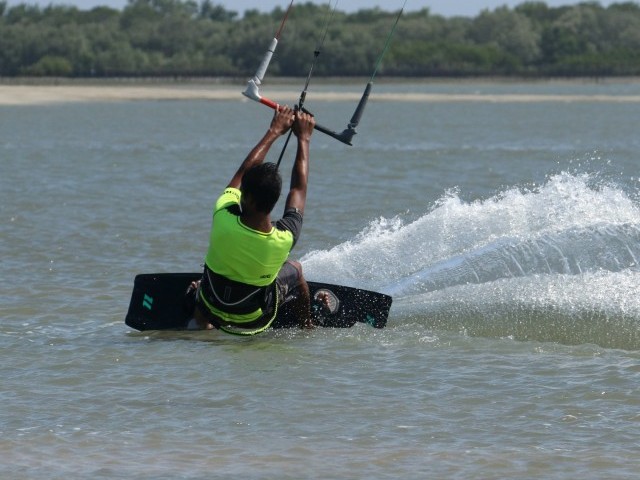
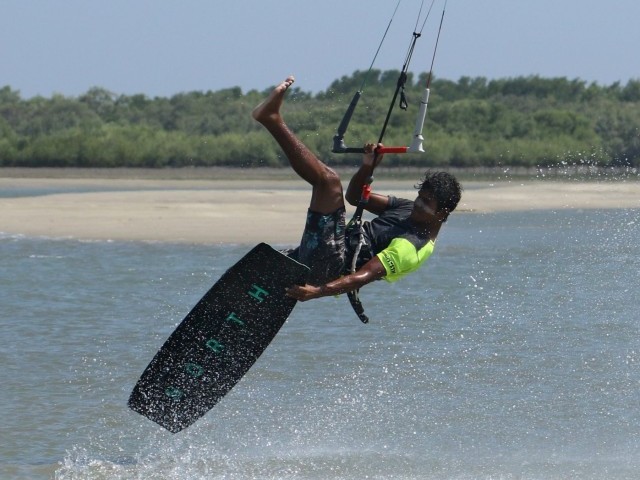
Approach Pic A.
The proof is in the pudding. If you’ve done your homework, you should be confident here, as all the same principles apply; kite correctly trimmed around 1 or 11 o’clock, work in some oomph whilst keeping tension on your lines with your heelside edge, and your hands centred on the bar. From here, you can either slide or mini pop to toeside and use the resultant loss of tension in the lines to pull the bar in and push it down to unhook. Here Christian has just switched to toeside, his board is flat, and he’s using this opportunity to unhook. He’s looking forwards not at his kite and is keeping pressure equally on both hands so that his kite doesn’t steer up.
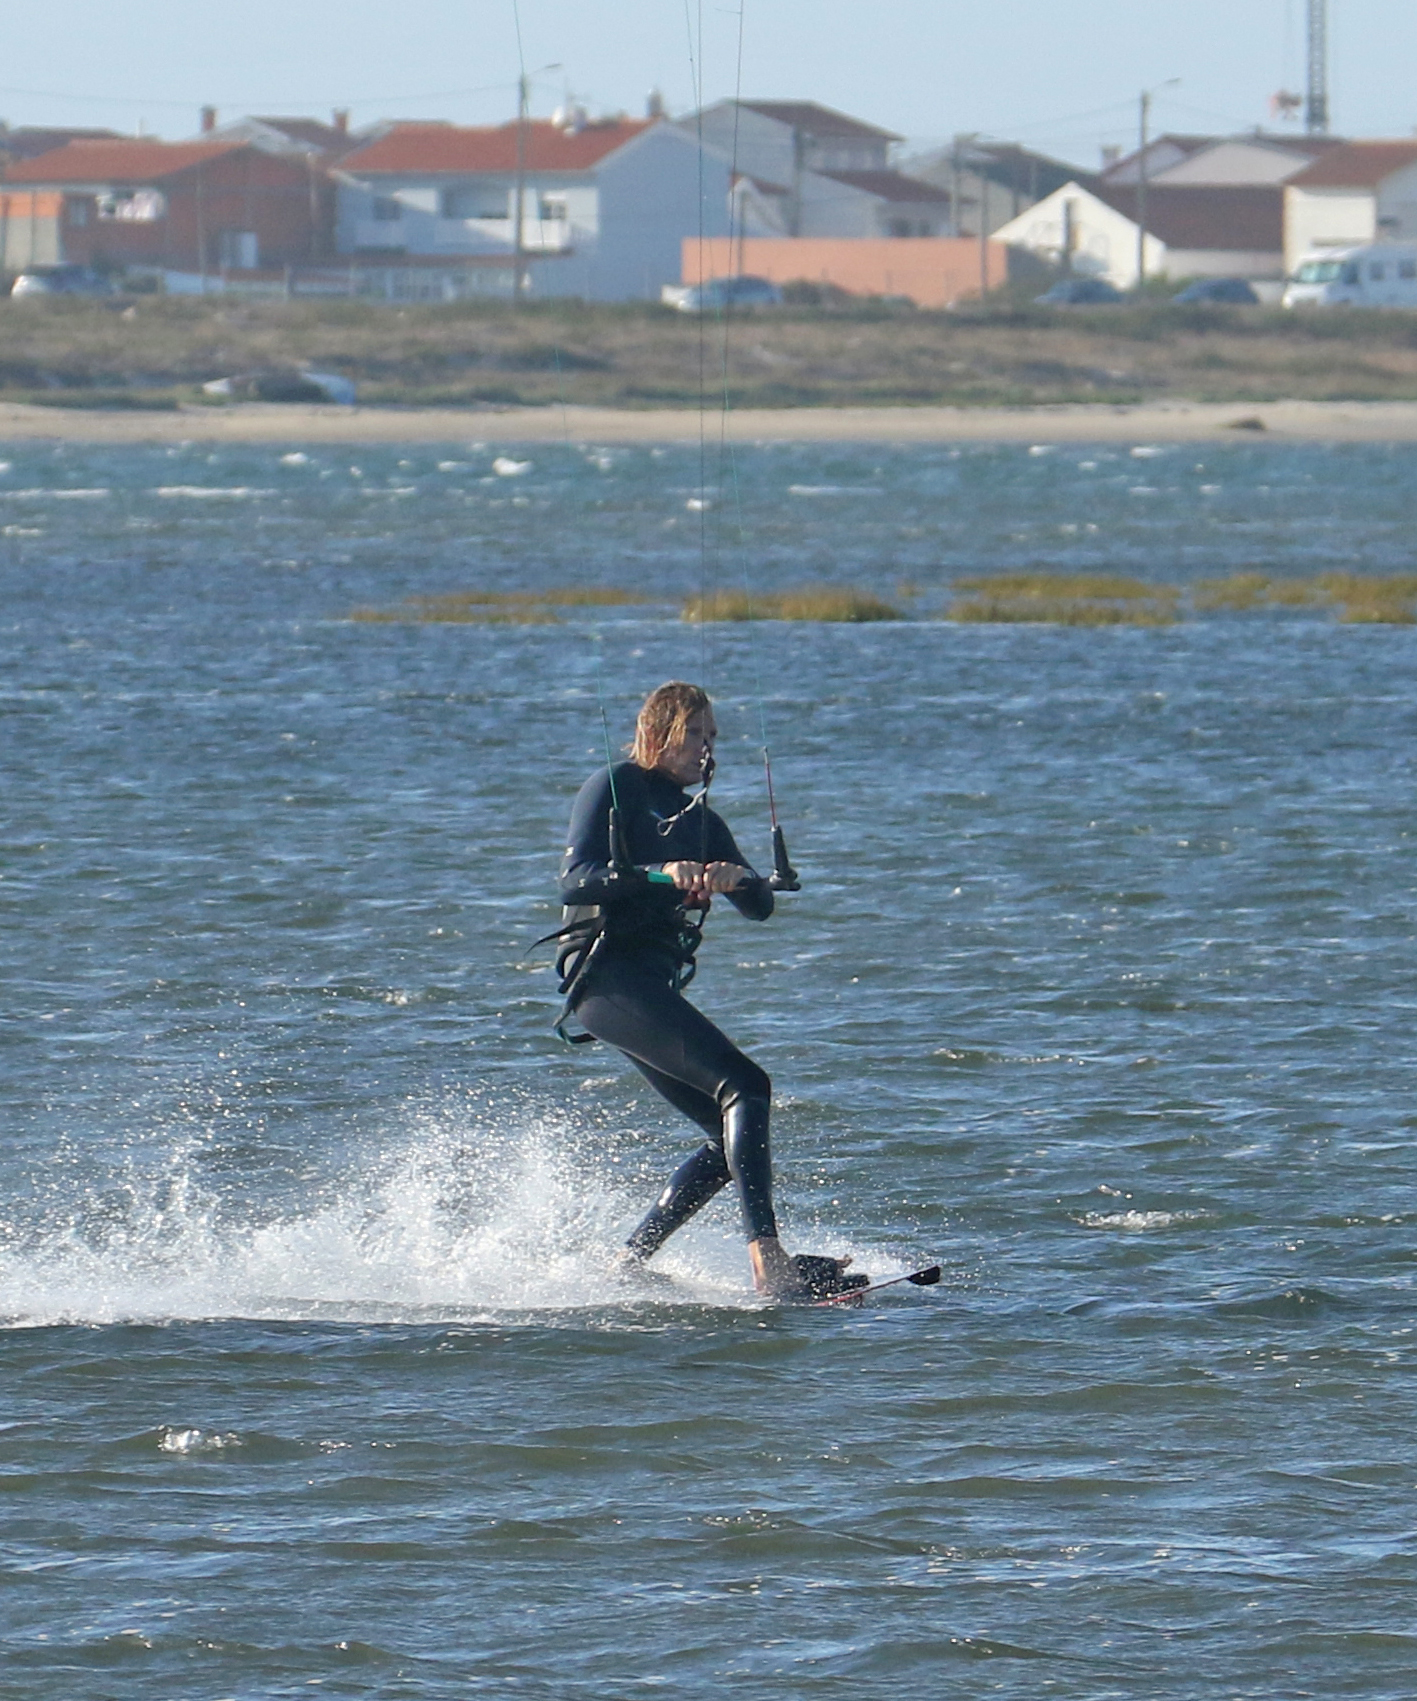
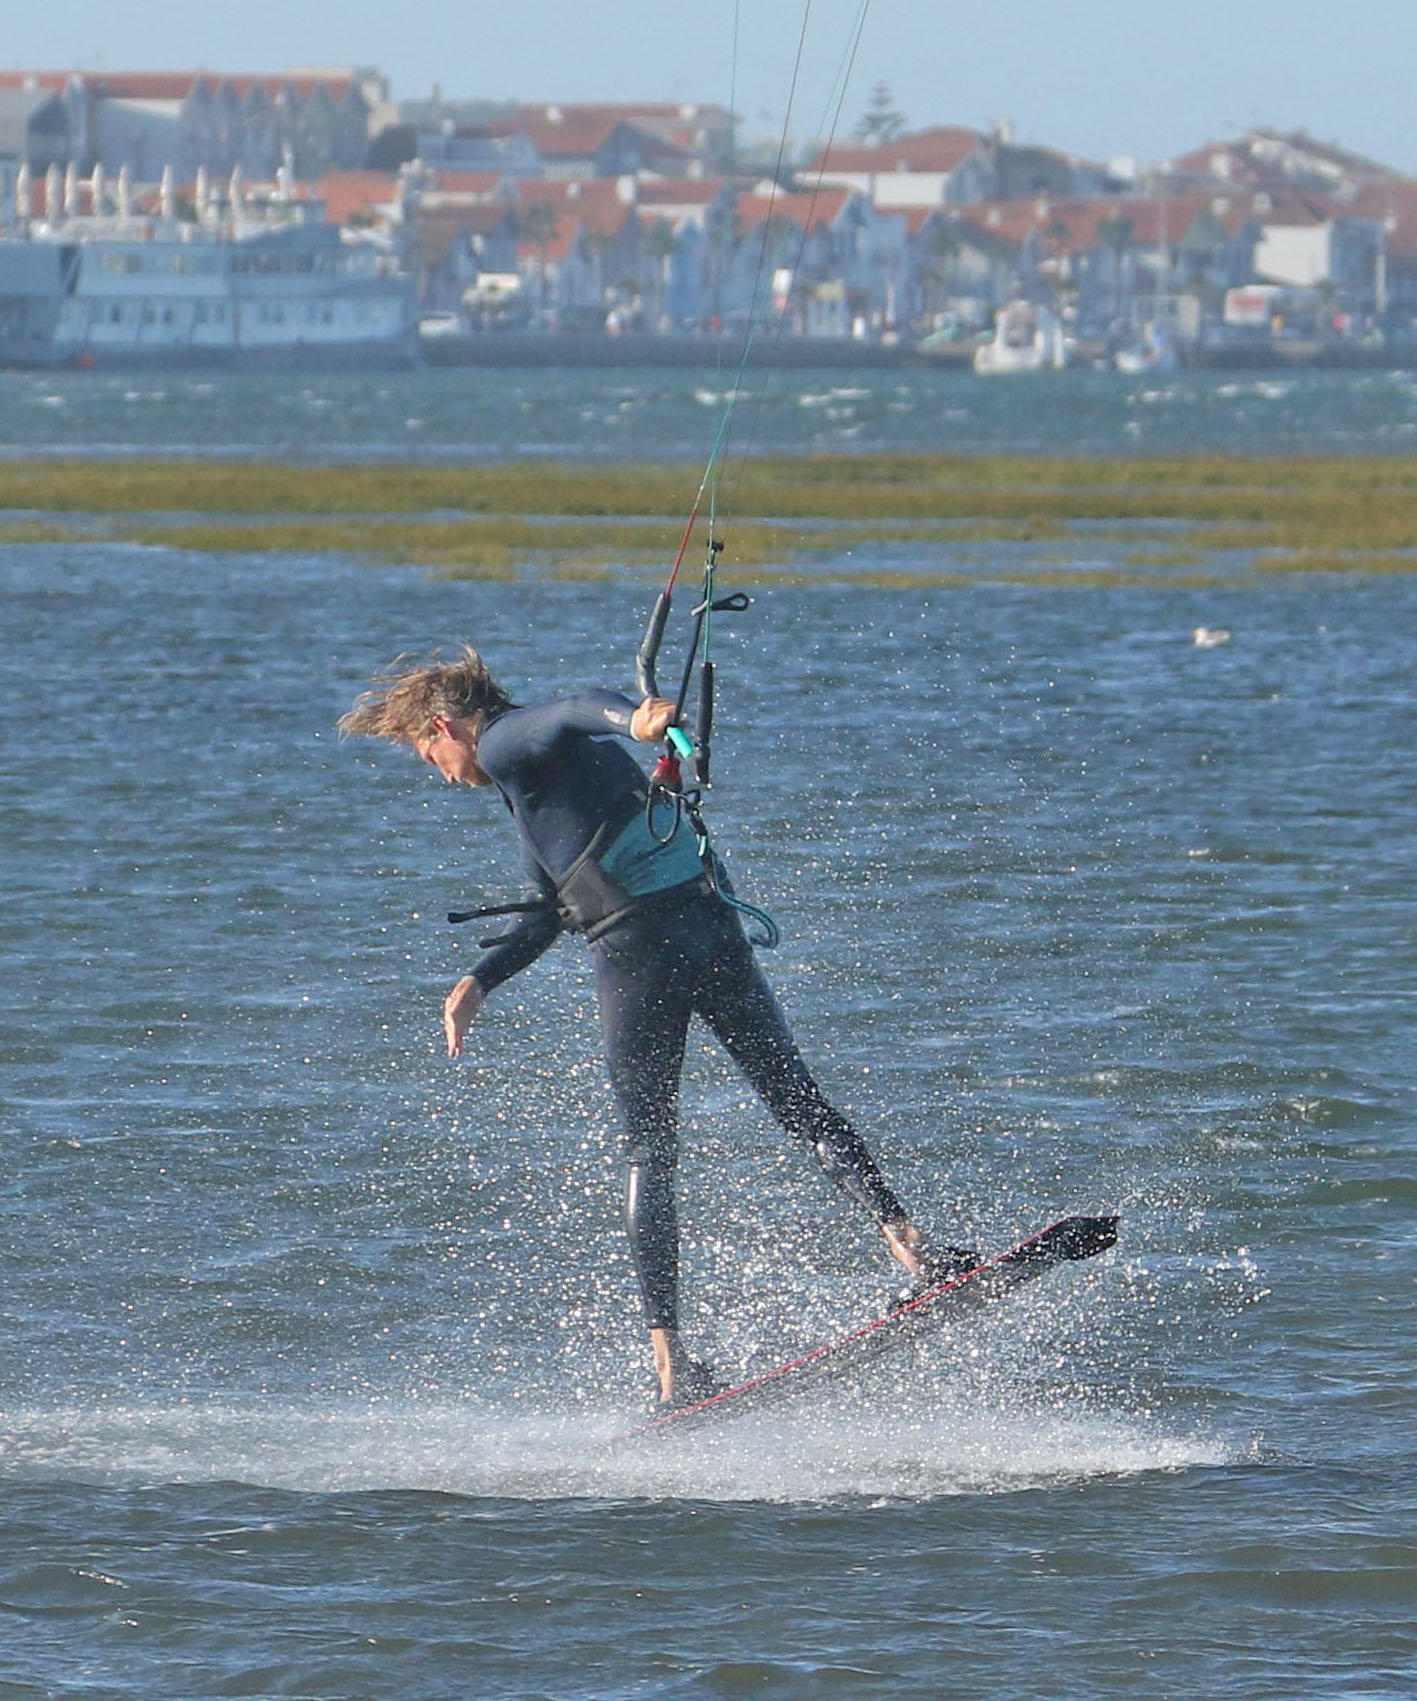
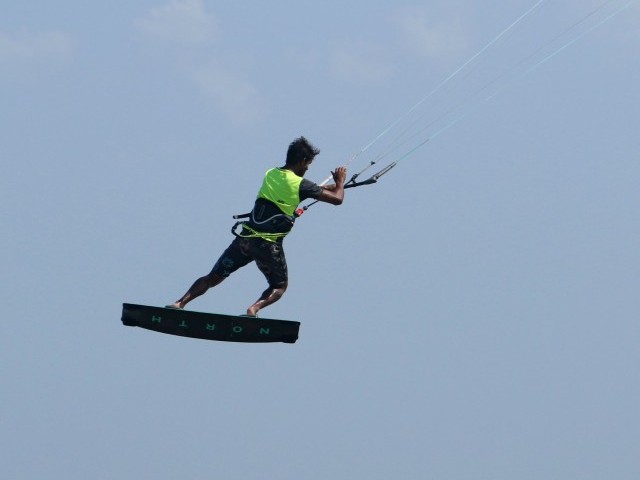
Tension Time Pic B.
Once you’re unhooked, it’s all about the pop. You can’t pop without tension in the lines, so that’s what you’re looking for. To borrow from before, because you stood up to unhook, you now need to get your weight low again and in a position to carve back up against the kite. Use the tail rocker of your board to initiate the carve by dropping your weight and hips over your back foot whilst flexing your back ankle and driving your back knee and weight across and upwind of the board to engage your toeside edge. All while keeping the kite still and the bar close. You can see how Christian has dropped his weight upwind, getting onto his edge and the tail, which will steer his board upwind. He’s looking upwind, his shoulders and hips are open whilst all his weight drops onto both feet, knees driving upwind and forwards, the same position as you should enter any hooked toeside move. In this position, the board will comfortably and quickly carve upwind and away from the kite, replacing tension on the lines and offering you power against which you can pop.
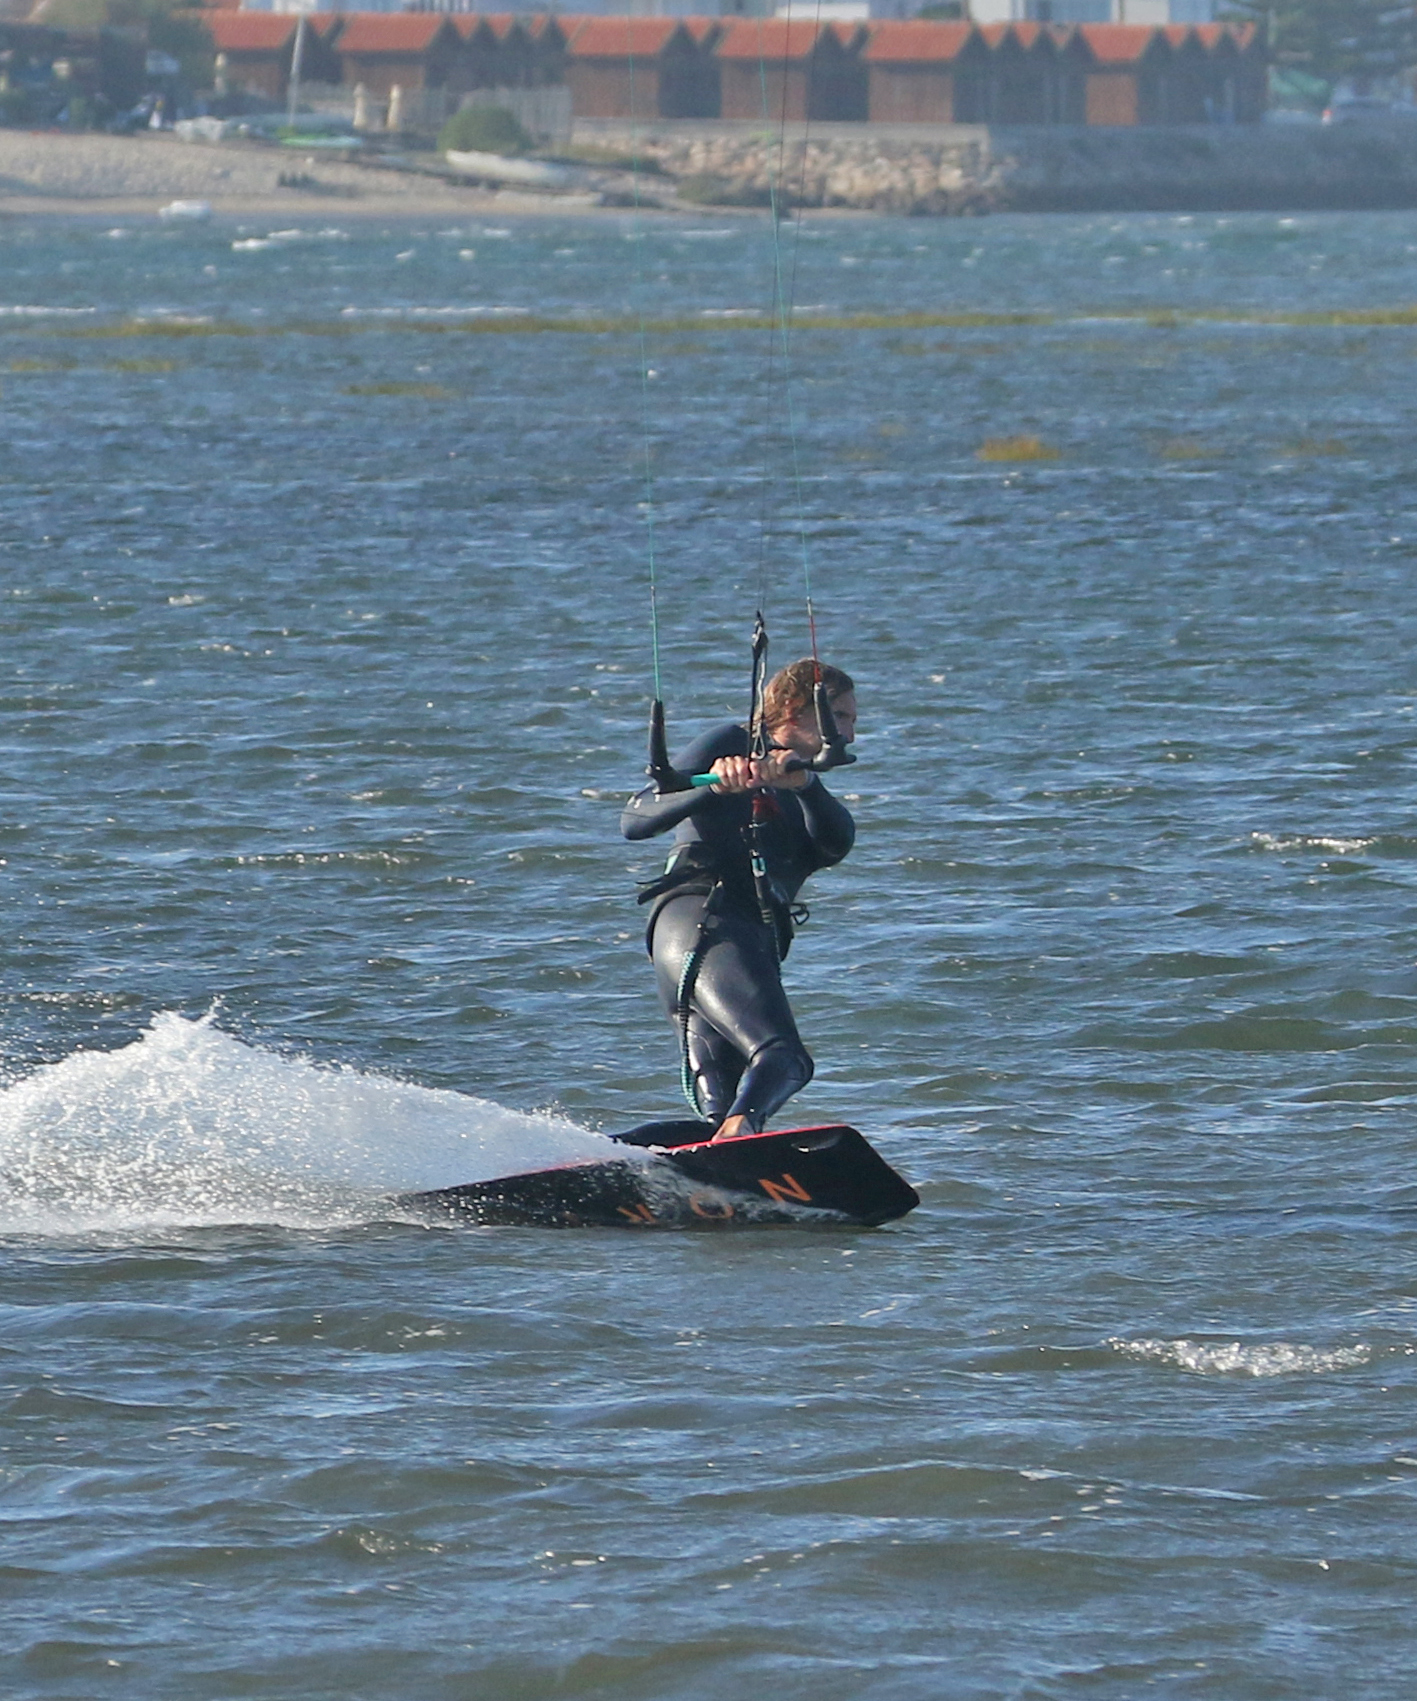
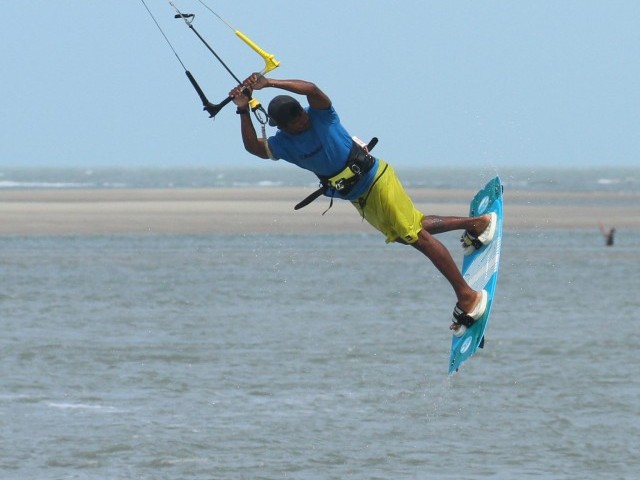
Pop Pic C.
Yet again, this bit should be no different to what you practised. From your strong carving position with weight on both feet, you’re free to rock back and explode up against your edge with your back foot whilst trying not to let the bar get away from you. You decide when to do this, and your cue is when you feel the kite pulling against you. Wait too long, and it’ll overpower you, pulling you over your board and off your edge. Go too early, and it’ll be a bit of a damp squib, a non-event. Your aim is to go up, which will be the consequence of exerting your energy in the opposite direction to the pull of the kite. It’s pulling you downwind; you kick yourself upwind. Here Christian’s weight is back so that the board takes off at a steep angle. This is the result of both legs being used; the front leg forces his weight over the tail fractionally before his back leg forces him up. Once again, the toeside popping equivalent of a heartbeat.


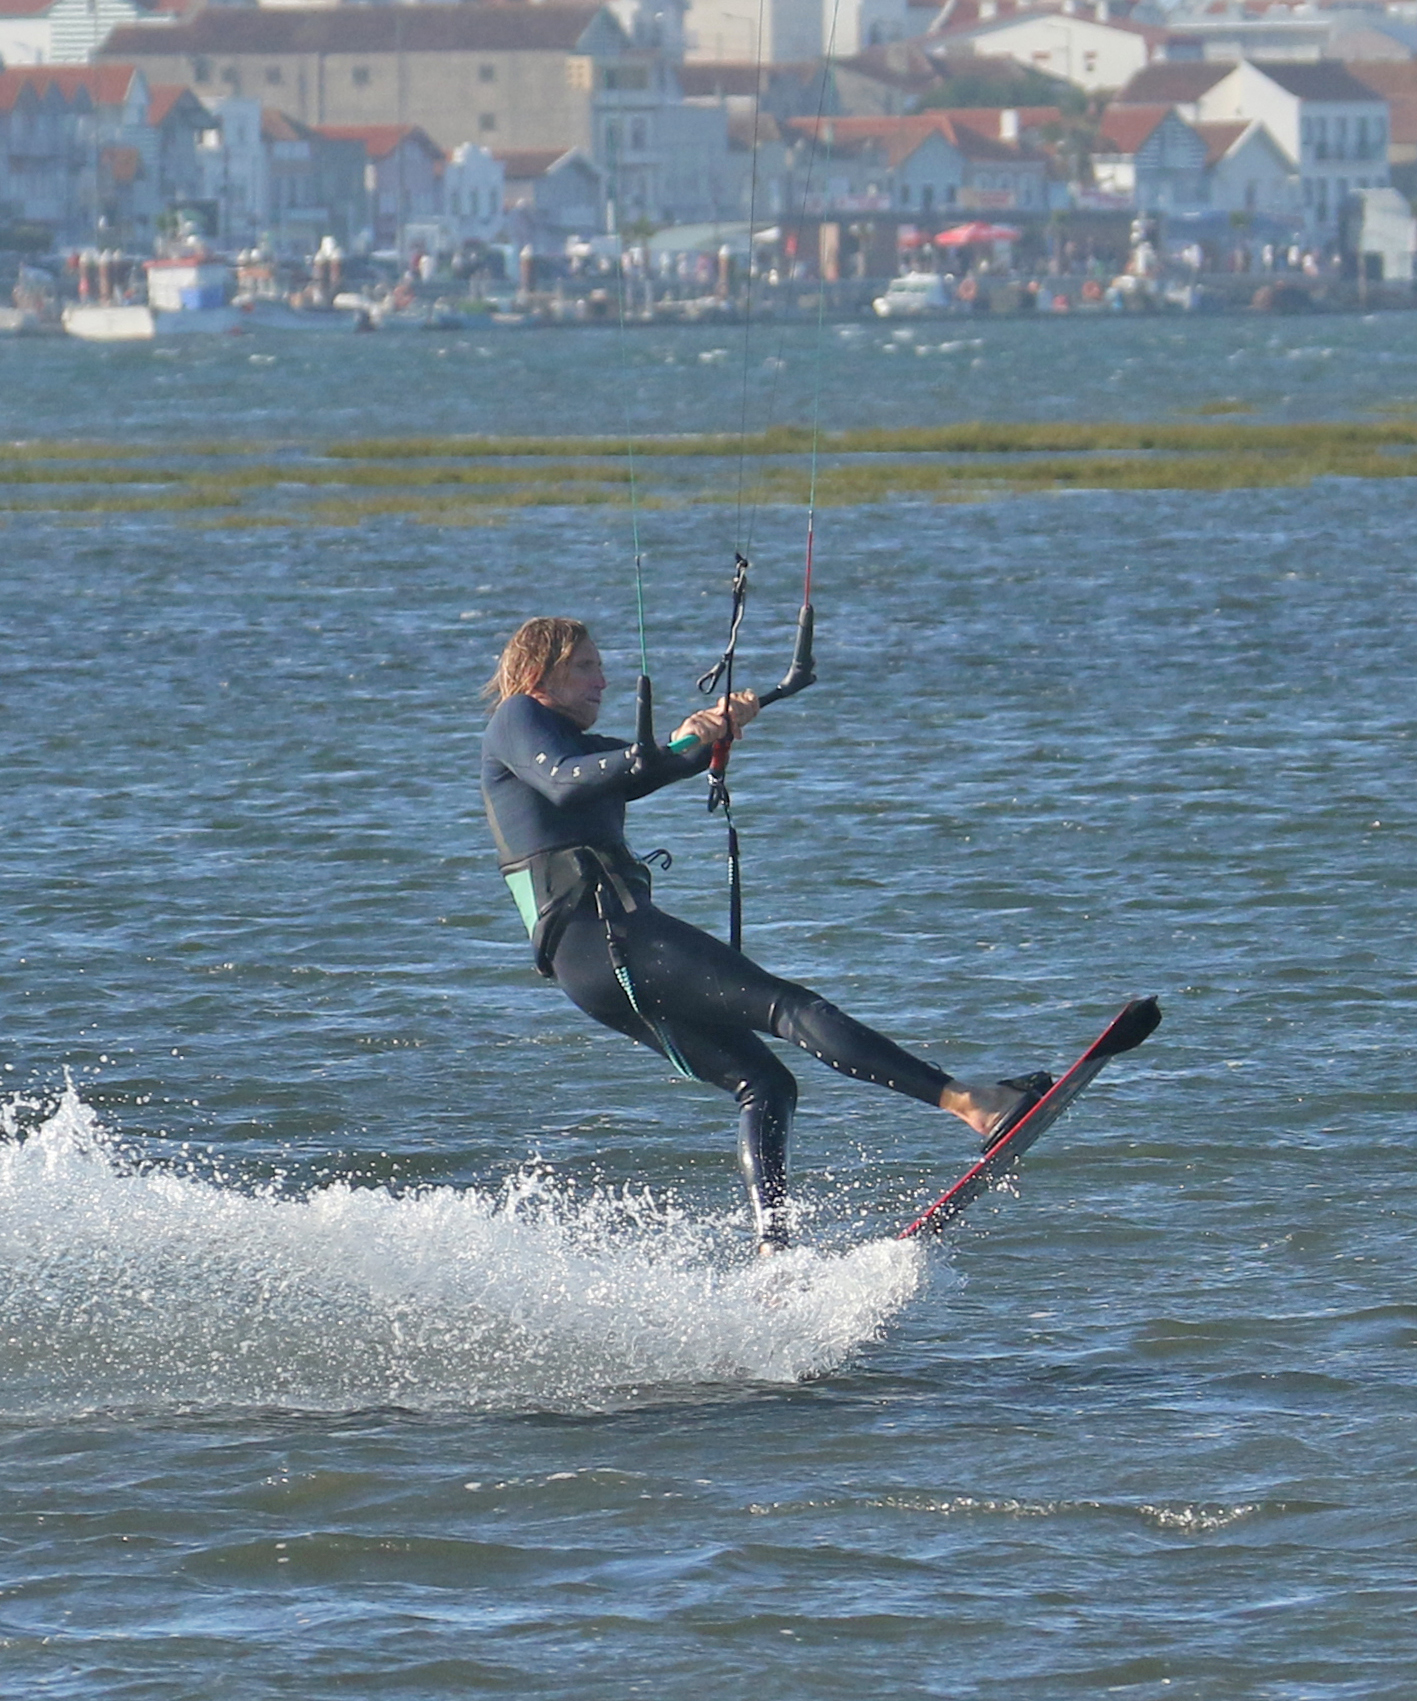
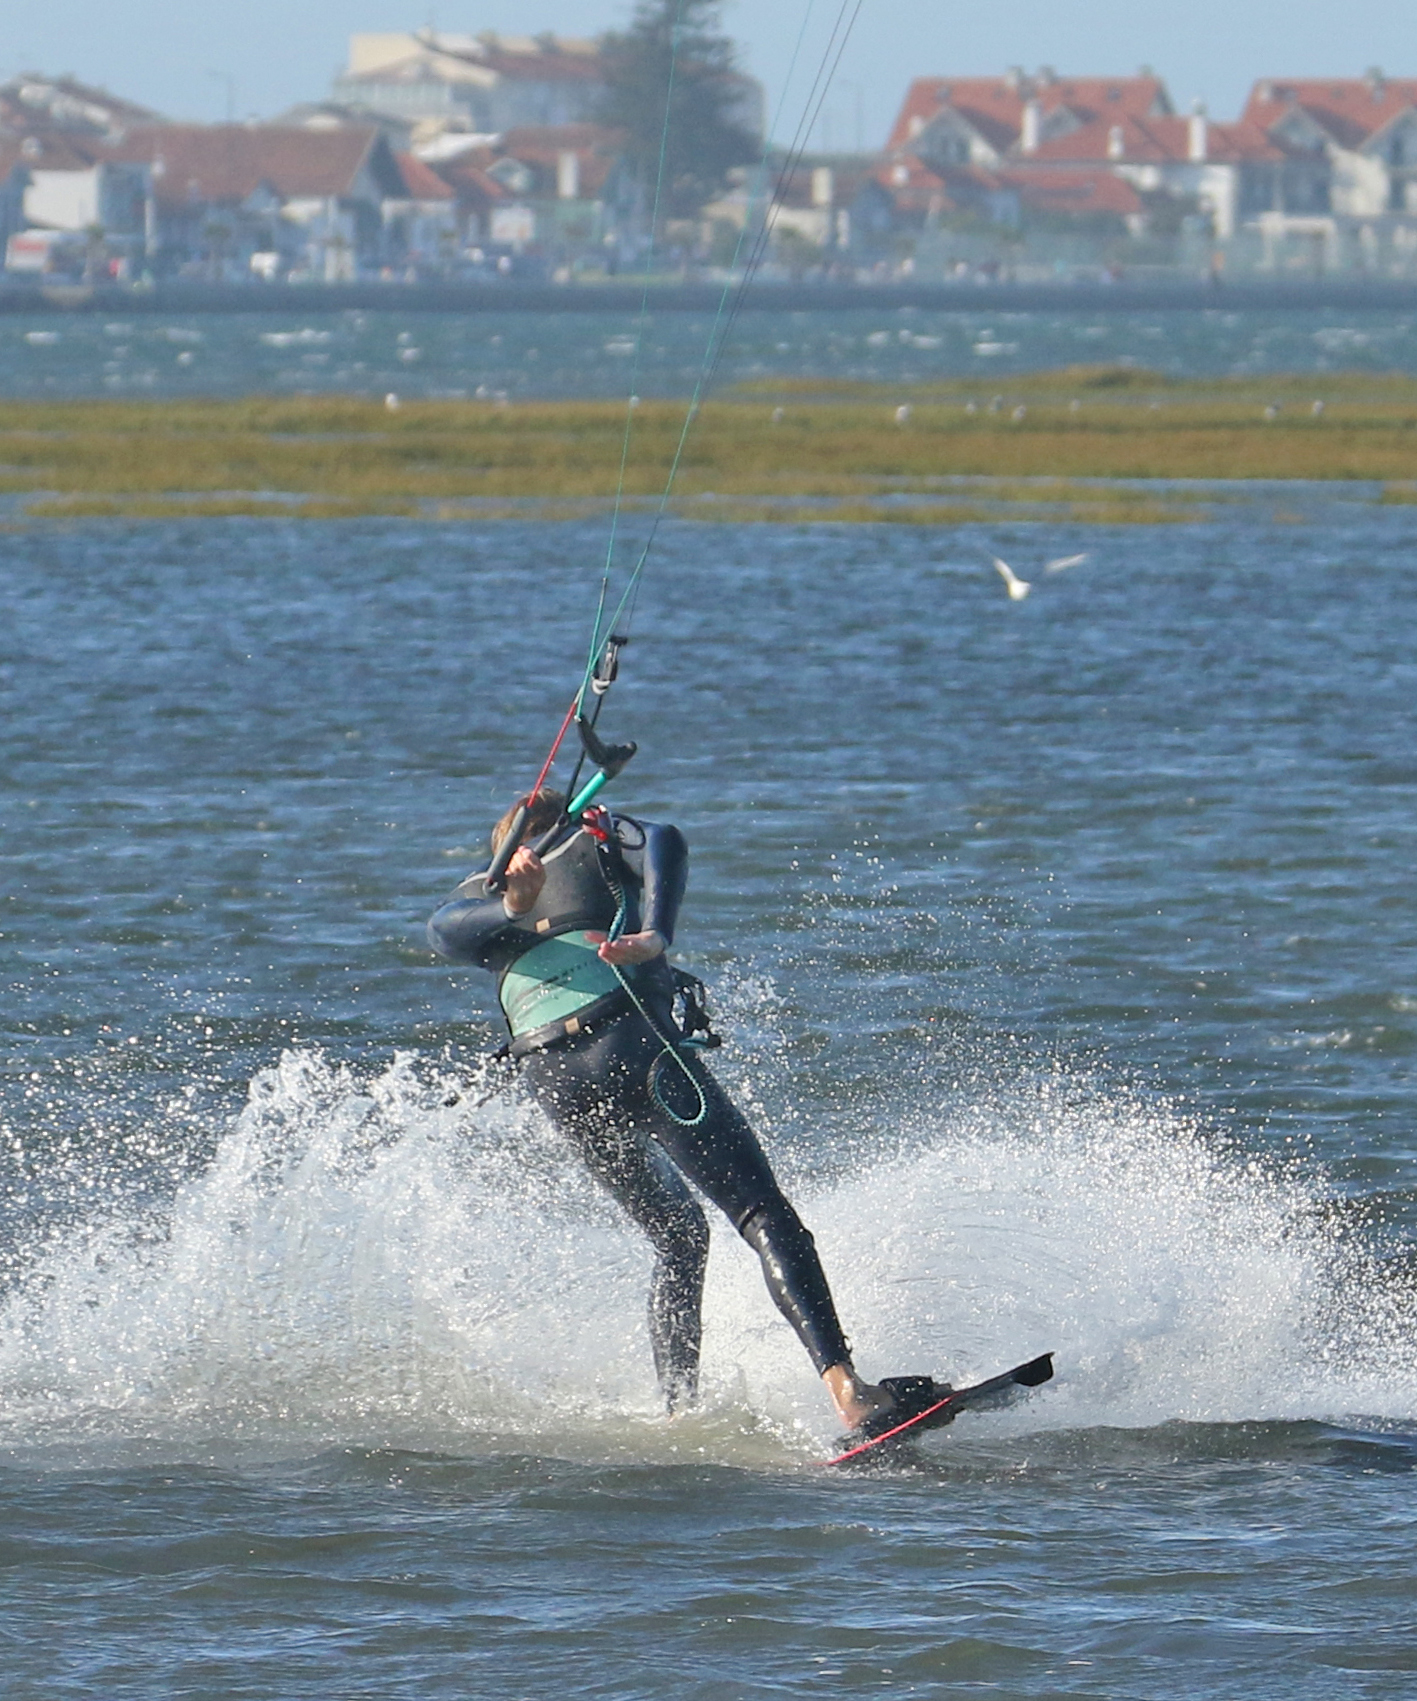
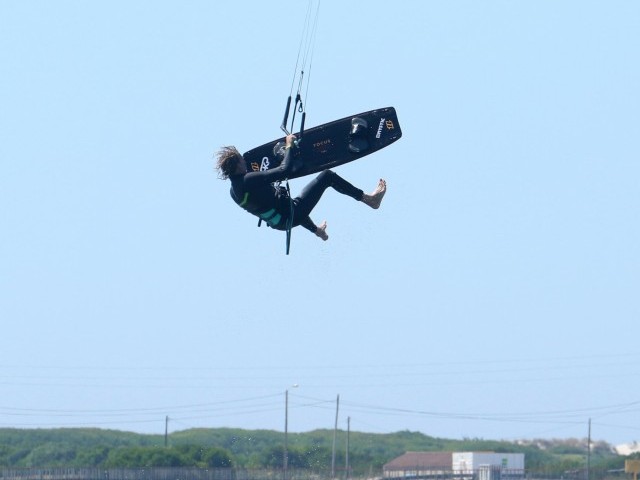
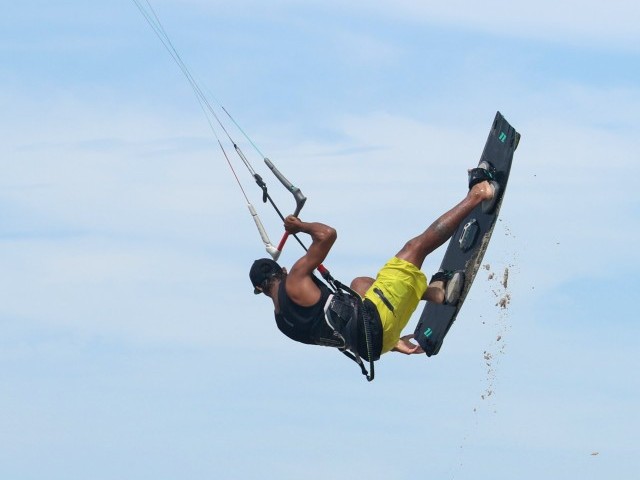
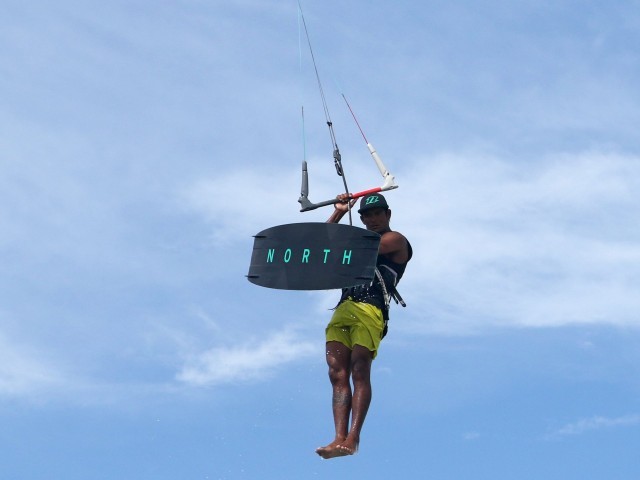
Turning Blind Pic D.
This is where things start to get interesting. The extremely good news is that even though you’re going for a blind landing, it is a continuation of what you’ve already accomplished. Previously once you left the water, you allowed yourself to be pulled forwards by the kite whilst keeping the bar close and lifting yourself over it. You then used your front hand as an anchor, a fulcrum point around which to turn so that you could lift your front knee and board around it, back to heelside. Now you’ll do the exact same, which will give you momentum, which you can use to go even further. As the nose of the board comes around, keep going by turning your head back, allowing your front knee to come under the bar. This is about commitment. As you turn away from the bar, you have three jobs. Firstly, start to twist the bar down with your front hand. Secondly, bring your back foot up, lifting the tail of your board up towards your bum. And last but not least, as you turn, you need to release your back hand. These three movements are precursors of what’s to come and can, no should, be practised on land. We’ll come back to this a tad later. If you have a quick look at Christian, you can see how he’s rotating around the same anchor point as before. However, as his front knee comes through, he’s turned his head, his bar is twisting down, almost staying parallel with his shoulders, and he’s lifting his back foot.
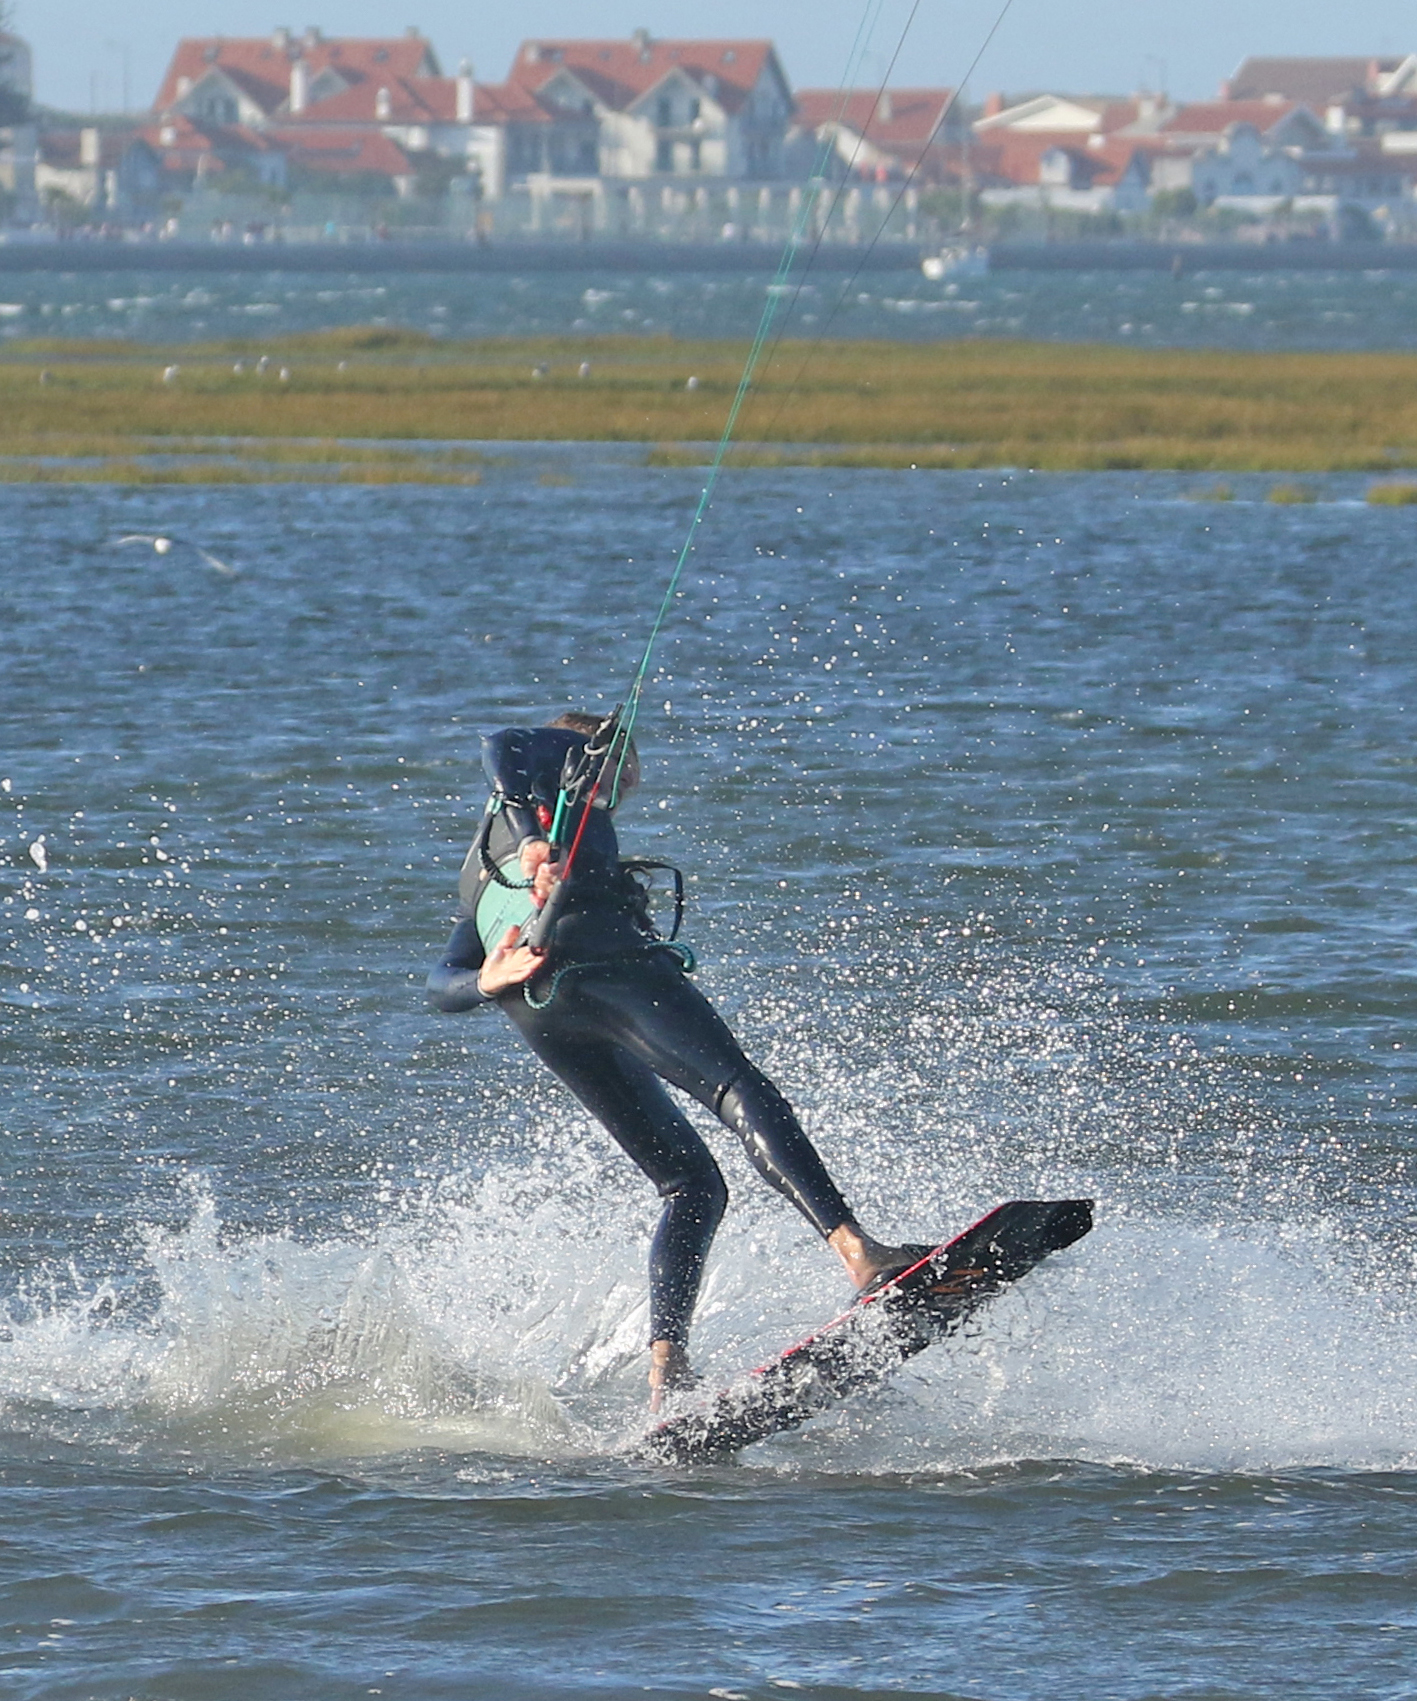
Land & Twist Pic E.
This stage is the reason for the above, the set-up for your landing. Rotating around your front hand with the bar in allows you to stay upright and balanced. By turning your head and twisting the bar, it not only sets the turn to blind, but it actually allows you to turn further, twisting your palm up and unblocking your shoulder. And by lifting your back foot, your board will land nose first so that even if you don’t turn enough, the board will pivot around the nose and turn further. If you get this far, the future is bright. Here Christian has released his back hand, which allows him to twist the bar further, which has the knock-on advantage of allowing him to turn his entire body away from the bar, which in turn brings the board around to blind. He’s landing on the nose of his board. From here, you have to take the landing. It’s oh so tempting to try and rush the pass, but you need to land first so that you’re in position to pass. Patience pays.
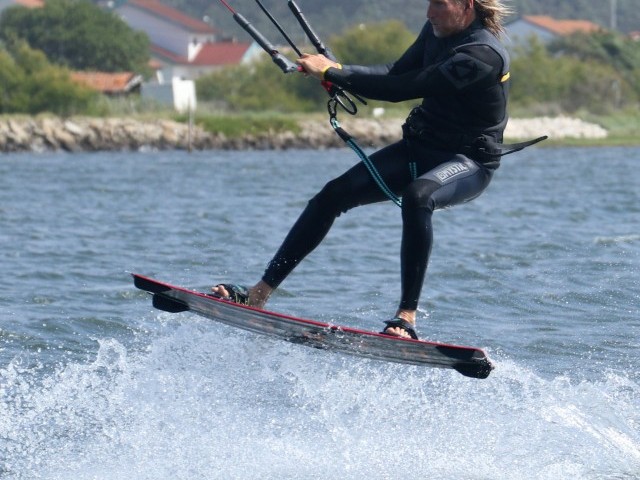
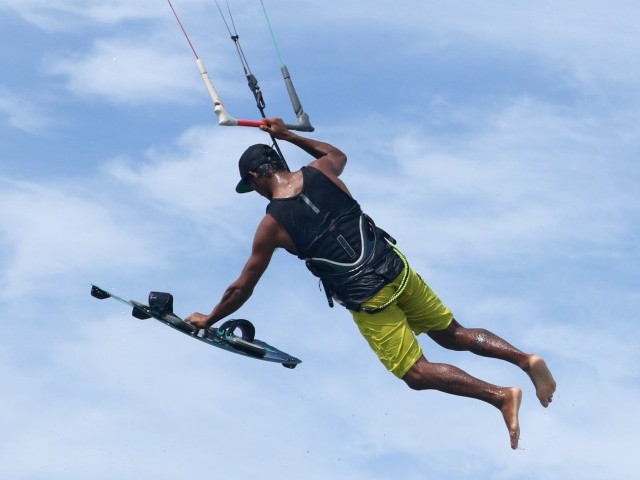
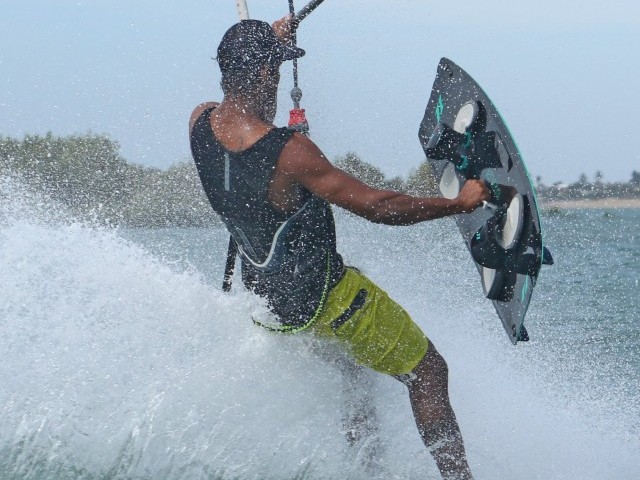
Double Take Pic F.
To make the pass simpler, you’ve got to look for the bar both visually and physically. Turning your head once you land has the effect of turning your shoulders even further. This does two things; firstly, it will help to move your weight onto your heels, and secondly, it’ll give you more reach with your free arm. With weight on your heels, you will turn downwind towards the kite, ditching tension in the lines and therefore bringing the bar in closer. As your shoulders turn and the board moves towards the kite, you can wrap your front arm and the bar into the small of your back, palm up, placing the bar within easy reach. As Christian turns his head, his body follows, the board turns towards the kite, and Christian almost rolls around onto his bar. Now you can physically look for it…
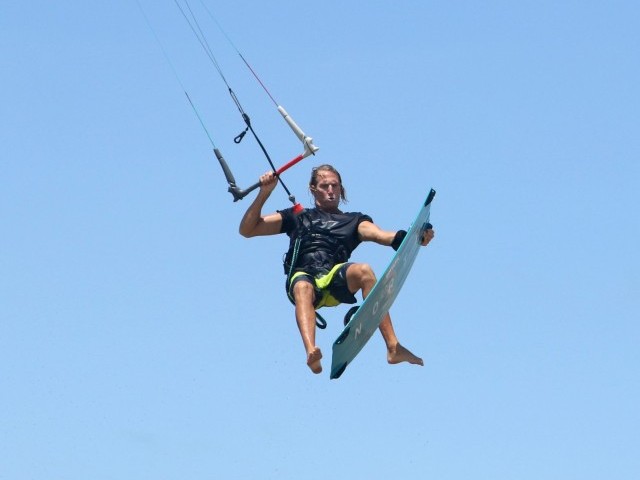
Hand to Hand Pic G.
With the bar twisted and patiently waiting behind, you can go for the pass, physically looking for the bar with your free hand. The movement which you will practice on land first is very hand to hand. Your hands are very well acquainted; they can find each other in the dark, underwater, even in your sleep. Use this to your advantage. As long as you twist your free palm up and reach behind you, your hands will reunite. Once they do, you can grab the bar and then release the hand you’ve been using. At the same time, keep turning your head and look forwards to where you’re going, as this will give you a sense of direction and synchronise your movement with the board and kite. In the photo, Christian is looking around, his hands have found each other, he’s grabbed the bar palm up and released his front hand.
Back to Your Toes Pic H.
Once you’ve passed the bar, you can stand up. You’ll be toeside, holding the bar in your back hand and hopefully, your kite won’t be wet. The beauty of passing from front to back hand, and thus a blind landing, is that it encourages the kite to dip when you turn to blind, but it then lifts it once you pass – as long as there’s tension in the lines. As such, once you’ve got your bearings, check your kite. If it’s low, get back onto an edge sharpish. If it’s high, you can either hook straight back in or let it loop down to get some speed back up. You can clearly see that Christian has magically ended up back on his toes as if nothing happened.

Top Tips
You can’t practice the rotate, twist and pass movement enough. You don’t need to be flying a kite, just holding a bar whilst rotating around your front foot. Concentrate on twisting the bar whilst you still have two hands on it. Once you have released, twist some more, and you’ll really get a feeling of how that unlocks you for the coming pass. This is even more important if this is a new blind side or you’ve never surfaced passed before. This seemingly simple twisting action really is the key to riding away.
Landing blind is an add on; treat it as such. Concentrate on your pop and gaining balance in the air, and only then can you continue to blind.
Commitment is also essential. It will always be considerably easier to go for broke if you’re not maxed out, full speed, gung ho. As long as you’re planing, you can pop, so start off gently and build up from there.
Common Problems
Not turning to blind. If you don’t twist the bar, you can’t get your body moving. That said, turning your head is key. You quite literally have to turn your back on proceedings to make this happen.
Getting pulled over into the water on landing. This is a result of the bar getting away from you. Blind is a landing. The pop comes first. Separate the moves so that you get over and close to the bar. Otherwise, your board and feet are left behind, and even if you turn wonderfully, your body will end up downwind of your board.


Falling quite hard and possibly catching your edge. It could well be a result of landing flat on the board. Make sure to lift your back foot so that you land a little nose first so that you pivot off the wind as the board touches down.
Landing fine, but then getting pulled as you’re attempting to pass. It’s because you’ve got weight on your feet, read toes, rather than your heels. You’re edging against the kite, putting tension on the lines with only one possible outcome. Make sure that you turn your head, which will put weight on the heels and turn the board towards the kite. Don’t rush.
Keystones
- Concentrate on your pop first
- Up and over the bar
- Front knee through, turn head and release bar with back foot up
- Land and then turn head, weight onto heels
- Hand to hand, pass bar and look forwards
This technique article was in Issue 89 of IKSURFMAG.
Related
By Christian and Karine
Christian and Karine have been working together as a coaching team, running improver to advanced kitesurfing clinics since 2003.
