
Unhooked Pop from Toeside
Technique / Advanced

Introduction
By jolly, it feels like an eternity since we last entertained the realms of unhooked. High time to put things right, make amends and get you frothing for a plethora of possibilities. We’re going to delve into the unhooked pop from toeside because it’s the base and fundamental of an entire complimentary box of tricks that we can excitedly unpack in due course.
To be frank, popping from toeside requires a dynamism and weight shift that isn’t exactly child’s play. However, just like all the skills that we work on, with a bit of understanding, focus and practise you’ll soon enough be celebrating wildly and wondering what all the fuss was about! Let’s ponder what’s involved.


We will assume that you’re already an unhooker, but a quick recap never hurt anybody. If you don’t get this dialled, you’ll be making the next few pages considerably more challenging than they need be.
First a brief sojourn into kite trim. Regardless of which kite you use, it needs to fly efficiently when you unhook. Simply put it needs tension on the back lines to give you power, but not too much or else it will stall. This means that using the trim strap to position your sweet spot, and therefore your bar down low near the chicken loop is essential. If you don’t trim and leave your sweet spot up high your kite will stall, and you won’t reap the rewards of all the experience and hard work that some wonderful designer put into it. However, blindly trimming all the way in, with no regard for where the power ends up, could equally leave you with saggy back lines, jack squiddly power in the kite and a literal sinking feeling.
Secondly the art of when to unhook for a toeside trick deserves some consideration. There are two possibilities, to unhook whilst heelside or once toe side. We’ll favour the later, once toeside, purely because if you bear away whilst on heelside, unhook, switch to toeside and then contemplate popping, a kitesurfing age will have passed. Unless you’re riding a tank, and even if you keep good form, there’s a high probability that you’ll no longer have enough speed and glide to carve up and pop. The bonus here is that the very nature or switching or popping to toeside often involves an involuntary slackening of the lines due to a touch of flat board down wind. The result, an opportunist moment to disengage yourself from the chicken loop.
And dare we add, regardless whether you consider it a safety pin, chicken finger or donkey dick, it needs to be out of your hook!!!
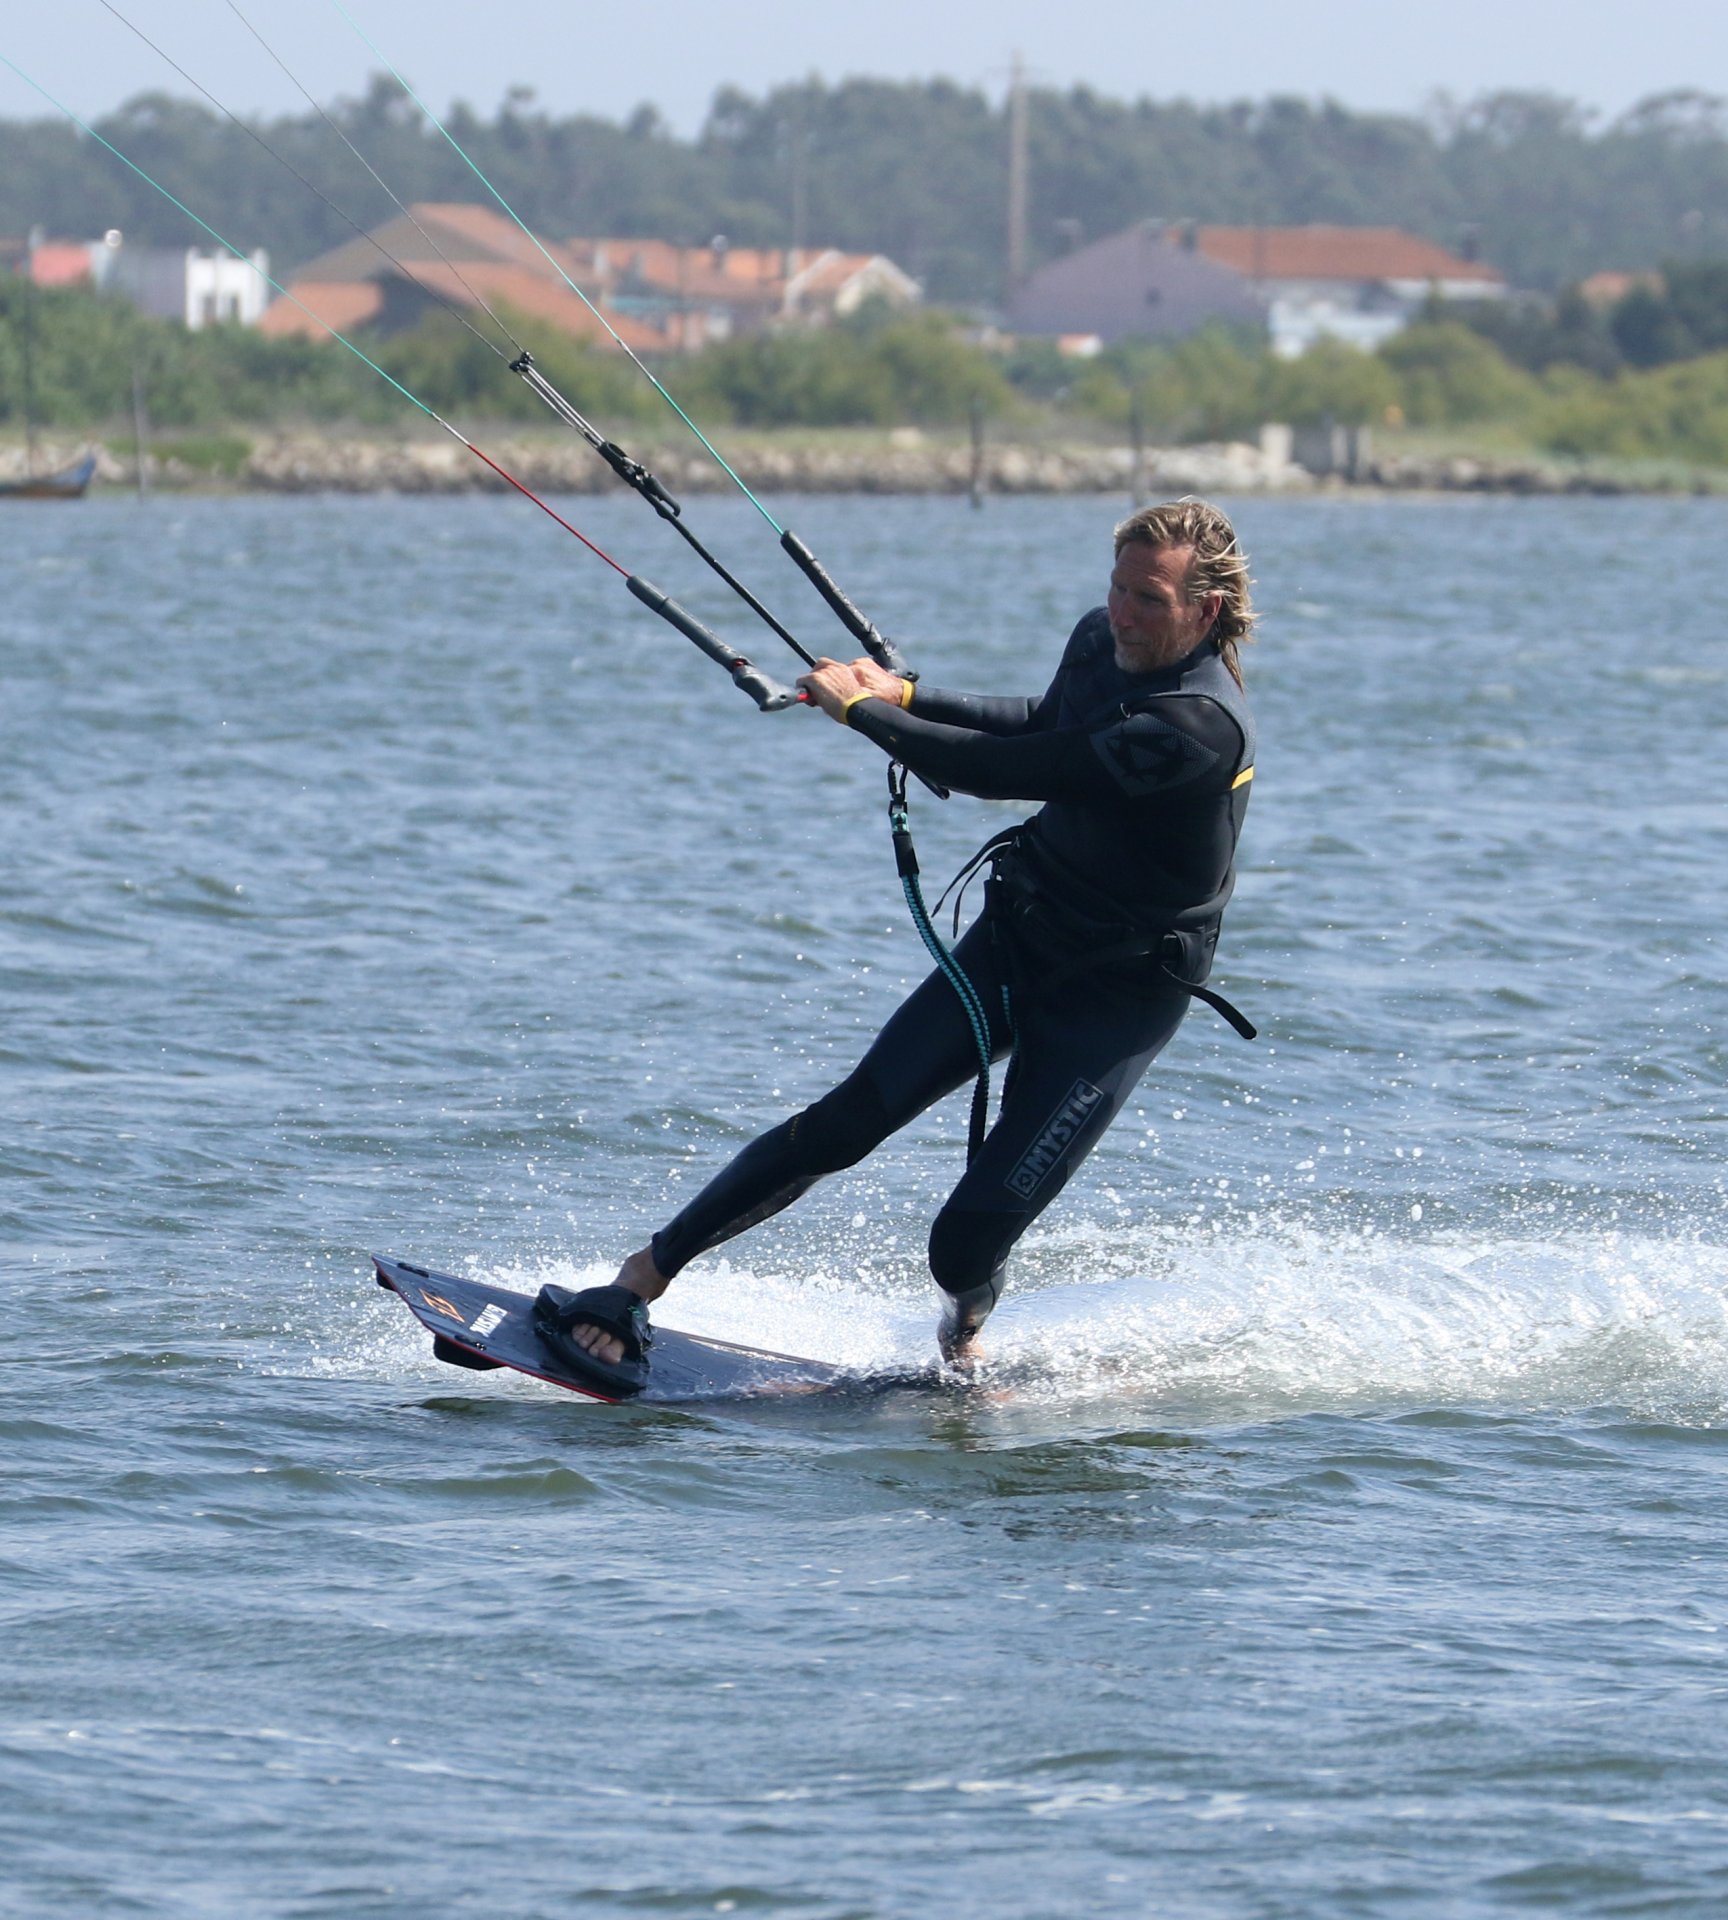
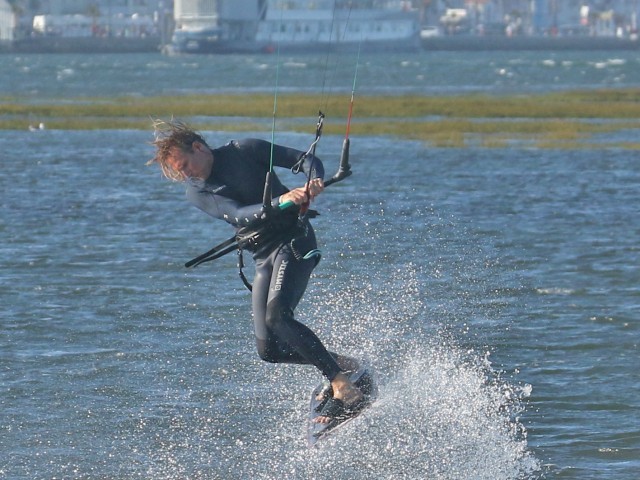
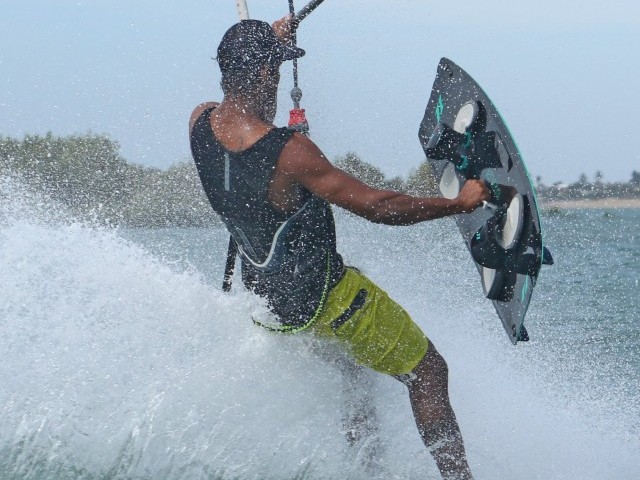
Unhooking Pic A
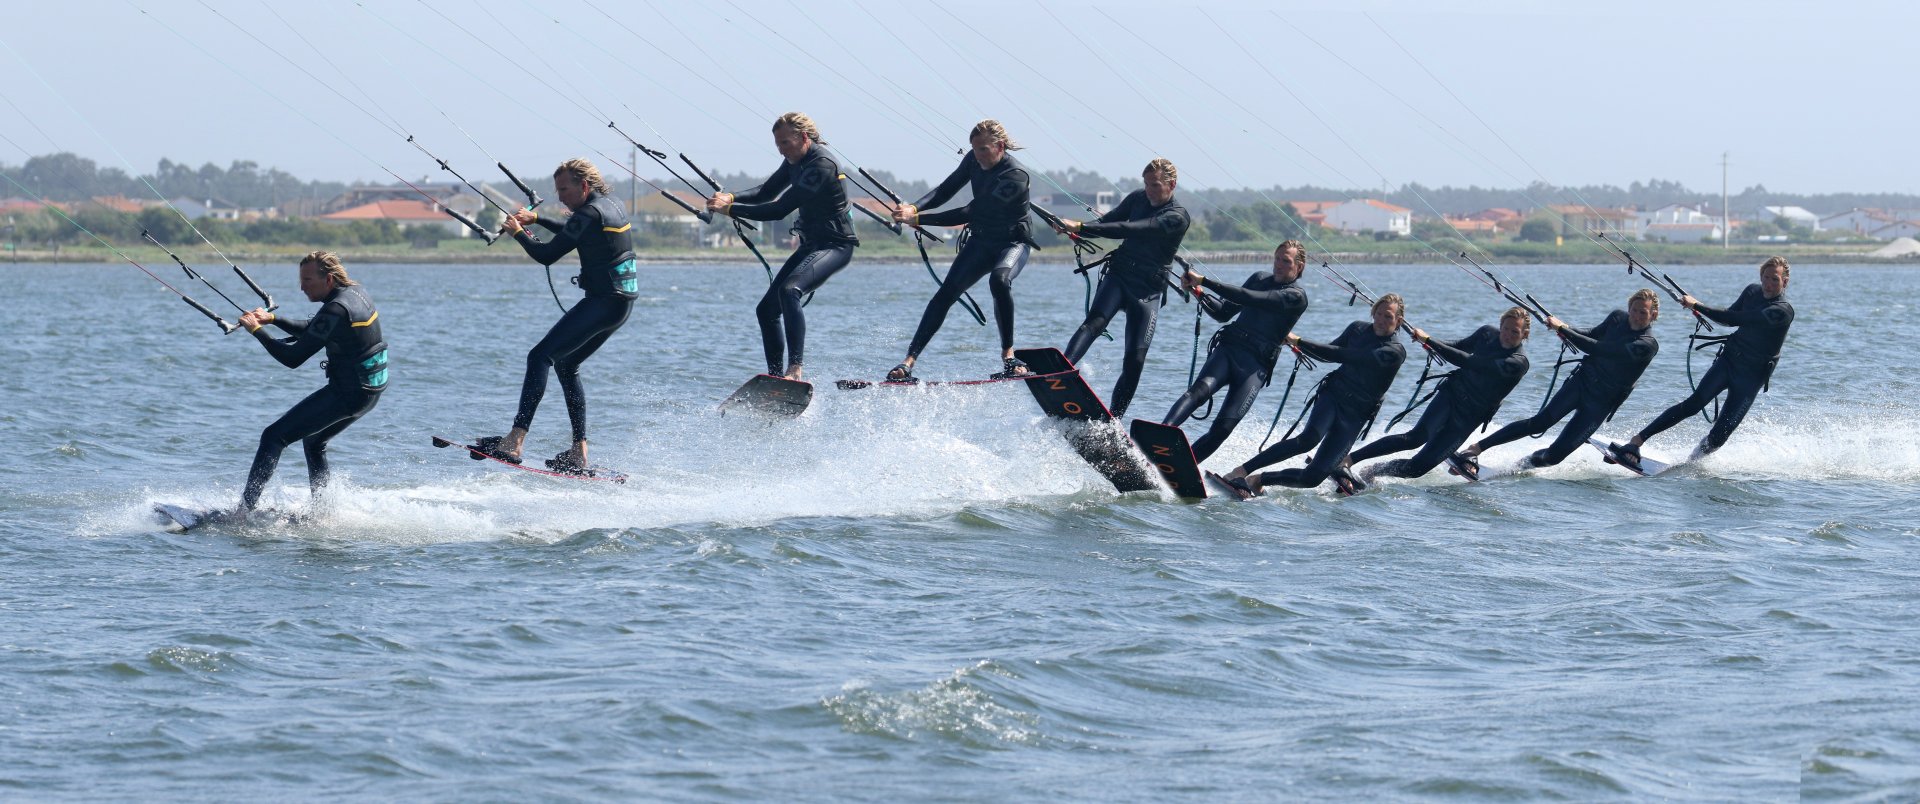
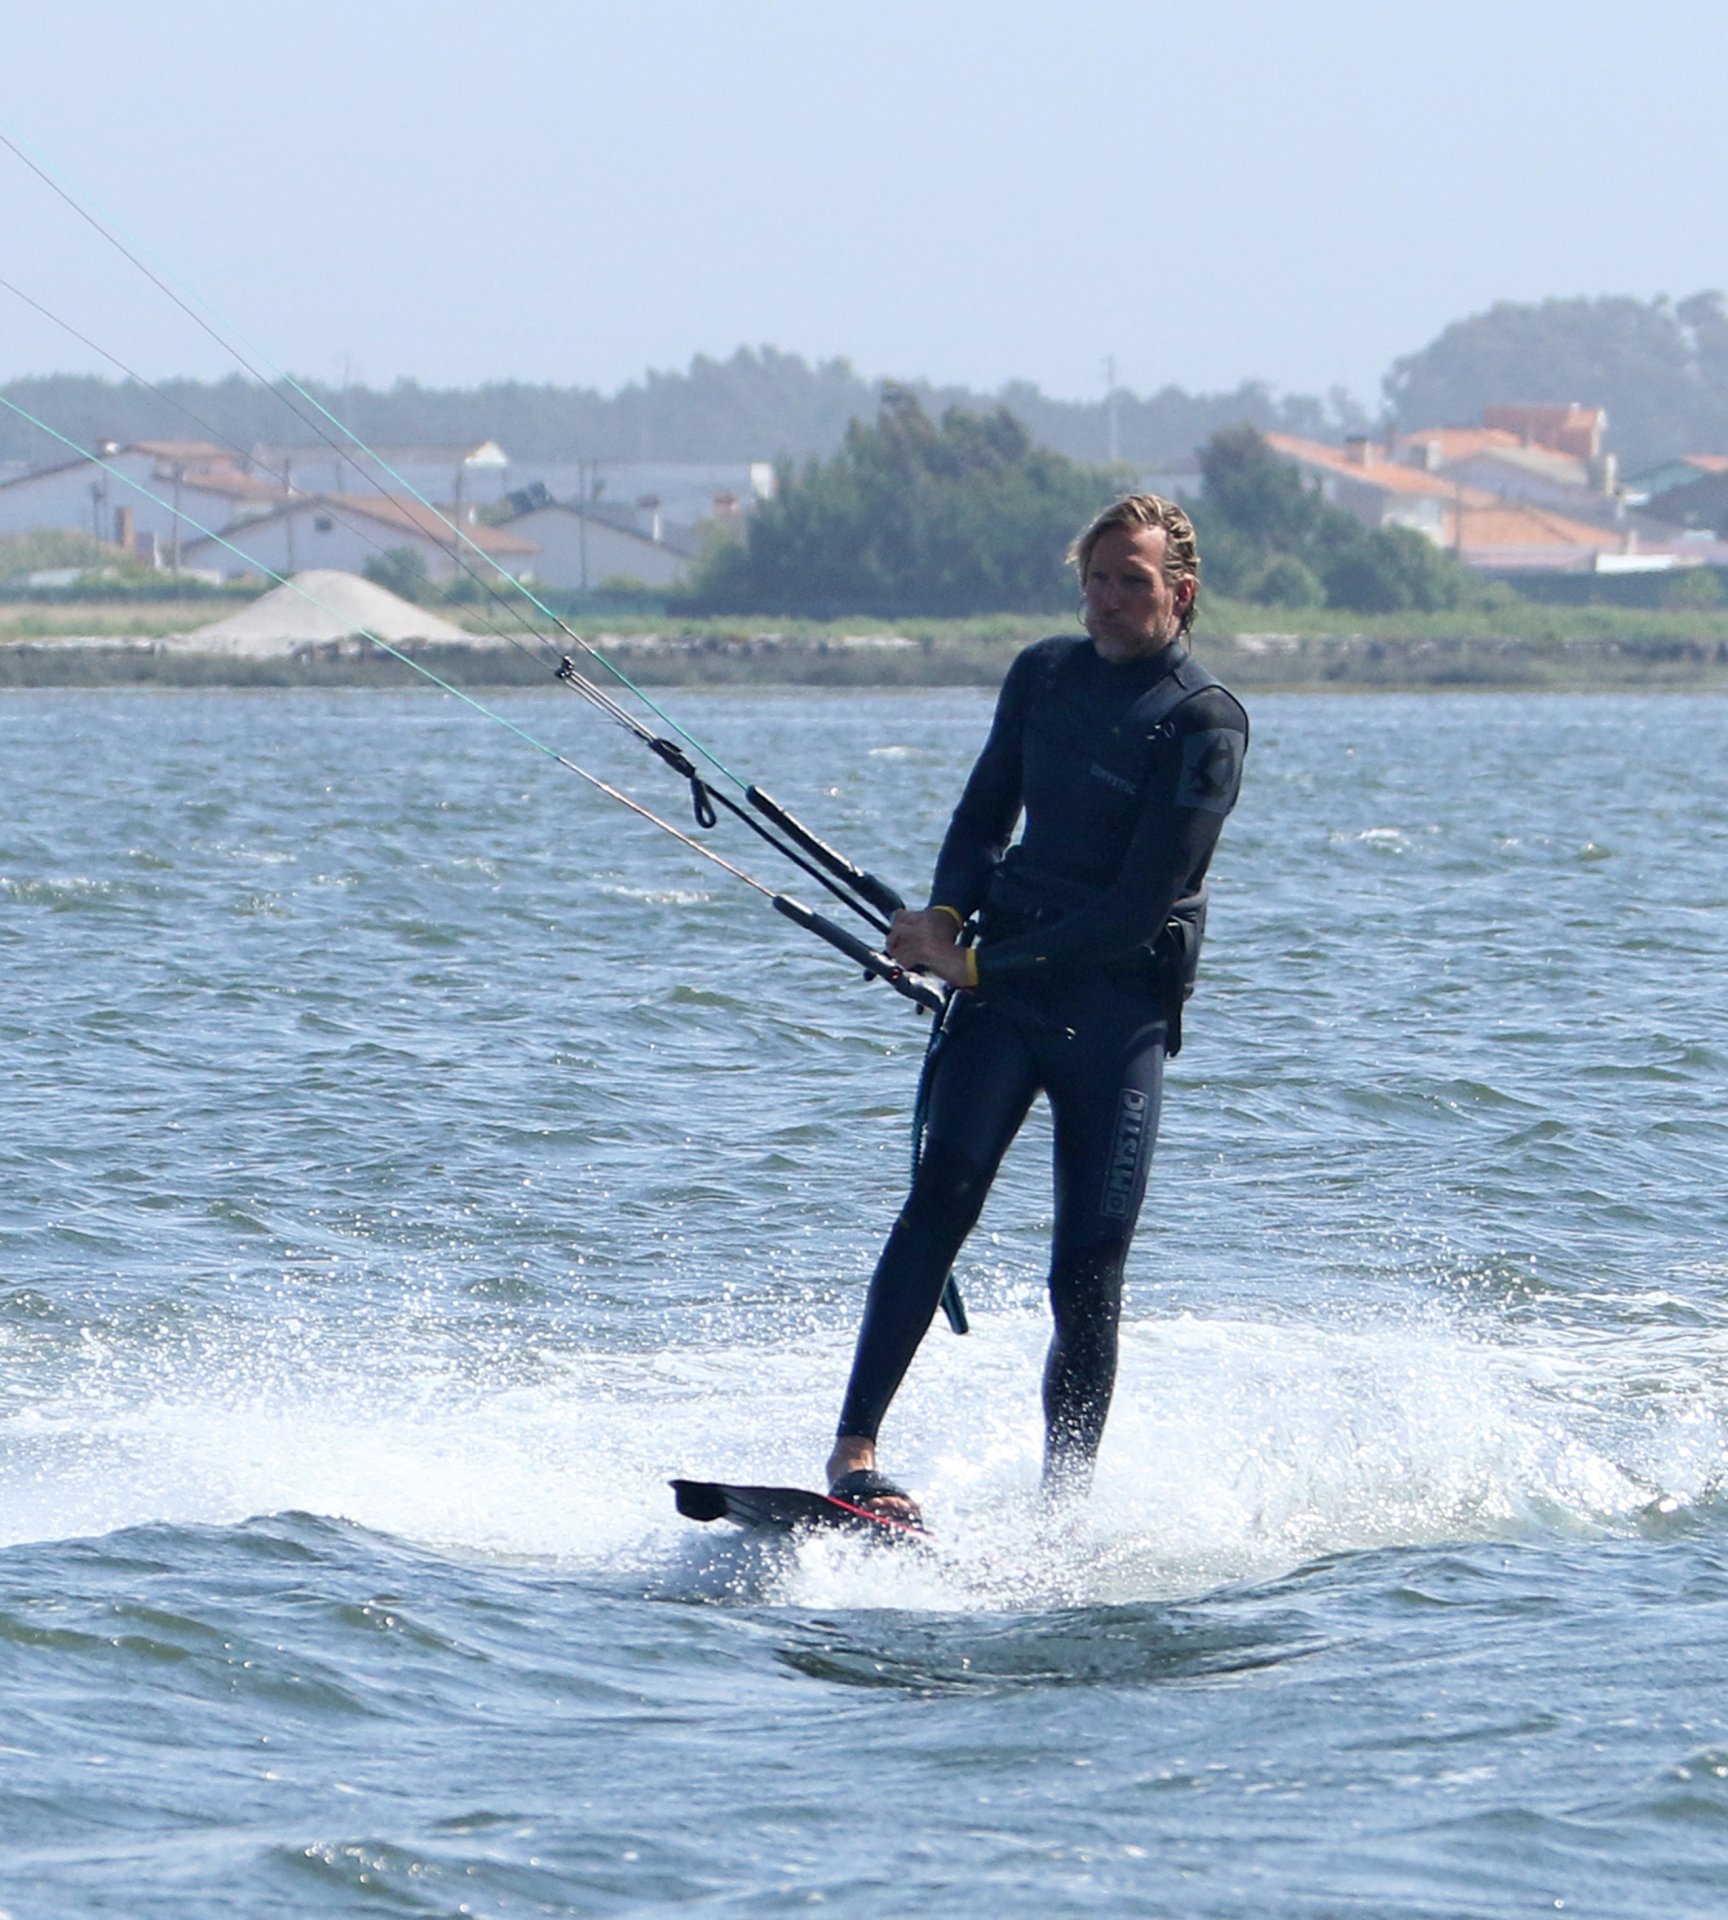
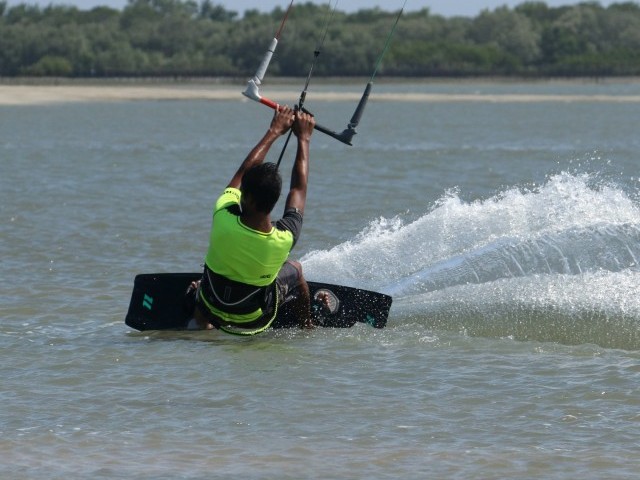
Your approach is all about set up. Trimming the sweet spot whilst keeping tension on an edge. With the power positioned close you may have to work the kite with a couple of dives to make sure that it’s flying happily and that you have enough speed. Get your hands centred on the bar to reduce your input and help keep the kite still throughout the move. Kite position, around 1 or 11 o’clock. Any higher it’ll be hard to unhook, any lower and it’ll be hard to pop. Once ready it’s time to toeside. Either switch with a slide or the gentlest of pops. If the water is flat, a quick slide is less likely to throw you off balance. However, if there’s any chop you run the risk of catching an edge because you’re entering with speed, so a quick, gentle, low, minimalistic pop is a fine plan. No massive carve upwind and extension of the back leg, just a squeeze of extra pressure and a lifting of the front leg. As soon as you’ve switched make sure that you keep the weight off your toes so that you’re not edging. Going straight back onto your edge is fairly instinctive if you’ve got a good toeside, so you might even need to weight your new back heel to flatten the board and steer it off the wind. As you do this stand up tall. This lifts your hips and shoulders up and will make the unhooking way less tricky. From this position, you can pull the bar in with your hands and push it down with your arms to free yourself! Looking at Christian, he’s standing tall, hands centred, his board is flat and with the bar pulled in, he’s pushing it down to unhook. Worth noting that he’s not looking at the kite or his hands but upwind where he’s about to go.


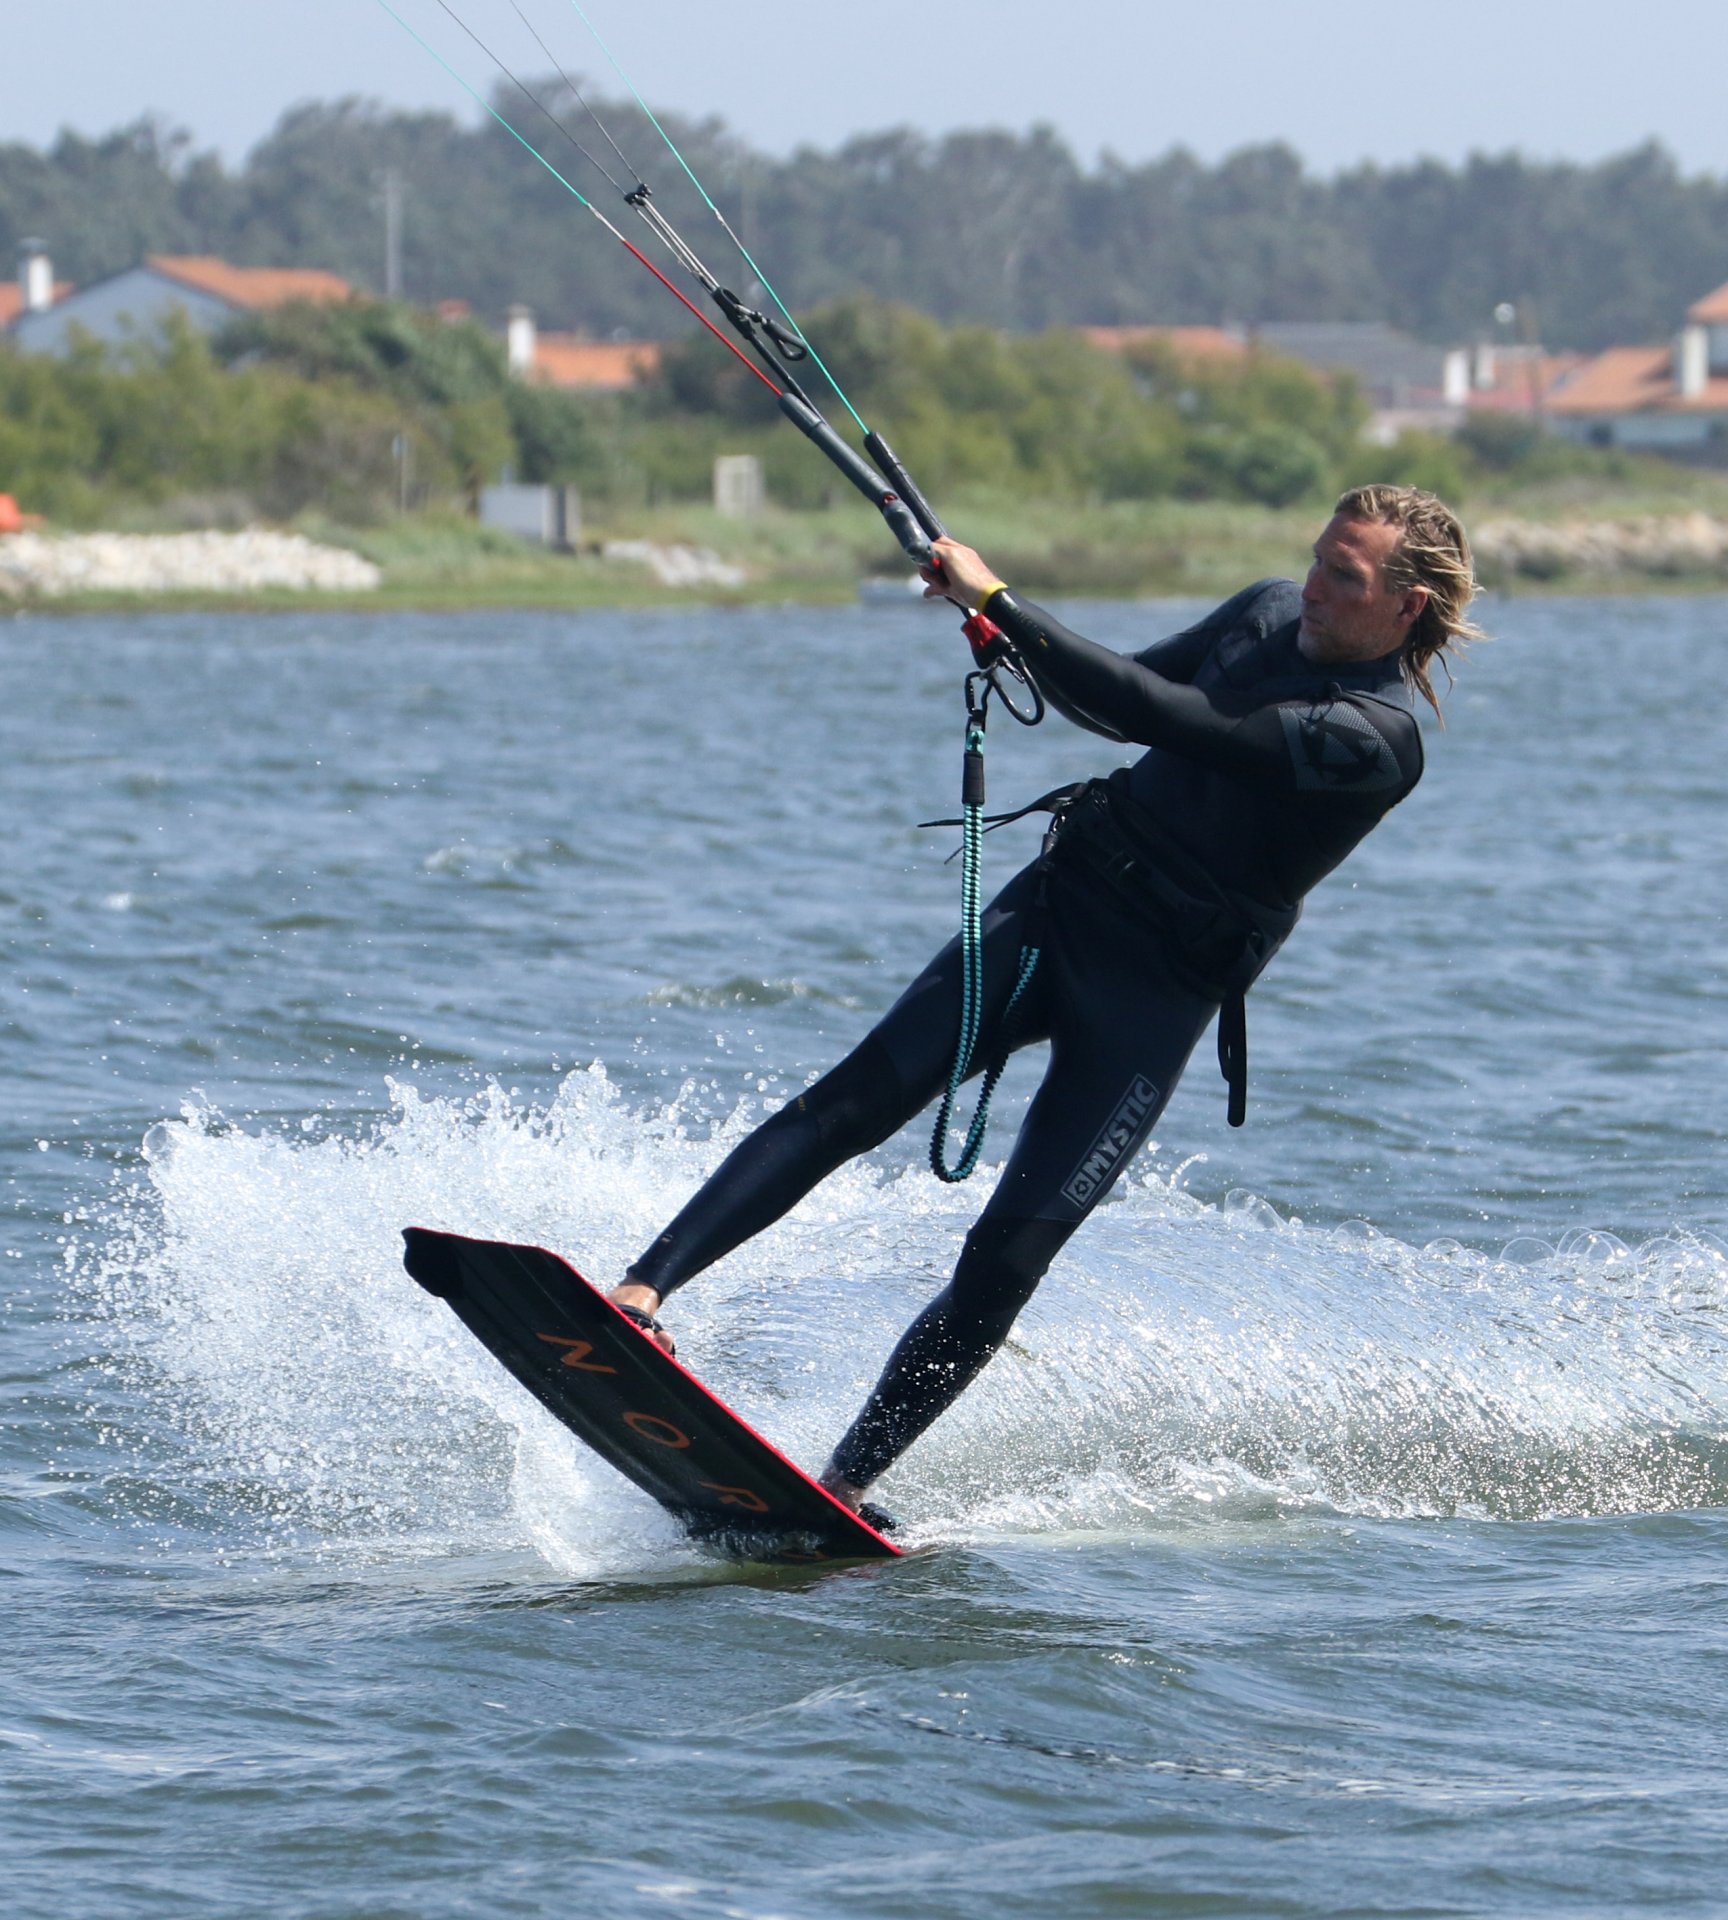
The Drop Pic B.
From the moment you unhook time becomes an even more precious commodity. In short, you need to get a wiggle on, chop-chop etc... The longer you’re moving on a flat board, towards the kite, the sooner you’ll lose tension and power and thus the ability to pop. To put this into context, it needs to be immediate, as soon as you unhook. Having stood up to unhook you need to get your weight low and in a position to carve up. Use the tail rocker of your board to initiate the carve, by dropping your weight and hips over your back foot whilst flexing your back ankle and driving your back knee and weight across and upwind of the board to engage your toeside edge. All while keeping the kite still and the bar close. You can see how Christian has dropped his weight both back and upwind, getting onto his edge and the tail, which will steer his board upwind.
The Carve Pic C.
Now that the board is steering upwind, you need to engage as much edge as possible so that the board carves up without stalling and stopping. Just like you would if you were heelside. Without morphing into a game of twister, this is mildly counterintuitive and more than a little alien at first because you’re unhooked. However, if you’re the proud owner of a strong toeside, this position is built from skills that you already have. Look at Christian, he’s looking upwind, his shoulders and hips are open whilst all his weight drops onto both feet, knees driving upwind and forwards. Same position as you should enter any hooked toe side move. Concentrate on moving your head forwards. You can see how Christian is breaking at the waist, bending himself and positioning his shoulders towards the front foot, whilst his chin literally rests on his leading shoulder. In this position the board will comfortably and quickly carve upwind and away from the kite, replacing tension on the lines and offering you power against which you can pop.
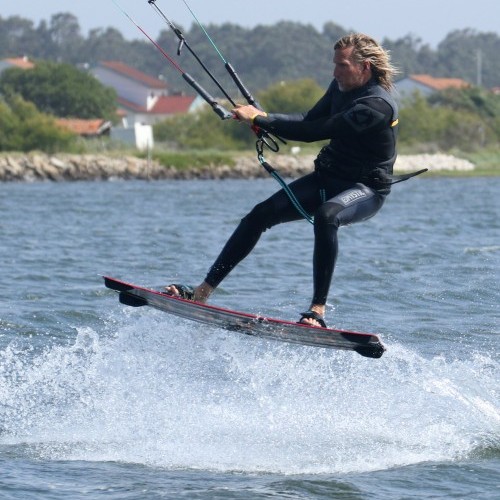
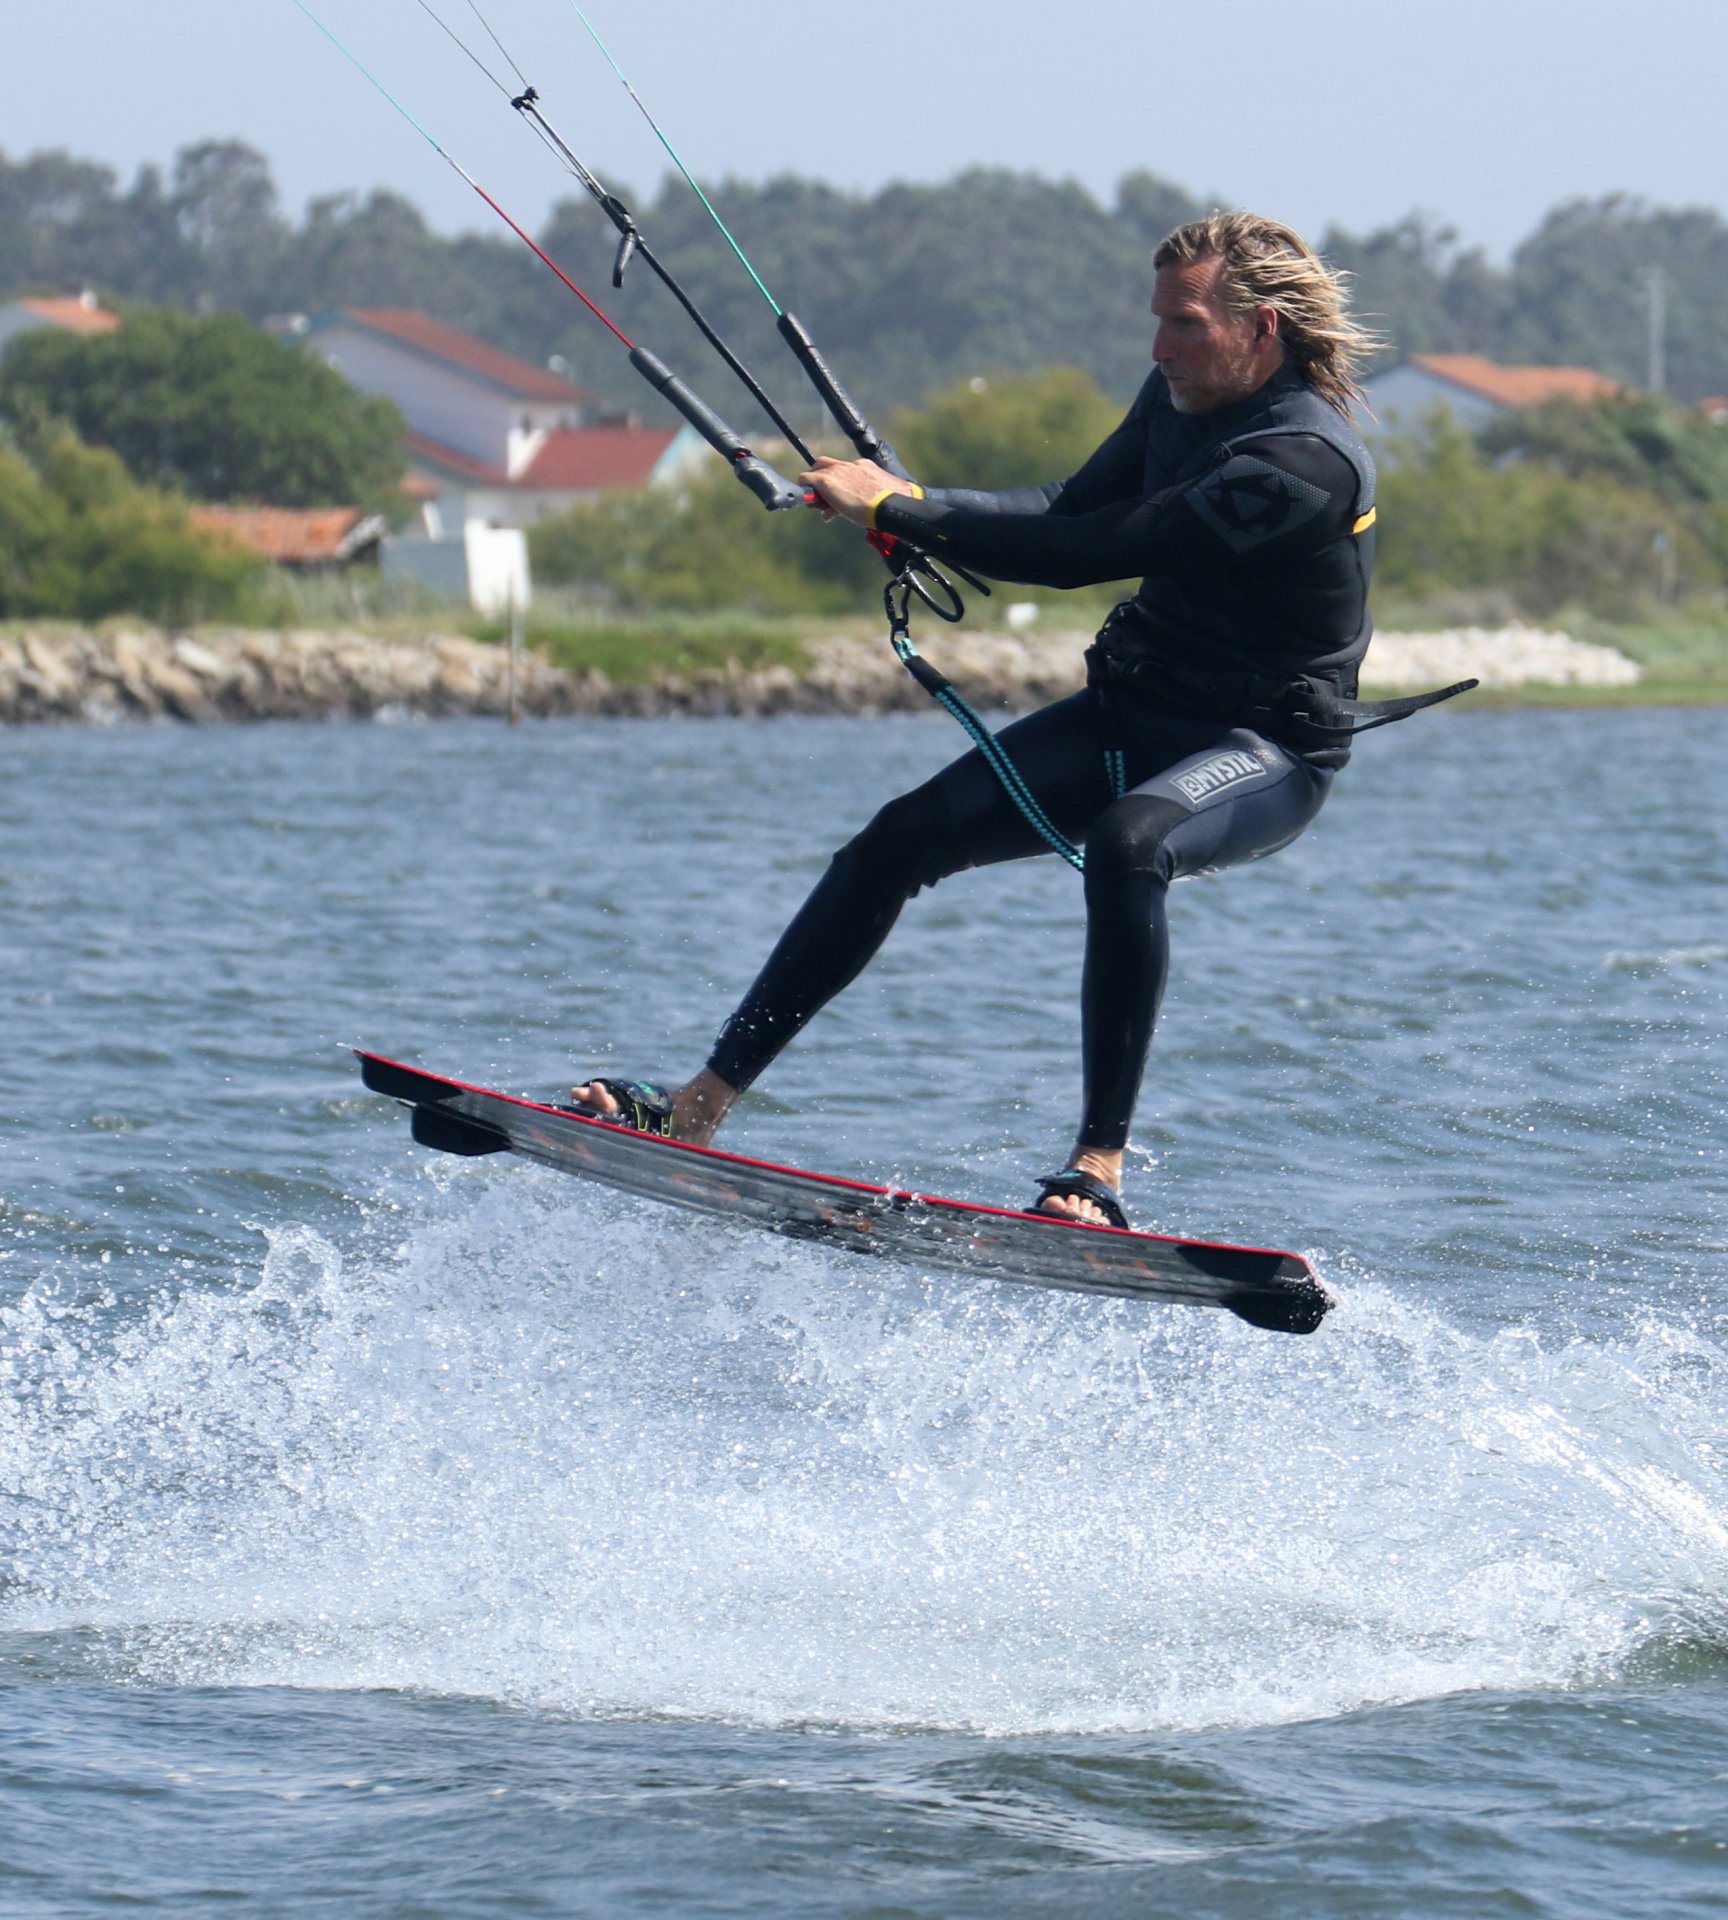
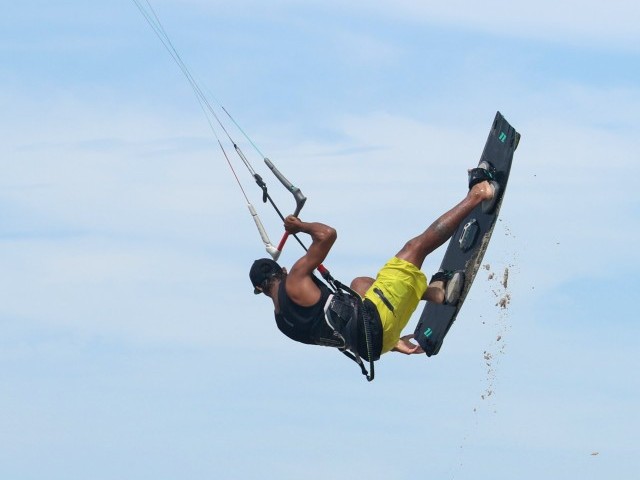
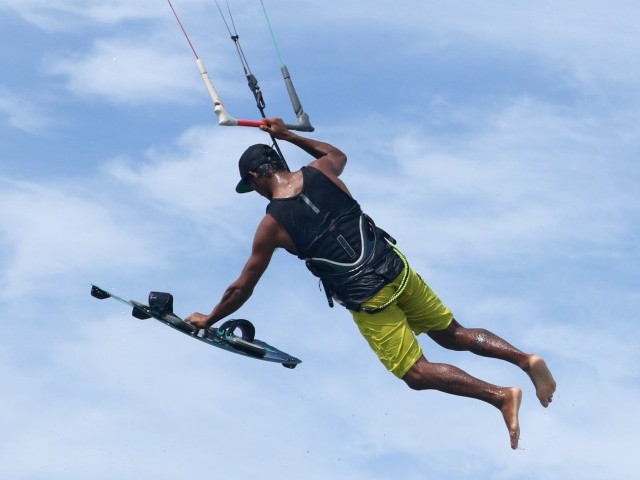
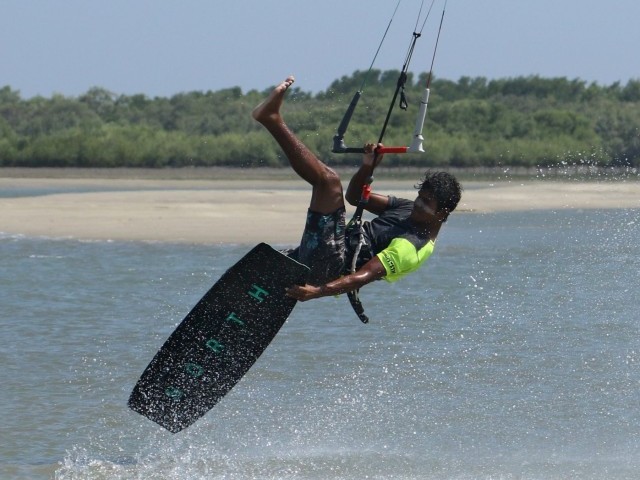
Your Call Pic D.
A pop happens because you say so! Heel or toe, you can’t wait for it to happen – you make it happen. Popping is all about dynamism, the sudden aggression of your stamp, extension and explosion. Your aim is to kick against the board from your strong toeside position. The beauty is that with weight on both feet you’re free to stomp with all your might against your back foot. Whereas if all your weight is directed solely over your back foot as you carve up, you’ll need ridiculous strength to pop. Yes, once again, it’s about technique, not brute force. Timing is crucial, as soon as you are carving, the tension is replaced, and you can pop. Wait too long and you’ll either be overpowered or stop. Extremes but both equally disruptive to your end goal. To launch yourself, you’ll actually use both legs, detonating the front leg a fraction of a second before the back leg. As your front leg extends, it throws your weight back onto your back foot and the tail of the board, which then enables you to stamp off your back leg with virtually no weight on it. In the pic, you can see that Christian’s weight is back so that the board takes off at a steep angle. This is the result of both legs being used, the front leg forces his weight over the tail before his back leg forces him up. The popping equivalent of a heartbeat.
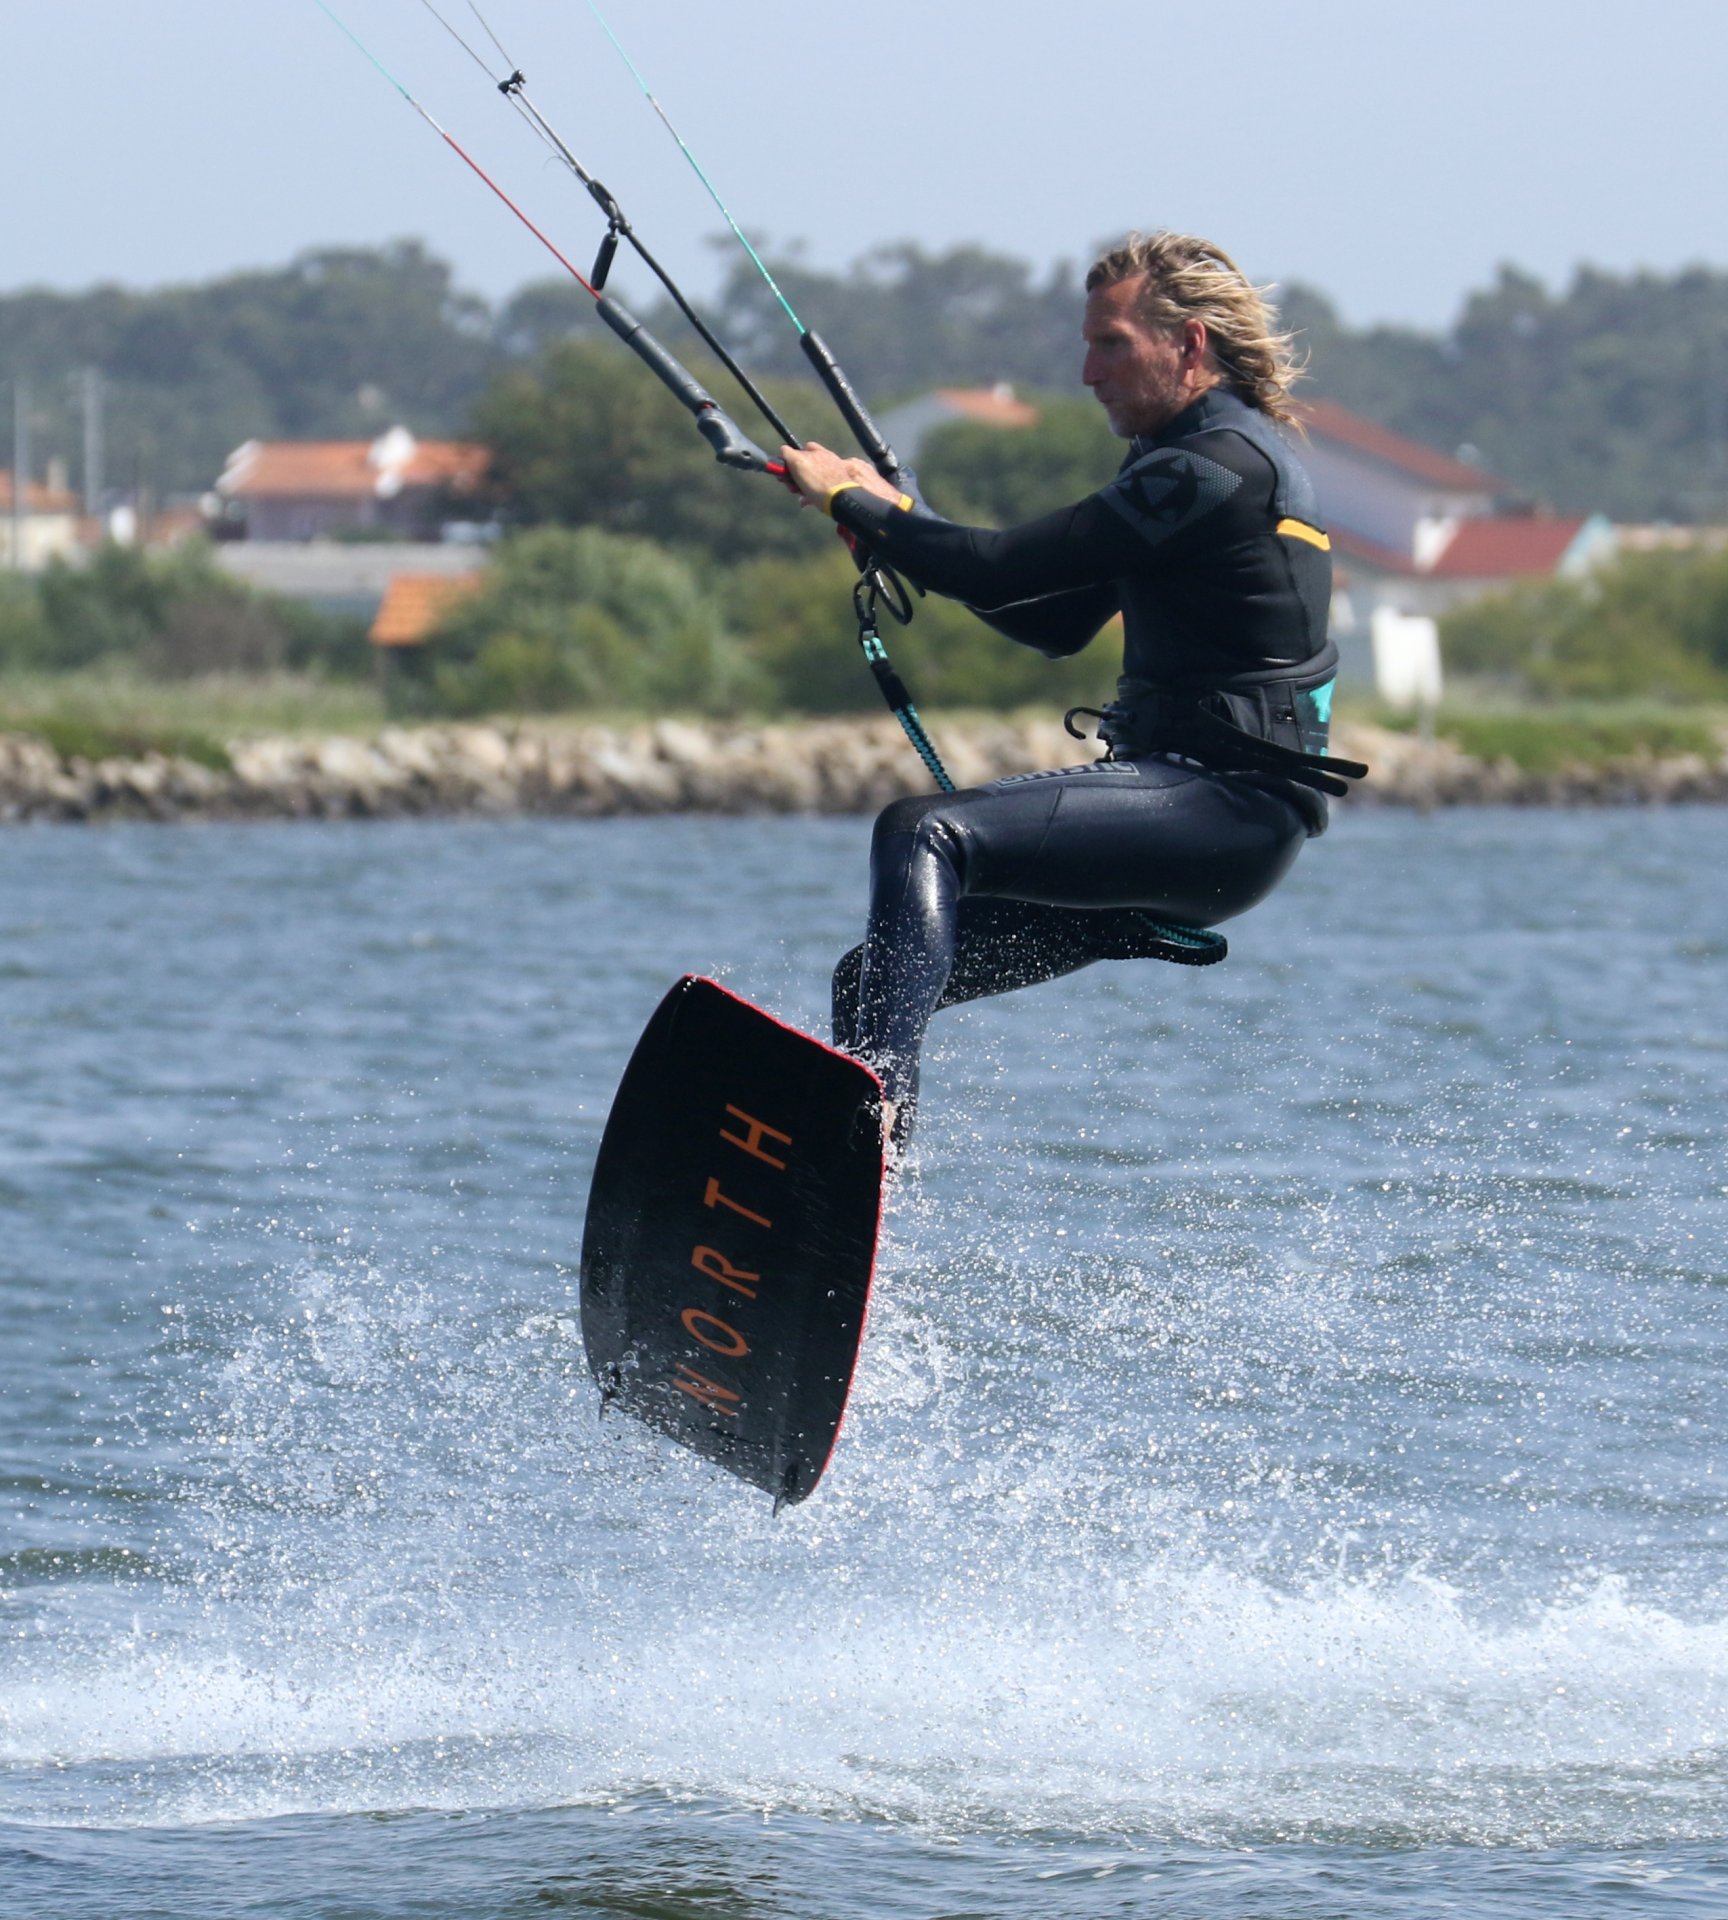
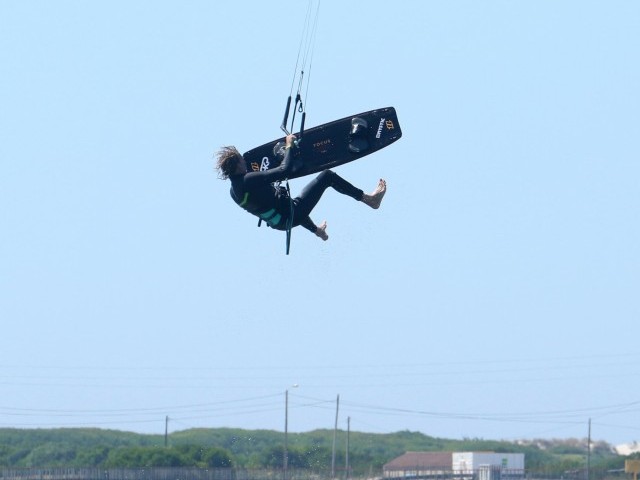
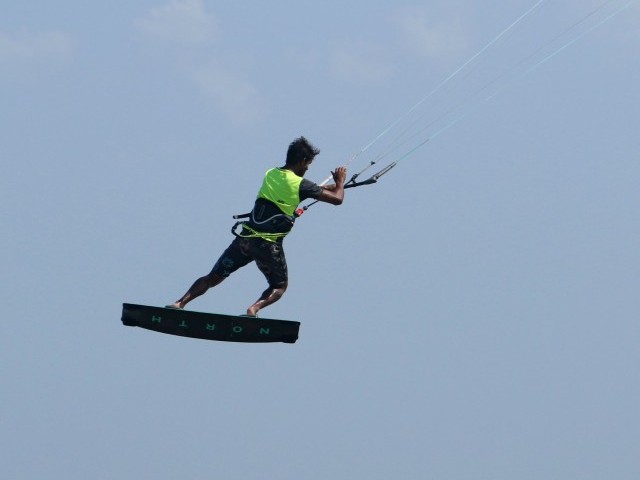
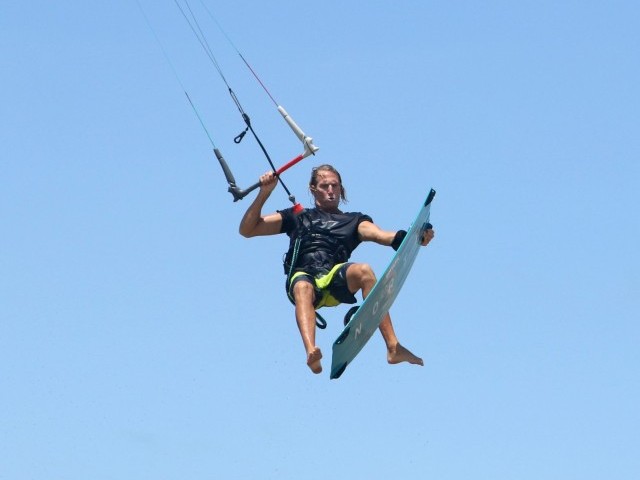
Up & Over Pic E.
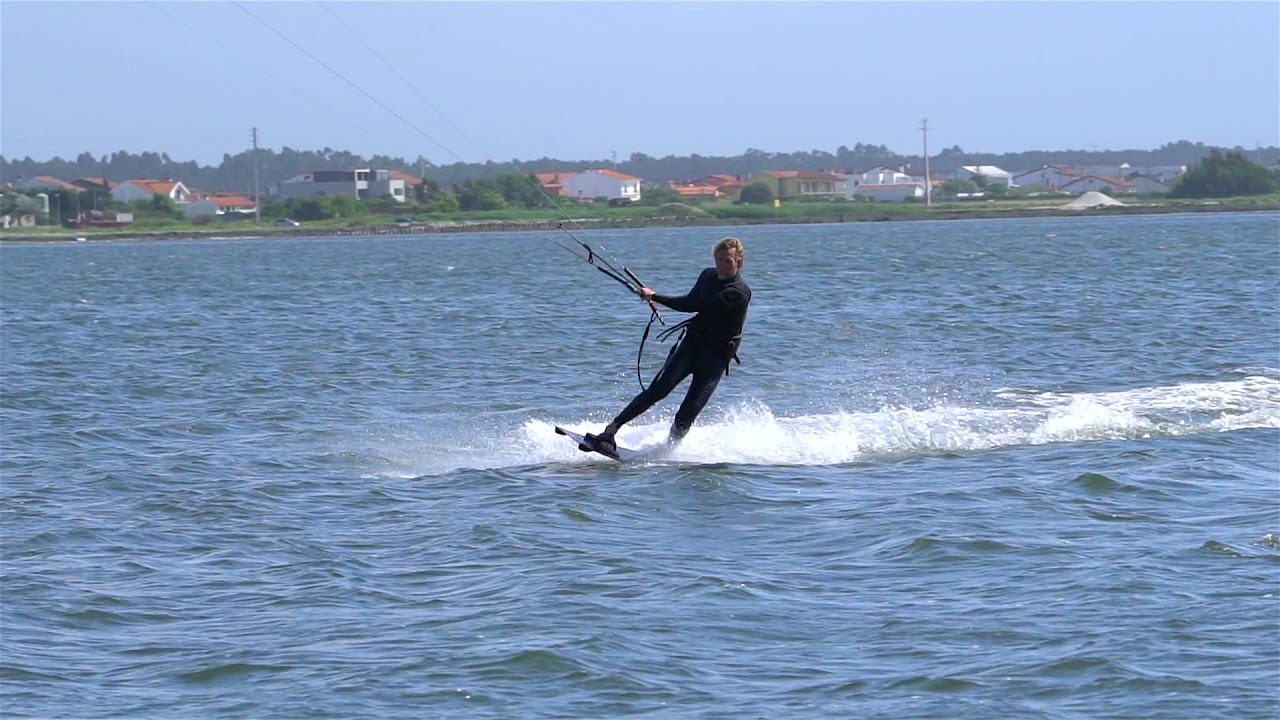
Once you’re rocketing off the water it’s all about regaining balance. In this instance, it means that you can return to heelside. In the future, it means that we can add a multitude of embellishments. To regain balance, you need to get back over the board. If you’ve completed all the preceding stages and managed a decent pop, the kite will do everything in its power to help you. Once you’re off the water the kite will pull you towards it, so go with the flow and allow yourself to be pulled forwards. That said, concentrate on keeping the bar close, push your hands down and try to lift yourself over the bar, keeping tension in your arms. This doesn’t mean that the bar has to be in your hips, it just means that your shoulders have to be strong so that you don’t get folded over. Christian is holding the bar in as he rises and keeps pressure on the bar, pushing his hands down. As such the kite has lifted him up and forwards so that he’s over his board, his body is now upright, and he’s balanced. His board is still effectively toeside and he’s very much concentrated on where he’s going.
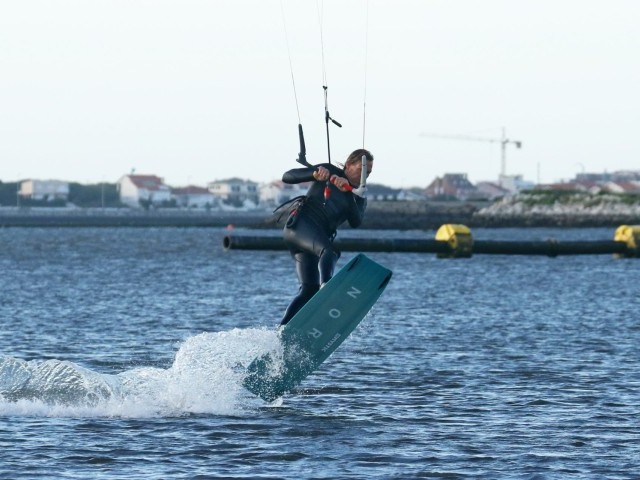
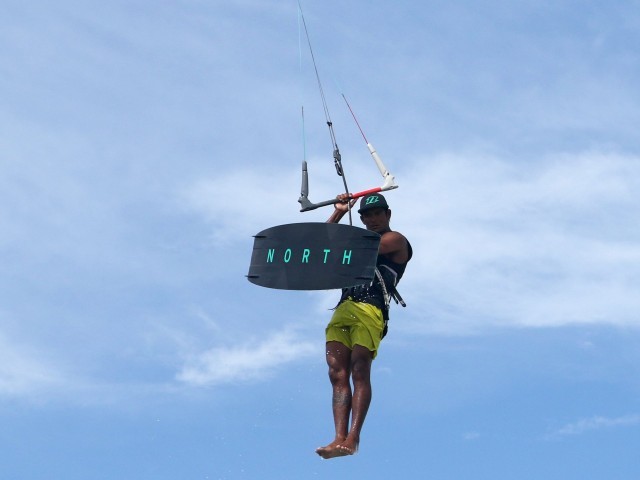
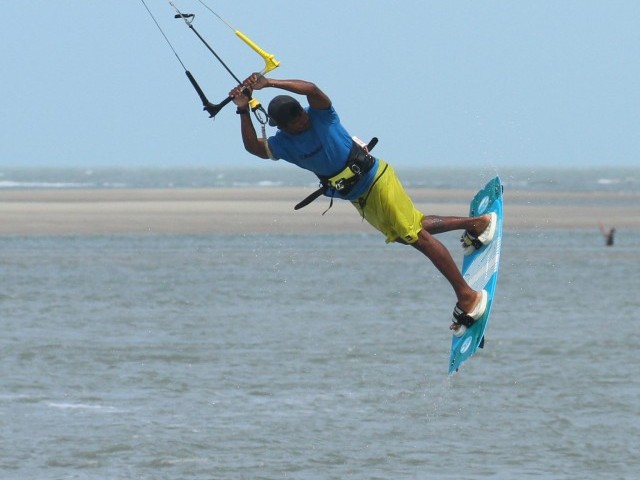
Board Work Pic F.
Now all that’s left to do is get the board back to heelside so that you can land over it, flat and towards the kite. Once again these will be skills that you possess. However, without the kite pulling through your harness you will need to manually call on them for help. Use the kite. Chances are it will have drifted up a smidgen. Steer it down with your hands so that it rewards you with a sense of direction. As you steer the kite, pull your front hand in towards you. This should now give you a solid fulcrum point around which to turn, to replace the usual harness hook. Now that you have this anchor, you can bring your leg through towards it, lifting what will be your front knee up and around. As it comes through, you’ll be set to land tail first, slightly downwind and ready to celebrate.


Top Tips
First things first. Go practice a few hooked in pops from toeside, but give more thought to bearing away before carving. This way you’ll prepare for the moment of unhooking and get the muscle memory going for the pop.
Get a feel for unhooking whilst toeside. Switch, unhook and get back on your edge to feel the tension without carving. This way you’ll acclimatise yourself with a vital stage in the process and you’ll find out just how much trim you require to be comfortable unhooking in the given conditions.
Have a good look at the sequence and videos to give you an idea of the timing and urgency.
Common Problems
If you’re struggling to unhook once toeside, you’re either overpowered or still on an edge. Try trimming more and then work the kite and make sure you bear away and stand tall to unhook.
If your kite moves erratically once unhooked, turning without your input or dropping, it’s a sure sign that it’s stalling. More trim, please.
If you’re getting lifted off your edge when carving up so that the board flattens and you can’t pop, it’s a result of the kite being too high. This is most likely because you’re drifting the kite up while carving. Concentrate on keeping the kite flying forwards whilst you carve up, keeping pressure on your front hand.
If you get pulled out of position in the air, make sure to keep your shoulders strong. Go with the kite but resist with your upper body so that everything remains compact.
Keystones
- Switch, stay flat and tall.
- Unhook, drop weight back and upwind.
- Move weight forwards and carve.
- Explode and let kite pull you forwards.
- Pull on front hand, bring knee up and through.
This technique article was in Issue 87 of IKSURFMAG.
Related
By Christian and Karine
Christian and Karine have been working together as a coaching team, running improver to advanced kitesurfing clinics since 2003.
