
Toeside Front Roll to Toeside
Technique / Advanced


Introduction
Toe to toe, a front roll with a difference. It’s funny how so much of kiting is based off one’s heels, when there are parallel universes out there comprised of all things toes, and if your name’s Tom Bridge, all things blind. It’s certainly a way to increase your trick count, but probably the best part is the different feeling of a move when you’re either taking off from toes, landing to toes, or, like here combing them both. If you’re fond of your toe side or it’s something you’re ready to explore further, then this one is for you.
We will be using the kite for this, so consider it a marginally sent trick, although we’re not looking for a huge boost, just a helping hand to give us some air and time to unravel ourselves. Let’s have a look at what’s involved to get this down pat.


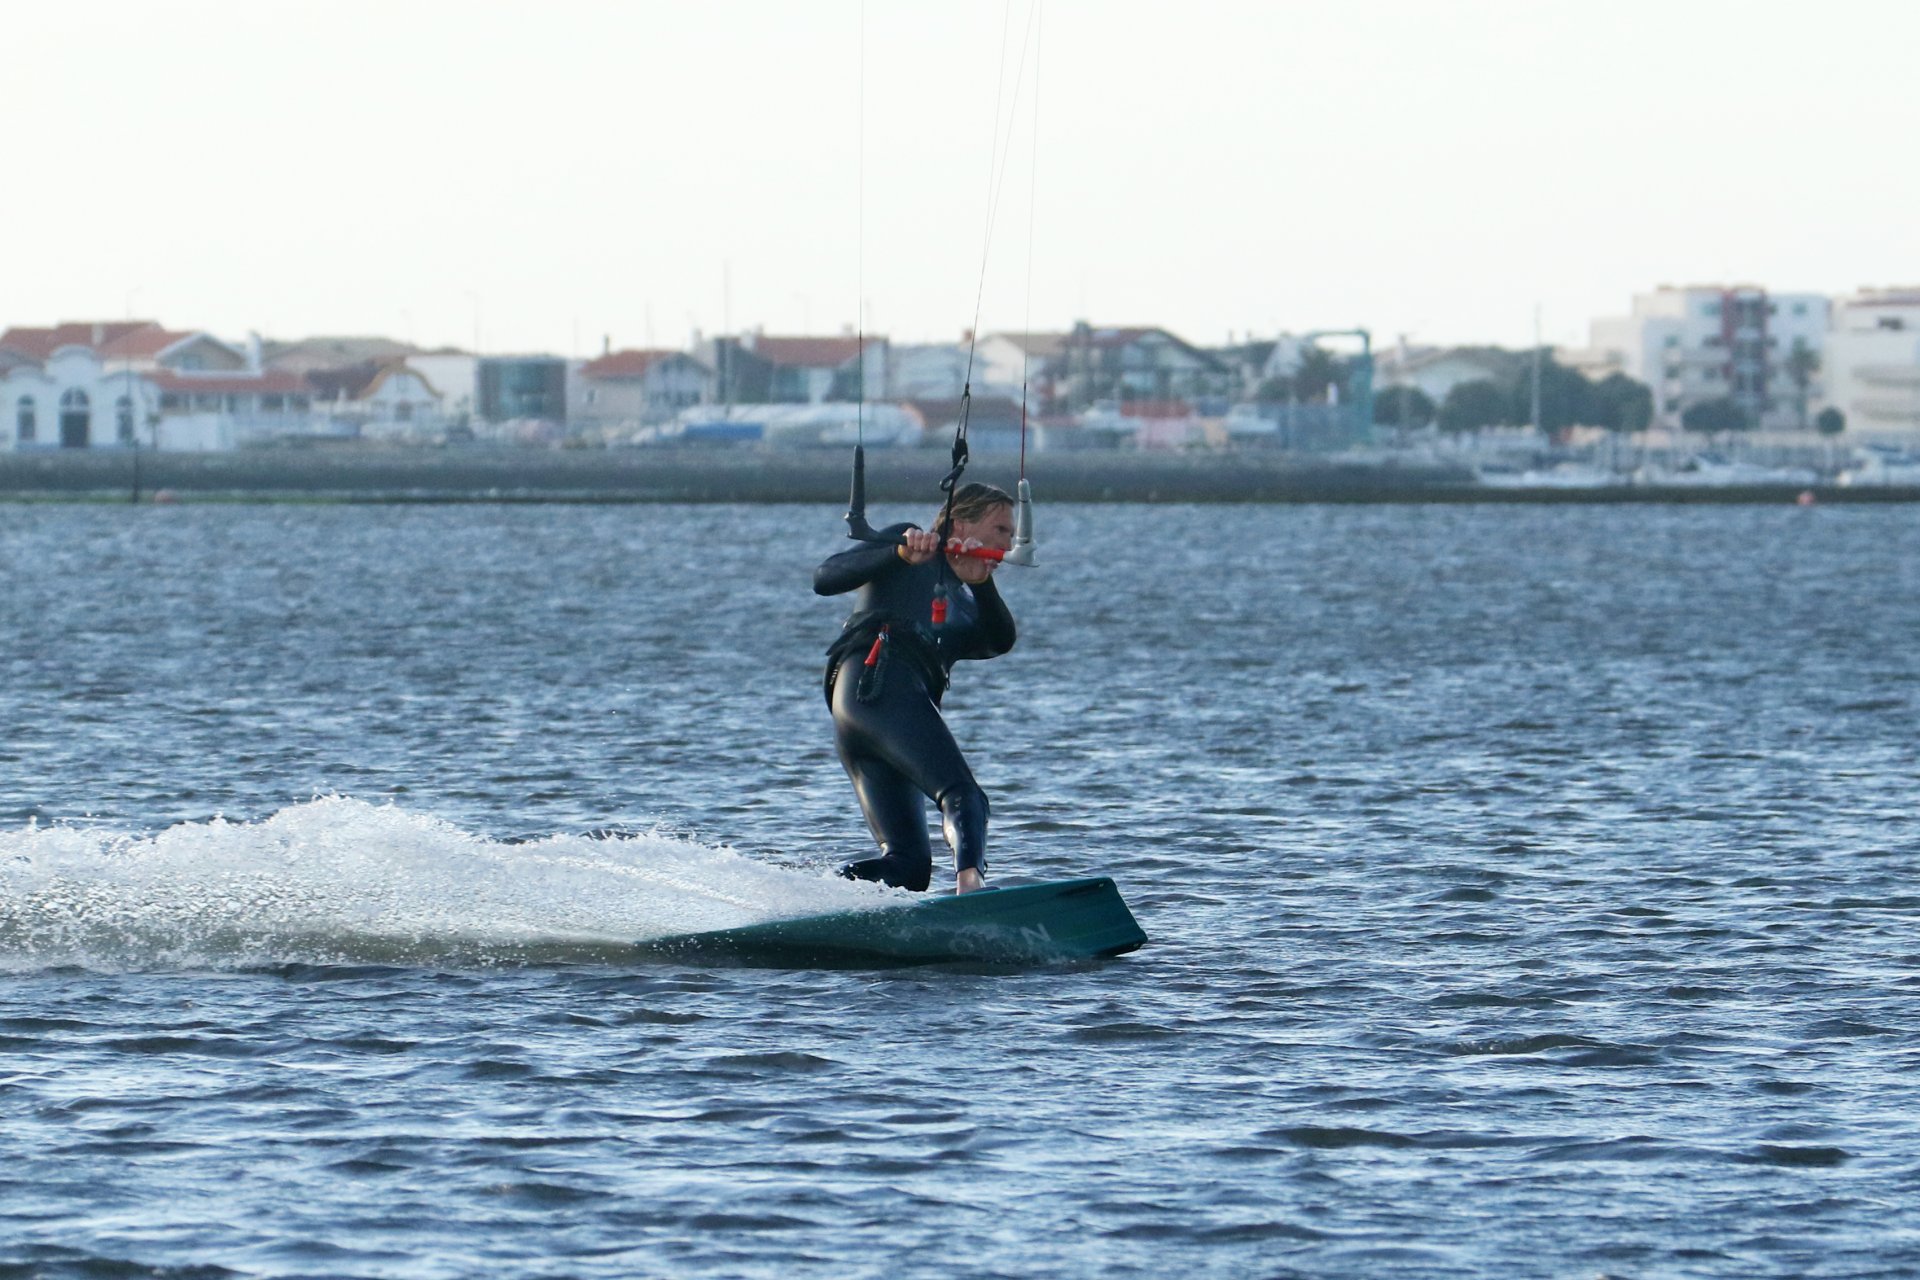
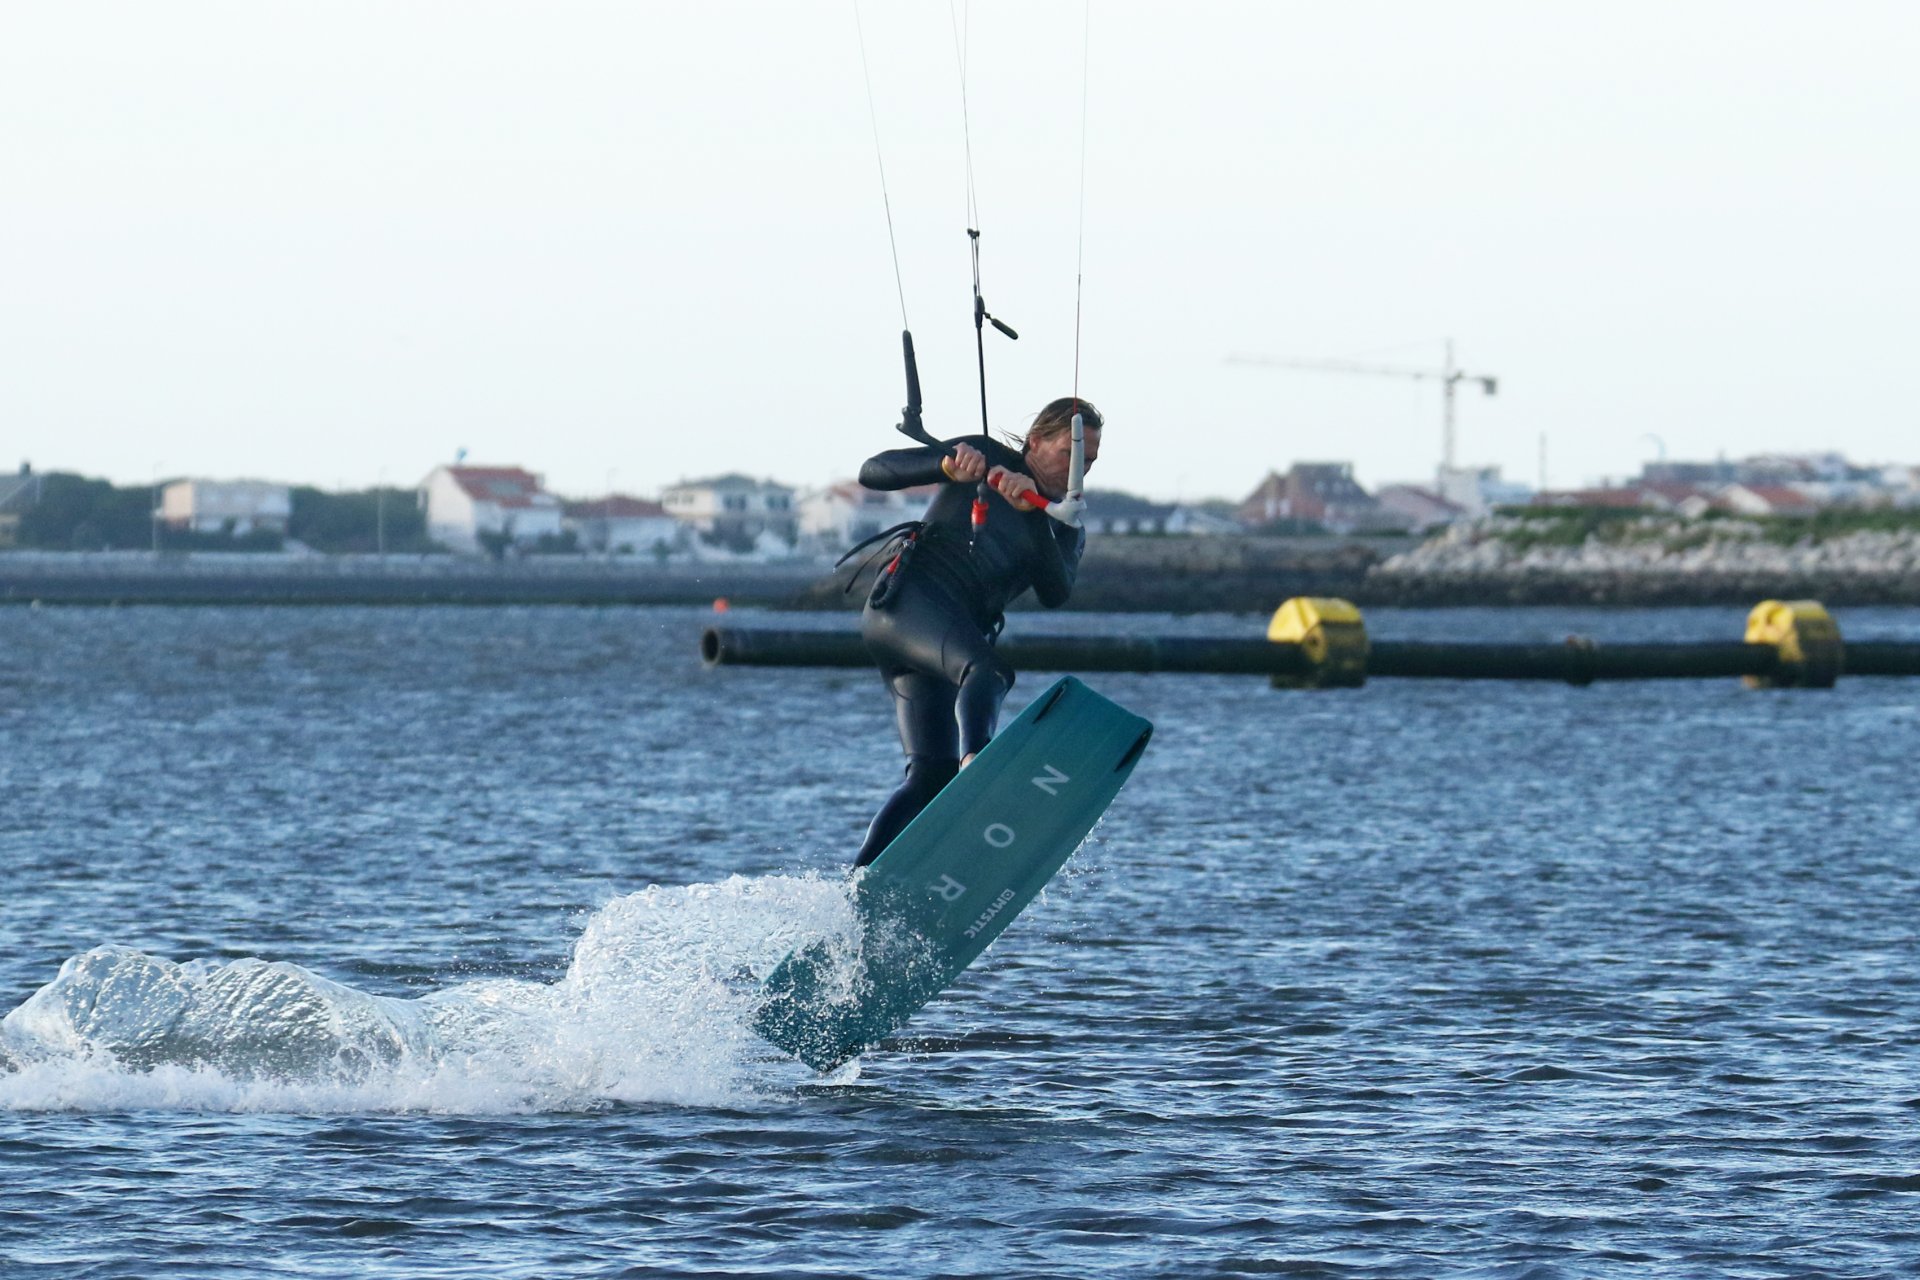
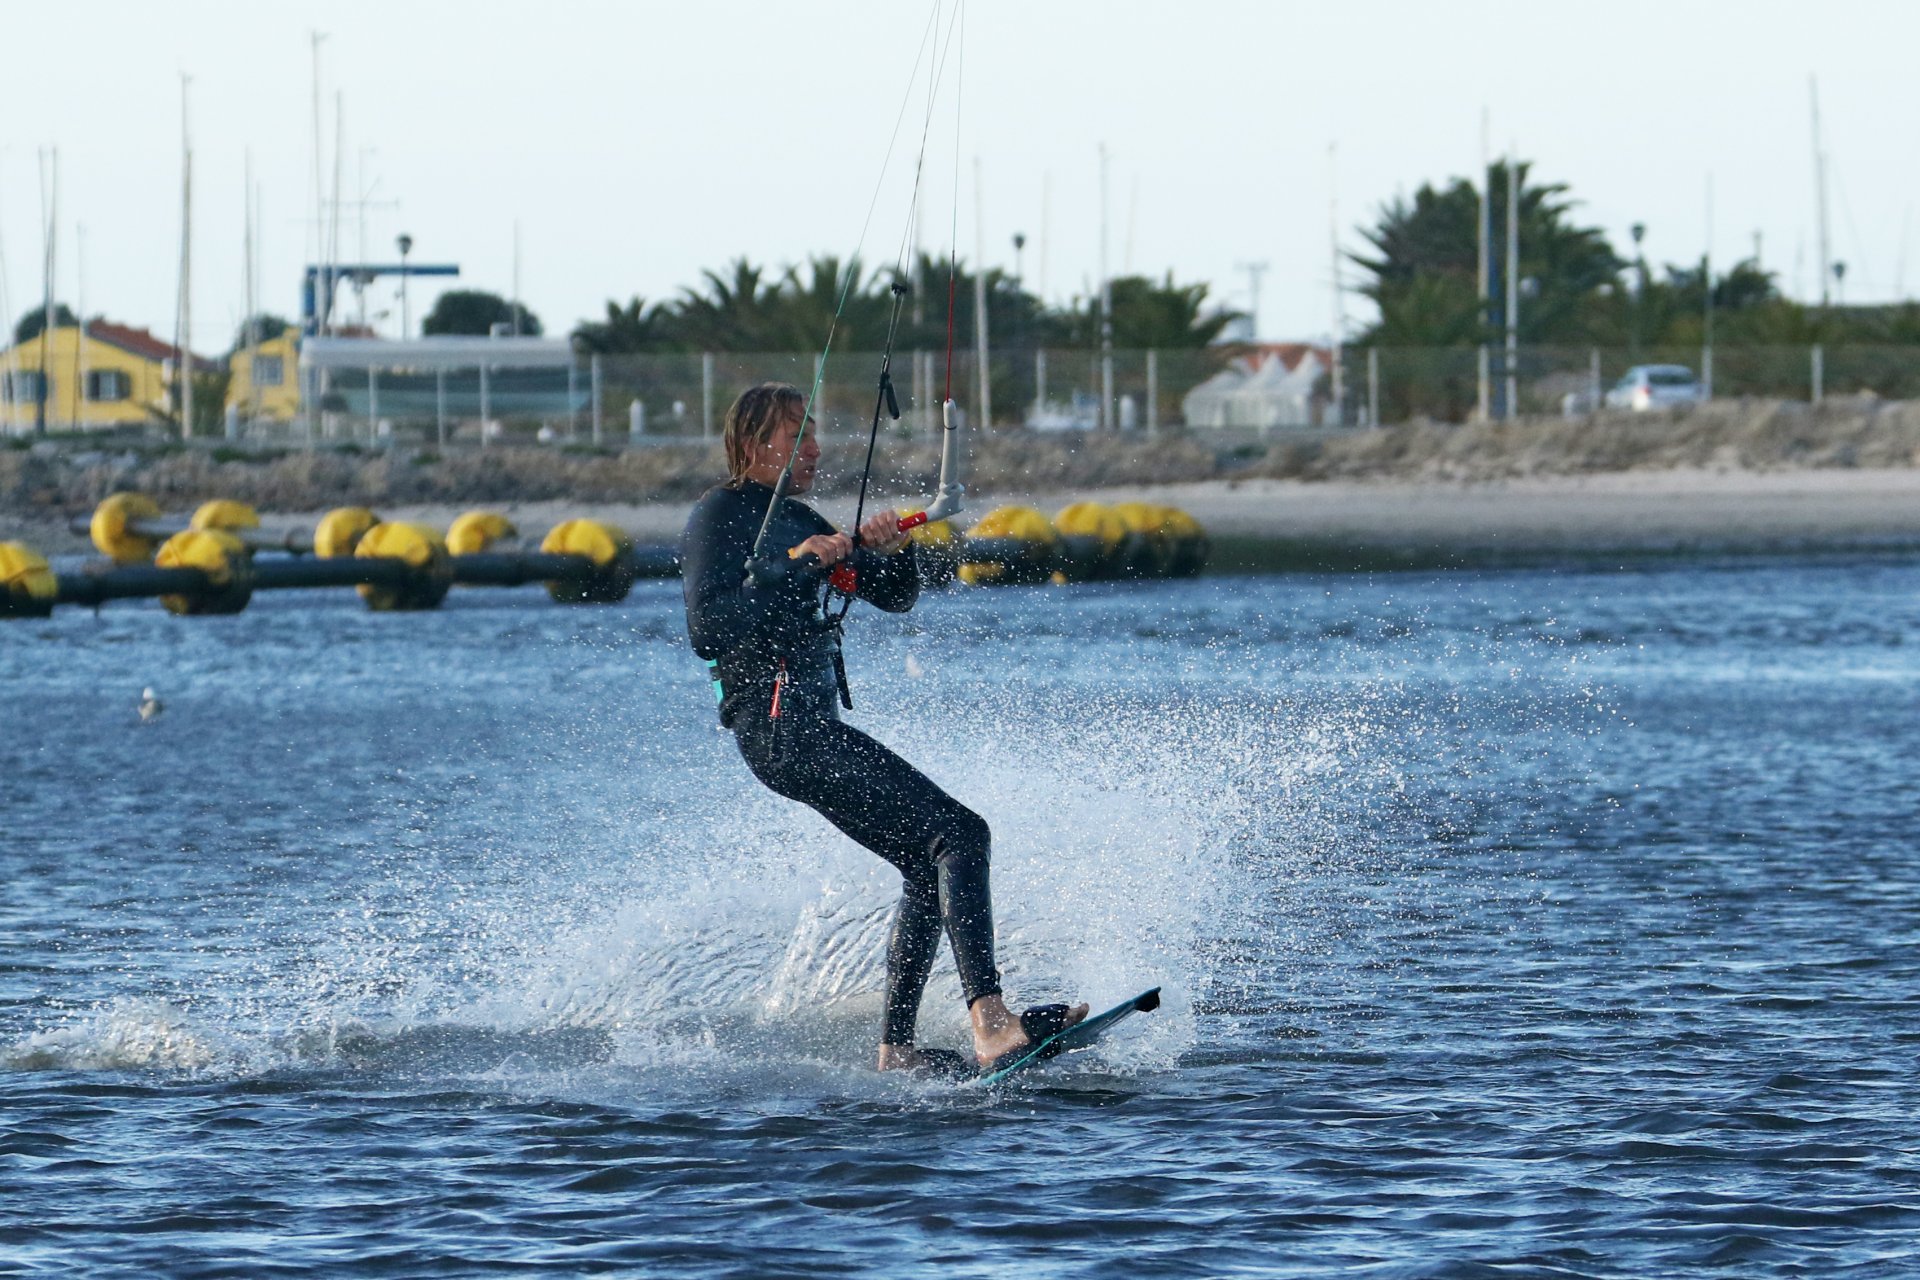
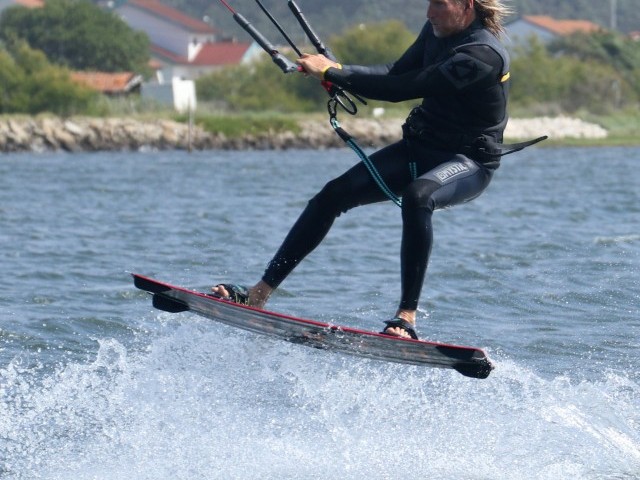
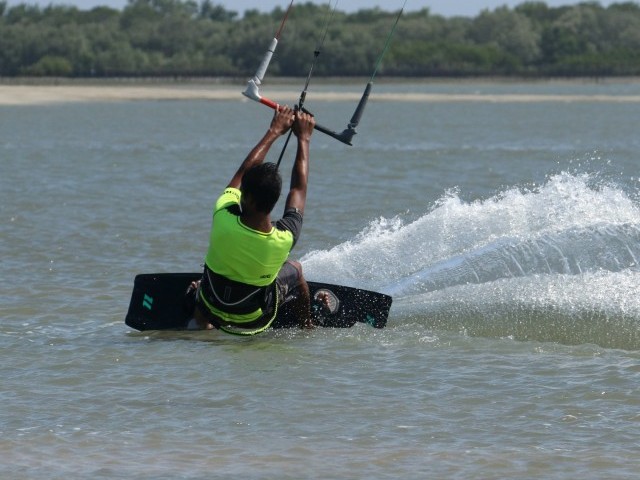
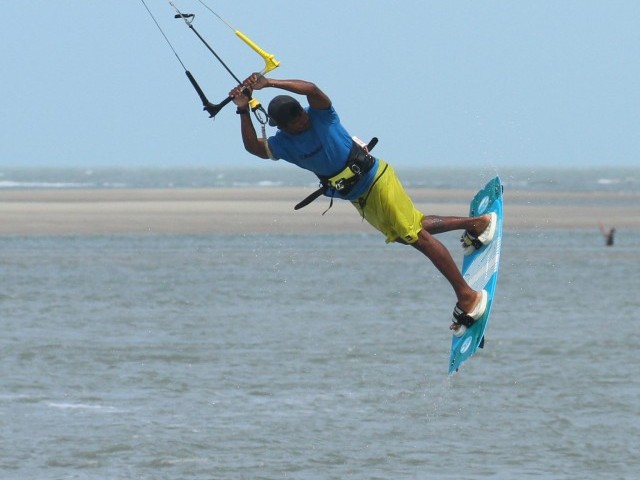
Toe Side Pic A.
To resist in preparation for even a small sent take off from toe side you need an upwind edge. The more edge you have in the water the more resistance you get, but without drag. Drag slows you down, resistance squirts your forwards. Now think about your early attempts at toeside, or perhaps toeside on your weaker foot – where is your weight. Right back over the tail of the board. You’re sinking the board, it’s dragging through the water and slowing you down. It might feel like resistance but really, it’s no different from towing your laundry behind you. To make it efficient you have to learn to get your weight forwards, trimming the board from front to back whilst still edging. Look at the picture and you can see plenty of Christian’s board in the water. Suffice to say you need to get your weight forwards and onto your front foot. The easiest way to do this is to open your chest and hips, facing forwards down the board so that you have a shoulder each side. This with a bent front knee, hips and head dipped forwards and both knees driving forwards, pointing in the same direction and working together opens the door to a world of possibilities. It will be simpler to adopt this position if you let your back foot twist in the strap and point forwards. Always the same analogy here, think of a surfer racing down the line or a slalom snowboarder in hard boots. Coming into any toeside trick this is your approach position – comfortable speed, no drag and kite flying at 11 or 1 o’clock on the edge of the window, ready to send. In the pic Christian has his chest open, two hands on the bar, knees driving forwards and plenty of edge in the water.
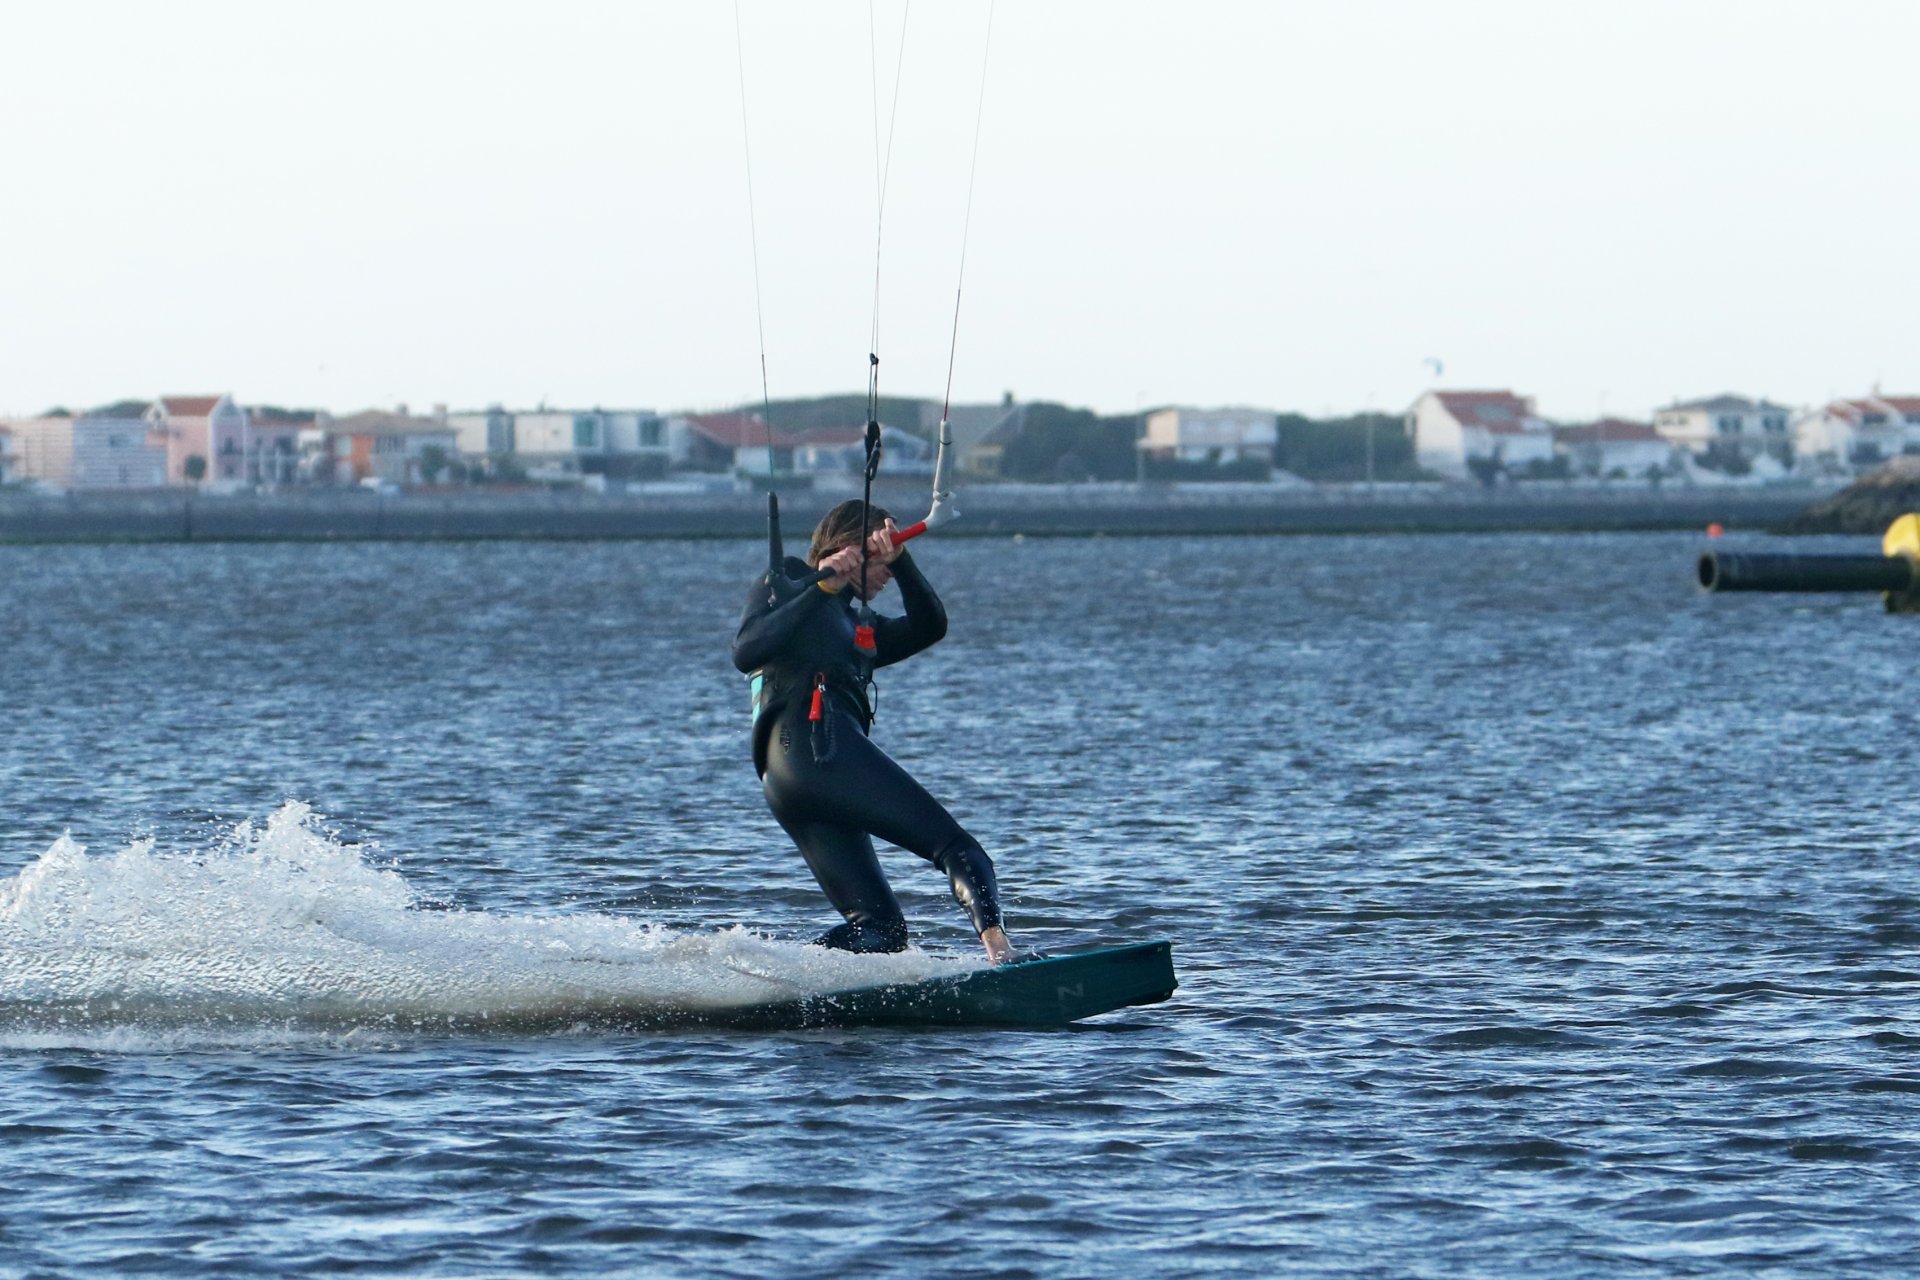
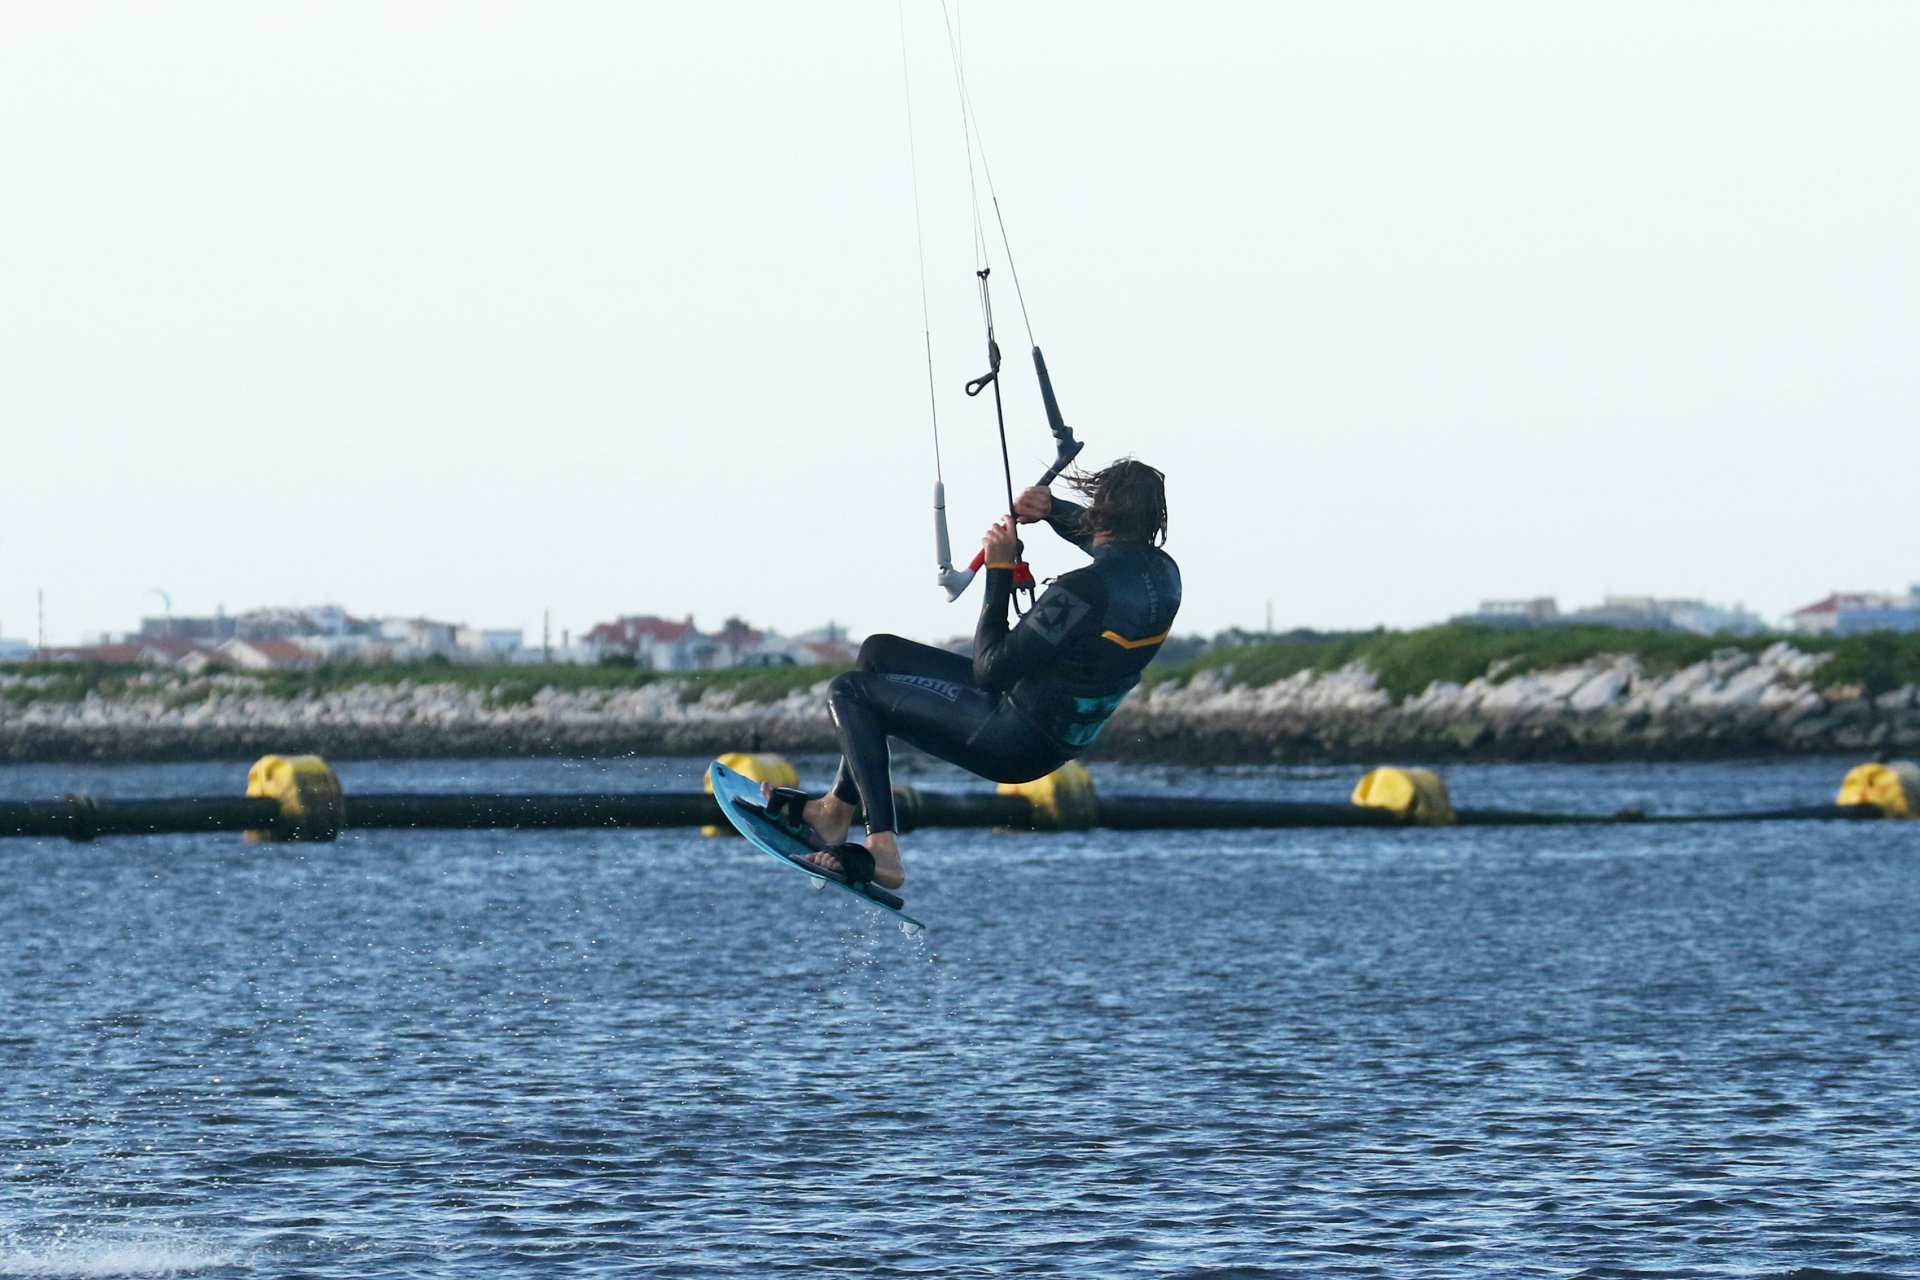
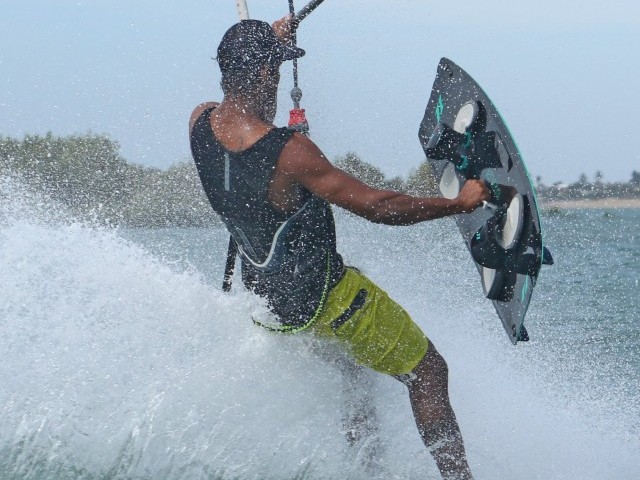
Send & Carve Pic B.
Now that you’re on a decent toeside edge, you can send the kite. With your chest open you should be able to control the bar with both hands, allowing you to steer with the usual pull push, keeping the bar on the sweet spot. Just as per heelside, if you yank the bar in as you steer it, the kite will fly lower across the window from 11 or 1 o’clock and it will pull you off your edge. Even though you don’t need a big jump, you want the kite to move, so a short sharp send is in order, so don’t be timid. The quicker the kite moves, the sooner you’ll have lift. Once the kite starts to move, you’ll need to keep resisting, so now is the time to exaggerate your edge, look up wind, drop lower and dive against your back foot. This will effectively carve you upwind from your upwind course. You can see in the picture how Christian is able to control the bar with two hands and therefore send the kite with the usual push pull, dropping his weight more onto his back foot to resist the kite as it lifts towards 12 o’clock.
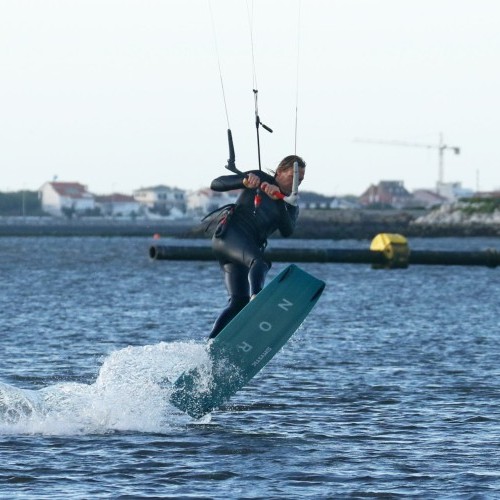
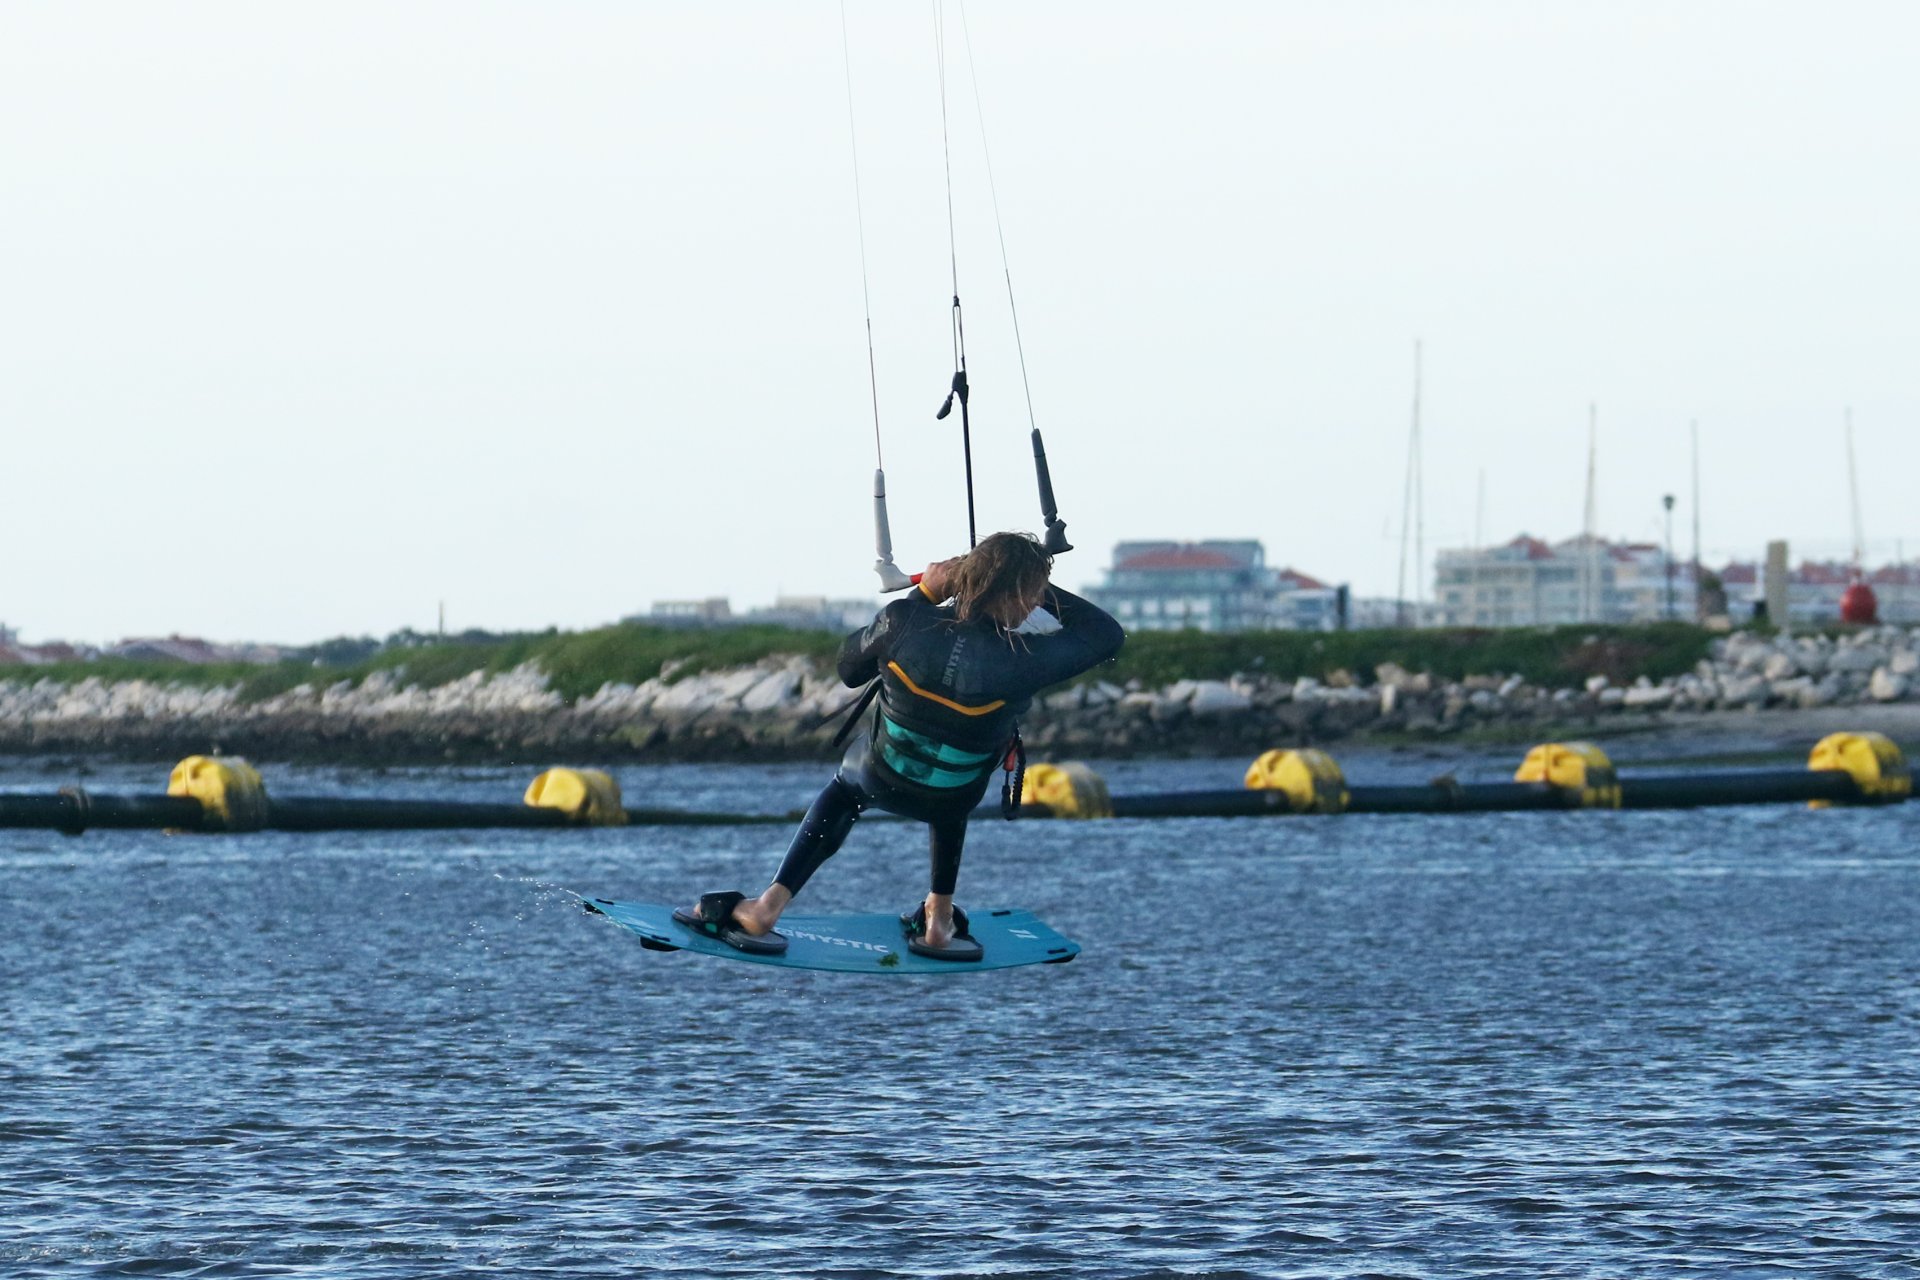
Weight Back Pic C.
This is really a continuation of the last point, but it’s worth pondering for a moment. To kick yourself into a front roll, you need to explode off your back leg against the toeside edge of the board. However, we have two issues if we approach in this position. One, we’re dragging that laundry, hence the forwards stance. Two, if all our weight is on the back foot, and all the pressure from the kite is being directed through your back leg, it’ll be pretty darn difficult to then suddenly extend your leg unless you have Herculean strength. As such as you carve and the kite rises and approaches 12 o’clock, when you feel the lift come on in your harness, you need to suddenly shift your weight back, bum over back foot, extending your front leg, so that immediately afterwards you can kick off you back leg. Here you can clearly see that Christian has extended his front leg, his weight has dropped back, the nose of the board has risen and in a blink of an eye he can kick off. It’s a quick action, drop back and immediately kick off.
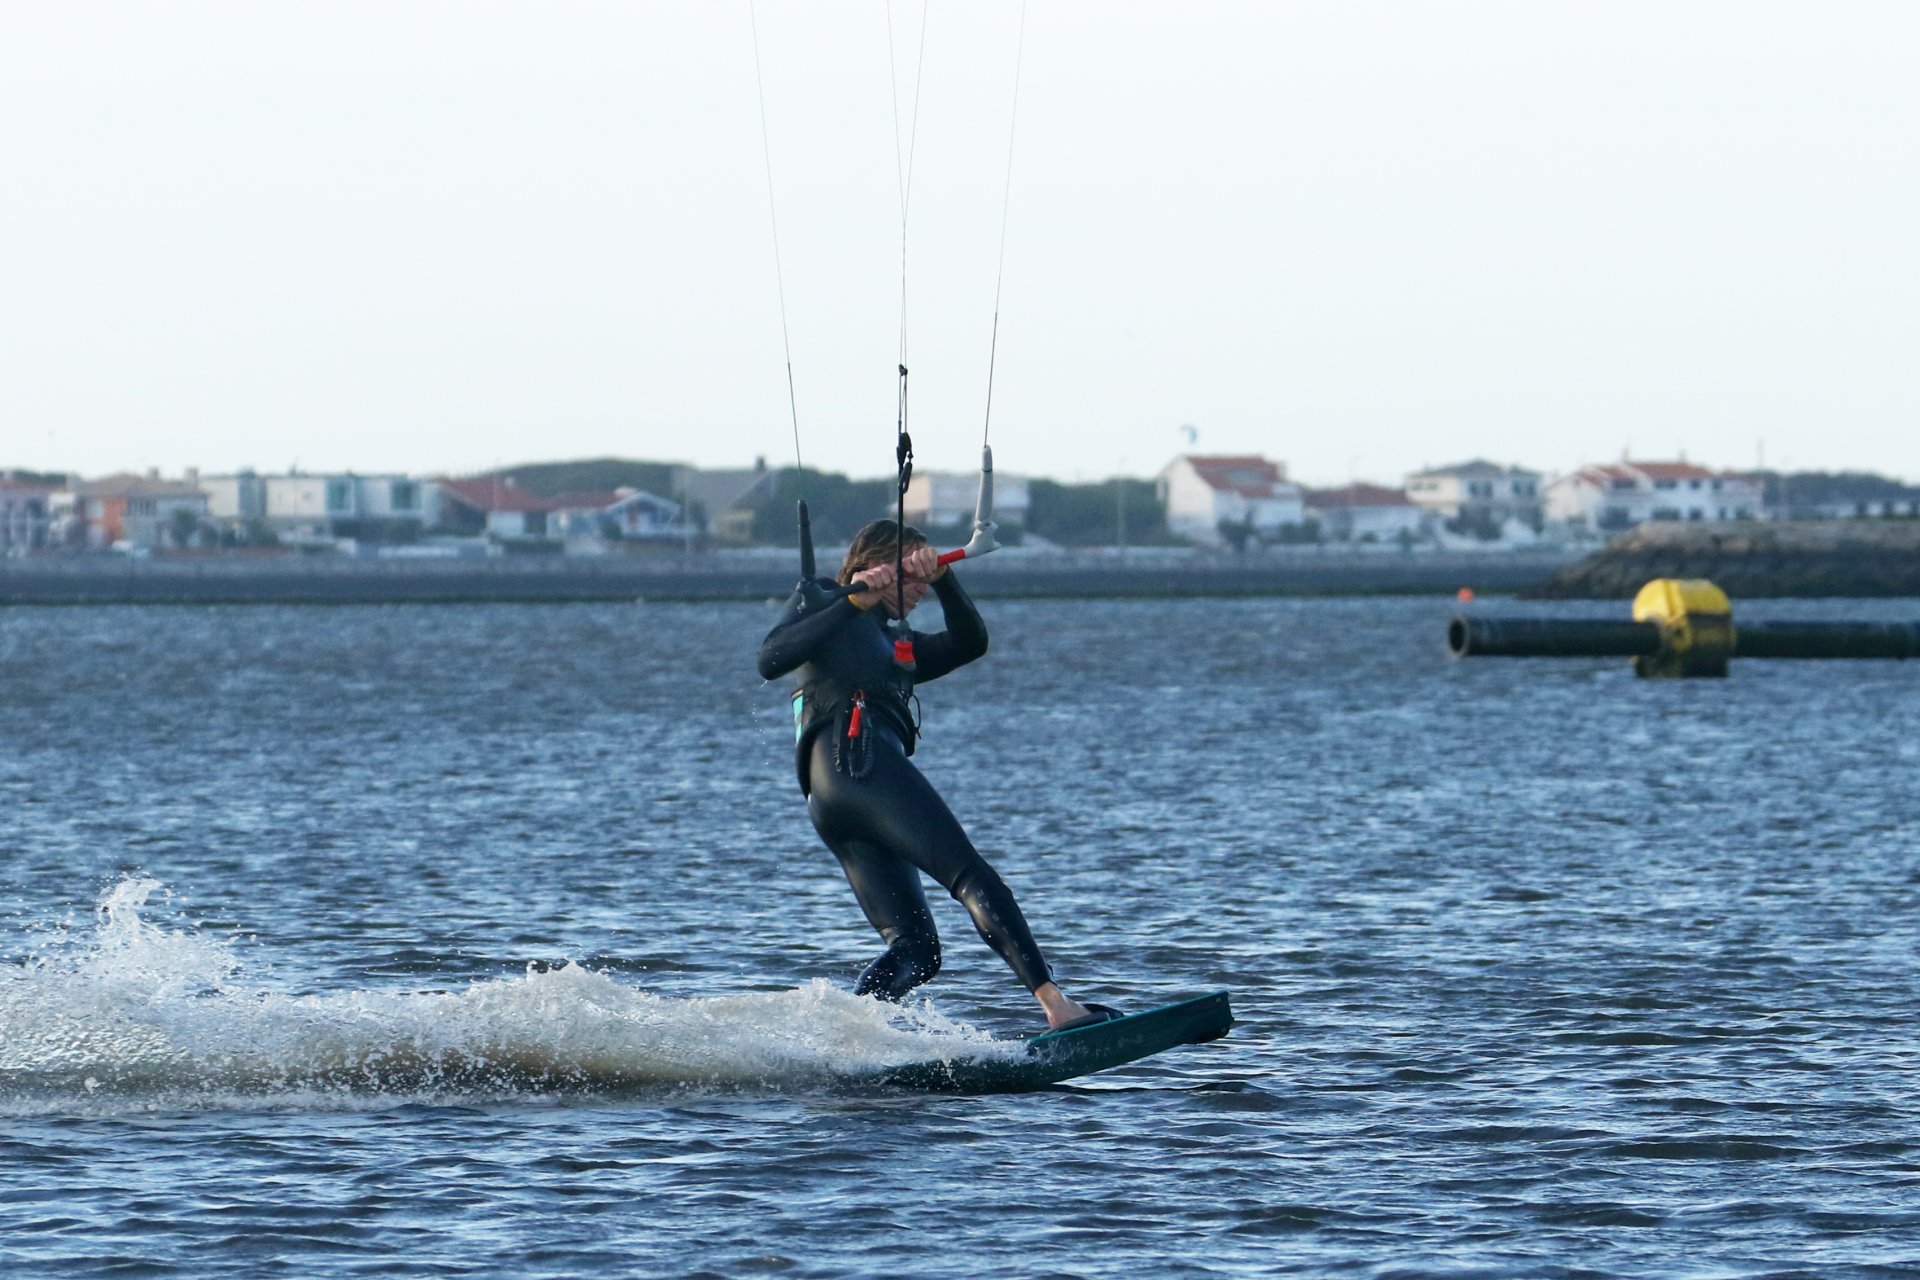
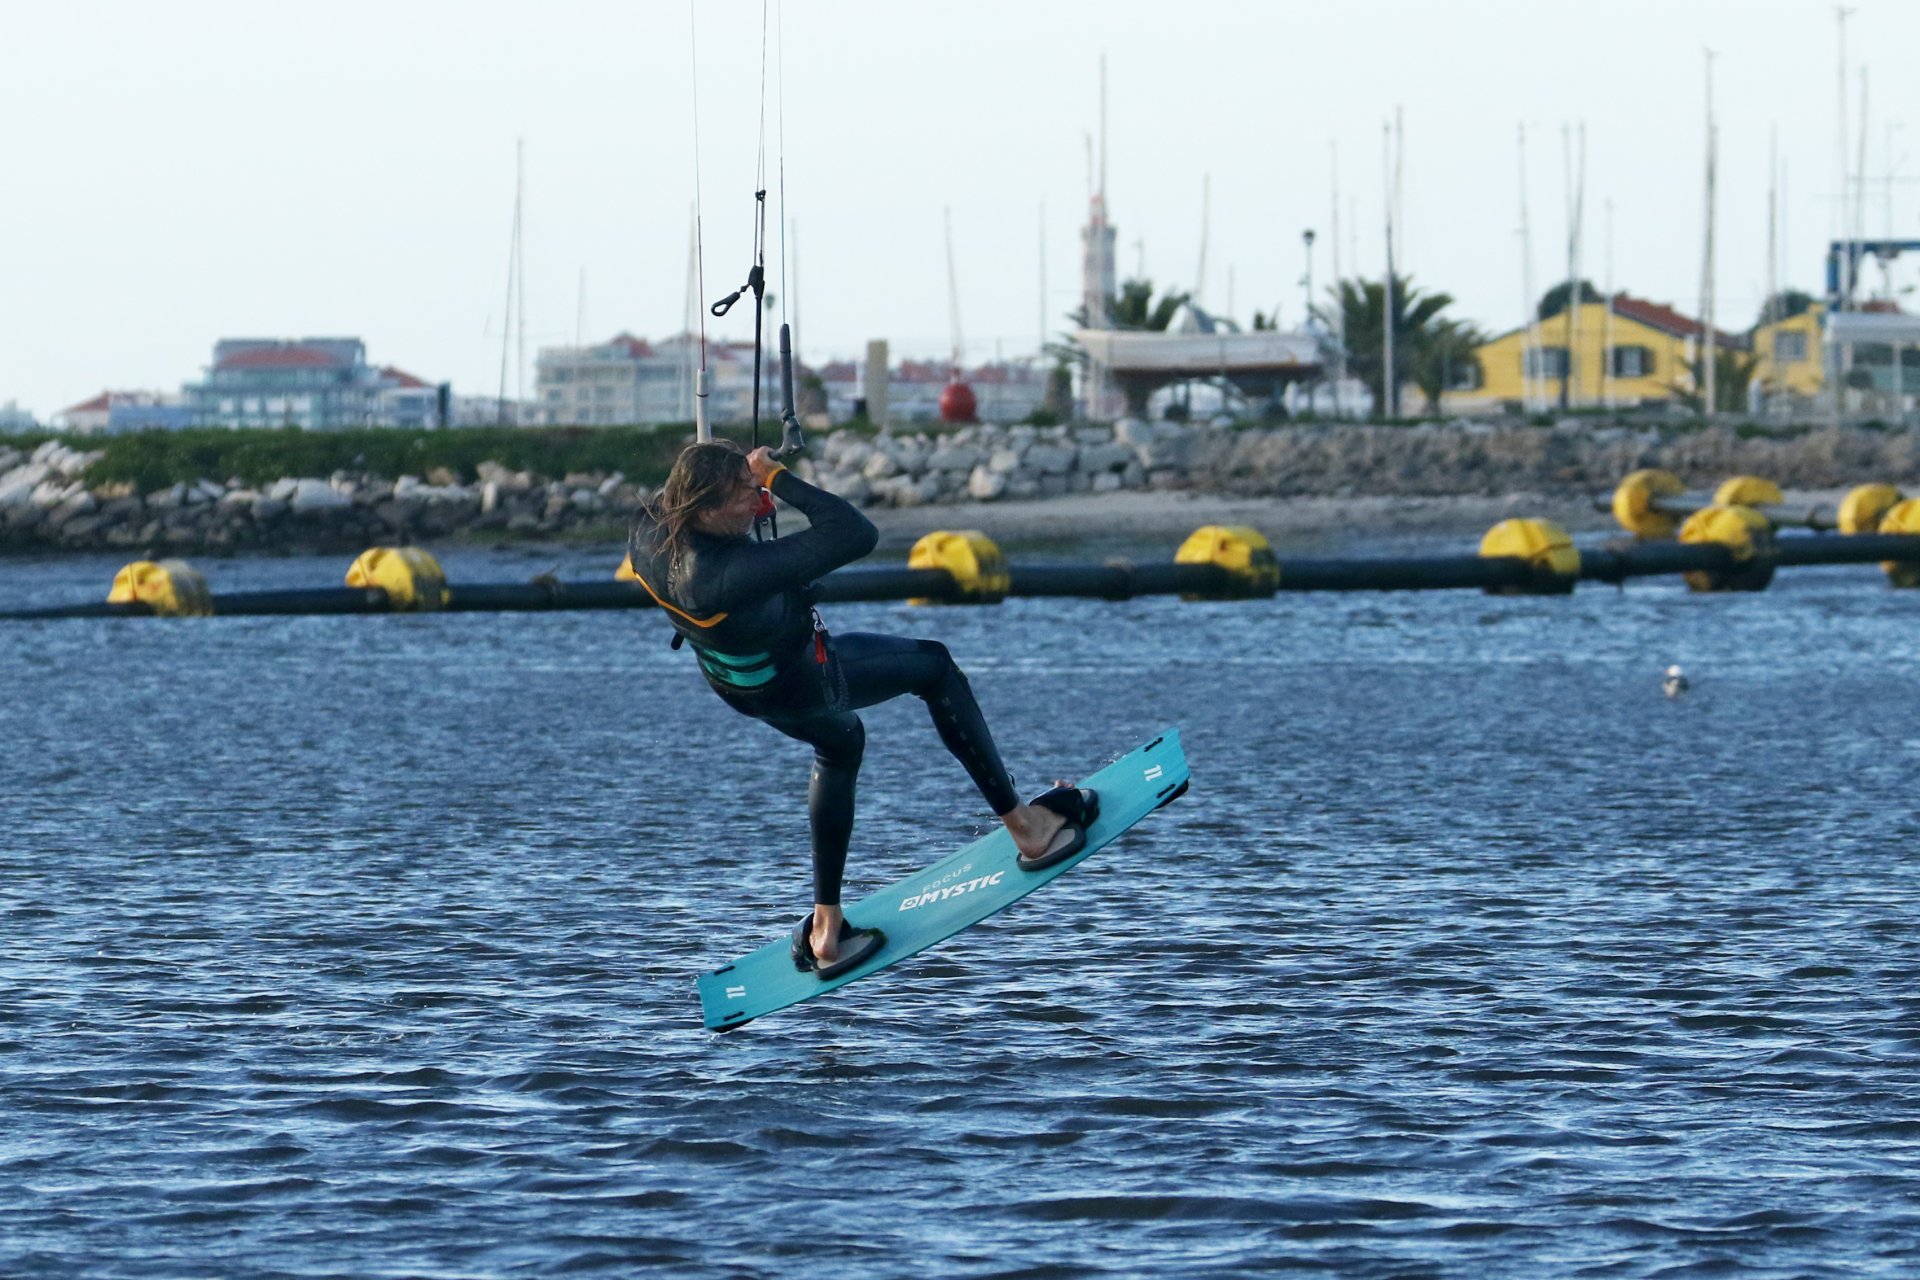
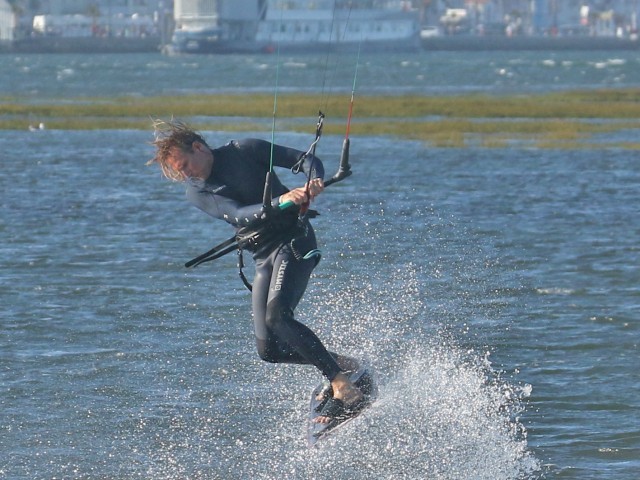
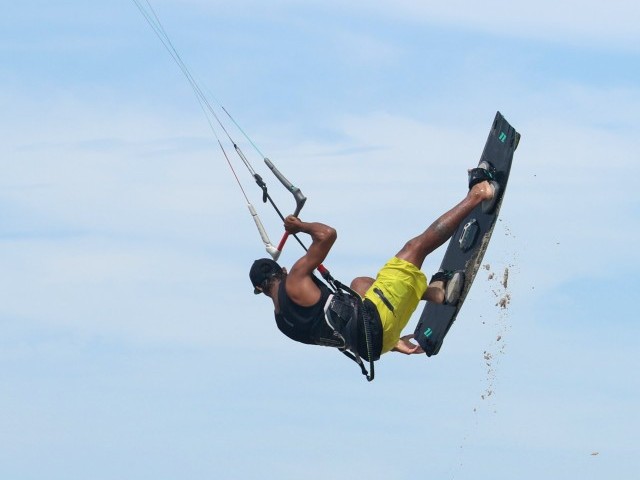
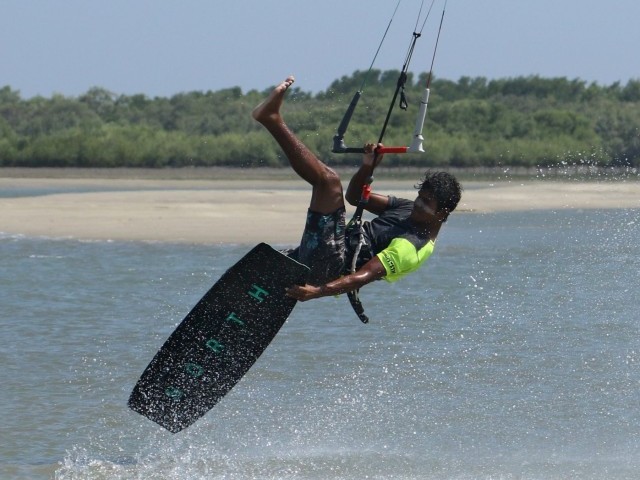
Take Off Pic D.
The great news is that it’s more natural to stamp off into a front roll from toe side than it is to stamp into a straight air from toeside. Things are going your way. Take off here is quite literally about stamping your authority on proceedings. First in the sequence is the kick. You need an explosive stamp from the ball of your back foot against the board. It’s oh so tempting to throw yourself across the board and under your bar in search of the rotation, but first it’s about up. Kick yourself hard upwind. Next part of the sequence is controlling the kite. You don’t want it flying any further back so get the bar level and pull it in for some lift. However, make sure that you stamp before pulling. And let us not forget the rotation. From the kickoff aim to get you head and leading shoulder heading down towards the water. You don’t need much, as you’ll find the kite and harness hook quite obliging in trying to untwist you and accelerating your roll. Here Christian has stamped hard against his edge, extending up off the water, he’s dipped his head down towards his front shoulder to start the rotation and he’s levelled his bar to stop the kite and bring it back to 12.
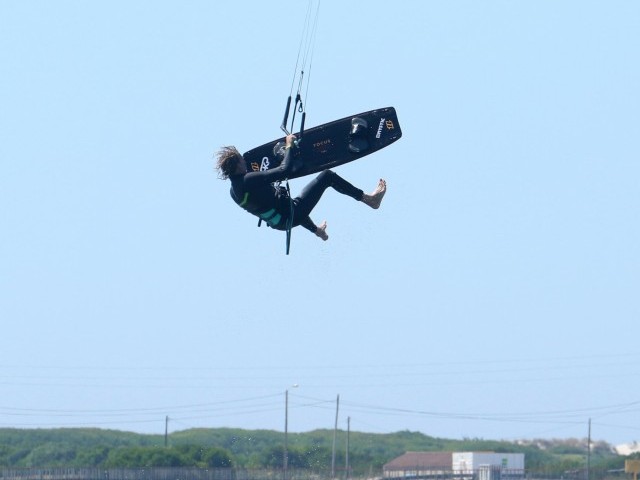
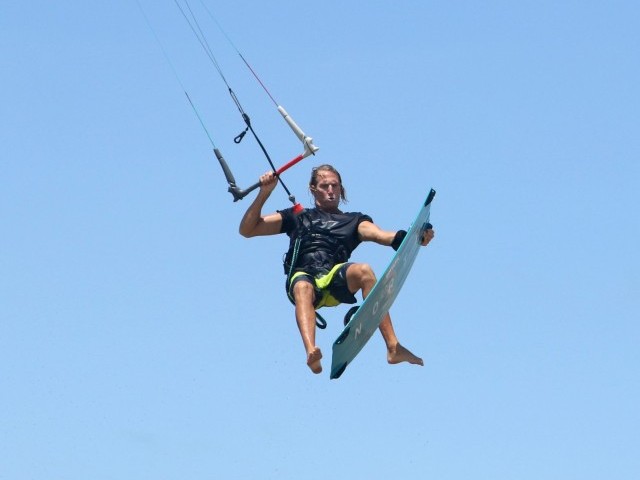
Roll with It Pic E.
Assuming that all has gone to plan you will be slowly rotating underneath your kite which should be around 12 o’clock. The slow rotation is in fact a plus, as your intention is only to get to toeside after all. However, to make sure that you keep all that kinetic energy working for you, bring your knees and board up. This will also give you more room when it comes to getting around the last few degrees at the end. Now if you look at Christian the glaringly obvious take away from this picture is the angle of his bar. He is already diving the kite, and let’s be honest it looks fairly aggressive! There’s a good reason for this, actually two. By launching from your toes, it is probable that you won’t have managed the same level of resistance that you manage on your heels. The result being that you’ll be travelling a bit more downwind and under the kite. And the very nature of throwing yourself forward into a front roll also has a tendency to move you downwind as one tends to lose a little edge. As such you won’t have as much tension on the lines as you’d like. Getting on the front hand early and with meaning will guarantee that the kite moves forwards. As it does it’ll help you around. This is all good and well, but please keep in mind that in this move Christian is flying a 12m, and although quick, it’s nothing like a 7. If you’re on a small kite it won’t need quite the same input, so simmer down.

In the Head Pic F.
Once you come around to the halfway mark and have passed through upwind your challenge is to do very little, and not force your body around a full front roll. Due to the fact that you are travelling downwind and you’re backwards, it will feel like your feet are left behind. If so, bring the knees in tighter which will put the board underneath you. Now it’s about focusing on where you think you’ll land. Keep looking over you back shoulder but pick a point in front of you and keep watching it. This will prevent you from turning the full 360. In the pic Christian is still steering the kite forwards, and he’s got his eyes fixed in front of him.
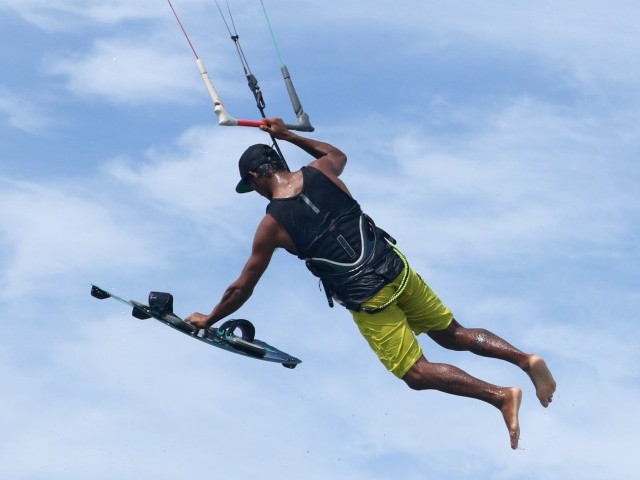
The Pull Pic G.
As a result of your determined steering the kite will start to pull you downwind. If it doesn’t, you’ll need to give it a bit more front hand. Your aim is to land downwind on your board, not toeside across the wind. With the kite pulling on your harness it’ll bring your hips around. At first this will feel unnatural as you’ll be the wrong side of the bar! Normally the bar is downwind of you, between yourself and the kite, but here your shoulders are leading. In preparation for landing you can drop the undercarriage, lowering the board towards the water as you drop. You can see that Christian is extending his legs, watching that mythical landing zone and holding the bar in for support.
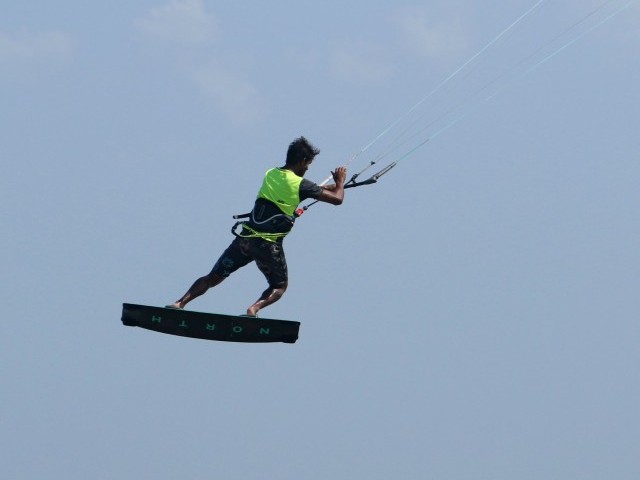
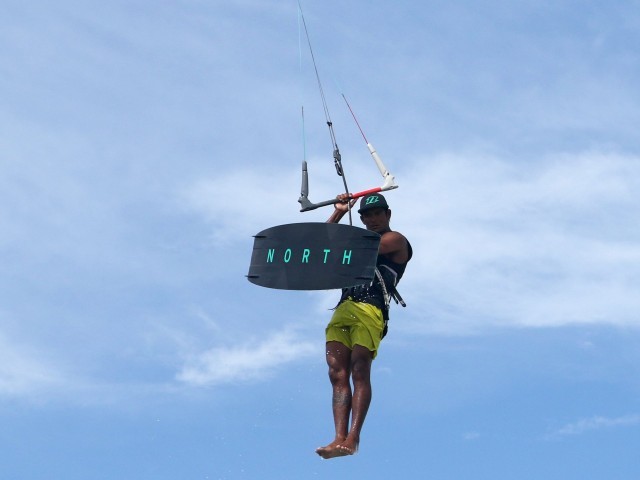
Bingo Pic H.
This is the landing shot and you’re probably wondering where the toeside is? It’s a few milliseconds away. As you come down and the kite pulls your harness and waist around you will land heel heavy downwind. From here it’s just a matter of getting your weight back over the board and carving up back onto your toeside edge. No different from a heelside landing when in fact you land flat and then carve back onto your heels. Last but not least, if you look at Christian’s bar, he’s steering the kite back up, lifting it away from the water. You need to get the kite back up asap, as it’s been diving for a while and you’re heading downwind straight towards it. Getting it back up and yourself back onto an edge means you’ve nailed it.
Top Tips
Make sure you have a solid toeside! Without a decent edge and some speed, the take-off will be so much harder. Spend some time on the flattest water you can find to hone that stance.
Trimming your kite sufficiently and turning your shoulders are the two ways that you can guarantee reaching the bar and not stalling the kite.


Giving the kite a short but sharp send, means less time trying to edge against a lifting kite, so give it the beans on the bar but for less time.
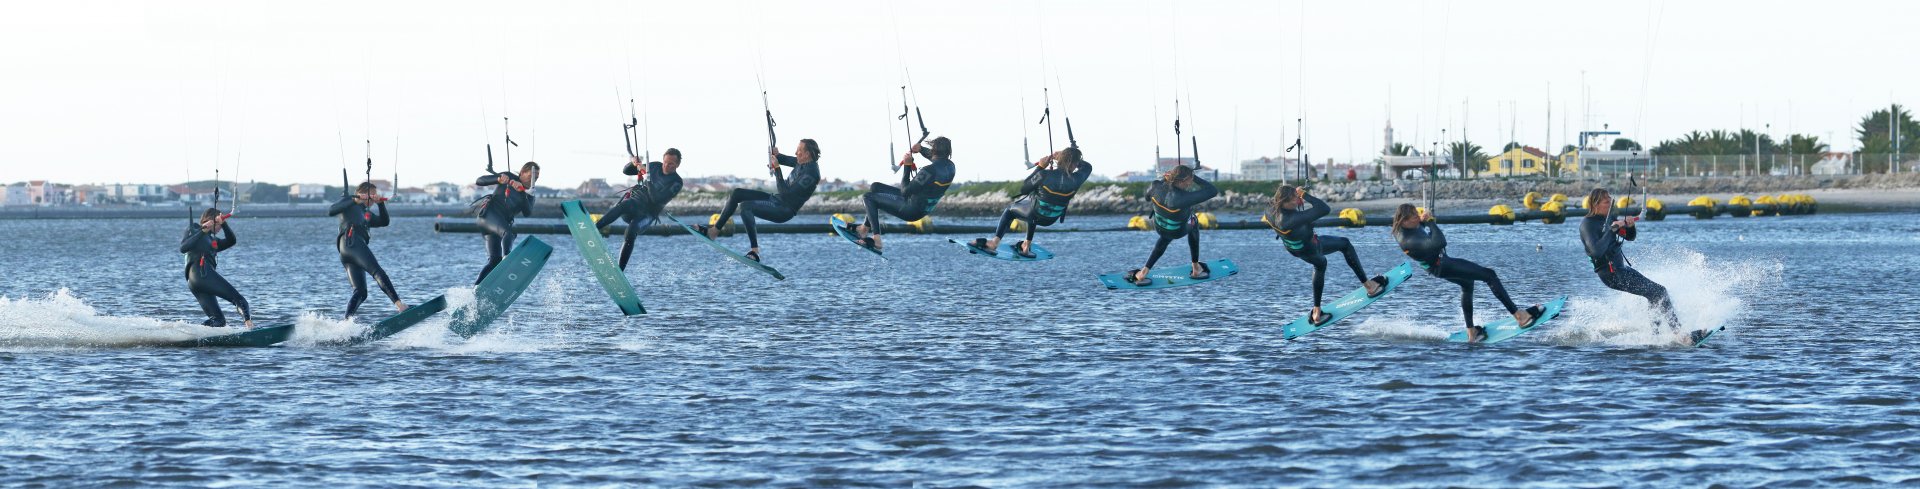
Now have a good look at the sequence and videos for some real life walk throughs.
Common Problems
Getting pulled off your edge when sending the kite. This is the result of pulling the bar in past the sweet spot when sending the kite. Make sure to trim enough so that you can reach the bar and send from the sweet spot.
Kite flying too far back. Normally a result of not having enough edge, so practice your position. However, if you drift the kite rather than send it, it may move way back before you feel lift, and it’s hard to rescue once there. Make sure you start at 11 or 1 o’clock and try to move it quickly just to 12. Also make sure you level the bar as soon as you kick off.
Over rotating into a full front roll. Often the result of too much air. A good problem to have, but tone down your kite send.


Not making it around and landing on your back. Not enough height. Can be a result of lack of edge or not enough send. Make sure that your kite does get all the way up to 12 o’clock before you kick and level.
Keystones
- Open chest, knees driving forwards, bar trimmed. That toeside position.
- Short sharp send
- Stamp and level
- Head and shoulder dip
- Early dive
This technique article was in Issue 86 of IKSURFMAG.
Related
By Christian and Karine
Christian and Karine have been working together as a coaching team, running improver to advanced kitesurfing clinics since 2003.
