
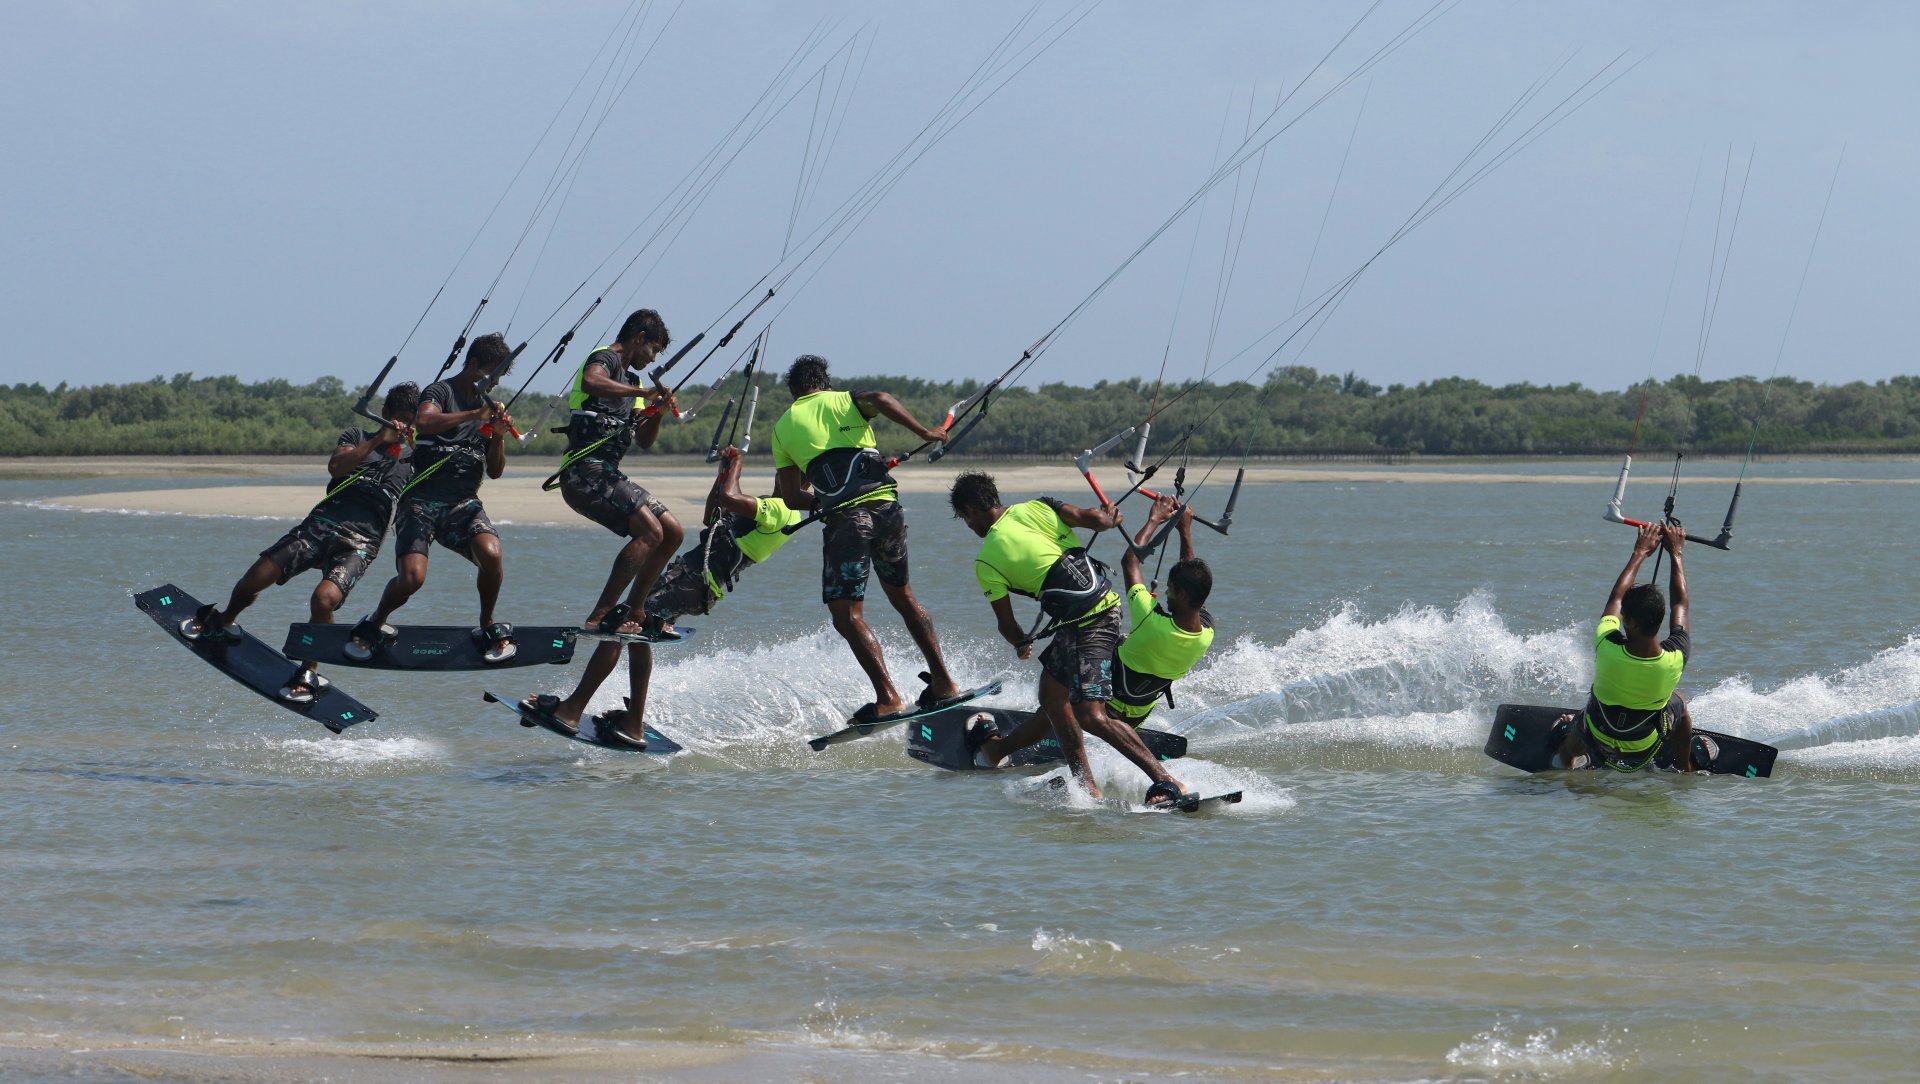
BLT to Blind
Technique / Advanced


Introduction
We absolutely love this one! A veritably fun little treat and an absolute banger of a cheeky move. Conjuring this out of the hat when turning low level next to the beach should get you a few laughs and plenty of appreciative whistles, smiles all round.
Basic requirements are a back roll transition and some form of blind. It’s not a move that will hammer you, so well worth a shot and well within reach if you’ve got the aforementioned pair down pat. The best way to think about and visualise the BLT to blind, is more as a BLT to toeside, You’ll then add the long spin around to blind on as a landing. Without delay we’ll continue to the nuts and bolts of how to put this together...


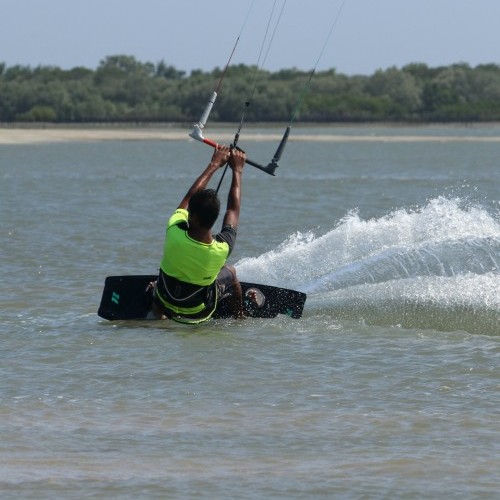
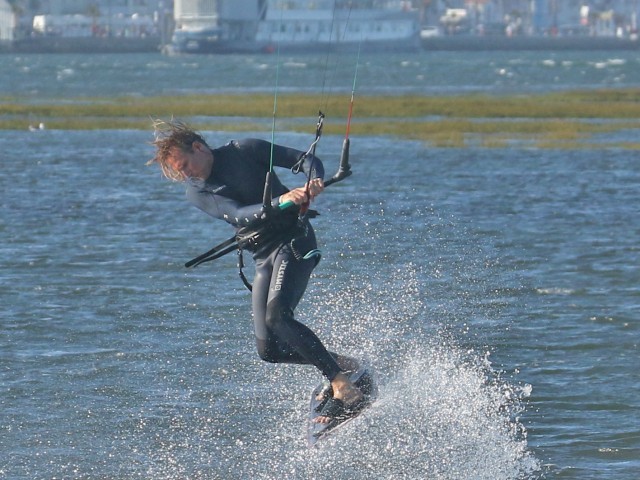
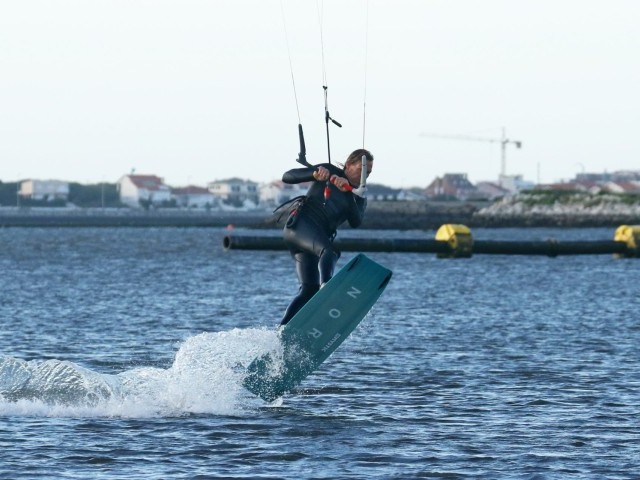
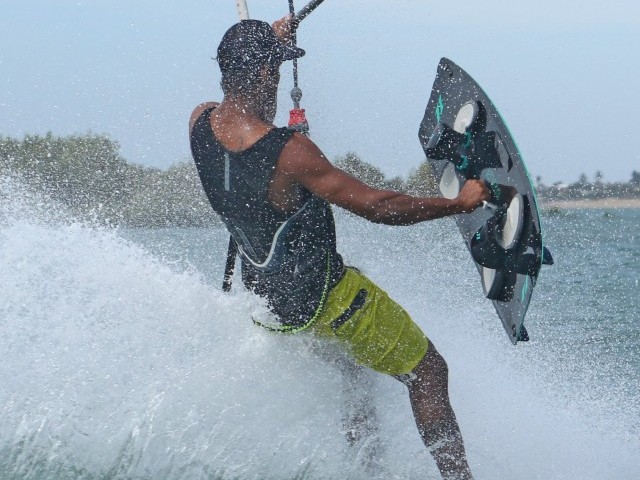
Your Approach Pic A.
This is a low level move and a transition, so you won’t be needing bags of power or buckets of speed. You do need control of your kite and you still need to take off, so an edge and tension on the lines are musts on your approach. You won’t be giving the kite much of a send, more of a gentle drift up towards 12, you’ll do the moving a tad later. As the kite lifts it’ll try and pull you up off your edge, so keep your weight low and resist with all your might. And if necessary, feather the bar out to dump a smidgeon of power. It’s also good practice to keep your hands close to the centre of the bar because you’ll be pulling against it later. Glance over at Heliarde and you can see he’s got a decent edge, his kite is drifting up whilst he’s feathering the bar and keeping his bum low. This combo allows him to slow down but keep tension on the lines to lift off shortly.
The Carve Pic B.
Being a low move, you won’t have a great deal of time in the air. This means that prior to take off you’ll need a strong carve upwind to initiate your back roll, and then a tad more so that you get a fair bit of the rotation done whist still in contact with the water. To assist with this carve you will need to sheet out slightly to stop the kite pulling so that you can move upwind. At the same time continue to drift the kite back towards either 1 or 11. This way once you take off it will immediately start to pull you slowly back towards where you came from. Looking at Heliarde, he’s dropped his weight back and is carving hard into the eye of the wind, he’s sheeted out and he’s steering the kite slowly across to 1 o’clock.
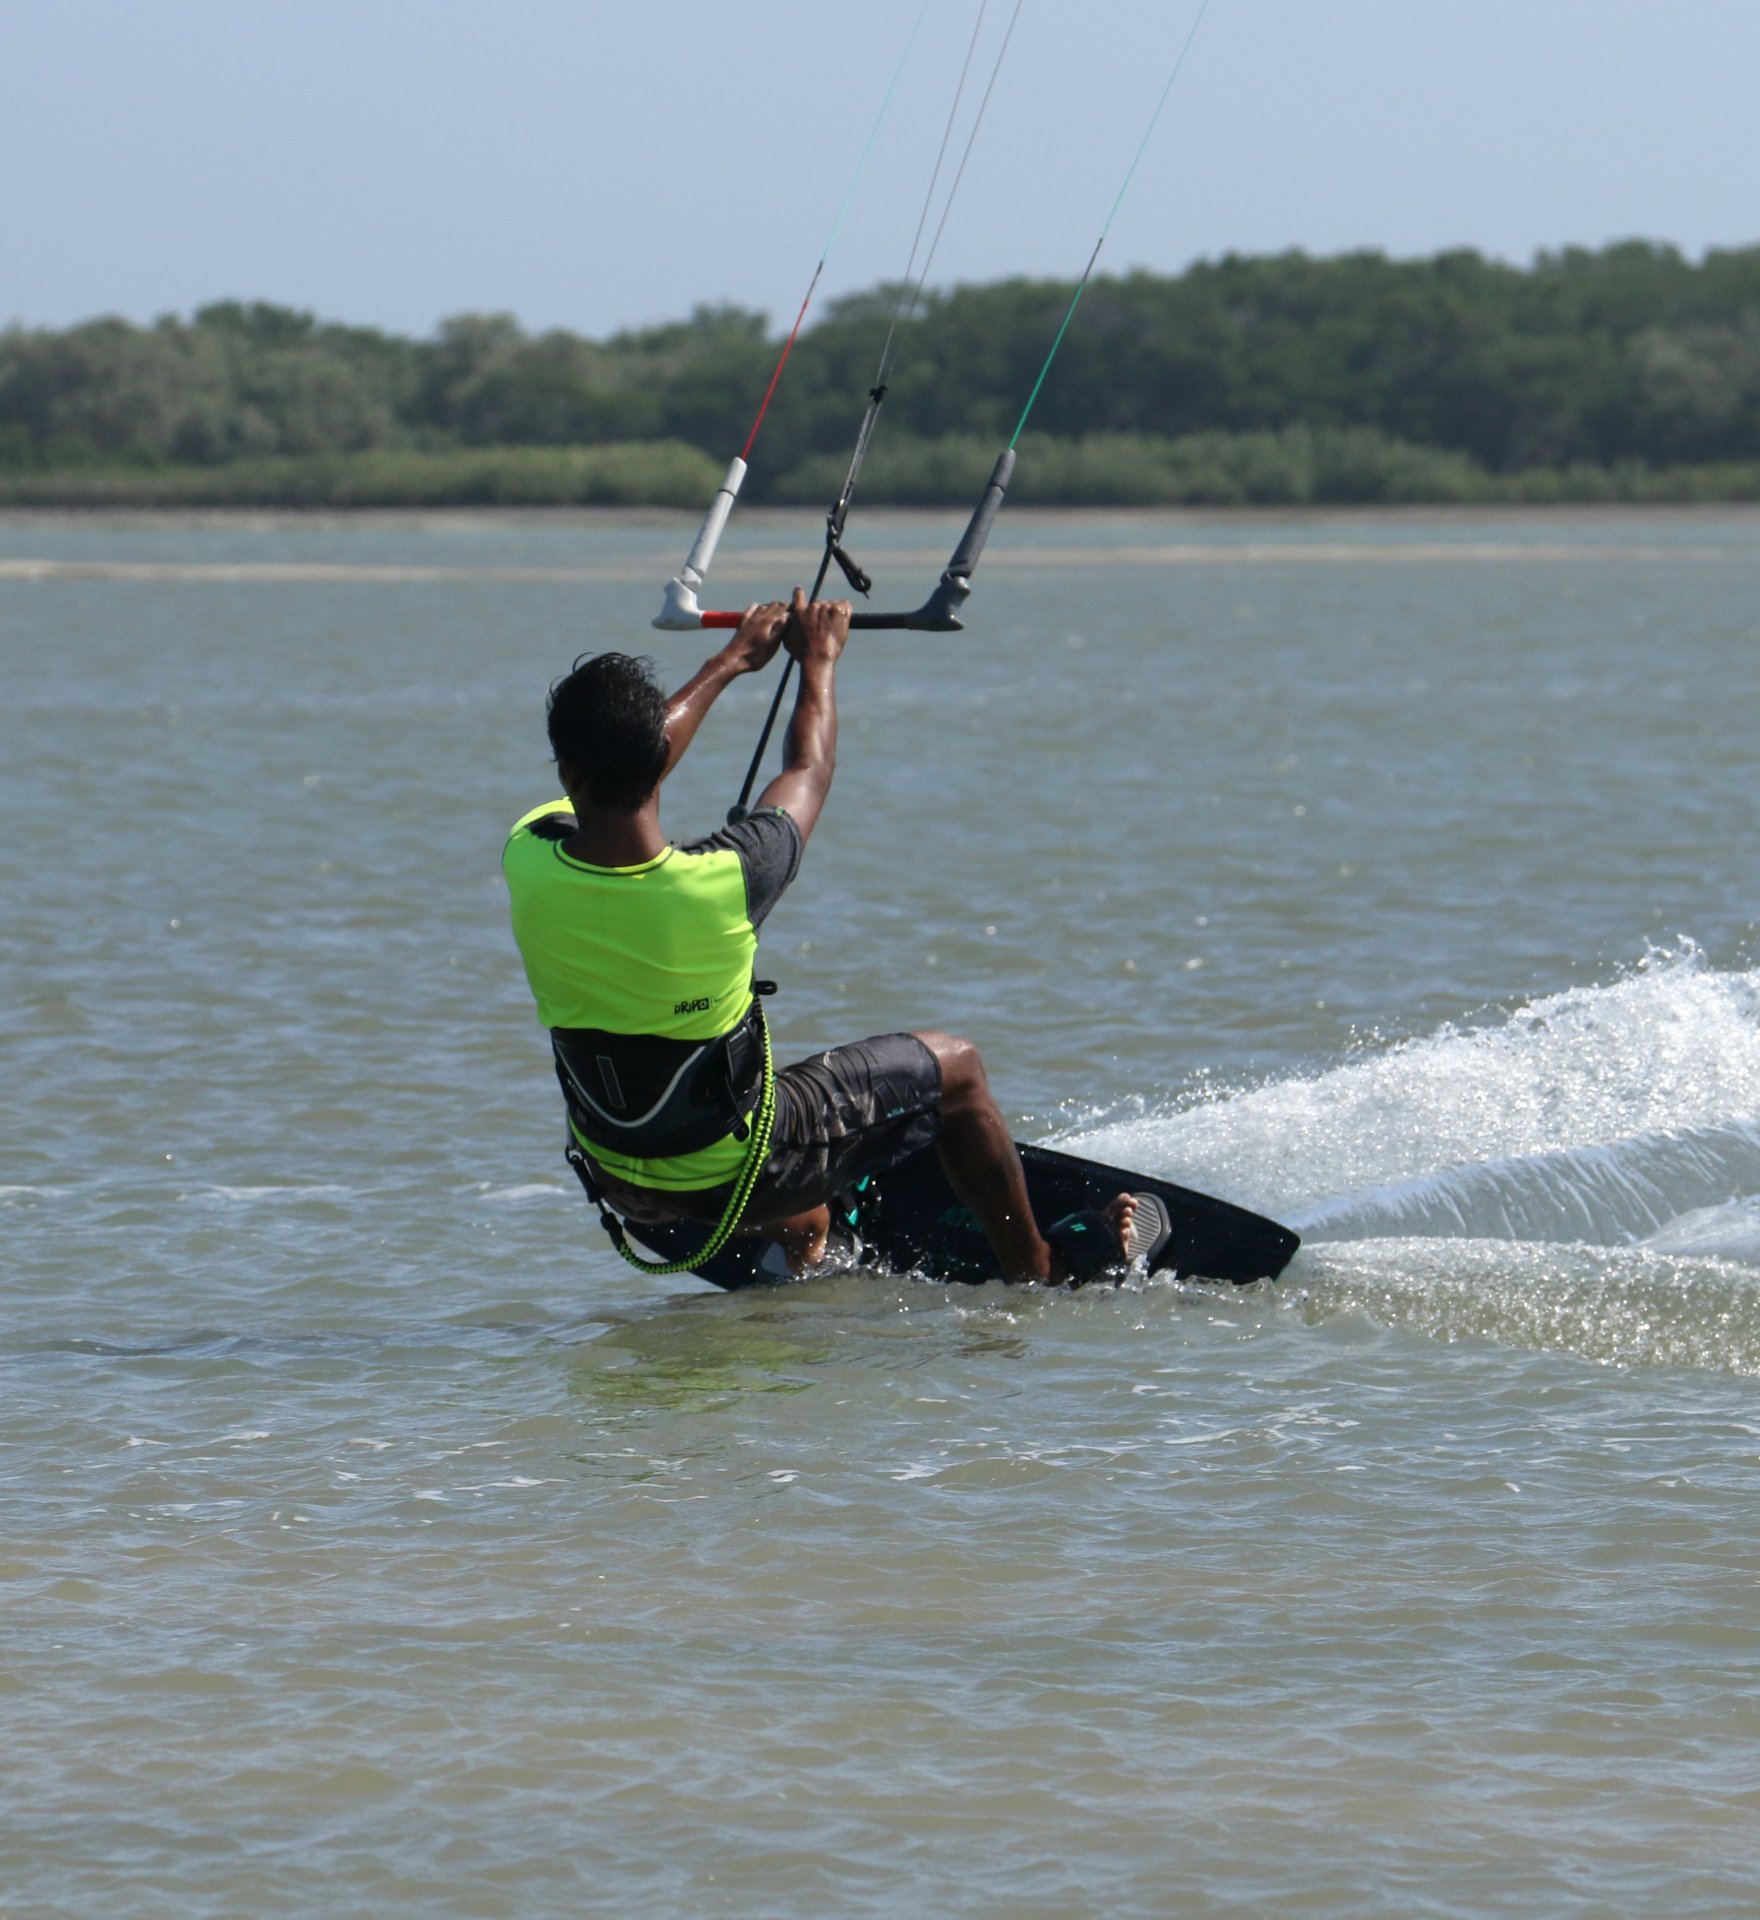
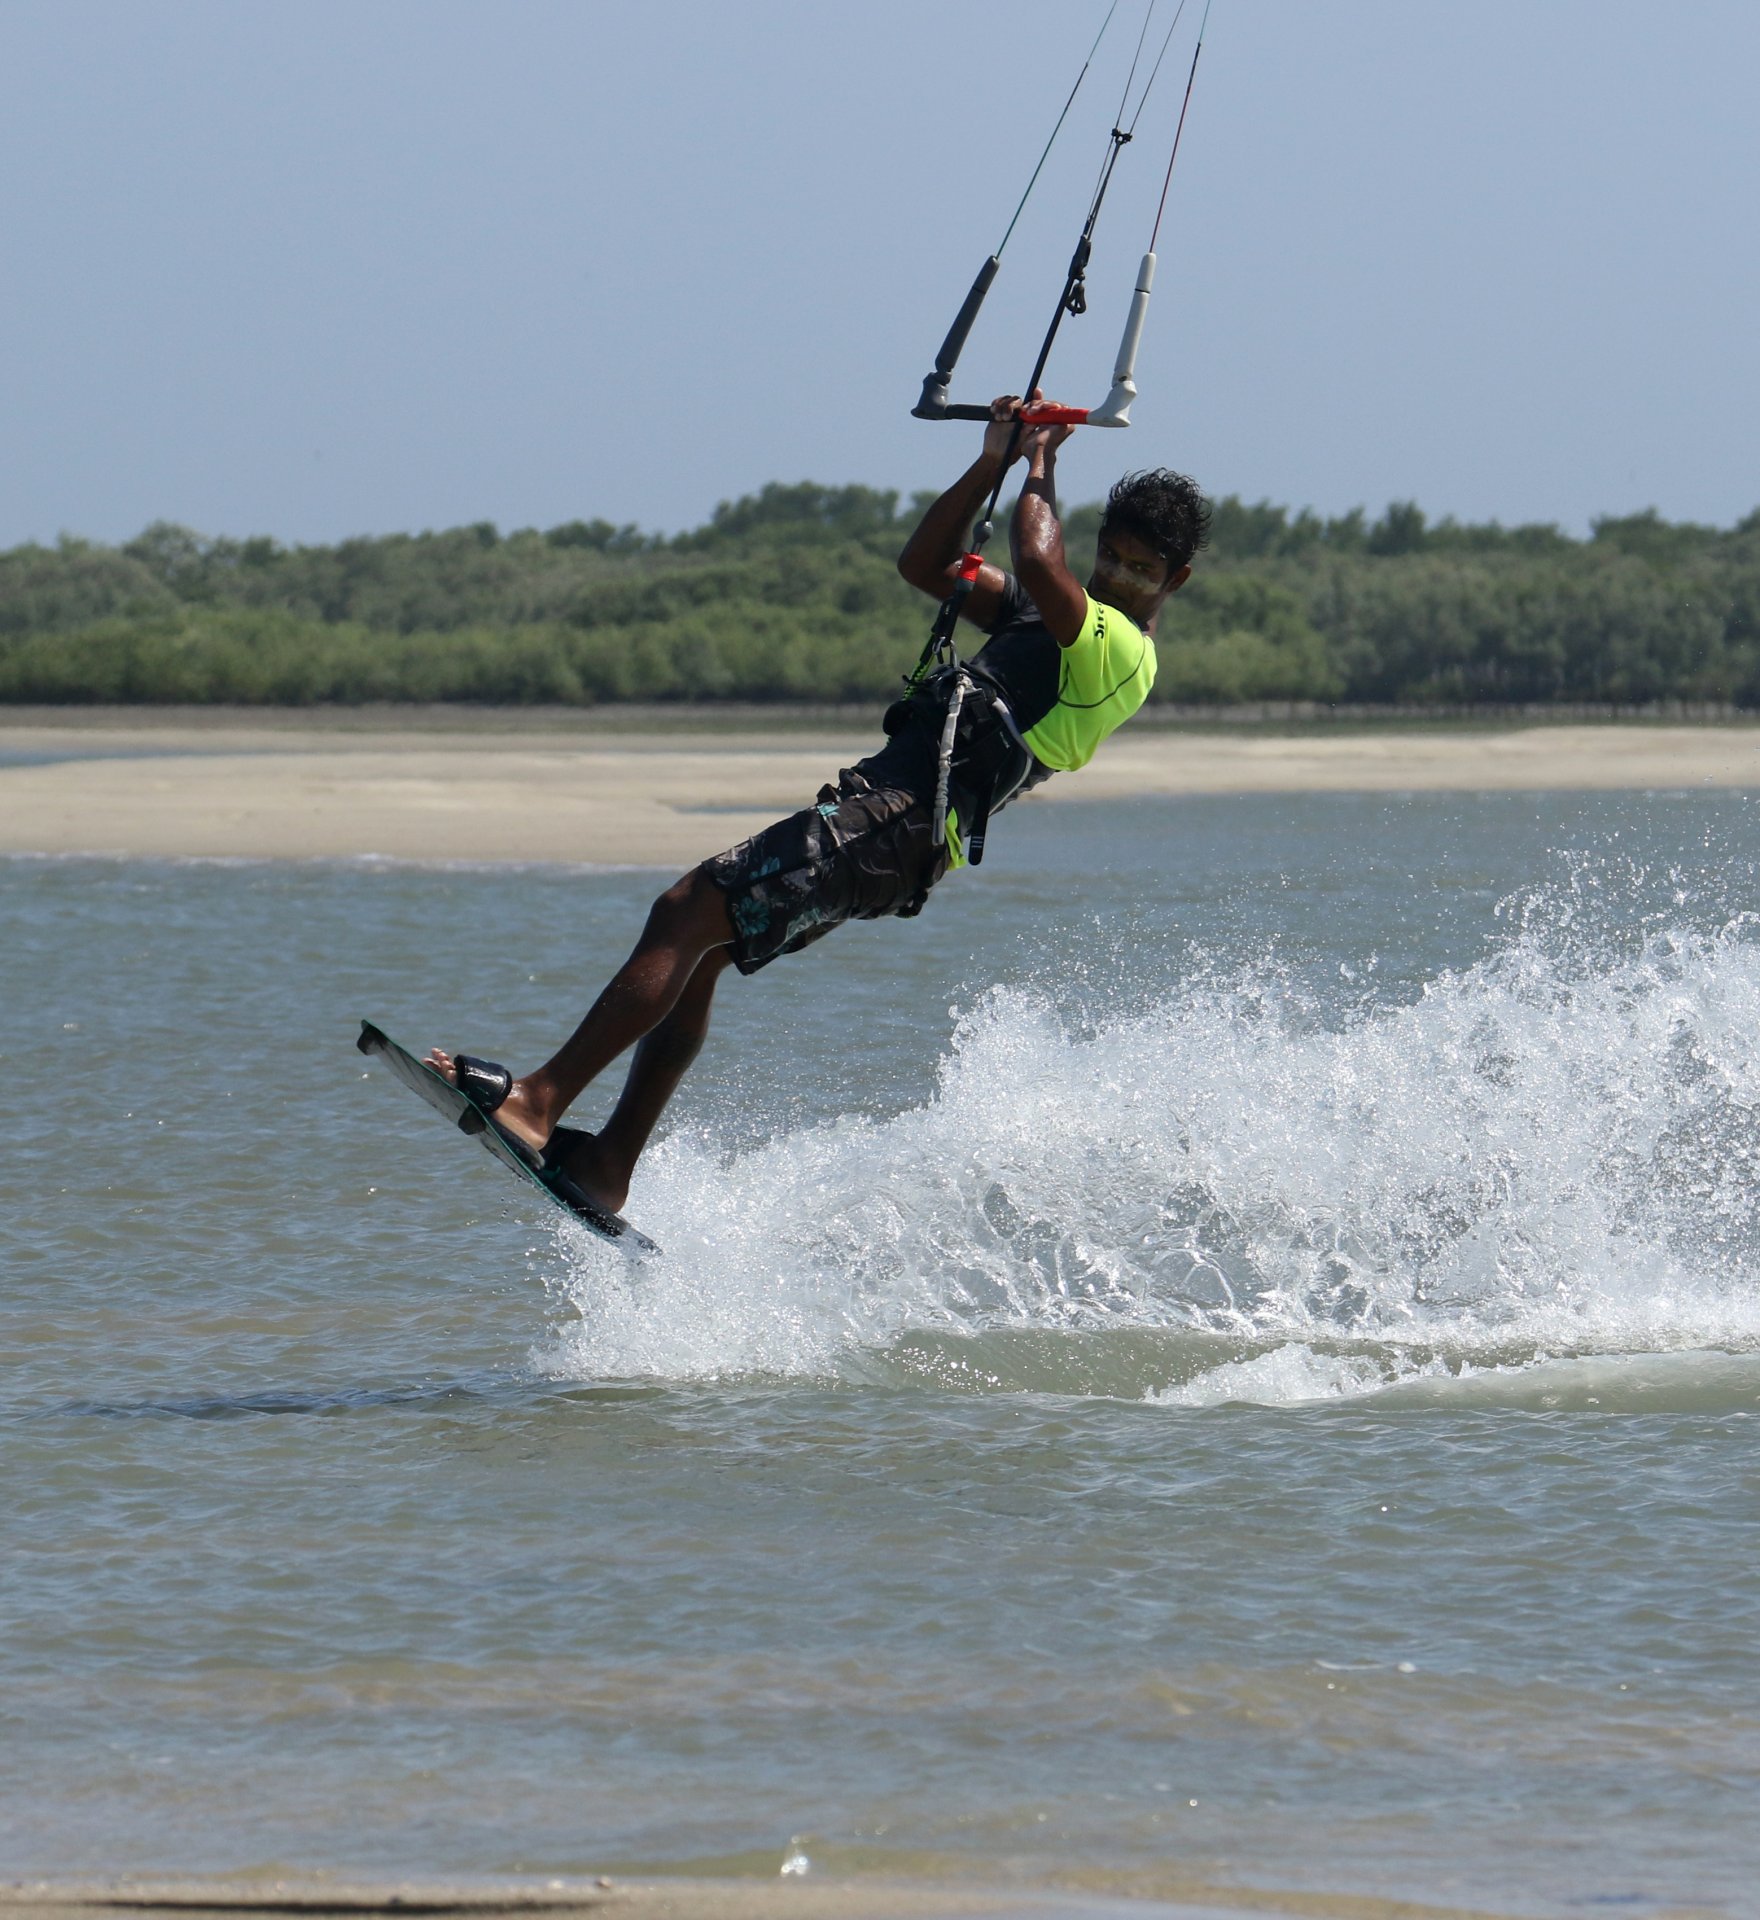
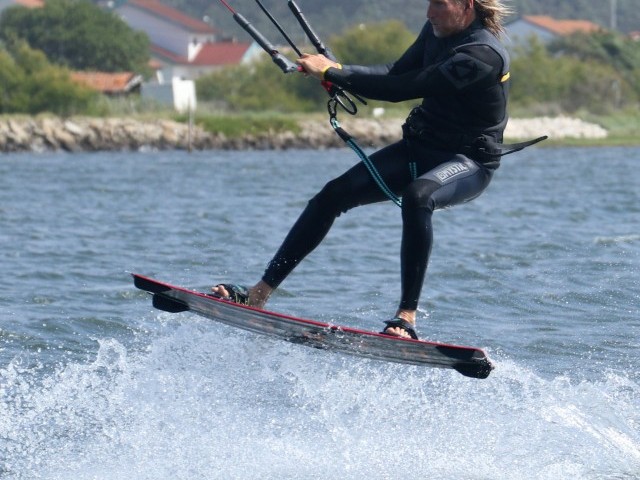
Lift Off Pic C.
Your take off will be the same dynamic kick up as always for a BLT/back roll transition. The only difference being that you will have carved that teeny bit further prior to stamping. It’s a combination of kicking yourself up off your back leg against the edge of your board, whilst pulling in a tad on the bar and of course levelling the bar to stop the kite moving any further. Here Heliarde has kicked off his back leg, so both legs are now extended, he’s pulled in on the bar for lift, but only to the sweet spot, otherwise he’ll stall the kite, he’s levelled his bar to stop the kite and he’s looking along the barrel of his shoulder to rotate slowly without giving it too much. No need to spin as you’re only going to toeside in your head, remember? This part of the move is where patience pays.
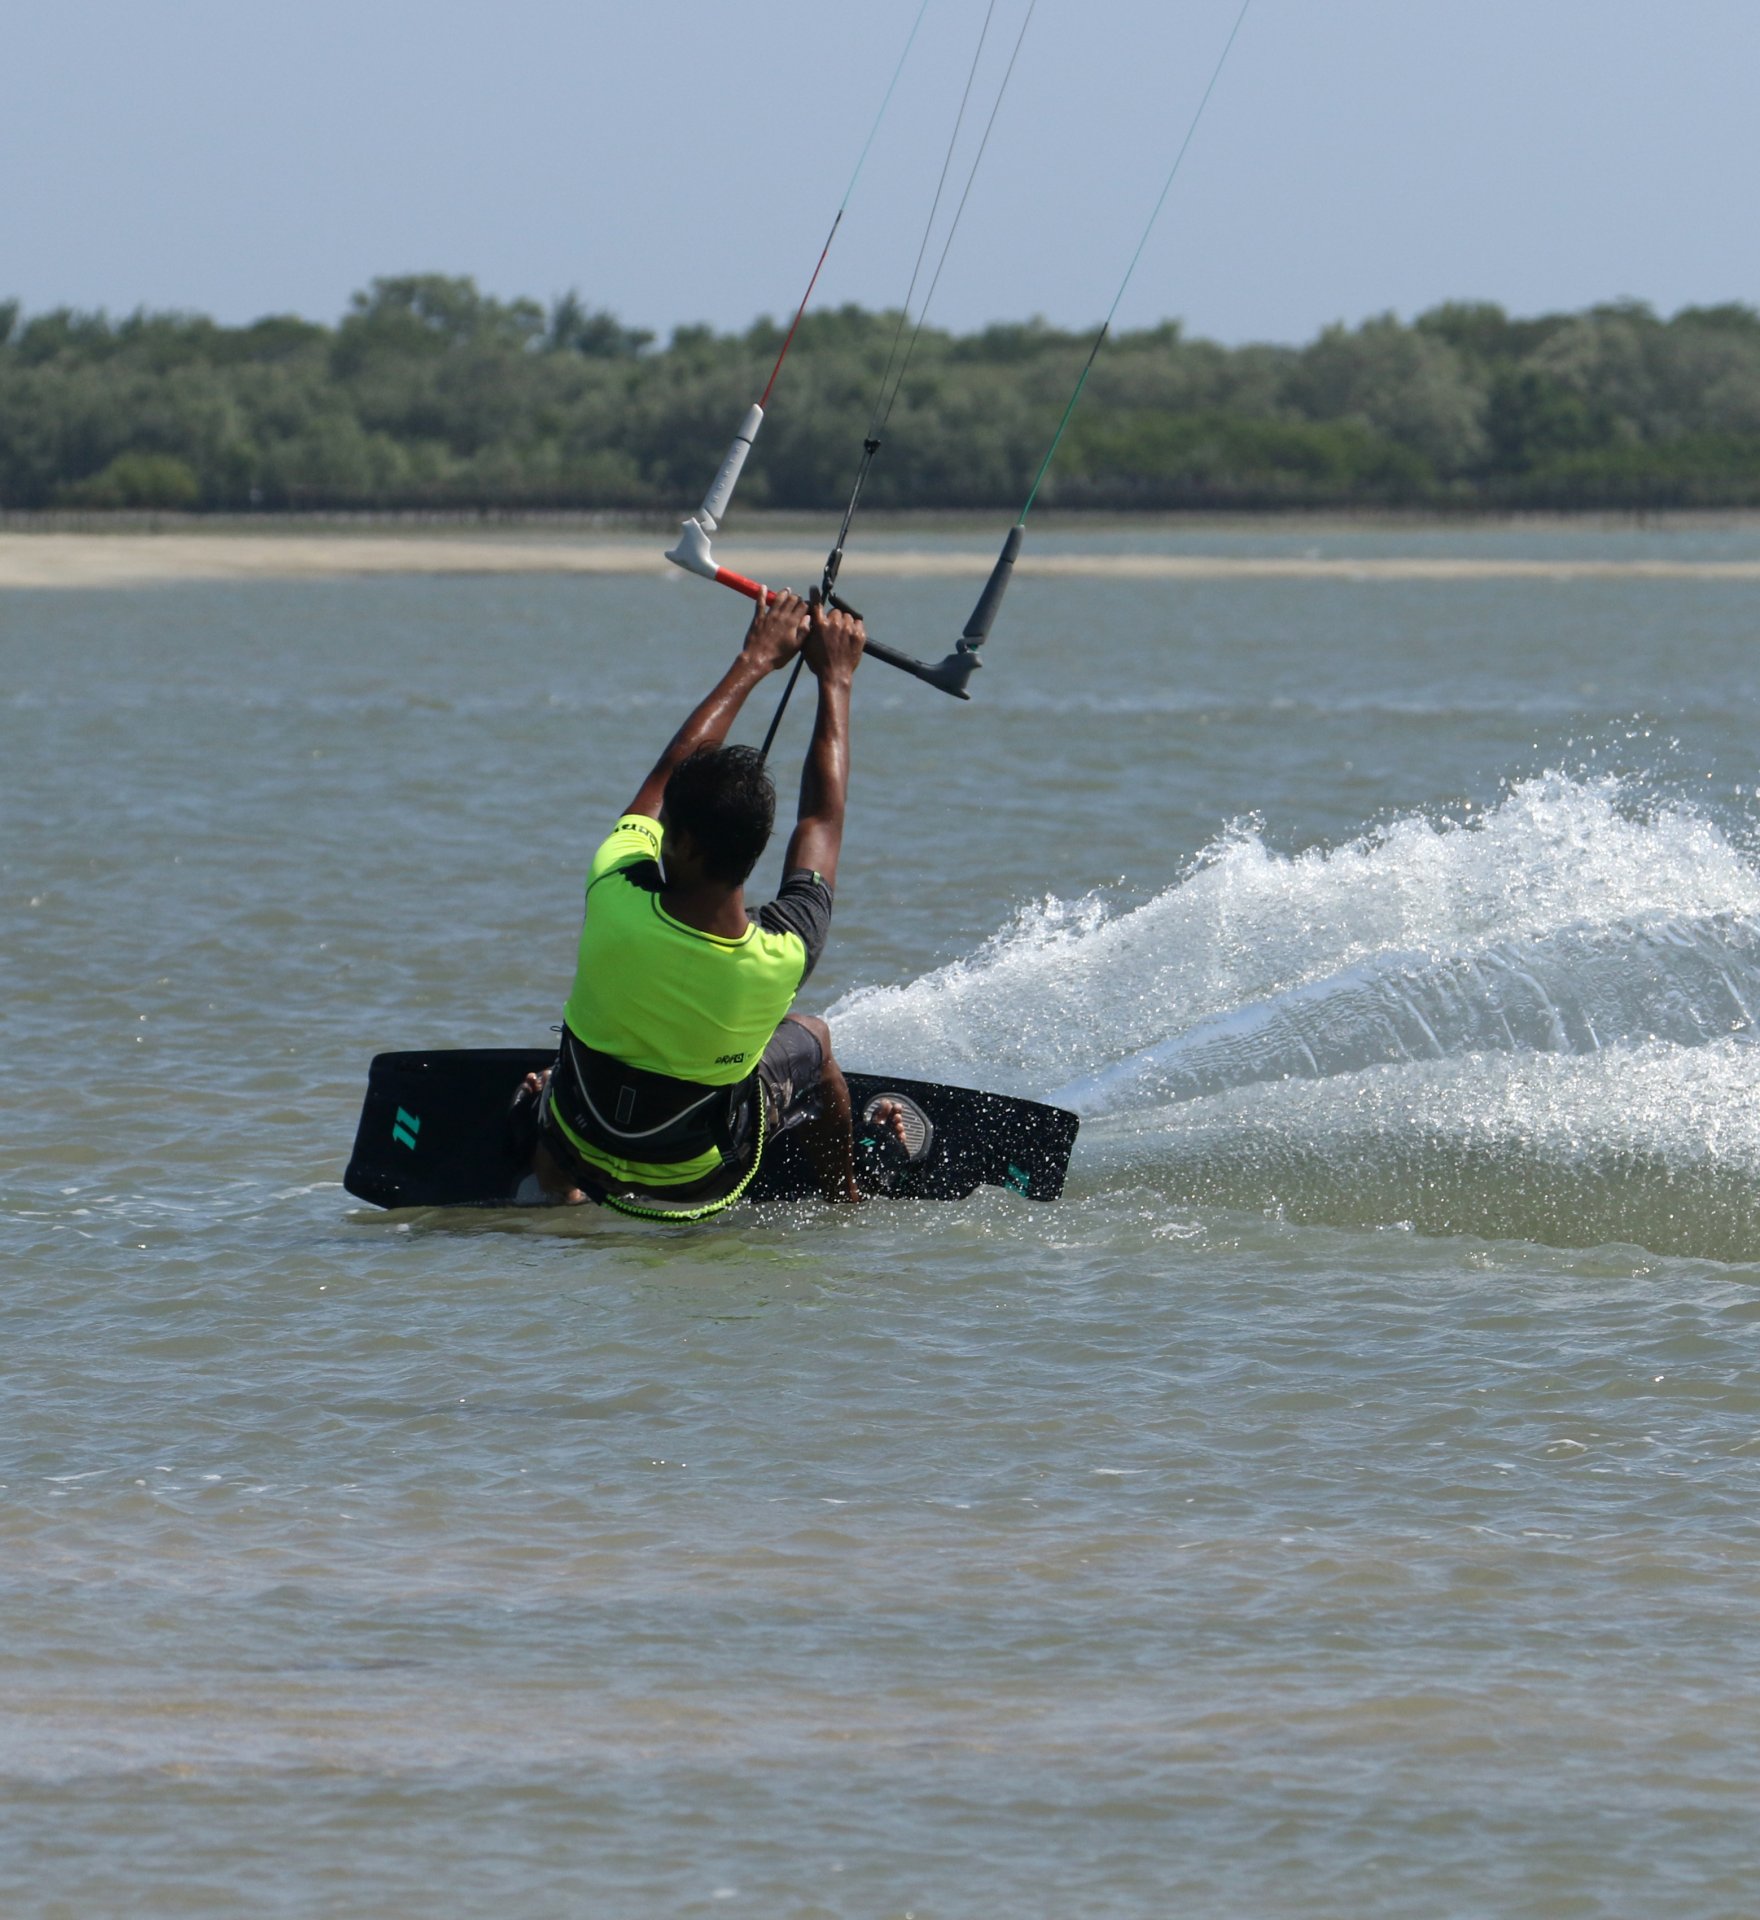
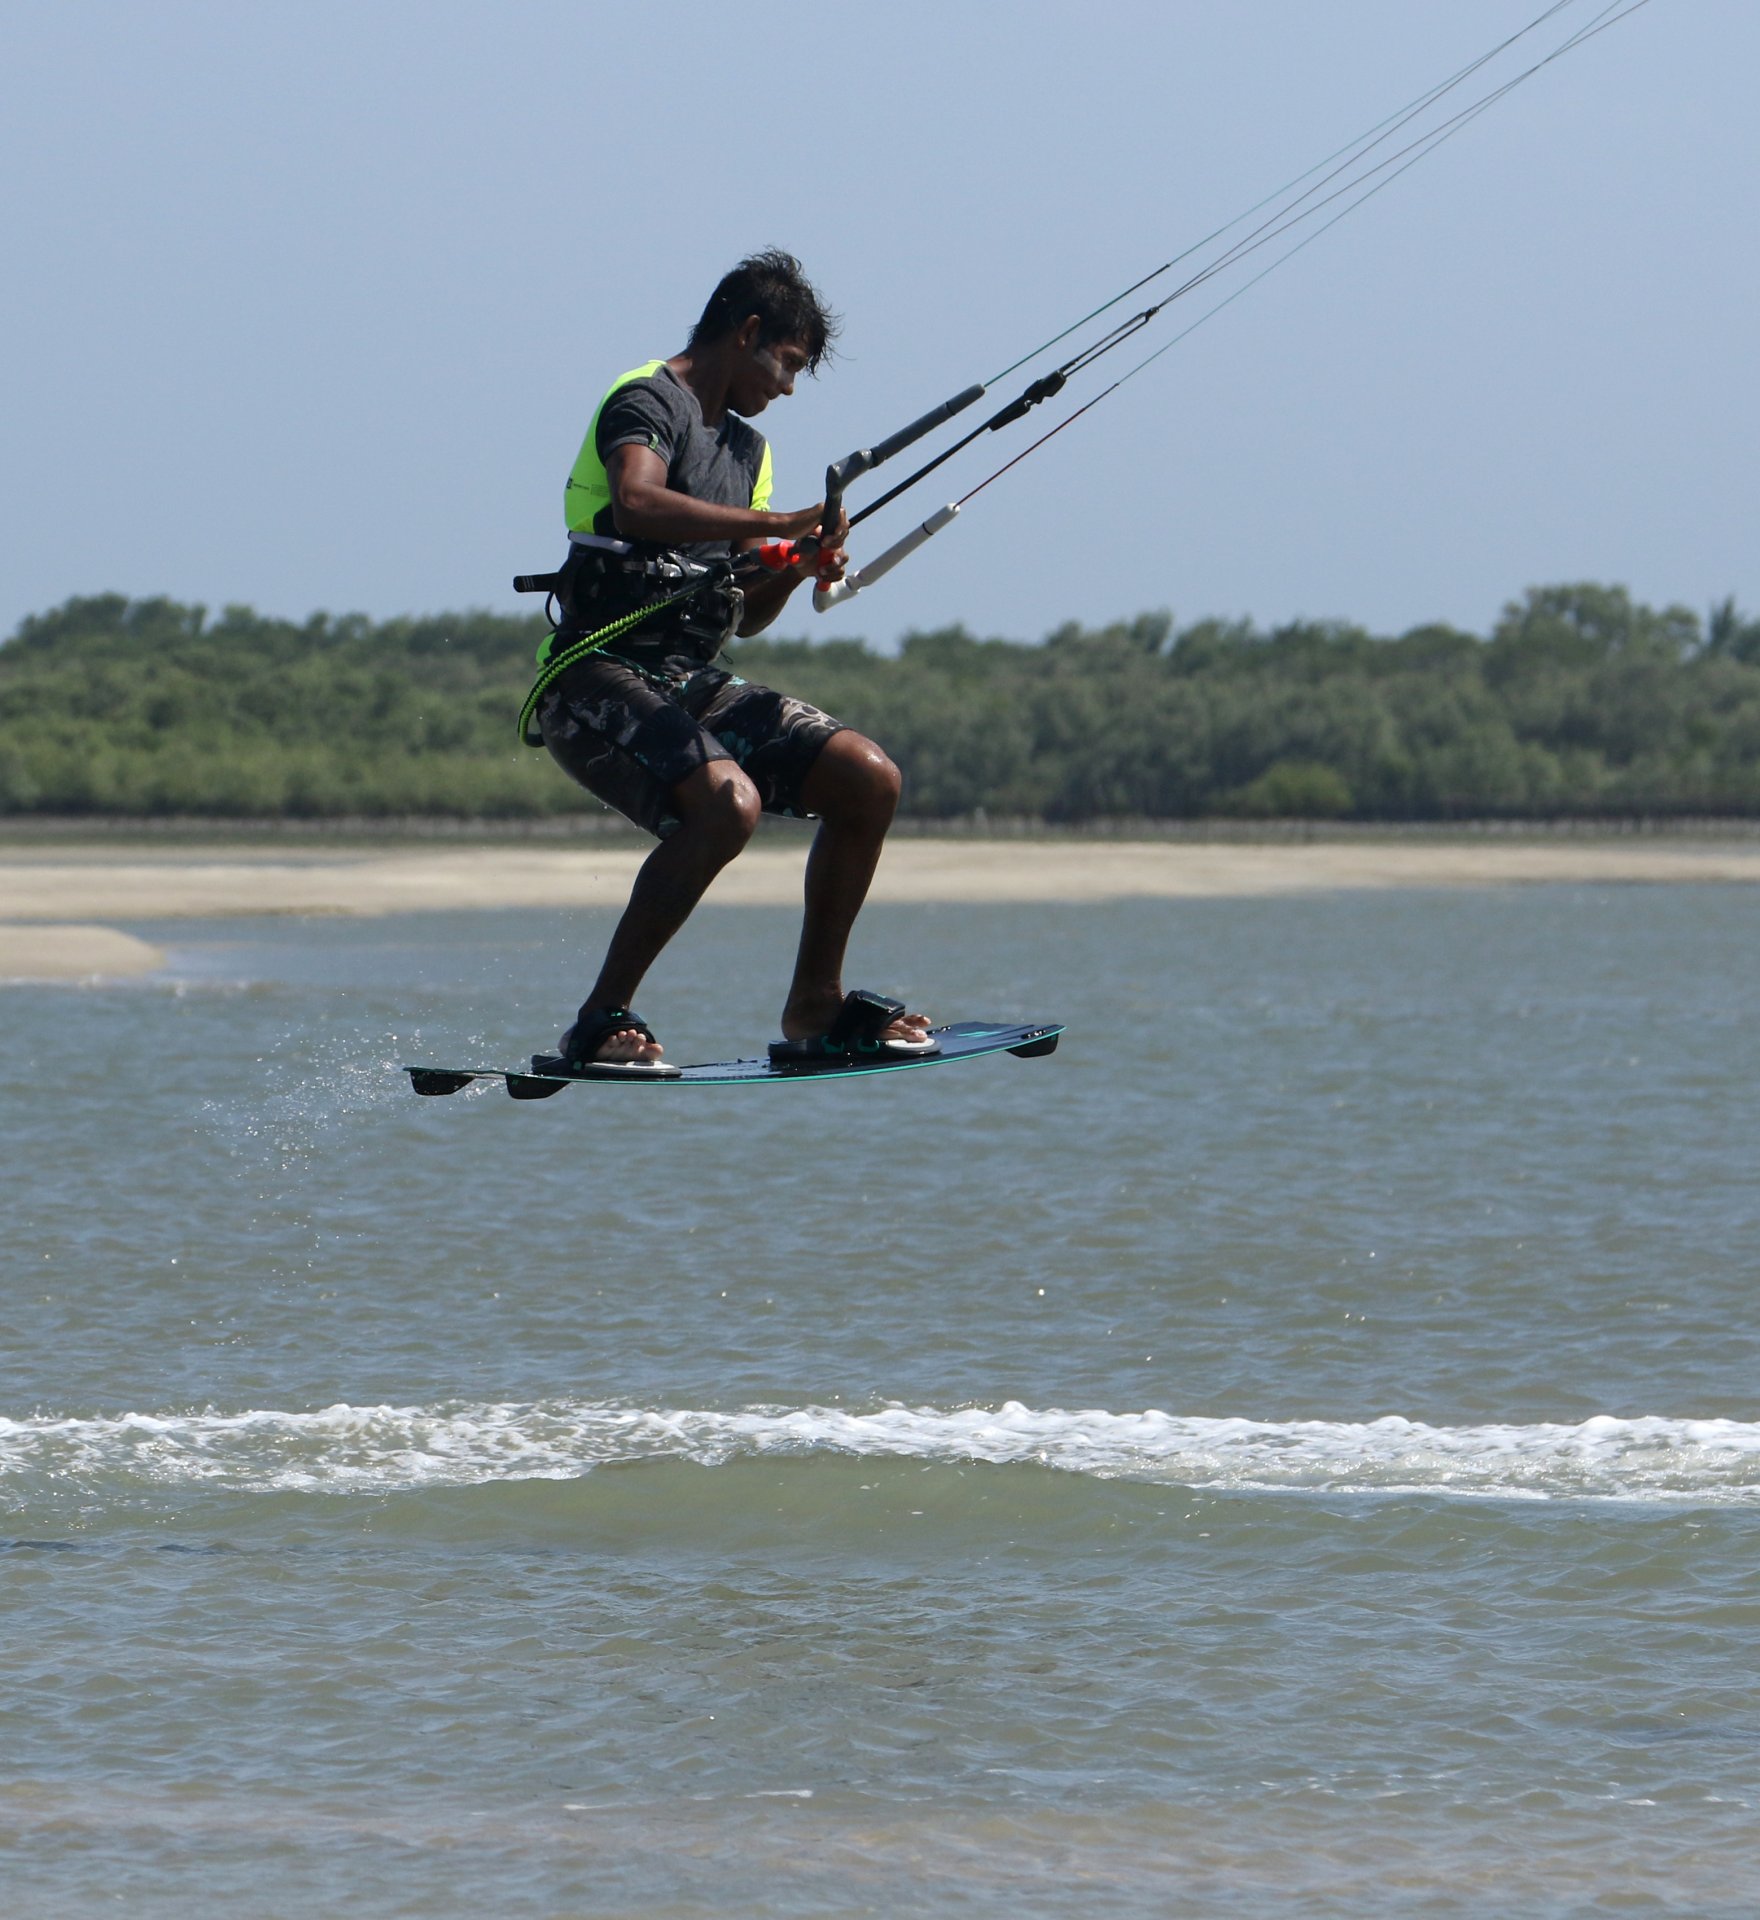
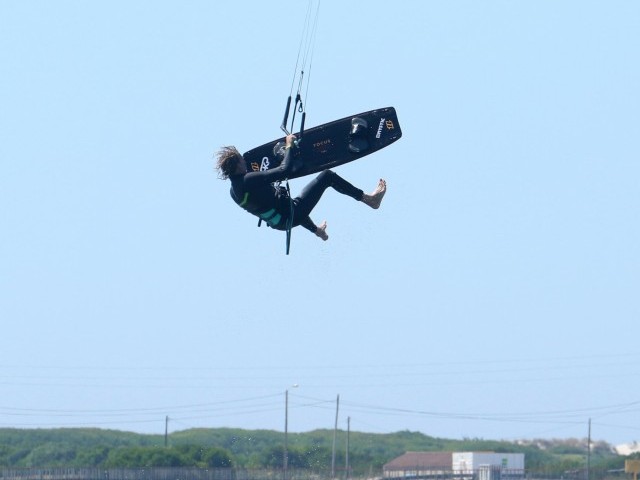
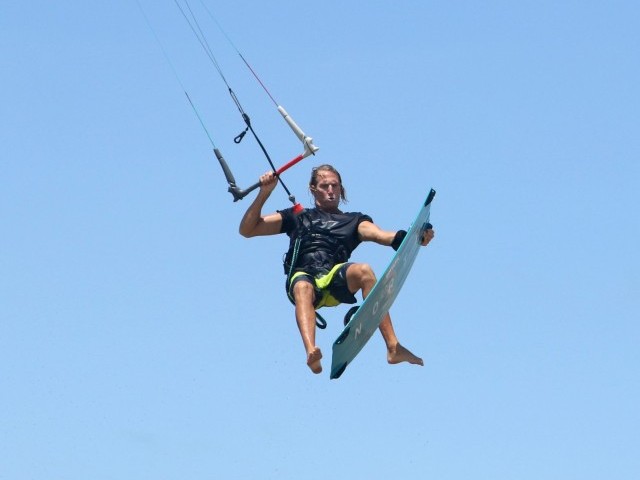
Timing Pic D.
You’re trying to freeze the moment, because the blind is only the landing. You should be waiting here, hanging in aerial toeside, looking at where you think you’ll land, until there is no more lift. This is then the signal to move, prepare for landing and throw the blind. When it’s time your first job is to dive the kite, so that it pulls you for landing and also gives you something to pull against. When diving you can sheet the bar in more, as although this will stall the kite slightly, it’s a deliberate ploy to stop the kite disappearing to the edge of the window. Looking at the picture, Heliarde is diving with the bar in, but he’s still hanging in toeside.
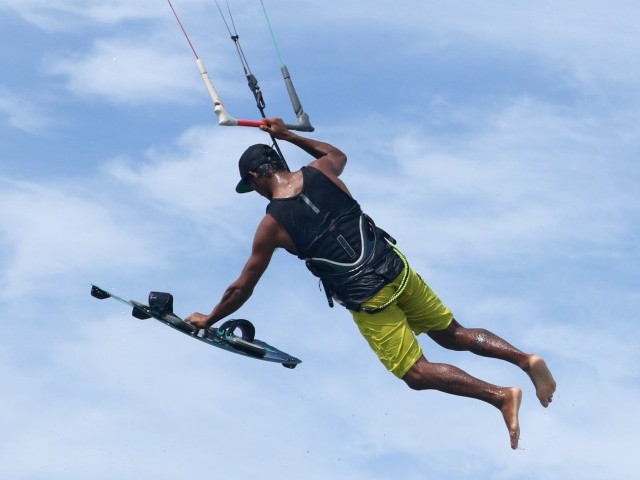
Throw It 1 Pic E.
This could be something new if your blind experience is that of popping around whilst riding hooked, either from heelside or toeside there are a few new bits. If you’re throwing Raleys to blind some of the skills here will already be in your armoury. Let us ponder for a moment what we need to achieve to land blind. You need to rotate 360˚ from this toeside position to get yourself and the board into a blind position. When you land blind, you need to be over the board so that you’re balanced and can then continue, even for a millisecond in that position. In this part you need to concentrate on getting over the board. If you rotate 360˚ that’s great, but if you leave your legs and ultimately your board behind you, won’t have anything to land on! You want to get yourself up and close to the bar and bring your front knee close and under the bar. The fact that you’re toeside will help in a moment. Heliarde is looking at where he’ll land, he’s pulled himself up and over the bar with his arms and he’s lifted his knees, so that the board is under the bar and underneath him.


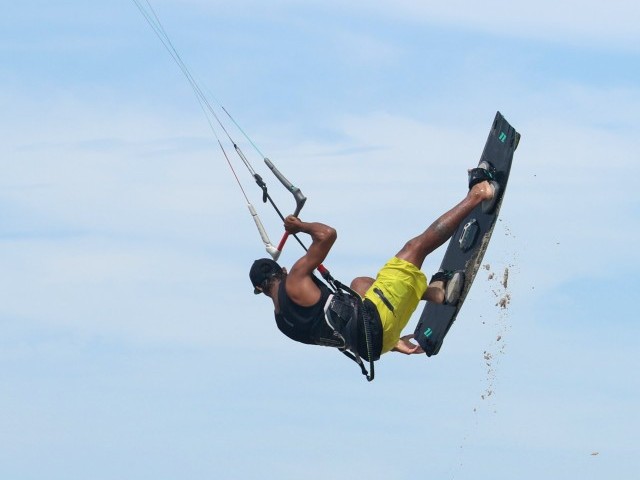
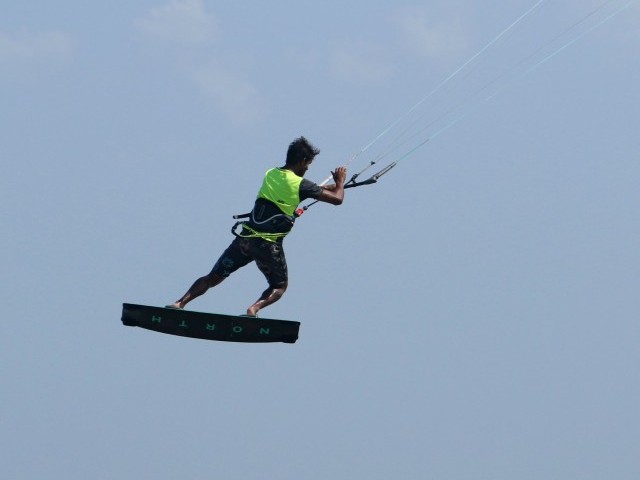
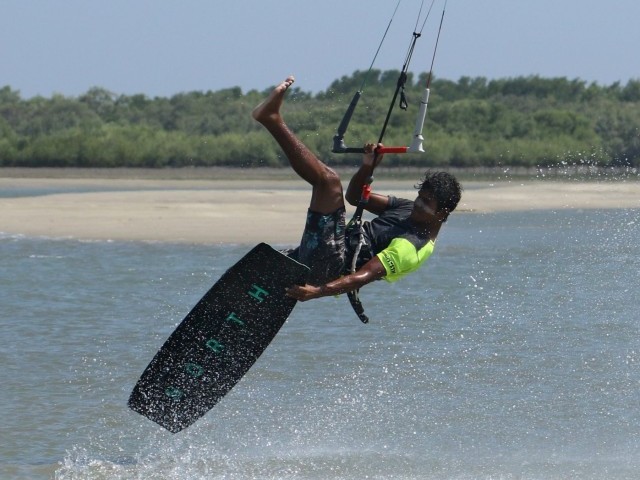
Throw it 2 Pic F.
To get enough rotation you need to use your lower body and board to build momentum and help you round. As you’re pulling yourself up and over the bar, you must bring your back knee through and under it, effectively pushing the front of the board forwards and round. The action is similar to lifting one knee up and across your chest whilst standing. This is why you wait in toeside mode. It leaves your back leg ready and primed to assist when you need it. As the board comes through you can start to turn your head back, so that the shoulders can turn with the board. Heliarde is pulling, he’s bringing his back (right) knee through and he’s turning his head and shoulders away from the kite.
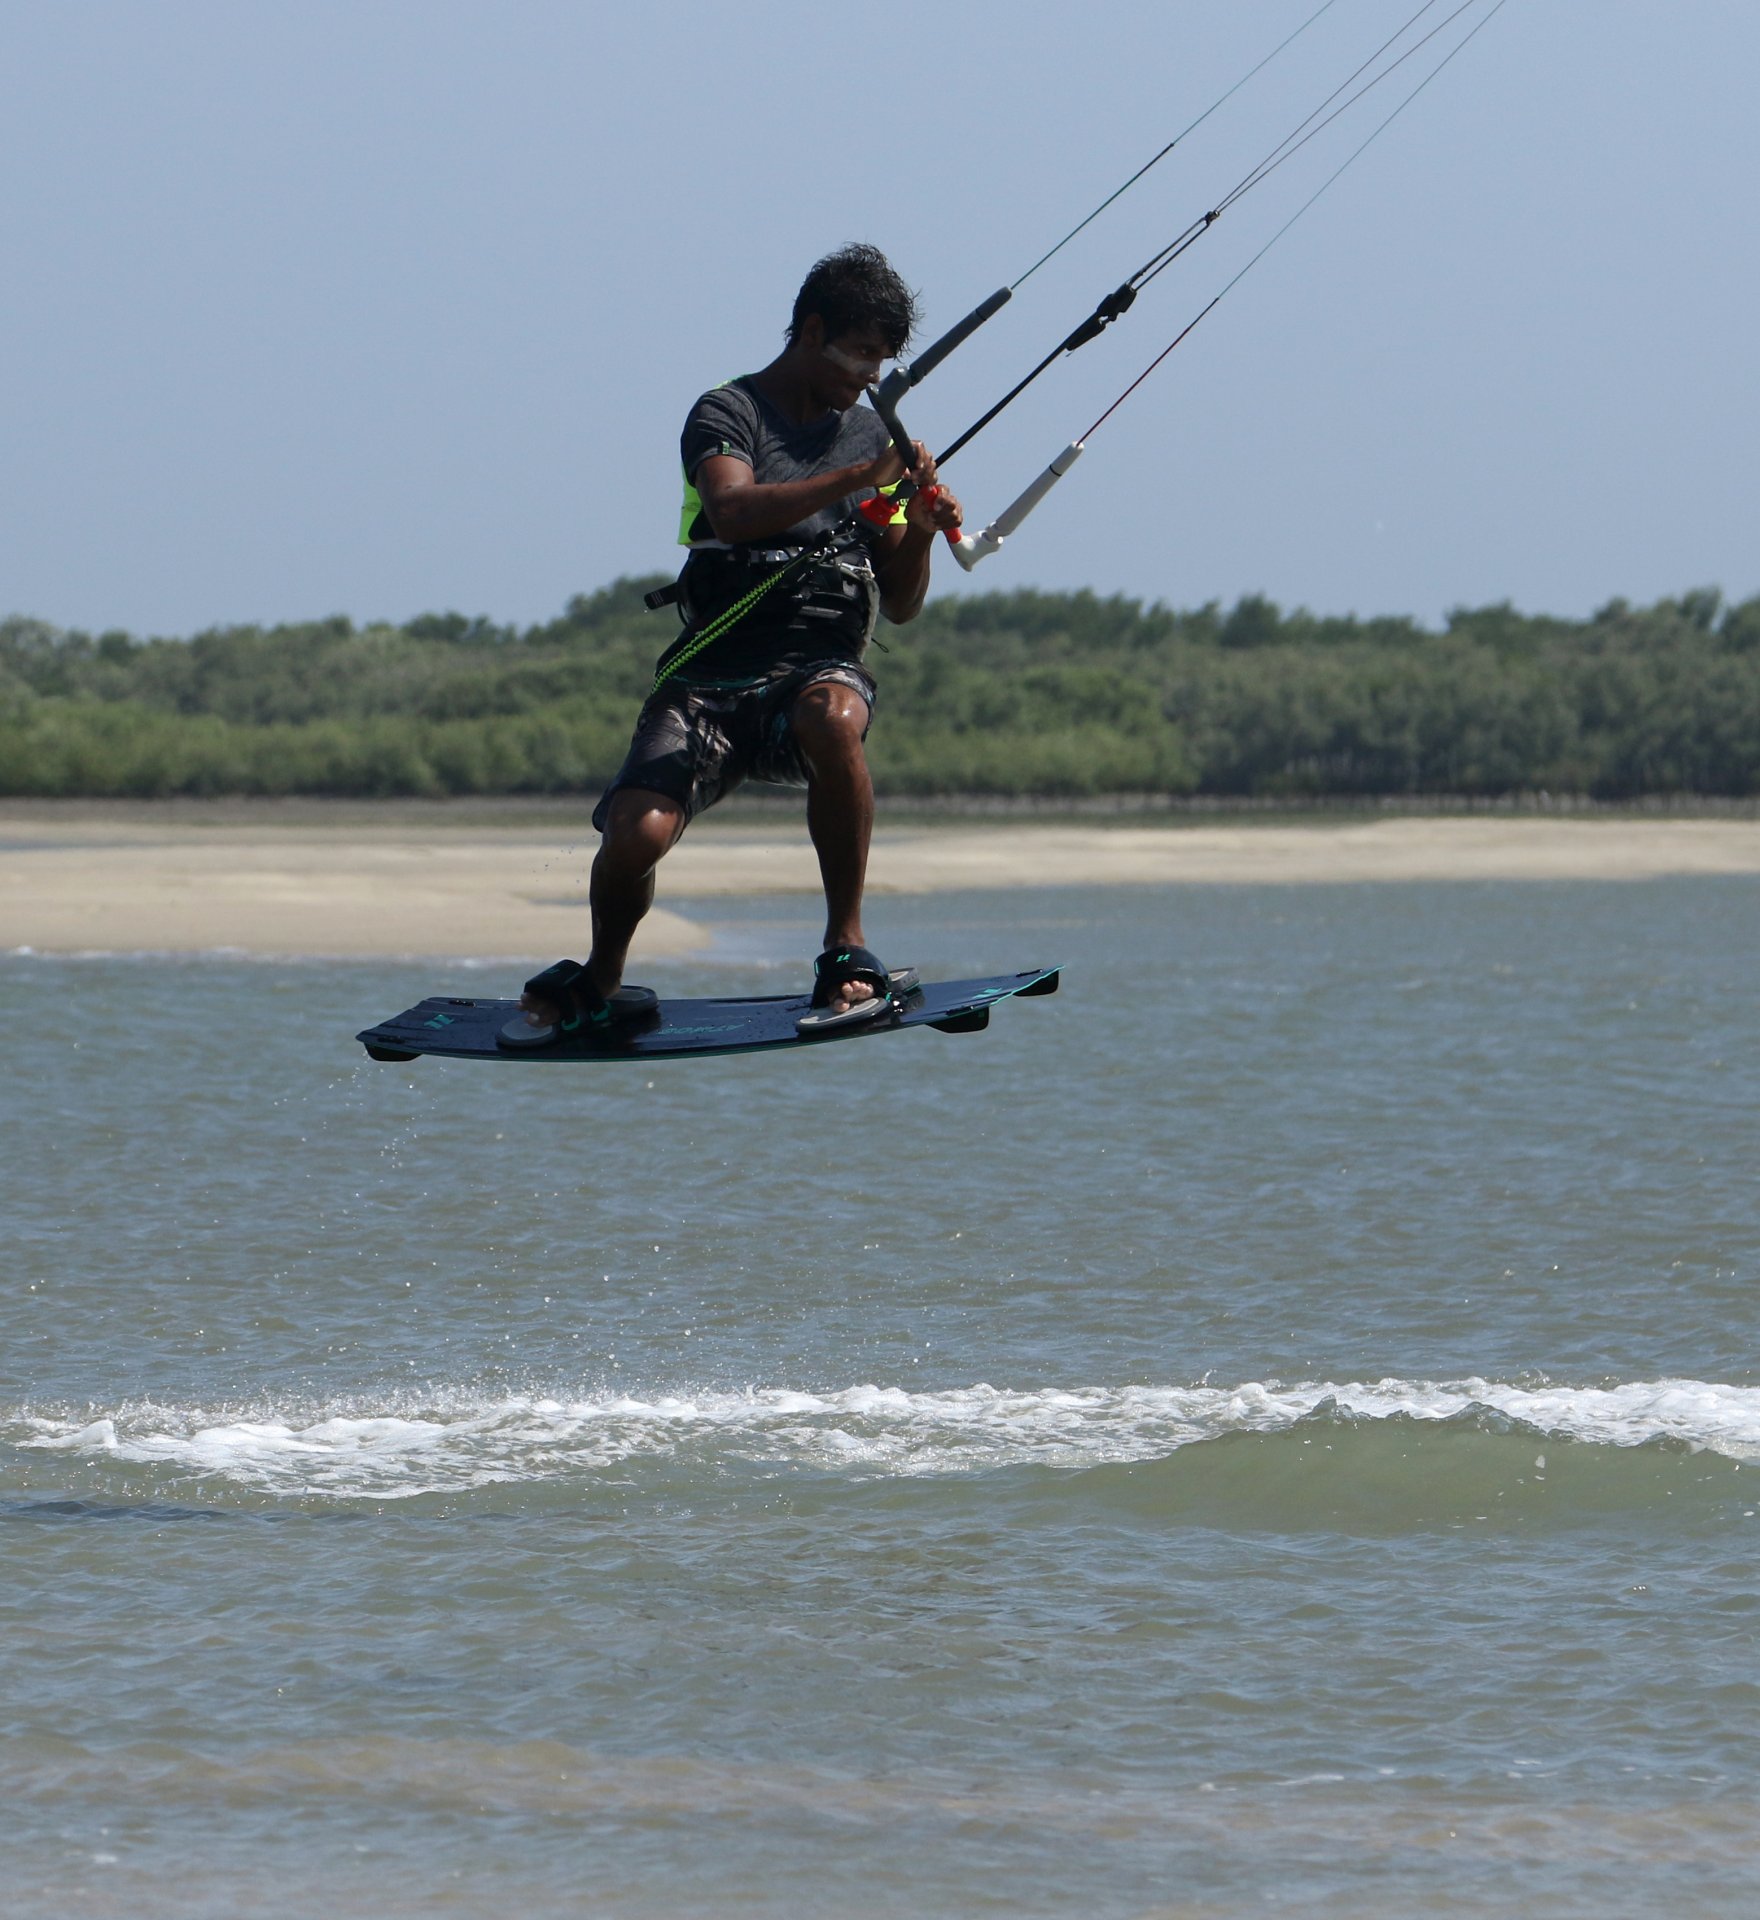
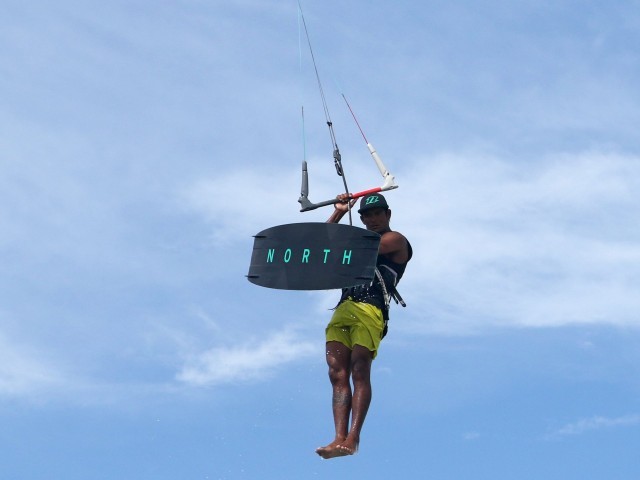
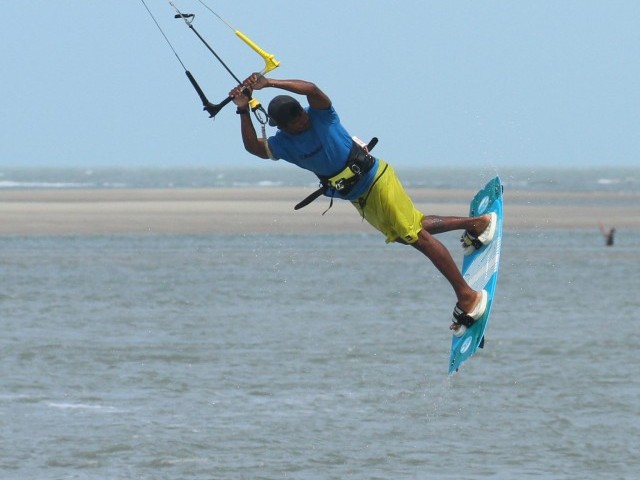
Landing Pic G.
All that’s left is to release your back hand and commit to the blind by twisting your head and shoulders to face backwards. The kite should be pulling you a bit, and depending on how much you may want to dump power by pushing the bar fully out. It’s also probable that you won’t get enough rotation. The great news is that it doesn’t overly matter. You’re aiming to land slightly nose first. As you’re coming around you can lift your other leg, heel towards bum. This will guarantee a nose first landing and as such, as the nose hits, it will pivot the board around the rest of the way. Here Heliarde is coming around nicely, he’s starting to sheet the bar out, he’s looking back and he’s starting to lift his other (left) leg so that he’ll land nose first. Bingo!
Once you’ve landed, chances are that you will be creeping along with very little speed, so best bet is to quickly slide out of blind by turning your head to look where you’re going and sheeting back in. As you progress with soft landings you can continue to ride blind, waving to the beach as you do so.
Top Tips
It won’t hurt to learn or practice the hooked pop from toeside to blind, as featured way back in Issue 20. This will add urgency and momentum to your throwing of blind.
For your first attempts don’t give too much thought to the kite. Get it set for a little BLT and try from there. Once you’re getting around to blind you can add the more subtle kite movements.


Have a run through of the videos and sequence to burn the movements into your subconscious.
Common Problems
Can’t get around to blind. First off if you over rotate your back roll and end up heelside you’ll struggle to get any momentum from your legs and board, so freeze it toe side by using your head less and try taking off a tad earlier. The action to throw the blind is aggressive. And make sure you plant the nose in first as it’ll make up for a lot of missing degrees.
If you’re getting pulled over on landing, it’s a result of the kite pulling you. Try diving the kite less pre throw, and make sure that as soon as you’re rotating to blind, you push the bar out to dump power.

If you’re landing face first upwind of the board with a sinus full of brine, you’re not staying over the board. You may be turning the head back, but also looking to far down at the water, breaking at the waist. It’s also a result of trying to push the board around separately from your body, donkey kicking it out, rather than rotating together. Practice the movement on land, jumping up, twisting and landing on your feet. You need them under you.
Keystones
- Slow approach, good edge, drift kite
- Carve right into wind, feather power out
- Stamp up, stop kite, slow to toeside
- Lift knees, dive, pull and front knee through
- Release hand, turn head, lift trailing leg
This technique article was in Issue 84 of IKSURFMAG.
Related
By Christian and Karine
Christian and Karine have been working together as a coaching team, running improver to advanced kitesurfing clinics since 2003.
