
Strapless Heel to Toe Carve
Technique / Beginner

Introduction
Carving a surfboard successfully, throwing up a wall of water and exiting with speed feels absolutely divine. It is the basic building block for all things wave riding. And once you are confident changing from edge to edge, or rather rail to rail and throwing the kite about, you’ll soon be ready to challenge waves that once seemed intimidating. All the while safe in the knowledge that you won’t be falling in every time you go for a wiggle.
This issue we’ll start you off with the heel to toe-side carve, which throws up a few more potential problems than it’s toe to heel buddy. The added benefit of getting these carves nailed is of course that it enables you to ride around on a surfboard without having to change your feet, or drop in and turn the board around. The liberation will only add to your confidence and lead towards your surf legend goal.

As with all past surfboard theory, we do recommend that you practice this in the comfort of small waves, or if possible on the flat. With less working against you, you’ll have more time to feel the subtle differences in timing and board trim.
First off let us have a good look at some of the more important aspects of carving, which should drum home the vital links in this process.
The Approach
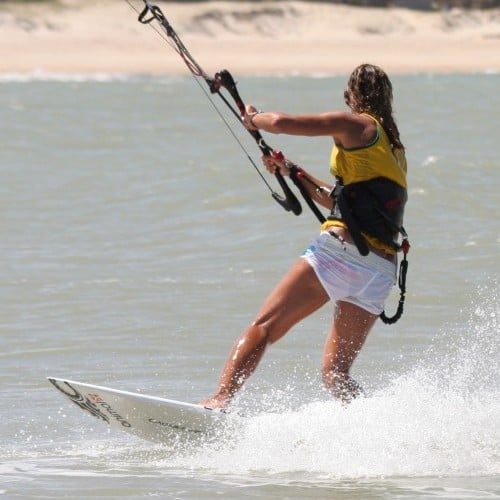
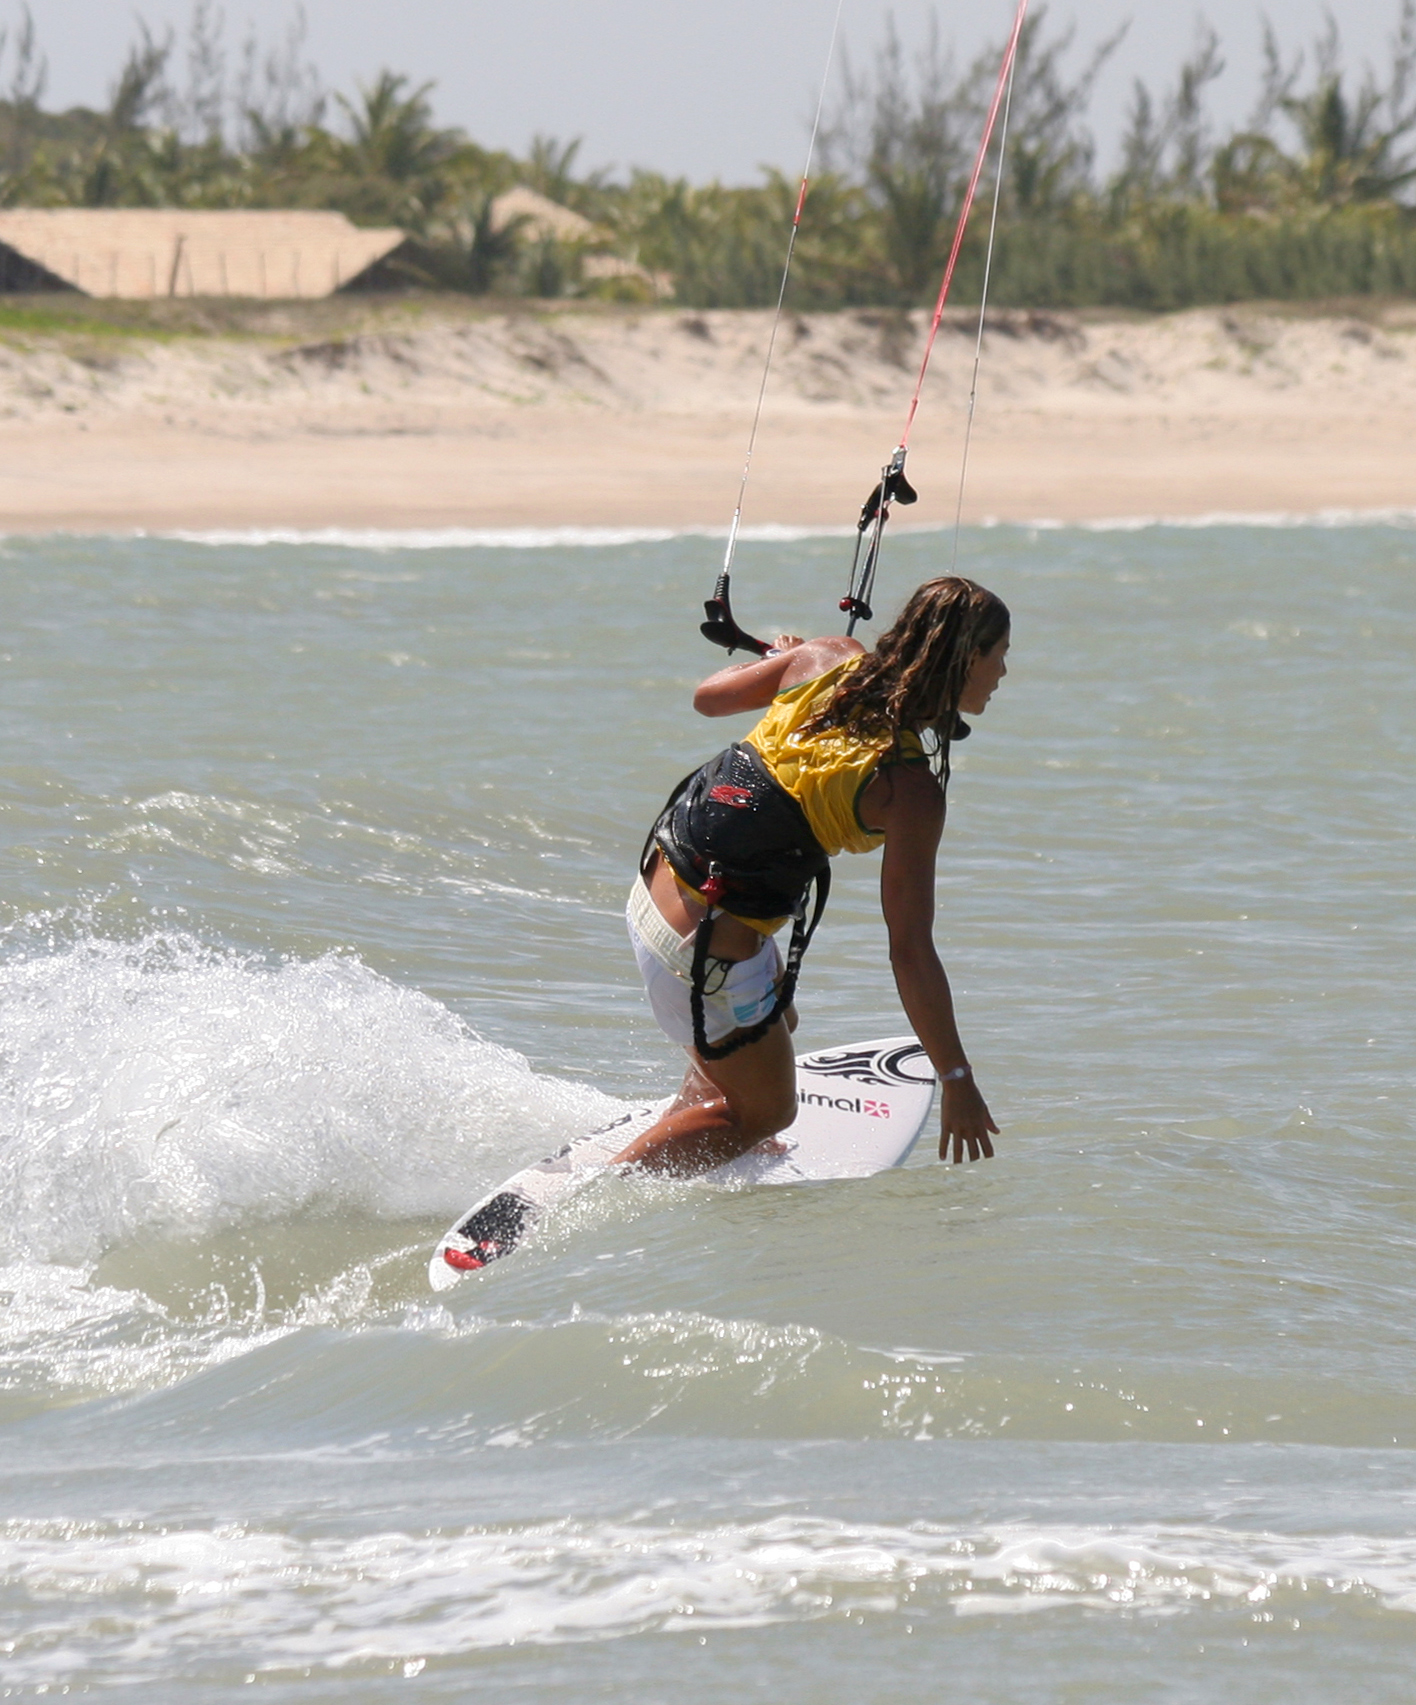
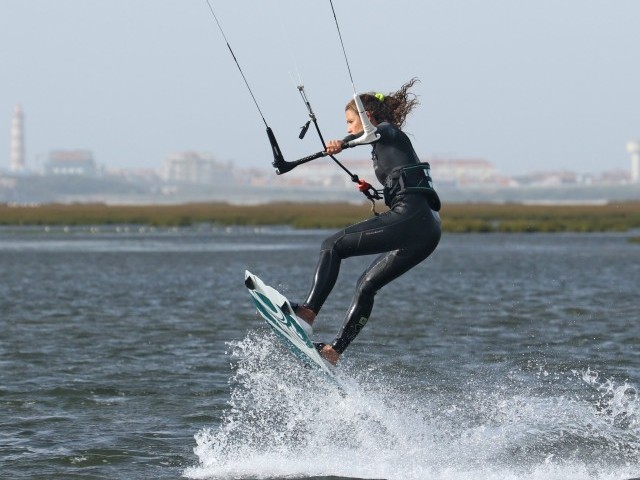
Pic A. In this picture we see Karine just moments before she moves her weight over the board to initiate the carve. And to be frank this one picture alone holds many of the secrets to good carving. Karine’s intentions are to get the kite moving across the window, and she needs to get the board ready to turn quite hard into the carve. We can see how she does this by looking at her feet, hips, arms and head.
Karine has her feet in a relatively wide stance, rear foot placed back towards the tail of the board, straddling the centre line, and front foot forward where the strap would be. The ball of your back foot must be on the downwind side of the board to make it turn, so it is worth having a look to make sure.
Having her back foot back on the board allows Karine to gently sink the tail of the board and lift the nose, as she drops her weight back. This serves two purposes! Firstly on the tail Karine can edge. By resisting, edging the board against the kite, Karine puts tension in the lines, which means the kite will respond when she asks it to turn. Secondly due to the design of a surfboard, it will turn more comfortably from the tail when Karine leans on her toes producing a biting carve using the rail.
Having her front foot forward gives Karine more balance, makes it easier to bend the knees and get her weight low and leaves her front foot positioned over the accelerator, ready for later!

Karine’s hips are both back towards the back of the board and out upwind of the board. Having moved them back gets the weight on the back foot and gets all the afore mentioned shenanigans in motion. She still has them upwind so that she can push against her back foot and therefore edge against the kite, placing tension on the lines, so that the kite is ready to turn.
Next up Karine’s arms. Nothing special here perhaps, but you can see that she has turned the kite pretty hard by pulling in with her right arm and pushing her left arm out. This moment is oh so critical. Karine is edging one way, and has already turned the kite hard the other. You’ll hear it a thousand times but its always kite first, even if only by a fraction of a second. The reason? Well if Karine turned downwind towards the kite and then tried to turn it, nothing will happen. No tension in the lines, so the kite wouldn’t respond, and worse of all, by moving towards a stationary kite, the kite can’t fly so it will just drop out of the sky. Not clever and not pretty.
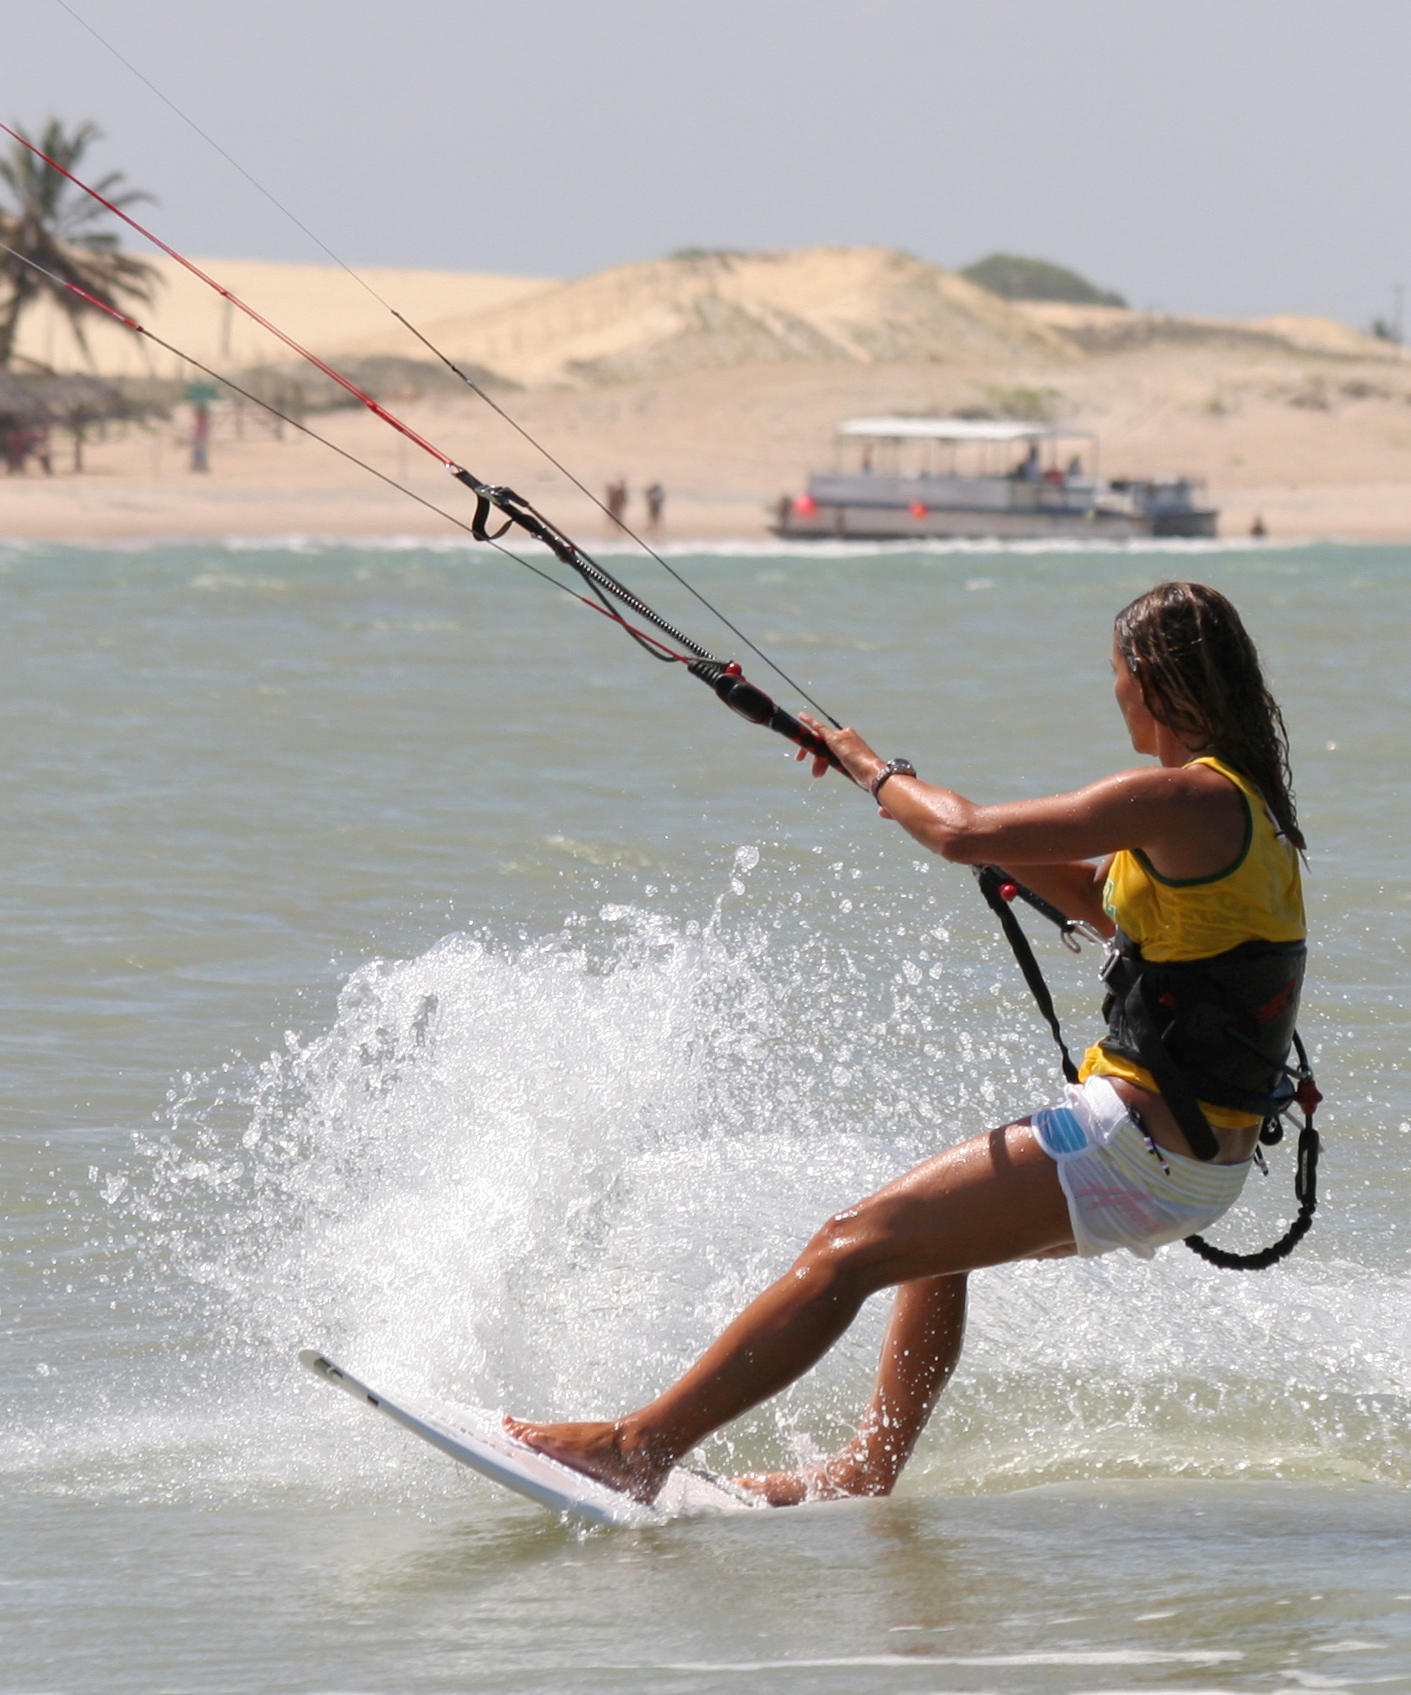
Finally the head! As ever the head is leading, so the body will follow. Although Karine’s body is still edging upwind, she’s not looking that way. She’s checking to see if the kite is turning and her gaze will then go past it and be fixed upon where she wants to go.
This might also be a good time to mention the kites desired path. Having started with the kite in between 10 and 11, Karine aims to fly it across to 1 or 2, in a straight-ish trajectory. You don’t want to be flying the kite up and over via 12 o’clock, as you’ll just end up underneath it and stop.
Carving onto the Rail
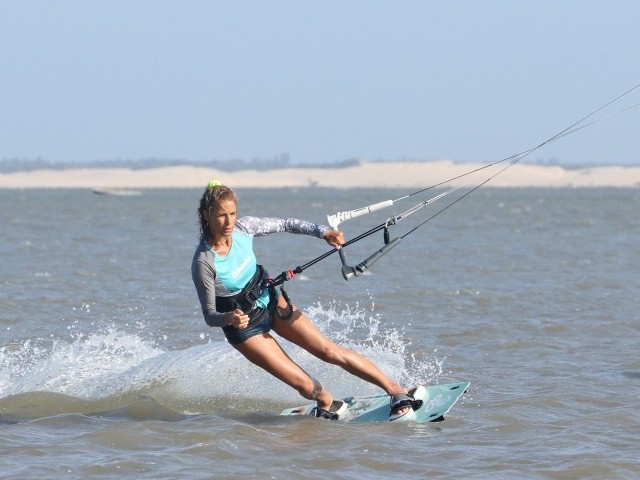
Pic B. In this shot it is all about getting into the carving position. To do this Karine has to get her weight across to the other side of the board, she needs to engage the other rail and she must literally drive the board around the corner. The beauty here is that if you move the kite first, it helps to pull you into position.
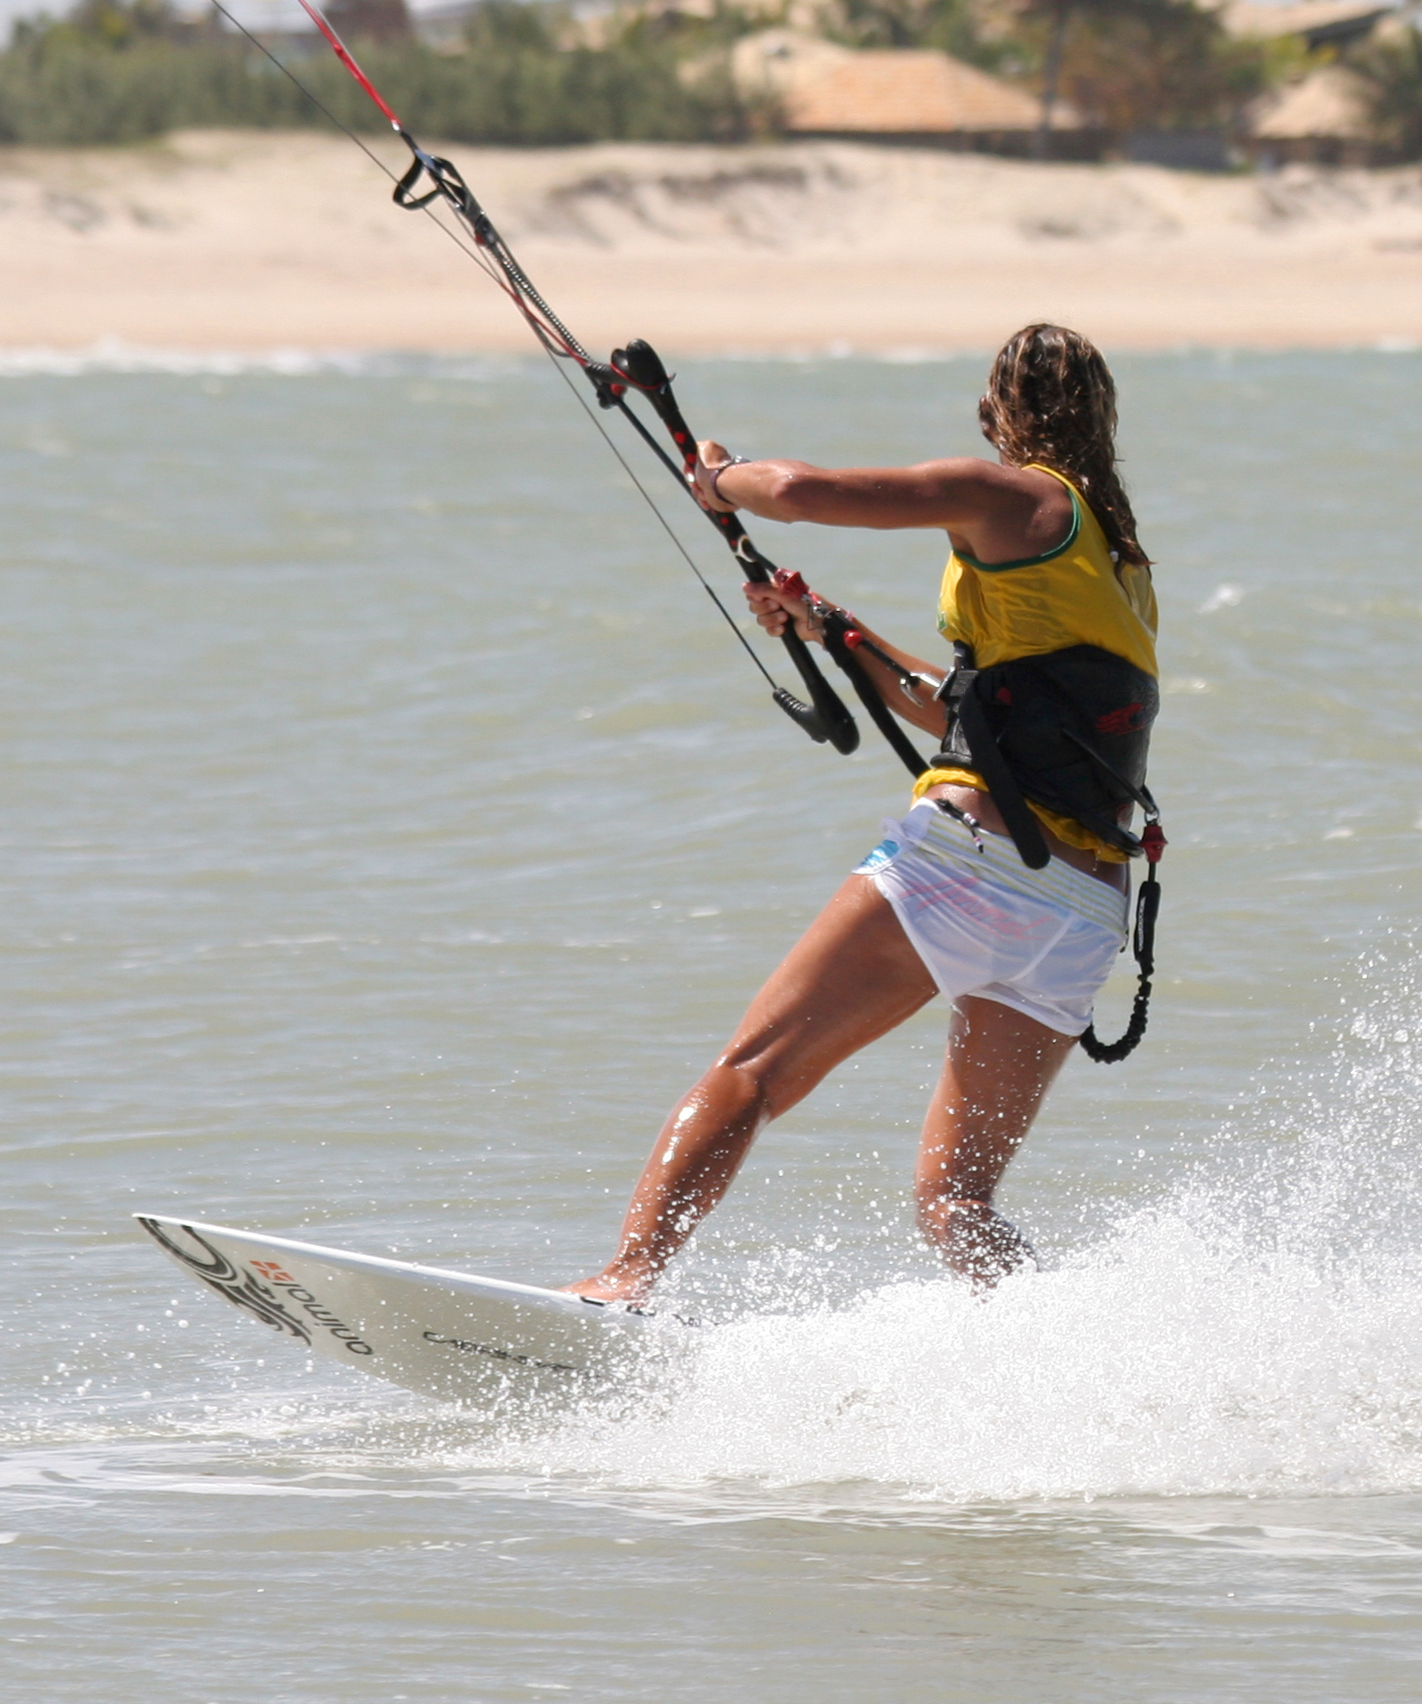
Having steered the kite hard across the window, it will pull, but not for long. As Karine feels the kite pull, she goes with it and allows the kite to pull her up and onto the board. As she moves onto the board she can no longer edge and therefore the board will drift towards the kite. This in fact would be the correct time to use the expression edge and release (without a pop in site)! This in turn reduces the pull of the kite. Karine doesn’t want to stay on a flat board, but she needs to get balanced, so she bends her knees and then starts to put her weight onto the ball of her back foot.
Assuming she has straddled the centreline of the board it will now turn very obediently, and as the board banks over, so too does Karine. Her body position is relative to the angle of the board. The more she engages the rail and banks the board over, the more Karine can commit her weight to the inside of the turn.
To really get the board turning well she can drive it around the carve. This in theory is simple but in reality takes some practice. To drive around Karine must push down on the ball of her back foot, so that she is pushing it against the water, away from her. She can only do this if she dips her back knee into the turn. To get this feeling on land, imagine you’re a sprinter exploding out of the blocks at the start of a race, the foot furthest back being the back foot on the board. This crouched push, through your leg and calf and very flexed ankles will reward you with a biting rail and a solid carve.
Half Way There
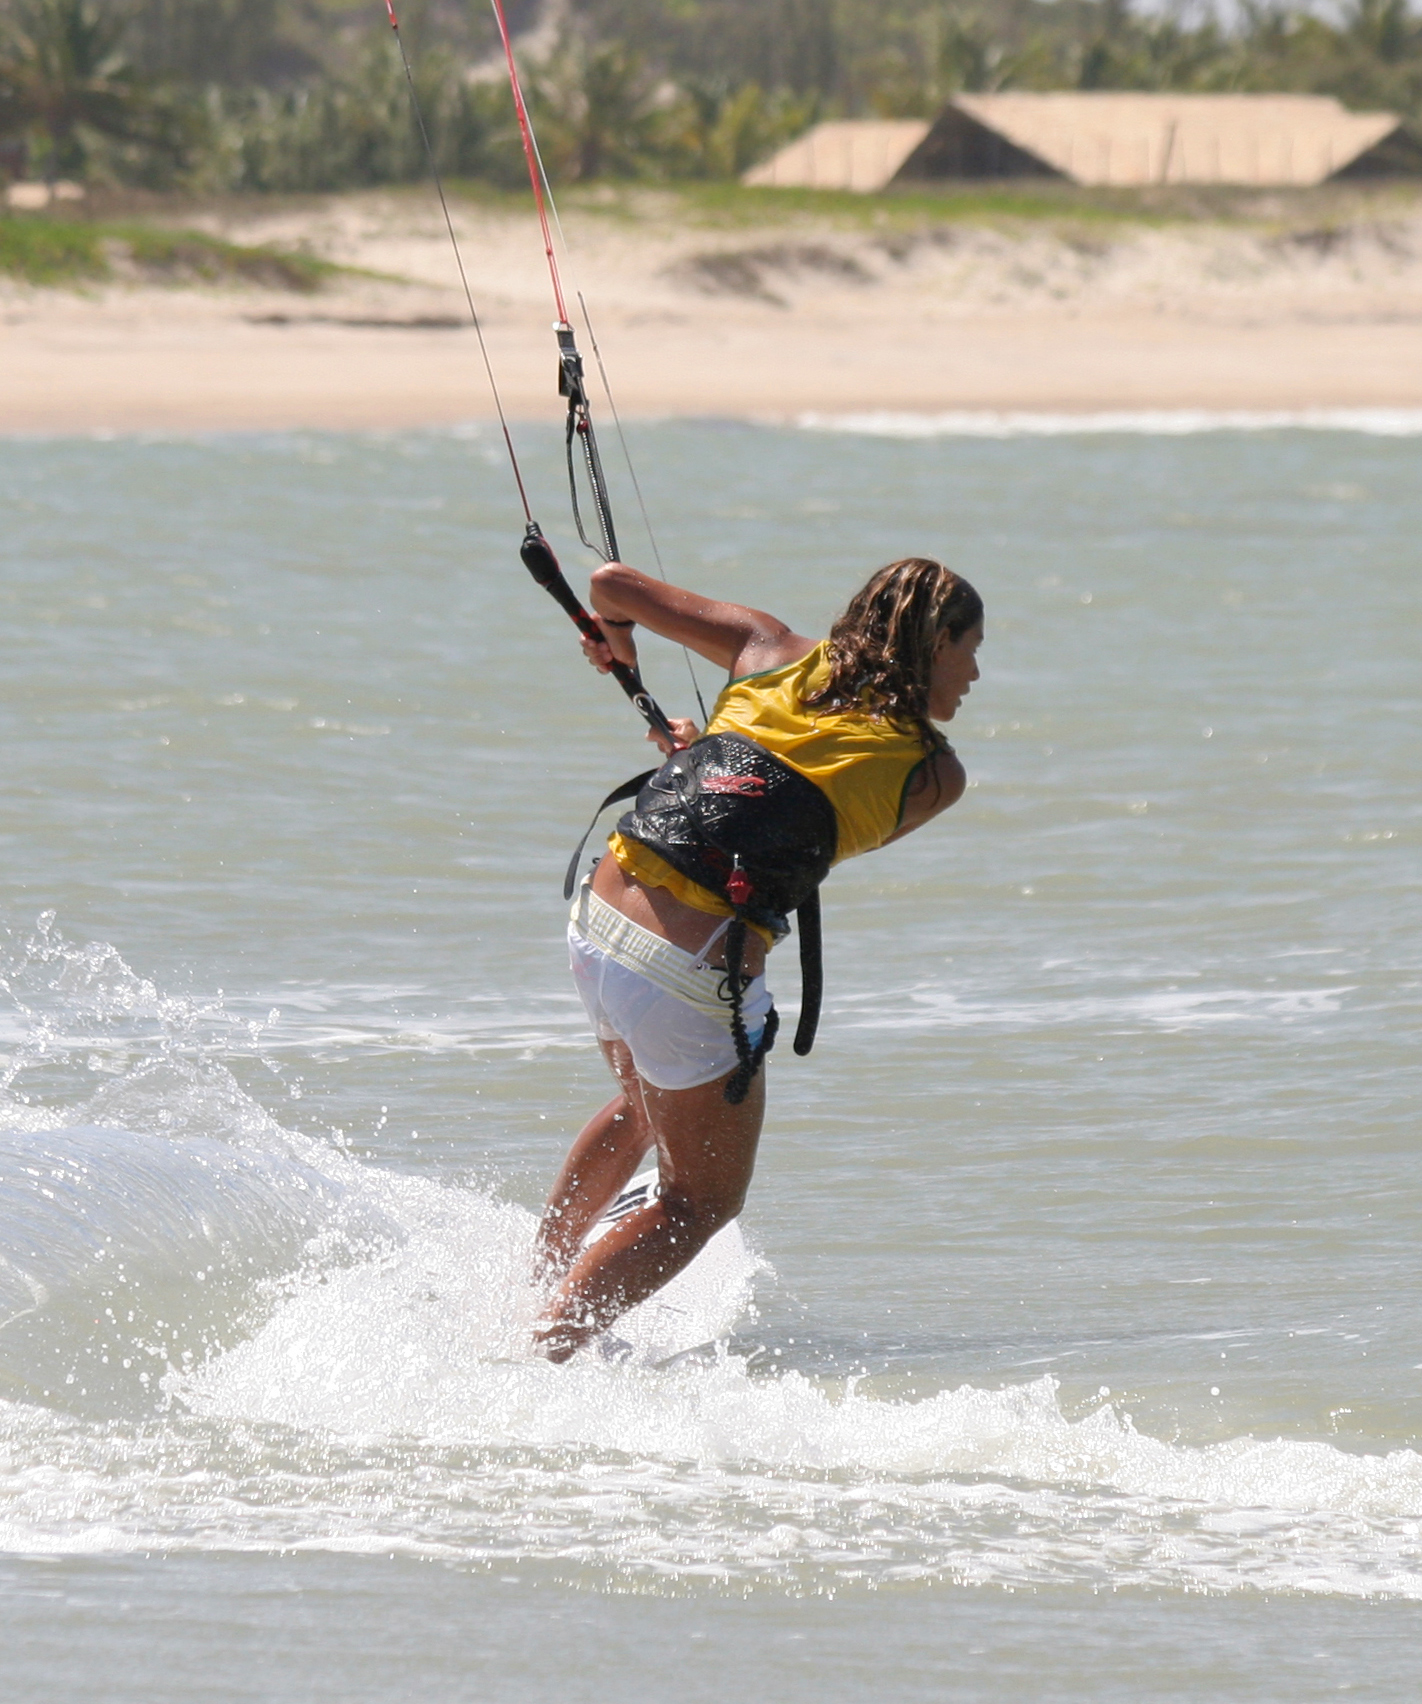
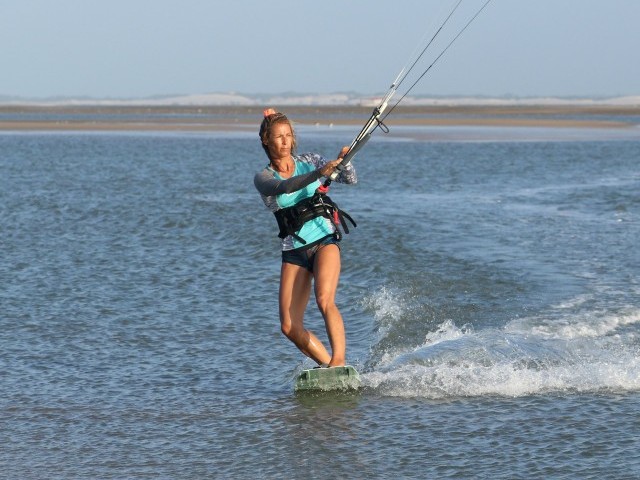
Pic C. We’re getting into familiar territory here. That said, it is at this point, when the board has carved all the way to downwind that many kiters falter. As already mentioned the board will drift off the wind once you stop edging and come up onto the board. This means that getting to this downwind state can be accomplished even without carving well. However to get past this point and turn the remaining 90˚ you need the correct technique.
Firstly we get a good view of Karine’s back knee. It is committed to the inside of the turn, dipped towards the water. This combined with pressure on the ball of her back foot banks the board over. Without this she could lean her body into the turn as much as humanly possible, but the board wouldn’t carve.

If you look at the bar Karine still has it grasped in two hands. This is good practice whilst learning to carve, as it will encourage you to keep the bar in, the kite turning and necessitate you to carve even if the kite pulls. Otherwise it is too tempting to let the bar out, relax your carve and stall.
Finally you can clearly see that Karine is still focused on where she wants to go. Her head is turned to look back from where she came, her shoulders and hips are also twisting around to turn her body fully around to toe side.
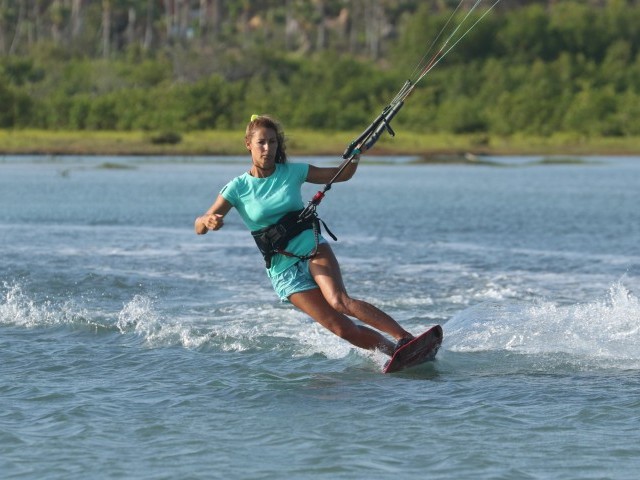
Toe Side Out
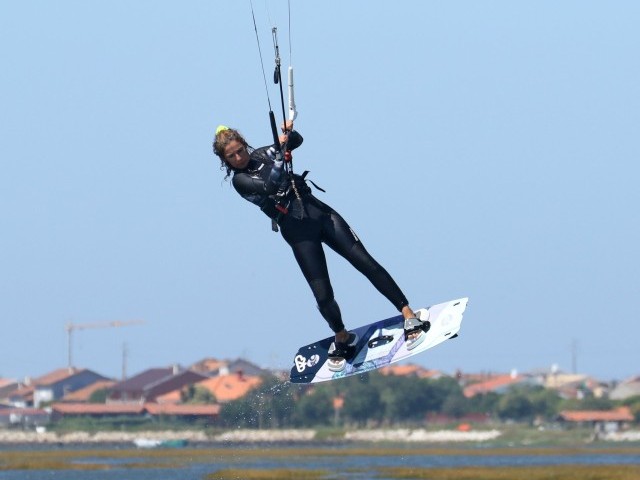
Pic D. Karine is now exiting her carve, so she wants to get onto a toe side rail so she can keep tension in the lines, and trim the board a tad flatter to make sure that she keeps her speed. You can see that the kite is now leading again, and because she kept the bar in it is now pulling her forward. Had she let the bar out earlier, the kite would have flown to the edge of the window and she would have no power.
To get onto her toe side rail Karine releases her front hand and stretches it upwind of her. This helps twist her shoulders further around and turns the board fully so that she exits on the rail. She can release her hand because the kite is now hopefully pulling in a constant manner, rather than surging through the window.
In order to trim the board flat, Karine moves her hips forward and flexes her front knee a bit more, to get her weight over her front foot and thus, presses down on the accelerator. Brilliant.

Top Tips
Hopefully you can now see that we have two important elements. Firstly the timing, secondly the carving! For the timing a simple mantra that has helped some of our guests goes: edge, kite, carve. At least if you get the order/timing you will have more chance of completing the carve. As for the carve getting the balls of your feet in the right place makes a huge difference. If you toes are on the centre line of the board it just won’t turn, so get your heels in and your toes over.
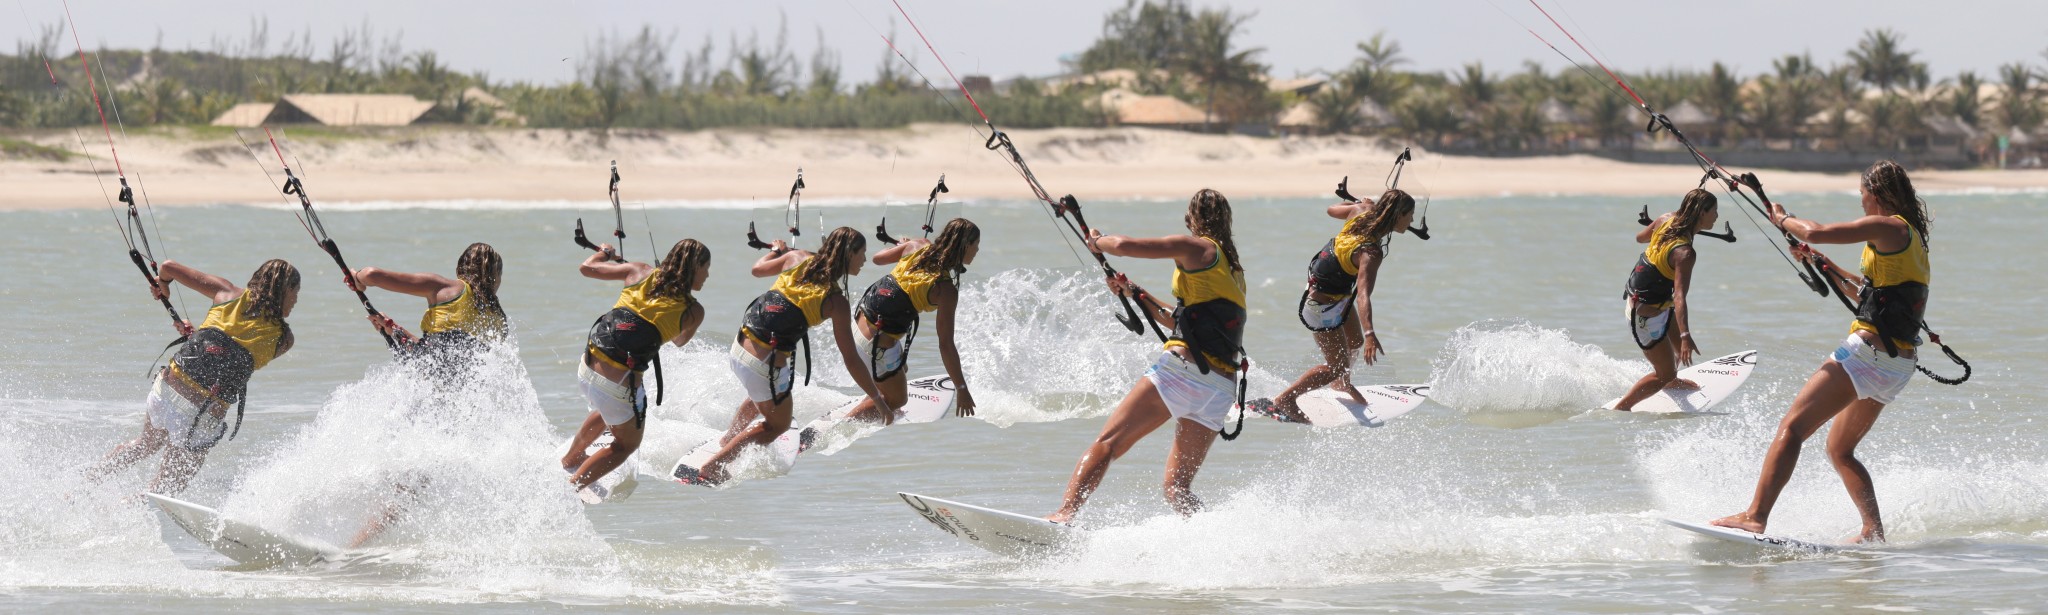
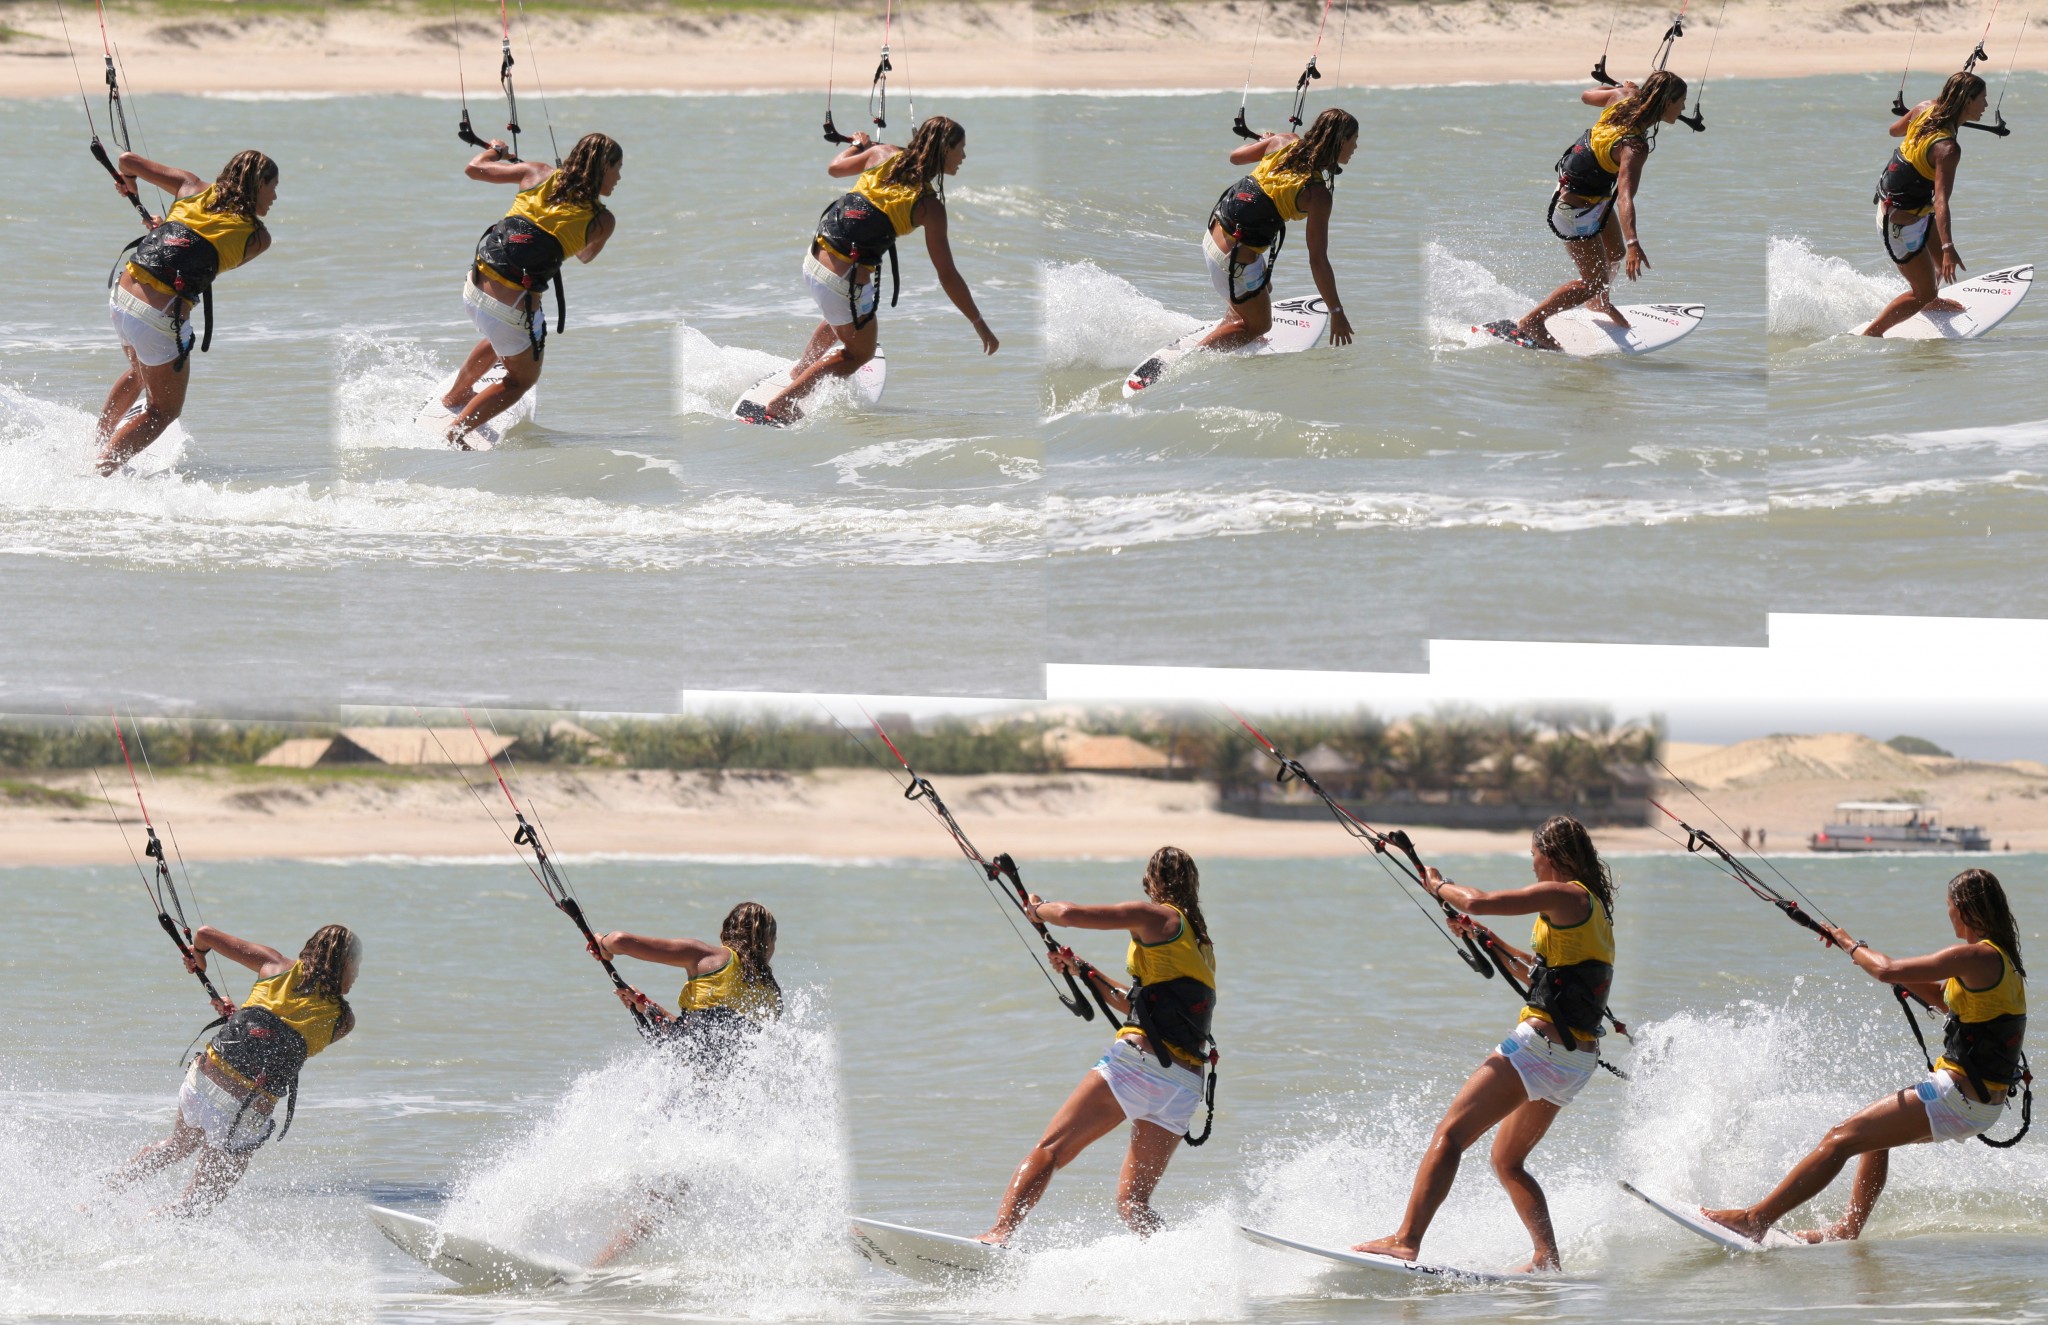
Following Sequence 2
- Pic 1. With her kite at 10.30, a wide stance and her back foot straddling the centreline, Karine sets up to carve a gouging turn. Firstly she edges against the kite and then she steers the kite aggressively across the window.
- Pic 2. As the kite starts to move Karine allows herself to be pulled up onto the board. As the board flattens it starts to drift off downwind and the pull in the kite reduces.
- Pic 3. Karine bends her knees, pushing her back knee towards the centre of the turn and turns her head to look where she wants to go.
- Pic 4. She has now got the board banked over and turning hard. Karine drives through her back foot, pushing the board onto the water, whilst looking back out to sea.
- Pic 5. Both of Karine’s knees are bent, her hips are leaning towards the centre of the turn and her ankles are bending. Yes and she’s still looking where she wants to go!
- Pic 6. At the downwind stage of the carve Karine has to keep the board turning. She keeps the bar in, gets as much weight as possible onto the ball of her back foot, keeps her shoulders and hips in towards the centre of the carve and looks where she wants to go.
- Pic 7. The board has turned and the kite is pulling, so Karine keeps the bar in to use the power to keep moving. This is a great shot to see the body committed to the carve.
- Pic 8. As the kite starts to fly forwards Karine releases her front hand so that she can turn her body away from the kite and continues to push away her back foot.
- Pic 9. As a result the board carves around towards toe side. The bar is still in and Karine is looking where she wants to go, not at the kite.
- Pics 10 & 11. As Karine exits the turn she needs to extend her back leg slightly and move her weight forward. This releases the brake and pushes the accelerator and enables the board to flatten off enough to use its volume and surface area to support Karine and keep the speed up.
Common Problems
You find that you are falling onto your front and the board is not turning with you. This is often the result of leaning your upper body over into the turn, without using your lower body to turn the board. You need to get your hips and knees into the centre of the carve by really flexing those ankles. And remember the amount that you lean is relative to the angle the board is banking at, so if you are not carving hard but you are stretched out over the water like a water-skier, you will end up in the drink.
Even with your ankles flexed, and your knees driving towards the centre of the turn, the board is not carving. This will be the result of foot position. Make sure that the ball of your back foot is on the downwind side of the board. It is harder to get the weight on this part of the foot, so you can exaggerate the positioning and literally place your heel near the centreline so that your toes dip into the water. Now the board will turn.
You stall and loose speed at the downwind mark. Firstly make sure that your kite is flying a straight line across the window. Secondly be sure to keep the bar in.
The board won’t carve past downwind. Assuming that the back foot is far enough across and you are getting your hips and knees committed to the centre of the arc it will be time to check your front foot out. As you go downwind you may already be moving weight forward on the board, which is not a bad thing. However if your front foot is too far towards the rail of the board and the ball of your foot is not near the centre, this will stop the board turning. So make sure that before you start your carve you get the front foot over the centre line too.


Keystones
- Feet wide and balls other side of centre line.
- Edge
- Steer kite hard across
- Carve with hips, knees and ankles
- Look where you want to go
This technique article was in Issue 25 of IKSURFMAG.
Related


By Christian and Karine
Christian and Karine have been working together as a coaching team, running improver to advanced kitesurfing clinics since 2003.
