

Twin Tip Heel to Toe Tack
Technique / Intermediate


It’s funny how moves that are the norm on other kite craft are not so often practiced on the trusty twin tip. The Duck Tack and Toeside Duck Tack were legitimate rip offs from the surfboard collective. This issue we’re unashamedly borrowing from kiting’s most recent, at least in popularity terms, evolution. Not quite loyal to the foil, but cheers for the move.
Yet again, much like the aforementioned surfboard tacks, this is also a great way to get your head around performing the move on a foil or surfboard, whilst remaining in the comfort zone that is footstraps and twin tip. However, rest assured that this is still very much a bona fide move in its own right. So, what is the twin tip heel to toe tack. A 180 turn upwind, starting in a heelside riding position. Crank it up and through the wind, throw your weight forward, and power out on your toes in the other direction. Read on for a more depth...


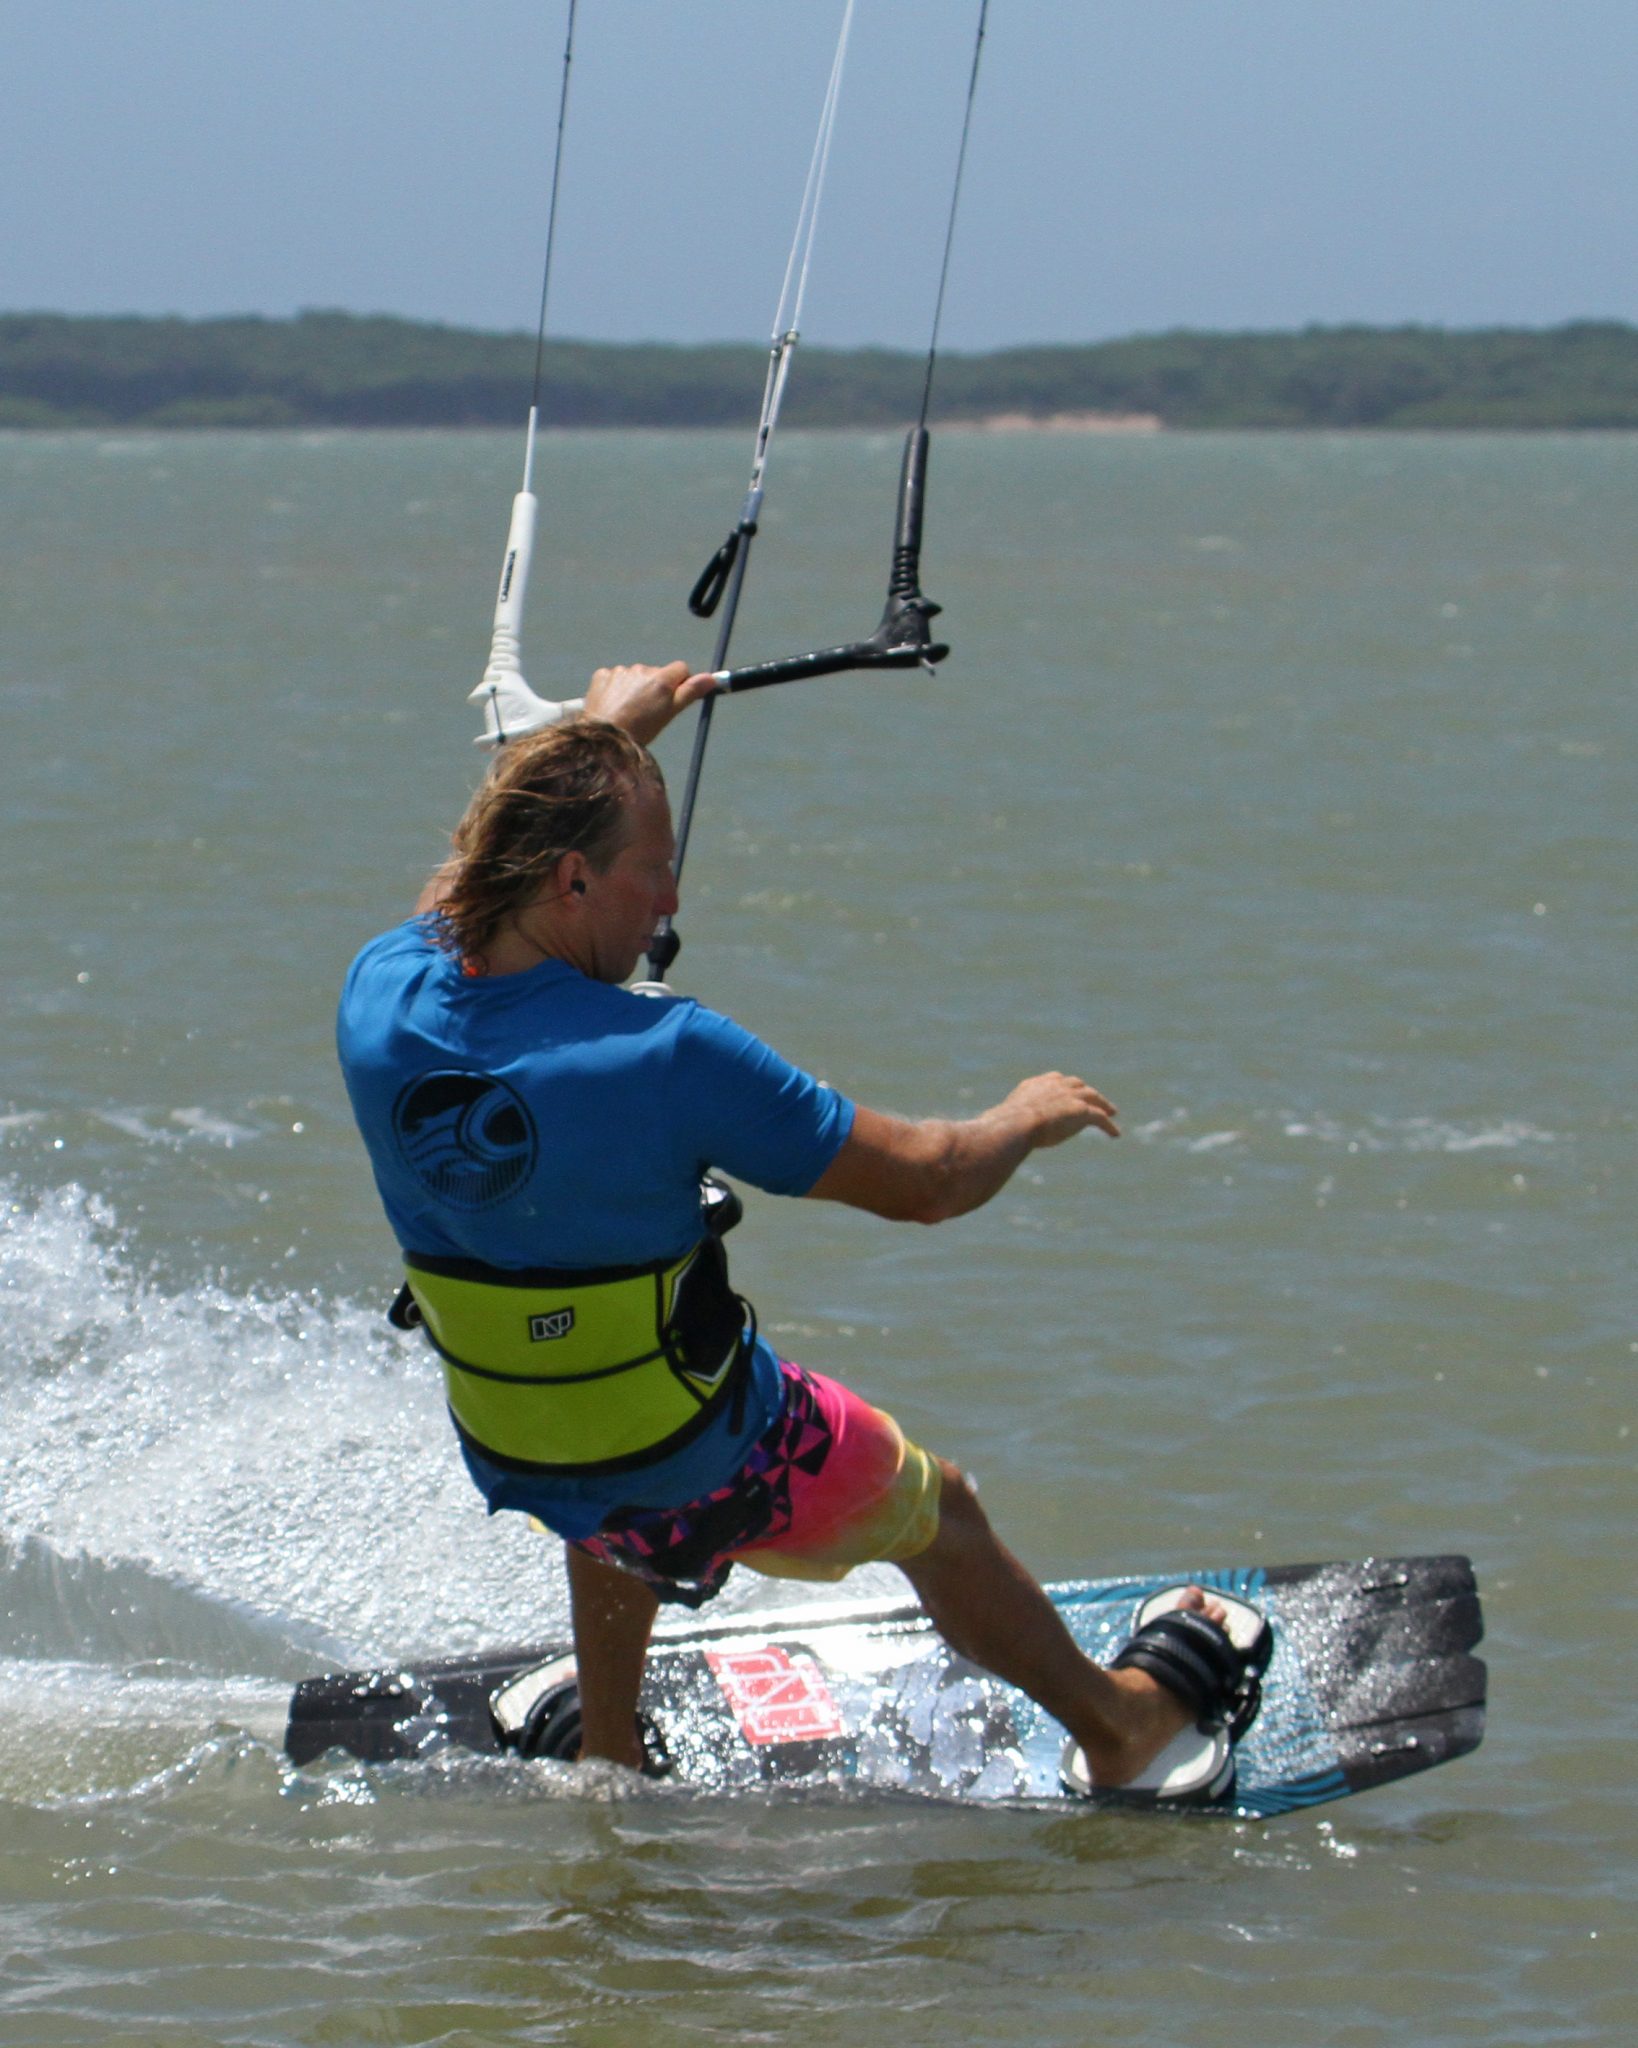
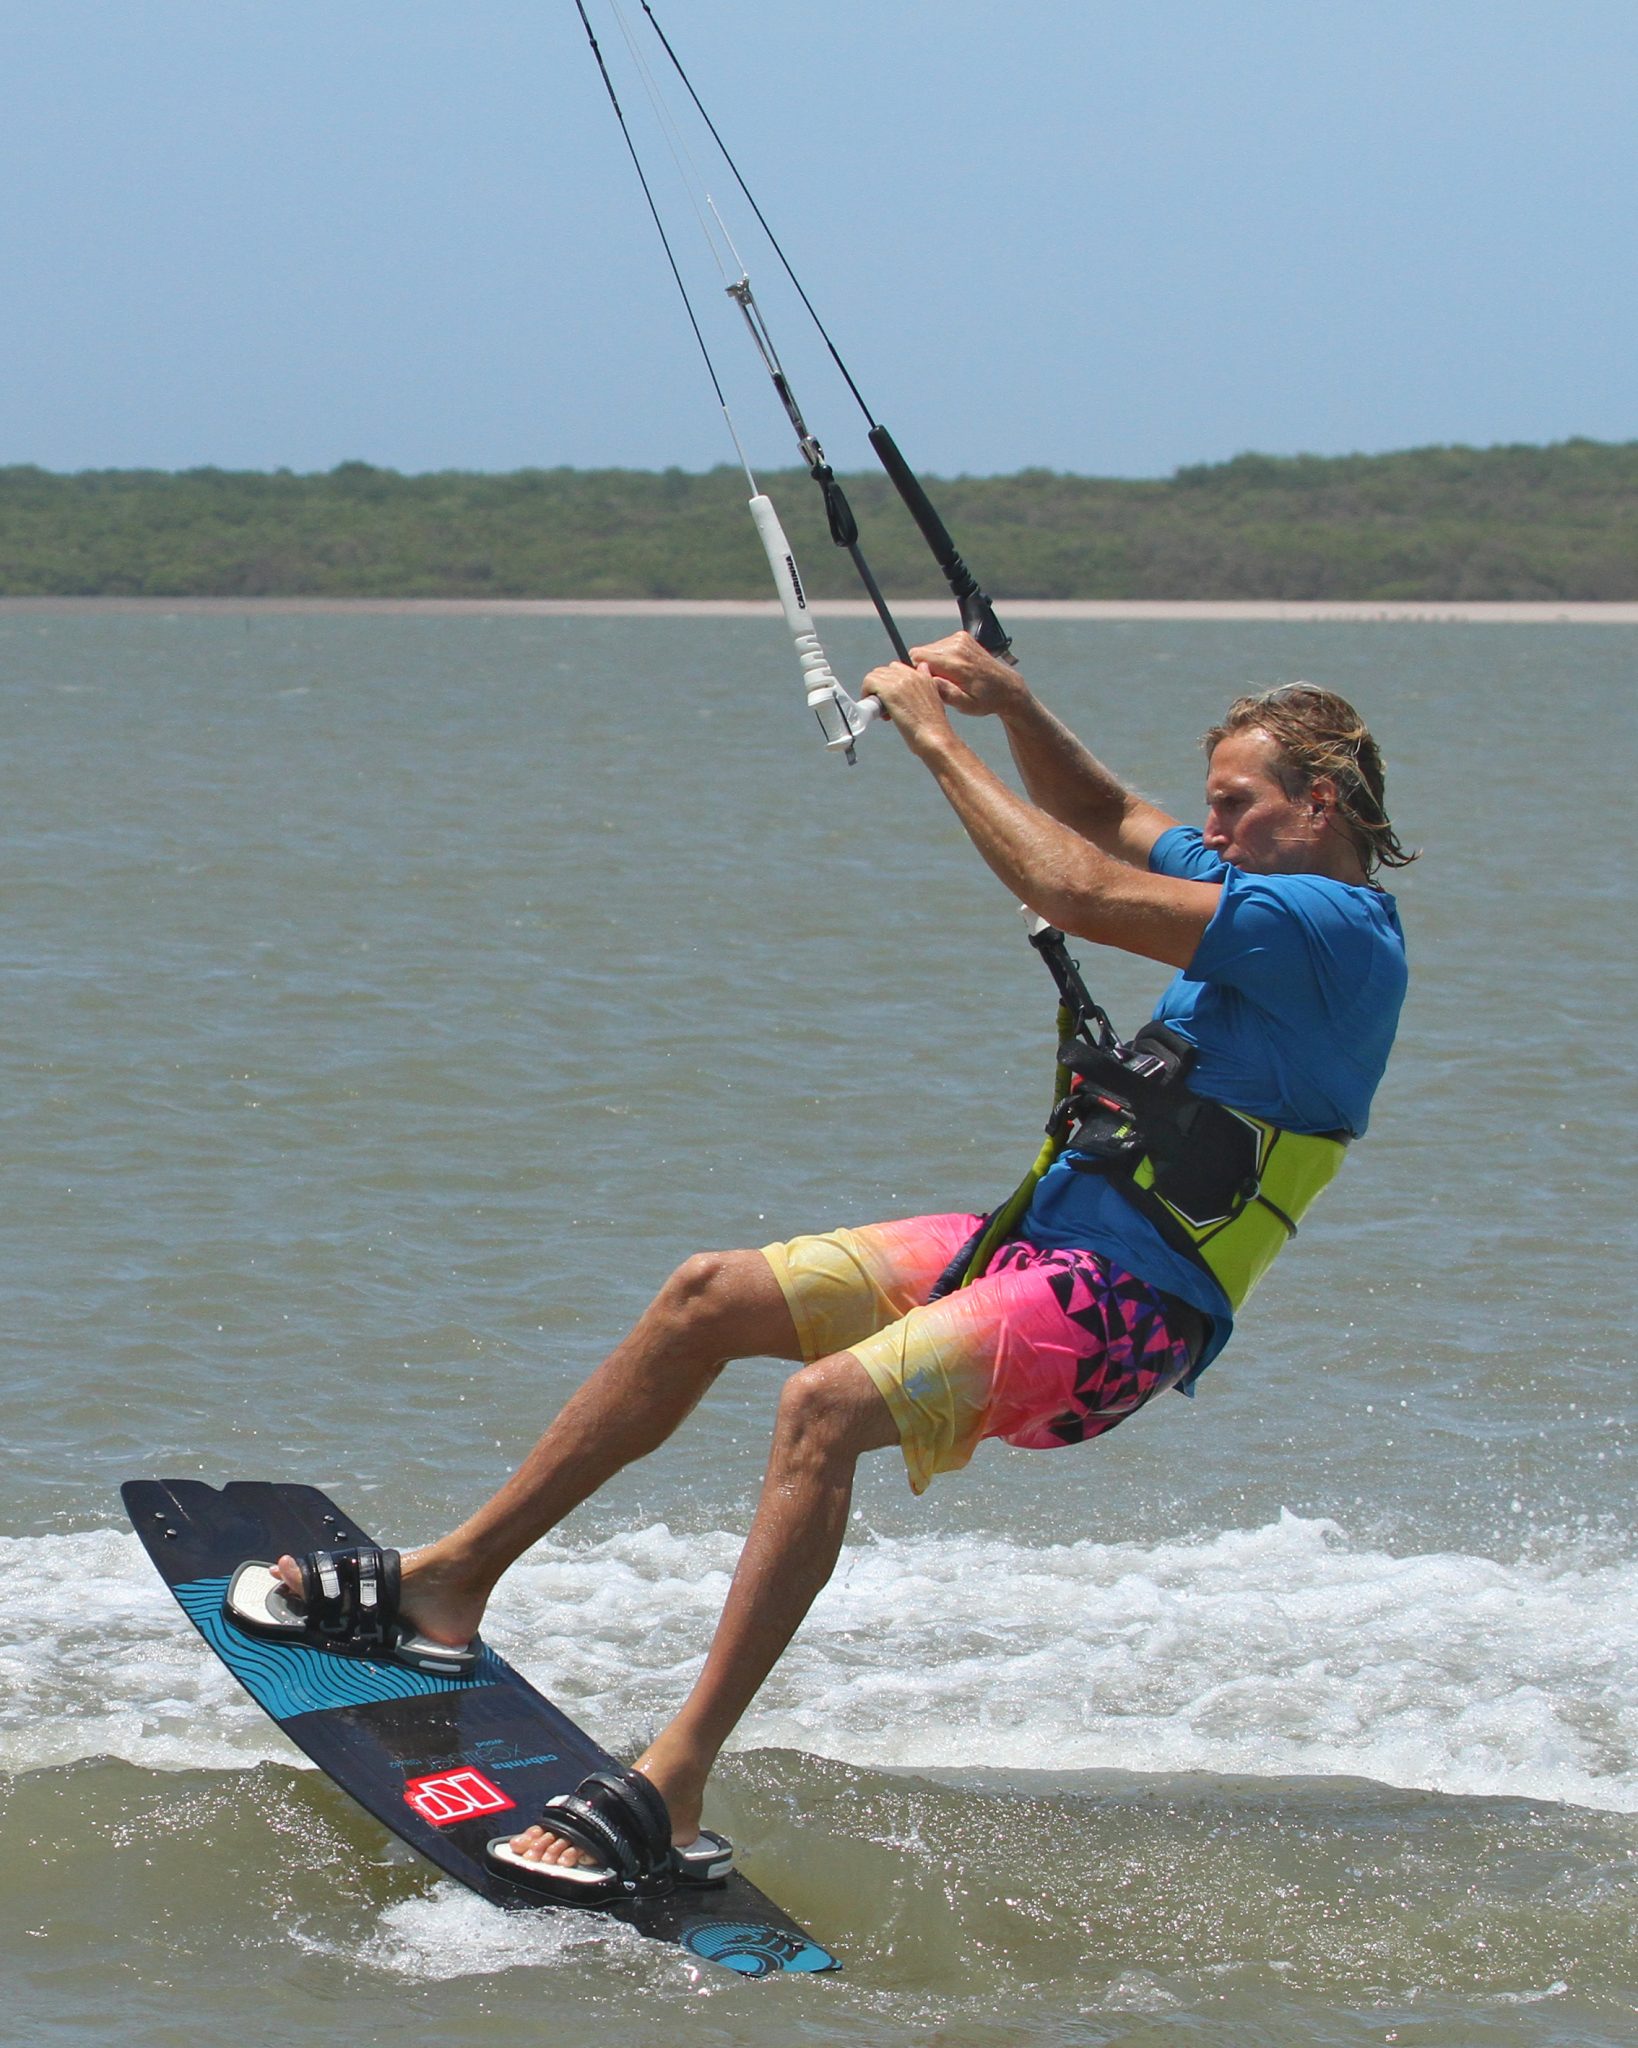
Your Approach Pic A.
To make this achievable, hunt out some flat water. You need speed and momentum so that you can carve your board as far as possible, and chop will only slow you down. As such make sure that you approach on a good upwind edge with plenty of speed. However, make sure that you don’t hold too much power on the bar, leave it gently on or just above the sweet spot and keep your weight up on the board. You’ll want your kite parked around 11 or 1 o’clock, but no lower. You will need to drift your kite up, and if it’s low it’ll take too long and potentially generate unwanted lift. You can see in the pic that Christian is flying in, but he’s not holding the same power as he would coming in for a jump or transition. This move needs to flow, so it’s about efficiency and not grunt. As Christian approached he takes his front hand off the bar and slowly drifts the kite up towards 12 o’clock. If you feel the kite lift, ease out the bar so that it doesn’t lift you or slow you down.

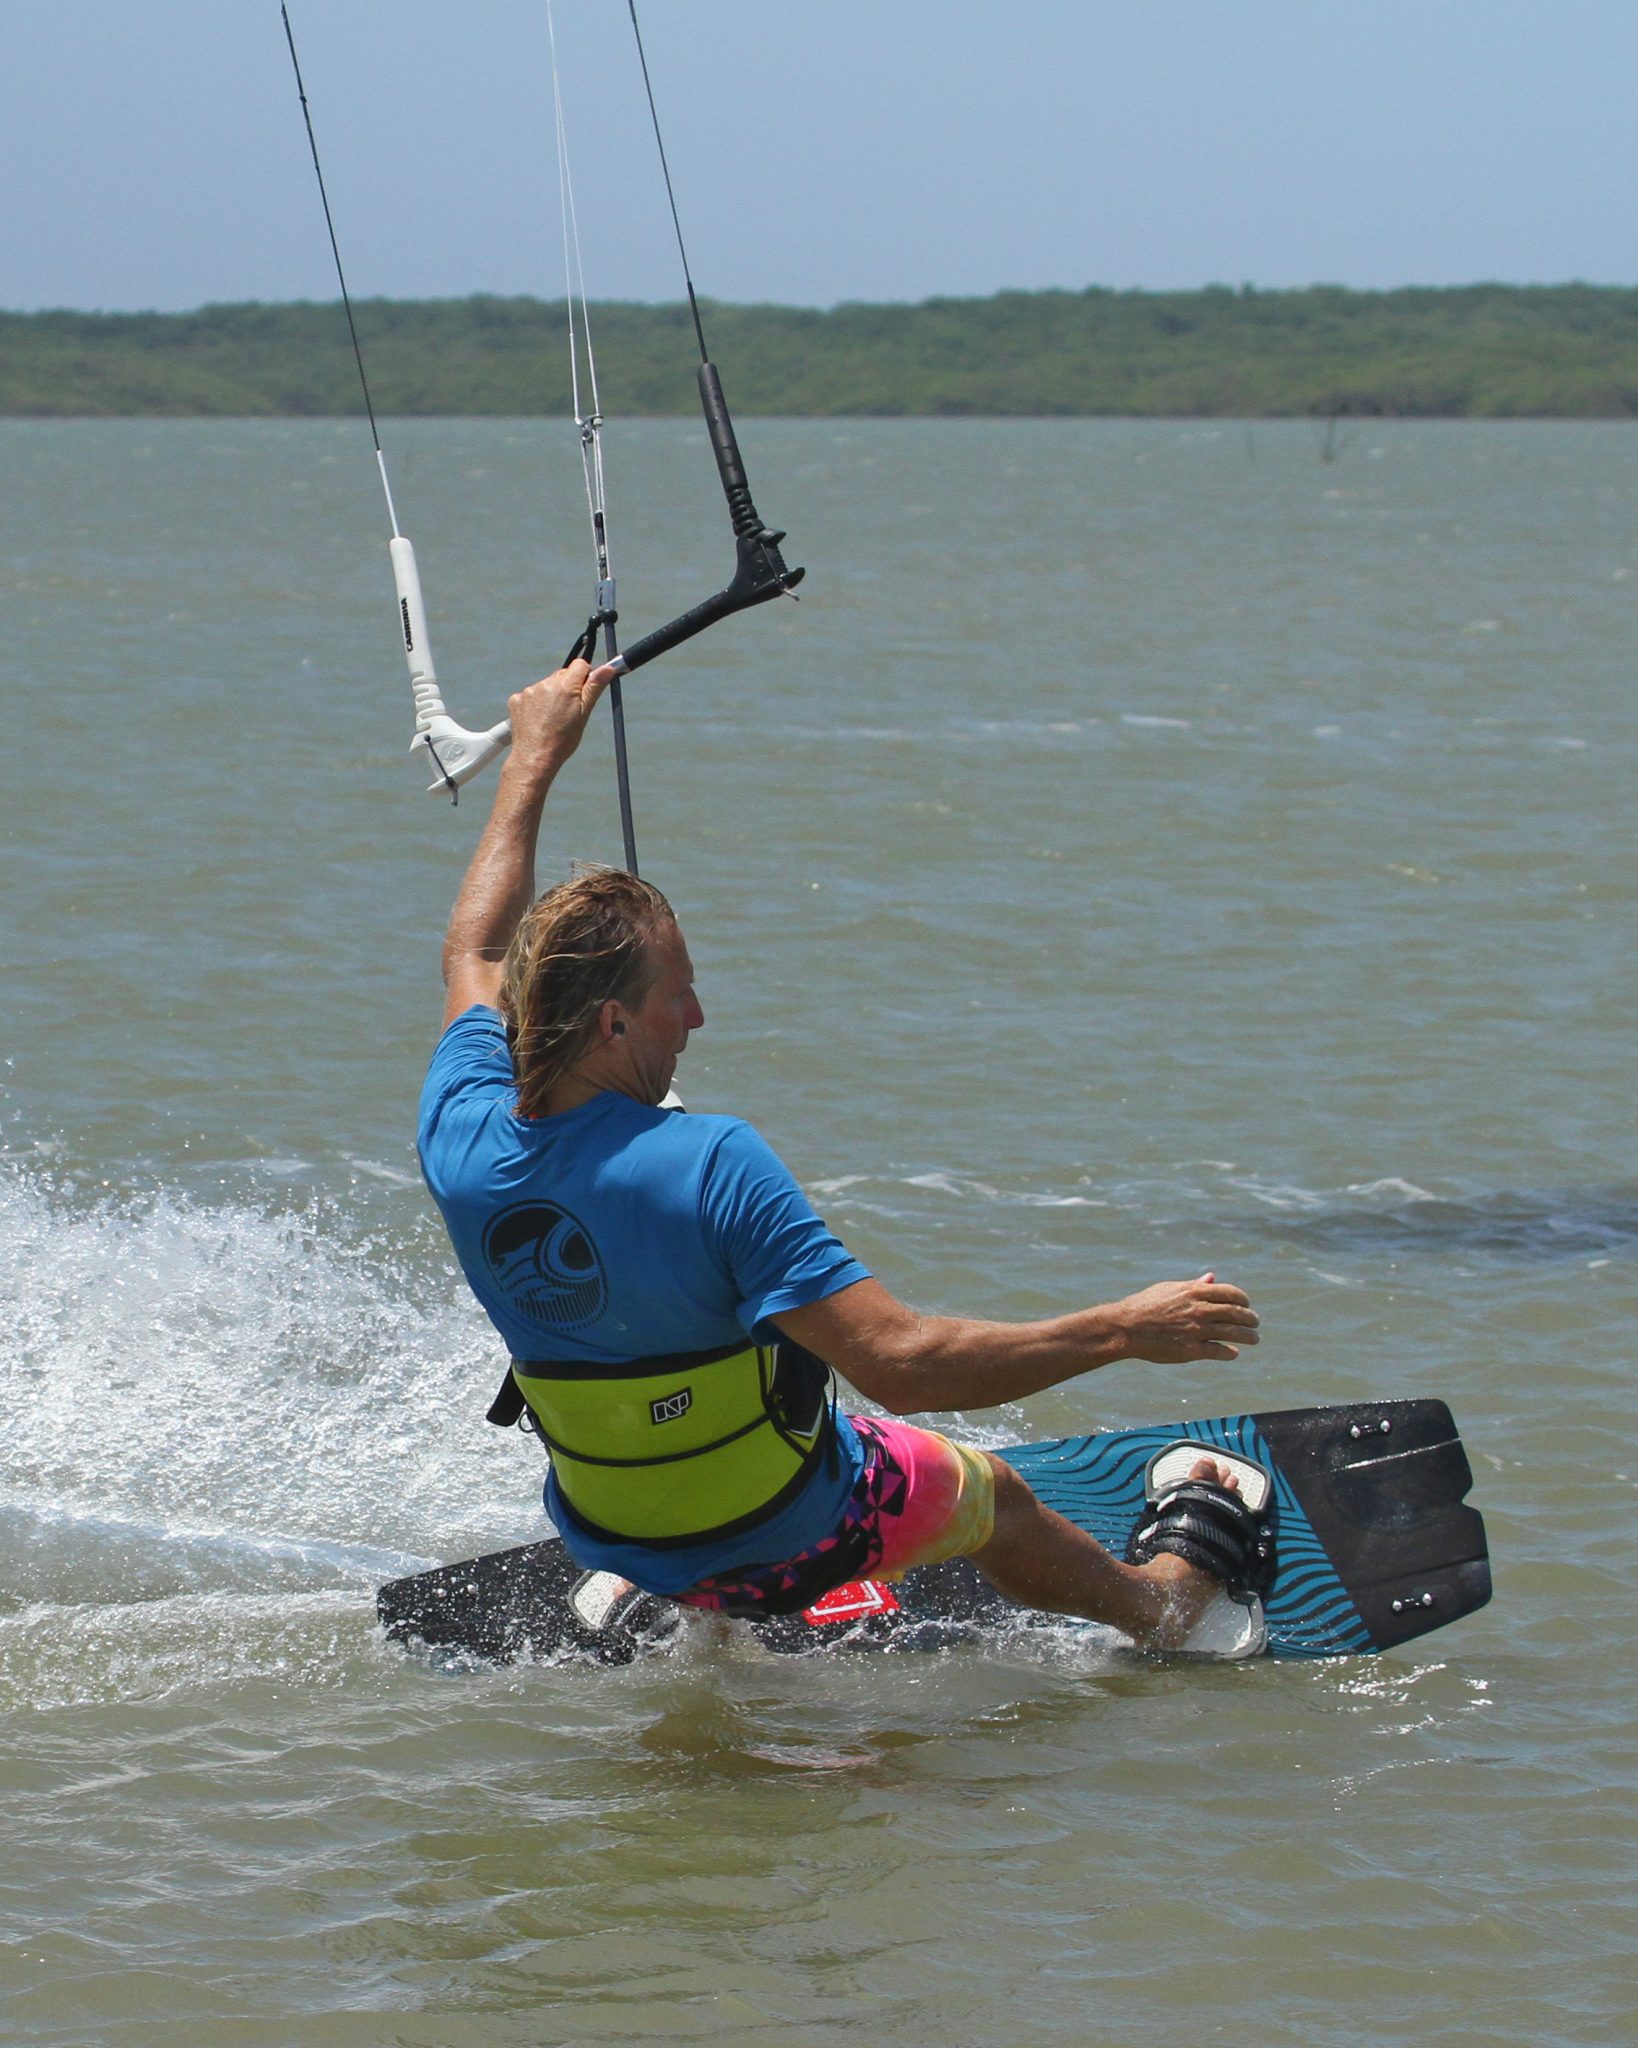
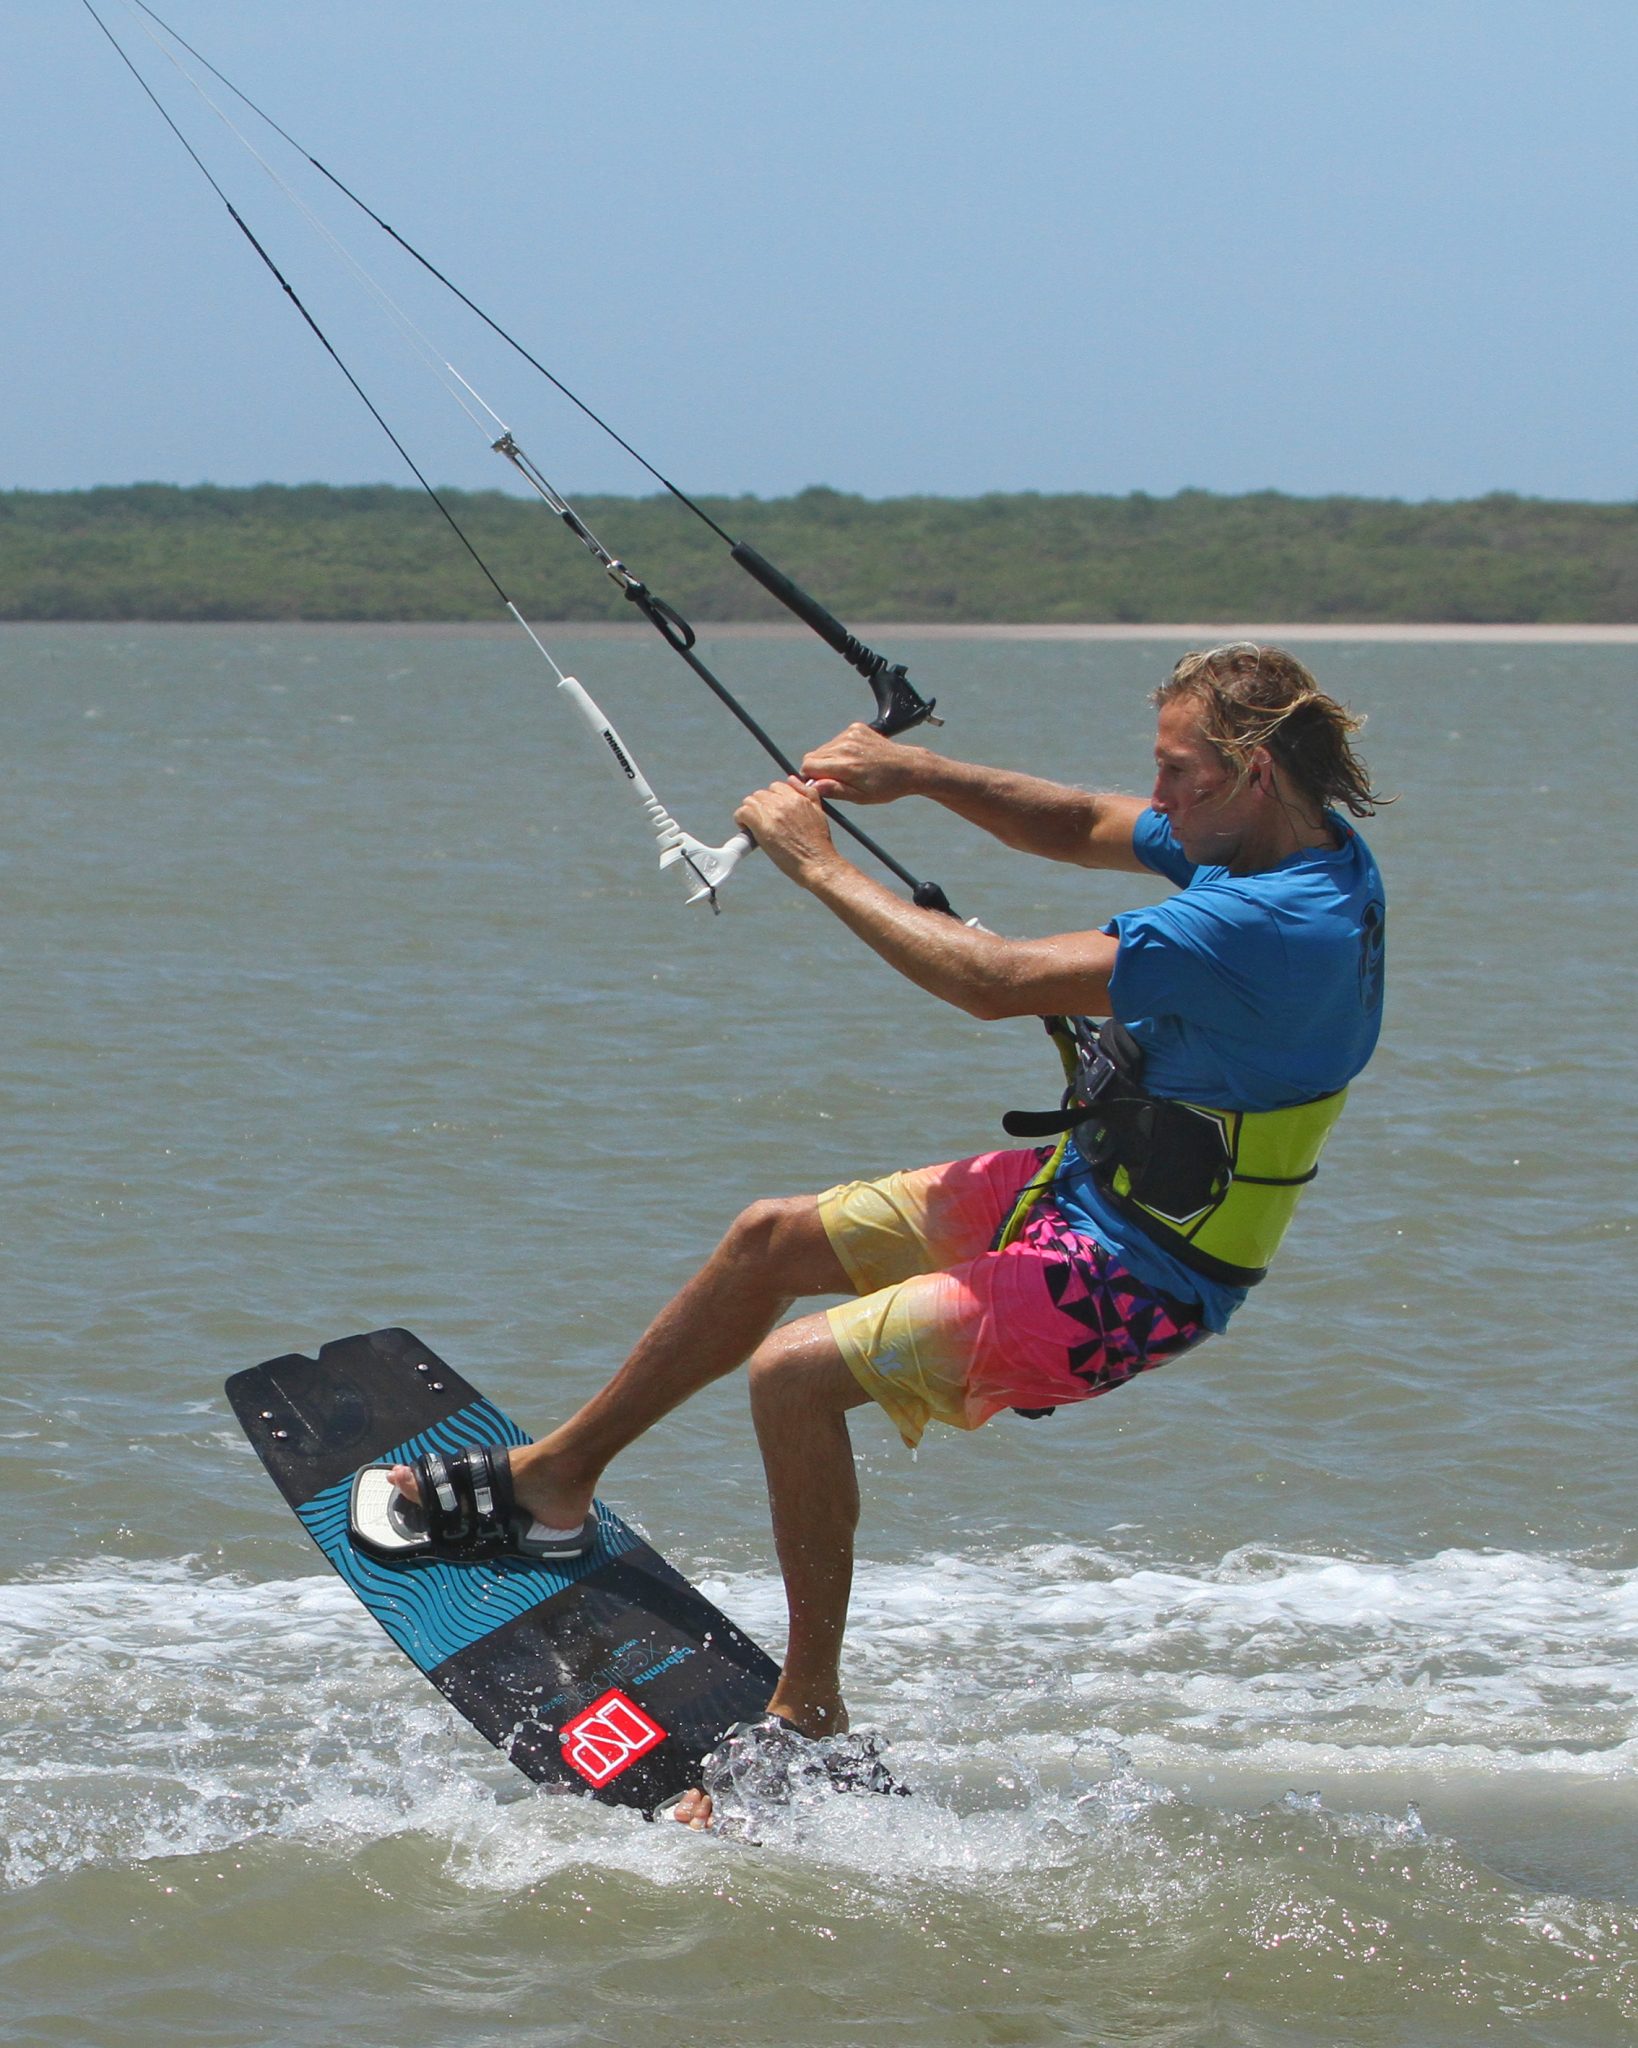
Carve Up Pic B.
Once the kite is high enough your job is to carve the board up and as far through the wind as feasible. If there is any tension on your back/steering lines this will not be possible. Here Christian has sheeted the bar out, while still keeping the bar steering the kite up. With little or no tension, he is able to drop his weight both low upwind and back over the tail of the board. In this position Christian can turn his head and shoulders, and carve the board hard up into the wind, leading with his free hand. It is important to keep weight on your feet, so that you can drive the board up into the wind. If you drop your weight but support yourself in the harness you won’t be able to carve up.
Keep Going Pic C.
This part is a continuation of the carve. It’s important as the temptation is to ease off once the board starts to turn, whereas the opposite is true, you must keep applying pressure through the edge of your board so that it continues to carve. You can see that Christian is driving through his back leg as it slowly extends. This straightening of the leg is done with feeling to keep pressure. You can’t kick the leg away from you (yet), rather slowly increase the pressure on your heel. This pressure will also hold you up. As the nose of the board approaches the eye of the wind try to reach up and get your free hand back on the bar, but don’t pull in just yet as you want the kite to carry on drifting over 12.
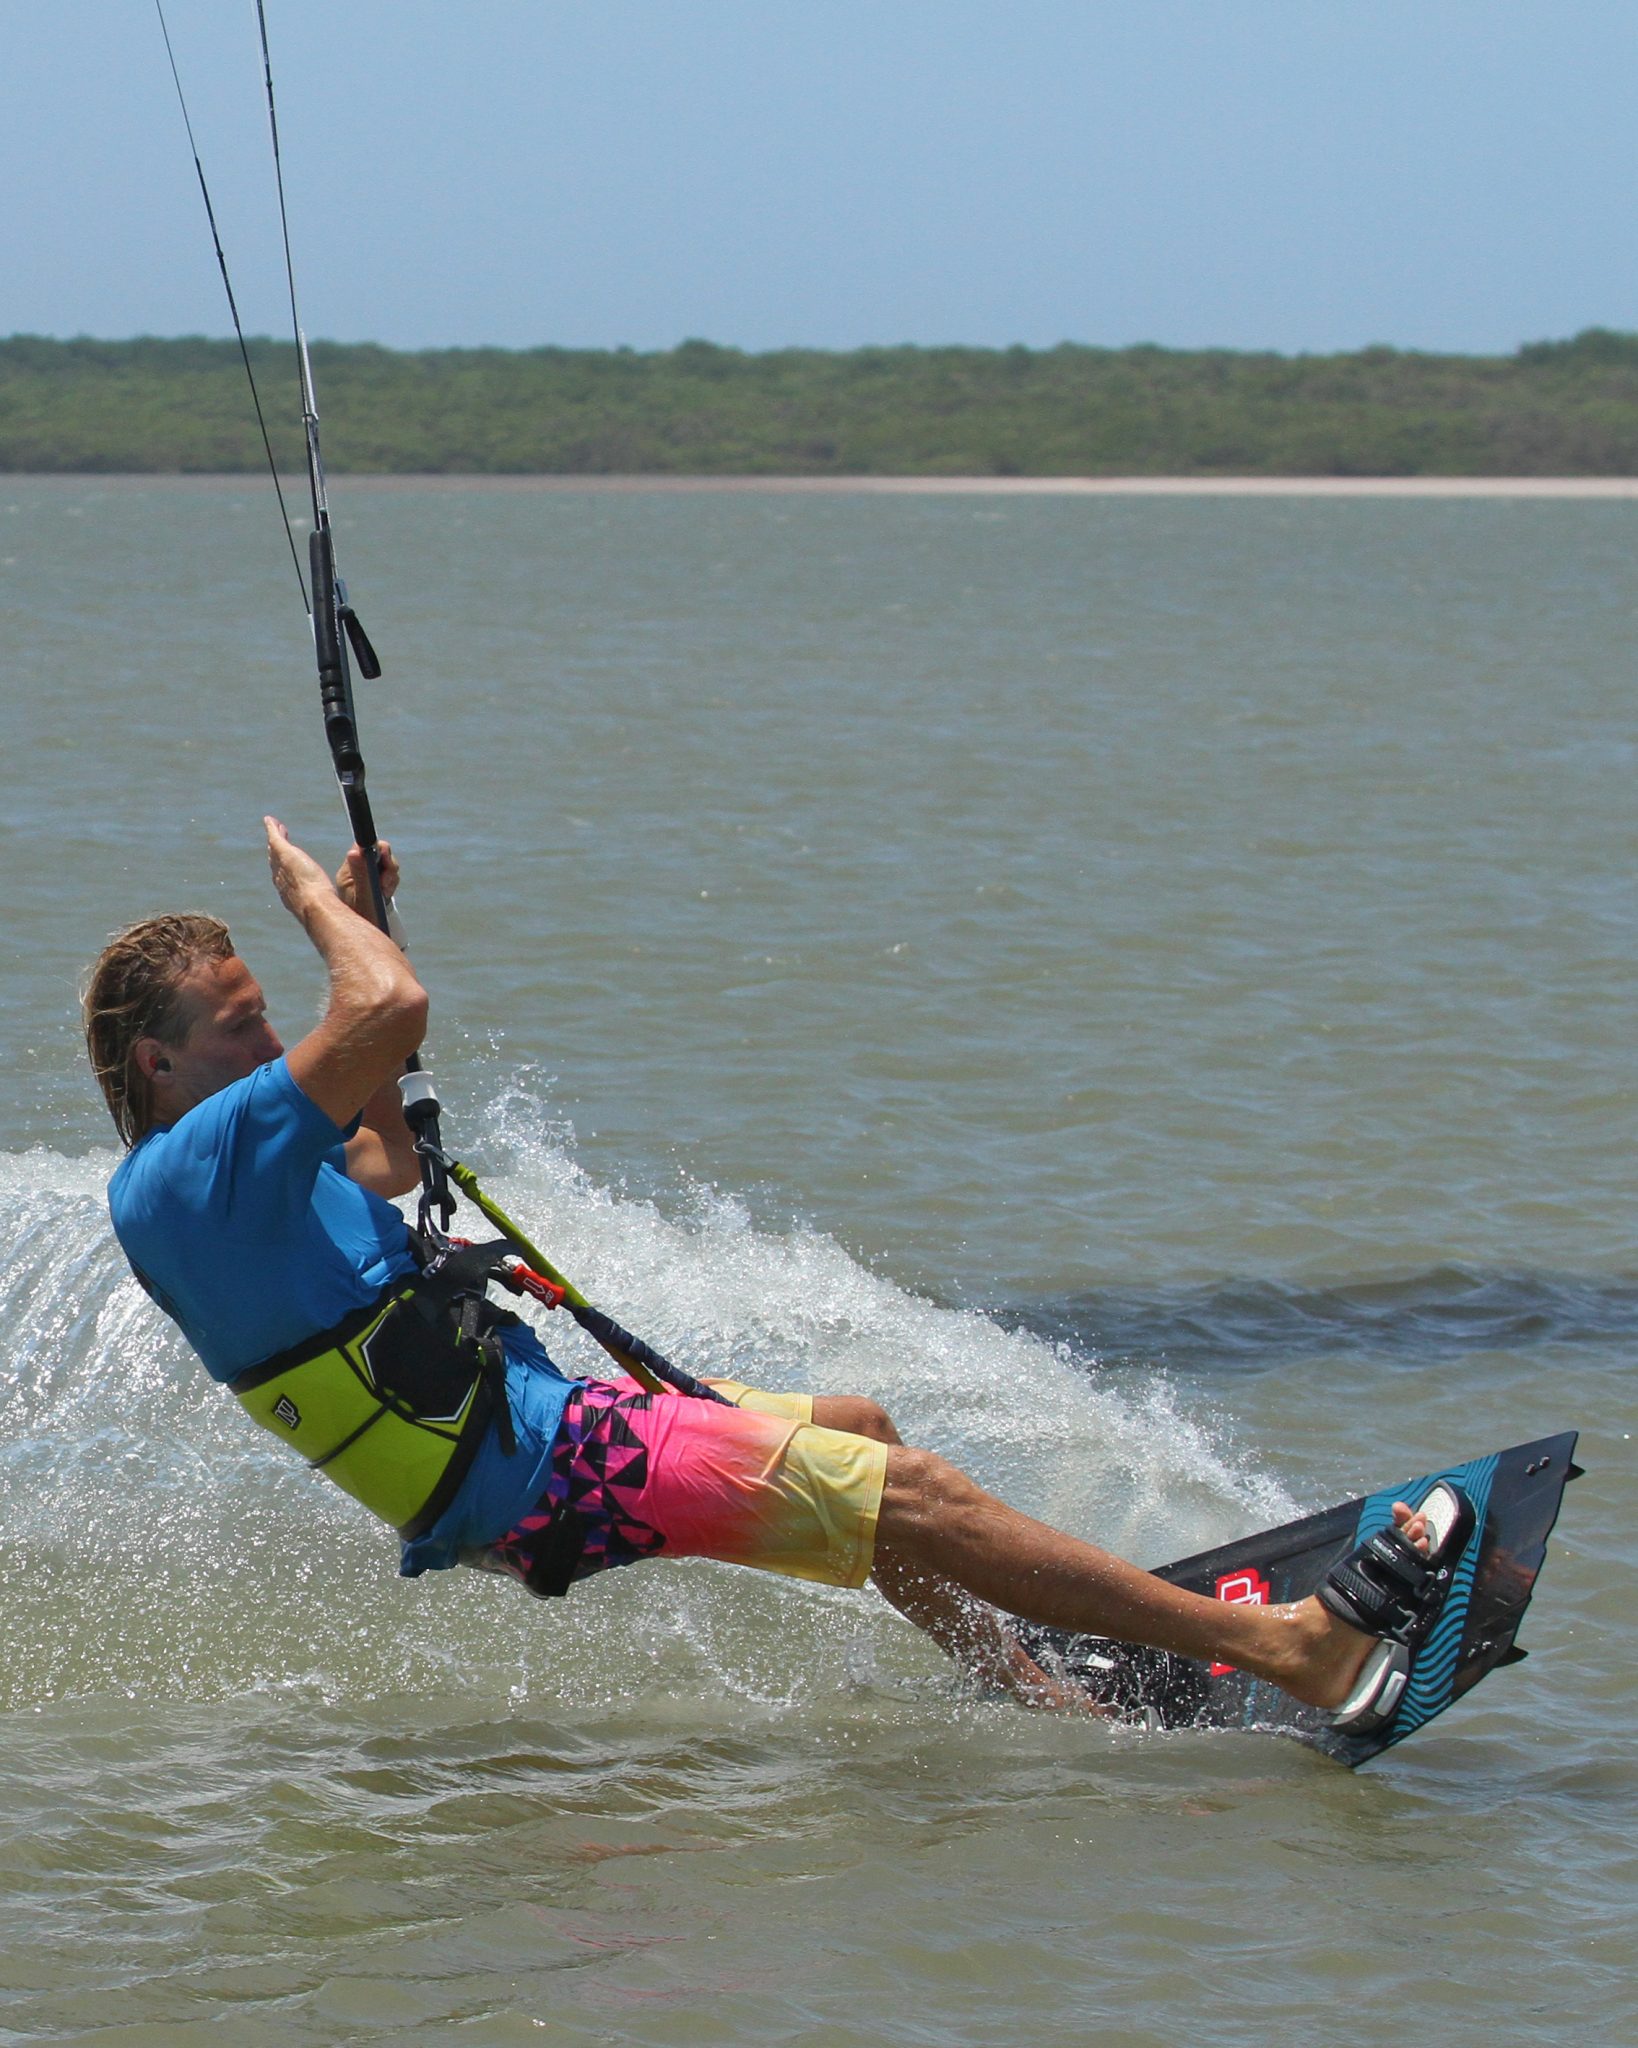
The Final Push Pic D.
The crux of the move, your success hangs in the balance here! You need to eke out as much from the carve as possible. The further you get around the better your chances. It is however a rather counter intuitive position. Looking at Christian you can see that he is downwind of his board, the kite is high and his body weight is fairly low. The obvious solution is to pull on the bar for support, whereas in fact you need to drive the board even further, extending the back leg more, pushing hard against the tail so that the board turns to face in the new intended direction. If you pull on the bar now the kite will lift you and plonk you unceremoniously onto your behind. Looking at Christian’s bar you can see that his kite has drifted past 12 o’clock. This is perfect. As the kite drifts into the other side of the window, any power will pull you in that direction, so patience is indeed a virtue.
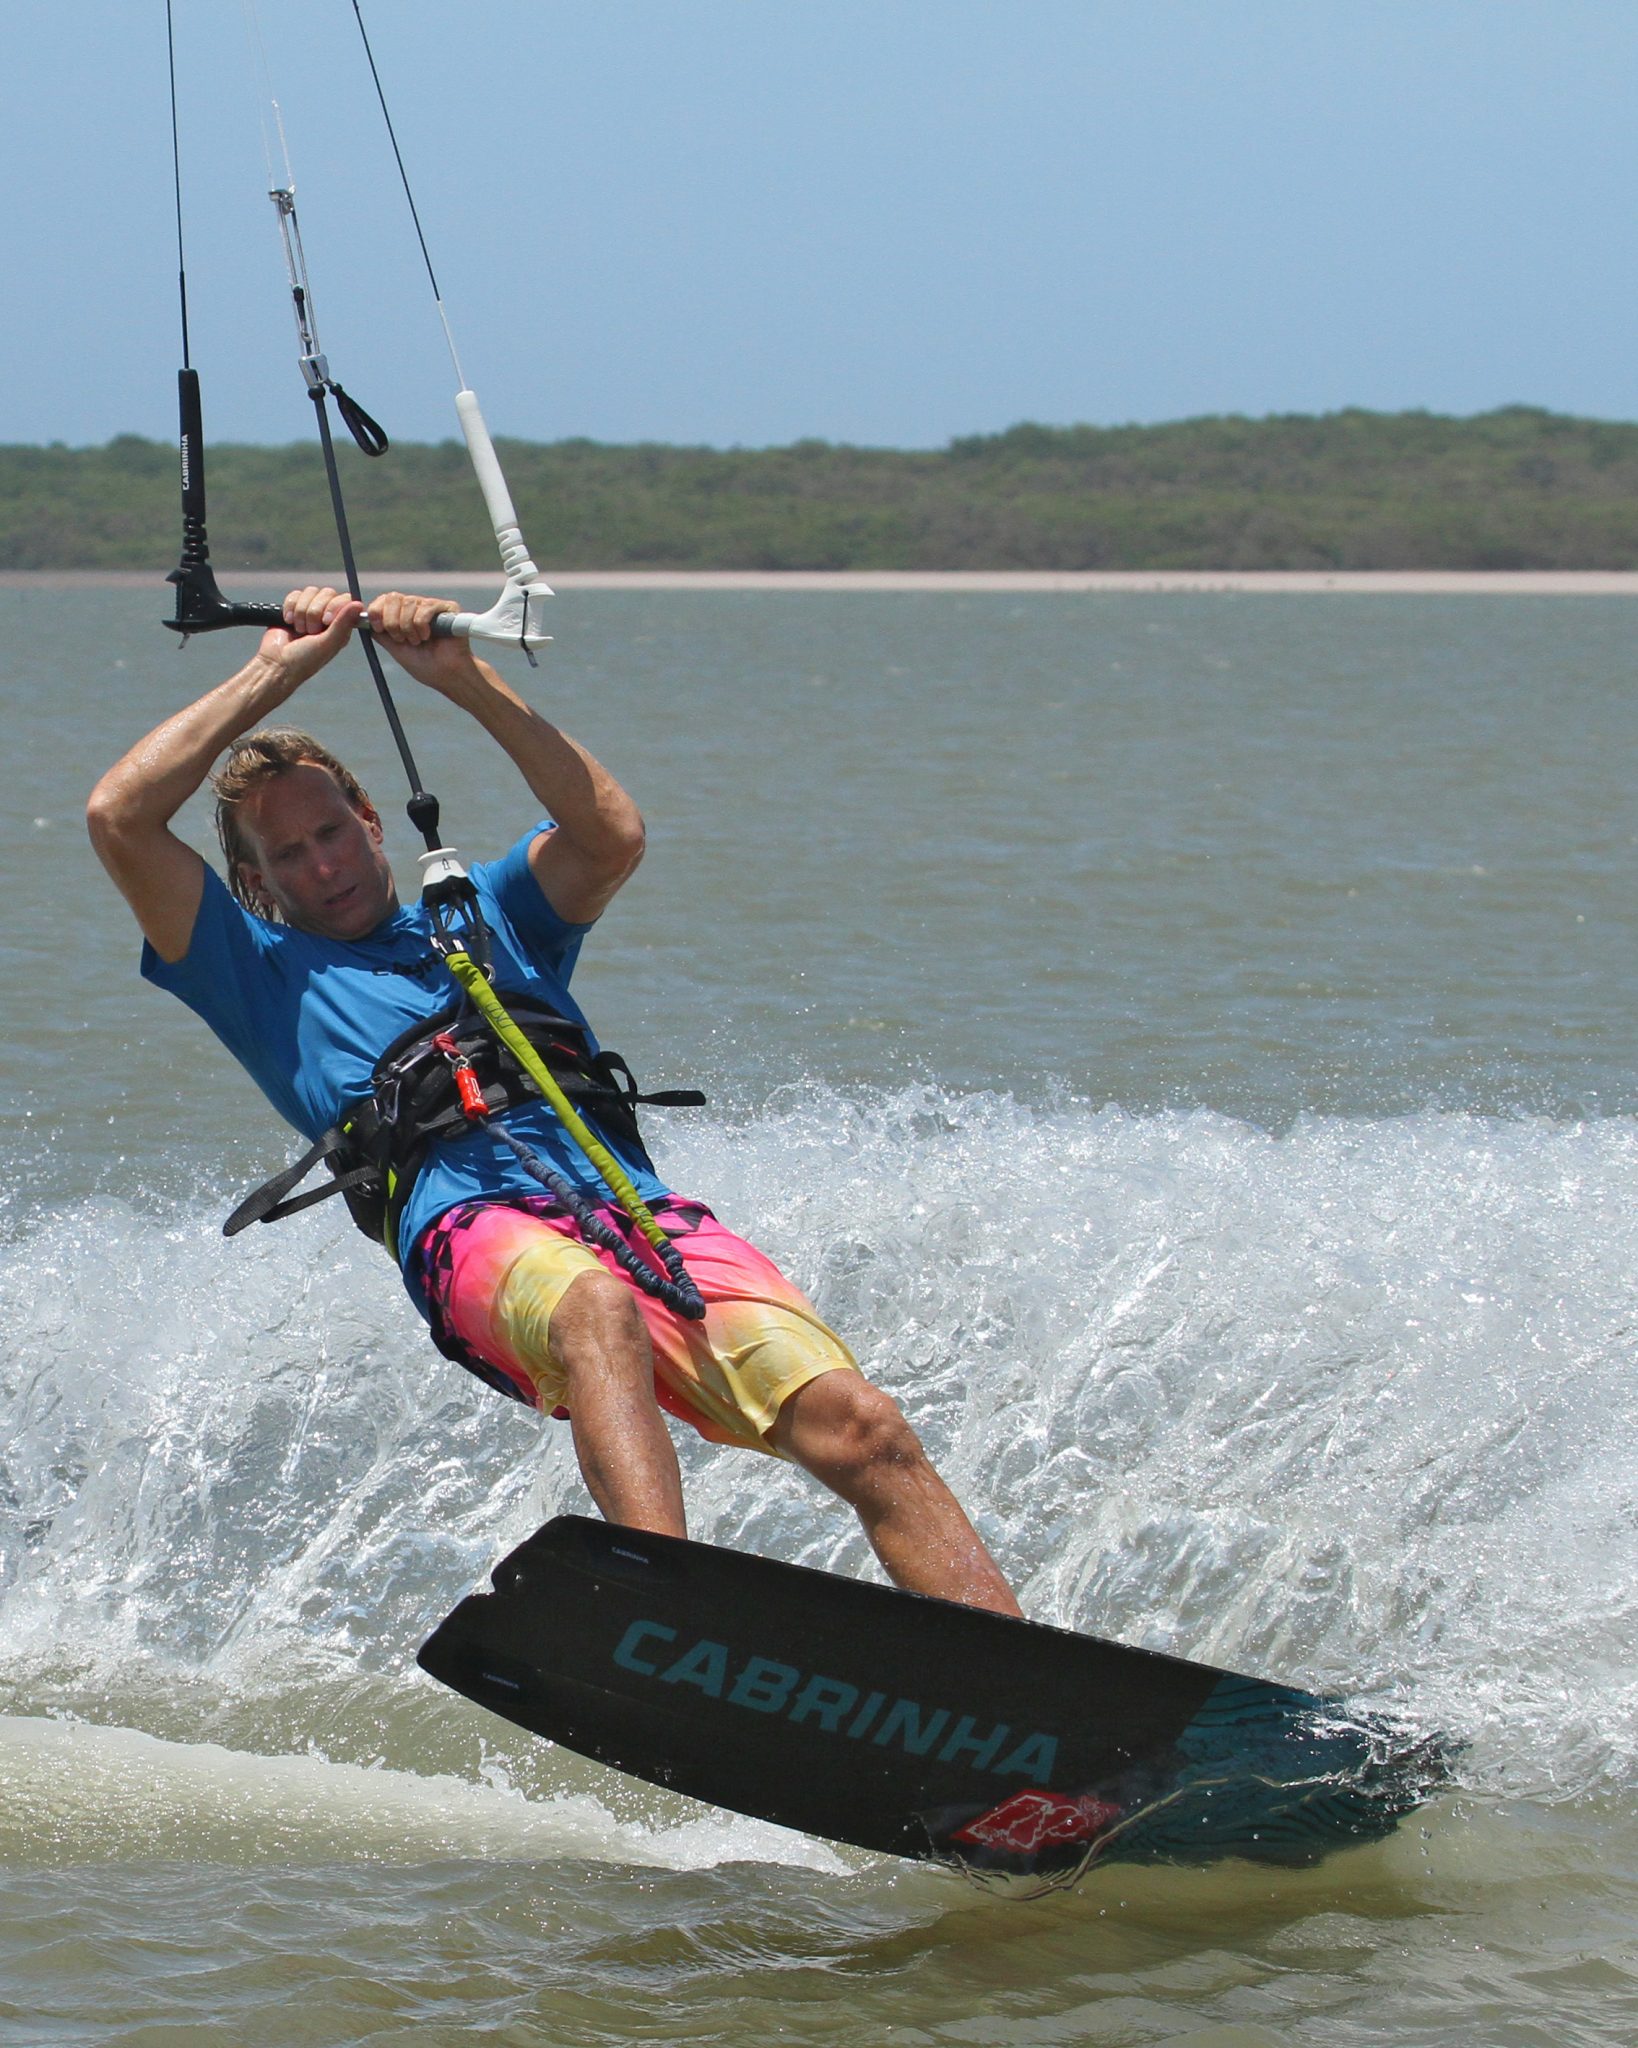
Pull & Kick Pic E.
To ride out of this you need to get the board back underneath you and pointing off the wind nose first. To get here is a question of timing. Simultaneously you must pull gently on the bar for support whilst also kicking you back leg fully away from you. Turning your head and shoulders to look downwind and finally pulling your front leg underneath you while diving the kite with your new front hand. That’s a fair list on the multi-tasking scale, but it is this combo that will rotate you and the board into position. With the kite supporting Christian’s weight, he is able to scissor his legs, pushing the tail away and pulling the nose under him. However, be subtle with the bar. Too much pull and you’ll get lift rather than support and suddenly you’re in the air and it’s no longer a tack but a dodgy BLT to toeside!!!

Dive Captain Dive Pic F.
All that’s left is to get moving and claim this puppy. The kite has continued to drift so it should be patiently waiting where you want it, which is in the new side of the wind window. Here Christian gives the kite a healthy dive with his new front hand. The kite then pulls him back up and over the board into a toeside position. Only note of caution here, as demonstrated, is to keep your weight back over the tail of the board and keep your body tight, so you and the board start moving together, as opposed to the board sinking and you being hauled on the handlebars.
Top Tips
Whilst attempting this for the first time you should really concentrate on sheeting the bar out and dumping your power. It’s the only way to carve upwind, and if you’ve never practiced a move like this it’ll be a very odd sensation. You will however find that it works a treat and that your board will start carving through the wind as long as you have weight on your feet.
It’s worth noting that if your sweet spot is trimmed a long way out, it will be difficult to dump the power and carve. Ponder that it’s all about dumping the power, drifting the kite and carving your board.
Now have a gander at the sequence and videos for a slice of reality.
Common Problems
If you’re having trouble getting the board to carve. As already hammered out, make sure you feather the bar out so that you can turn the board. If all is good and you’re letting the bar out and the kite is high, then the chances are that the problem is that as you start to push against your back foot, you’re also swinging your hips forwards toward the nose of the board, as if you’re about to transition. Keep your hips back.

If you’re getting lifted at any stage during the move, you’re pulling on the bar. As the kite is high, it won’t take much of a pull for it to pick you up.
And finally, if you’re getting around but then get pulled onto your back rather than out onto toeside. This is a result of the kite not drifting across into the other side of the wind window. If you dive the kite from 12 o’clock it’ll pull you straight downwind, and because you’re facing upwind it’ll be onto your back. Make sure the kite drifts across to at least 11 or 1 o’clock. Dived from her the kite will pull you forwards and out of the move. Sweet.
Keystones
- Speed and gentle on the bar
- Drift kite up, bar out and carve
- Hips back and drive board through the wind
- Gentle pull and hefty kick
- Dive kite from new side of window
This technique article was in Issue 72 of IKSURFMAG.
Related


By Christian and Karine
Christian and Karine have been working together as a coaching team, running improver to advanced kitesurfing clinics since 2003.
