
Surfboard Heel to Toe Carve with a Down Loop
Technique / Intermediate


Introduction
It would be a shame to learn one without the other! And depending on your preference, it’s not written in stone which is easier to conquer first, the toe to heel or the heel to toe. Therefore, it makes sense to give you both options to work on, even though a lot of kiters will feel more confident trying first from their toes. Adding a downloop/underturn to a heel to toe carve is delightful and challenging in equal measures, but if you concentrate on what makes and finishes a decent carve and as before crack the timing of the downloop, then this is well within your reach. Now let’s have a look through what makes a good solid carve and how to add the downloop...
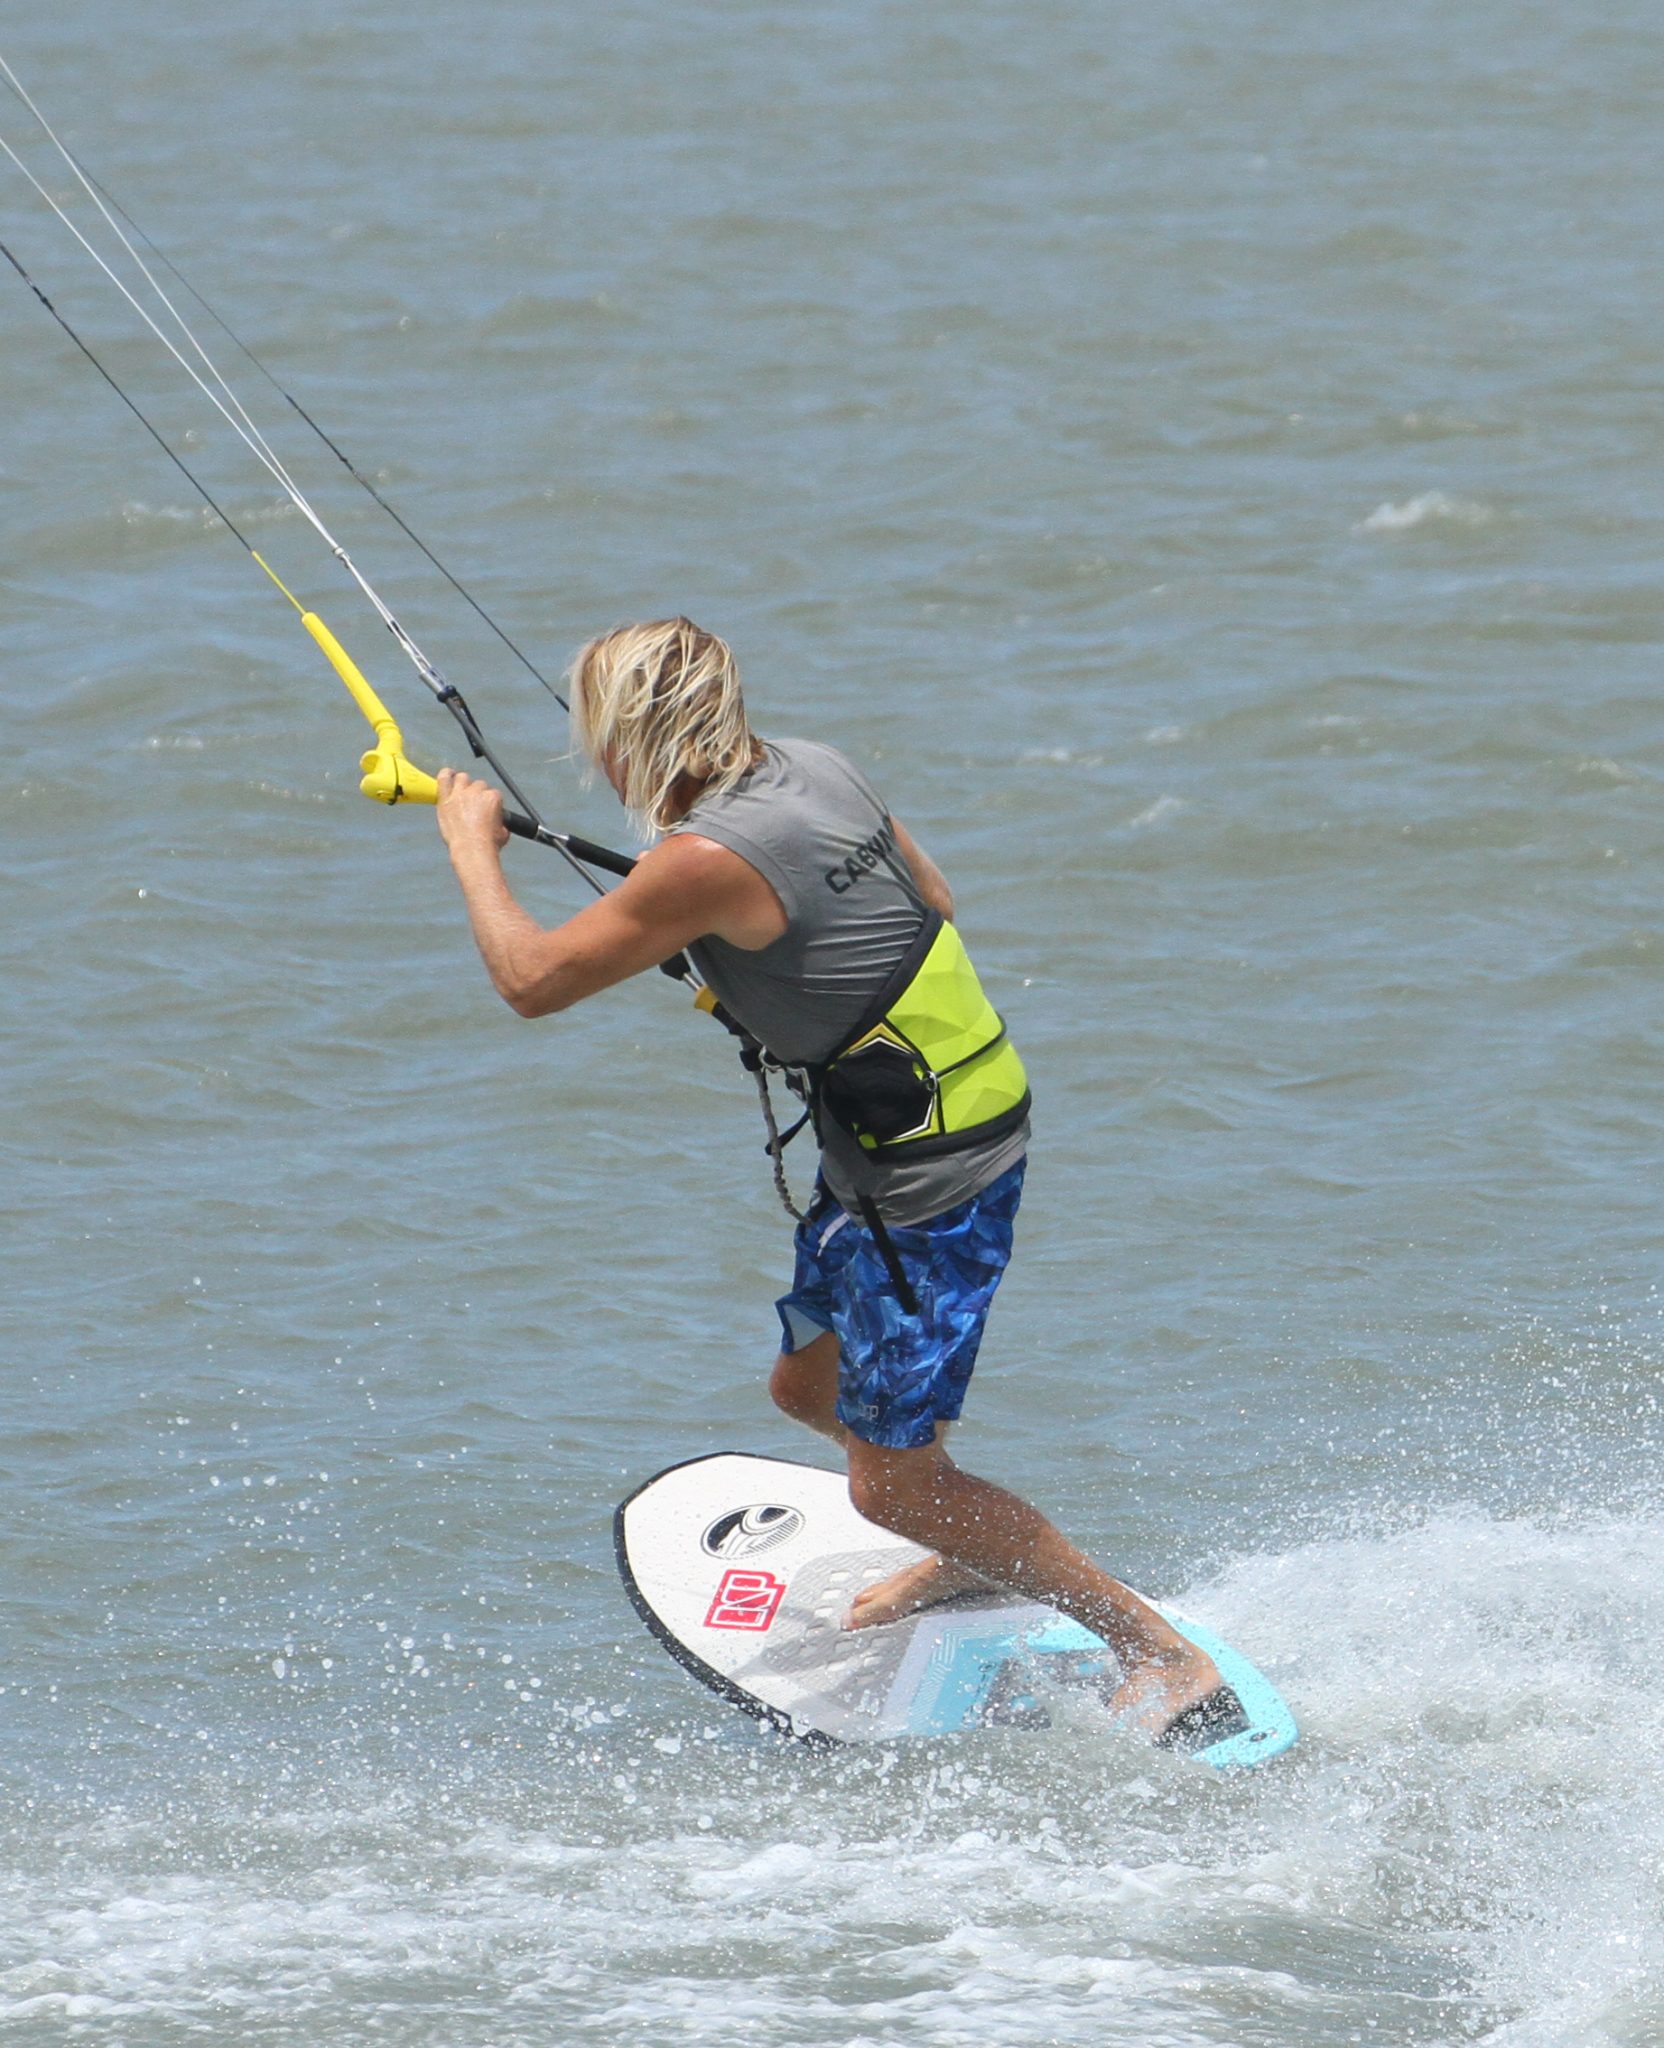
The Approach - Pic A.
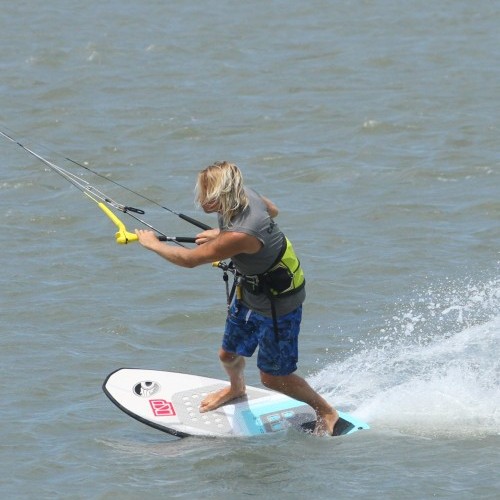
Foot position is critical for a solid carve. It’s going to vary from board to board, but you’ll always need to make sure that your front foot is both forwards and across the board so that you can finish the turn on a decent upwind toeside edge. The back foot also needs to be back far enough so that it can straddle the centreline comfortably. This way you can still edge into against the kite on your approach, but you’ll also be able to keep the board pushed down once you’re around to toeside. Again you don’t want to have an awkwardly wide stance as this can lock your hips in place and make it very difficult to shift your weight during the turn. Your kite needs to be low enough to edge against, around 11 or 1 o’clock. And finally, you need to edge to have tension – bend your knees and sit down a little bit so that your bum drops upwind of the board and pushes your heels down into it, seeing as how you’ve wiggled your feet across. In the pic, Christian has his weight upwind and is sitting a bit, keeping the board on an edge, with his hips forwards to keep the nose down. He’s wiggled his feet across into carving position and has his shoulders open, facing forwards. He’s now ready. The only thing left to do now is lift the kite higher so that he’s got the room for the downloop.


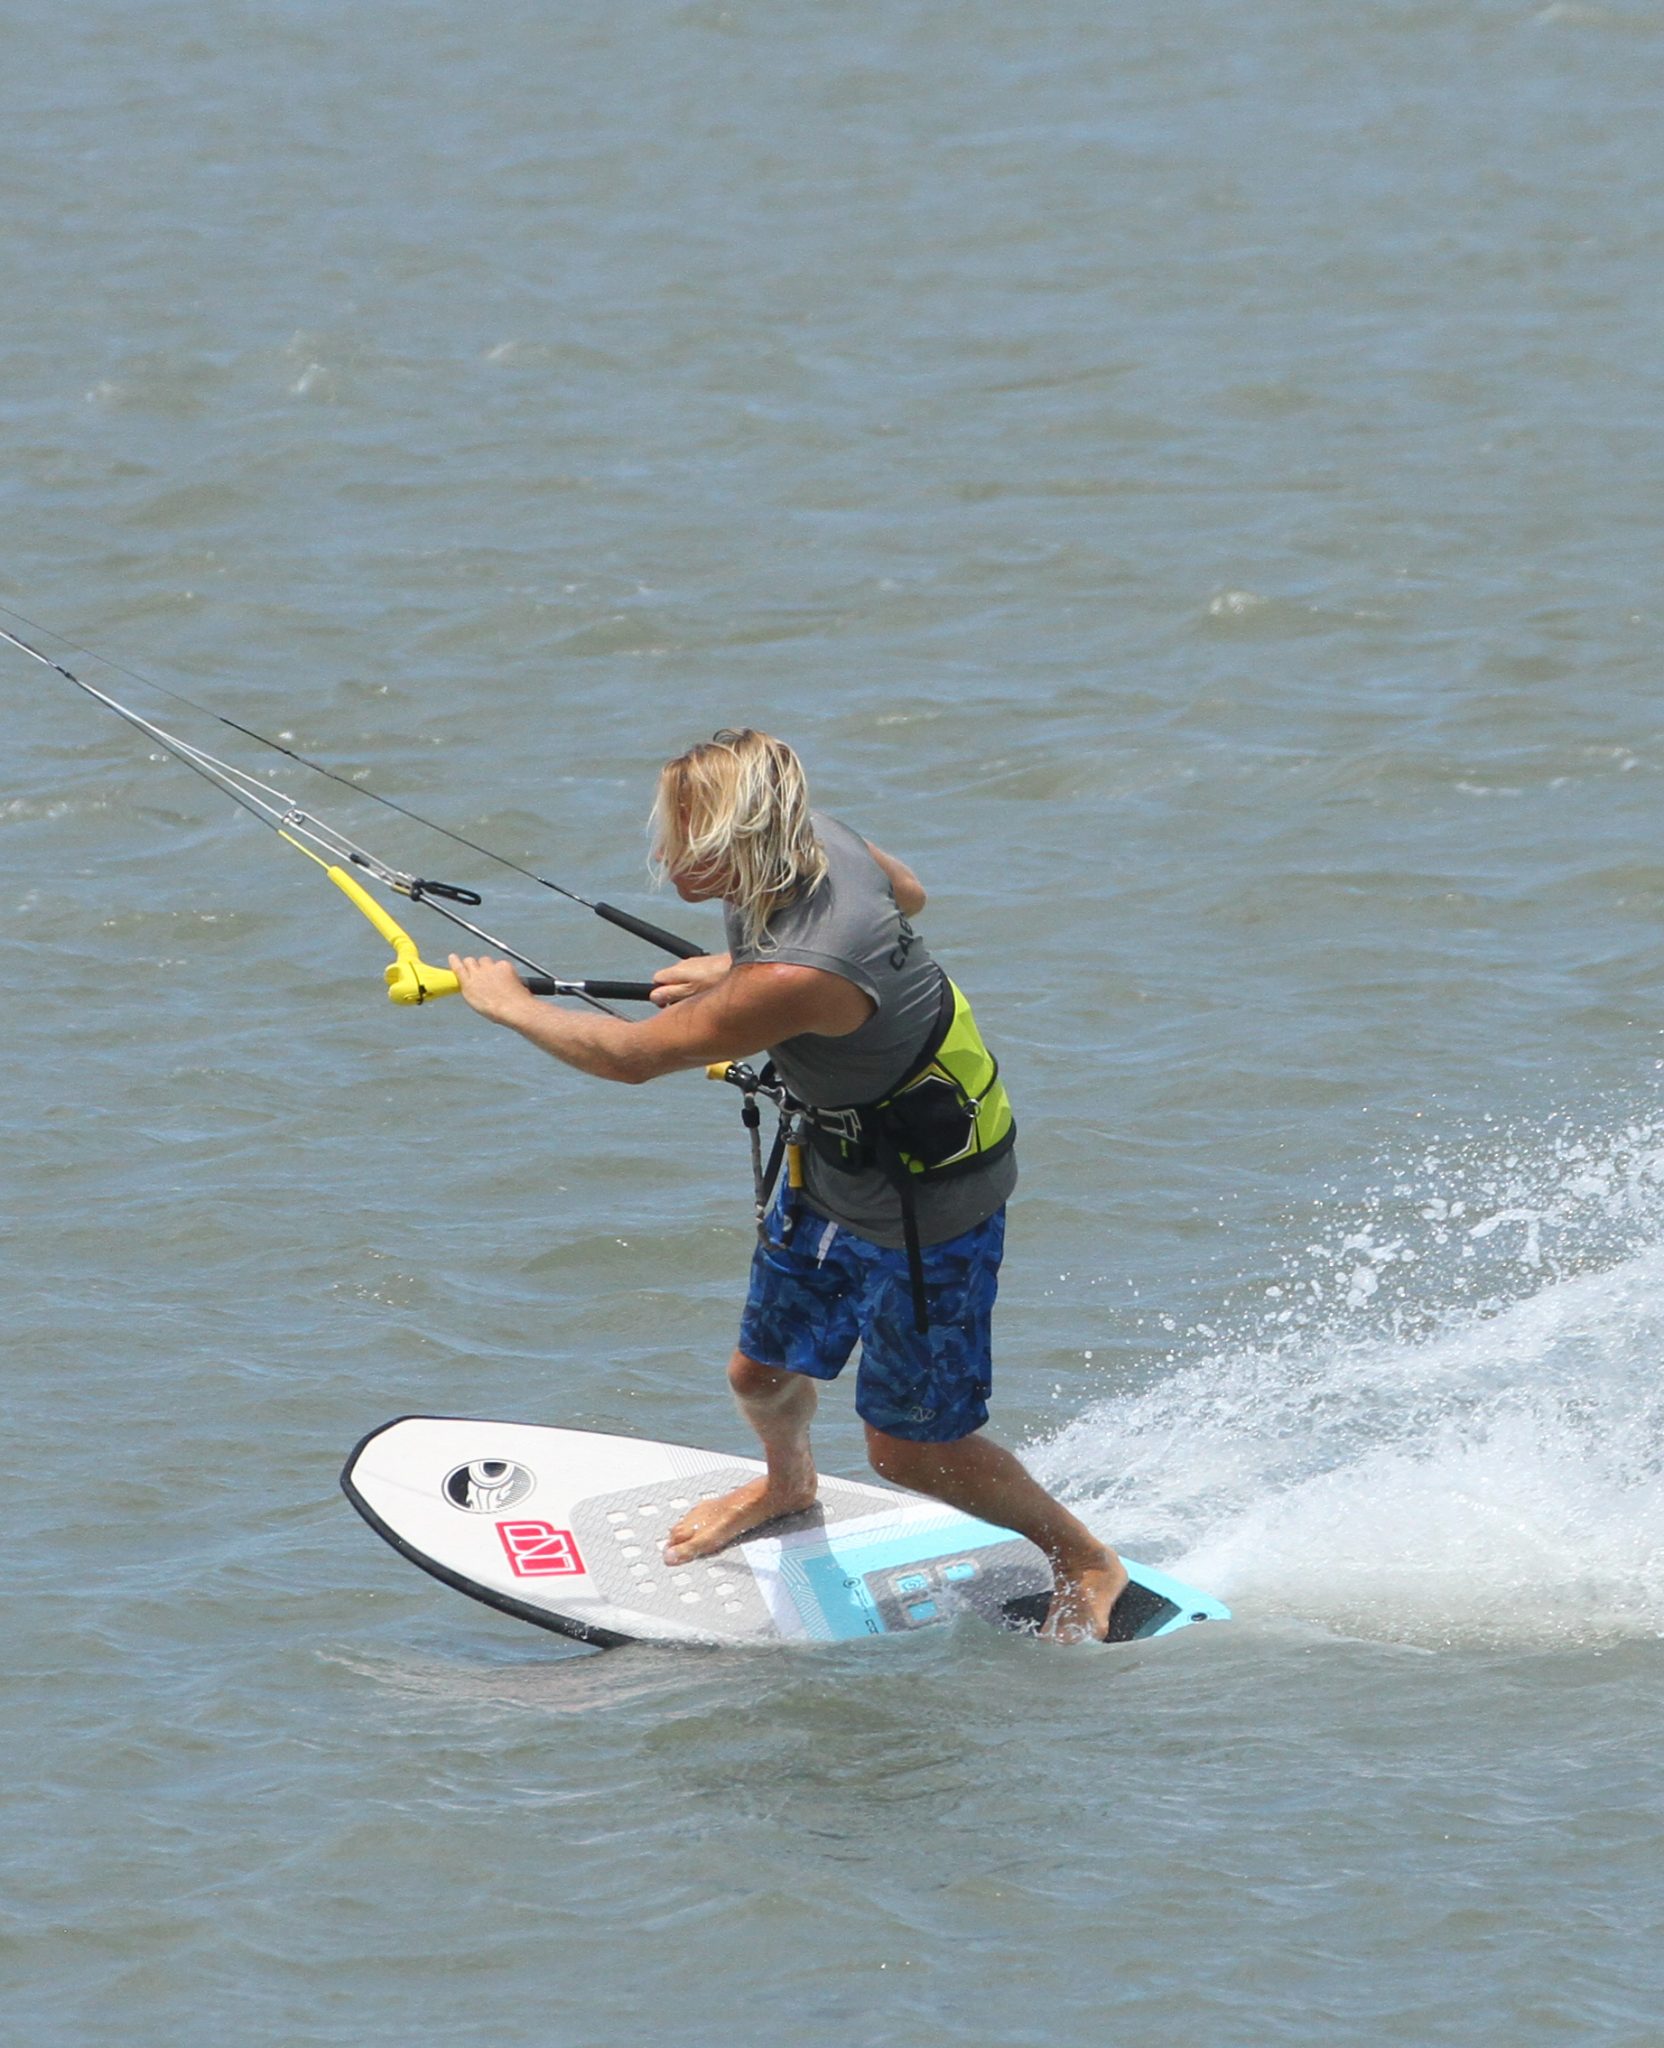
Rolling into the Carve – Pic B.
To initiate the carve, Christian stays low and shifts his weight across the board onto the balls of his feet, by flexing at the ankle and pushing his knees across the board, which rolls the board across onto the toeside rail and sets the carve in motion. He’s looking, and his front hand is forwards towards the end of the bar. As the board flattens and turns towards the kite, he starts to pull and push to get the kite moving into the downloop. This is necessary as once you start carving from your heels, you will lose tension in the lines very quickly, so you can’t wait too long otherwise you’ll miss the opportunity and leave the kite waiting and flapping at the edge of the window. To make sure you get a nice carve on, it’s imperative to keep looking forward. It’s tempting to turn your head and shoulders and look back the other way, but remember that throughout the carve you’ll be moving forwards around an arc.
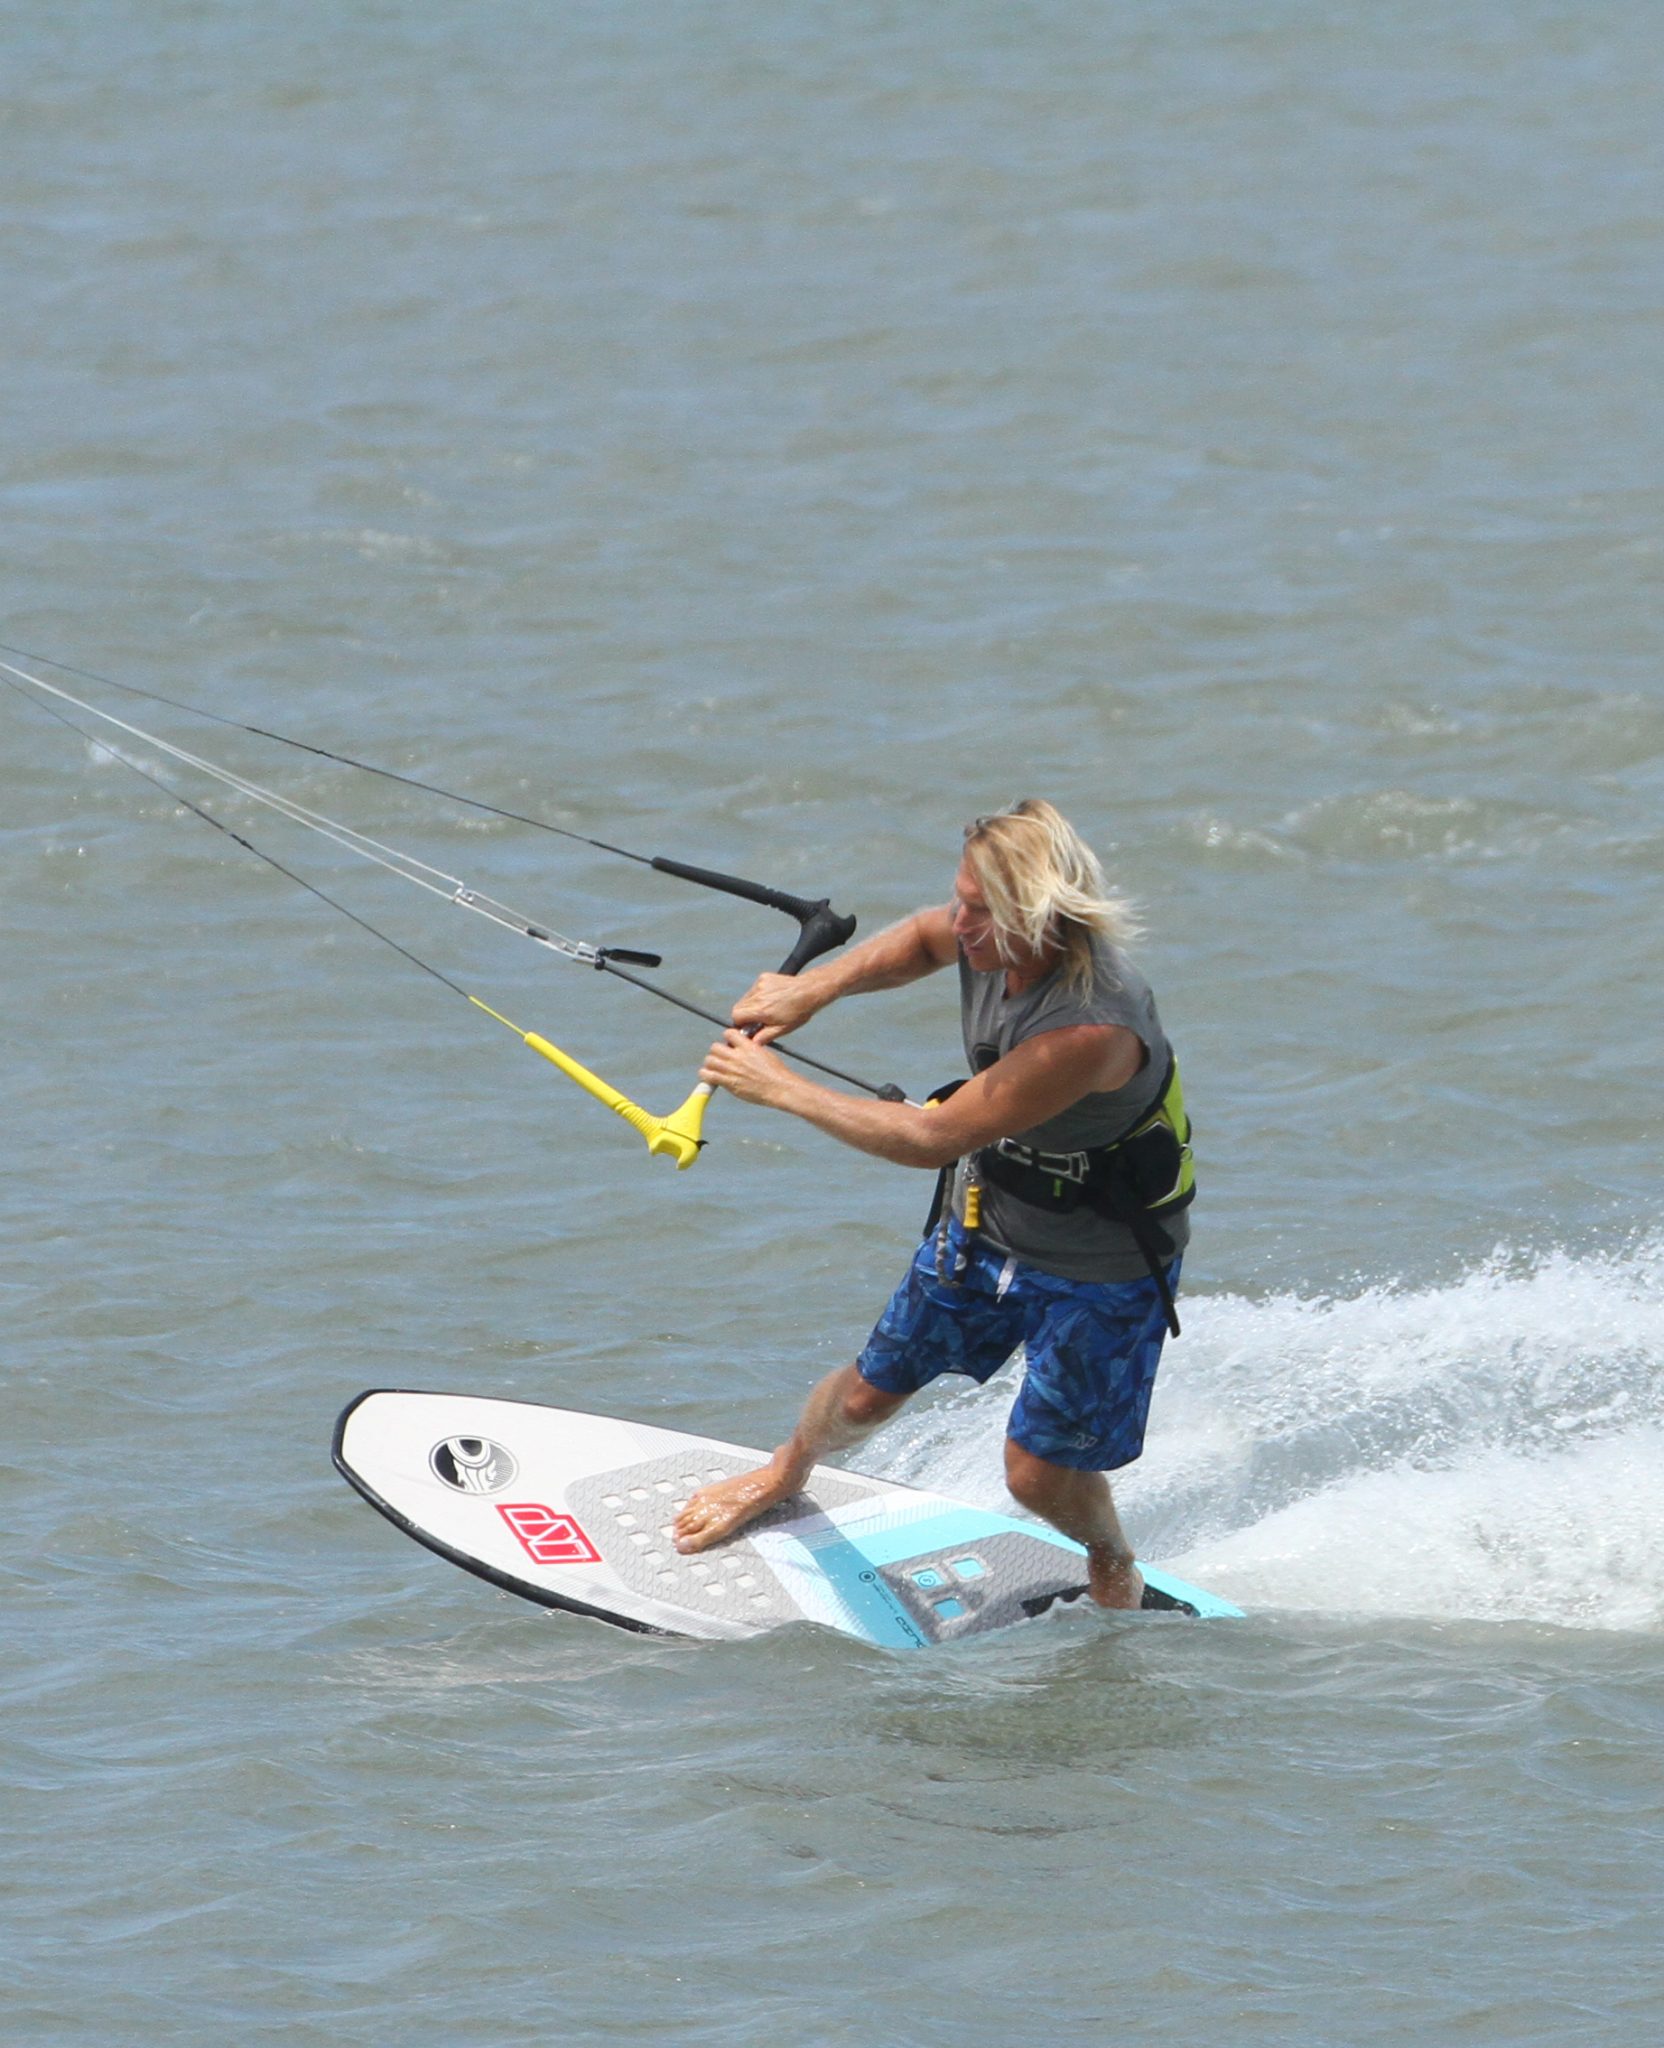
The Downloop – Pic C.
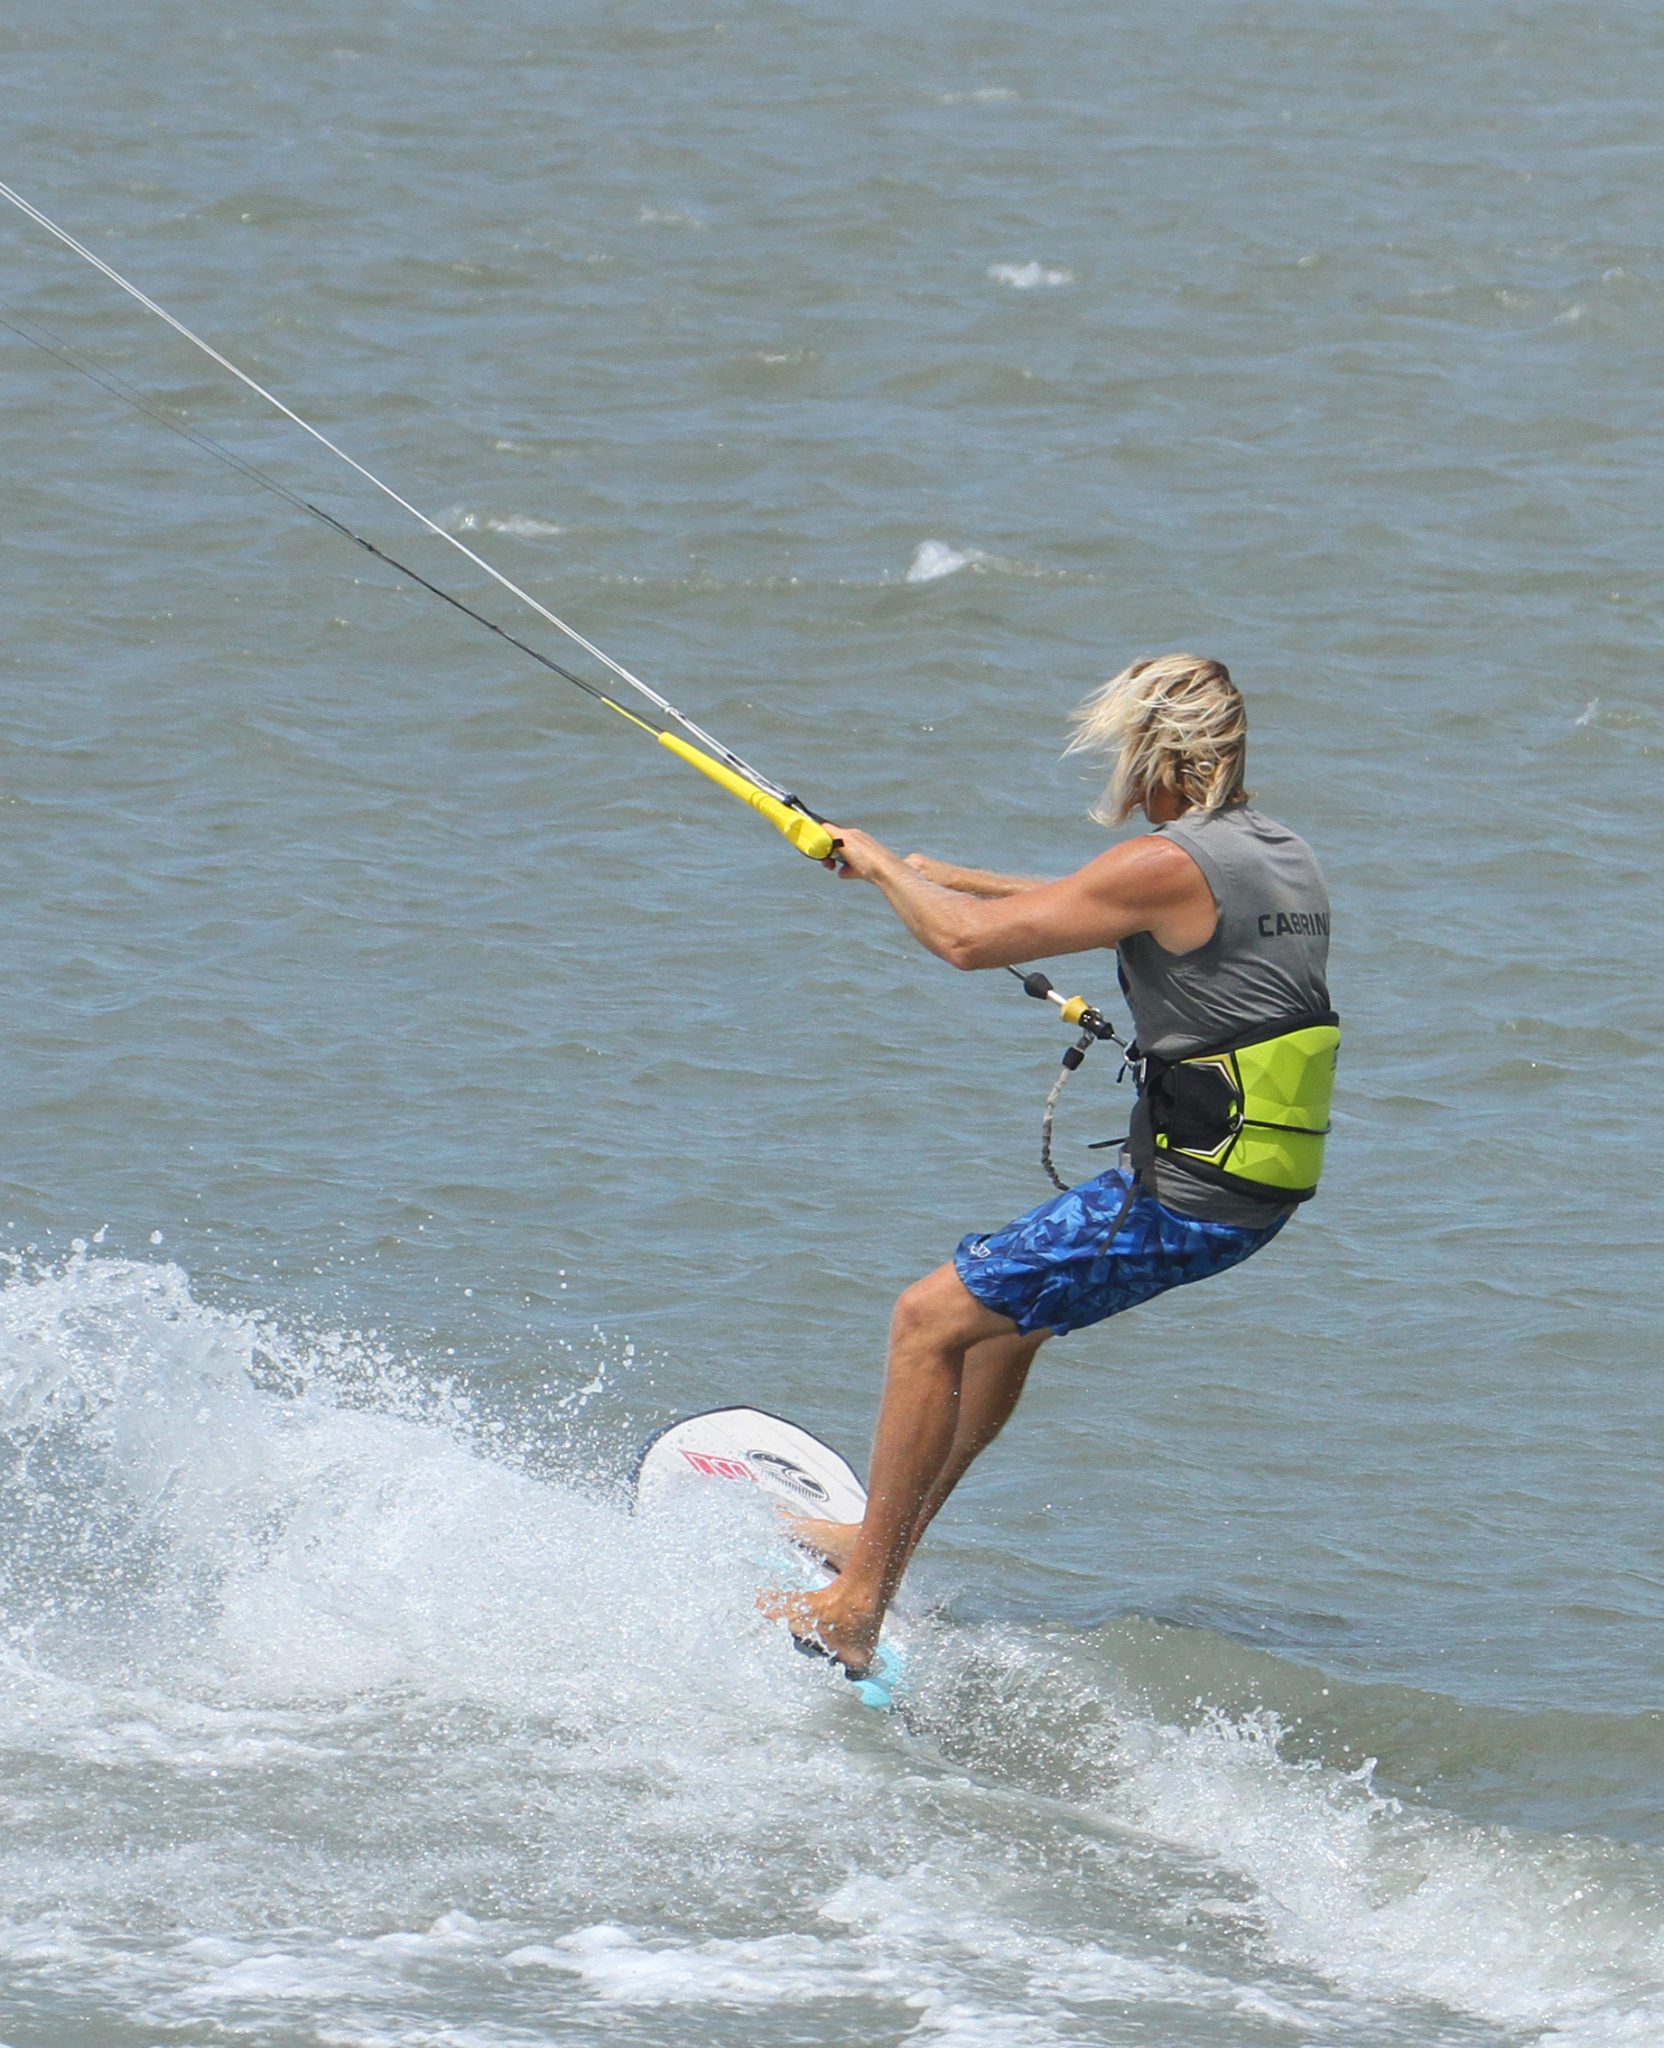
Just as with any downloop, the key here is commitment. You’ve asked the kite to turn, so keep at it. At this stage, Christian is now fully over onto his inside rail, and the board is carving nicely. Due to the sudden downwind nature of this carve, the kite might be slower than you anticipate to react. Therefore, you’ve got to make sure that you keep the bar on the sweet spot and give the push with your front hand and pull with your backhand as much as possible. You can see that Christian has the bar turning aggressively, his front hand is pulled in, backhand is pushed all the way to touch the centre line and it’s on the sweet spot. Carving wise his knees are both pointing forwards, and his ankles are flexed, driving the board around the turn.
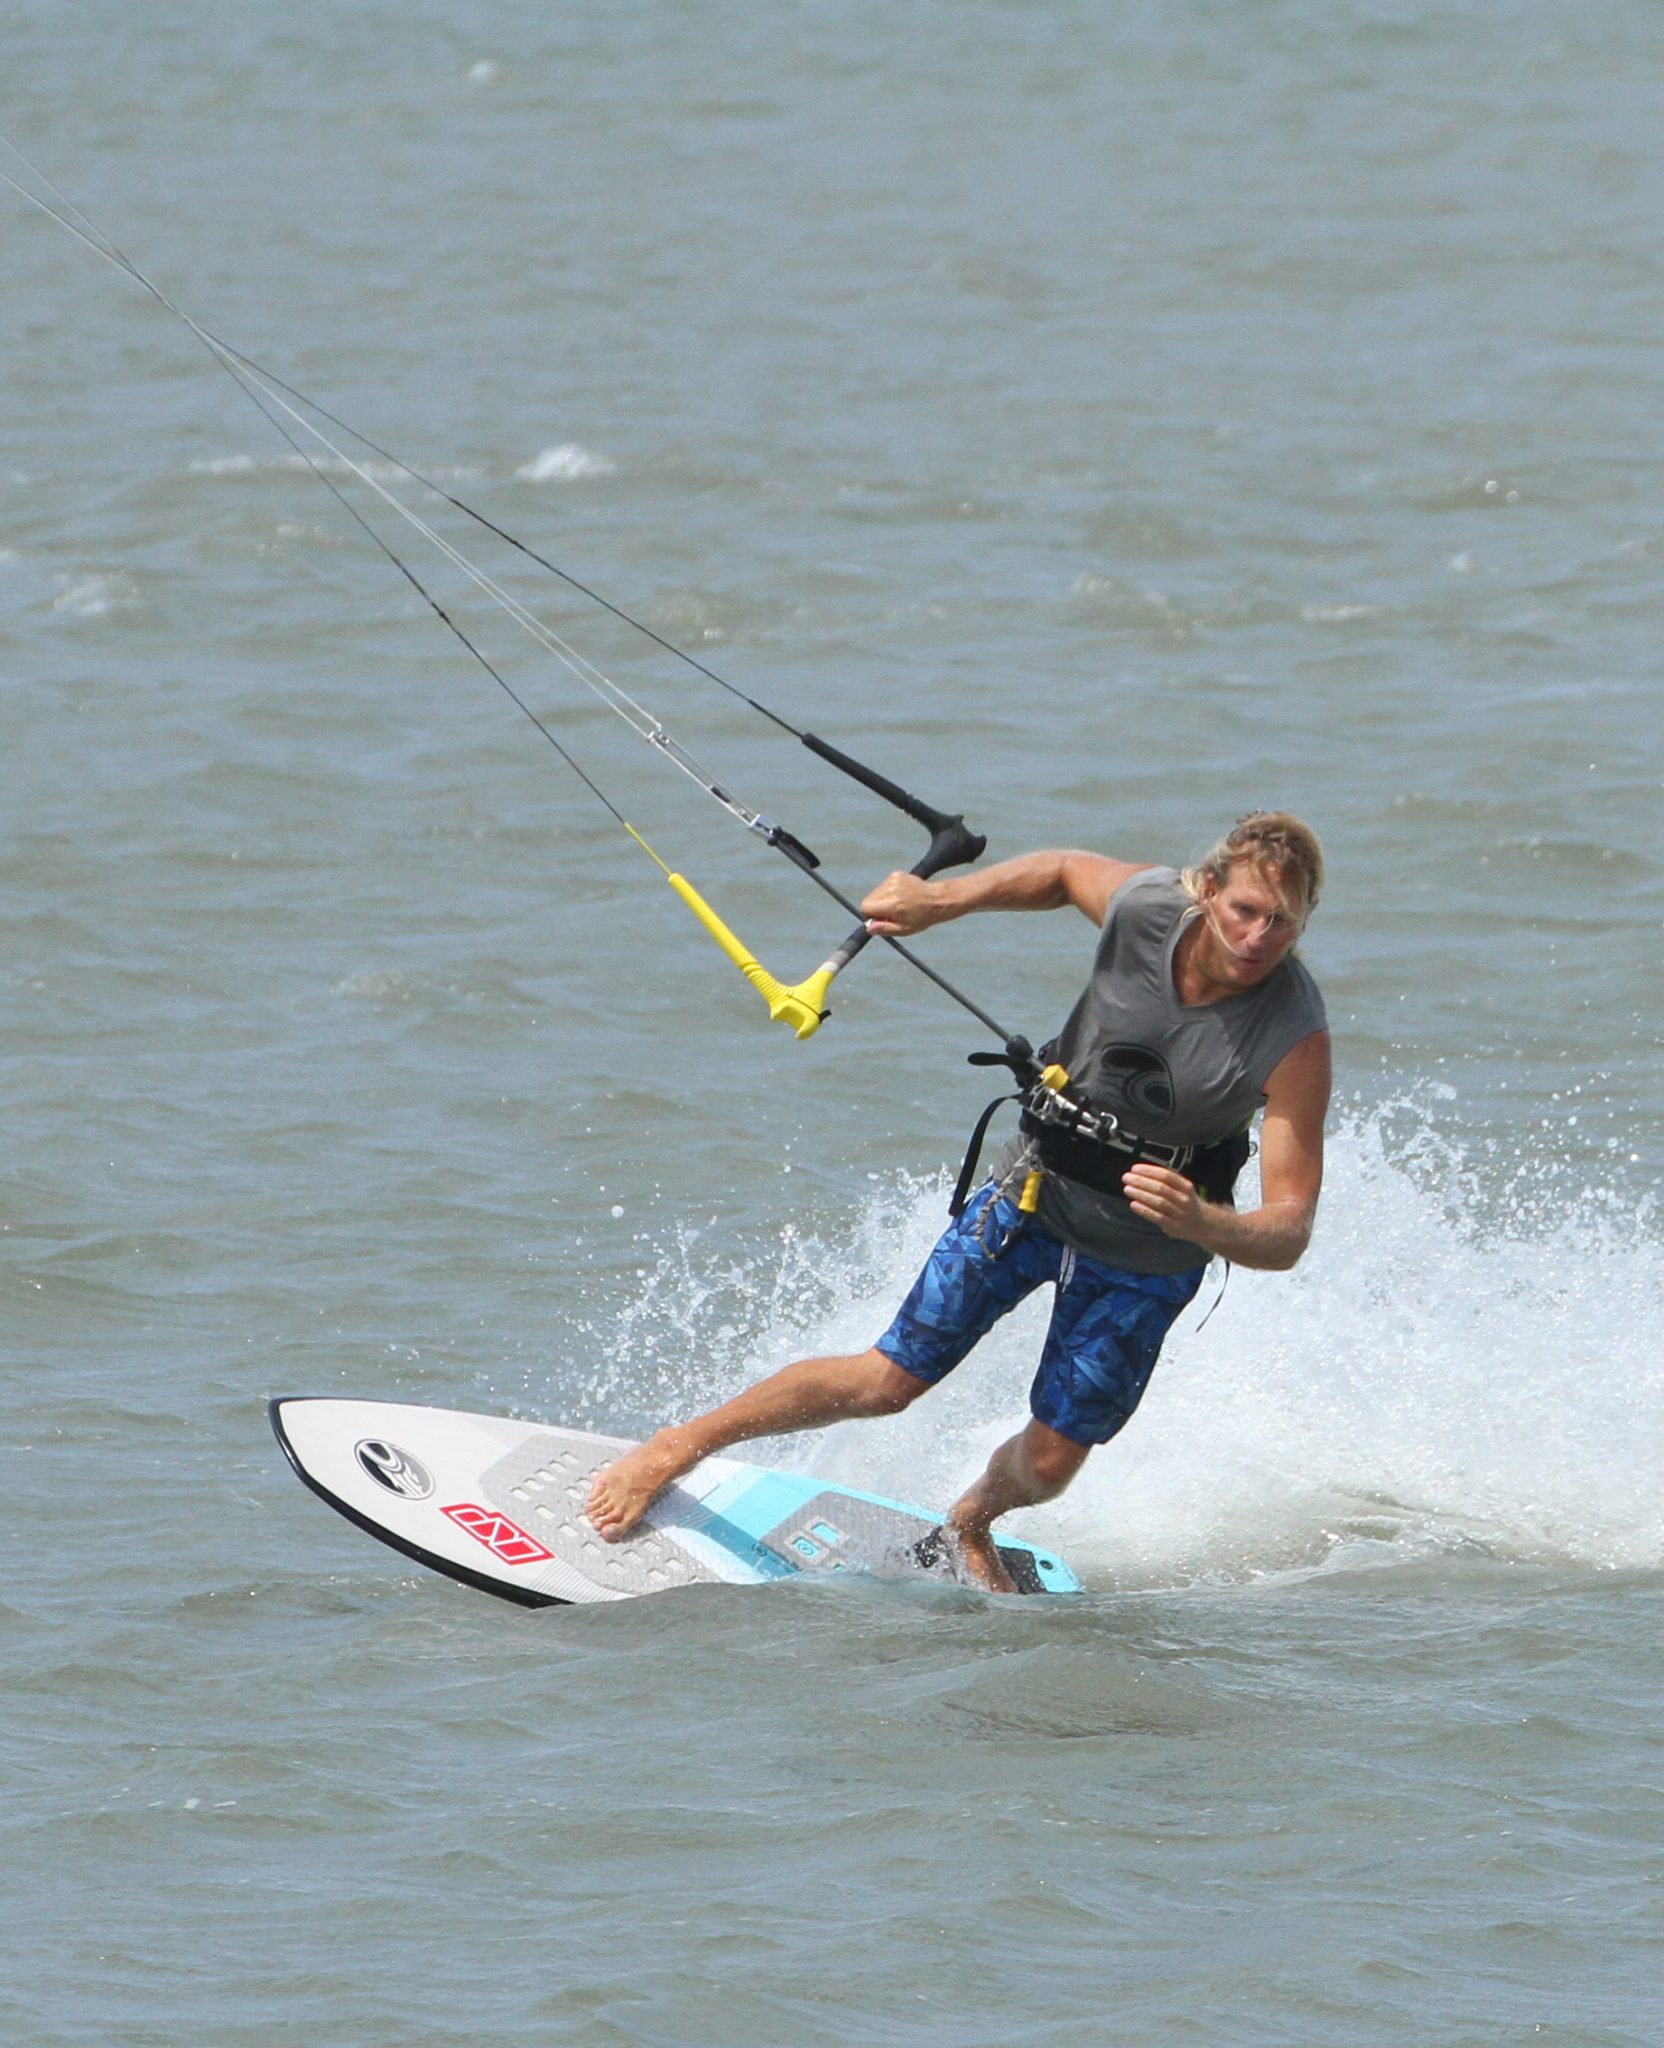
The 2nd Half of the Carve - Pic D.
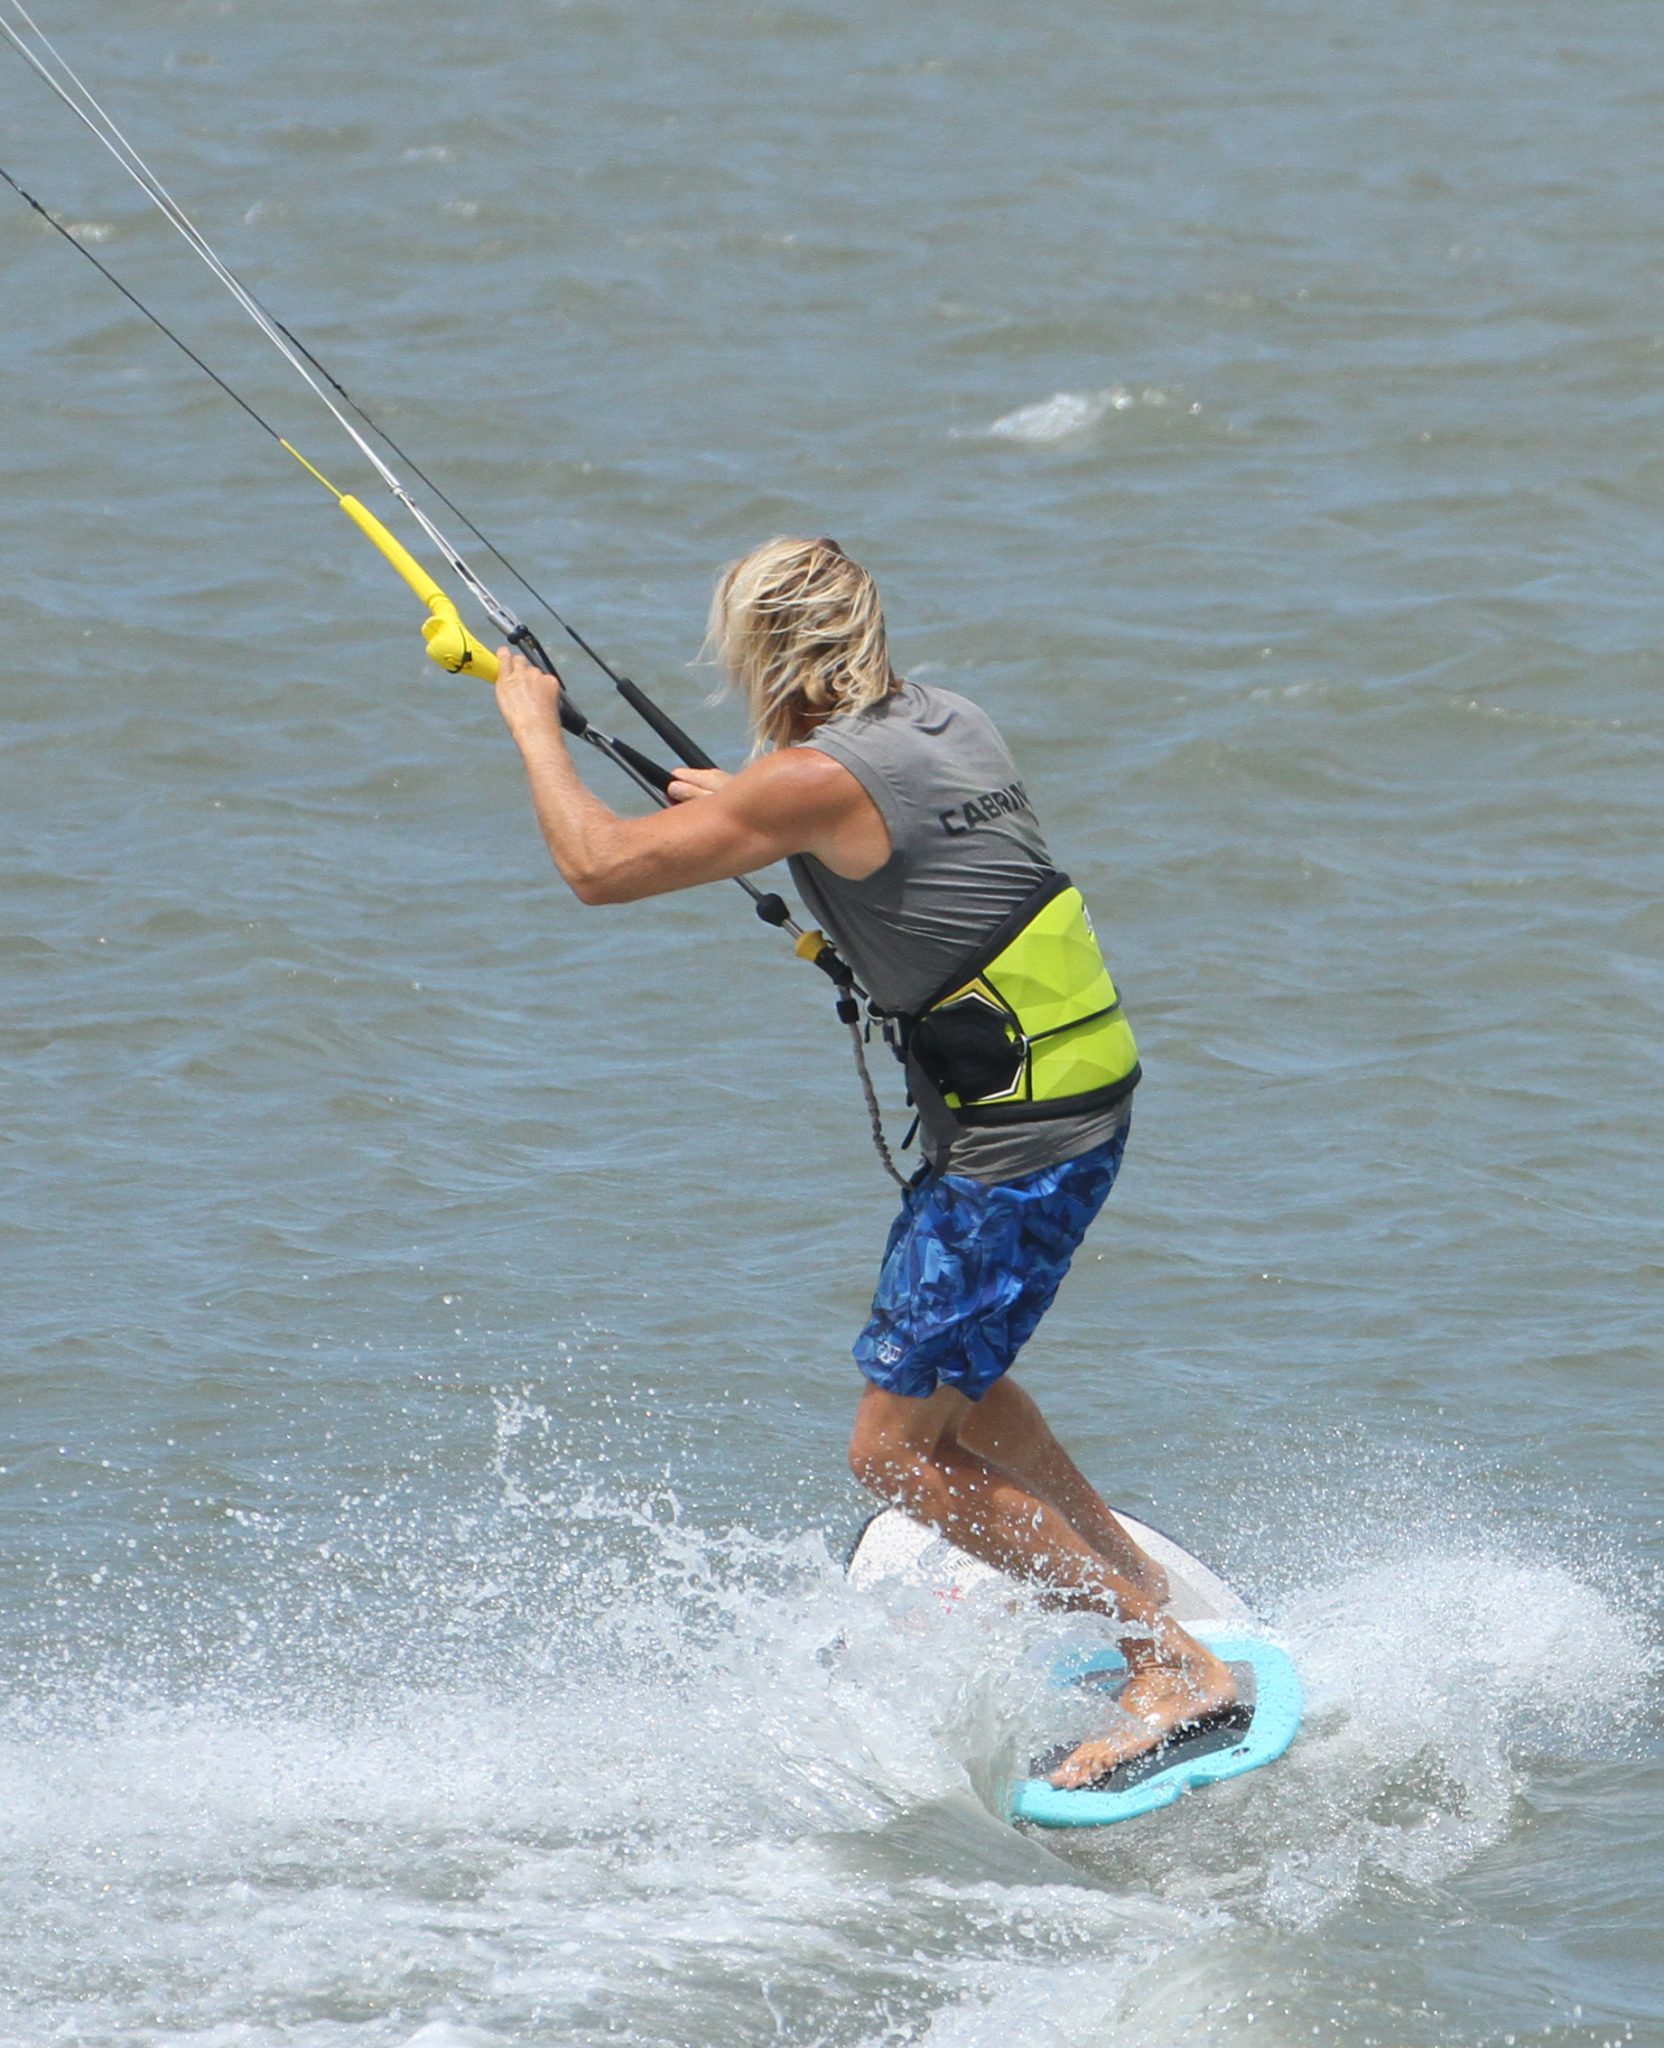
Once you come through the downwind section of the carve, it’s tempting to think that the job is done. Your aim, however, is to finish back on your edge, heading upwind and make sure that the kite has come all the way through the downloop until it’s on its way back up towards 12 o’clock. Christian is pretty much in the same position that he was in the previous picture, even though he’s into the final part of his carve. His lower half is still driving the board around, while the upper half is still turning the kite. The only difference is that now there may be some pull from the kite, which means that you’ll need to resist it. That’s why Christian’s back shoulder is dipping into the inside of the turn – to counterbalance the pull from the kite.
Prepare for Toeside - Pic E.
As you come around and back across the wind, you need to be ready to assume your default toeside position, as hopefully the kite will now have come through its loop and be returning upwards. The first job is to stop turning the kite so that you can use it to pull you forwards and back upwind, so level the bar off. Once it’s level, you’ll want to slide what was your front hand and is now your backhand (in this case Christian’s right hand) back towards the centre of the bar. You can see that Christian is still carving, but he’s stopped his pull/push and has both his hands now centred on the bar – nearly there!
The Grand Finale - Pic F.
Having finished your carve, all that’s left is to get yourself riding back upwind so that you can cross your wake. First and foremost is getting the kite settled, and then it’s riding toeside. To achieve this Christian has released his front hand from the bar. This allows him to push the bar out just a touch, which in turn allows the kite to breathe and fly to the edge of the window, into its most efficient upwind position. It also enables him to twist his shoulders a touch more and move his free arm forwards, trimming the board to keep it going and leaning against the kite so that his hips move upwind and he can resist the power. Job done!

Top Tips
As with any downloop/underturn, practising a few without the board, in the water will remind you how it’s done before you start multi-tasking. And try out a few carves first too without the downloops, to make sure that they’re comfy. Then marry the two together:) Now for the full visualisation have a look at the sequence and videos.
Common Problems
If you tend to pivot your turns too much off the back foot because you turn your head and shoulders back at the beginning of your carve, try pointing your back foot slightly forwards. This will encourage your knees to work together and will open your shoulders up.
If you’re being pulled off the board as the kite loops, chances are you’ve looped too early, so make sure you’re already carving before pulling the trigger.
If your kite won’t turn. Either you’re downlooping too late into the carve. Or you’re letting the bar out as the kite turns.
Keystones
- Wiggle feet across the centre line
- Drop weight and sit, kite high
- Flex ankles and move weight across to start Carve
- Push/Pull to downloop, keep carving
- Finish turn upwind
This technique article was in Issue 69 of IKSURFMAG.
Related


By Christian and Karine
Christian and Karine have been working together as a coaching team, running improver to advanced kitesurfing clinics since 2003.
