
Raley
Technique / Intermediate
Introduction
For many a kiter the raley is likely to be their first foray into the world of unhooked trickery. The first low flying manoeuvre, which rewards in self-satisfaction and images of looking like the pros. The raley is jolly good fun and starts a completely new progression along one of kiting’s many paths, and for those of you who may like to pigeonhole things, you’re about to attempt “Wakestyle”.
However before you enthusiastically rush out and spend your bonus (sorry) on a pair of phat bindings, you don’t need to be youthful or particularly rad to start popping raleys left, right and centre. The Raley is merely the next building block up from a gentle pop and can be performed both hooked in or unhooked, the principals are the same, and the severity/stylishness of this move can be worked on at your own pace, even with foot straps.


We’re going to go through the unhooked variation, Video 1, as you’re more likely to have a few problems once you slip out of the chicken loop. Hopefully if you are about to attempt this you will have read and practiced our piece on unhooking, understand the necessary trimming requirements and be able to pop your board up and off the water. As with most tricks we’ll have a good look at any foundations, then run through the sequence in real time, complemented by common mistakes and finish up with a keystone checklist to recite and meditate over before heading out onto the water.
Start Equals Finish
No rocket science here, but a basic principle that returns great rewards on all things pop. We’ve banged on about this in the past and it’s time to do it again! The direction in which you are travelling just before you carve onto your edge will pretty much be the same as the direction you land.
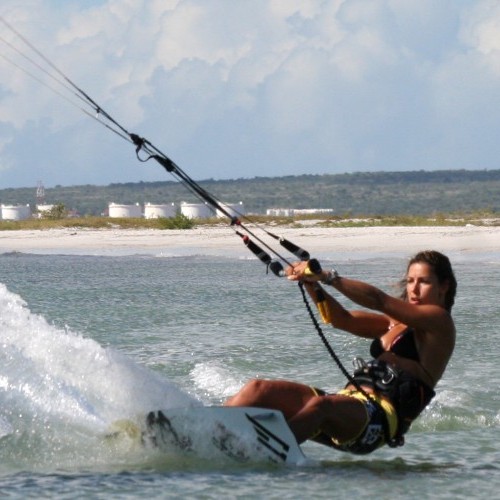
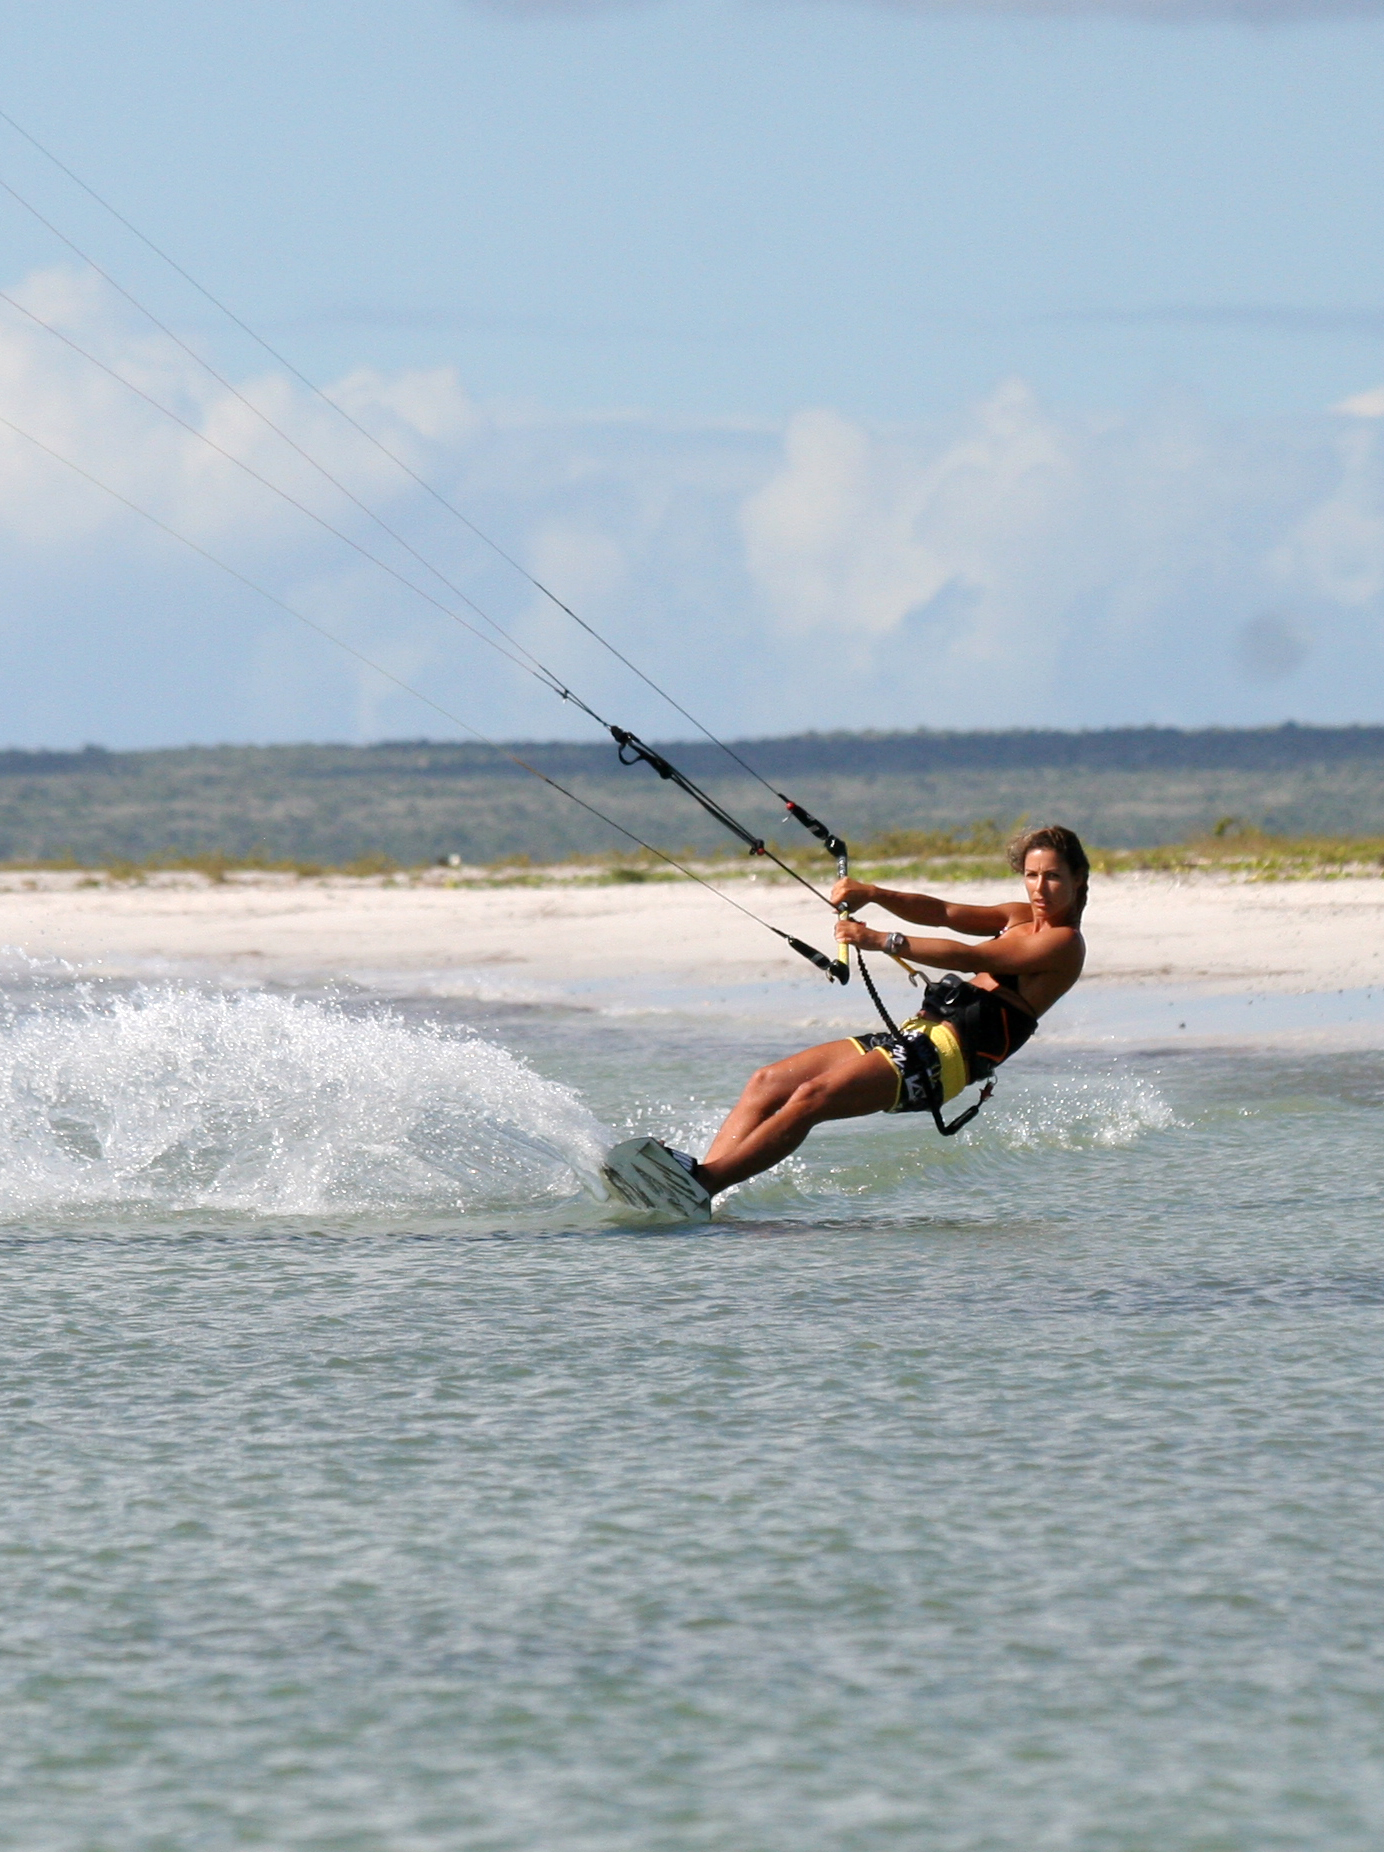
Pic A shows Karine travelling ever so slightly upwind, on an edge and with speed. This gives you a good idea of the wind direction.
Pic B demonstrates how far off the wind Karine has turned to commence proceedings. The advantage here is threefold:
- The lines slacken and help Karine unhook easily whilst allowing her to keep the bar in close.
- Carving from here it is highly unlikely that Karine will kill her speed as she won’t be able to turn that far upwind against the kite, and therefore with practice will feel the timing to pop.
- Starting the carve, having already turned off the wind, Karine’s kite will drift slightly back in the window and pull her in the direction she is now travelling. This equals a more downwind landing and a greater likelihood of sticking it.
Pic C is the beautiful result of this equation. You can see that Karine is coming down to land with her board facing the same way as in Pic B.


Love the Bar
The next crucial part of the raley is your body position when you dig your edge in, and momentarily carve up against the power in your kite.
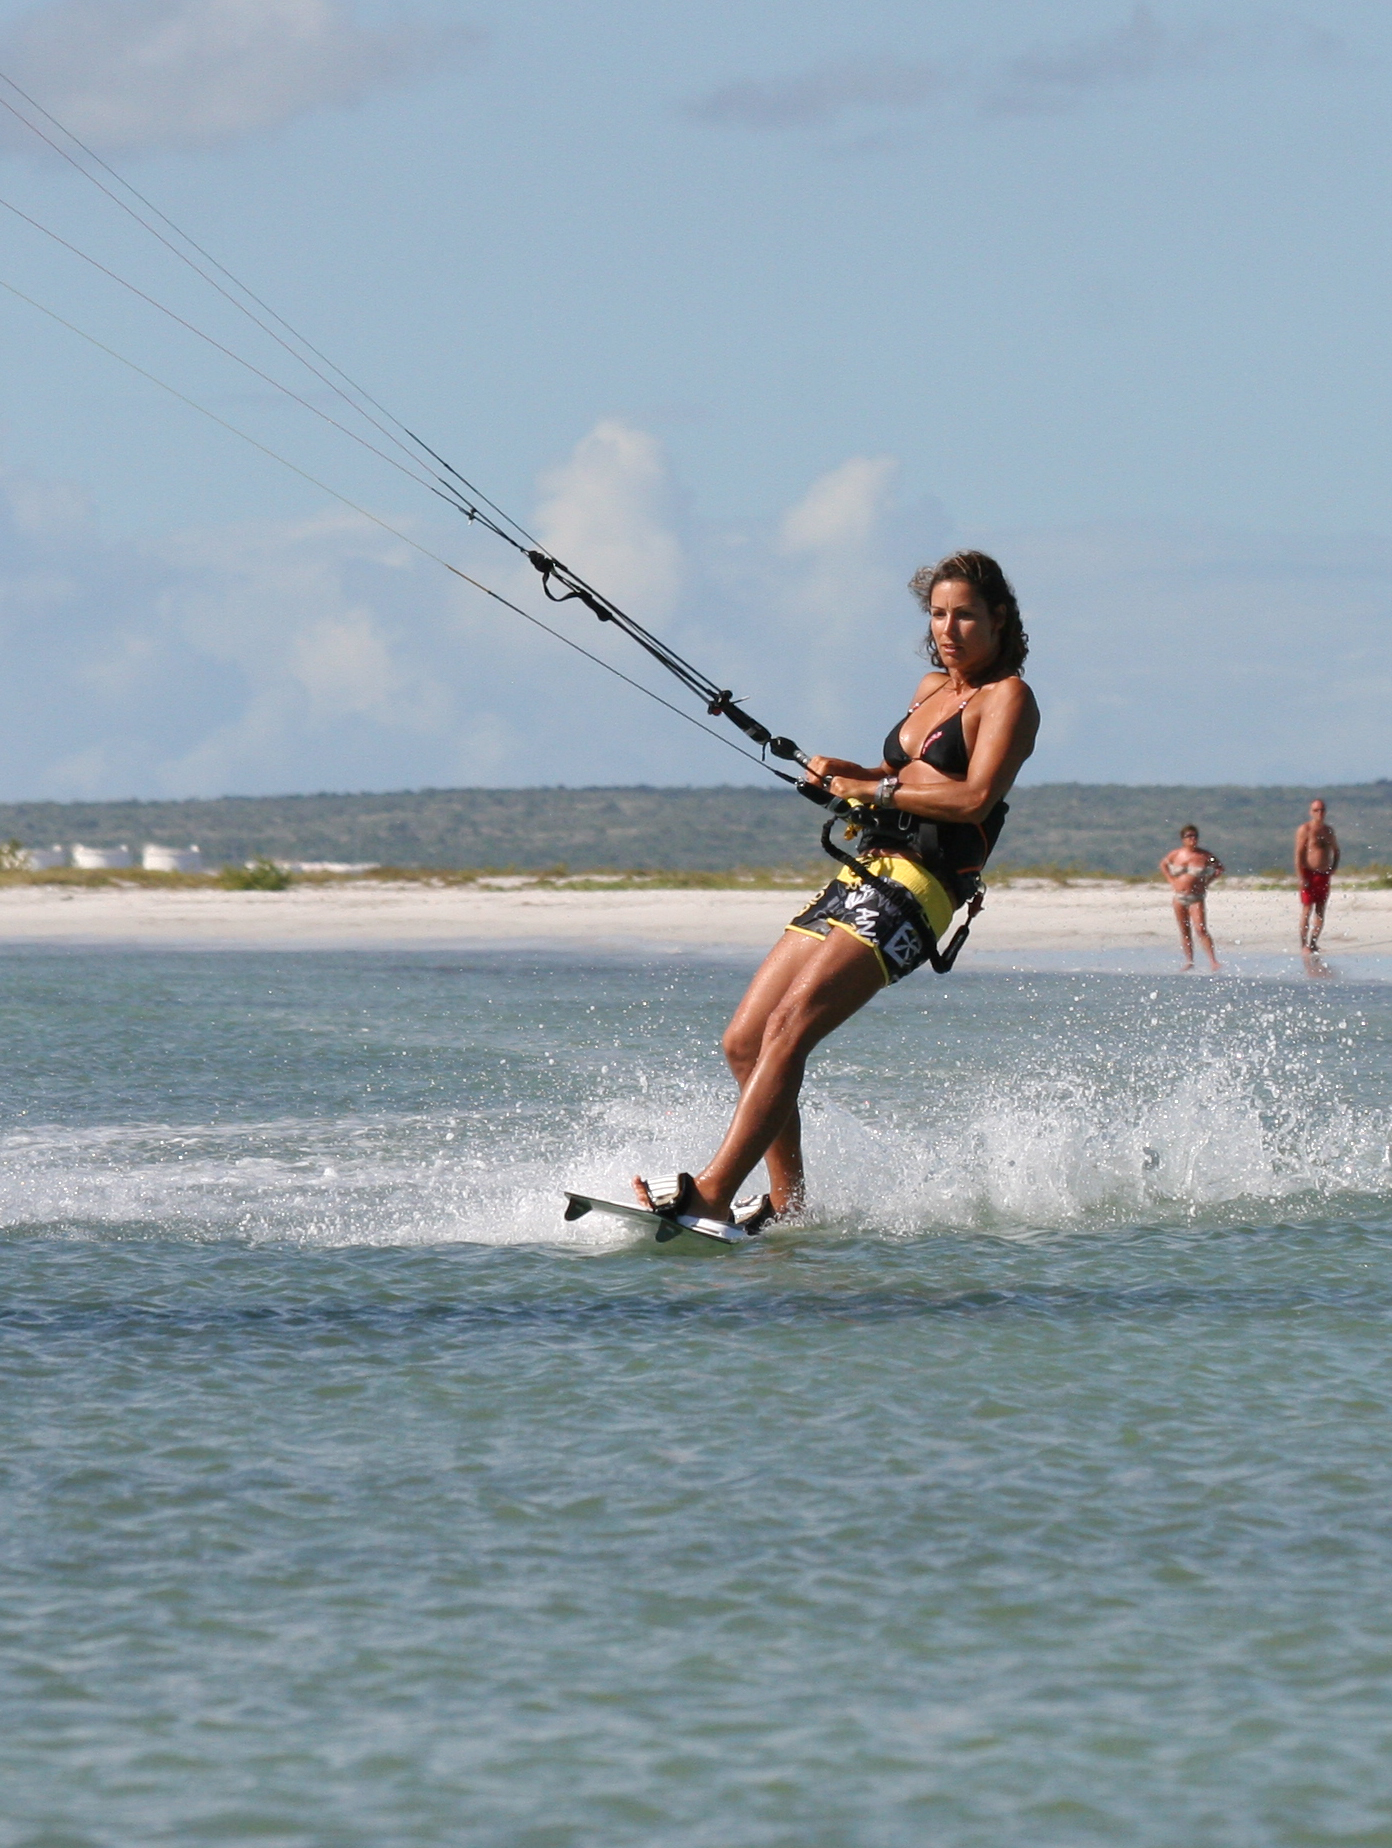
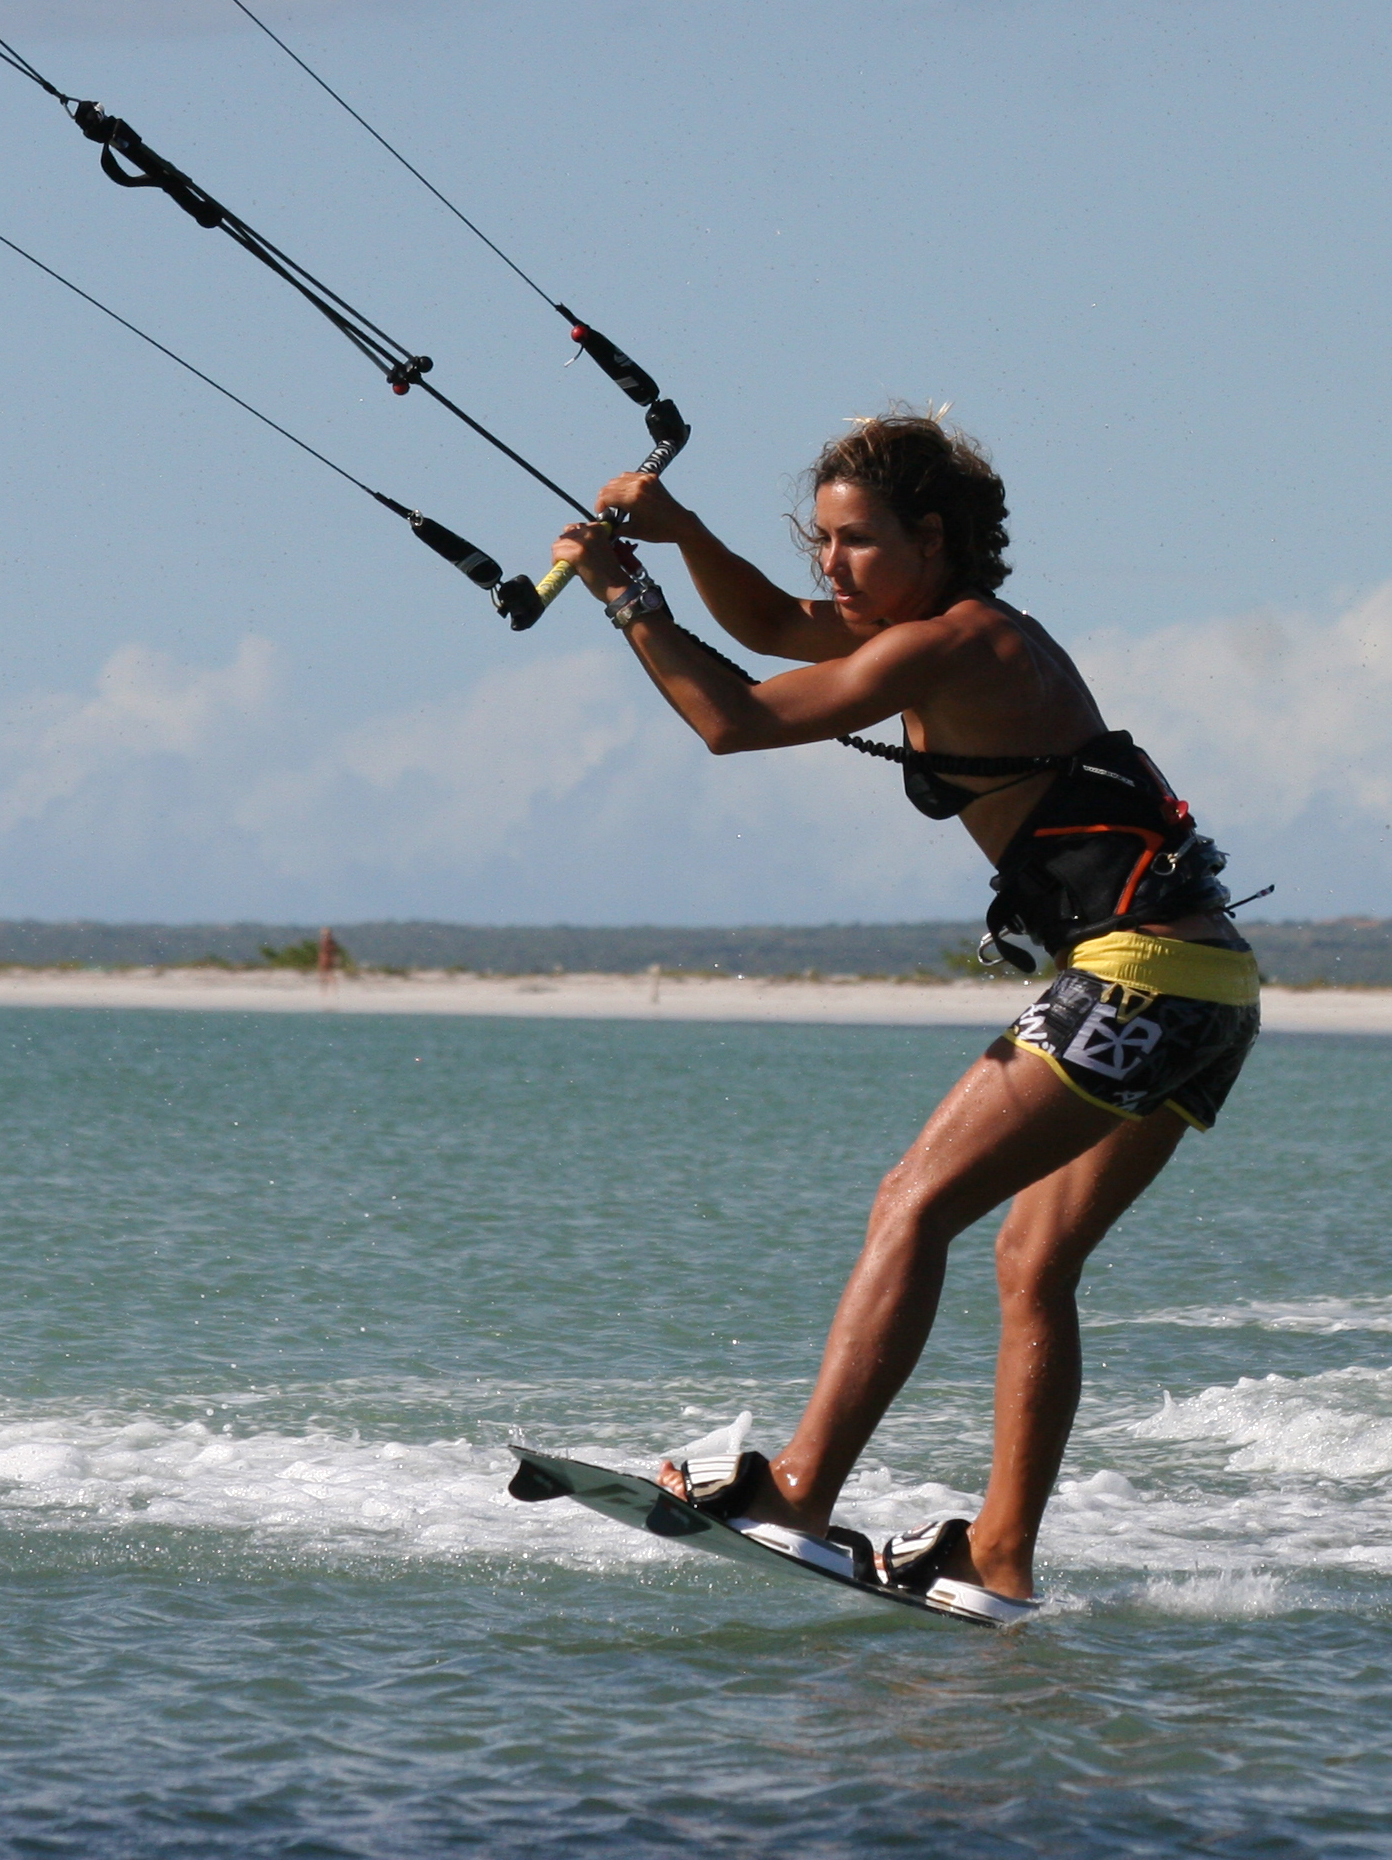
Pic D and Pic E show 2 very different results of trying to carve against the power in the kite. In both pictures Karine has approached the move well, she has trimmed her kite correctly and has turned off the wind prior to carving (and the water is mill pond flat). She has her hands centred on the bar and will maintain equal pressure on each of them as she carves.
In Pic D Karine is carving the board up away from the kite, with her weight biased over her back foot and the back of the board, with her shoulders back behind her hips. Her front leg is extended with a tiny amount of flex and her back leg is slightly bent. This picture was taken nanoseconds before lift off, so Karine’s hands have risen with the pull of the kite, but they will have started tucked right into her hips. This position will push the power through Karine’s heels onto her edge. With the weight over the back of the board, she uses the shape of the board to bite into the water and edge up.
In Pic E Karine is also carving the board away from the kite. However she has allowed her shoulders to be pulled forward in front of her hips. In this position the bar is in front of the board, so there is no way that Karine can dig her heels in and push against the power with her legs, and the more she is pulled the further forward she will come. This in turn flattens the boards and gives Karine nothing to pop off – game over.
So what can you do to achieve the correct result?


1. Return of the Kite Face
If you have another quick butchers at the two pictures, ponder a moment at Karine’s facial expressions. In the unsuccessful Pic E Karine almost looks relaxed, and certainly shows no sign of strain. Pic D on the other hand shows a return to form with a decent Kite Face. We all have them, whether when lifting something heavy of pushing something large! It’s all about effort, and the more effort you put in to pushing your legs away, the easier it’ll be to keep you shoulders back.
2. Chop-Chop
Timing is everything. In the case of the raley and popping it’s about being quick, using those fast twitch muscles and not pondering the physics involved. You need to pop off the water before the kite has the chance to pull your shoulders forward. If you don’t turn off the wind enough to pop, and carve too long, you stop. Now that you’ll be going off the wind you won’t stop, but instead the kite will keep pulling whilst you turn. The end result is that you turn the board under you, so your feet and legs go upwind as the kite pulls your arms and shoulders downwind, a kiting wedgey if you like.
3. Exploding Stamp Elastic Band Theory
Combining effort into your edging for a very short while, before popping hard is a recipe for success. But what is that pop again? Popping is the simple act of stamping down, suddenly and explosively with you back heel. It’s the speed and power of you straightening your back leg against the resistance of the board’s edge.
With all the resistance and the sudden extra power from you back leg you are essentially putting as much tension on your lines as possible. The kite is pulling away from you and you’ll be pulling back against the kite. Effectively you are stretching an elastic band, and as soon as you stamp off you back heel it will ping you towards the kite. You need make no effort to jump forward into a superman/woman position, that parts automatic.
This is best demonstrated in Video Slow Mo. If you watch Karine you can see that as soon as she feels her shoulders being pulled forward she explodes up off her back leg. It extends fully as quickly and powerfully as she can manage. This means that she is still on an edge, so there is resistance to push against. Once she pops, the kite pulls her towards it and stretches her out.

4. Kite Works
The position of your kite will affect you success with the raley. Realistically aim to fly your kite around the 45˚ or a tad higher, but by 1 o’clock or 11 o’clock it’ll be too high.
If your kite is too high it will be difficult to edge against its power, as it will be coming from high up rather than in front of you. Coming from here you’ll have less resistance to edge against and will fighting more against lift. To combat this you’ll need to sit more, which can result in skidding out. The result of all this is a dangly jump often lovingly referred to as a gayley. If you find yourself flying through the air supported by the kite like this remember to steer the kite back down for landing.
If you have the kite too low, you’ve either suctioned on a new pair of bindings, and intend it so, or you’re about to find out why some people swear by neoprene shorts. With the kite low, the superman effect is considerable, but it all happens rather quickly, not giving you, the rider much time to get your landing gear down. This can be a fun way of improving your raley, particularly on flat water, once you’ve mastered it.
Your hands need to be centred on the bar. It’s not uncommon to accidentally pull on your back hand as you carve, so make an effort to apply some extra steerage down with your front hand.
The Best of The Rest
Being a trick that requires no movement or upward lift from the kite, it does therefore benefit from a fair amount of speed. Also having a couple of sudden changes in direction means that the flatter the water, the easier it’s going to be. Look for flatter sections in between waves or chop, but remember you’ll need to give yourself and everybody else more room now that your kite is lower.


Equipment wise you should be able to learn a raley on any kite size you feel comfortable unhooking with, as long as you’re leeshed on. Board wise any twin tip larger than a 140 won’t make it easy.
For the approach and note how Karine looks where she wants to go and never at the kite we look at sequence 1.
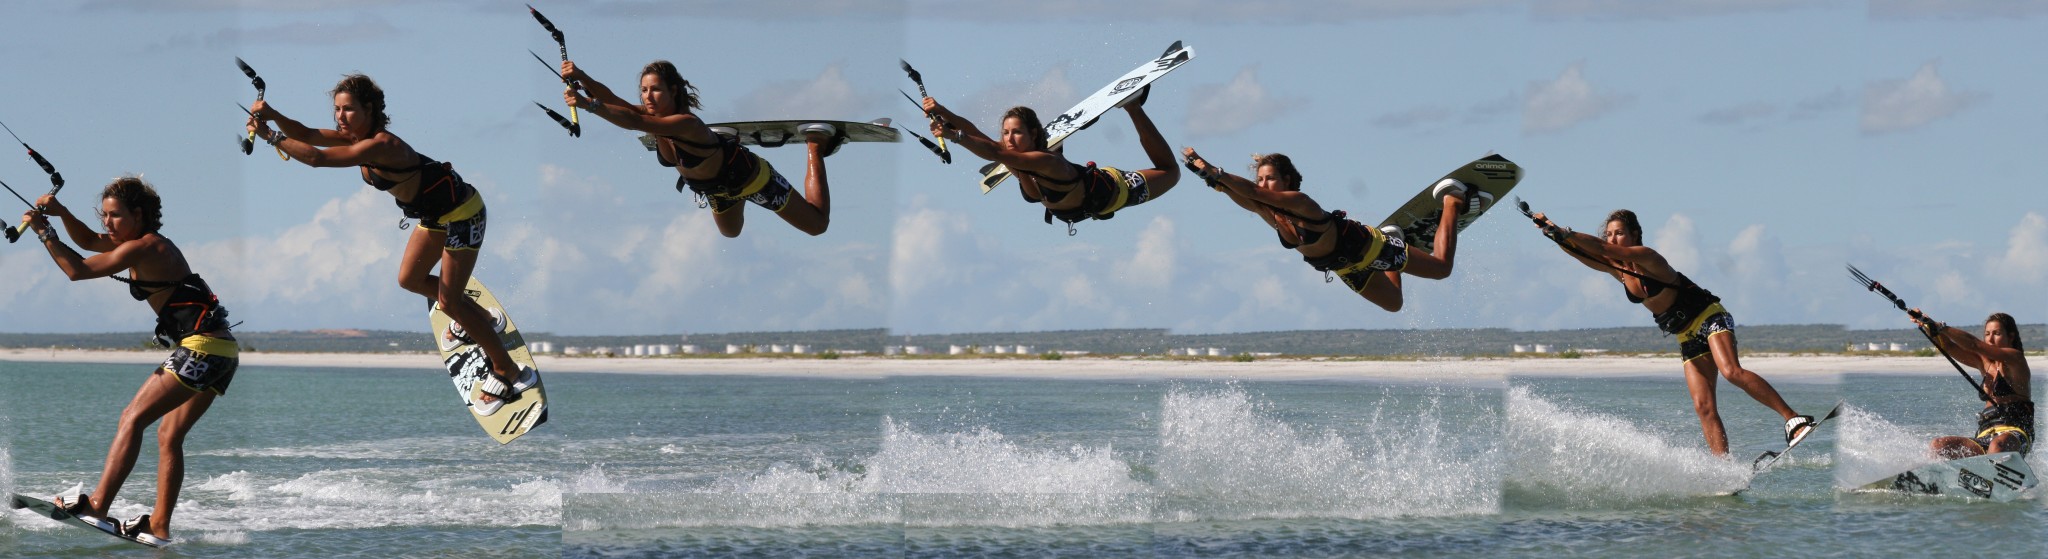
Following Sequence 1
- Pic 1. Having checked to see that the coast is clear, Karine has stopped resisting with her legs and instead has bent them and allowed herself to be pulled up over the board, which is now flattened and turning off the wind.
- Pic 2. As she stands up over the board Karine extends her front leg in order to keep her weight back over the tail of the board. She also keeps her back leg slightly bent, as this is where her pop will come from.
- Pic 3. Having turned downwind towards the kite there is less tension on the lines so Karine can easily unhook. She does not to look down at the chicken loop and makes an effort to keep her shoulders back and hips forward. She pulls the bar in towards her hips.
- Pic 4. And pushes it down to release the chicken loop. Karine extends her front leg and leans back into the wind. By doing this she pushes the board in front of her and positions it back in between her and the kite.
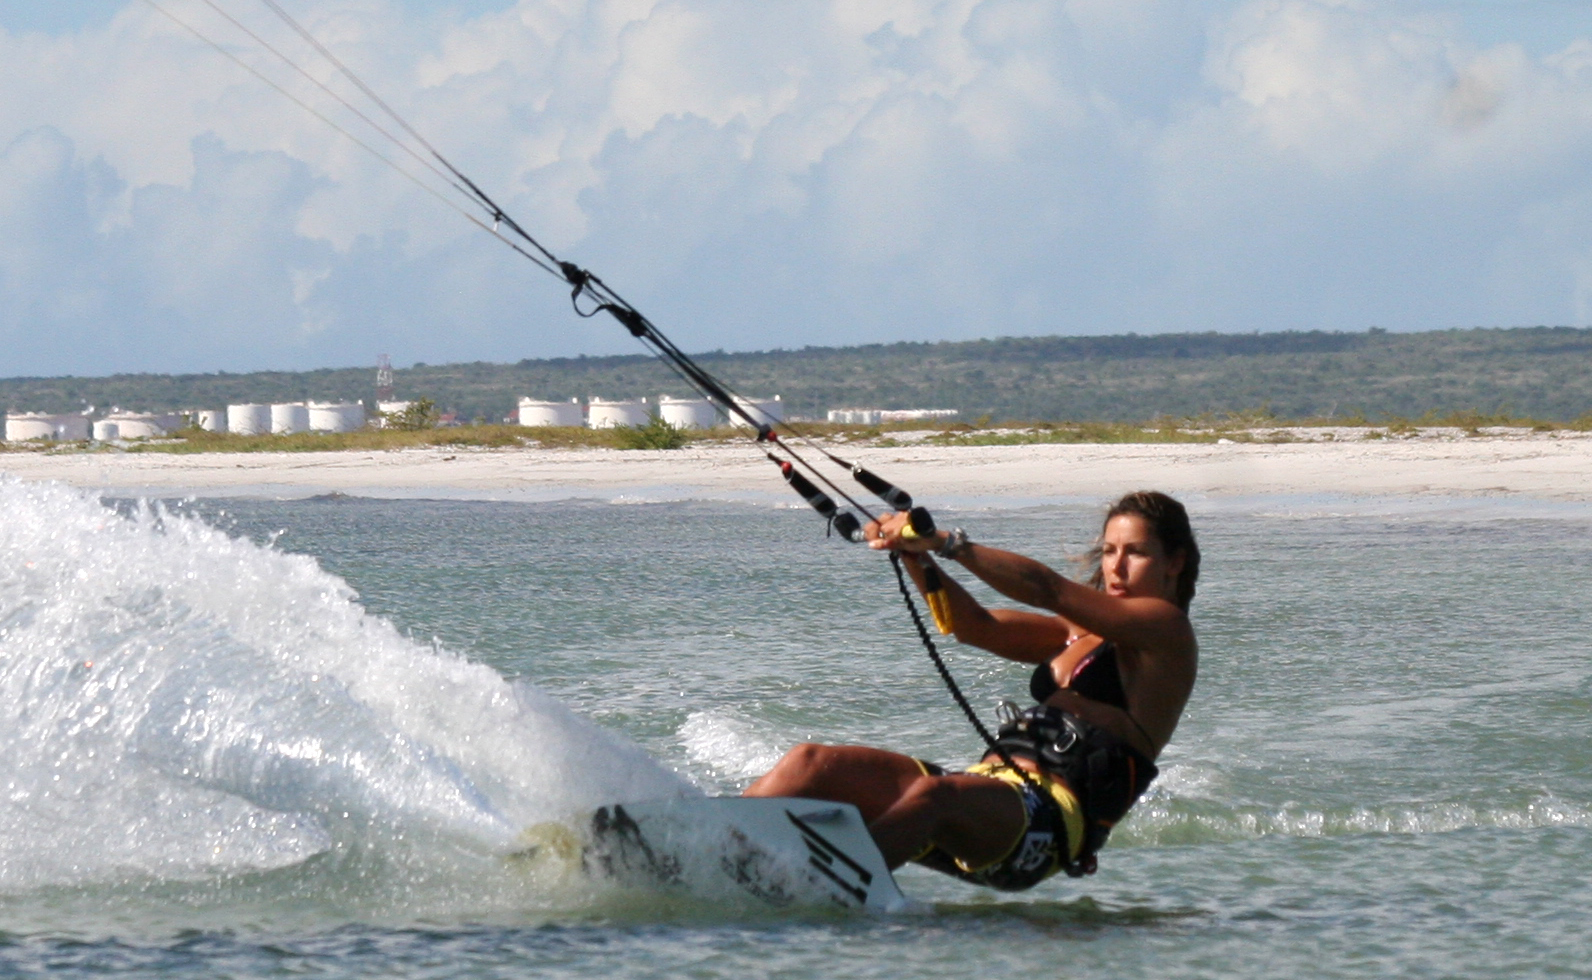
- Pic 5. With her shoulders leaning back into the wind and her hips moved over her back foot, Karine can now start to resist against the edge of the board, driving against the edge with her legs and turning the board away from the kite. Best kite face please.
- Pic 6. The edge of the board is well and truly biting. With Karine’s weight on the back foot and her shoulders committed well up wind she has successfully put a load of tension back onto the lines and built up the necessary energy to get herself pinged off the water. Tally-ho.
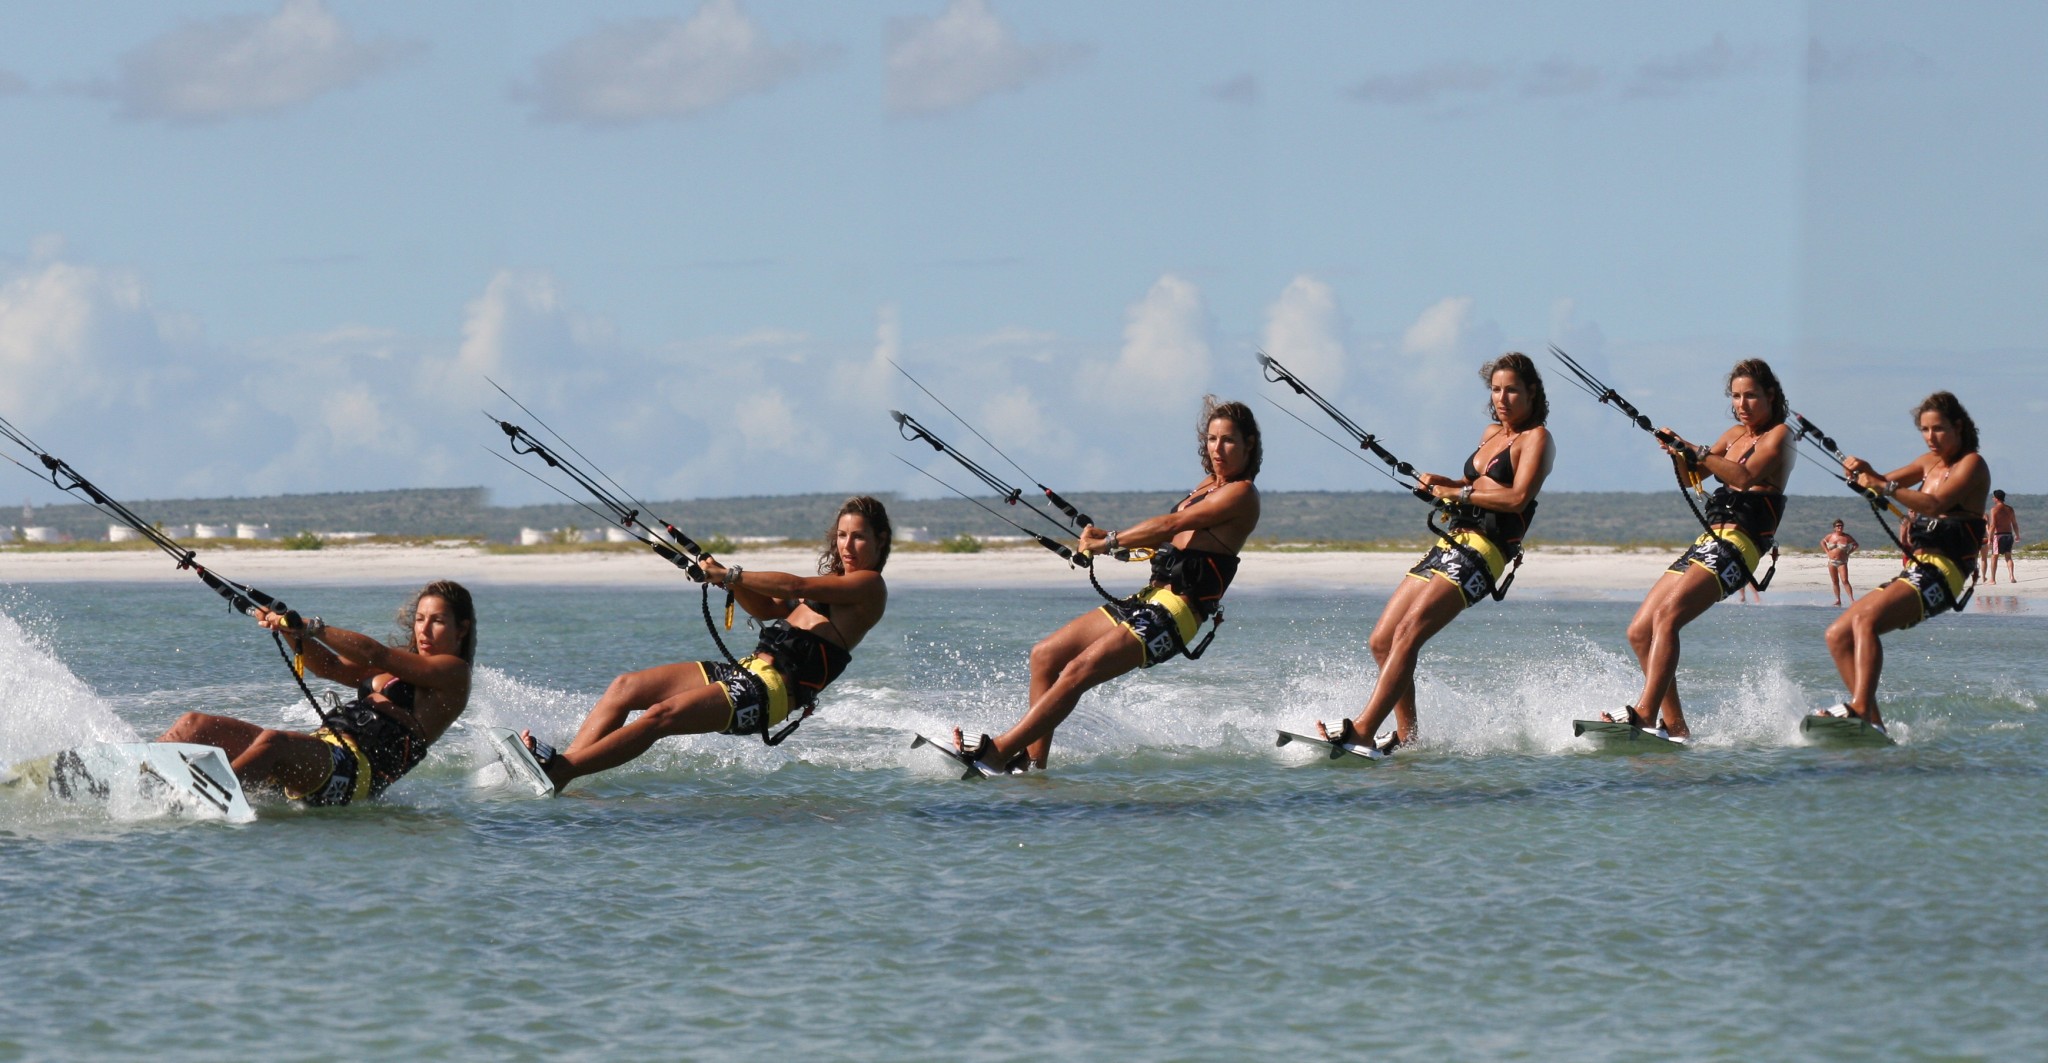
For the take off and in-flight entertainment we look at sequence 2. Ideally the kite should not move throughout this phase of the raley.
Following Sequence 2
- Pic 1. Karine is edging super hard with her front leg extended and back leg slightly bent. You can see how her hips are over her back foot as the board is digging in heavily on its tail. However, she is starting to loose this tug of war, as the kite is starting to pull her shoulders forward. She must pop now before she losses her edge.
- Pic 2. Karine stamps down hard on her back heel against the edge, extending her back leg as quickly and forcefully as she can. This pops her up off the water.
- Pic 3. Now that Karine has left the water the kite pulls her forward towards it. This action stretches Karine’s body out.
- Pic 4. The speed of leaving the water flicks her feet up behind her. For added style points keep the arms extended. You can see that Karine has her bar parallel with the leading edge of the kite, which will stop her kite rising, and will make it easy for her to dive it down even if it did go up.
- Pic 5. To keep herself balanced Karine has kept her eye on where she thinks she’ll land throughout her time in the air. The pull from the kite will vanish as Karine has effectively caught the kite up and is now travelling in the same direction as the pull. This is the precursor for the slack in the lines achieved at the end of decent pop. Because of this Karine’s legs will naturally start to fall.
- Pic 6. To help swing her hips and therefore her feet and board forward and underneath her, Karine pulls her arms in towards her hips. She is now fully focused on where she will land. If the kite has risen this would be a good chance to steer it down hard for a controlled landing.
- Pic 7. Karine comes in for a perfect tail first landing, with the board pointing towards the kite; in the same direction she started the move, magic.
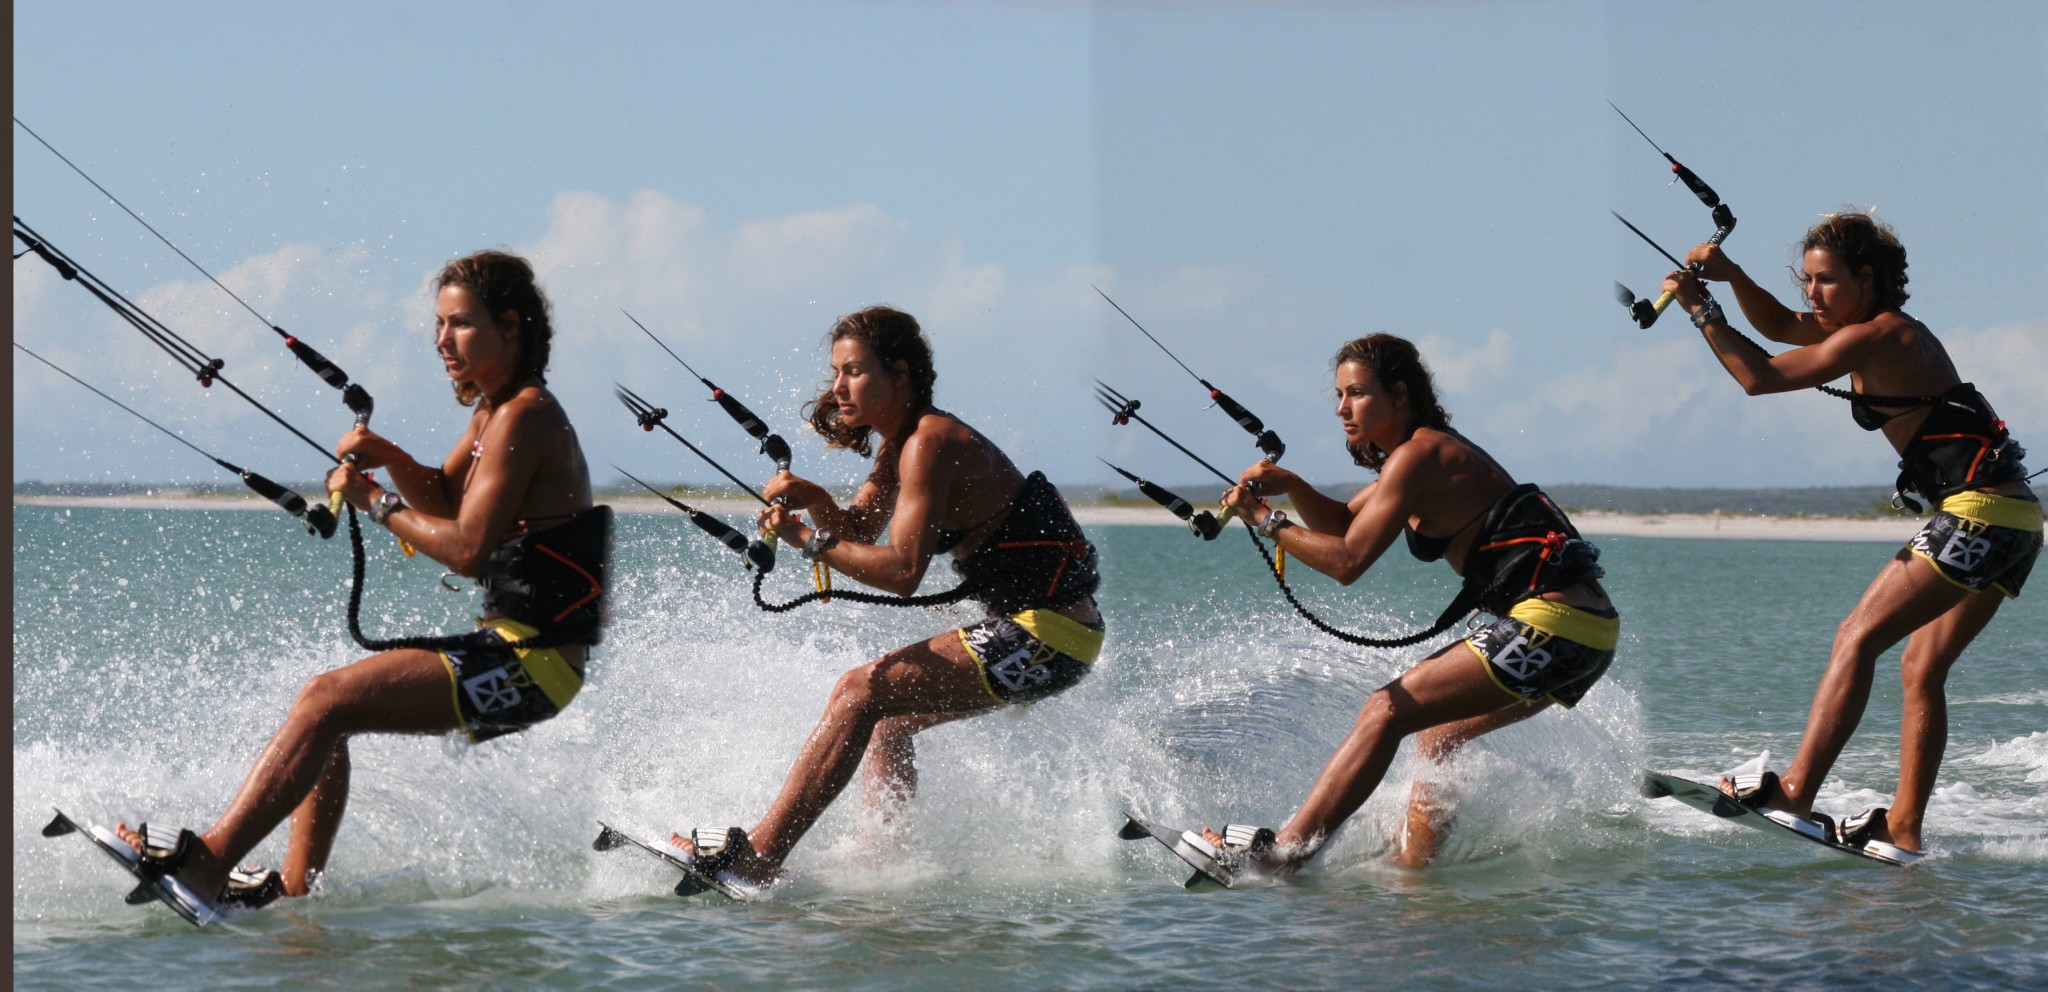
Following Sequence 3
- Pic 1. Karine touches down tail first with her legs extended but ready to absorb the landing. Remember there is no kite floating you, so you are falling down to the water.
- Pic 2. As soon as Karine feels the landing she looks up towards the kite. This not only allows her to check where it is and make any necessary adjustment, but also keeps her head up, which in turn makes it more likely to sail away as the board will not stick to the water.
- Pics 3 & 4. As long as Karine keeps following the kite there will be no power to pull her off balance. This also makes it easier for her to get the bar close to her hips and hook back in. Once she’s steady she can hook back in and carve back onto her edge.
Common Problems
If you are flying through the air, dangling under the kite. Probably the most common problem, resulting from you pulling on the back hand whilst carving against the kite. The more you turn off the wind the less the kite will react to pressure on the back hand. Also make sure your kite is not too high before you start.
If your feet are coming out of the straps you’ve either got your straps too loose, or more likely you are physically throwing yourself forward into the raley off the balls of your feet, as opposed to jumping up and back against your edge from your heels.

If you’re loosing speed and power and therefore getting no pop, you’re either bending both legs too much, and absorbing all the power, which lets you turn too far upwind. Or you’re not going off the wind enough at the beginning and therefore carving too far into wind.
If you are loosing your edge against the power. Check your trim. Make sure you keep you shoulders back behind your bum, keep your front leg straight and only bend you back leg a bit. Don’t look at the kite.
Keystones
- Bear away at least 45˚.
- Front leg extended.
- Carve kite face hard, bum low and shoulders back.
- Don’t wait long & stamp like Billy O.
- Pull on front hand and land downwind.
This technique article was in Issue 13 of IKSURFMAG.
Related


By Christian and Karine
Christian and Karine have been working together as a coaching team, running improver to advanced kitesurfing clinics since 2003.
