
Jumping Beach Start
Technique / Intermediate

Introduction
This is always such a firm favourite when the planets align, and the spot just begs for it. Launching yourself with gusto off terra firma and onto the water’s surface without wetting your ankles is both a sight to behold and a feeling to cherish. The mechanics are similar to jumping, so if you’re already proudly displaying the underside of your board to all and sundry then this one should be on your to do list.
Before we continue to the nuts and bolts, a few details that should be adhered to. Firstly, this is a move for offshore or cross offshore spots. If you’re devilishly brave, foolish or extremely accomplished, it’s vaguely possible with cross shore, but we wouldn’t advise this. However, under no circumstances should the idea bulb spark with any inkling of onshore on the menu. Secondly, as we so often mention, deep water is what makes kiting both fun and safe, a sport of aerial gymnastics with a splashing consequence. Few spots have the luxury of deep water right next to dry sand, and as with everything, nothing is certain. If it’s not deep enough to fail spectacularly, it’s not deep enough, period!


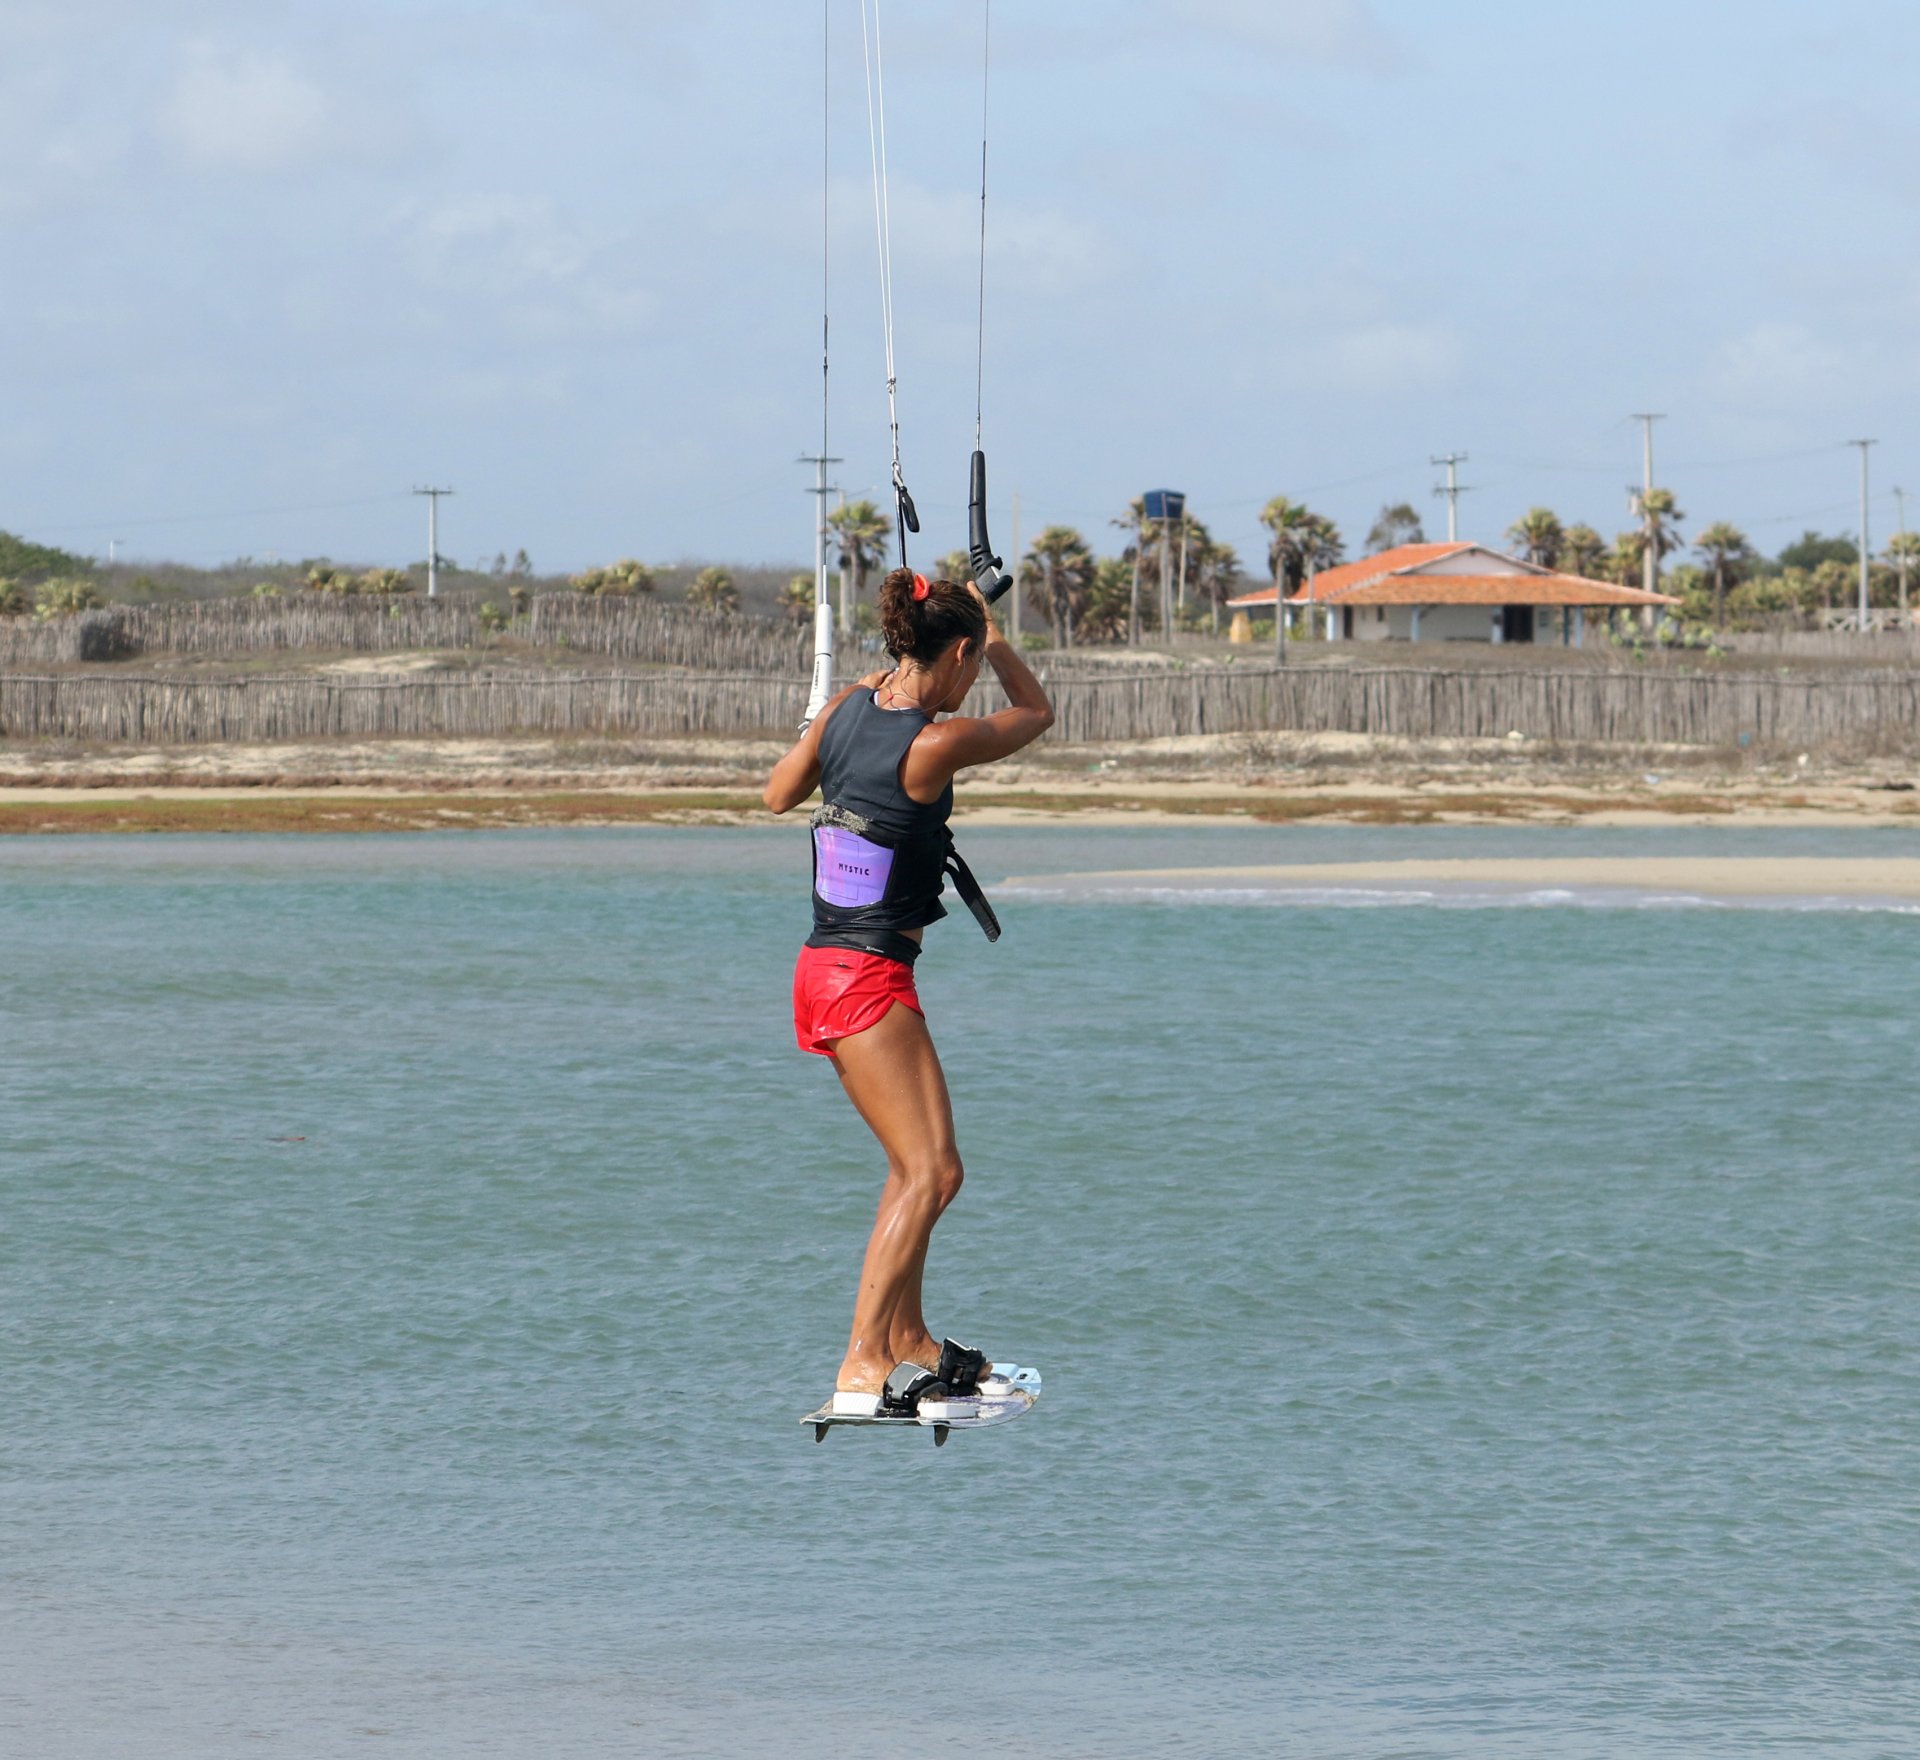
In this feature, we’re using a section of beach from which the wind is blowing offshore, with a tiny bias so that going left takes you out further. As such, Karine will be jumping up and landing left foot forward, which guarantees that she’ll end up in the drink. By the very nature of jumping with a kite, she will also fly considerably downwind when she gets airborne.
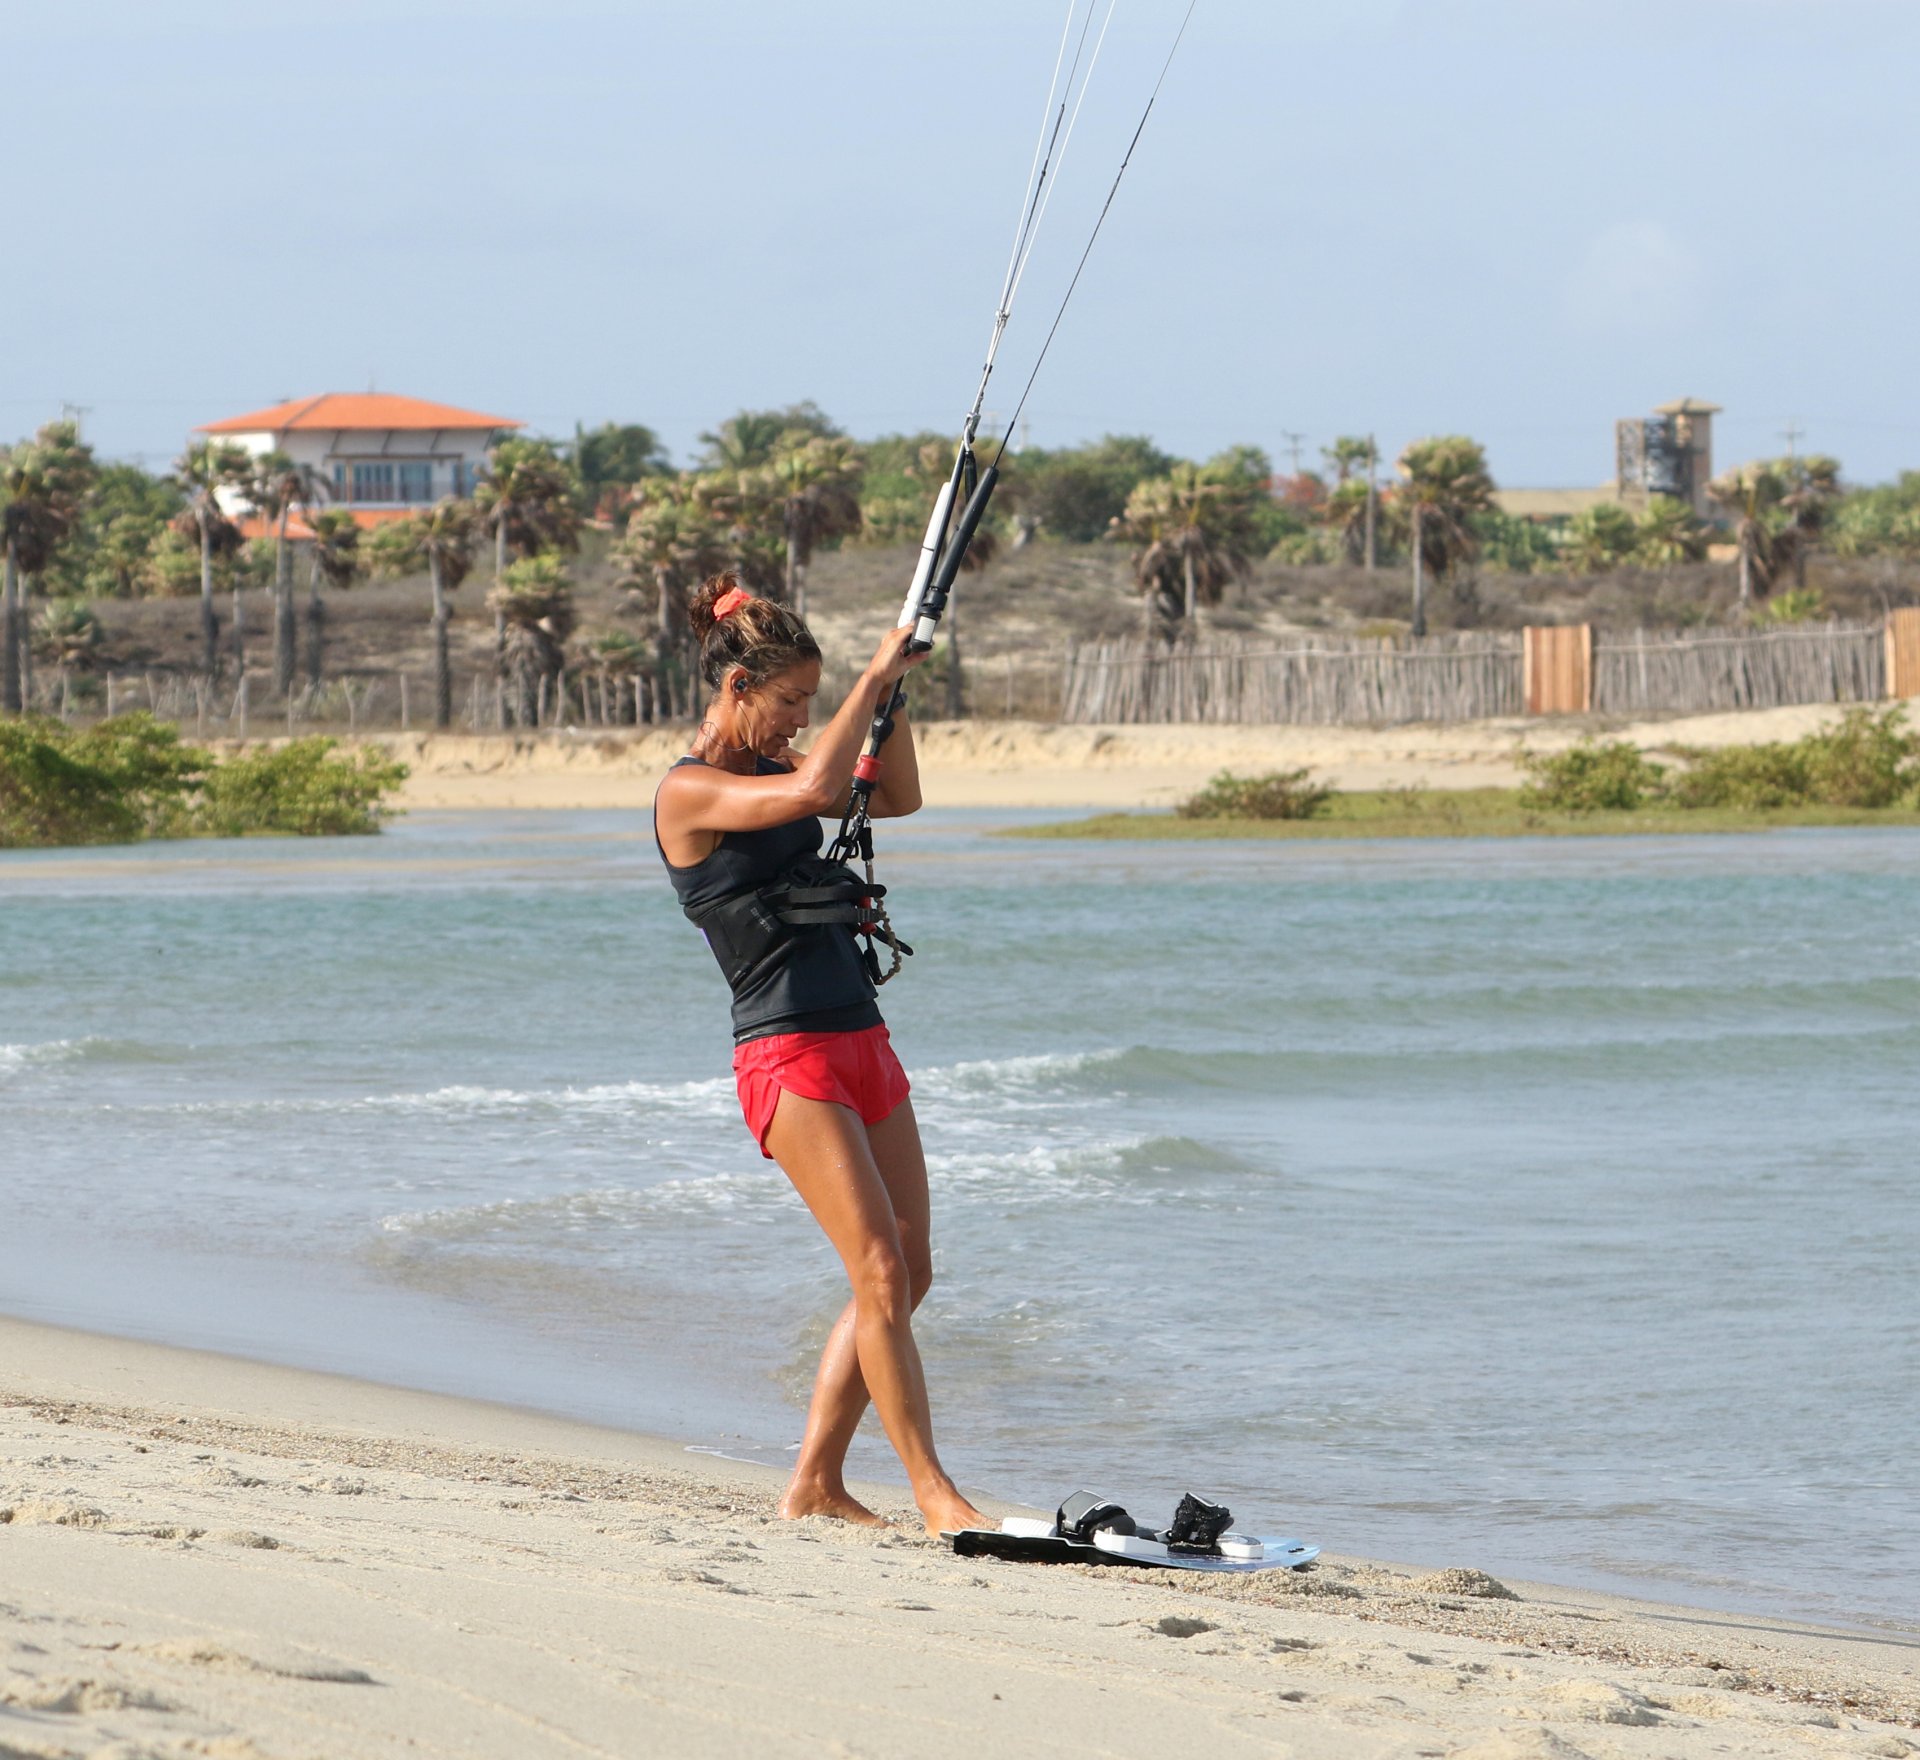
Set Up Pic A.
You’ve found yourself the perfect spot. Couple of things to note. Firstly, try and get yourself as near to the water as possible, just in case. Secondly, if possible, look for dry sand. It’s not a must, but your board may stick to wet sand, and it’s preferable that you don’t part company. It’s also advisable to find a flat patch; if you’re on a decline, it will be trickier to resist the power. Place your board across the wind, biased so that the tail points ever so slightly upwind, and the nose a fraction down. With your kite at 12 o’clock, climb aboard and wiggle your feet into your straps. Your sweet spot should be trimmed out, as you’ll need some tension to get you up and off the beach from a standing start.
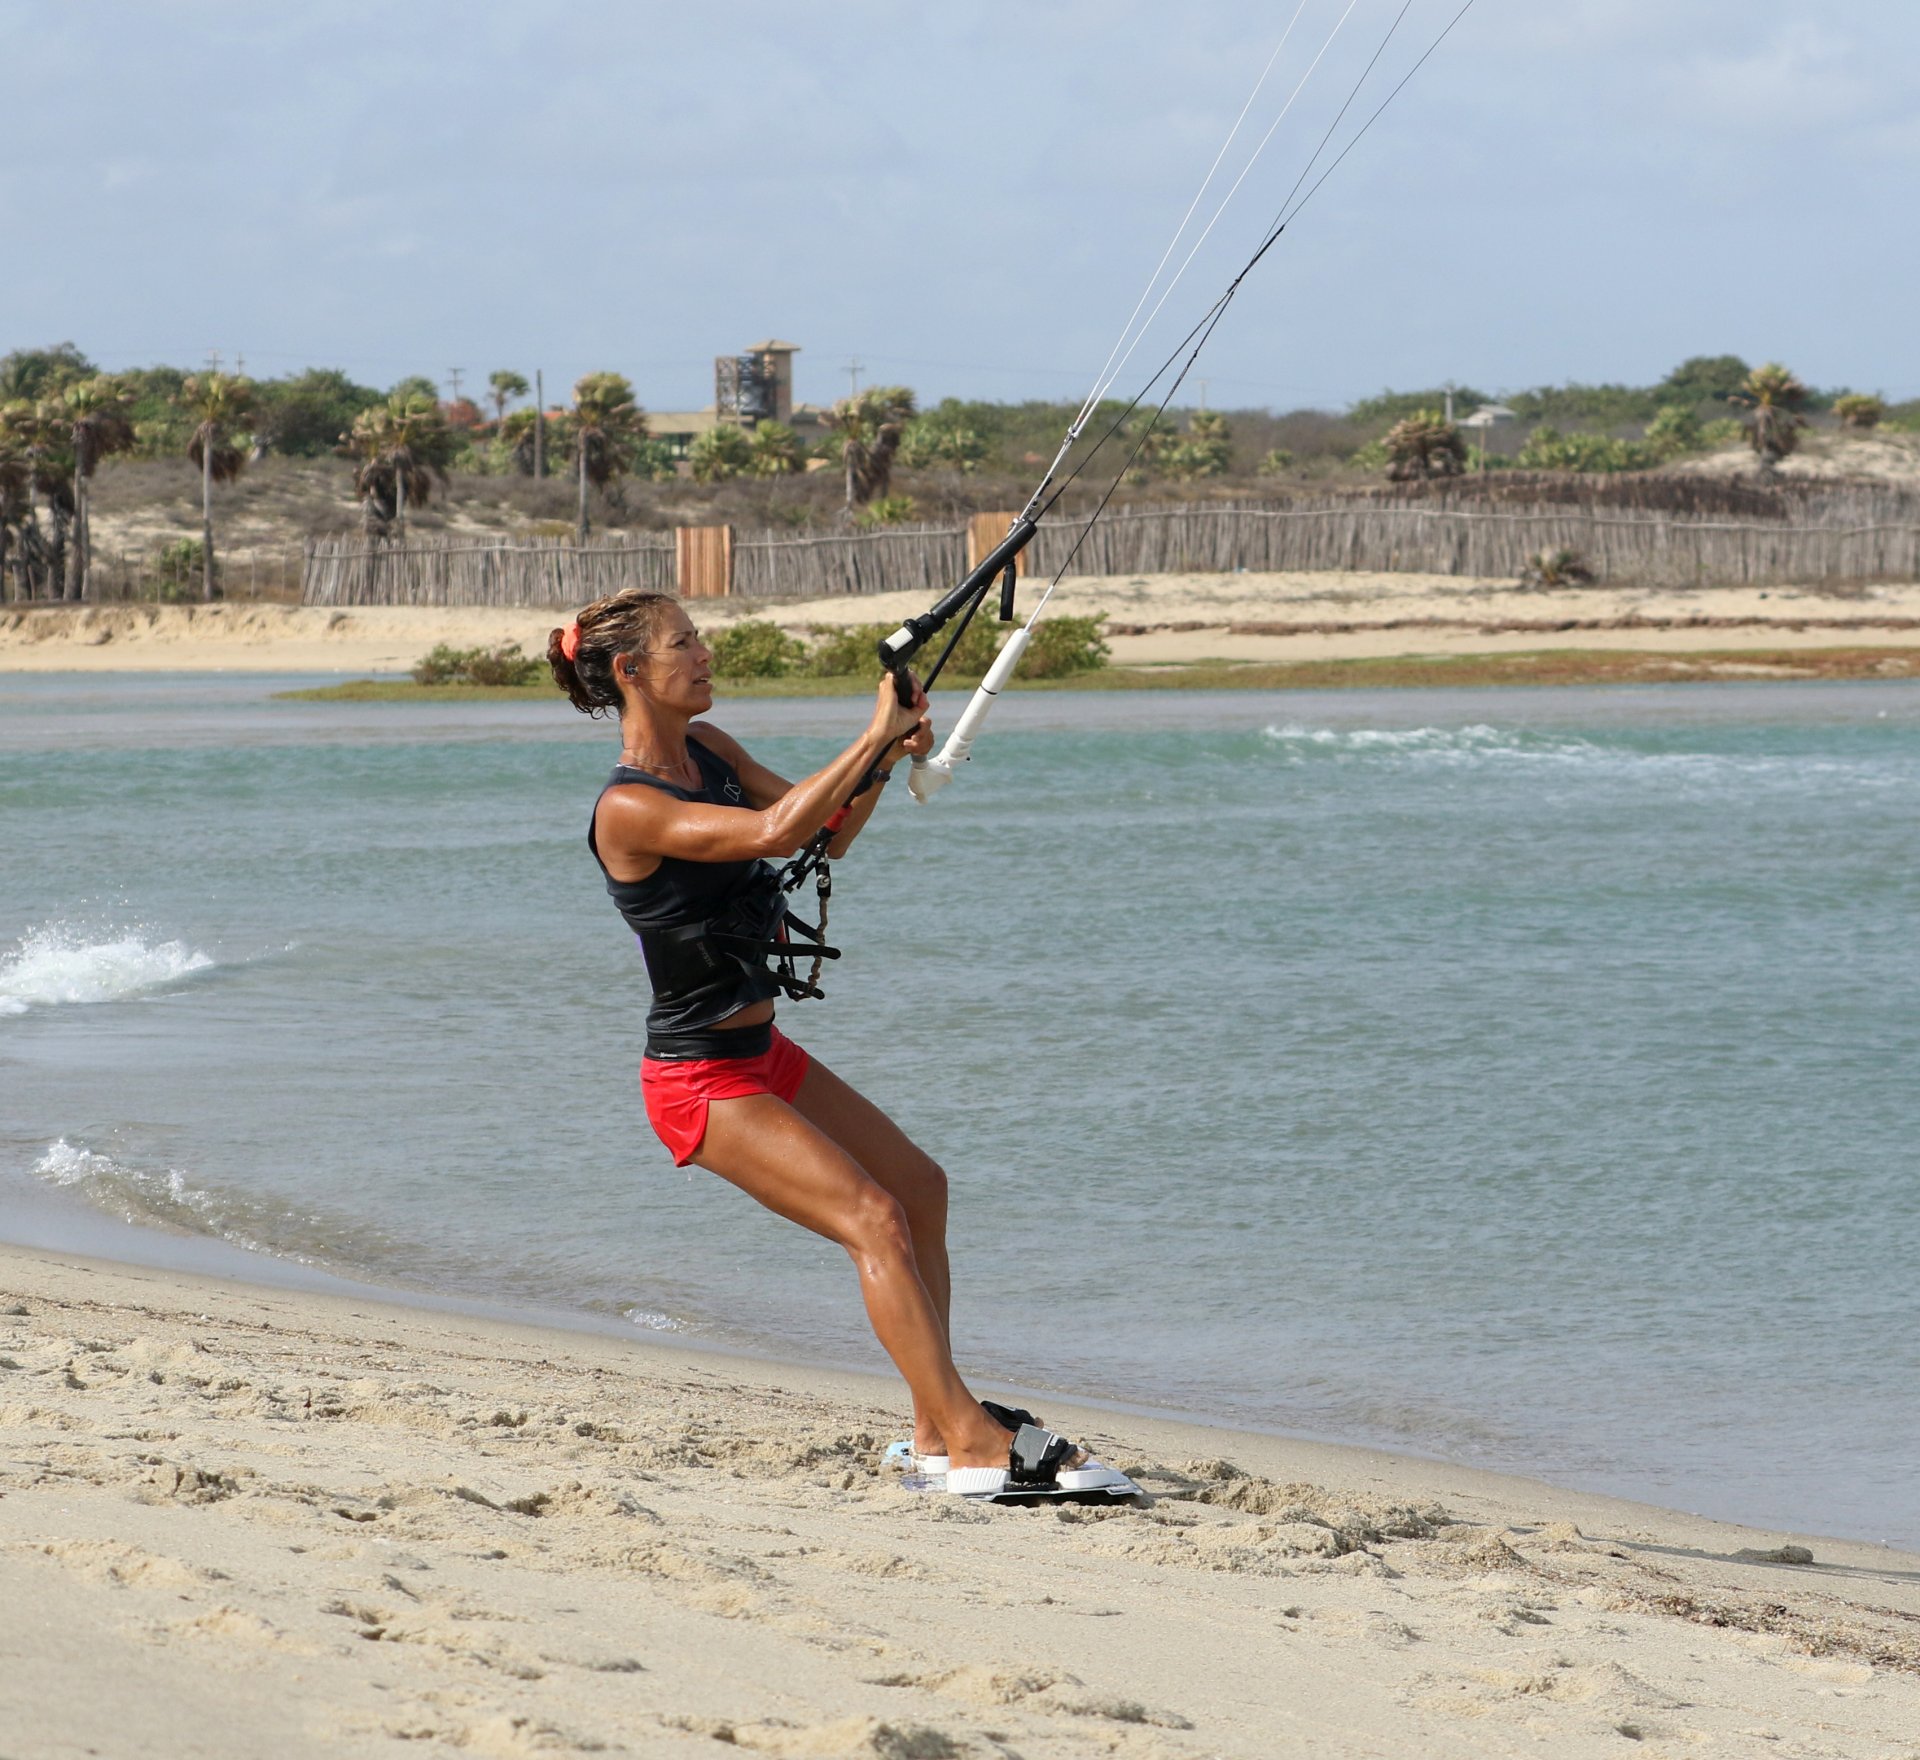
Ready Position Pic B.
This would usually refer to a certain stance whilst preparing to receive a serve, make a tackle, kick a ball or lift a weight. Normally in these pages we focus on the approach to a move, however, seeing as we’re starting from a standstill, it seems prudent to bring things back down to the foundations. Your ready position should start with you putting your board down as above. Once in the straps, drift the kite back slowly, in this case to just past 1 o’clock. If you pull a little on the bar, you will feel some pull as the kite drops a little deeper into the window. Now, wiggle your board so that you can comfortably lean gently against this pull with your weight on your heels. Now your board is in the perfect position for the jump, as it means that you will be able to resist against the pull once you send the kite. Karine has her kite around 1 o’clock, she’s holding some tension on the lines to feel the pull and has dropped her weight slightly to counterbalance it. Her weight is balanced equally between both feet so that she can use as much of the board as possible to get some oomph. She’s ready!
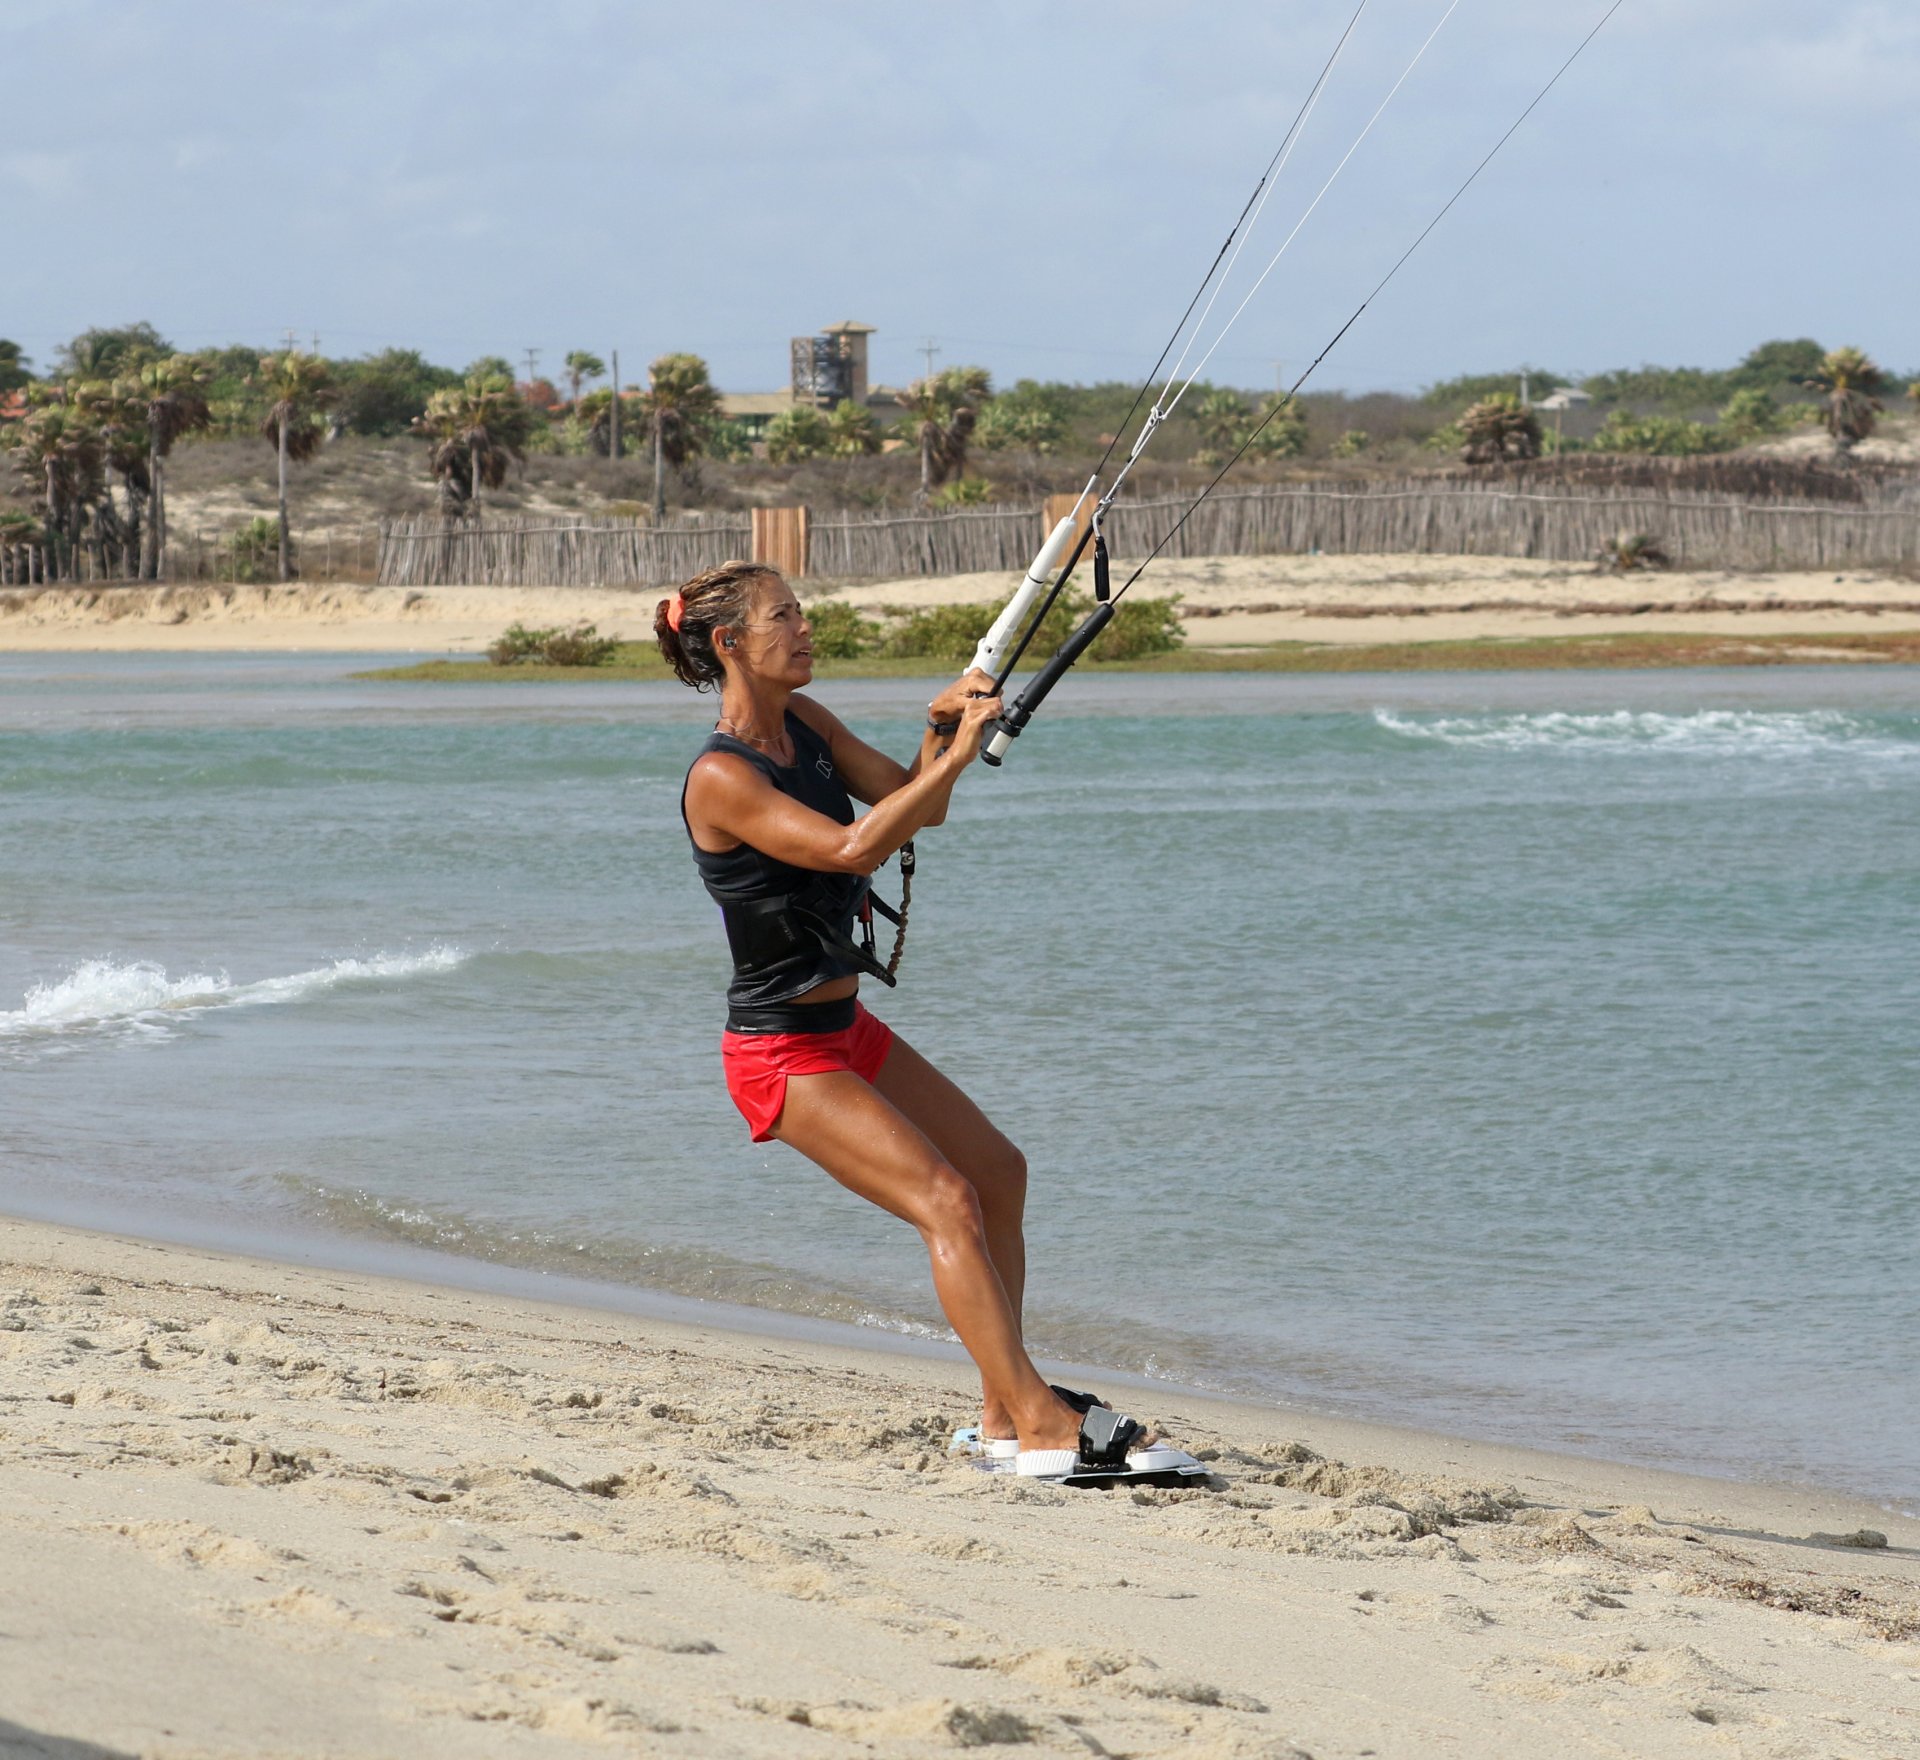
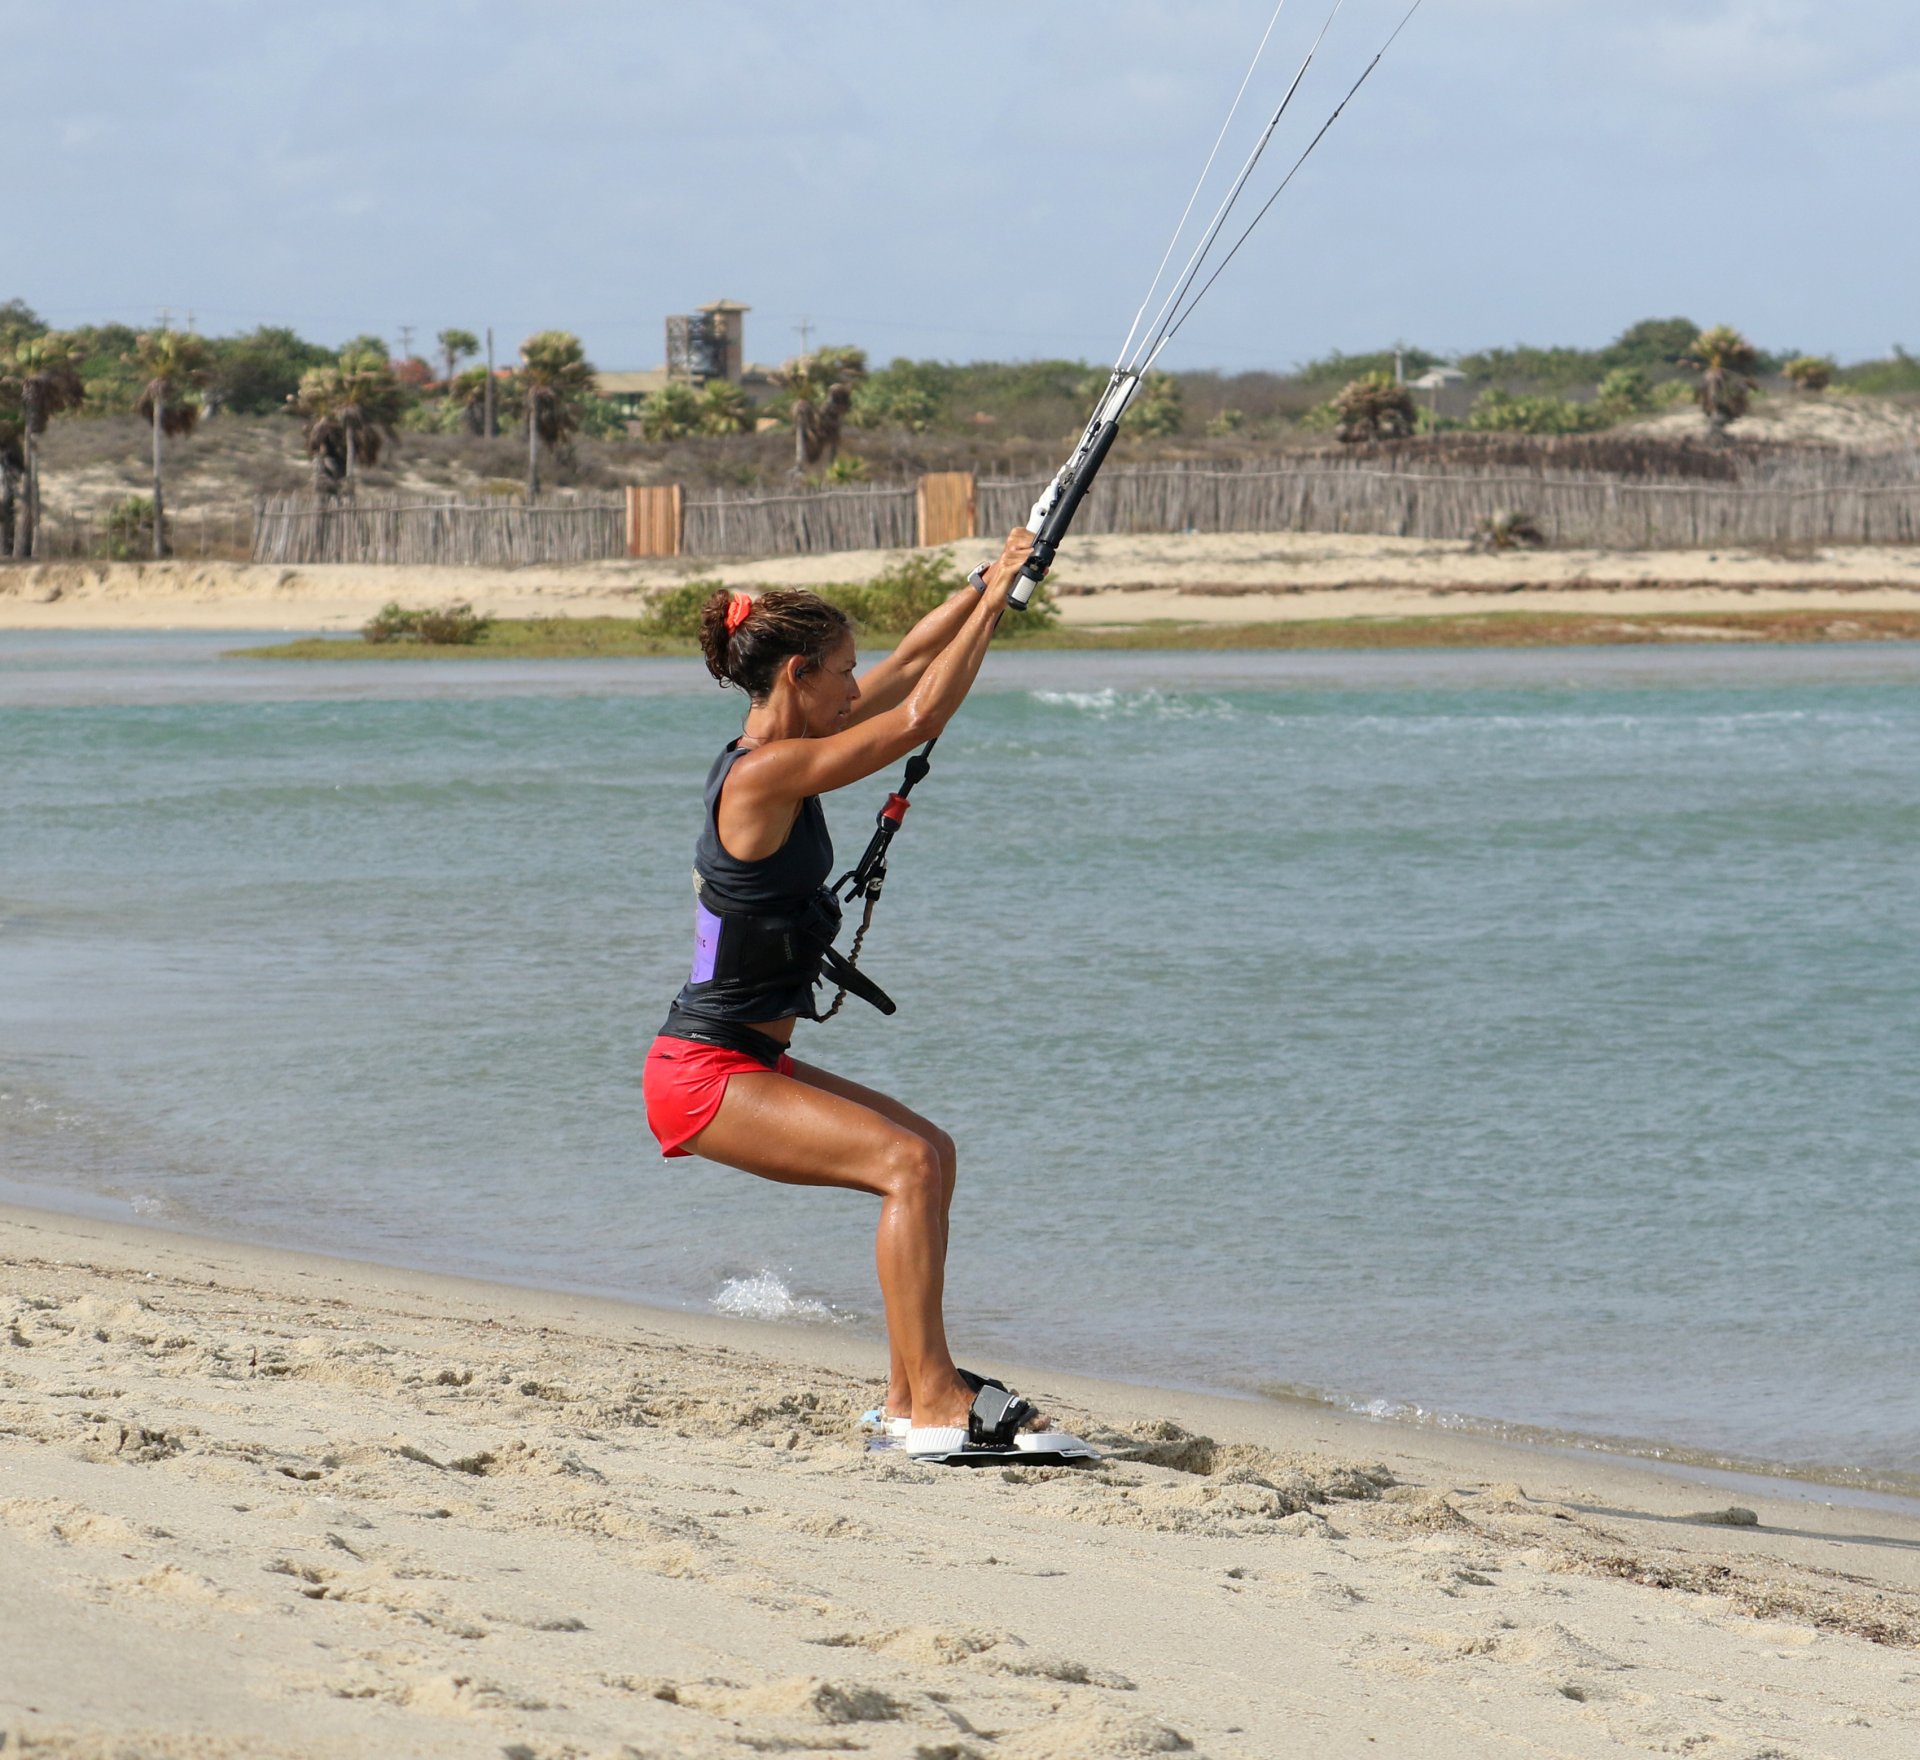
The Send Pic C.
Your plan is to send the kite to 12 o’clock. There’s a pretty high chance that the first few times you will move your kite too gingerly and not a lot will happen. You’re not moving. You’re static on a beach, and as such there is no apparent wind in the kite; it’s your job to produce it. The faster the kite moves, the more power it will generate, so don’t be shy, give it some welly! That said, you must make sure that you turn the bar on the sweet-spot. It’s way too easy to yank the bar in with your front hand as you steer the kite, which will only choke and stall it, resulting in all the pull coming from in front of you, rather than above. Karine is push-pulling the bar on the sweet spot, watching as it rises, whilst keeping her weight back, resisting and adding tension in the lines.
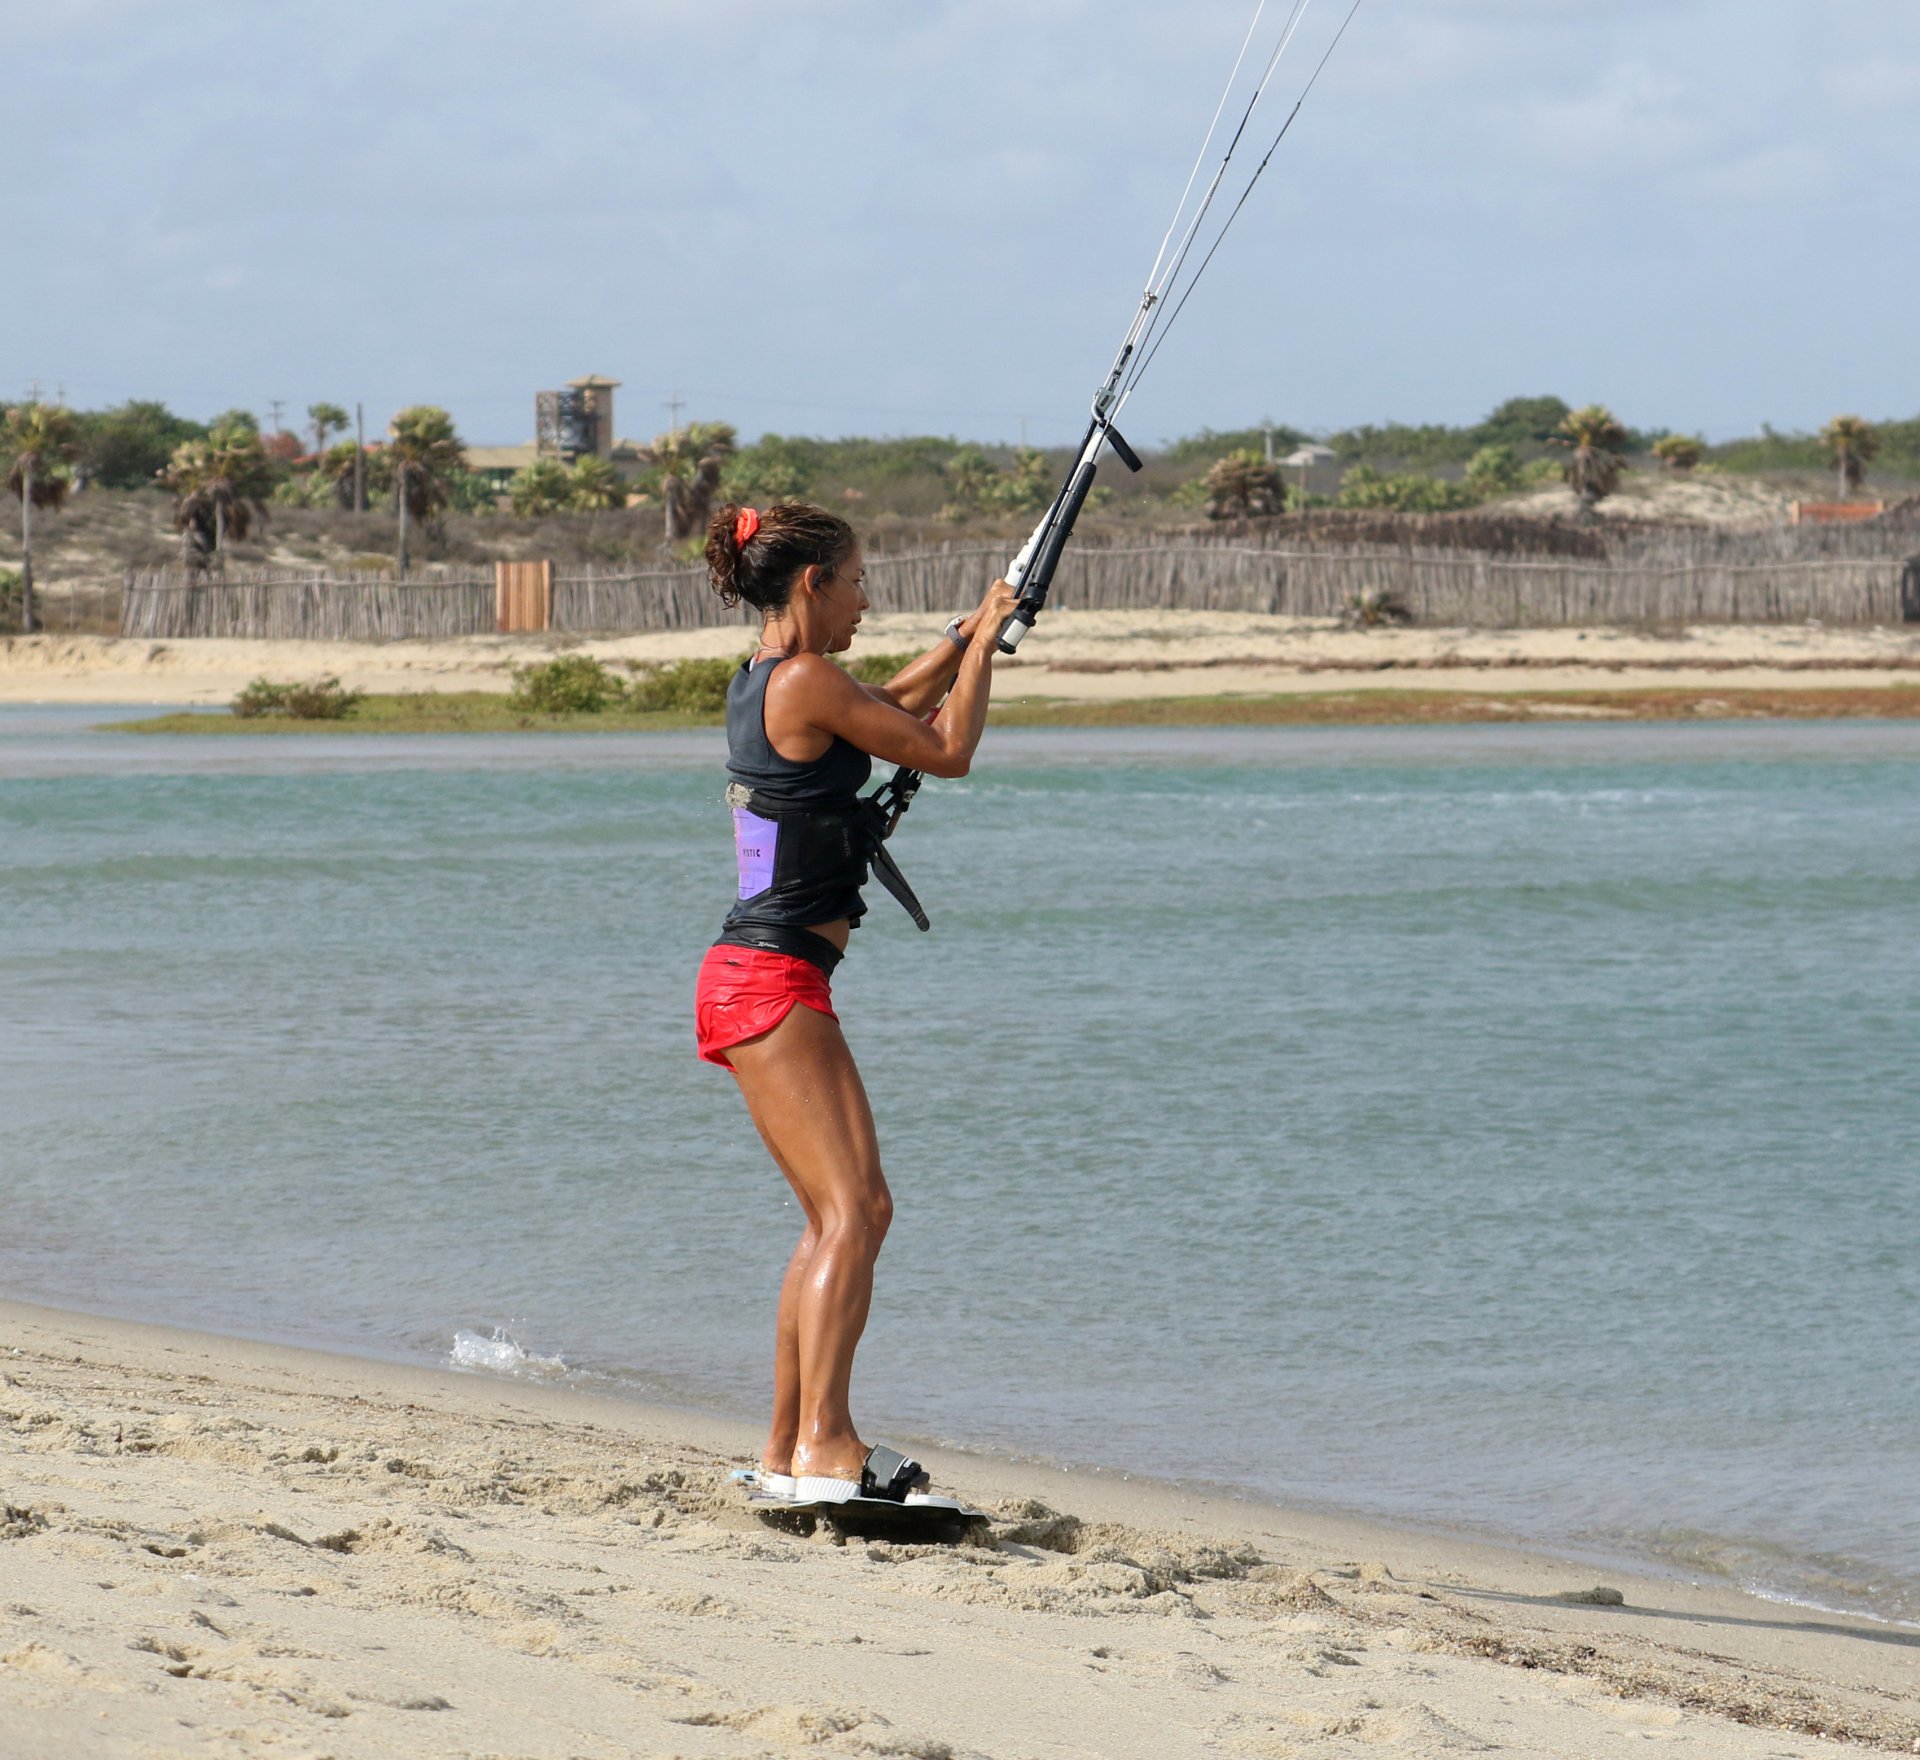
Drop, Resist & Level Pic D.
If you send the kite correctly, it will turn and motor up and across. Whilst it moves it will start to pull harder, and as such, you need to resist more, rocking back onto your heels and dropping your weight in an attempt to get your edge into the sand. Here you can see that Karine has committed her weight against the kite and as such is building up some energy. You can also see that she has levelled her bar. You don’t want your kite flying across to the other side of the window, as this will make the eventual landing more difficult. You’re looking for lift up and off the beach, so 12 is the magic number.

Coil & Breath Pic E.
As mentioned above, you want the kite to go up towards 12 around the edge of the window. This will give you maximum lift. To guarantee this, you need to let the kite breathe as it powers, so feather the bar out to follow your sweet spot as the kite rises. You also need to resist the upward pull of the kite by squatting down whilst keeping weight on your heels. This has the added bonus of coiling your springs ready for take-off. Karine has let the bar out, allowing the kite to climb towards 12, she’s squatting with her weight on her heels to resist and her bar is still very much levelled.
Kick Off Pic F.
Once the kite reaches 12 o’clock, it’s time to launch. Even if you follow the sweet spot and let your kite breathe, you’ll know when it’s time as you’ll feel everything lifting. That said, if it adds confidence you can watch your kite and use the visual clue of it reaching 12. Your launch sequence is standard kite practice, legs first and then you can pull on the bar. Here Karine is extending her legs, trying to jump off her heels, not her toes, so that she’s resisting until the very last moment. As she extends, she then pulls the bar in for a little help from her kite. Note that the bar is still level.
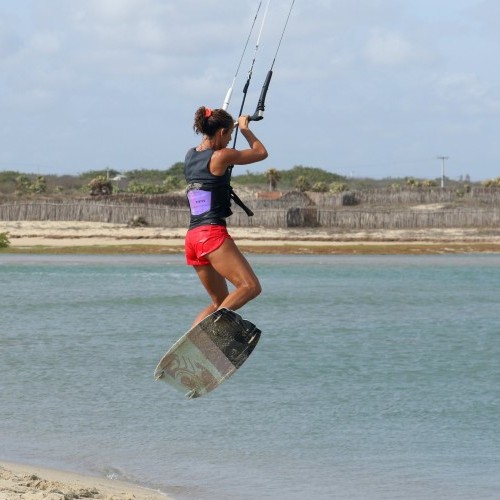
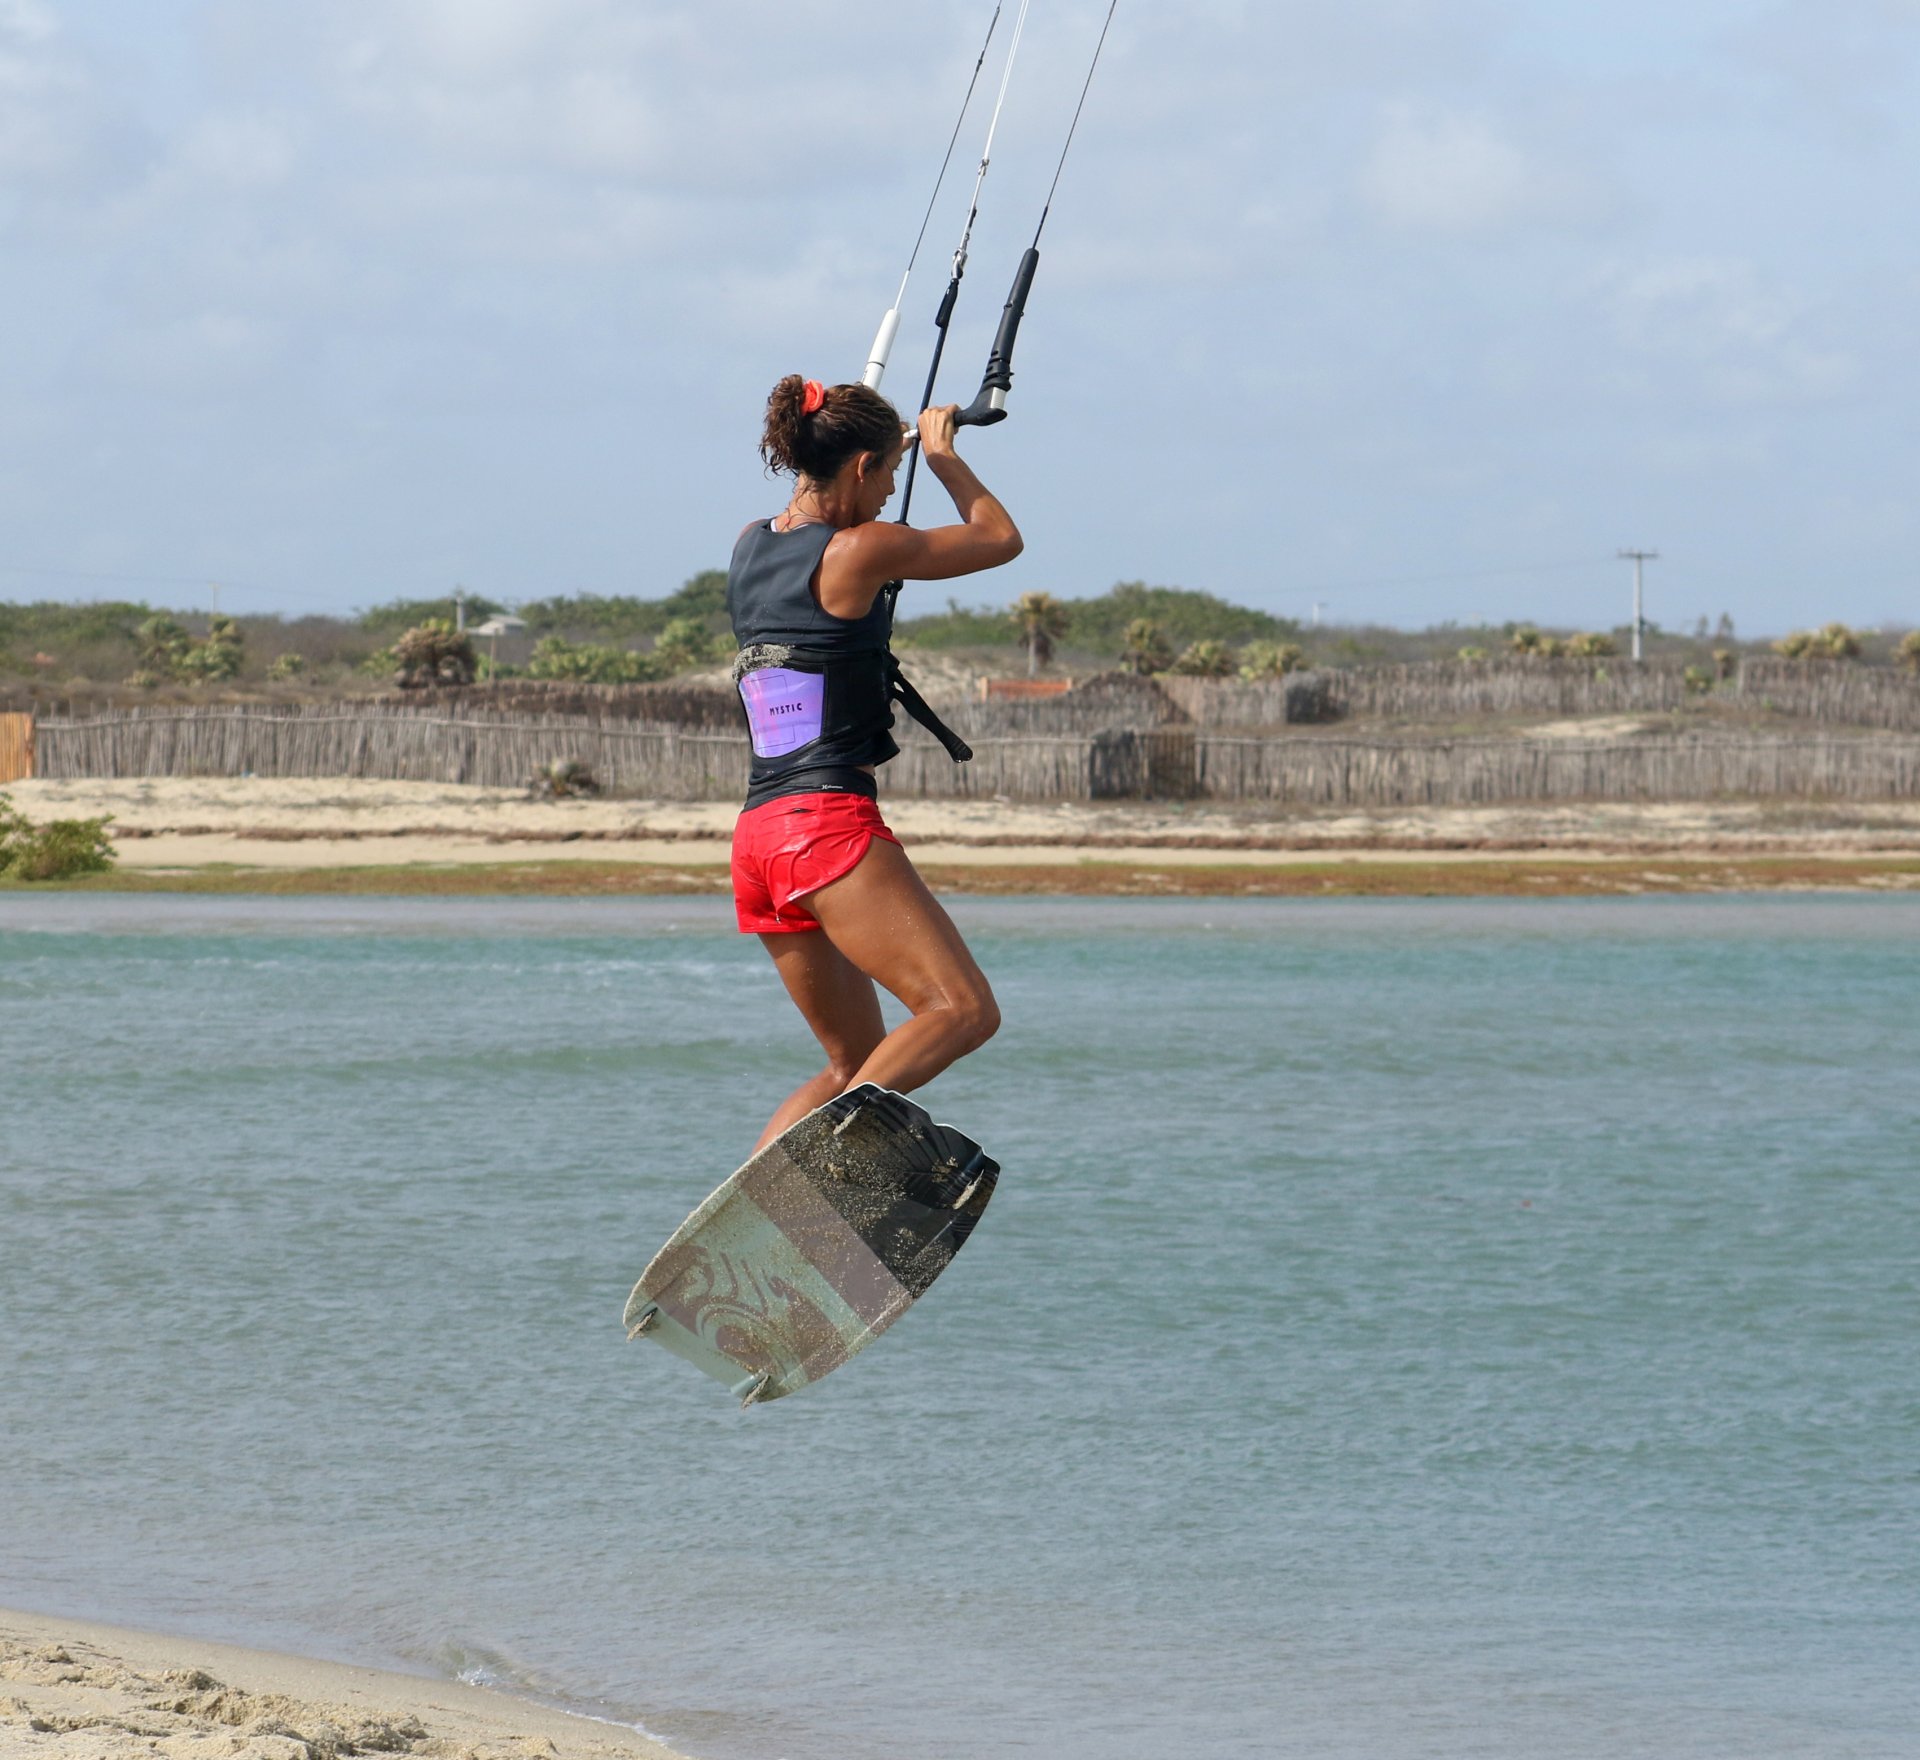
In Flight Entertainment Pic G.
From here on in, you should be in familiar territory. As per a jump or transition, get yourself into a comfortable and balanced position. How long you have will depend on the effort and effectiveness of both your resistance and kite send. Should you get some height, bring your knees up, keep your bar on the sweet spot and your kite above you. Here Karine lifts her knees as she rises and keeps the kite above her on a level bar.
Landing Gear Down Pic H.
Yet again, as per jump or transition, patience is a virtue. Wait until you’re descending, then drop your legs, dive the kite to pull you downwind and twist your hips to point your board downwind for a soft tail first landing. Karine is perfectly set for a smooth landing, she’s given the kite a decent dive from above, her bar is on the sweet spot and she’s pointing downwind. Now, back to the beach for another one! 🙂
Top Tips
Deep water and offshore wind!

Positioning your board so that you can resist is key. Don’t rush into the jump, but spend some time leaning against the kite and moving it slowly to find the position in which you feel most comfortable to resist.
You do need to give the kite more of a send than you’ll think is wise, however, there is no harm in starting gently and building up.
To be able to stop the kite at 12, you need the kite to start low enough to generate sufficient lift by then. This will depend on kite size and wind strength.

Deep water and offshore wind...
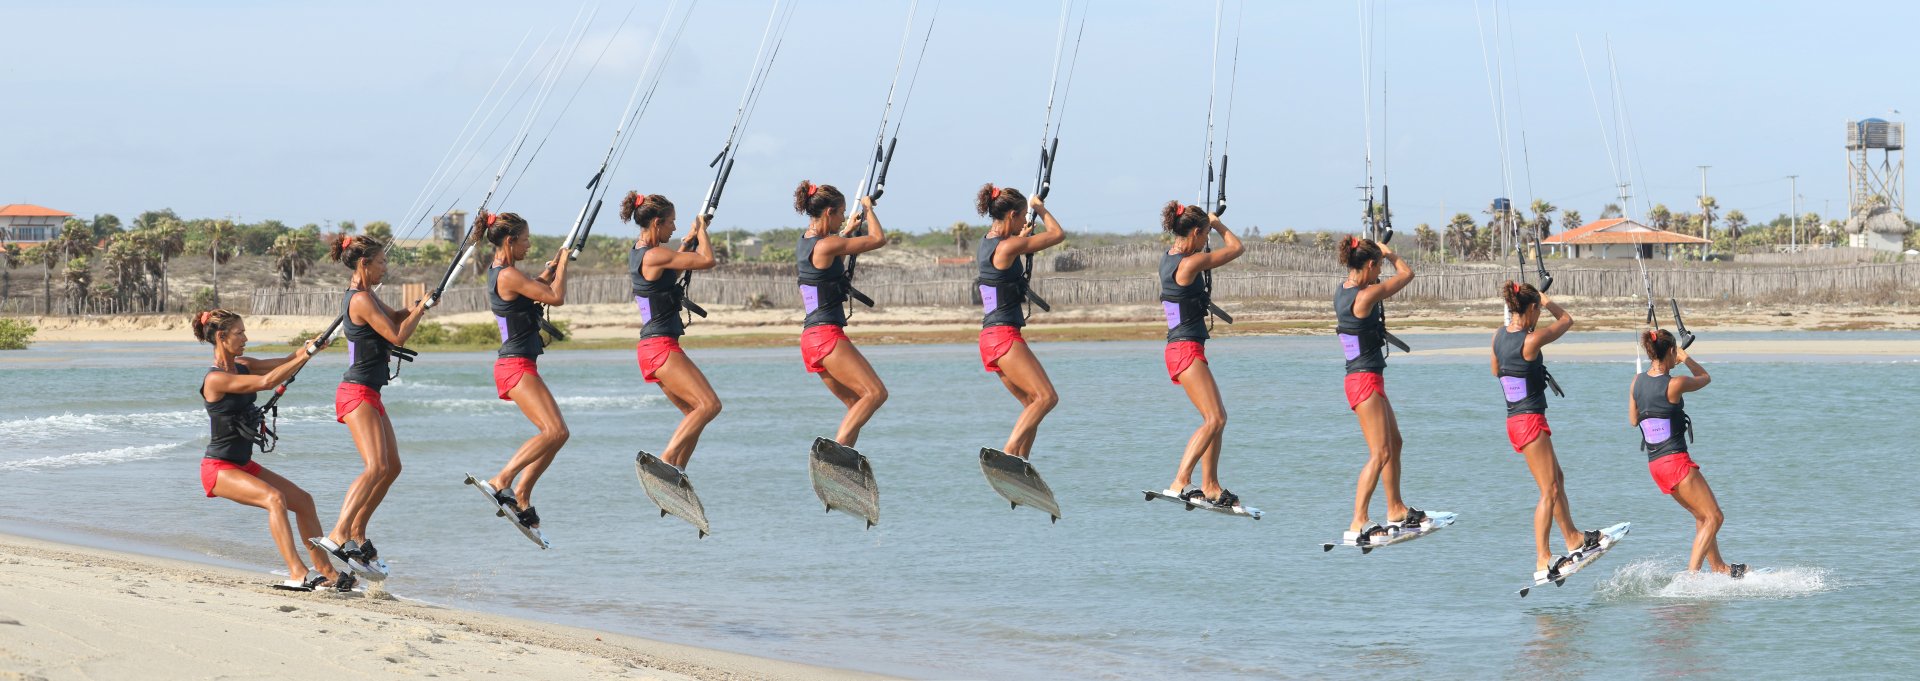
Now have a look at the sequence and videos for a step by step and real time playthrough.

Common Problems
If you find that you’re not getting enough height on your jump. Chances are that you’ve either trimmed too much, don’t have enough power or are being too gentle with the send. That said, if you’re moving the kite well but you’re not going up, you might be trying to jump off your toes rather than with your heels against the edge. Make sure you drop your weight back.
If you’re getting pulled across your board and landing unceremoniously face first in the water, you’re most definitely choking your kite. The power comes from the kite moving, not from you yanking the bar in. Let the kite breathe enough so that it goes up to 12.
If you’re landing nose heavy on your front foot, it’s a sign that the kite is moving past 12 on the send. Make sure to steer the kite up, but then level before springing into action.
Keystones
- Ready position
- Decent send from low enough
- Let the kite breathe
- Level, stamp, pull
- Dive and downwind
This technique article was in Issue 96 of IKSURFMAG.
Related


By Christian and Karine
Christian and Karine have been working together as a coaching team, running improver to advanced kitesurfing clinics since 2003.
