
Double Back Loop Transition
Technique / Intermediate


Introduction
Adding an extra rotation is a sure fire way of stepping up a move that you already have mastered, and the double back roll transition is definitely up there as one to learn, so here it is. One word of warning though, if you’ve been practicing the double back roll kite loop from last issue, you may need to rewire your brain and press default as these are two distinctly different moves that you don’t want to be confusing.
A good base before starting this is a solid and controlled, BLT, or back roll transition if you’re from across the pond. From there on this is what you’ll be doing….


The Approach
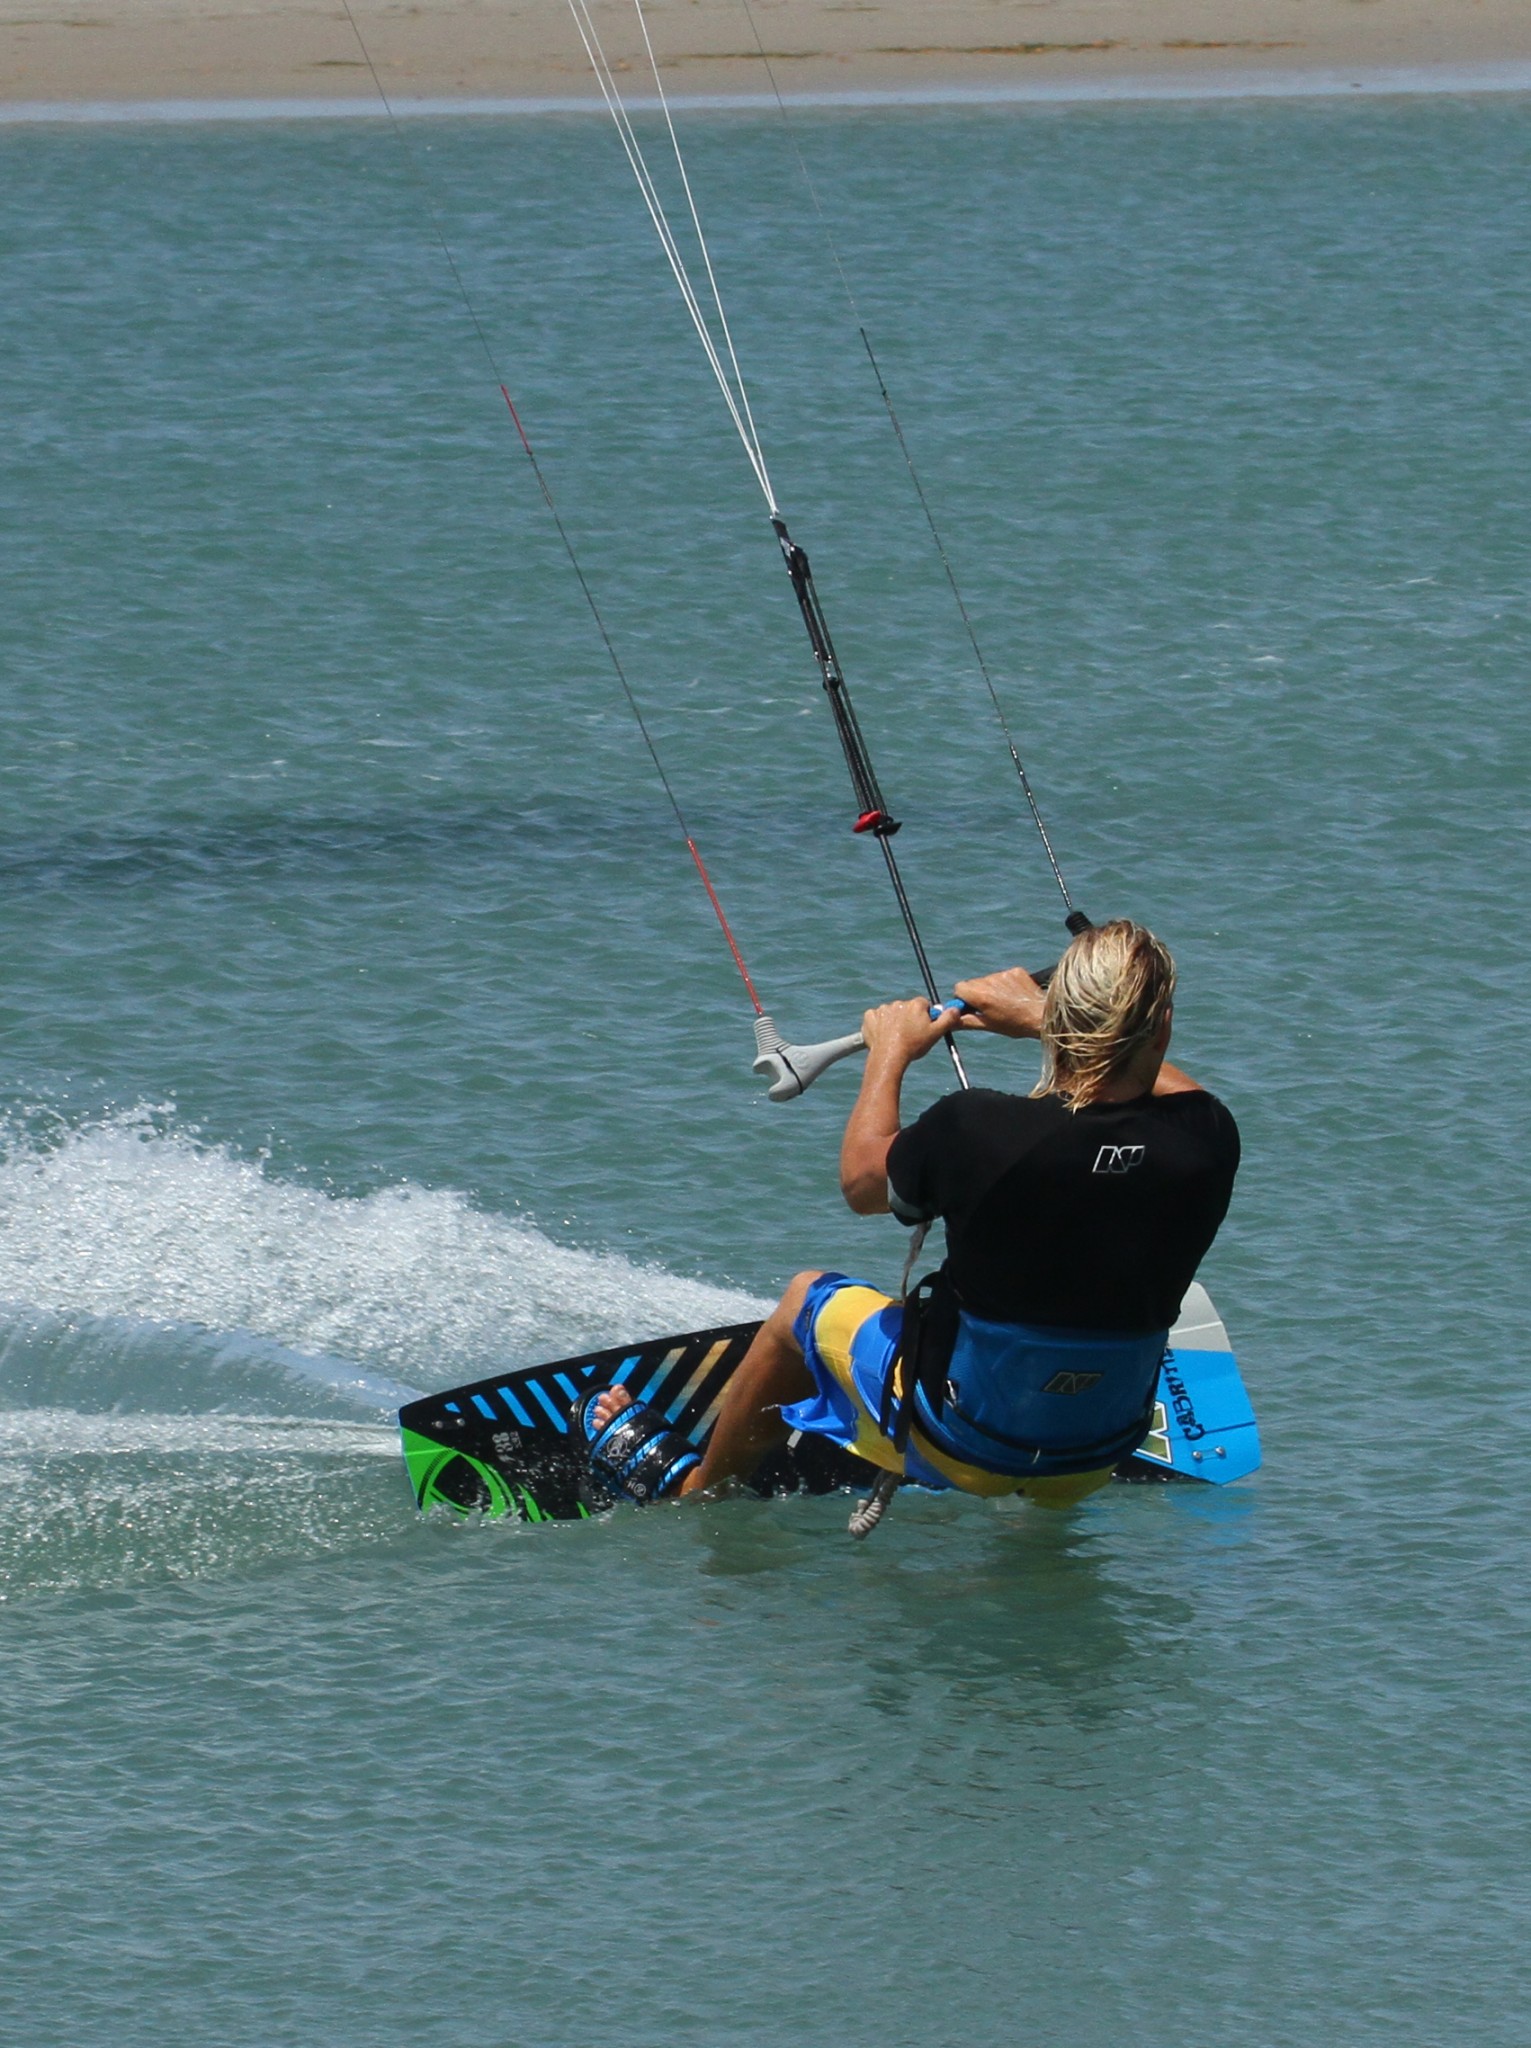
The two things to remember for any transition are; you need to kill some forward momentum, and you still need to send the kite for lift. For both of these elements you need a good edge. From a good edge you can edge harder upwind to slow down, and with a good edge you can send the kite quickly and sharply from either 11 or 1 to 12 o’clock because you maintain tension in the lines. If you think about this you won’t drift the kite up slowly whilst standing up on the board and your chances of success will be greatly increased.
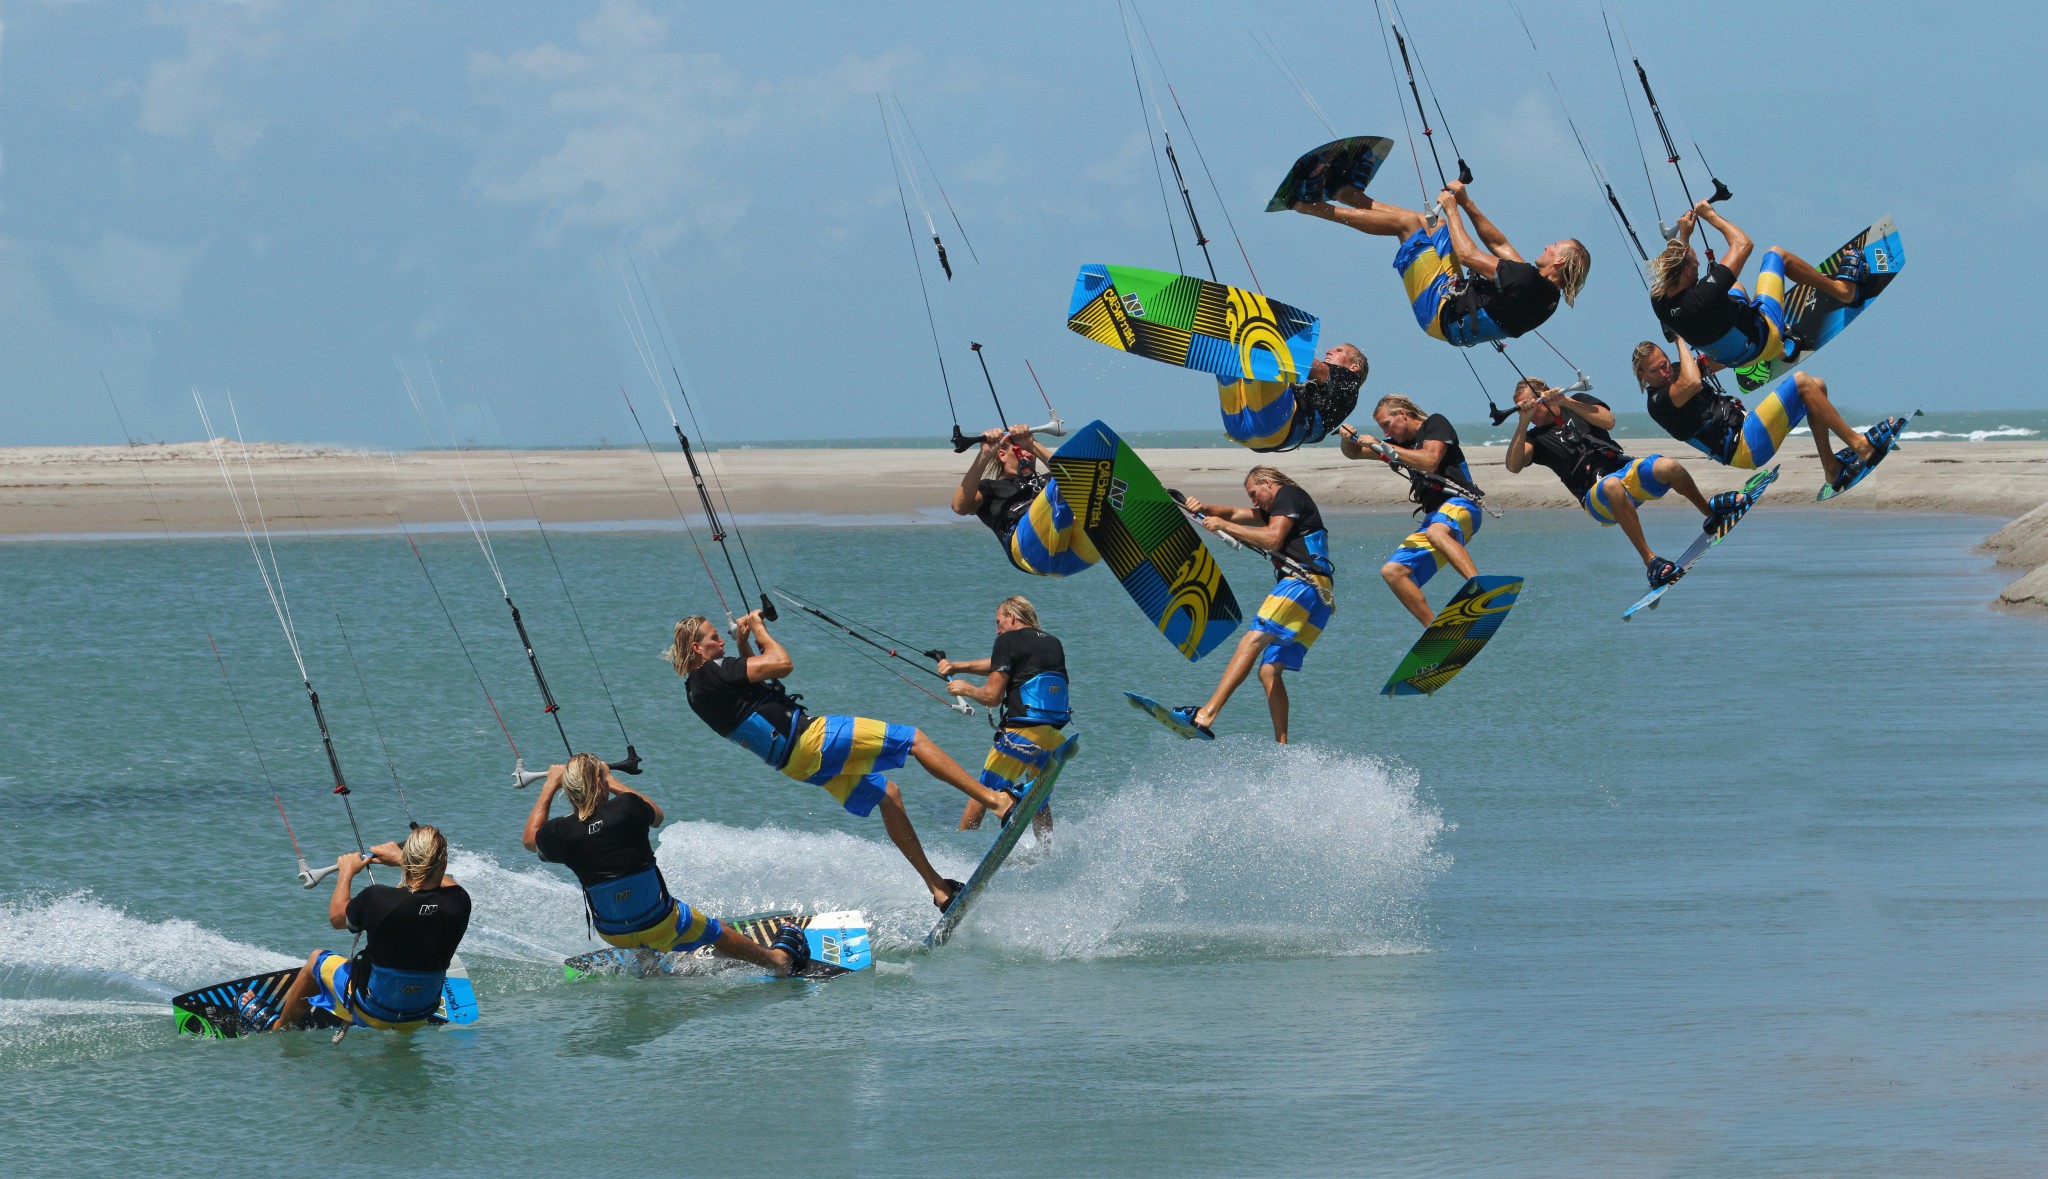
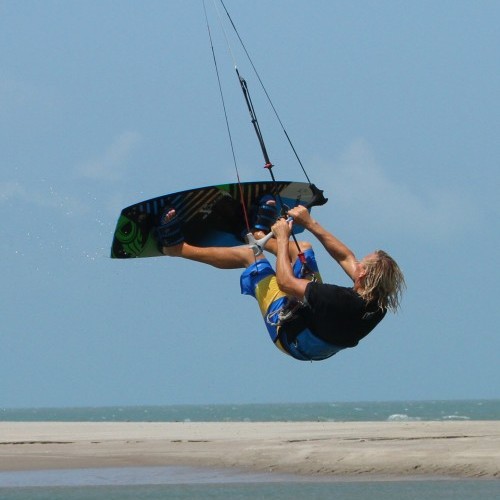
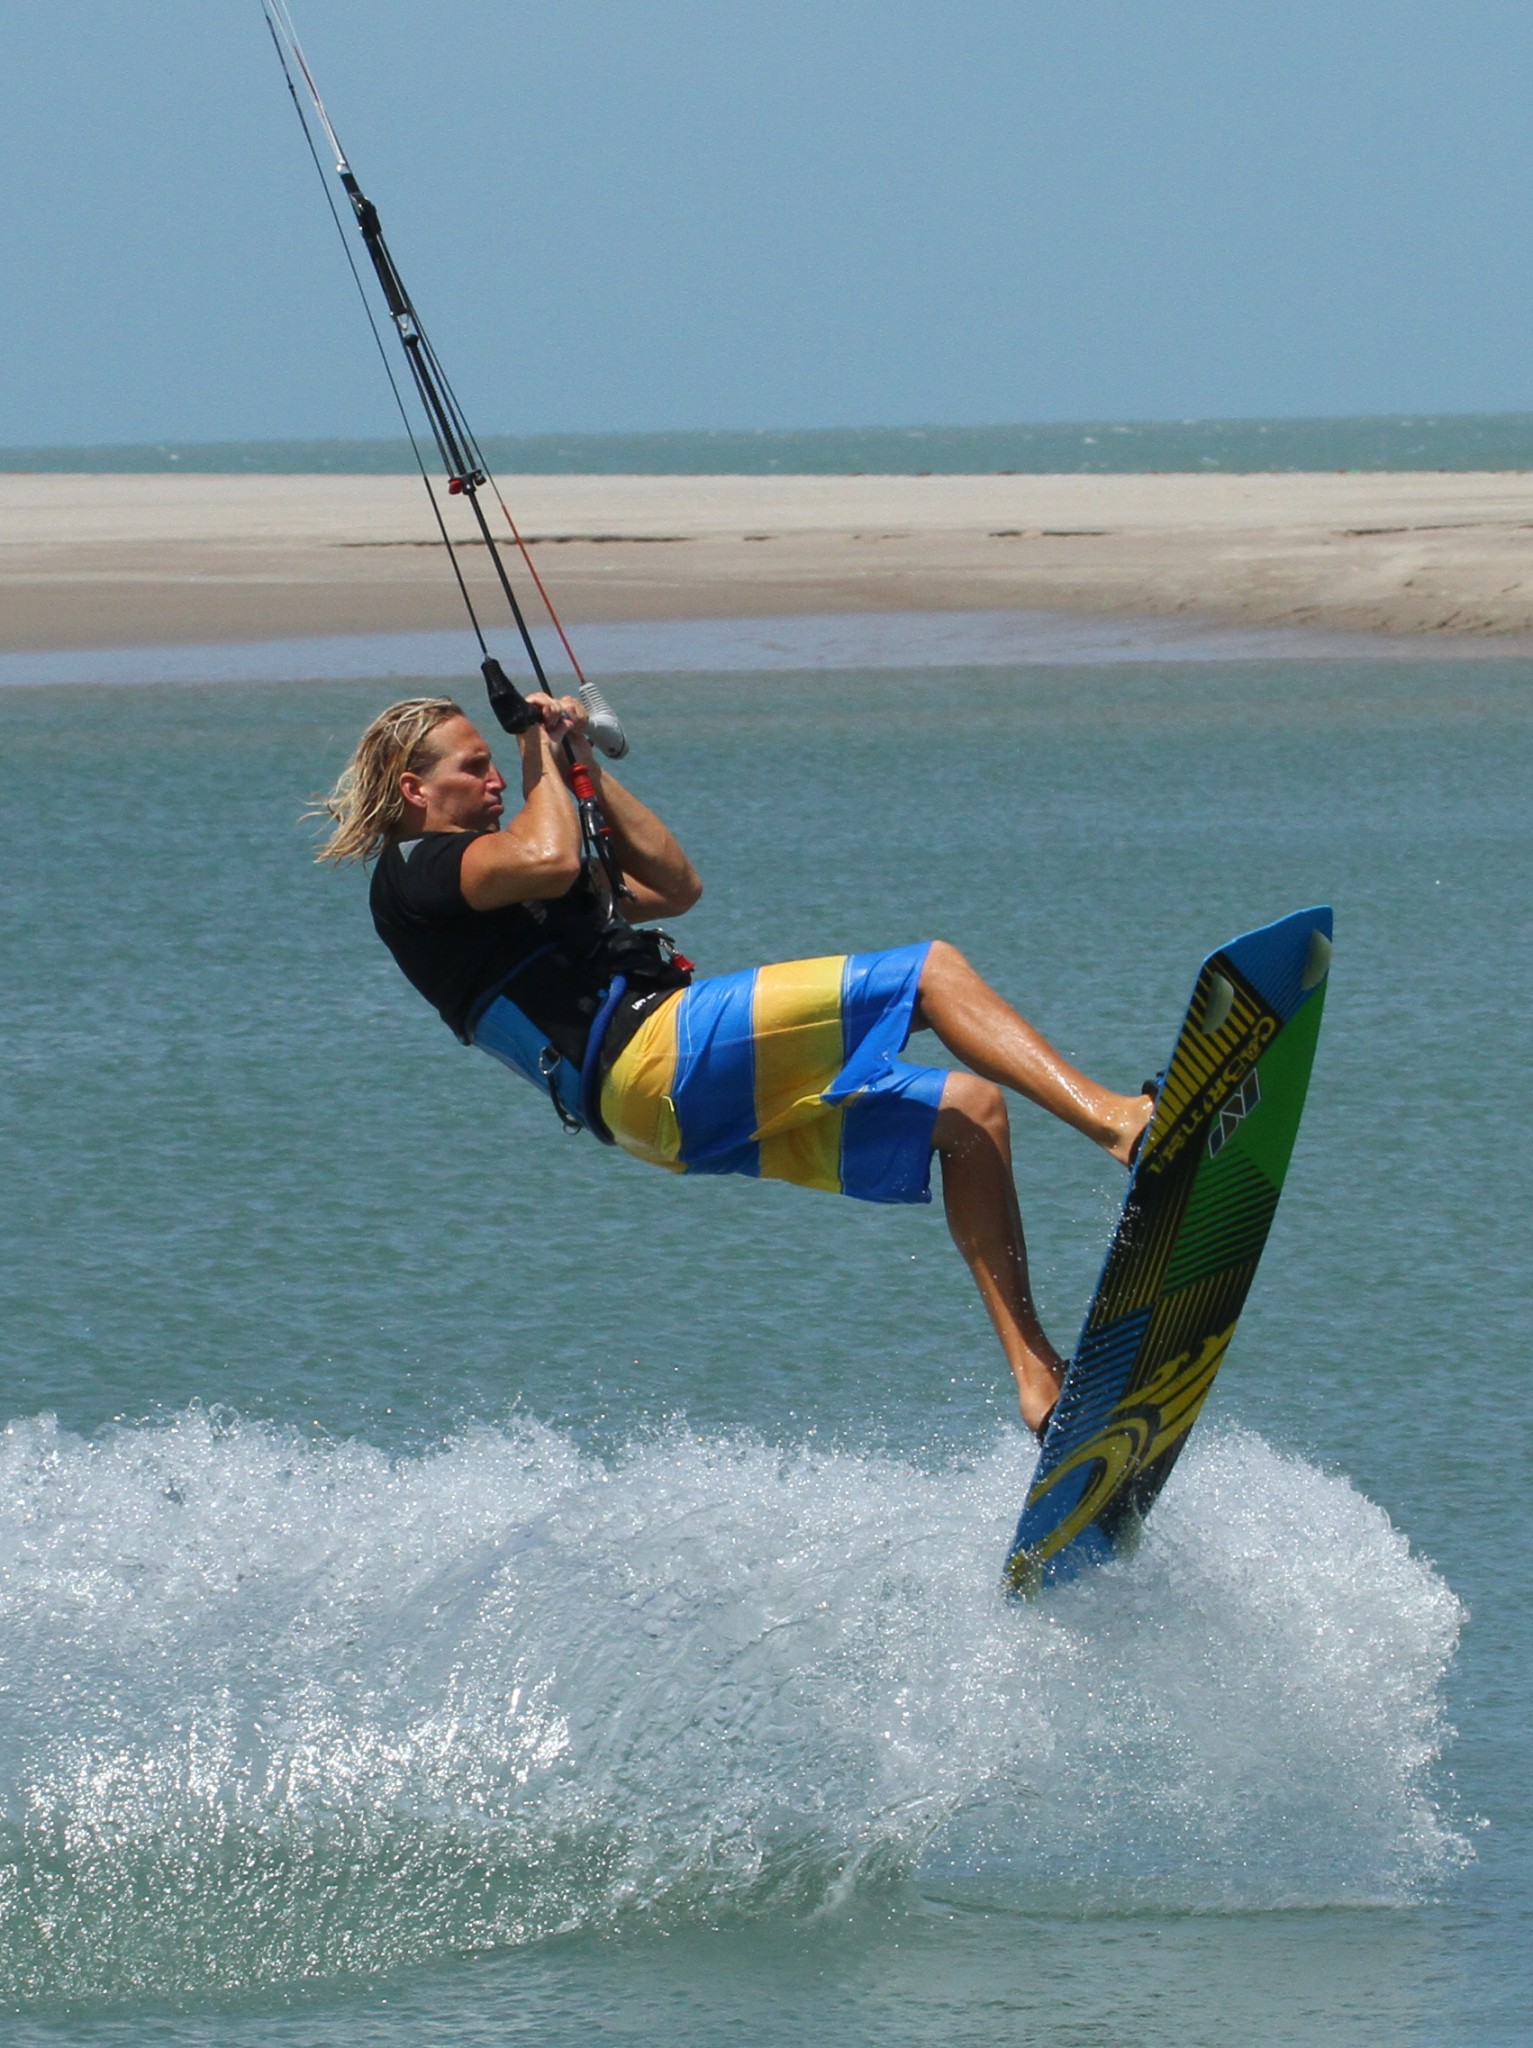
In Pic A you can see that Christian has come in with good speed on a decent edge, kite at 11 o’clock, weight back and tension in his lines. From here he has sent the kite up whilst edging harder to both resist the pull, and also to slow down. Note that even though his back leg is bent it is not soft – it is pushing and therefore resisting.
The Rotation
This part may require a bit of practise and a certain element of trial and error, depending on your standard BLT. If you are a recognised exponent of slow casual looking back roll transitions then speeding up the rotation to accommodate an extra 360˚ shouldn’t hold much of a problem. If however you’re guilty of the occasional foray into spinney quick low BLTs, then you’ll need to concentrate more on your approach and take off, in search of more height and float, which added to your spin speed should see you nicely round the full double.
It is worth mentioning here that you do want to help yourself into the second rotation, but you don’t want to force it as later in the move you can use your head, body and kite to help you finish.
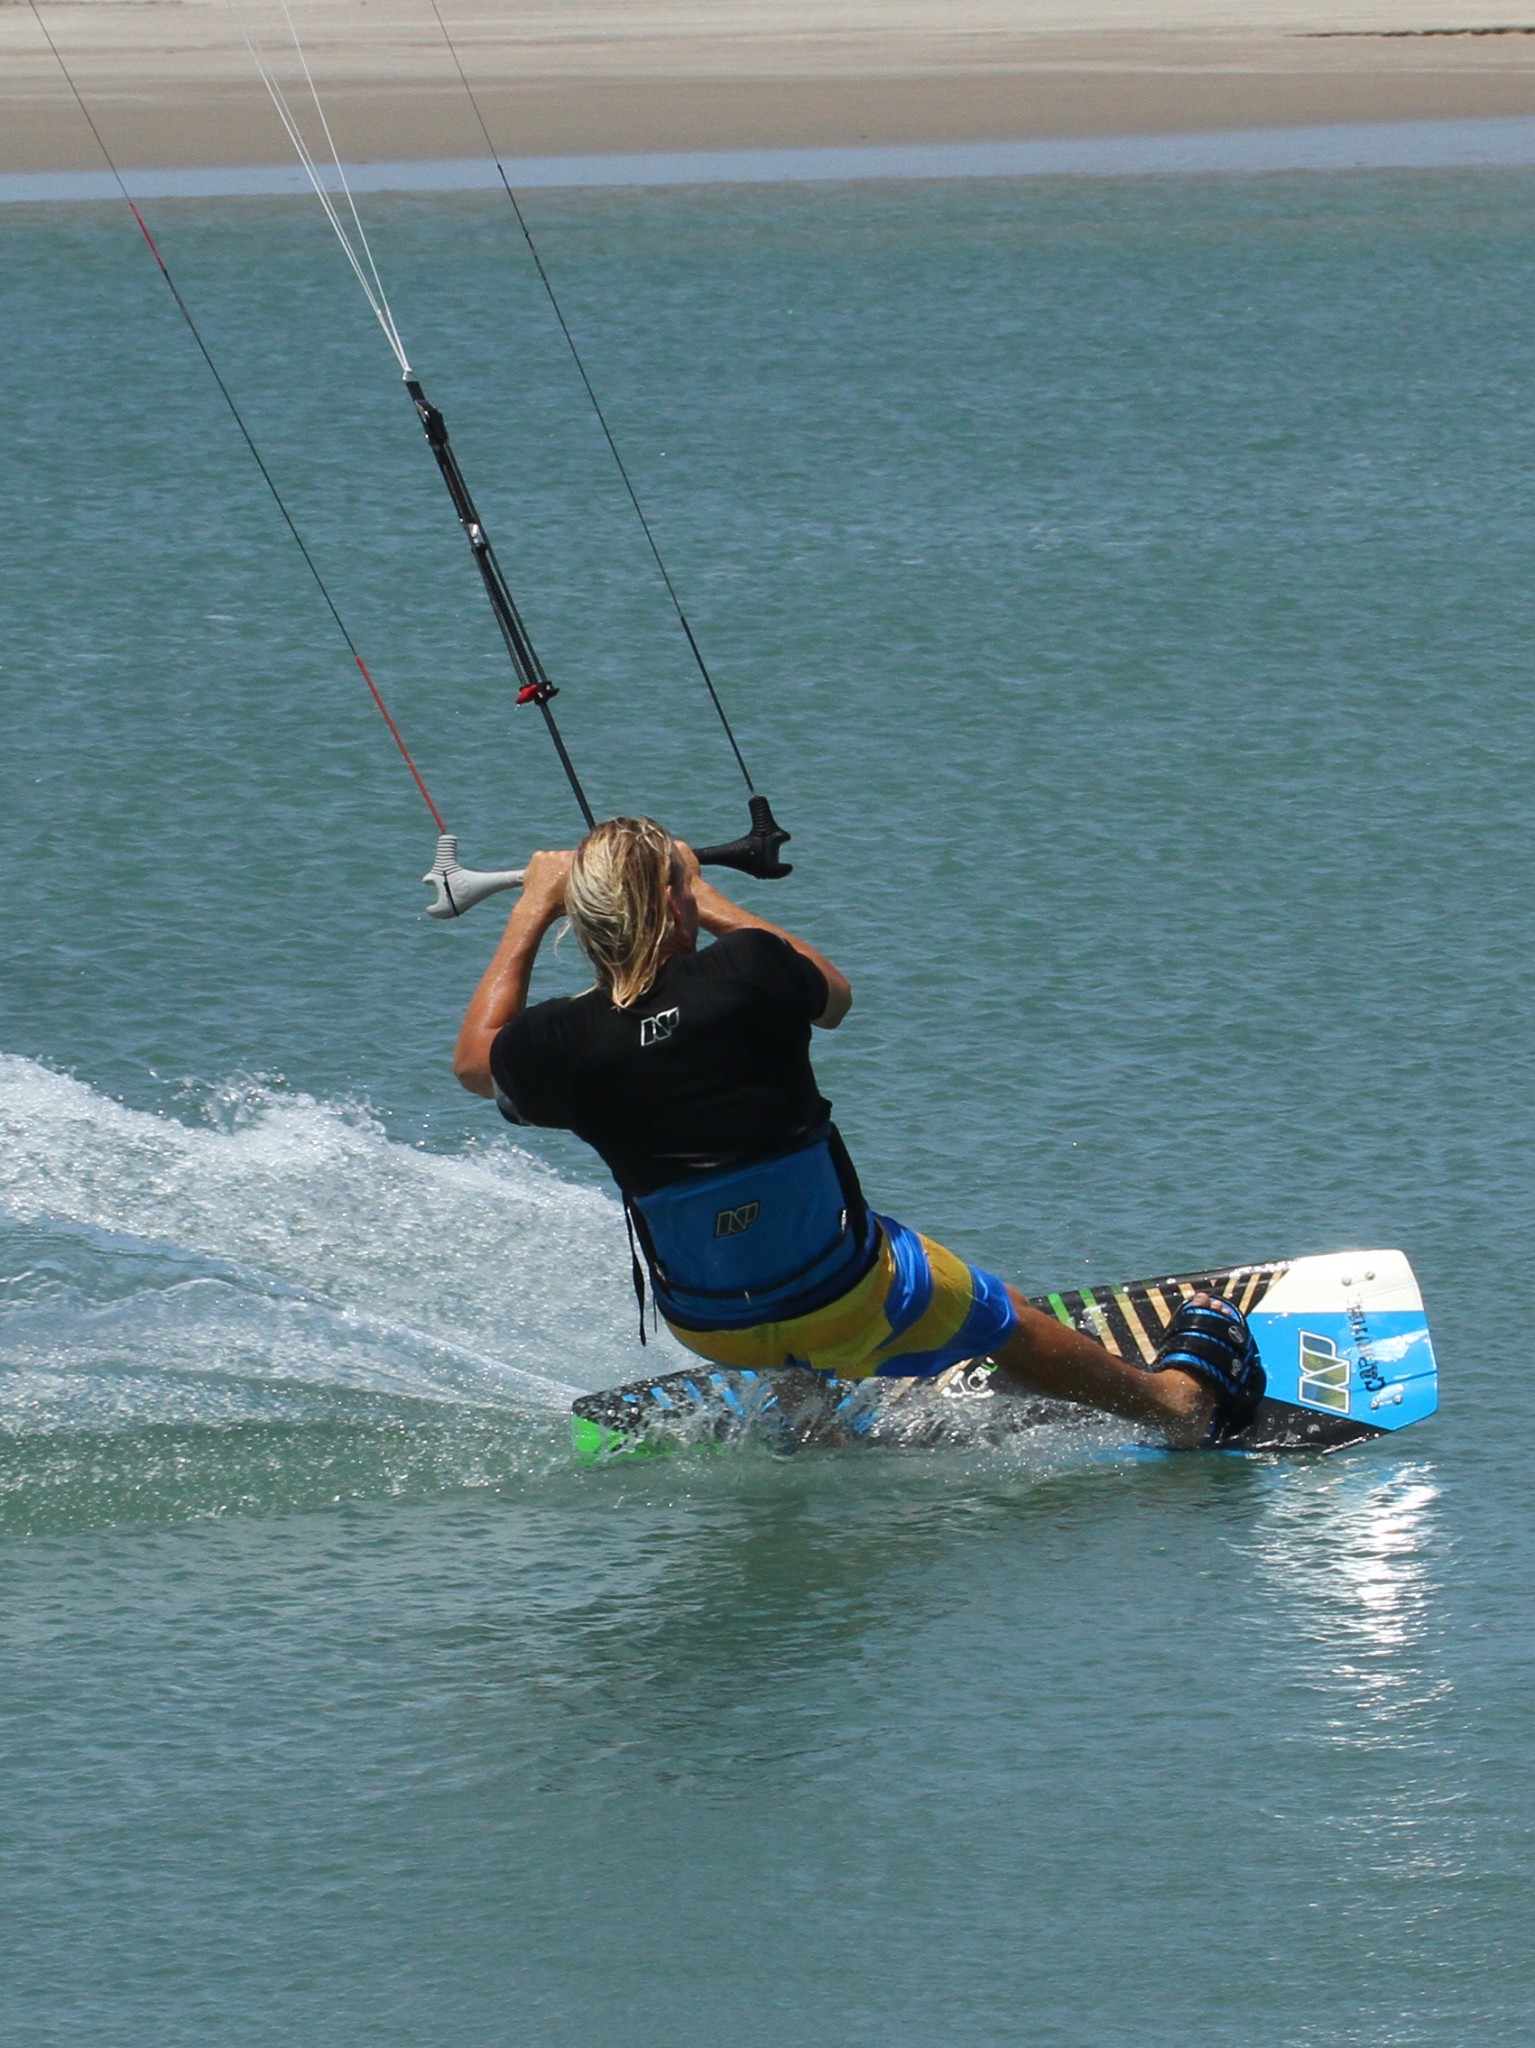
Here in Pic B. Christian has dropped his weight way back over the tail of the board. With his weight so far back the board will turn/carve much further into the wind as it is almost pivoting on its tail. This will effectively speed up Christian’s rotation as he will carve further into wind before take off than for his standard BLT. The timing here is also important, you must drop back as the kite starts to lift, a fraction before you take off. This way you’ll still edge and therefore be rewarded with some air and float. If you drop back too early you’ll be pulled back and the kite will fly further back in the window, offering you less time in the air to make it round the two times.

Take Off
This is your key moment, although your approach will dictate how this goes. If you have edged and resisted and literally stabbed the kite back hard but for a short time you will be able to pop up off your back leg as you pull the bar in whilst the kite is somewhere close to 12 o’clock.
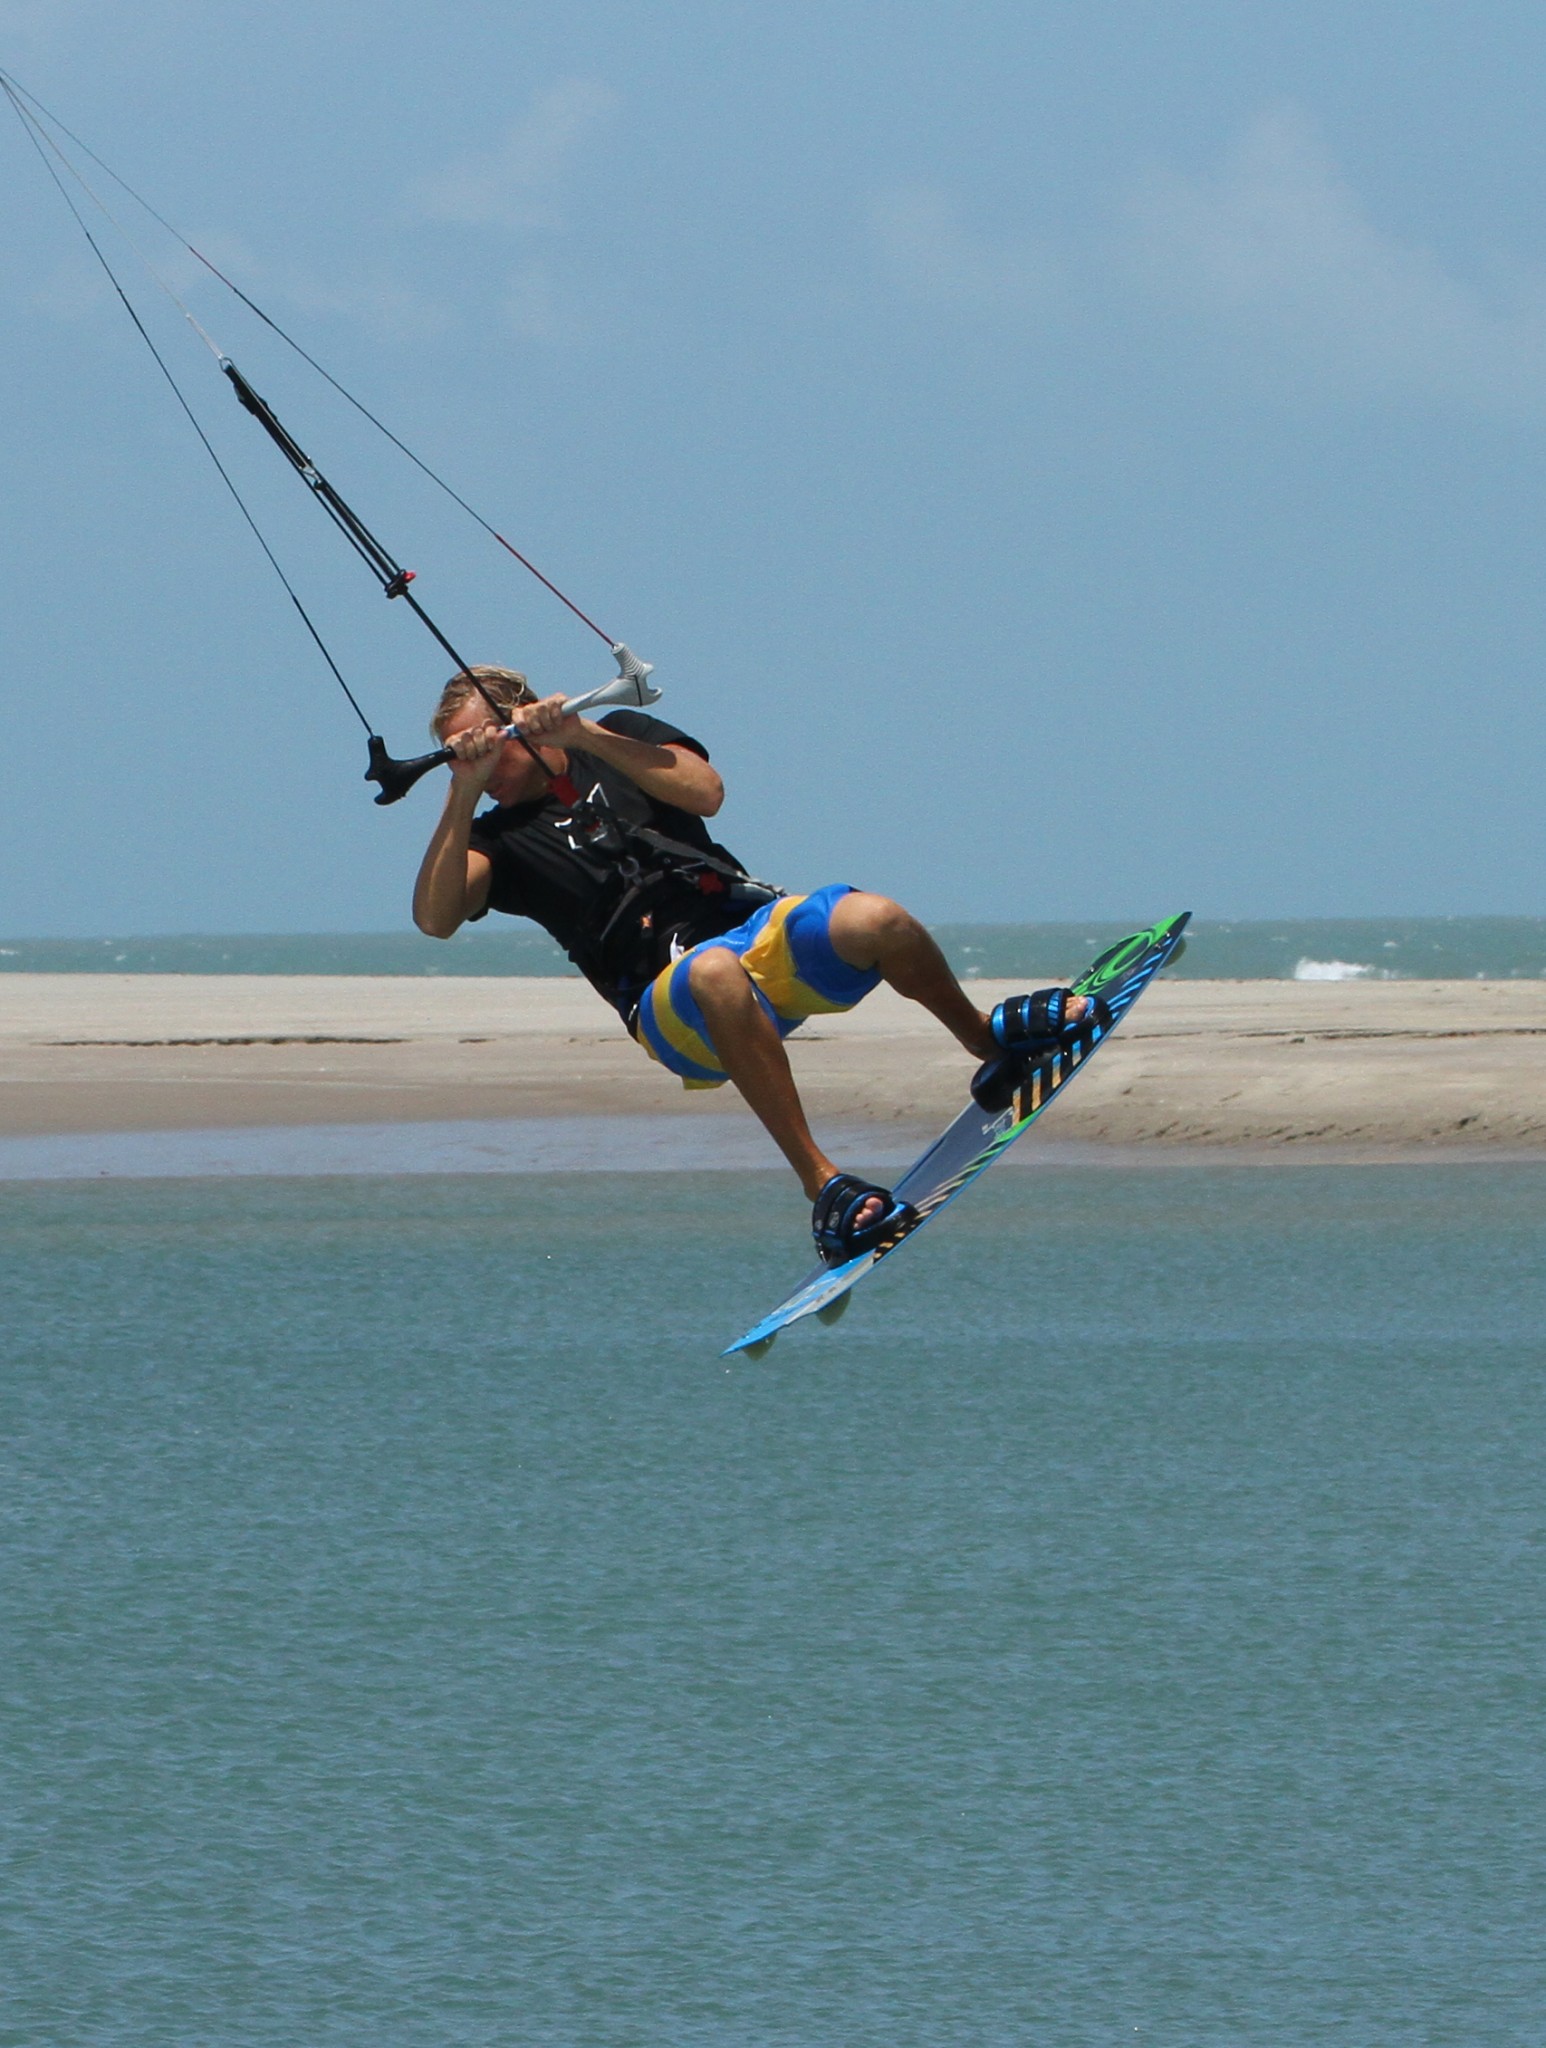
You can see that after popping up into the transition Christian has pulled the bar right in. The reasons for this are two fold. Firstly by pulling in hard with 2 hands Christian effectively stops the kite moving and keeps it centred above him around 12 o’clock. Secondly he gets a cheeky bit of extra lift from the kite. However be warned if your sweet spot is trimmed miles away from you, your kite will flare/stall and you will not get the float or control that you’re expecting. As Christian takes off he keeps his head looking forward between his arms, which will stop him over cooking the rotation. Finally Christian lifts his knees, making himself small, balanced and easier to rotate.
Half Way House
In a perfect world your aim is to complete your first rotation by the time you reach the apex of your transition, so one on the way up and then one on the way down. That said unless you’re getting great height there wont be much time to separate the move into two halves. What is important though, is that you are ready and primed to go into number two as you complete the first 360˚.
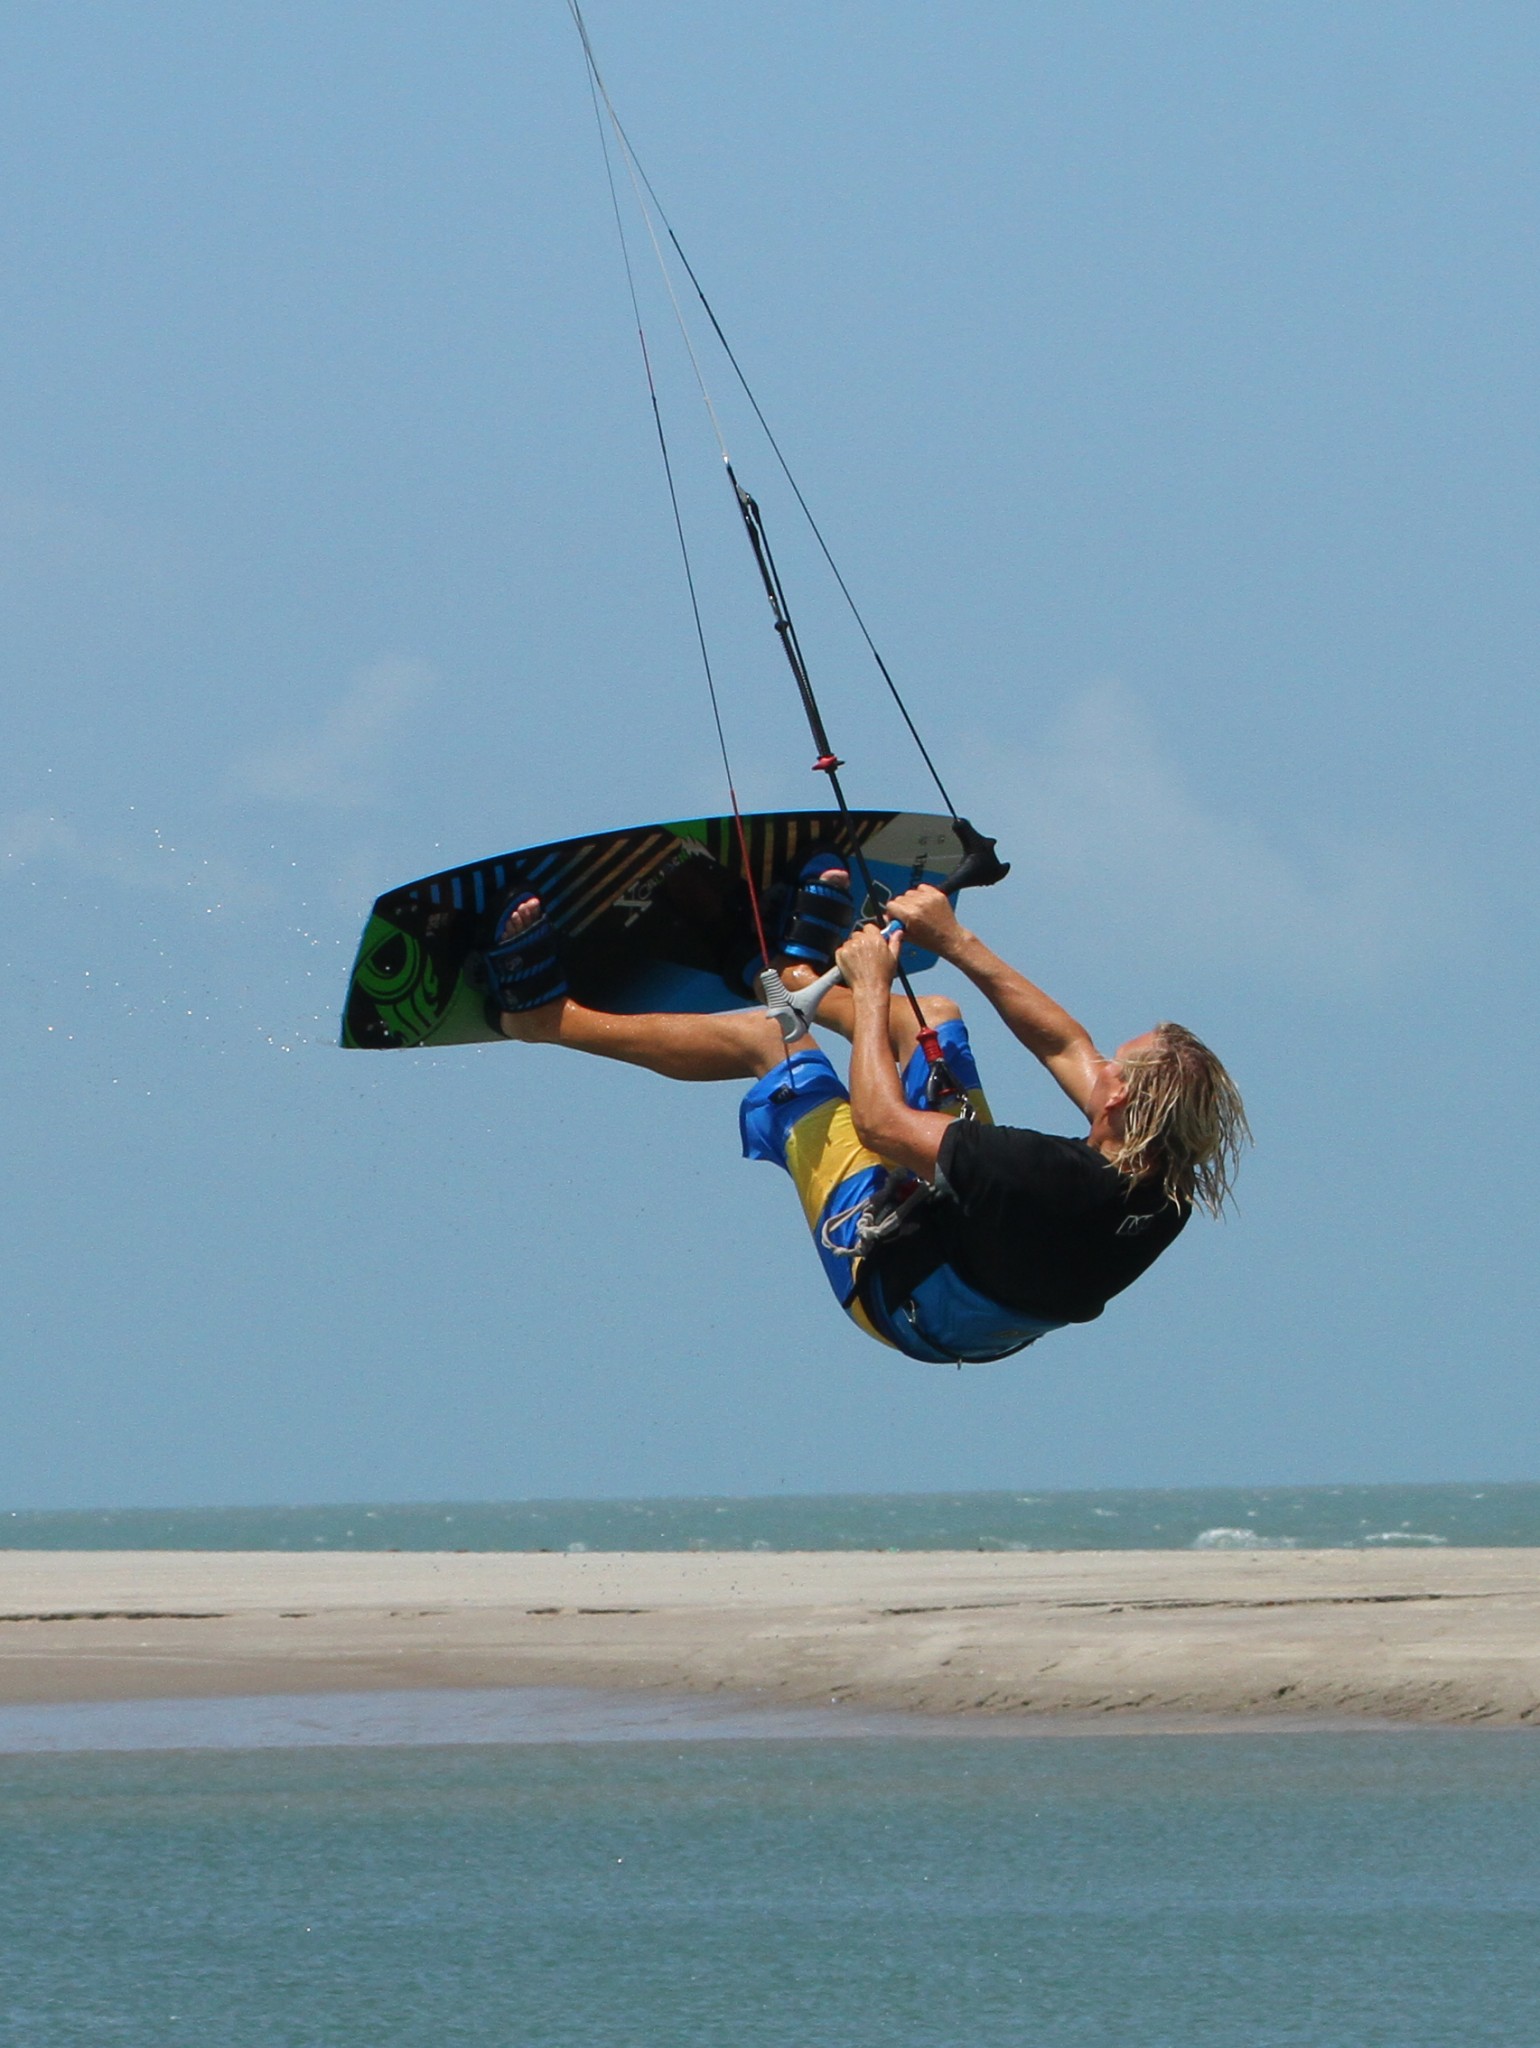
You can see in Pic D. that Christian has lifted his feet above him and has his knees pulled in close. This slightly inverted position will make it much simpler to finish the move, as with your feet high and knees in, your whole body, legs and board will follow your head and shoulders as you turn into the second rotation. It is of course possible to complete the move with the board down low, but you are far more likely to finish with your head and shoulders, but find that the board has been left somewhat behind – which will hinder your smooth landing. You can also see that Christian has started to pull, gently at first, on his left hand (old back hand, new front hand – whichever way you prefer to think). This gentle movement of bar and kite will encourage you to lean back into the second rotation.
Turn and Land
Your second rotation, which is not a full 360˚, will come from a mixture of your head and the kite. With your feet up look around and you’ll continue to turn and the rest will follow. You can see that Christian is focused on where he will land, and as soon as he feels that he is rotating, he dives the kite down hard. The pull from the kite twists him around and powers him up for a down wind landing. Timing here is tricky as you need the pull to complete the rotation, but if you pull too early the kite will end up low with little power and as such you’ll be forced into a late kite loop once you have landed to keep you dry. If you time the dive well, you’ll get the perfect dry landing without needing to loop the kite.


Top Tips
Start with some single BLTs, concentrating on the edge, send, upward take off and keeping the kite above you at 12 o’clock through out the move. Once you’re comfortable, confident and consistent bring your feet up and go for the second rotation whilst keeping the kite at 12. Once this is in the bag you can dive hard to add the perfect 10 landing!
If you’re struggling with the slow rotation, concentrate on the up rather than the spin and approach with less speed and more edge, whilst sending more aggressively - but just for a short moment.
Now have a good look at the Sequence and Videos.
Common Problems
The most common problem here is completing the move but landing with the kite so far at the edge of the window that there is no way to get any power to get moving. There are two probable reasons for this. Firstly you’re drifting the kite up rather than sending, so you feel the lift late and the kite has already travelled too far behind you. Secondly as you take off you’re leaning back onto your back hand, so you don’t stop or even redirect the kite to 12. Concentrate on performing the move with the kite at 12 o’clock and then add the kite dive on at the end.
The other notable problem is not having enough height to land cleanly, so you are completing the double but always landing on an edge across the wind with your bum in the water. This can generally be associated with concentrating too much on the rotation and not launching yourself up into the move. Make an effort to pop up into the rotation, and not just carve around into the wind.


Keystones
- Good solid edge with legs resisting
- Send kite positively
- Pop up into the back roll and centre bar
- Keep Kite at 12 o’clock and lift legs
- Turn head at apex and dive kite to complete number 2
This technique article was in Issue 44 of IKSURFMAG.
Related


By Christian and Karine
Christian and Karine have been working together as a coaching team, running improver to advanced kitesurfing clinics since 2003.
