
Double Back Loop Down Loop Transition
Technique / Intermediate


Introduction
This is a fine transition, and with the down loop pulling you out at the end, you’ll get a lovely surge of power and exit with as much speed as you took into it. Down loop transitions are all about having confidence with the kite, as you need to keep flying it throughout the move, so this will be your focus. In this one you’ll also be aiming for more of a double back to toe side so that you’re ready for a down-wind landing on your new front foot. So in preparation we’d recommend that you’re happy with at least a back loop to toe side and definitely comfortable with your down loops.
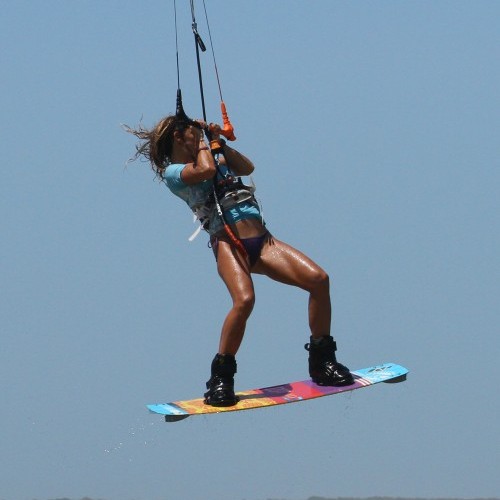
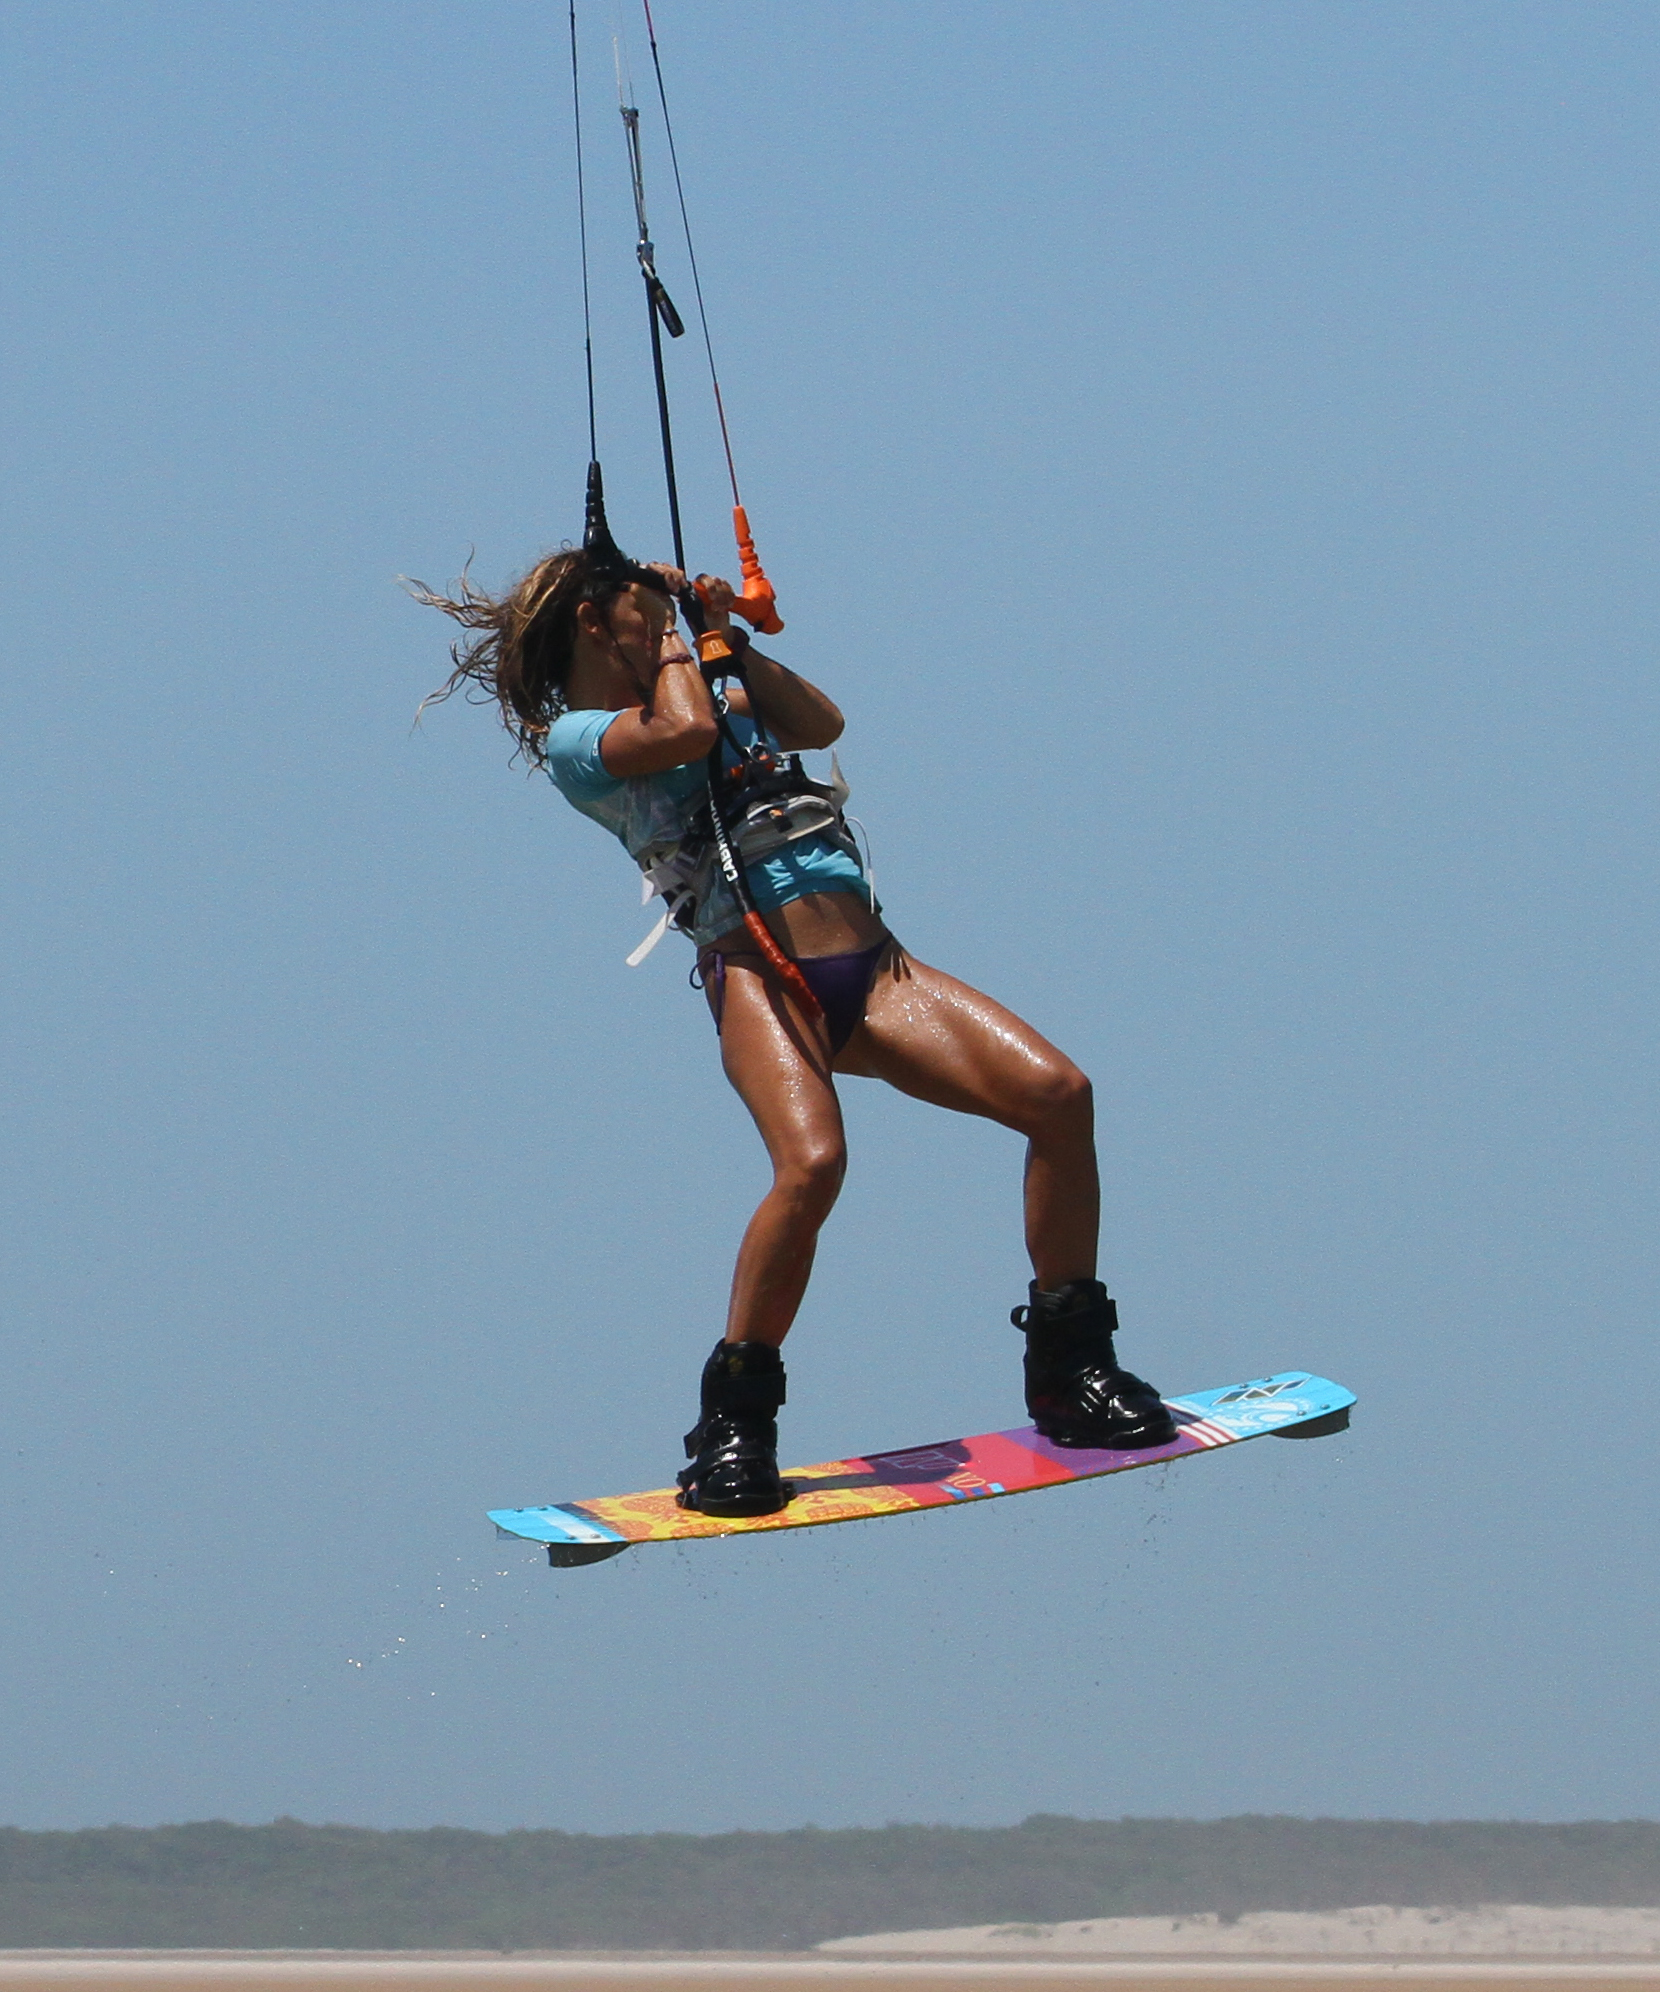
Take Off Pic A
As with most moves your take off will dictate what happens next and has a heavy impact on the success, or lack of – so let us get a good understanding of what is happening, and why. You will need enough height to complete a double back rotation. You’ll need enough rotation to complete the double. And you’ll need enough control to both have the kite in the right place and bring the back foot through to toe side at the end.


First off,you’ll need to come in on a good edge with some speed and send the kite positively to get enough height whilst maintaining forward momentum. Don’t kill your speed as for a standard transition as you need some momentum to carry you forward into the down loop.
Next you need to get a bit more spin to guarantee you get into the 2nd rotation. However, this part is a compromise as you don’t want to wildly throw yourself into the back rolls because you need control at the end for the toe side landing. To get enough spin you will carve into the rotation hard with the edge of your board and you can lean back slightly to use the boards tail to push you round – this will spin you quicker. However, you must still keep your head perpendicular to your shoulders, if you throw your head around over your front shoulder you wont have the control, you’re more likely to lose your edge and you won’t be able to use your head for the 2nd rotation.
You can see that Karine has a strong edge and has carved hard upwind on take off to generate the rotation, whilst her head keeps looking forwards through her shoulders.
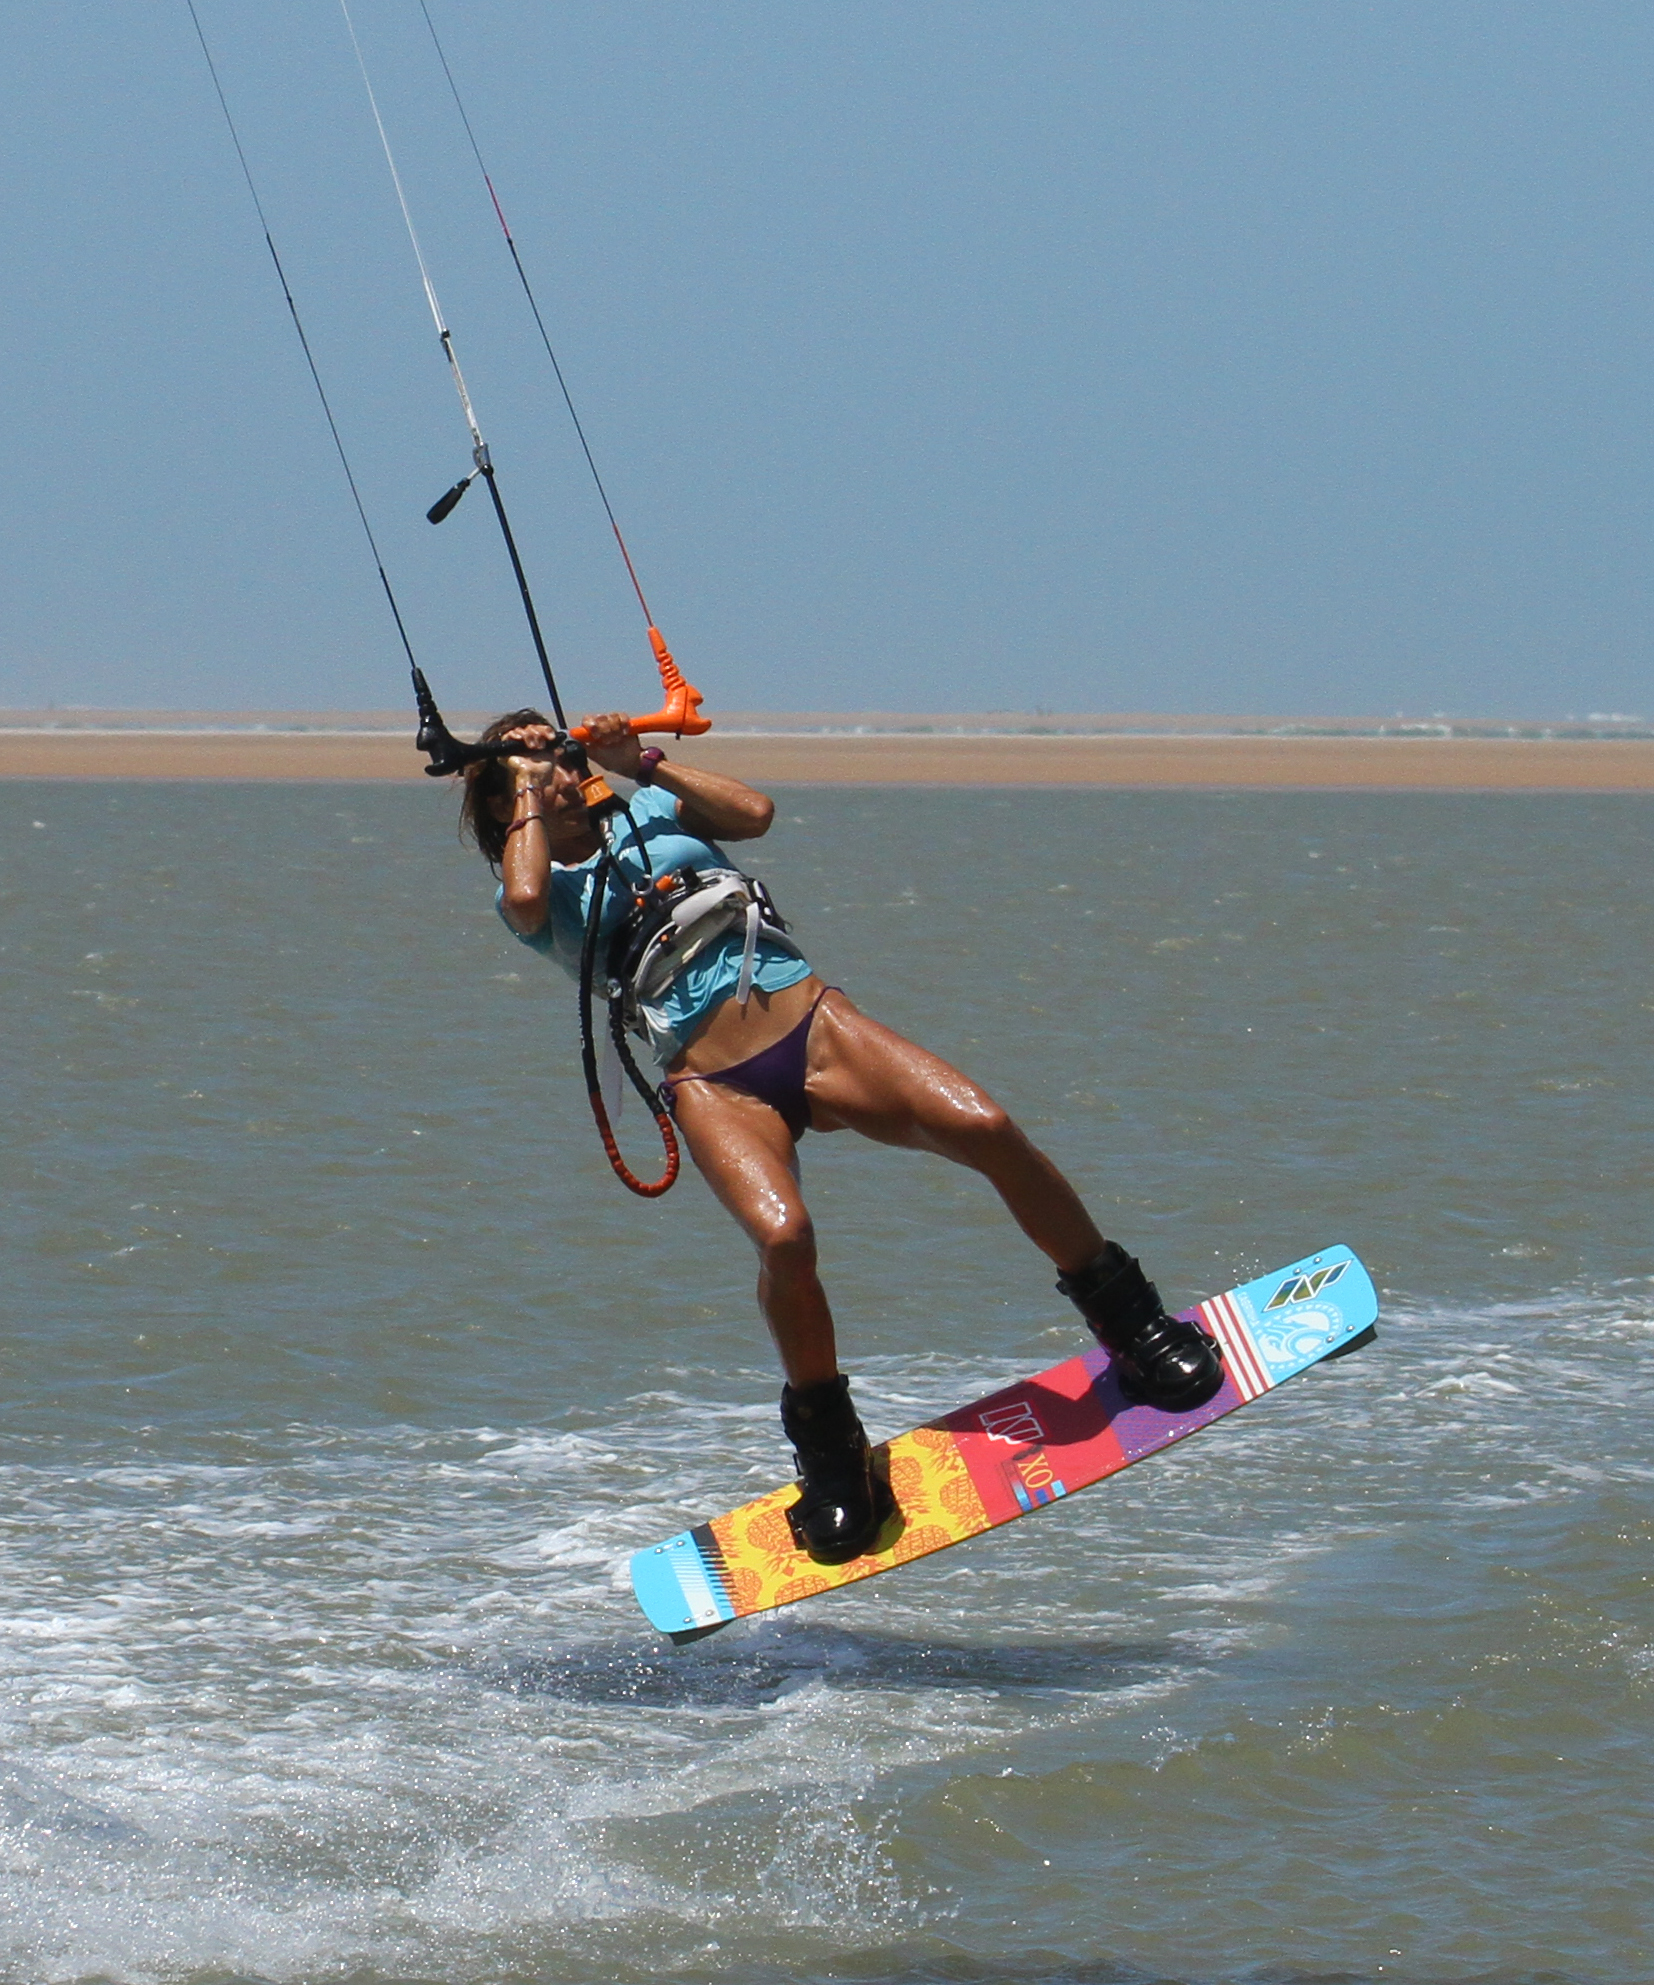
Kite and Chill Pic B
Immediately after take off your job is to get the kite back where you want it for the most float, and keep tension in the lines so that the kite is ready for action when you next need it. Here Karine is pulling on her front (left) hand to stop the kite sending any further back and bring it forwards towards 12 o’clock. Notice that her head is still looking forwards, she’s not looking over her shoulder and is content with her rotation so far. In theory she’s only just taken off and has already nearly done 180.
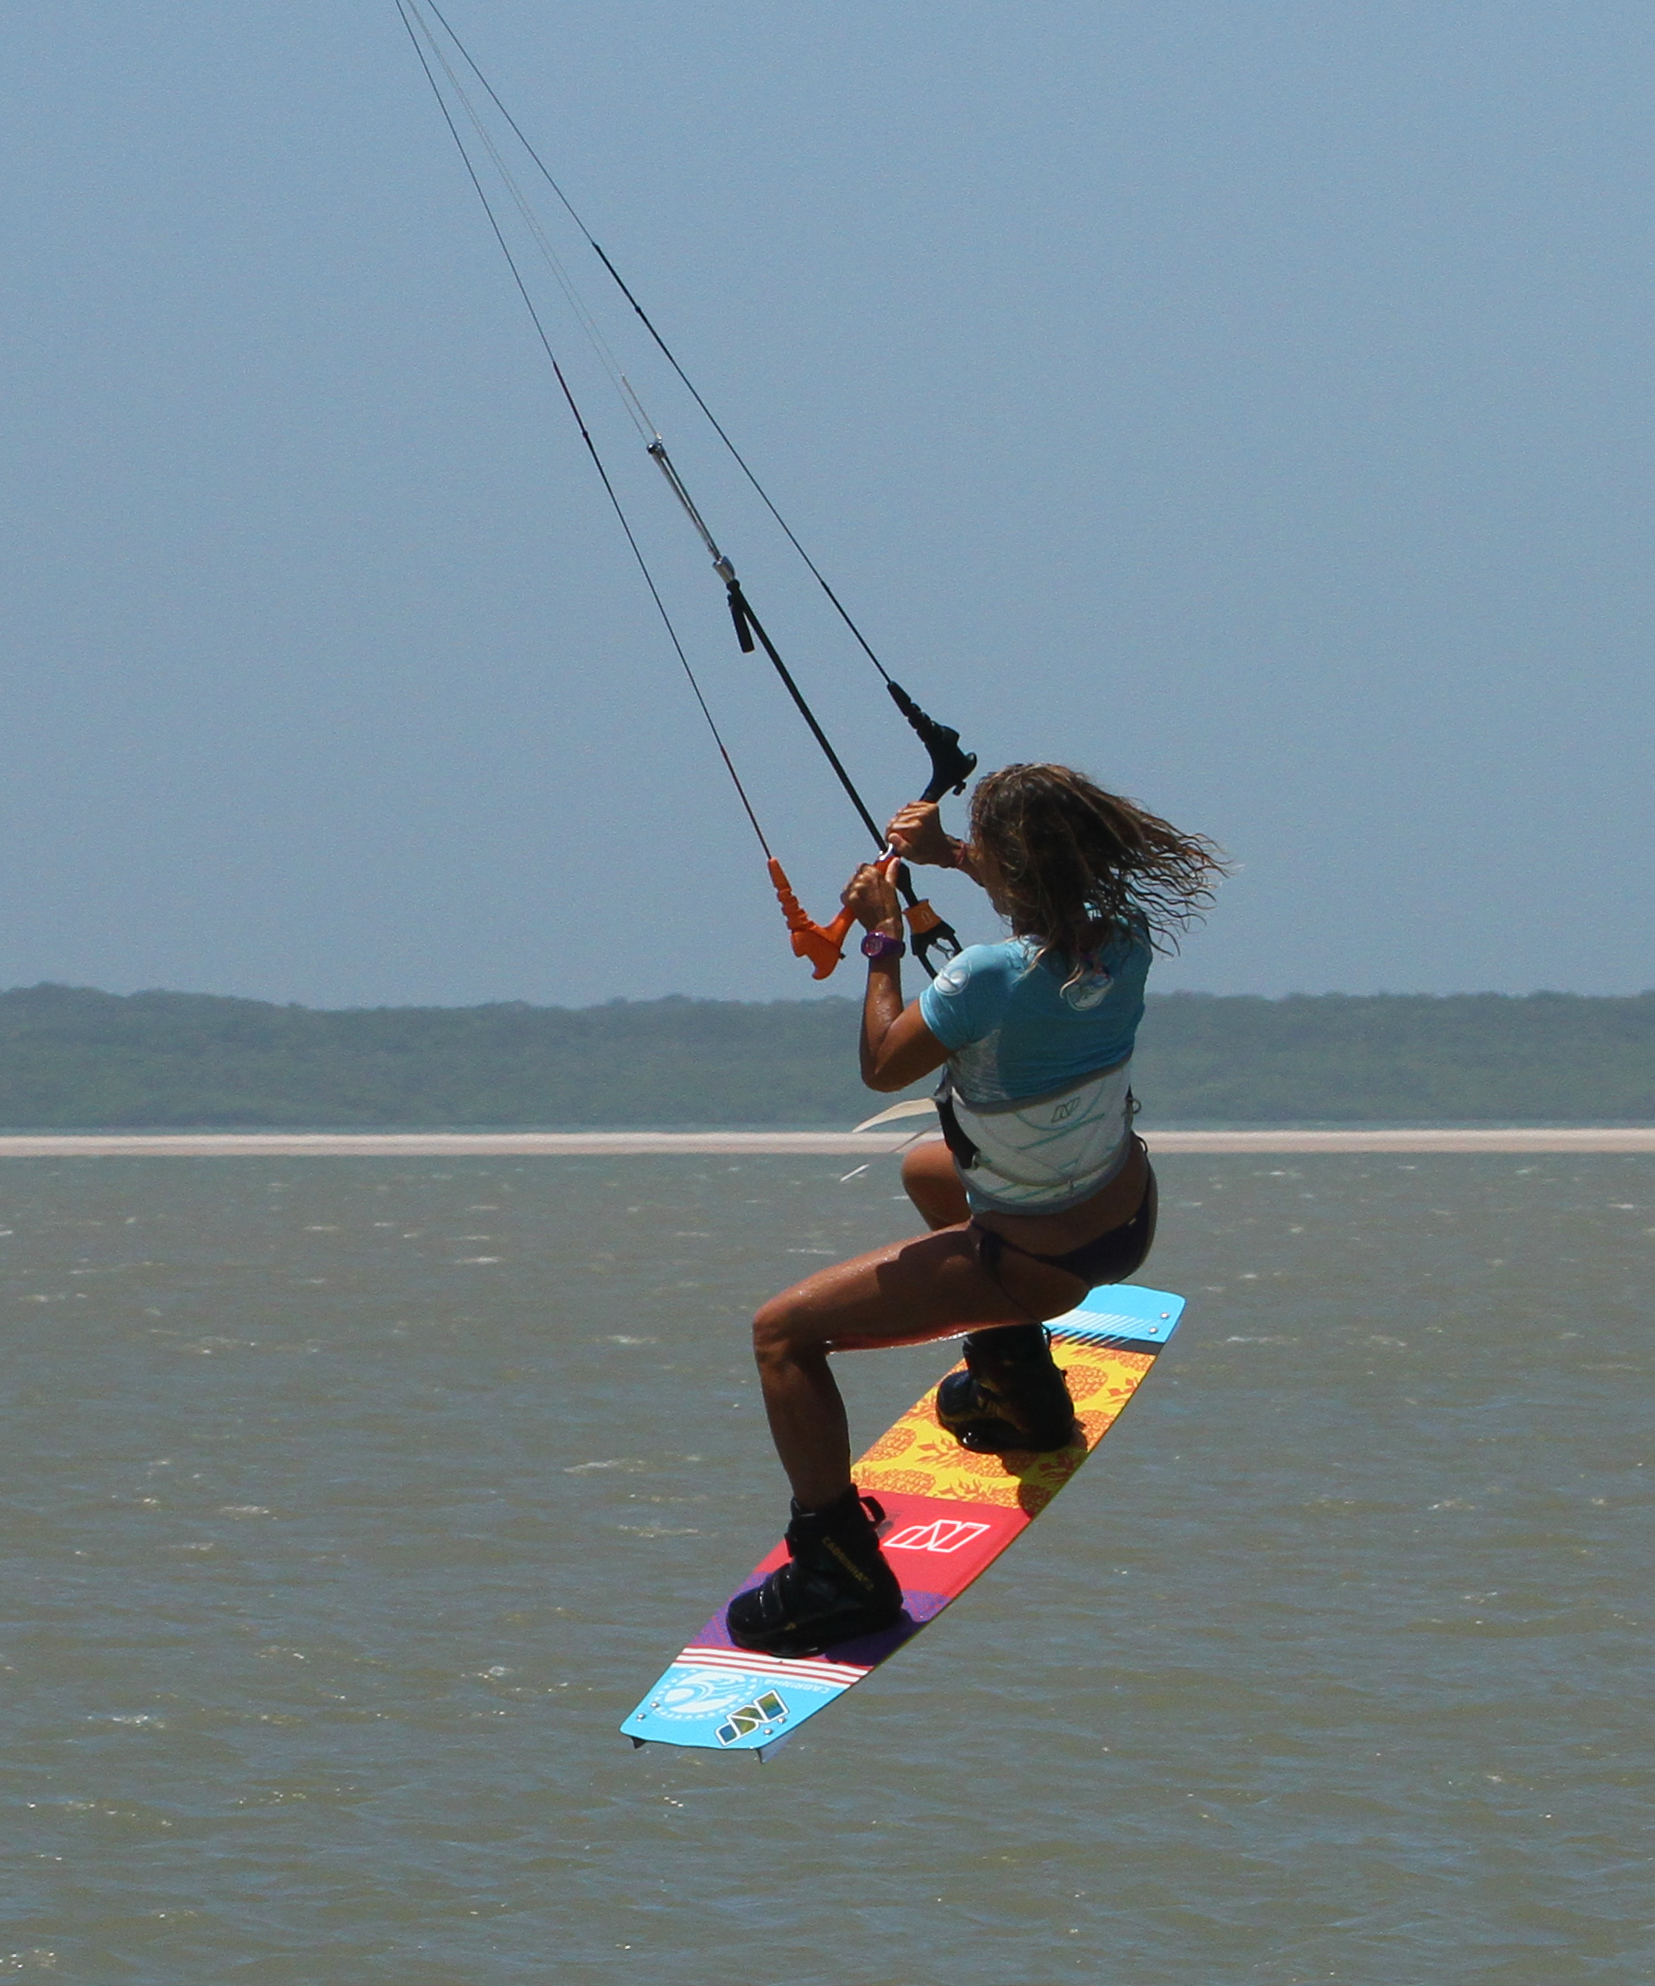
Round 1 Complete Pic C
With the kite moving forwards towards 12 o’clock you should be lifting all the way around your first rotation. Your aim is to get number 1 out of the way on the way up as this way you will still feel where the kite is. Once you start to drop you won’t have the same feedback on the bar so it will be more difficult to time the down-loop correctly. Karine has finished her first rotation here, her bar is still in and her head is still looking forwards.


Head and Kite Pic D
To get the 2nd rotation happening with enough urgency you now need to use your head. Karine is now looking over her shoulder, encouraging the rotation and also giving herself a view of what is to come and where she is. Knowing where she is gives her the cue to move the kite further forward. This has two benefits: firstly, she’ll be rewarded with a bit more lift as the kite goes over and past 12; secondly, to down-loop the kite effectively with balance and resulting in a pull that leads to a downwind landing the kite needs to be moving progressively forwards before you pull the trigger. So as Karine comes around half way into her 2nd rotation she wants the kite to be on it’s way from 12 o’clock towards 11 o’clock.
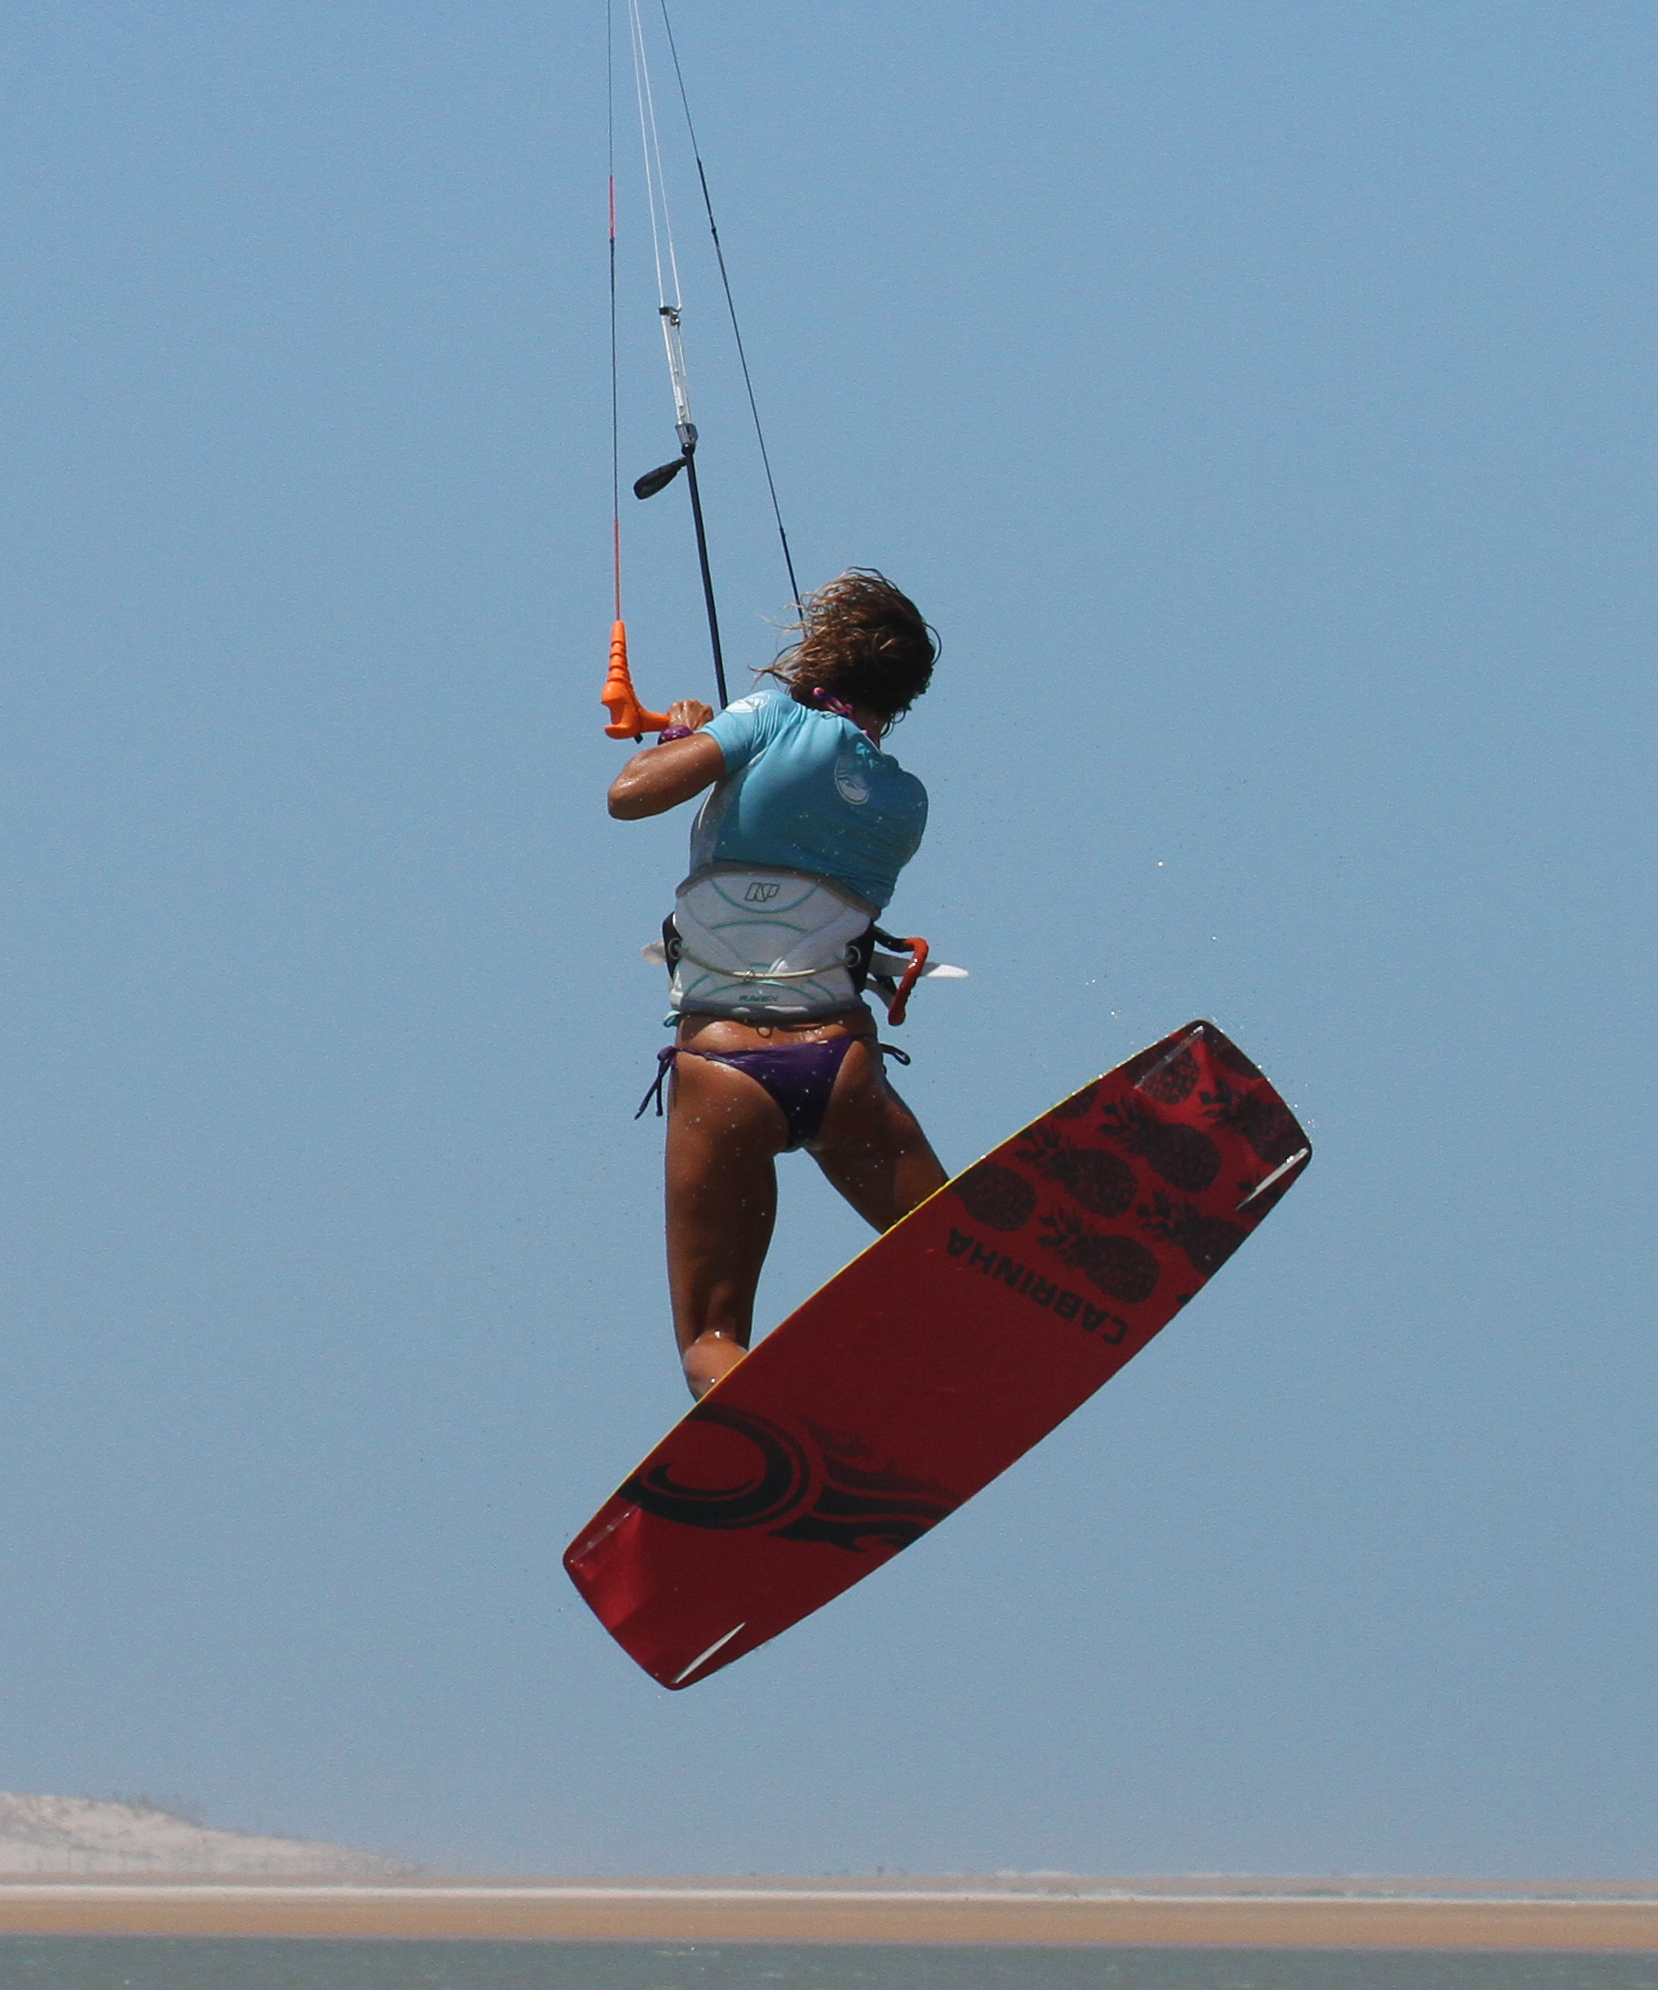
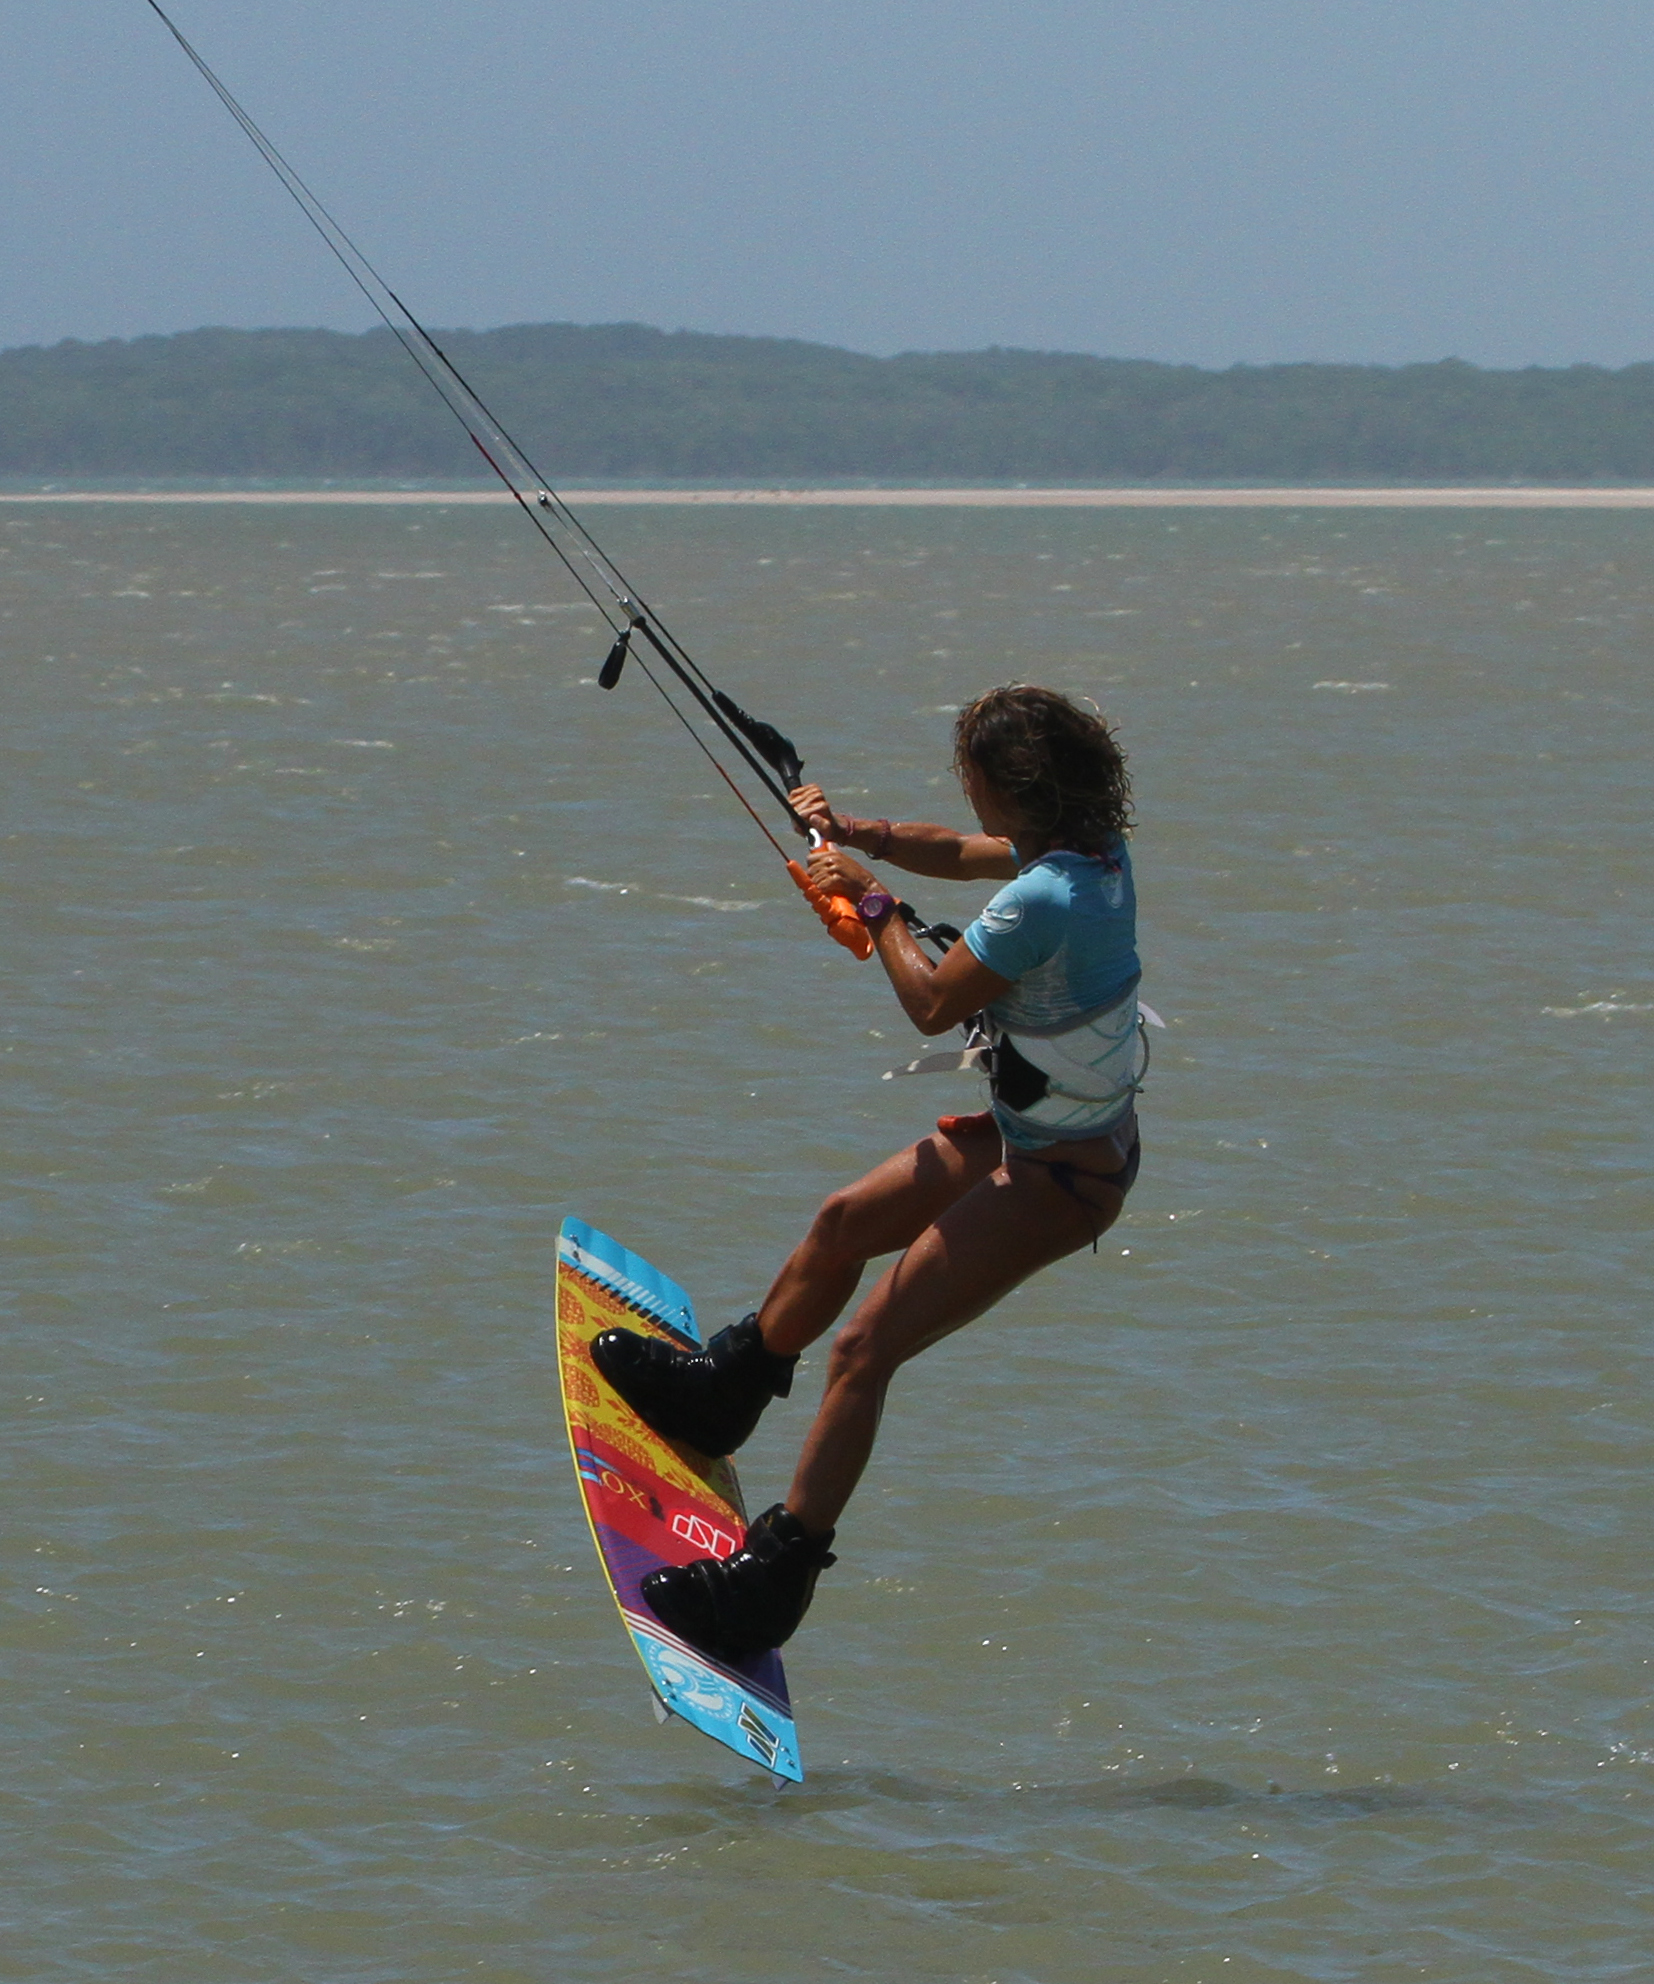
Spot and Loop Pic E
Once Karine can see where she’s going and has a view of her landing spot it’s time to pull the trigger and get the kite looping from it’s new position near 11. As the kite is already on its way forwards Karine just increases the pull on her front hand and can assist further by pushing away with her back hand. This will get the kite turning more aggressively. It’s worth pondering where the kite should be turning. It wants to be on it’s way from 12 to 11, then scooping under so that it lifts towards half twelve or 1. You don’t want it helicopter looping straight down from 12 and back up, or even then to 1 as you’ll have no power to pull you out of the move. This is also the time to set up for your toe side landing, and it works well with the pull from the kite. As the kite dives the pull will be from more downwind as opposed to the edge of the window, which should make it easier to lean upwind and lift your back knee up ready to bring the leg through.
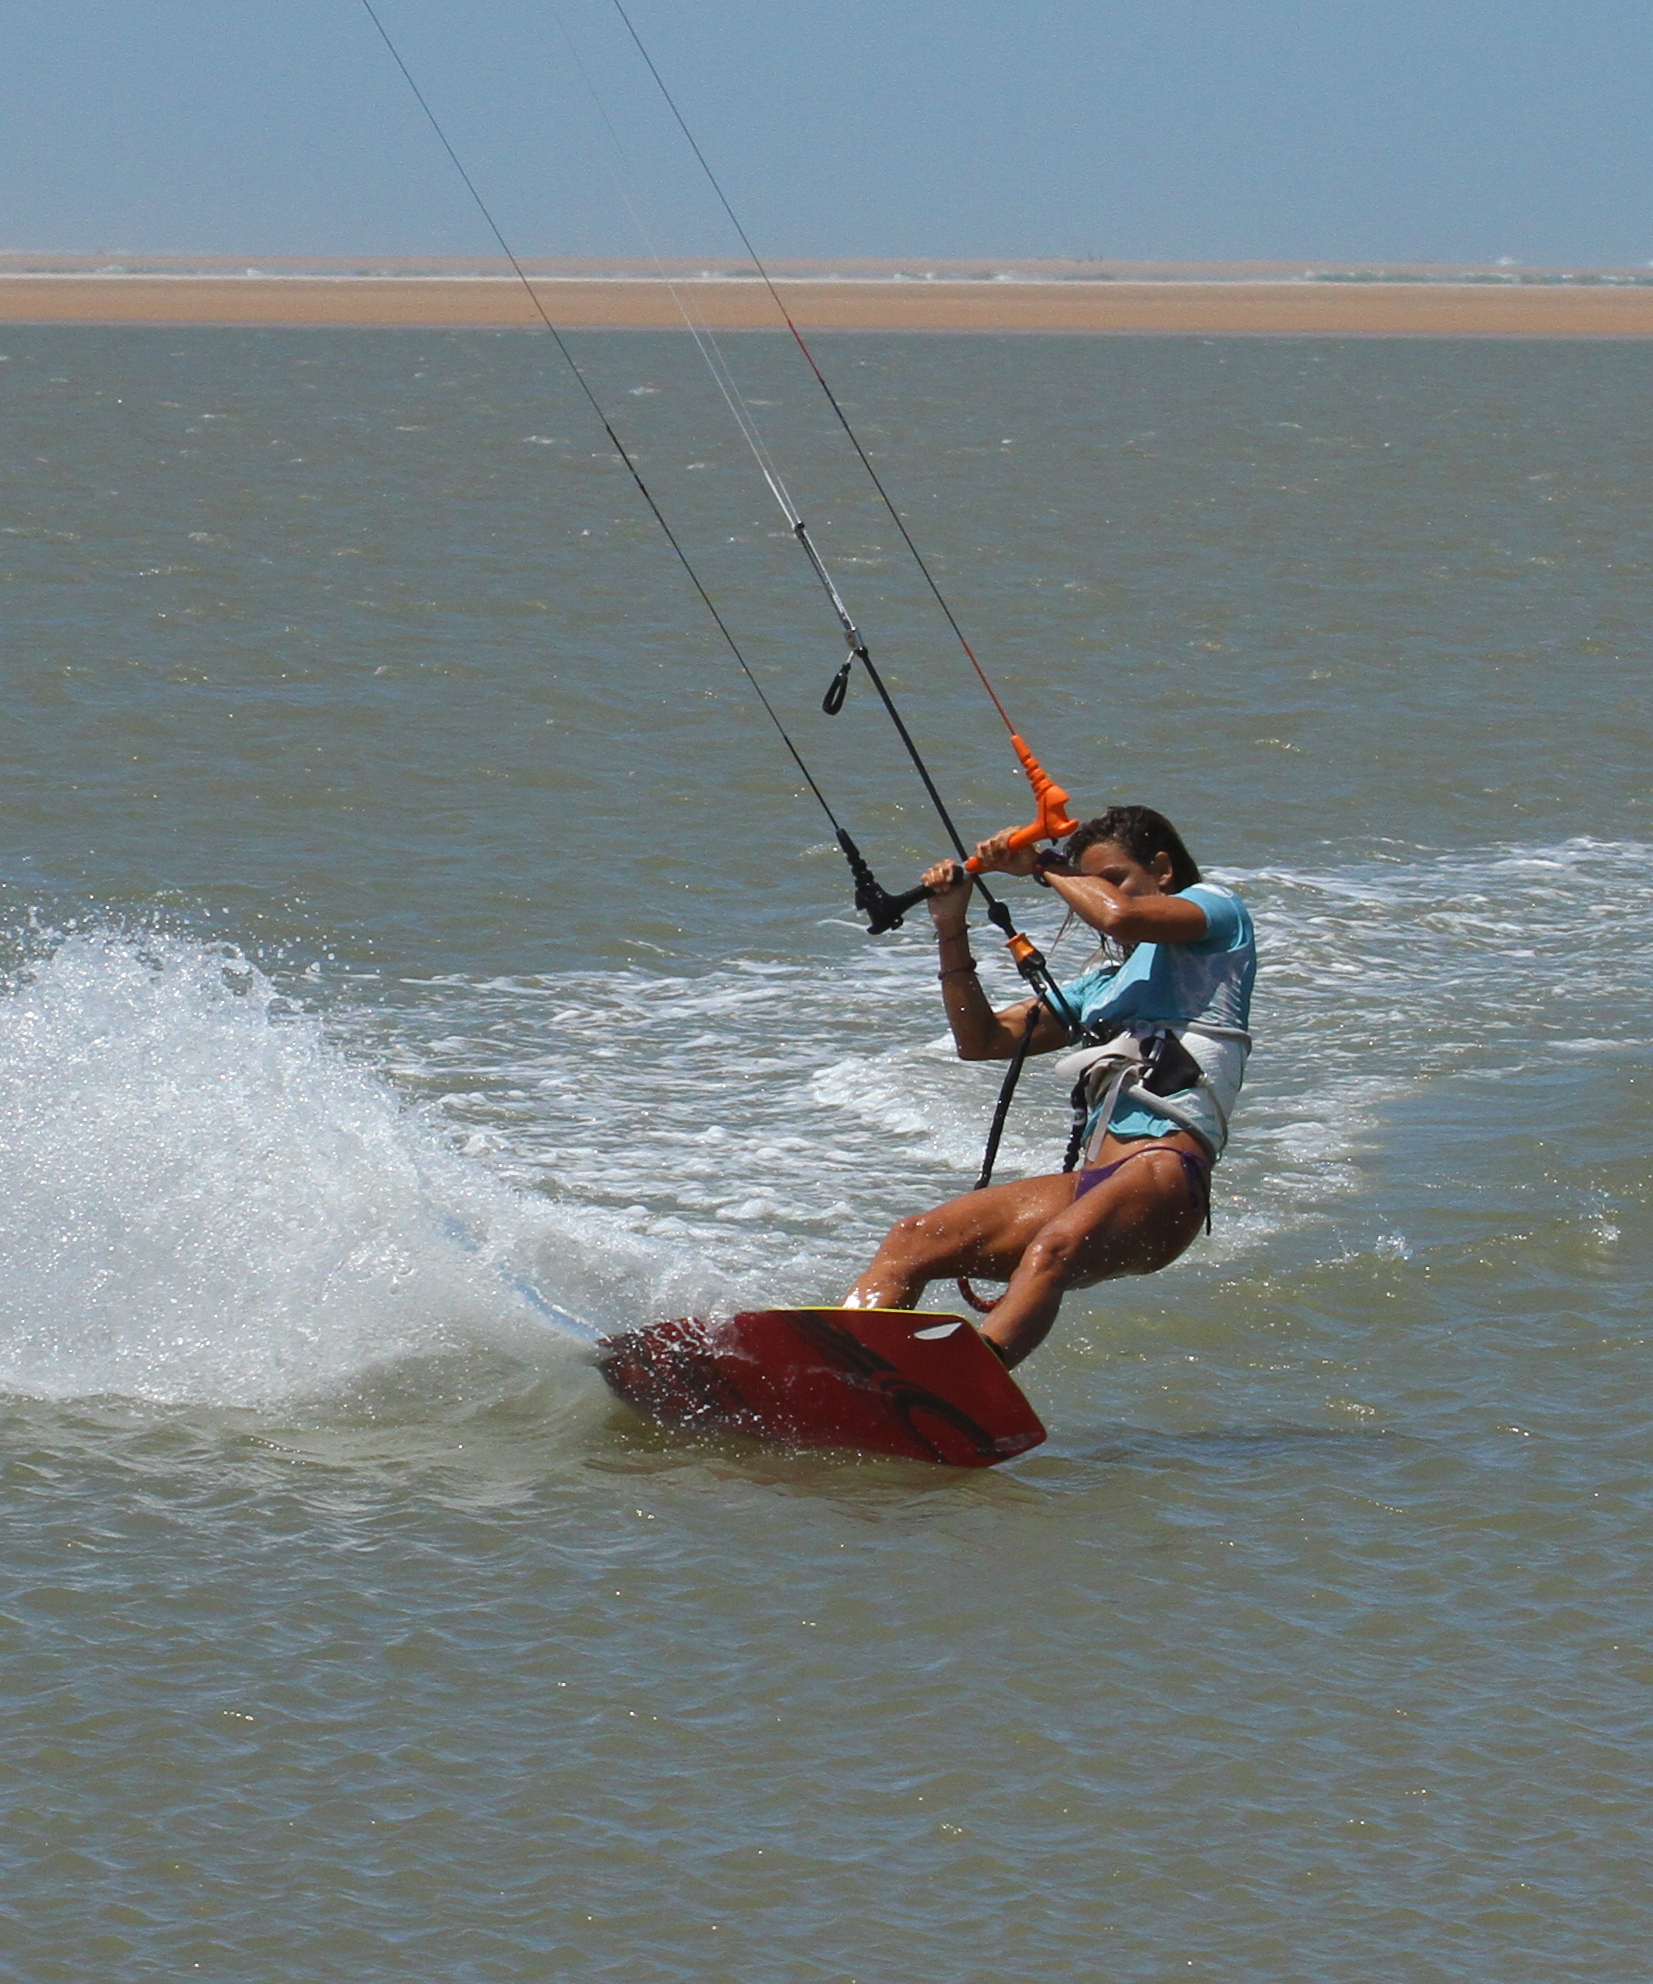
The Landing Pic F
A sum of all the previous parts. With the kite pulling and her back knee high, Karine keeps the kite turning and allows herself to be pulled downwind whilst she brings the back leg through to land right foot forward. It’s worth keeping both hands on the bar as if you let go with your non pulling hand it will encourage the other foot to come forwards for landing and you’ll also most likely let the bar out, which will slow the kite, make it flutter or crash it into the drink. Once Karine has landed she’ll fly the kite up and forwards whilst carving back upwind.
Top Tips
Down loops are by their nature less aggressive than kite loops as you’re travelling with the kite as opposed to sending the kite back in the opposite direction as per kite loop. For this reason you want some power from them, but to harness it you do need to be moving forwards. Hence a down loop should be considered a continuation of your landing dive rather than an extreme pull on the bar from 12 o’clock. As a warm up try a few aerial , the loop transitions, and if you’re dropping down flat, fly the kite further forward before looping it.
Now to see distance travelled and timing in real, have a look at the video, and check out the sequence for all the parts frozen to see.

Common Problems
As above chances are if you come out with no power you need to fly your kite forward before down loop time. If you’re trying to down loop it from 12 or behind, you’ll get nothing out of it.
Other than that it’s possible that you’ll land toe side and then carve out with an underturn rather than a down loop in the air. This is actually a good way to start, so just build on going earlier with the kite.
If you over rotate so that you get pulled over downwind of the board, it means that you’re spinning too much and as a result have probably let the bar out. Keep the bar in and keep your head looking forward, slow rotation on the way up, slow on the way down. The toe side is a last minute add on.
Keystones
- Good send and edge for double back rotation.
- Move head and kite quickly back towards 12 o’clock.
- Use head for 2nd rotation and spotting landing.
- Move kite forwards during 2nd rotation.
- Down loop the kite progressively as you lift the back leg through.
This technique article was in Issue 56 of IKSURFMAG.
Related


By Christian and Karine
Christian and Karine have been working together as a coaching team, running improver to advanced kitesurfing clinics since 2003.
