
Can Can Air Gybe
Technique / Intermediate


Introduction
Way Back in Issue 60 we introduced you to a life of high kicks and frilly knickers. We’re heading back to the ways of the Moulin Rouge, and although we can’t claim that this trick will be as visually stunning as the film, it’ll undoubtedly be pleasant on the eye and a giggle to perform whilst humming Orpheus in the Underworld. What’s more, if you’re able to grab an air gybe, you’re more than welcome and ready to give this one a shot. So what’s involved?
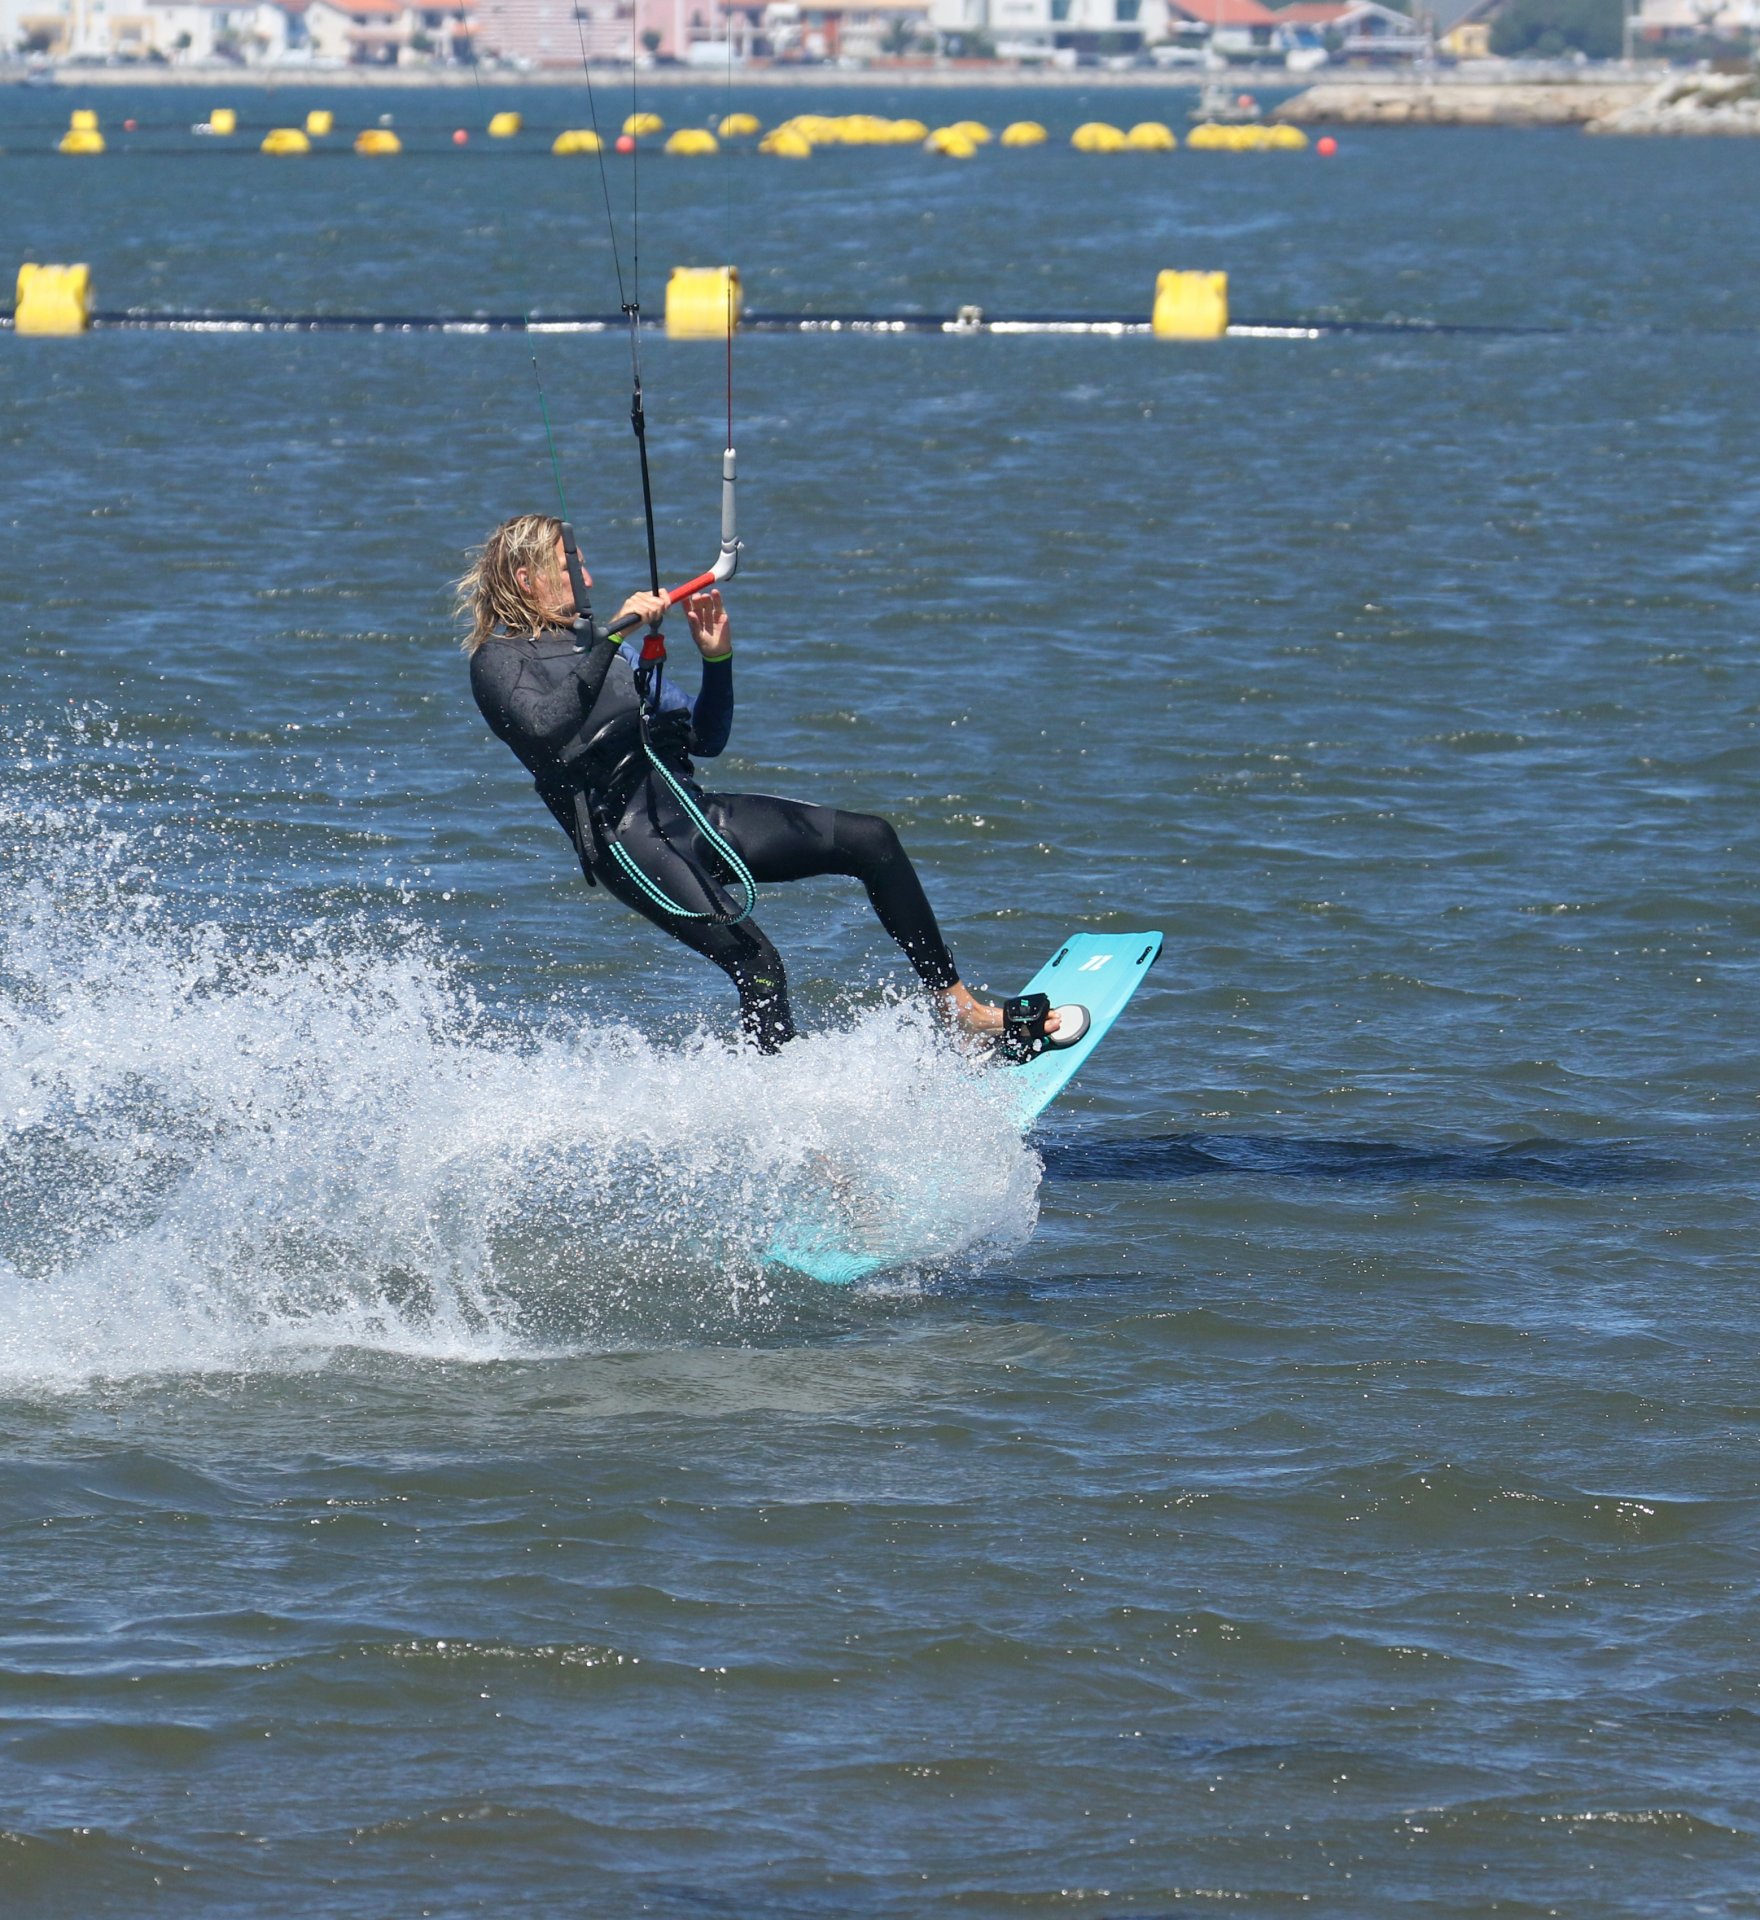
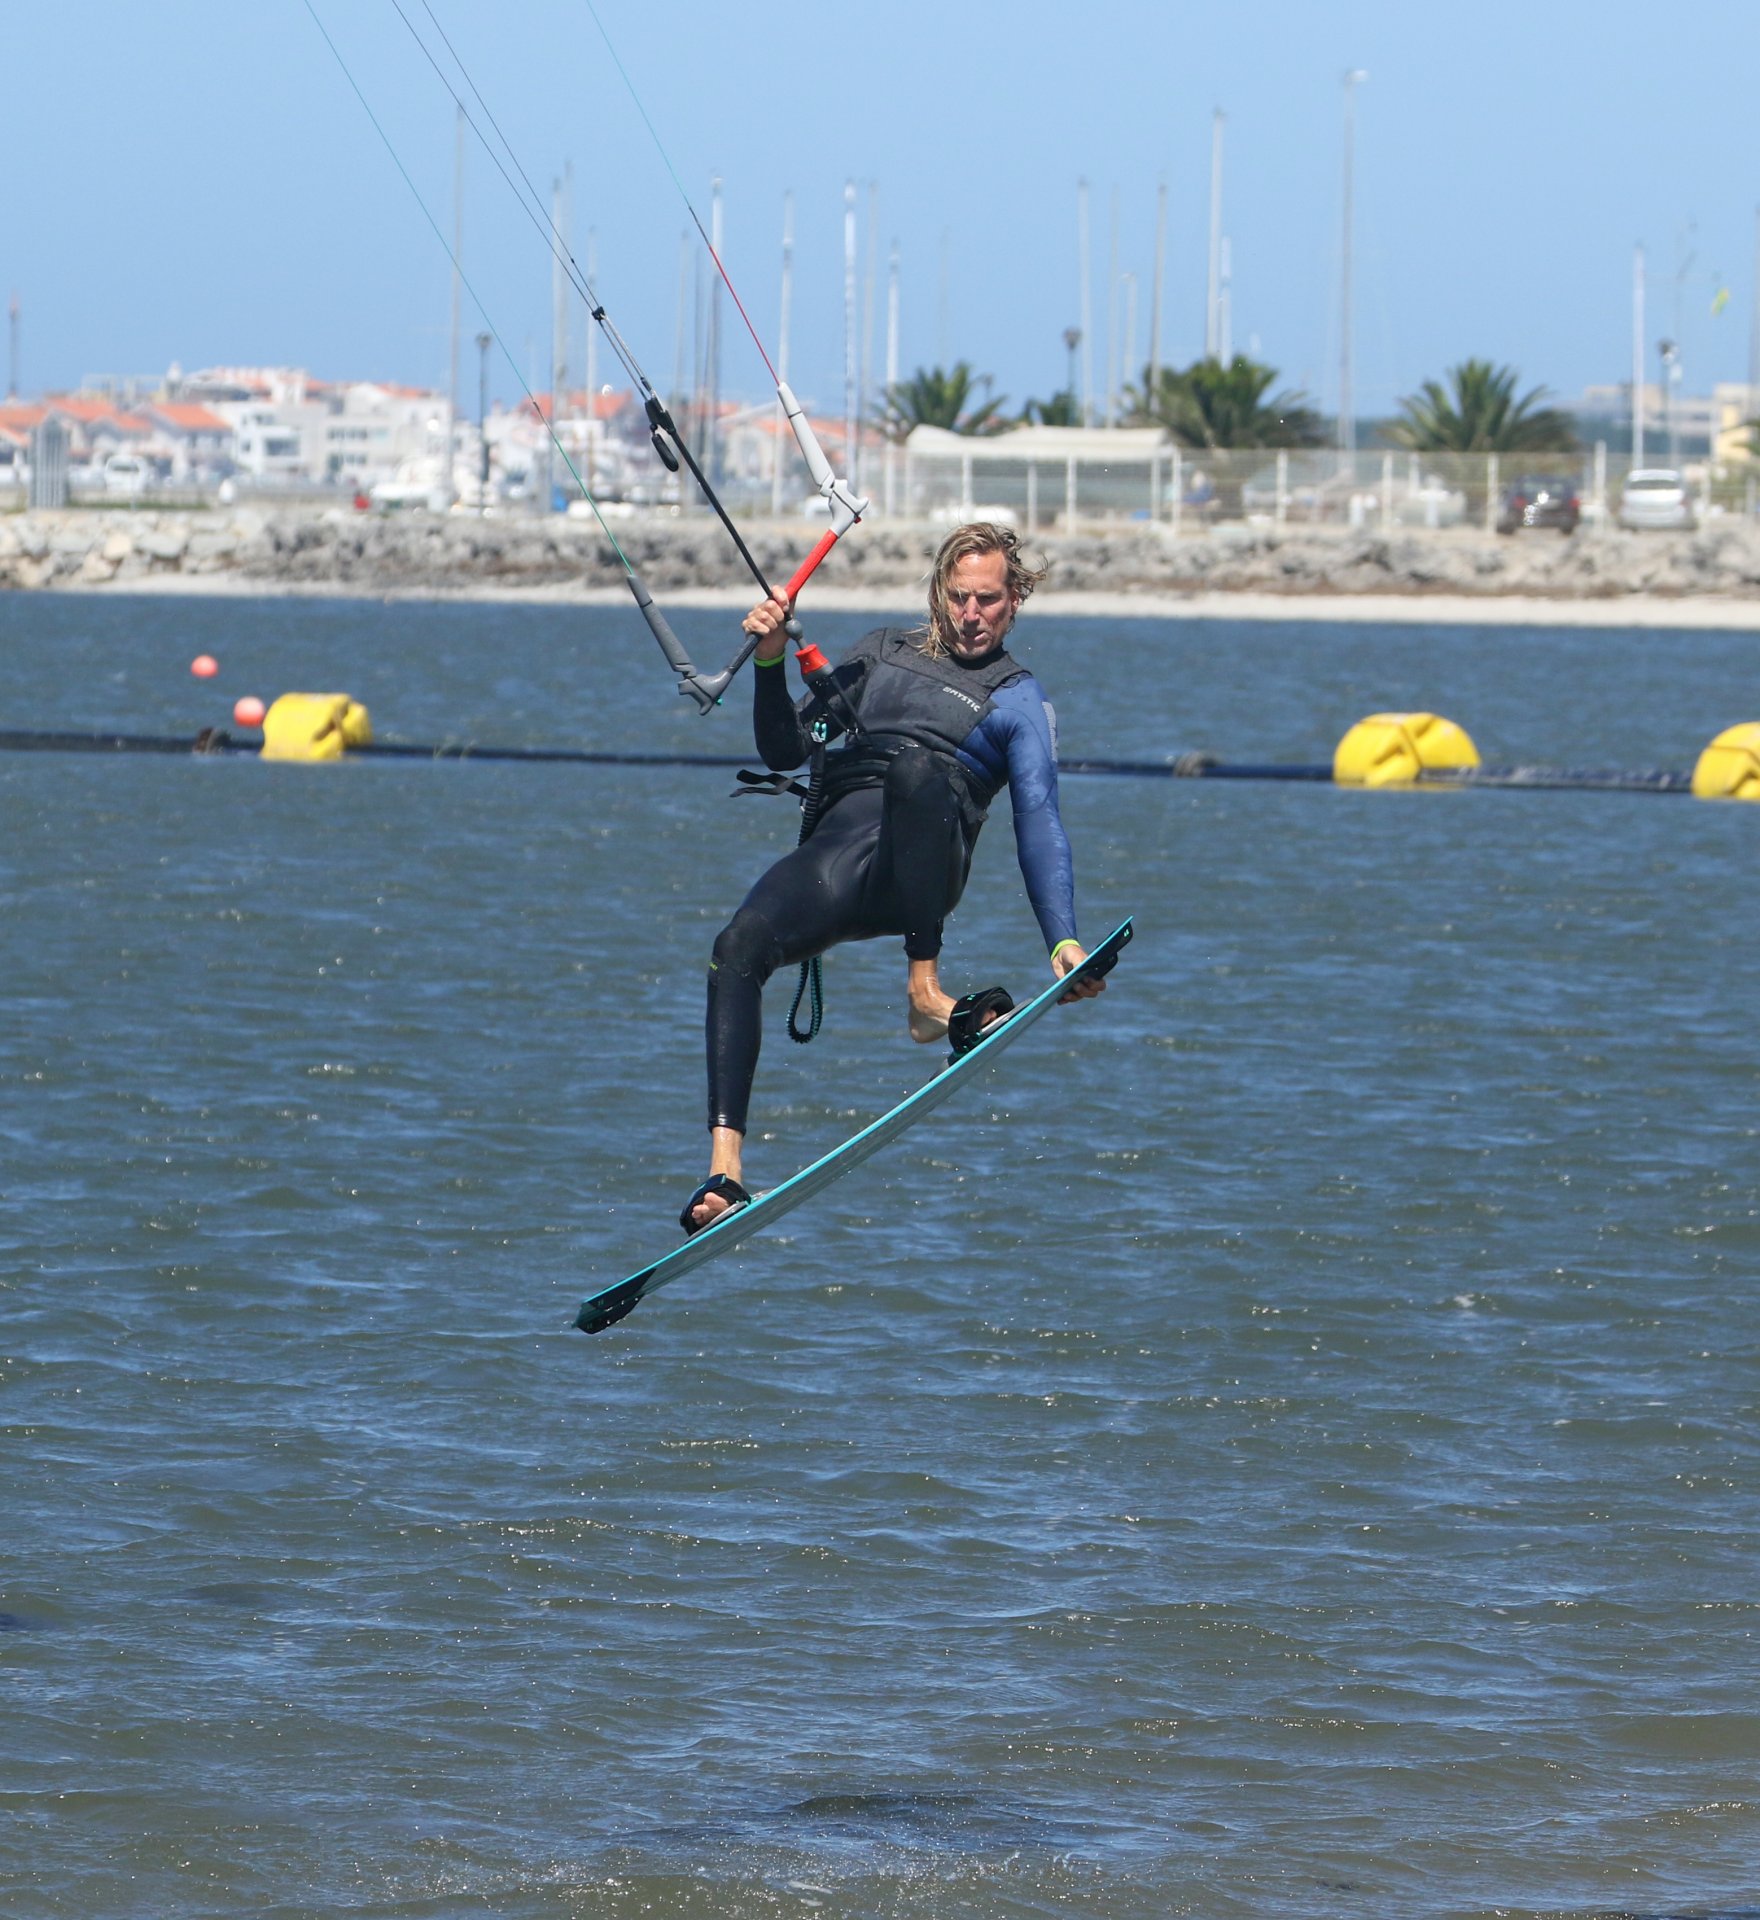
Set Up Pic A.
Being an air gybe, you should be pretty familiar with the approach. However, unless you have ninja skills, you will appreciate a bit of extra time and float to get the necessaries done and dusted. This will require a bit of speed and plenty of edge. Added to that, a decent send is paramount to float, but as it’s a transition, the kite mustn’t move too far back. Hence, you’ll want to start it around 11 or 1 o’clock and give it a good sharp but short send. In the pic you can see that Christian is approaching with some speed, his backhand centred on the bar, a solid edge with his weight low and front shoulder down, and he’s given the kite a decent send from 11.


Brakes on Pic B.
To get the float and time you need to convert your speed into tension to give you the classic elevator lift, lots of up with not much travel. To achieve this, you need to time the kite with a very sudden and aggressive increase in edge, so that as the kite reaches 12 o’clock, you are effectively slamming on the brakes and dropping your weight further upwind and lower against the rising kite to get maximum tension on the lines. Christian is edging with all his might, digging the edge in by resisting with his legs, and he’s dropped his derriere right down on the water to counter the lifting kite. You can feather the bar too so that the kite doesn’t pull from downwind. And last but not least, the kite only has to get to here, 12 o’clock, so stop it in its tracks by levelling the bar. This will make the rest of the move considerably easier.
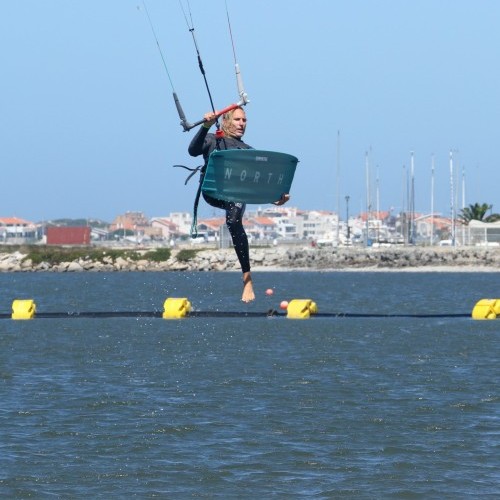
The Kick Pic C.
Once again just as per an air gybe, pre-empting your take off with a good solid stamp against your edge will give you many advantages. By going early, you can get up before the kite moves past 12, which will give you more float and with the kite above you less to worry about. The kick itself will give you some extra height and time. And if you get the kick against the edge, it will also help you to get more up and less drift. There’s still a lot of work to do post take off so as soon as you’ve kicked you should be moving towards the grab, which means releasing your front hand and bringing your front knee up. Looking at Christian, you can see that his kite has stopped at 12 o’clock, he’s stamped against his back heel, extending his rear leg. His bar is in, and he’s already released his front hand whilst his front knee is lifting, bringing the board up towards his hand.
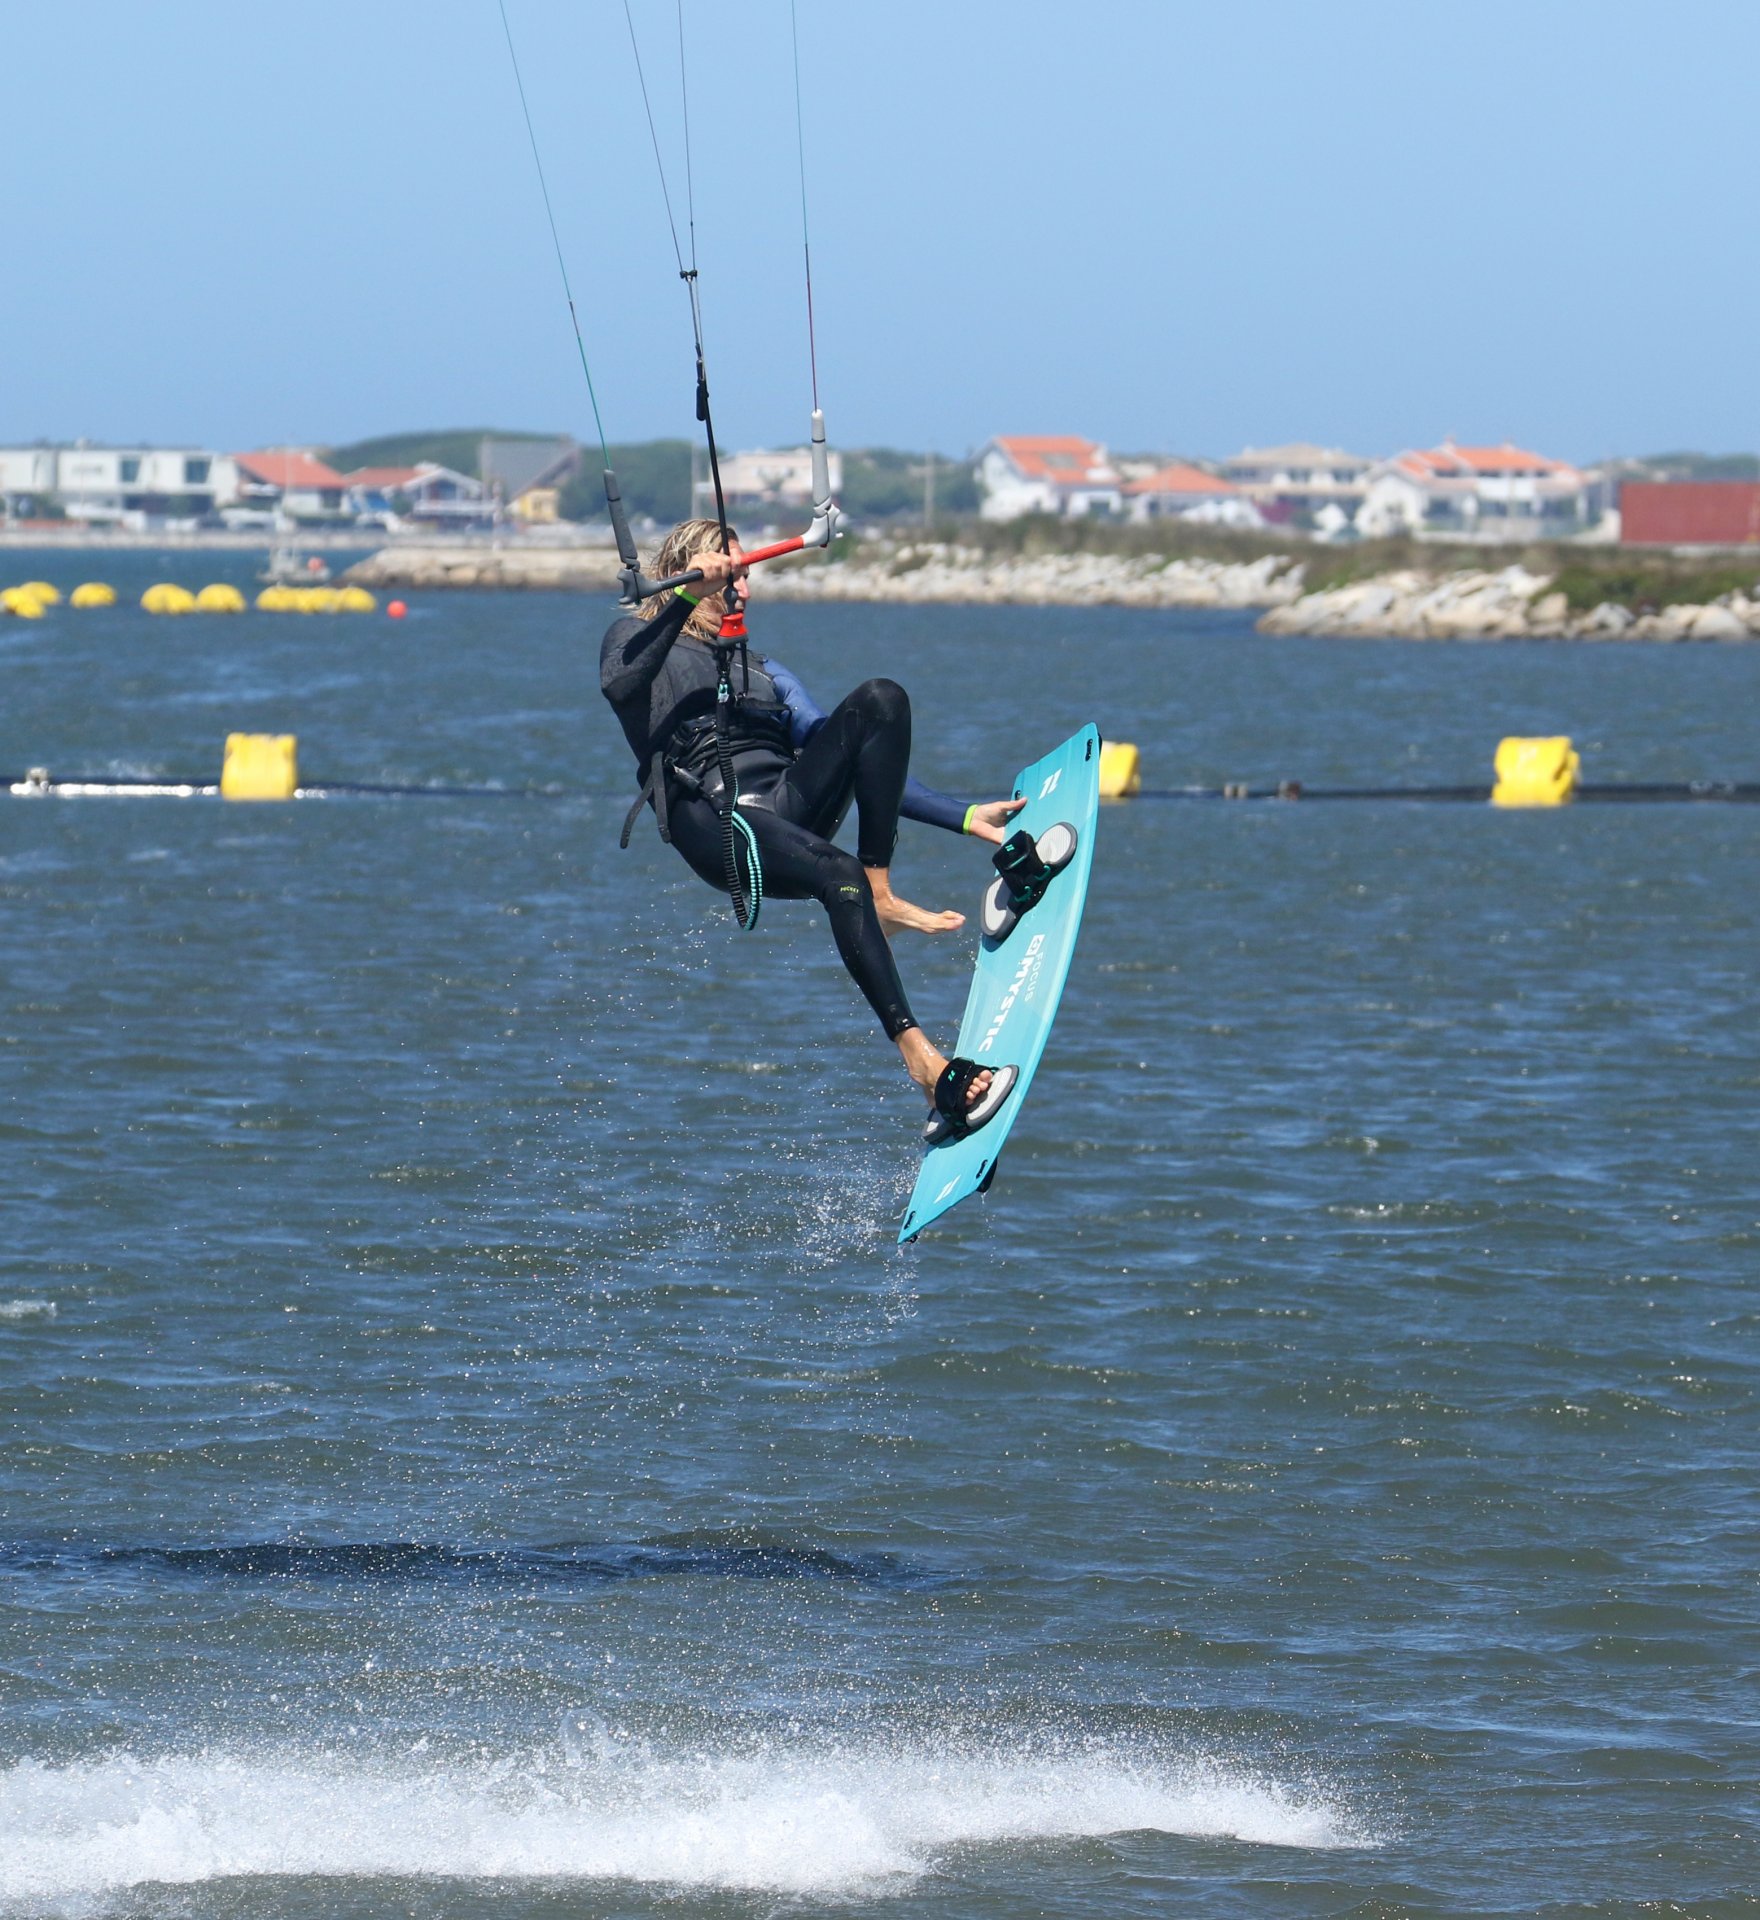
Grab & Go Pic D.
You’re aiming to grab the heelside of the board somewhere near the front fin. Once you got the grab, hold tight and pull your front foot out with your knee-high. It’s quite instinctive to push your foot down towards the water, but the Can Can is all about the high kicks. With your knee up it should be easy to lift your foot over the board. Keeping your back leg extended will give you more room. Here Christian lifts his foot clear of the strap and keeps it high so that he has room to move it up and over. His bar is in, and his kite is high. Game on.
Show Some Leg Pic E.
Here we go! With your foot over the board, you can now kick your leg straight out in front of you. Make it count by extending the leg as much as you can, aiming to get your foot high. Paris will be proud. However, there’s no time to dilly dally as you’ve still got a down and then another high kick. Once you’ve got your foot up as Christian has managed here, pull it back over so that it’s behind the board. Keeping the arm that is holding the board straight and your back leg straight will afford you the most space. Concentrate on keeping the bar in so that you don’t drop yourself down, you’re not finished yet.
Leg Down Pic F.
Time to get some rhythm going. As you pull your leg back over the board push your foot down towards the water, extending the leg as much as possible as you would for a one-footer. You can see that all the while Christian has his bar in. Christian is still looking forwards, the way he was on take-off. This is vital, if you turn and look the other way too early, you’ll inadvertently drift your kite back.


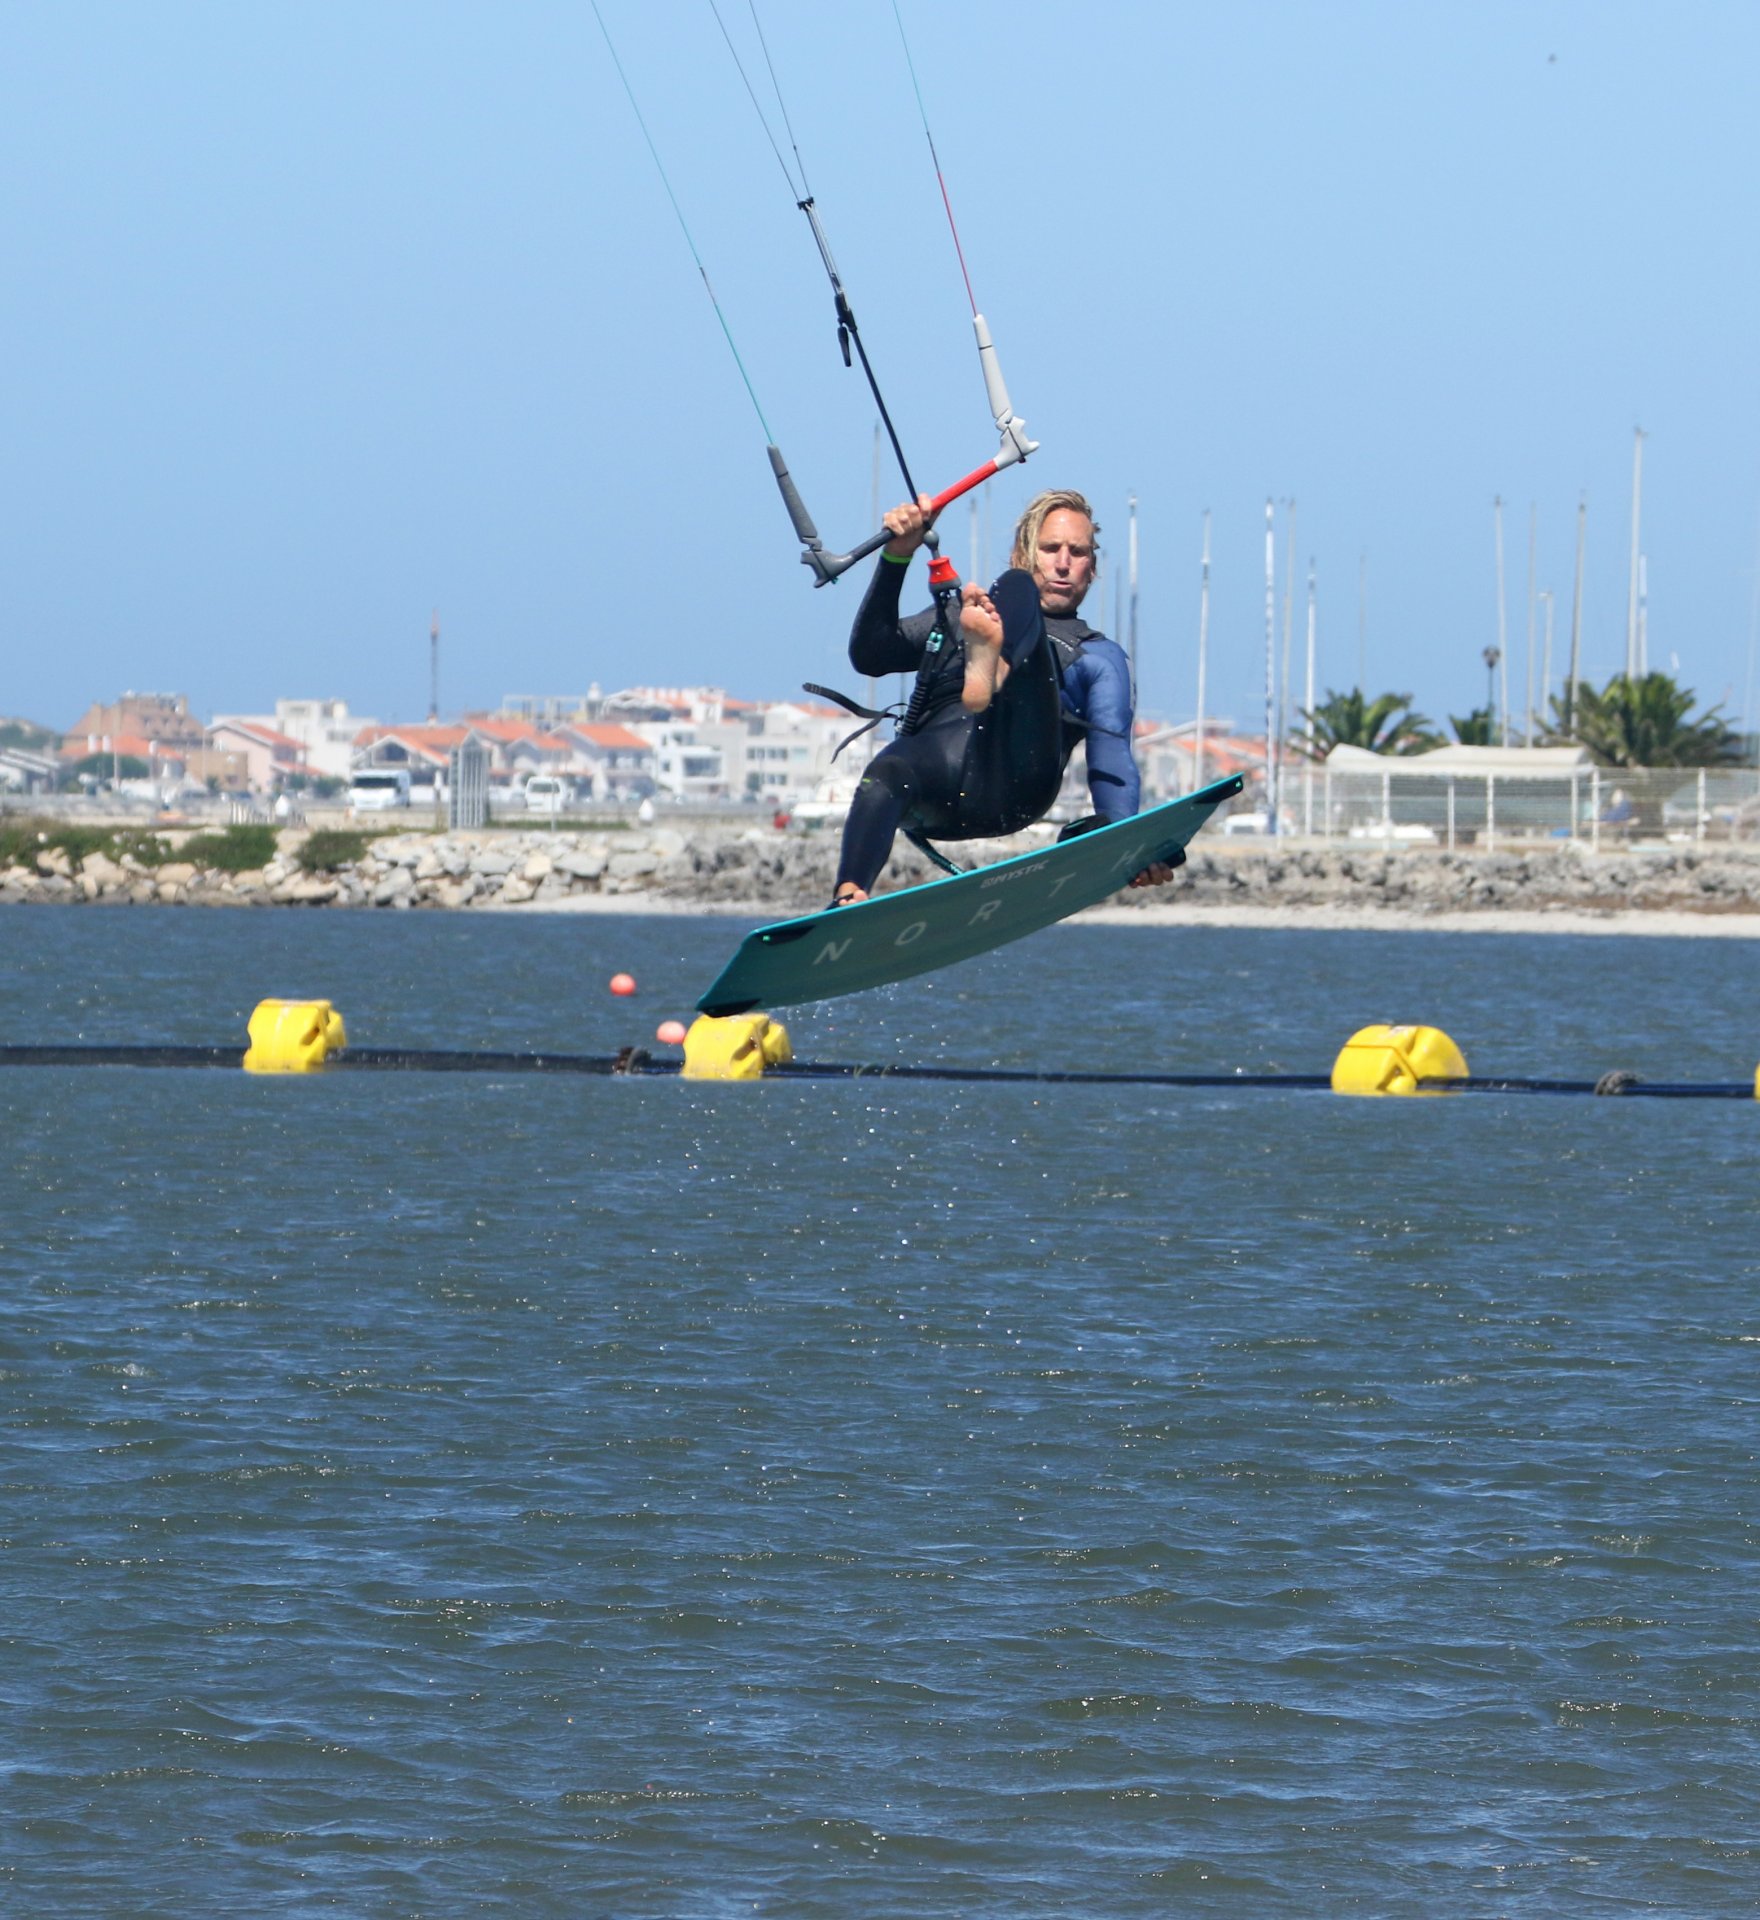
Just One More Pig G.
As soon as your leg is down, boys and girls, bring it back up and over for the final flourish. Same again, kick your leg forwards and extend for full glamour puss points. Up, down, up. Nearly finished. Looking at Christian’s lines, you can see that his kite is drifting slowly back, as it tends to when you have one hand off the bar. You need to make a call whether you still have enough float for this last kick. If you’re dropping fast, it’s best to bail. If you’re still supported, get a move on and finish. Christian’s bar is still in for lift, and it’s worth noting that he’s already focused on his back strap, anticipating and aiming up for the reunion of foot and strap.
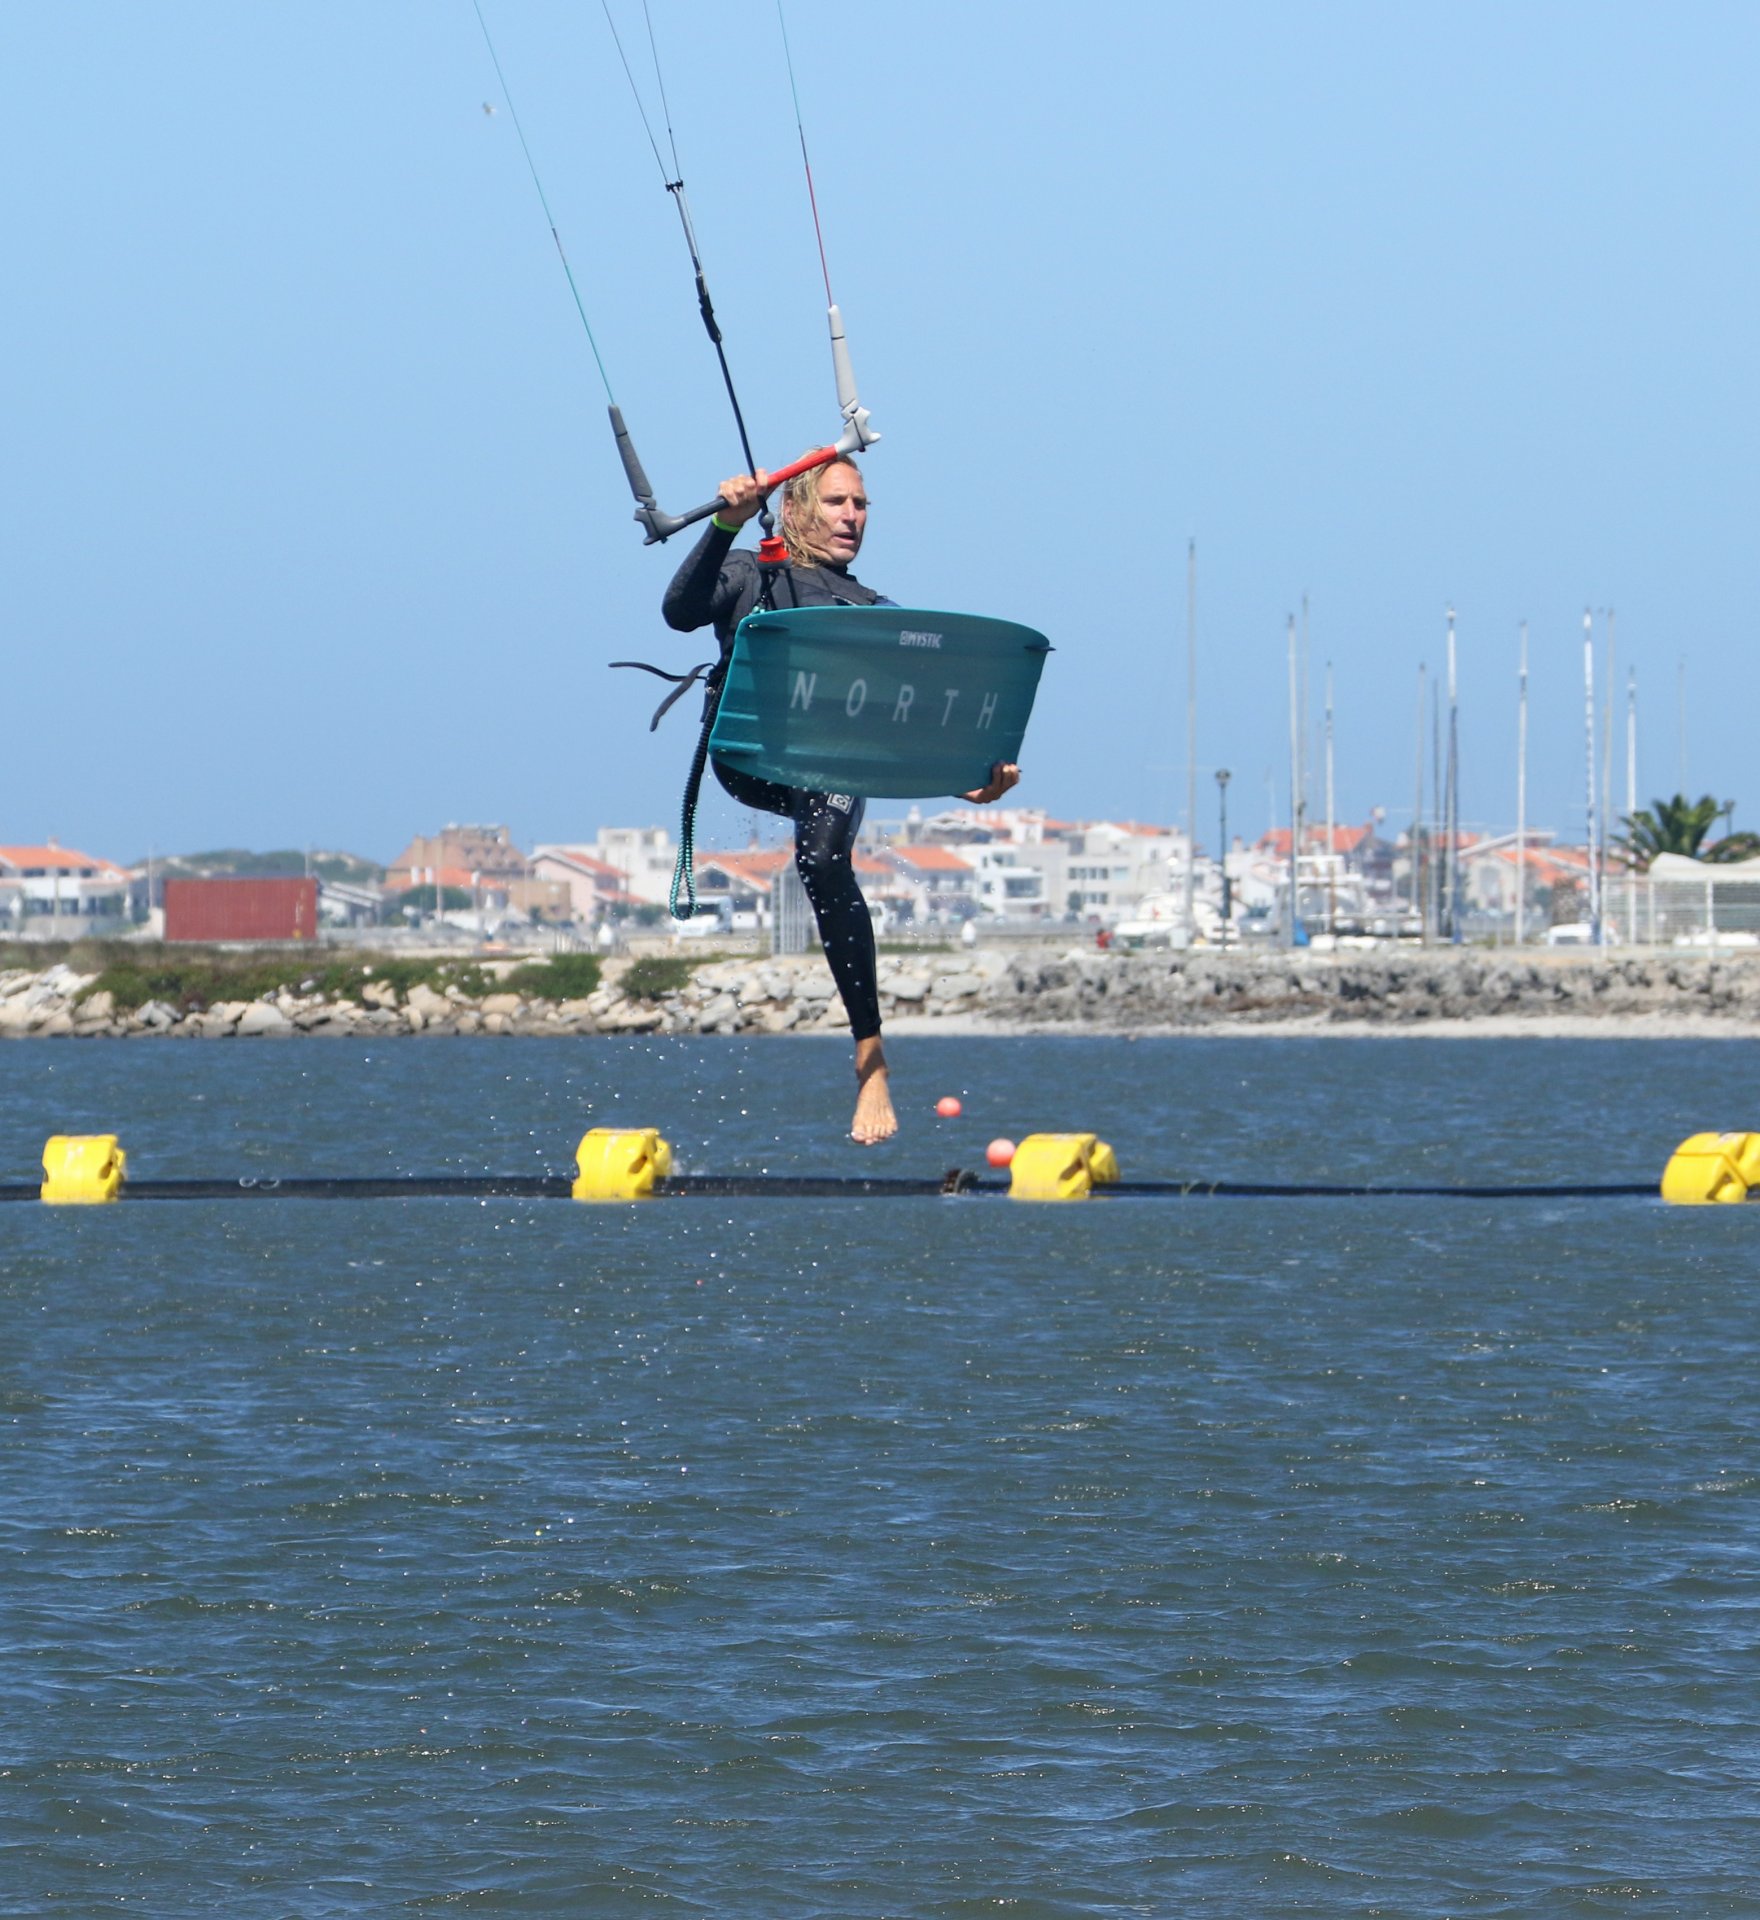
The Tom Daley Pic H.
Now is time to commit to your landing and it’s all about the dive. With the kite drifting from above you, you need to get the power on sharpish so that your kite can still dive down through the window and pull you downwind for a soft, splash-free landing. This means that you’ll need to commit to the dive before your foot is happily tucked up in its strap. With the bar in and a good hold on the board, you should still be able to reposition your foot whilst diving the kite. Here Christian has pulled the trigger on the dive, giving the bar a decent steer with his wrist, whilst fiddling his foot back in.
Top Tips
Building up to this is key. Start with some floaty air gybes, then add a grab, a cheeky one foot, a can, and finally the full Monty. Your effort should be concentrated on kite position, as if the kite is right, you’ll have time and confidence to nail this. It certainly helps if you can learn on a slower, lifty kite. Two factors that’ll make the most difference are levelling or even slightly redirecting the kite before take-off and that early stamp. As soon as the kite drifts too far, you’ll be playing a hopeless game of catch up.
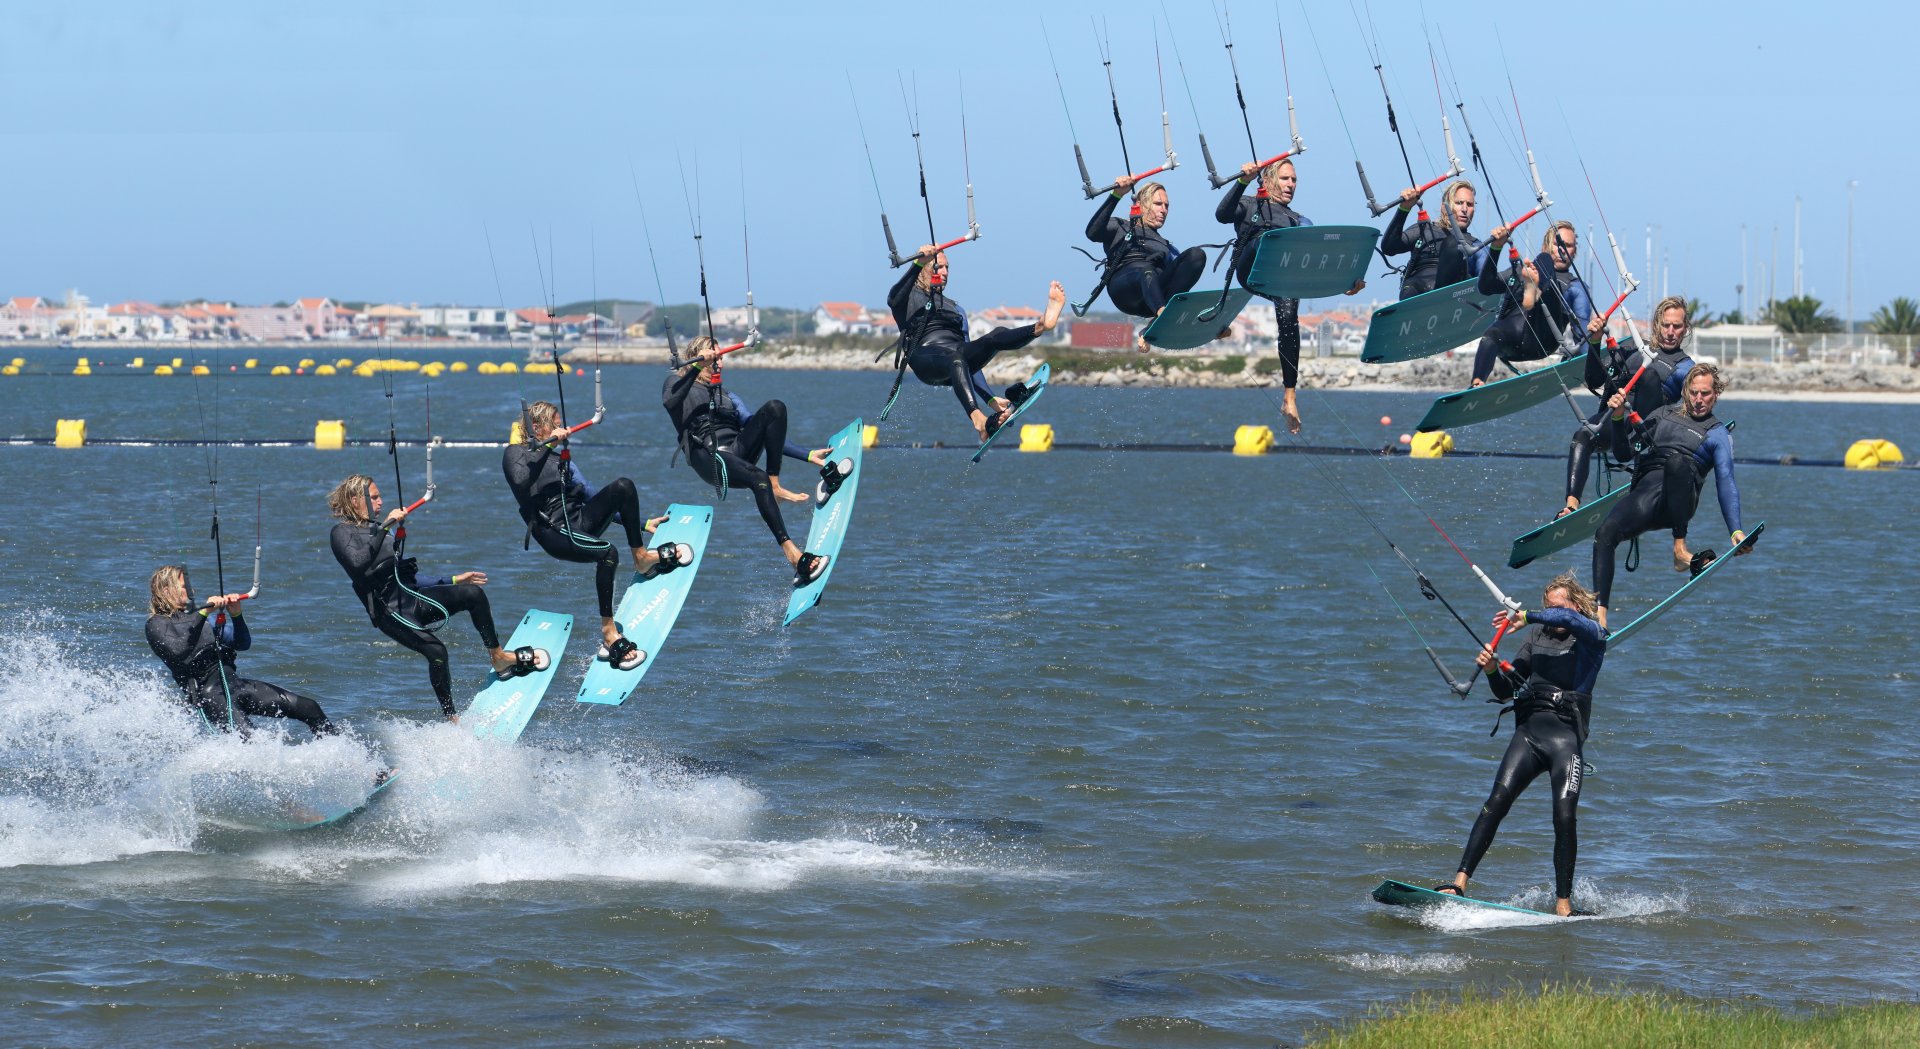
Have a look at the sequence and videos for the actual Full Monty:)
Common Problems
The main issue that you’ll encounter is the kite drifting across to the other side of the window. At the very least this will make landing with power impossible, and at worst it’ll drop you back into the drink. Get your backhand centred on the bar, make sure it’s a short sharp send from 11 or 1, no drifting and go early.


If you don’t have room to get your foot over and through for the high kicks. Keep your arm straight and your back leg extended and down. Added to this if you keep your front knee up there should be plenty of space.
And finally, if you’re landing across the wind and stopping. Commit to the dive early. If you wait until your foot is snug your kite will drift too far to give you power. So as soon as you’re on the way down, foot or not, give it the beans.
Keystones
- Short sharp send
- Level bar and stamp
- Grab with the straight arm and extend the trailing leg
- Look forwards whilst kicking up, down, up
- Hard dive before kite drifts too far

This technique article was in Issue 83 of IKSURFMAG.
Related


By Christian and Karine
Christian and Karine have been working together as a coaching team, running improver to advanced kitesurfing clinics since 2003.
