
Back Loop Kite Loop from Toeside
Technique / Intermediate


Introduction
Another celebration of the diversity that kiting offers by the mere action of marrying a couple of skills that you have down, to make yet another enchanting move. These next few pages will see you cavorting with your toeside back loop (or roll) and kiteloop with the net result hopefully rewarding you with a stunning new move with a somewhat less stunning name, the back loop kite loop from toeside. Hopefully common sense prevails and you’ll only be up for this should you already have the two pre requisite moves already firmly in the bag. That said however, we will of course repeat the required methodology for both so that there’s no need to go hunting.
Let’s start by having a talk through all the necessaries.....


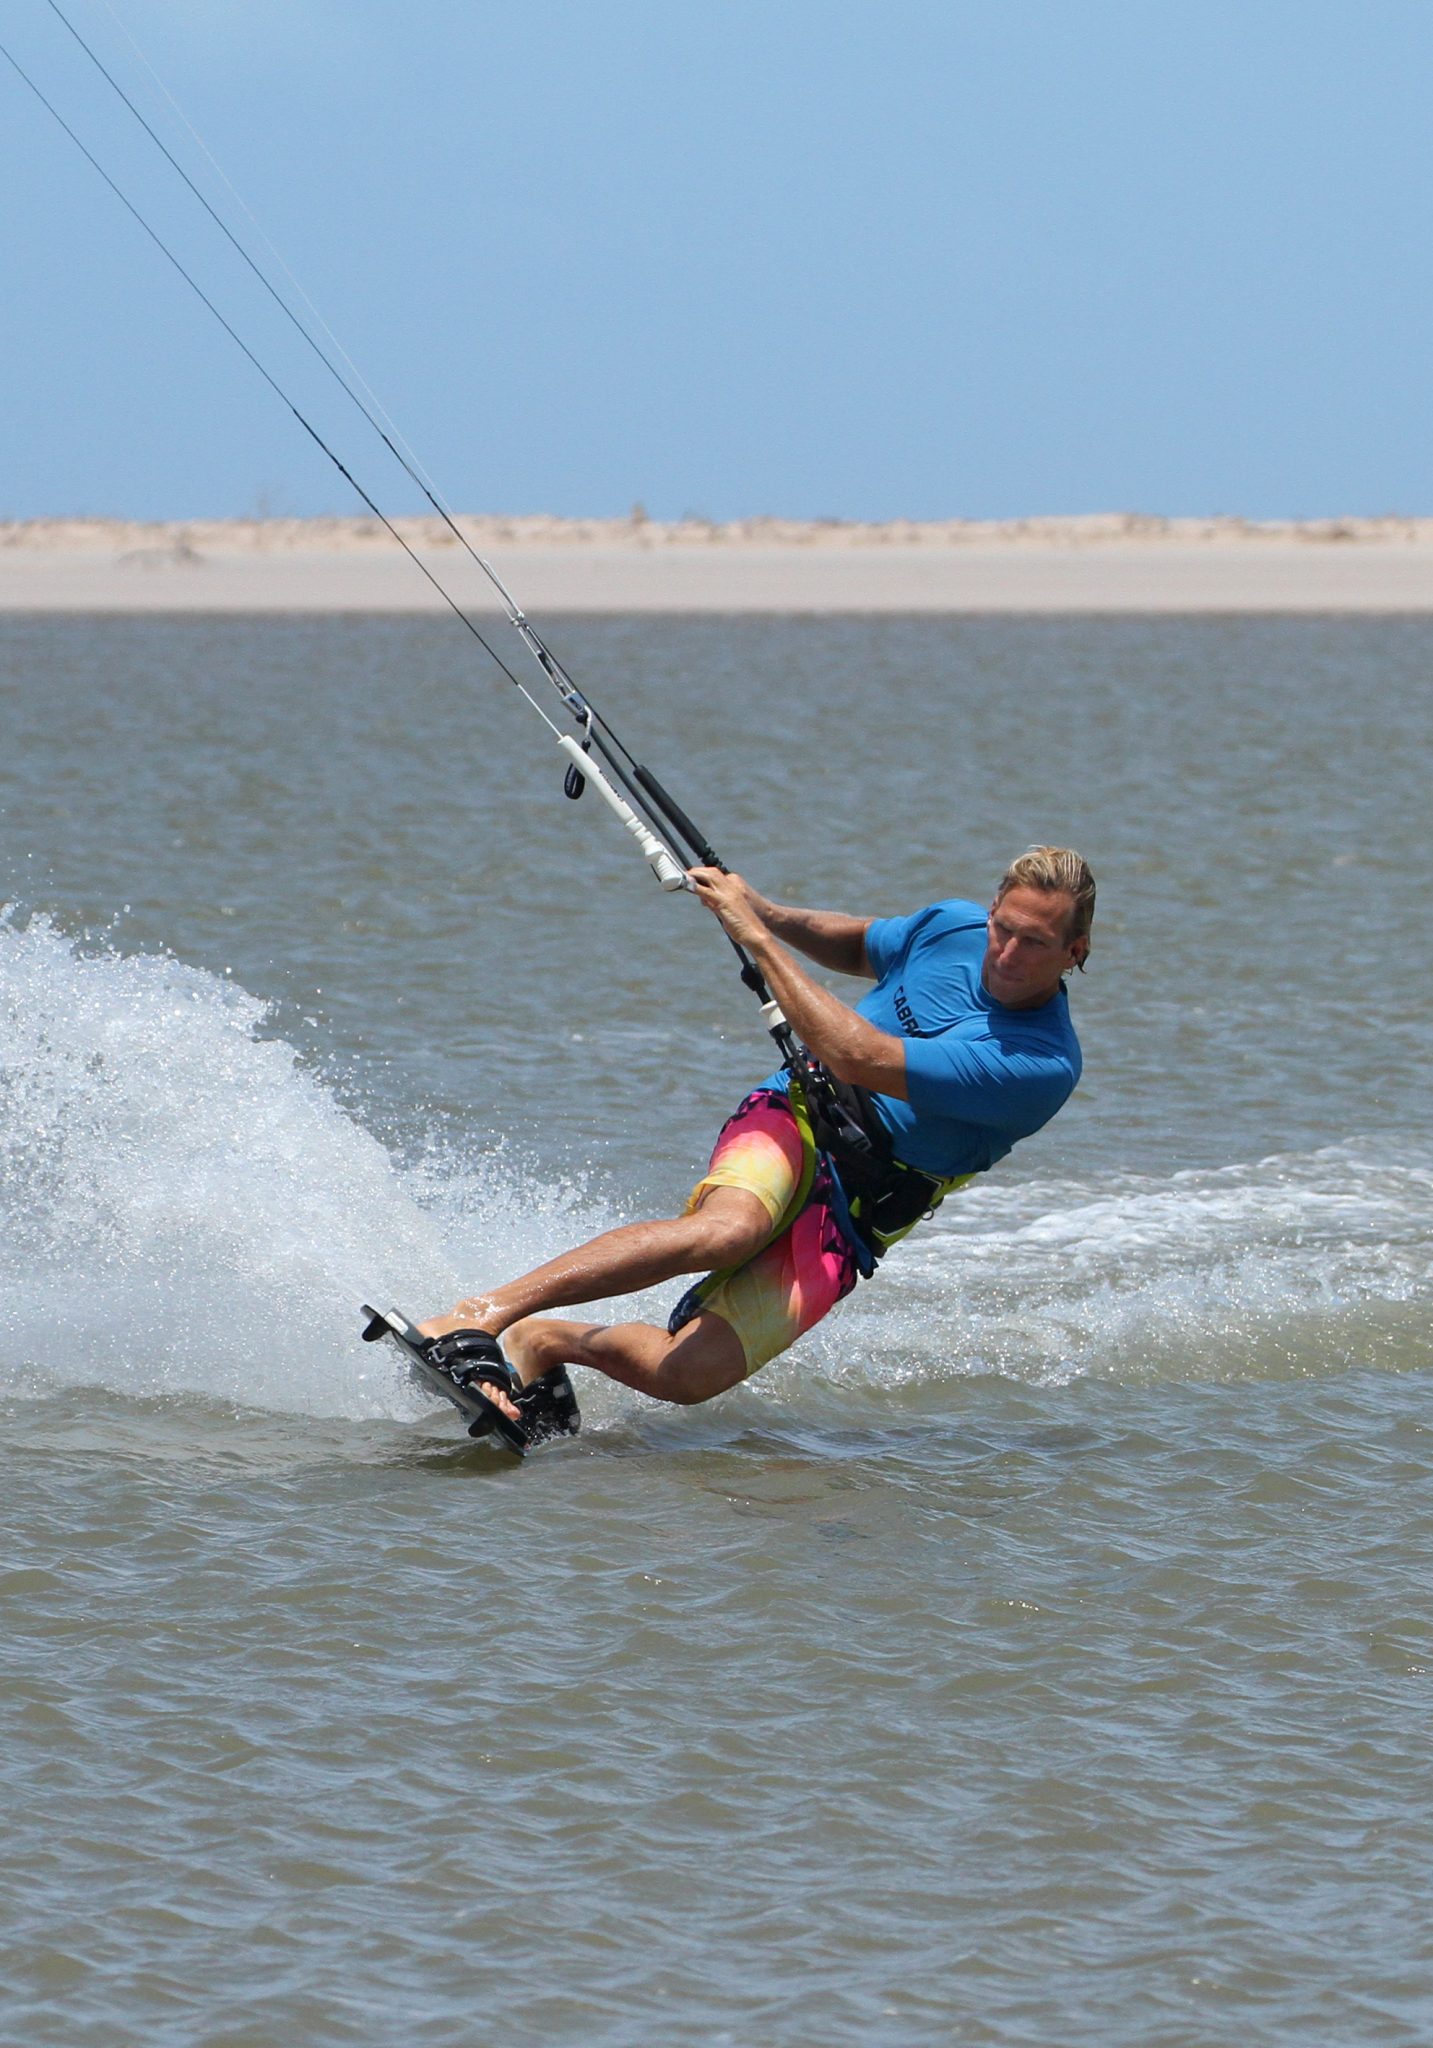
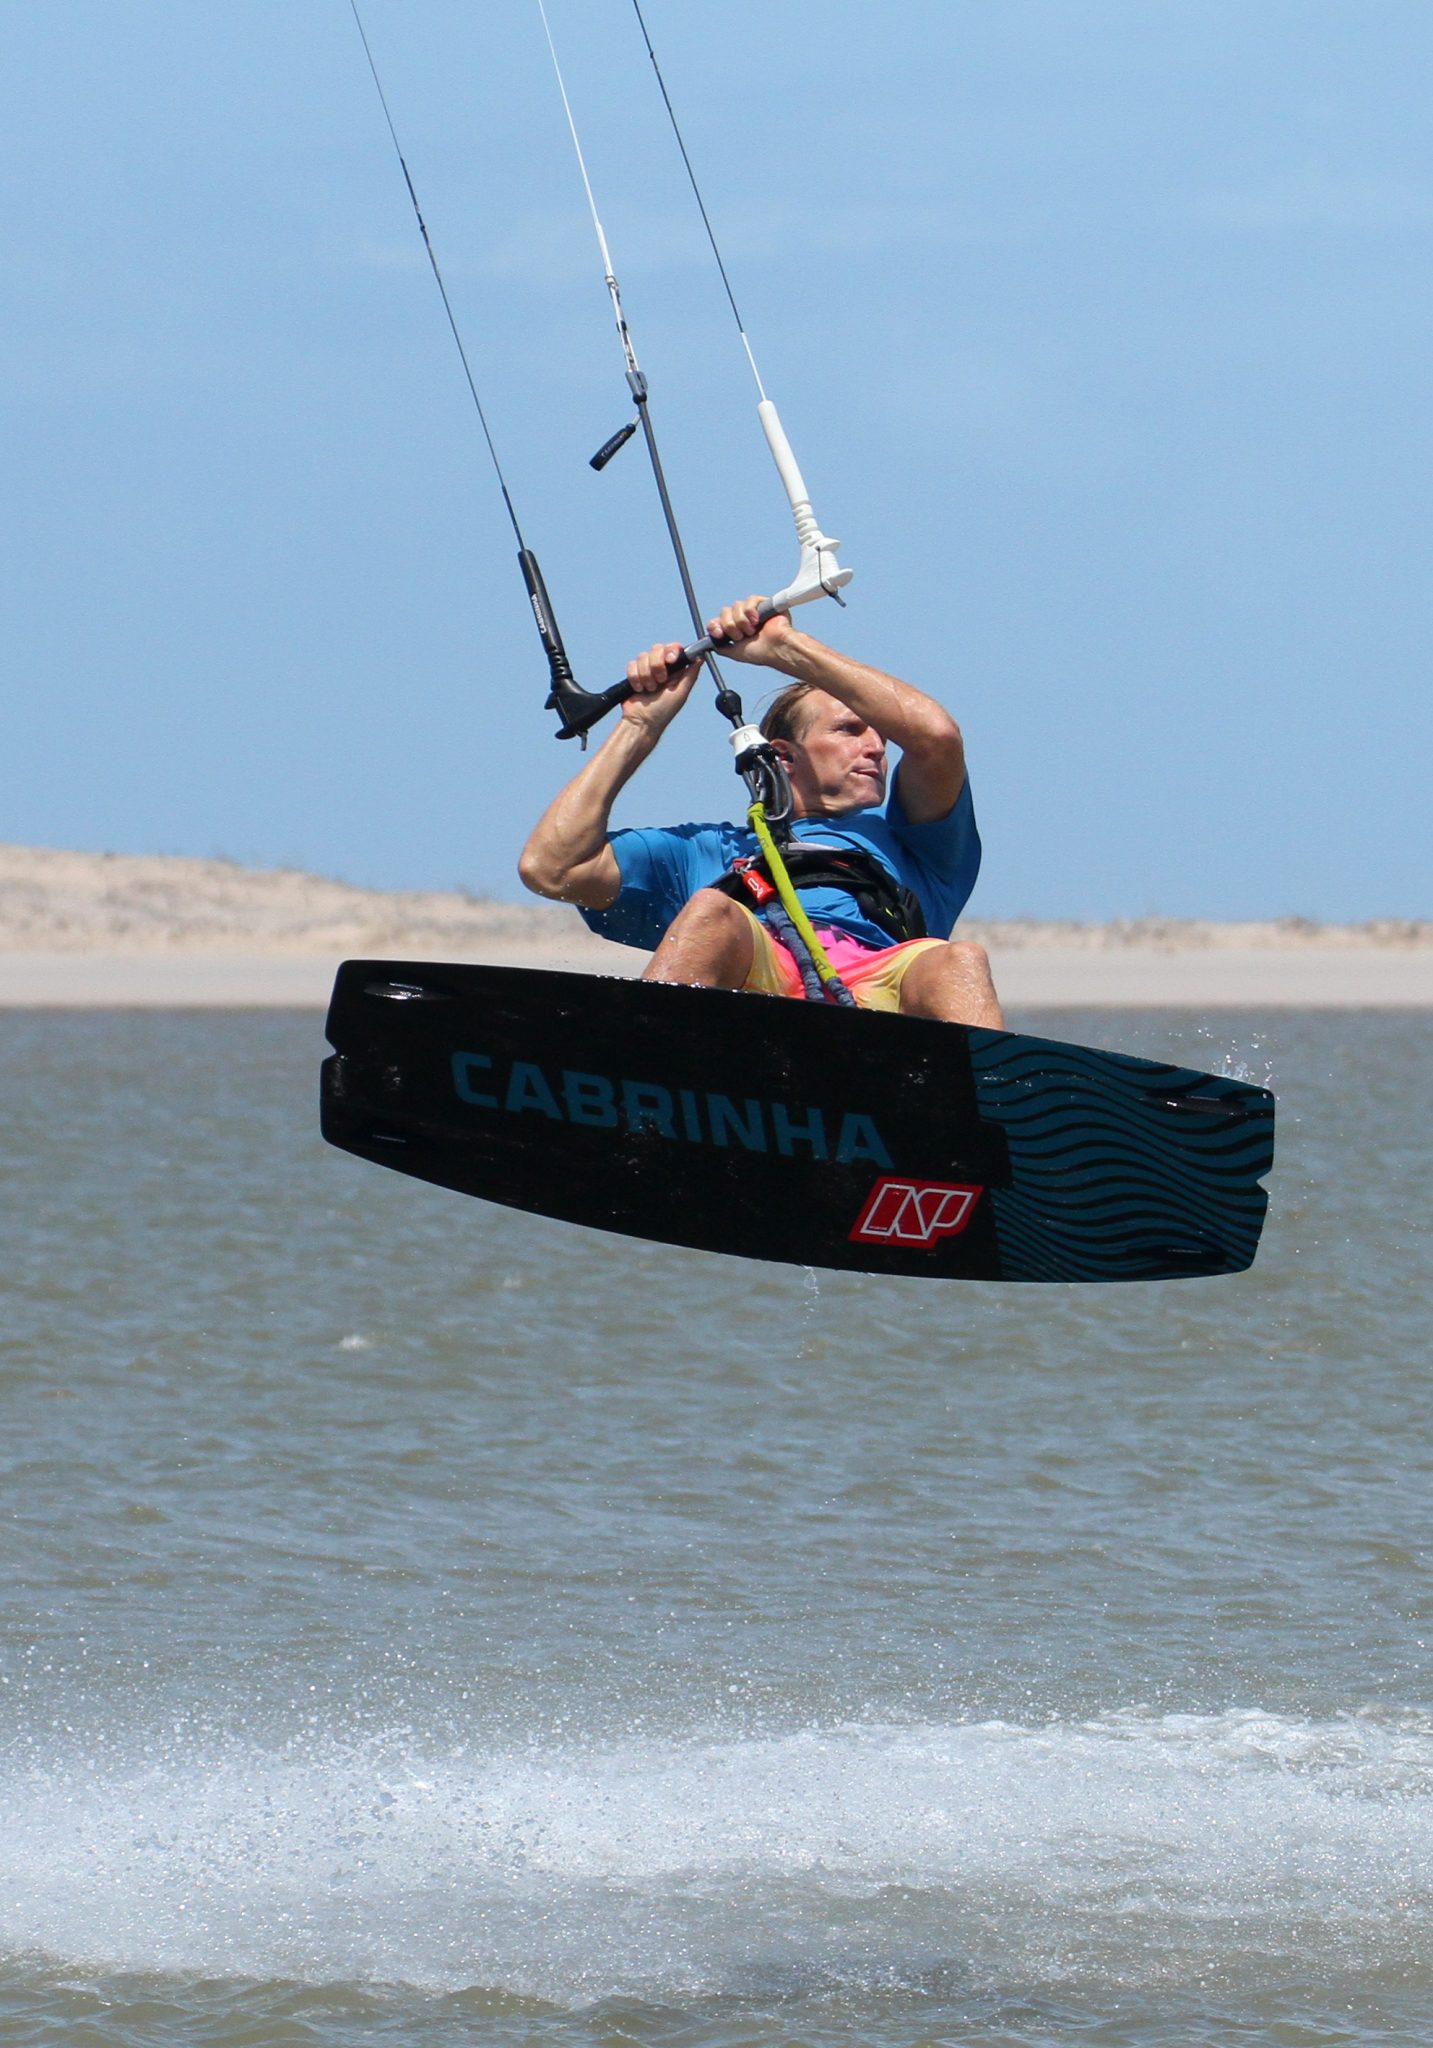
The Approach Pic A.
To resist efficiently and effectively you need a whole lot of edge. The more edge you have in the water the more resistance you get, but without drag. Drag slows you down, resistance squirts your forwards. Now think about your early attempts at toeside, or perhaps toeside on your weaker foot – where is your weight. Right back over the tail of the board. You’re sinking the board, it’s dragging through the water and slowing you down. It might feel like resistance but really, it’s no different from towing your laundry behind you. To make it efficient you have to learn to get your weight forwards, trimming the board from front to back whilst still edging. Look at the picture and you can see plenty of Christian’s board in the water.
Suffice to say you need to get your weight forwards and onto your front foot. The easiest way to do this is to open your chest and hips, facing forwards down the board so that you have a shoulder each side. This with a bent front knee, hips and head dipped forwards and both knees driving forwards, pointing in the same direction and working together opens the door to a world of possibilities. Think of a surfer racing down the line or a slalom snowboarder in hard boots. Coming into any toeside trick this is your approach position - speed, no drag and kite flying at 11 or 1 o’clock on the edge of the window, ready to send. You can see in the picture that the other advantage of this position is that Christian is able to control the bar with two hands and therefore send the kite with the usual push pull, dropping his weight to resist the kite as it lifts towards 12 o’clock.
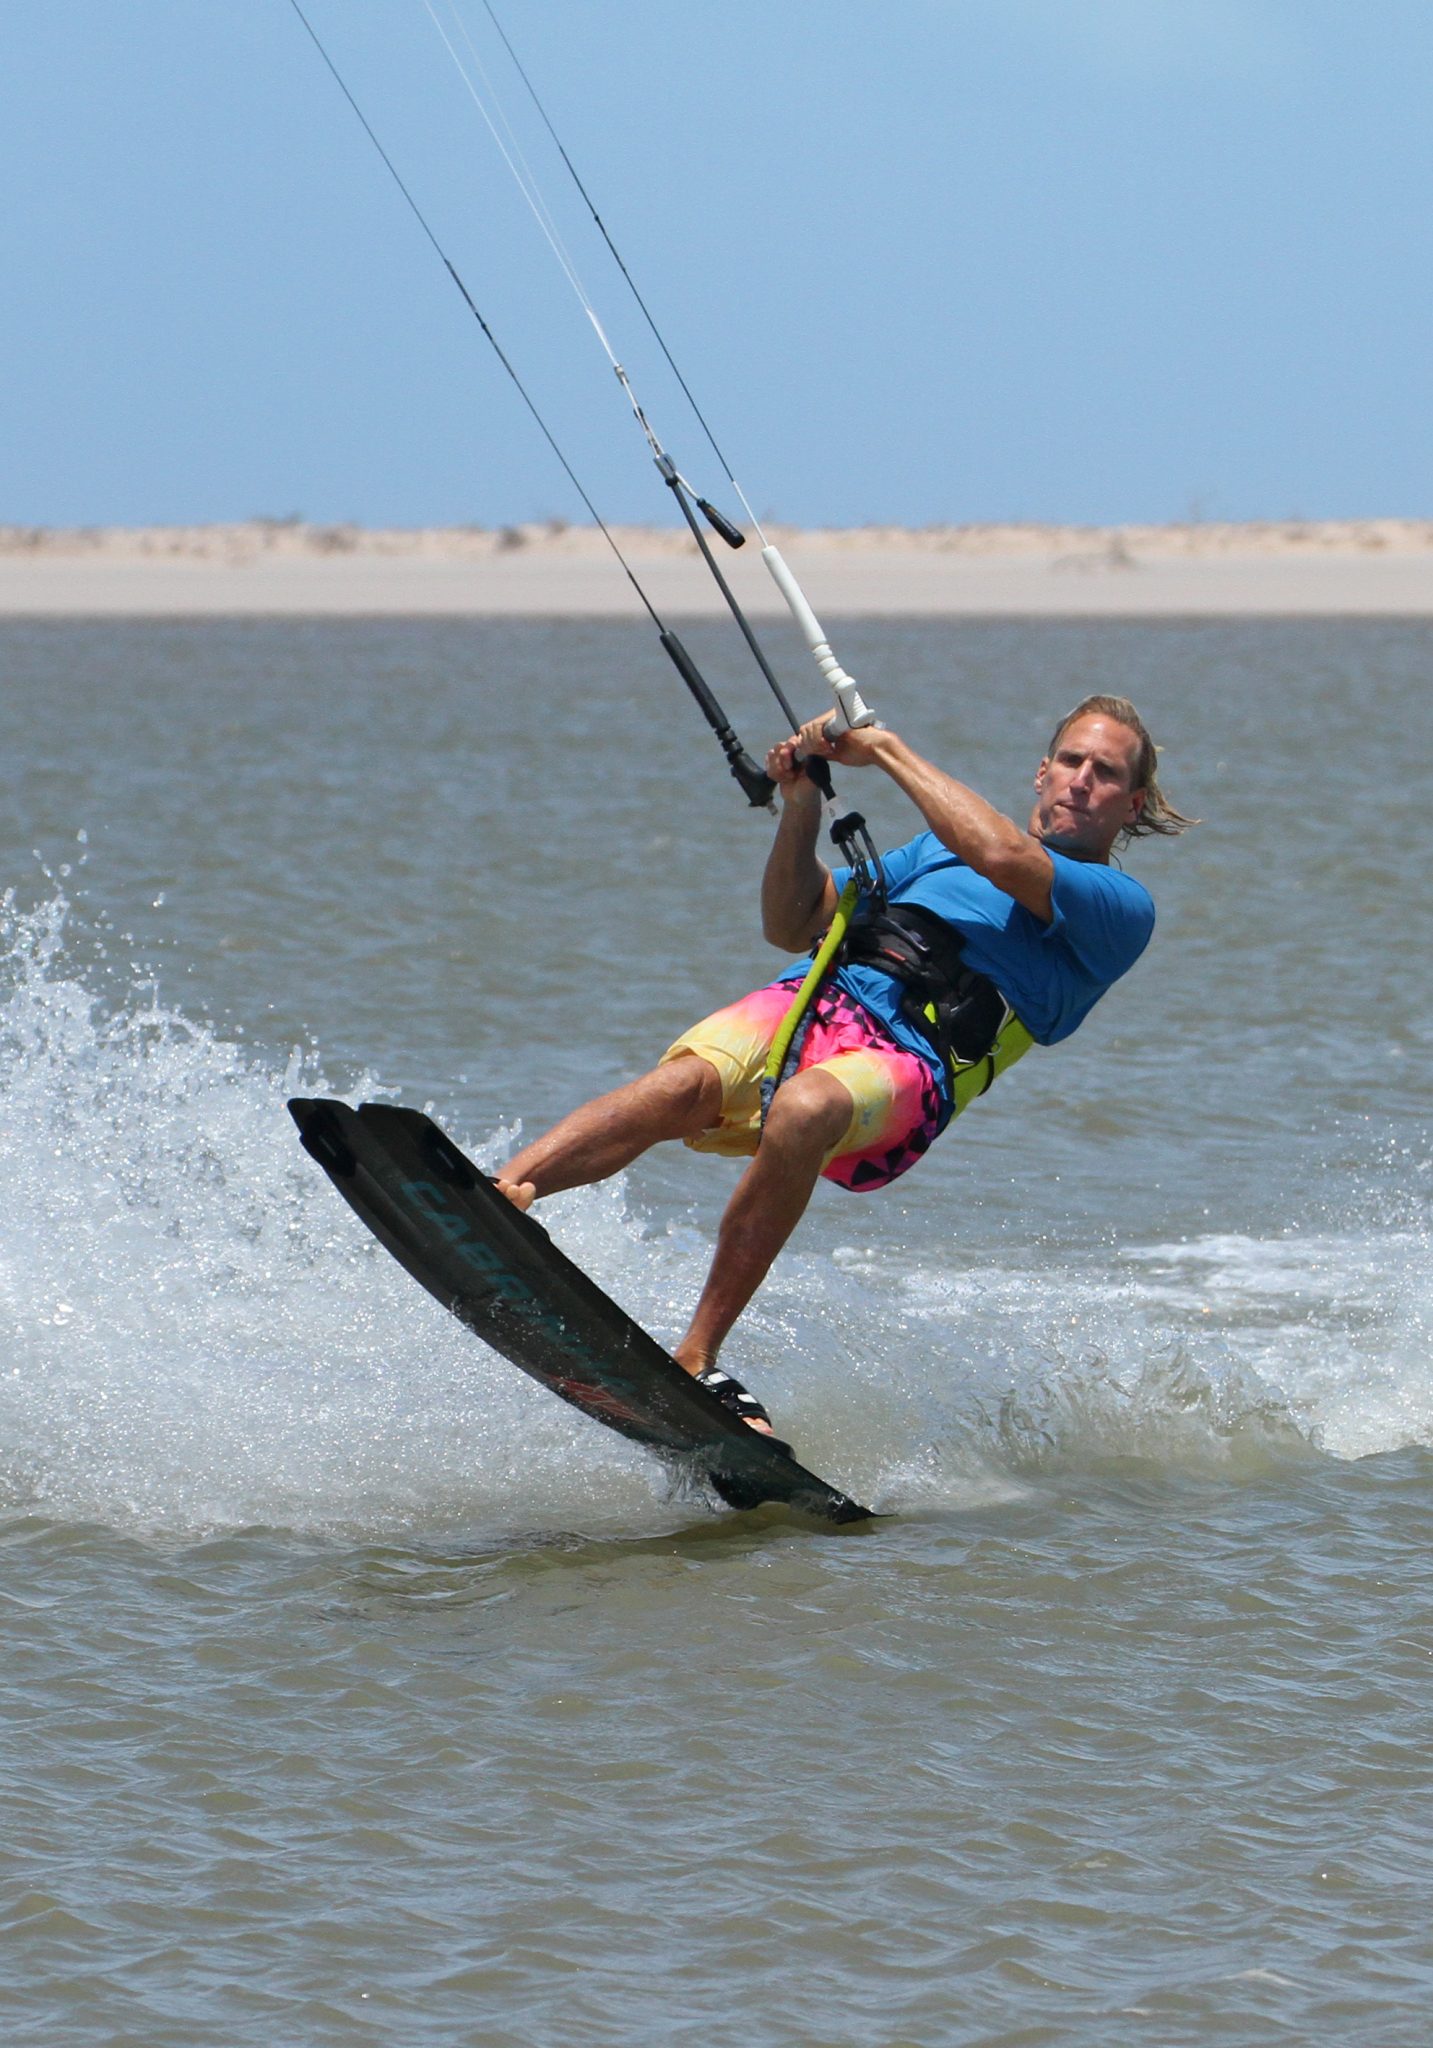
Take-Off Pic B.
With the aim of adding a back rotation you will need to add a bit of back leg kick, which can only be done with your weight back. However as discussed in the last paragraph you can’t just be back. Also, it’s impossible to kick off your back leg if all the power you’re edging against whilst sending the kite is already transferring through it, unless you’ve got legs like a Dutch speed skater. The art is to time perfectly when to drop back over your back foot to kick up into your rotation.
If you have a look at Pic B. Christian has sent the kite from 11 o’clock and was still edging on all his board during the approach. As the kite reaches around 12, he’s edging super hard but then drops his weight quickly back by moving his hips and extending his front leg. However, he doesn’t bend his back leg any more as he would then lose his edge! From here he’s ready to kick. It’s a sudden movement, from edging to suddenly rocking back a kicking off. The result of moving your weight back on the board also gets it carving which will help initiate your back rotation.
As you take off, the kite will pull you slightly back as it lifts you. As you feel it pull, you must stamp down against your edge, digging the tail in as this will encourage more up and less back. You can see in the pic that Christian’s shoulders and his head are leaning back. As long as you go up you’ll have time to rotate. Once you do start to go up it is super important to stop the kite going any further back in the window. As a result of being toeside, and thus it potentially being a weaker edge your kite will likely fly further back than you’d like, so stop it on take-off by levelling the bar as Christian has here.

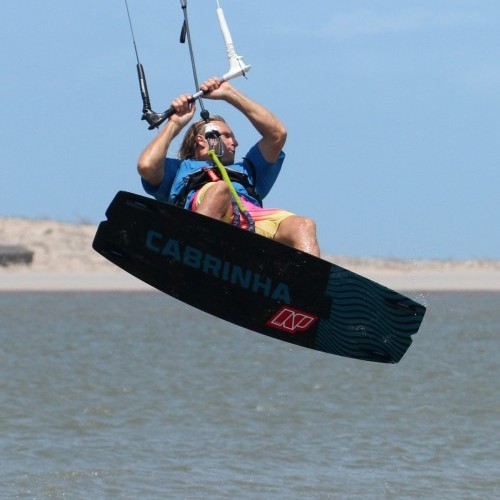
Another Slow Back Roll Pic C.
The rest of the rotation should be simple enough once you’re up as long as you can keep control of the kite. Your aim is to rotate slowly so that you know where you are and can anticipate the timing of the kite loop. It’s a must to go round slow, otherwise the kite loop is likely to over rotate you and dump you unceremoniously with some force. It should be the kiteloop that helps you finish your rotation. With the kite keen to go back, you need to be aware of where it is at all times. Even though it’ll help pull you back and start your rotation, if it carries on back it won’t be in the right place to start the loop. If you look at Christian, his bar is in and level, which stops the kite going any further back and keeps tension on lines, meaning that the kite is ready to move as soon as he pulls. Then once he’s up and going slow he turns is head to look over his front shoulder to make sure that his rotation continues.
Pull The Trigger Pic D.
Much the same applies once the time comes to loop the kite. If you’re well versed in the back roll kite loop, there’ll be very little difference here. By the time that you’re half way around your rotation your body and board should have come around to where they’d be in a heelside back roll. So once you’re halfway around, look over your shoulder for the water downwind of you. Once you can see it, it’s time to get the party started. In fact there’s more than pulling as to get the most out of the bar and therefore the kite you’ll want to push as well. A decent pull and push will give you the most leverage from the bar and it’ll help you keep the bar on the sweet spot, preventing you from stalling the kite and killing the pull. You can see that Christian has started to pull and push to get the kite looping. It’s worth noting his backhand is placed in the middle of that side of the bar. If your hands are squeezed up together around the centre line it’ll be much harder to pull and push!
Don’t Stop Pic E.
Once the kite starts looping, you’ll feel the pull. As with any form of kite loop, it’s imperative that you keep pull-pushing the bar and hold it in on the sweet spot. It can be tempting, especially if you’re surprised by more power than you expected, to ease the bar out, or let it out completely. However, best ignore the wisdom of evolution and hold on for the ride. This way the kite will continue to loop, quickly and will therefore get round enough and start its merry way back up to 12 o’clock, which will lighten your landing considerably. As long as you keep your head turned and eyes focused on your potential landing spot, the kiteloop will pull you through and out of your back rotation. Looking at Christian you can see that he’s still pull-pushing, the bar is in, his head is turned and he’ll be focused on where he wants to go. The result, his kite is on the way back up.
Prepare For Landing Pic F.
With the kite moving North, your legs, feet and ultimately board will catch up and drop beneath you. You want to land downwind, so keep looking that way. It’s also important to finish the loop with the kite up high, so resist the urge to dive the kite or stop the loop. From here you’ll have a softer touch down. Just be ready to take the landing and put the board down on the water before you carve back onto your edge.
Top Tips
When learning this it makes total sense to make life easy for yourself. You want a kite that turns quick and responds well, so your 9m will be preferable to your 16m. You also want confidence to give it the beans and pull the trigger. If you stacked and it’s blowing you might hesitate, think twice or just quite reasonably bottle it. So pick a session when you’ve enough to get off the water, but not too much to nail yourself. And finally, regardless of kite size, get your hands further apart so that your kite will turn more easily.


Now it’s time to review the sequence and study the videos
Common Problems
If you’re only getting a small amount of air, or launching yourself out of the straps the chances are you don’t have enough speed on entry. Come in a bit quicker and the board will be happier to edge rather than stick and you’ll be able to send the kite a tad more aggressively.
If you find that you’re not getting around and the kite is pulling through the loop but dumping you on your back, bum or side, chances are that the kite has gone too far back before take-off. Start with the kite a bit lower before sending, and send with a tad more conviction.

If you’re getting the height but you’re not finishing the rotation, you could well be looping the kite too early. Make sure that you can see the water over your back shoulder before looping it.
If you’re landing too hard or are bouncing our on touch down. This is often a sign that the kite is not finishing its loop up above you. Potentially two reasons for this. Firstly you might be stalling the kite, pulling the bar in too far when you loop. Let the kite breath as it comes around the loop, so that it can fly back up. Secondly you may be coming down and thinking about diving the kite to land, therefore stopping the loop prematurely and then rather than being pulled down wind for a soft landing, you’ll be landing more across the wind on an edge. Finish the loop.

Keystones
- Speed and Edge
- Short but sharp send
- Kick off and level bar into slow rotation
- Look over shoulder and once half way pull trigger
- Finish the loop for a downwind landing

This technique article was in Issue 73 of IKSURFMAG.
Related


By Christian and Karine
Christian and Karine have been working together as a coaching team, running improver to advanced kitesurfing clinics since 2003.
