How To Make A Bomb Proof Kiteboarding Board Bag
Features / Fri 19th Apr, 2019 @ 1:00 pm
Every summer for the last five years when King of the Air Kevin Langeree comes to Cabarete for our annual kite camps, when he unpacks his gear, invariably his surfboard is broken; no joke, every year! And every year I run it off to Susi Mai’s dad, Plinsi for an emergency repair, which he does with perfect German precision.
How to keep your gear safe when the airlines play toss the surf bag game is the problem of every surfer who travels the world chasing waves. Here’s a solution to that problem!
I’ve been travelling the world with the same customised Mystic board bag for the last five years. In those years, I haven’t had even so much as a breath mark on any of my gear. I, too, was tired of trying to figure out ways to securely transport my equipment, but they all eventually failed in one way or another. I’d cut pool noodles lengthwise and then duck tape them to the circumference of the board. They’d always tear off in transit, and I’d end up with a ding in my board. I tried wrapping the boards in cardboard, but once wet, cardboard turns to papier-mâché puke. I’d wrap all my kite clothes around my boards and then bind it all with packing tape. Not so great for the clothes. Duck tape chic later in the bar.
Finally, I channelled my inner engineer and decided to find a real solution to the problem that plagues all kitesurf travellers, build a bomb proof board bag. I succeeded, and here’s how I did it!
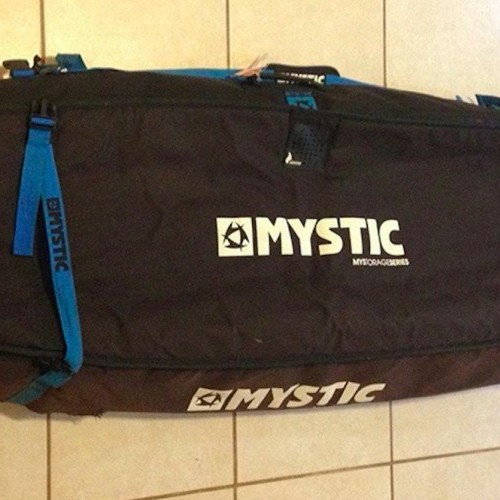
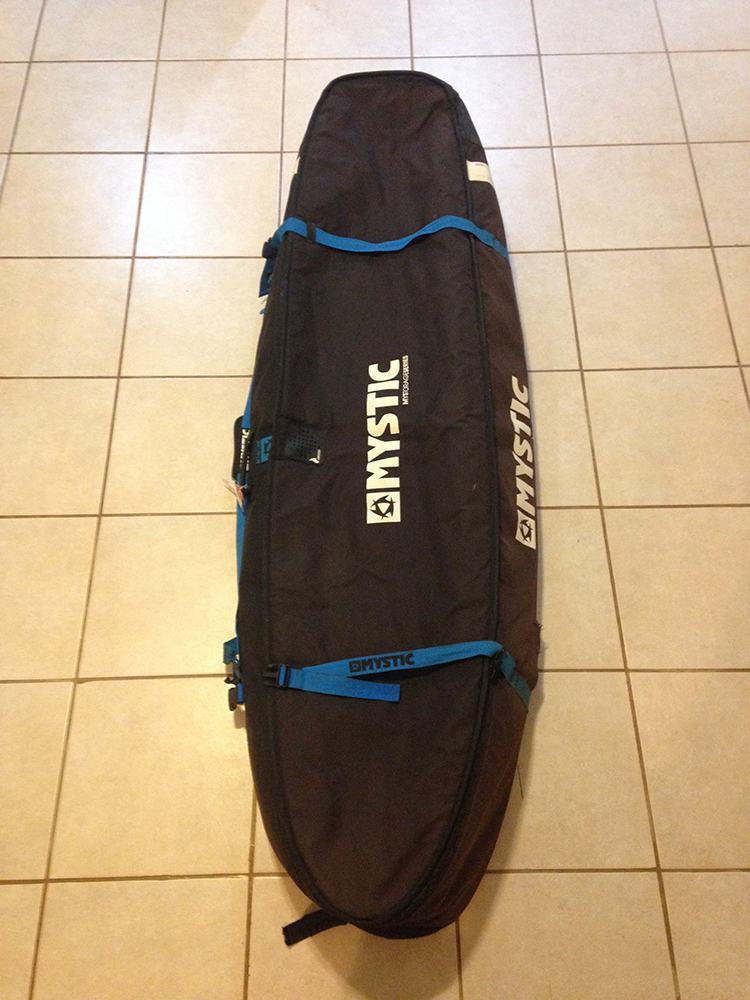
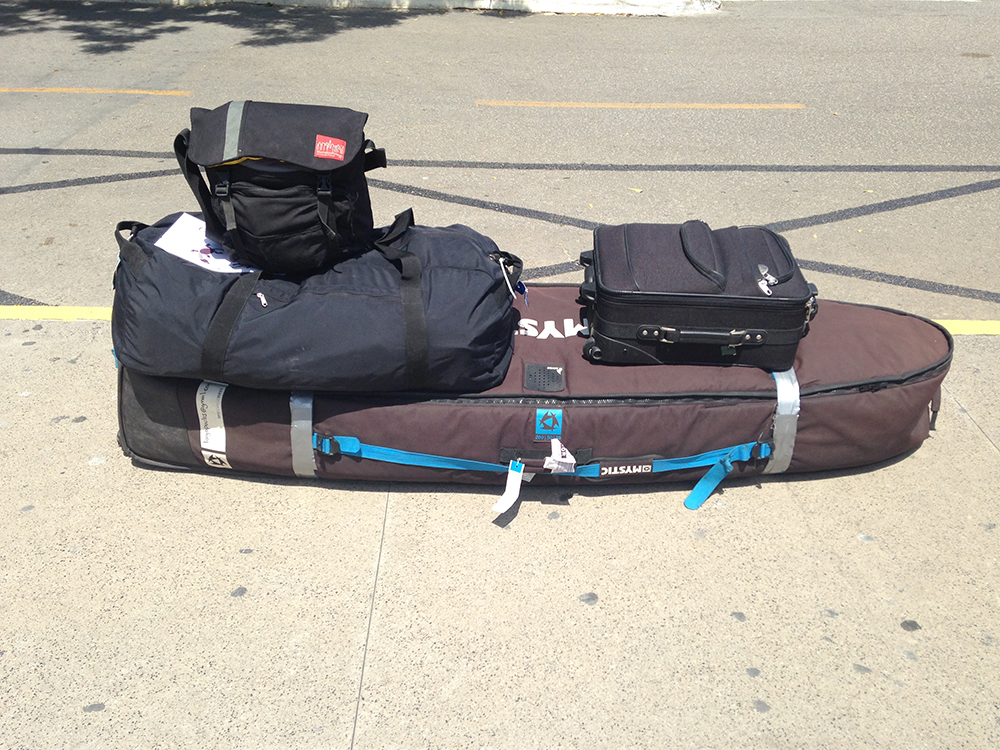
1. The Bag
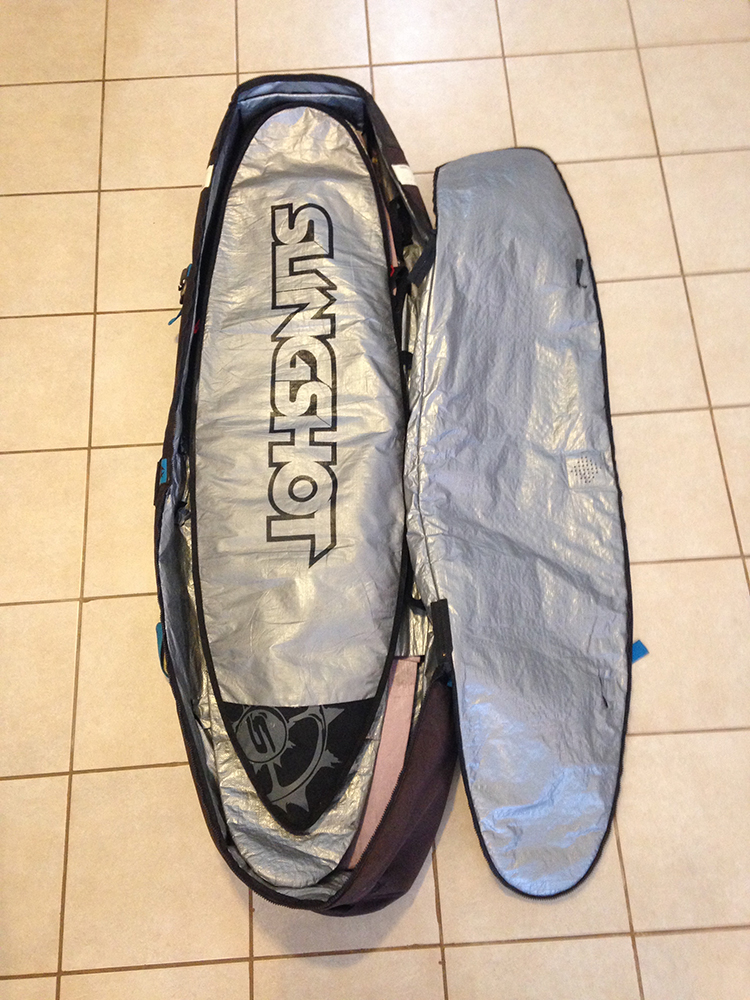
Regardless of the bag you choose, what is essential is that the seams, zippers and corners line up to make 90-degree corners. I like my older version of my Mystic Pro Surf bag because of the wheels, and it holds lots of gear. Once full, and reinforced as you’ll read, it becomes a solid box that will not bend in the middle when picked up from the ends. This allows it to be lifted from the front handle and easily rolled through airports.
While travelling I put my clothing bag on the board bag at the rear just over the wheels, so there is no carry weight, only drag weight; the weight you barely notice once rolling, and I cruise through airports.
2. The Secret Of Bomb Proofing
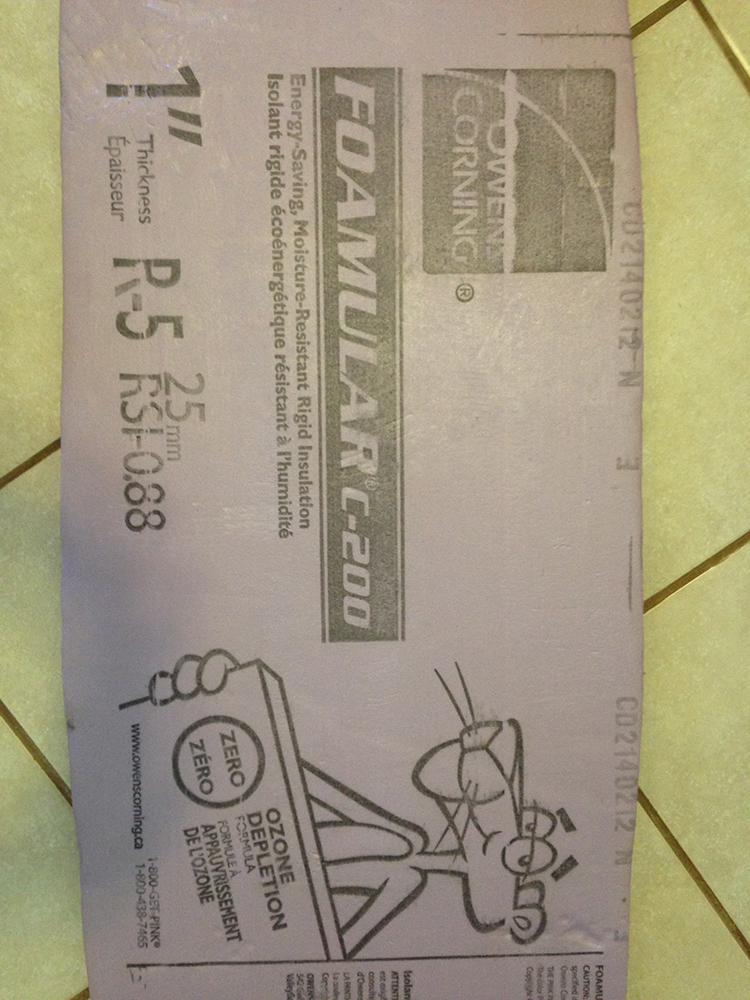
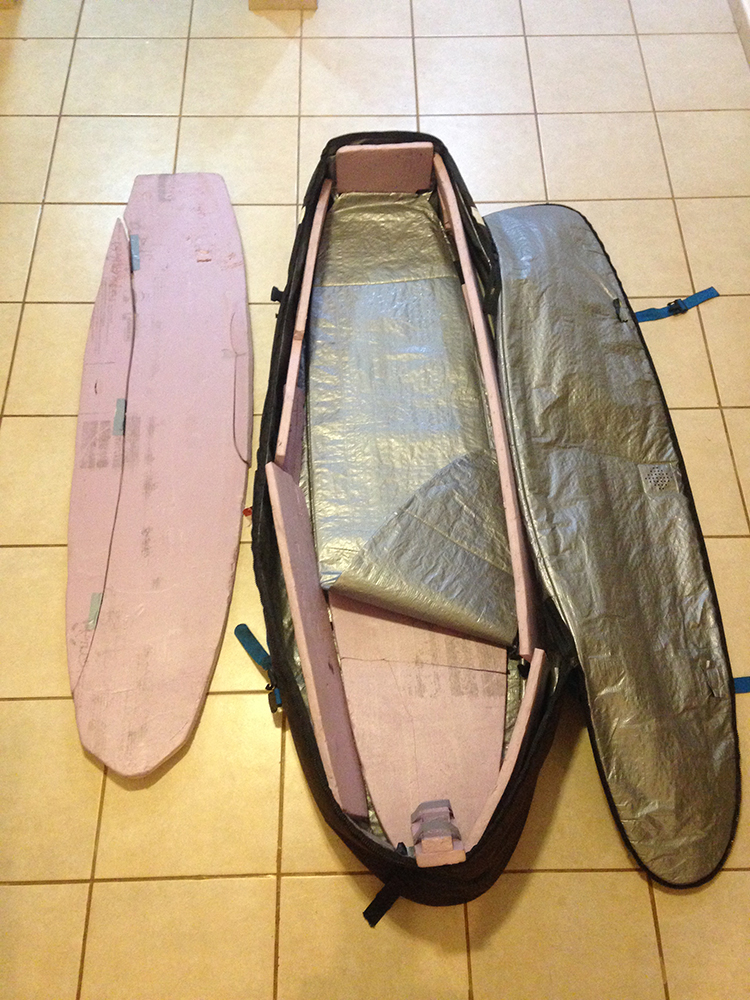
High-density foam board for home insulation is the secret (Pic 2). In cold climates like Canada, you can go to any big hardware store to easily find these panels. The foam comes in 4’ x 8’ foot panels in different thicknesses. I use 1’, thick foam board; one panel is enough. If you’re concerned about weight, it maybe adds 2lbs pounds to your total weight; super light!
3. Cut To Measure
Put the foam board on the floor. Place your board bag on top, and trace the outline of the bag onto the foam with a sharpie. As the final cut foam piece will go inside the board bag and you’ve just traced the outside, take off about one inch around the perimeter to make sure your blank will fit in the bottom board bag. Trace the board bag, not the surfboard that is going in the bag! You’re making your bag bomb proof for any size and shape of the board. The board size is irrelevant.
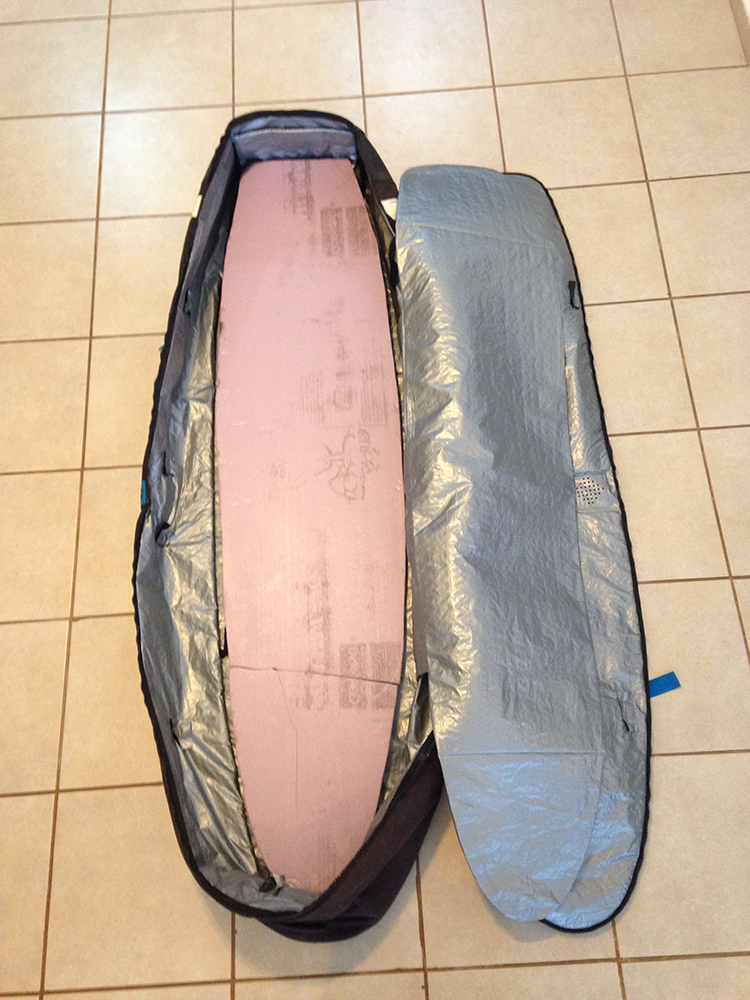
Cutting: Use a new blade box cutter, and make sure you place the foam on concrete or another hard surface that you don’t have to worry about scratching. DO NOT do this on your living room floor! Your knife will slice through the foam like butter, cutting whatever flooring is under the foam. Once you’ve fine-tuned the shape and fit of your base foam, use it as a template for your top piece. Trace your perfectly fitted foam onto your new foam for your 2nd piece.
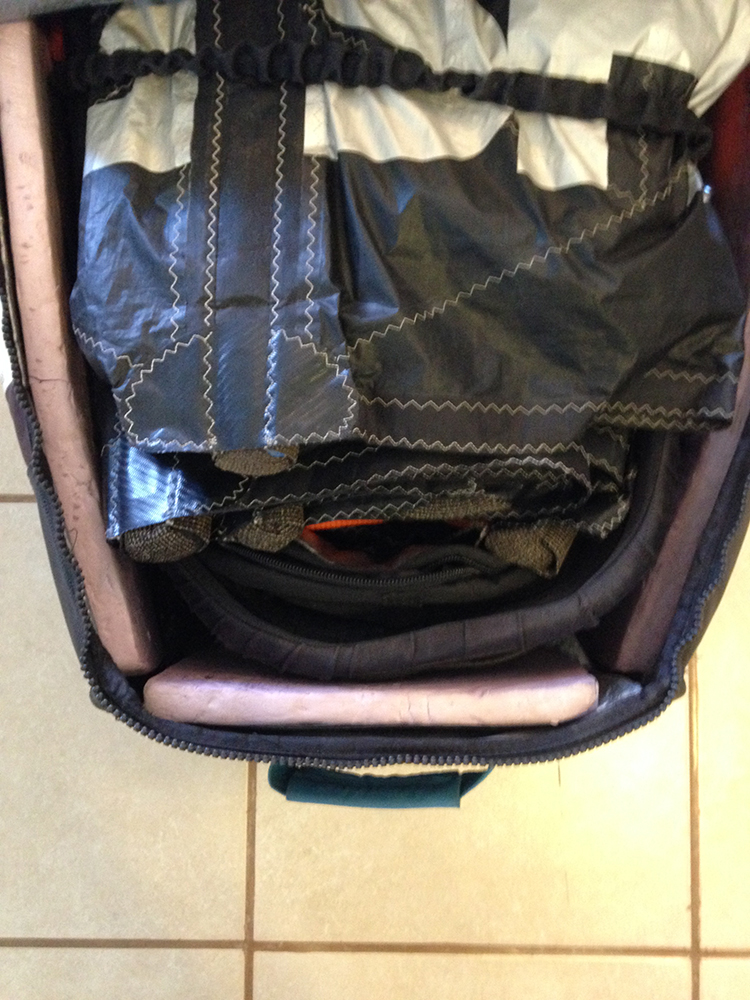
Sides: You should have enough material remaining to make side walls for the bag. Measure the interior height, not length, of your bag so you can make sidewall reinforcements. With the bag flat on the ground measure up until just before the zipper. Leave enough wiggle room for the zipper to close easily. Cut to almost the length of the bag.
Nose and tail: Often board bags get stacked vertically in airports. When this happens, the board sometimes bottoms out inside the bag, and a crushed tail or nose happens. Cut pieces of foam the width of the area, and double the layer of foam on these points to make sure no matter how hard the bag is slammed down, the board is always on foam.
4. Layers
I place my first foam under the padding sleeve that comes with the board bag. Then I roll the sleeve onto the foam, and put my first board, inside its day bag.
I then layer the biggest kite I’m taking on that trip.
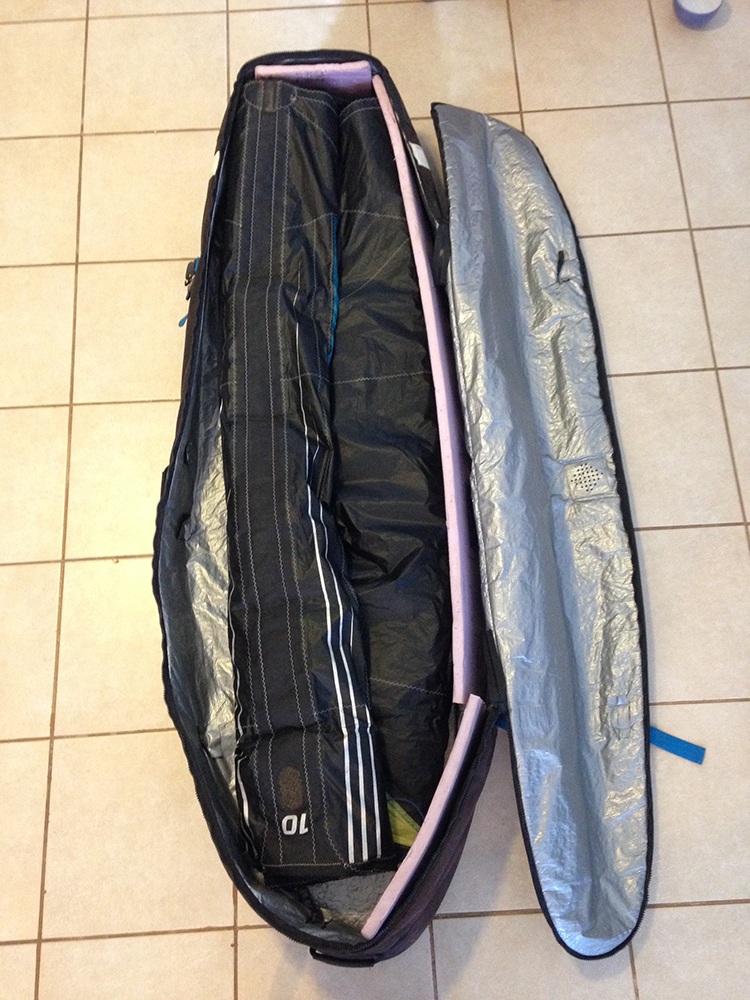
This is following by my 2nd surfboard, which is then wrapped by my yoga mat.
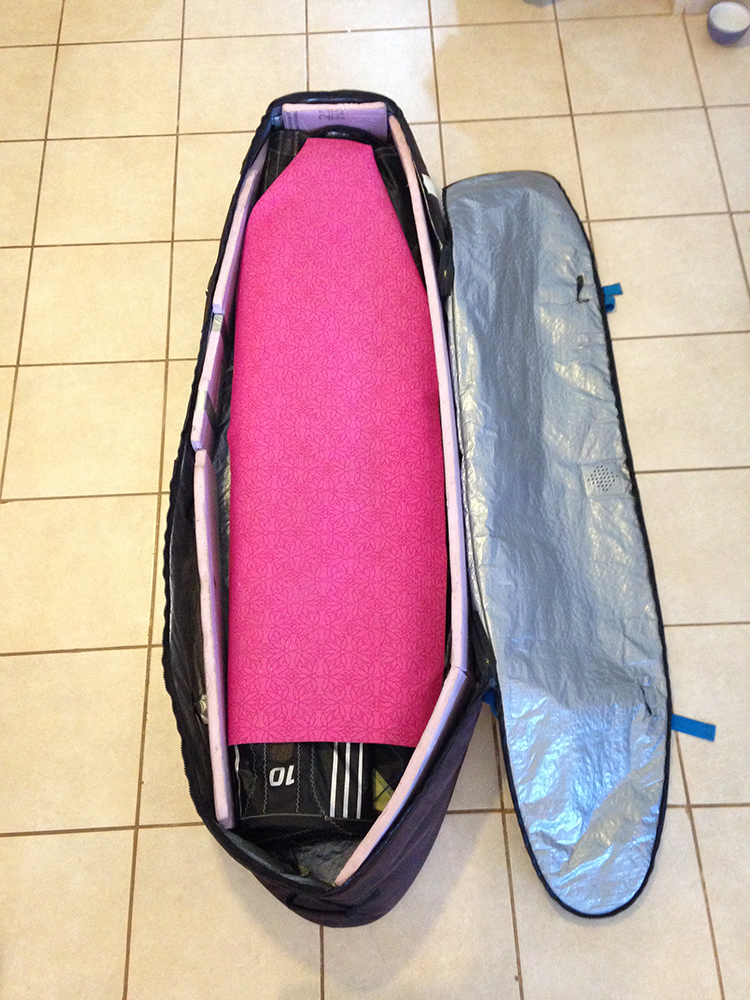
I continue with the rest of my kites, biggest to smallest. At the top of the pile, near the nose along the sides, I put one bar on either side of the bag. I pack kites biggest to smallest so that when I close the bag at the nose of the bag, there will be lots of space for things like fins, wax, etc.
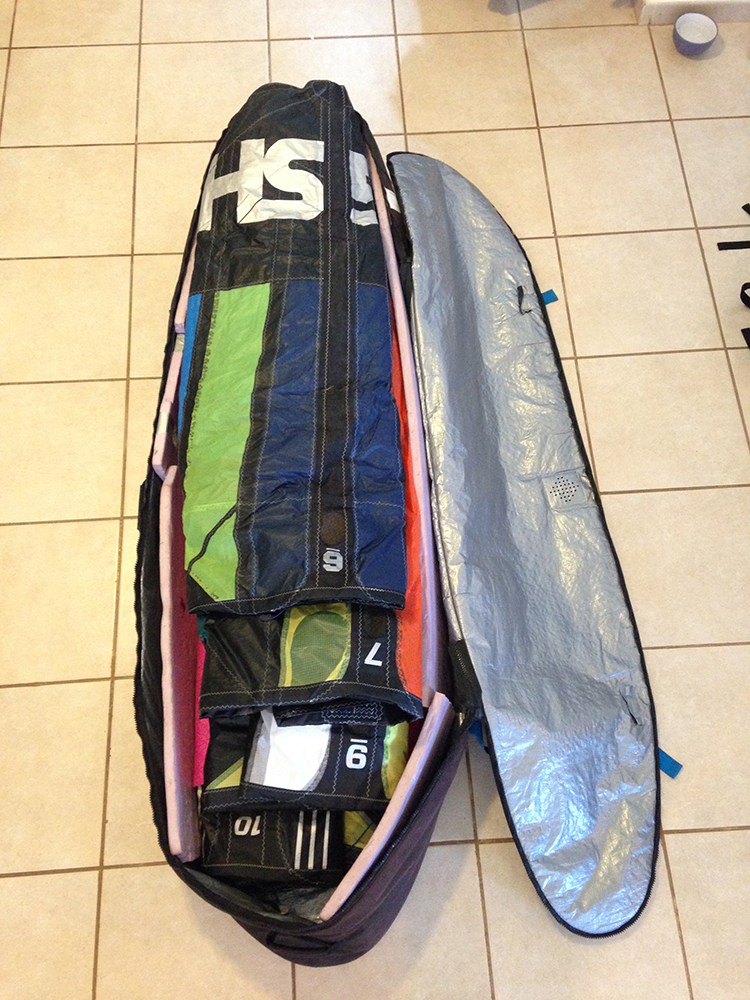
At the base of the bag, I stack my harness vertically so that it acts as yet another layer of protection to the tails of my boards.
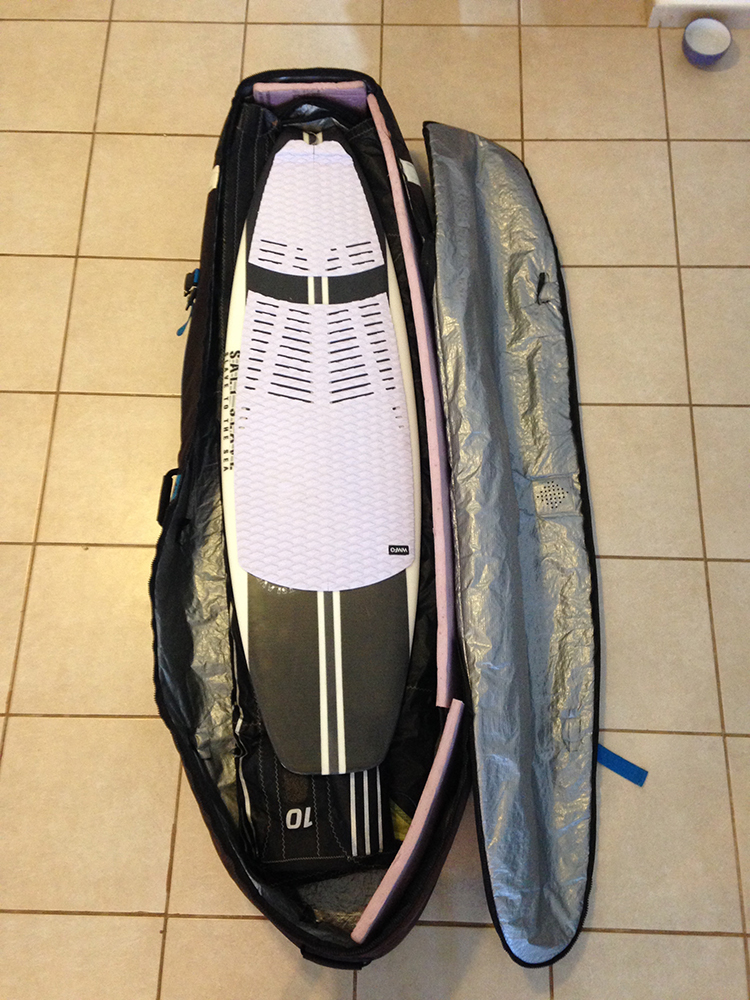
When all is layered, I place my top piece of foam and zip up my bag. If the foam pieces are cut to measure, your zippers should line up at perfect angles and have little to no stress on the locking zip. Gone are the days of fearing your board bag zipper will fail in transit, and your gear will spill out.
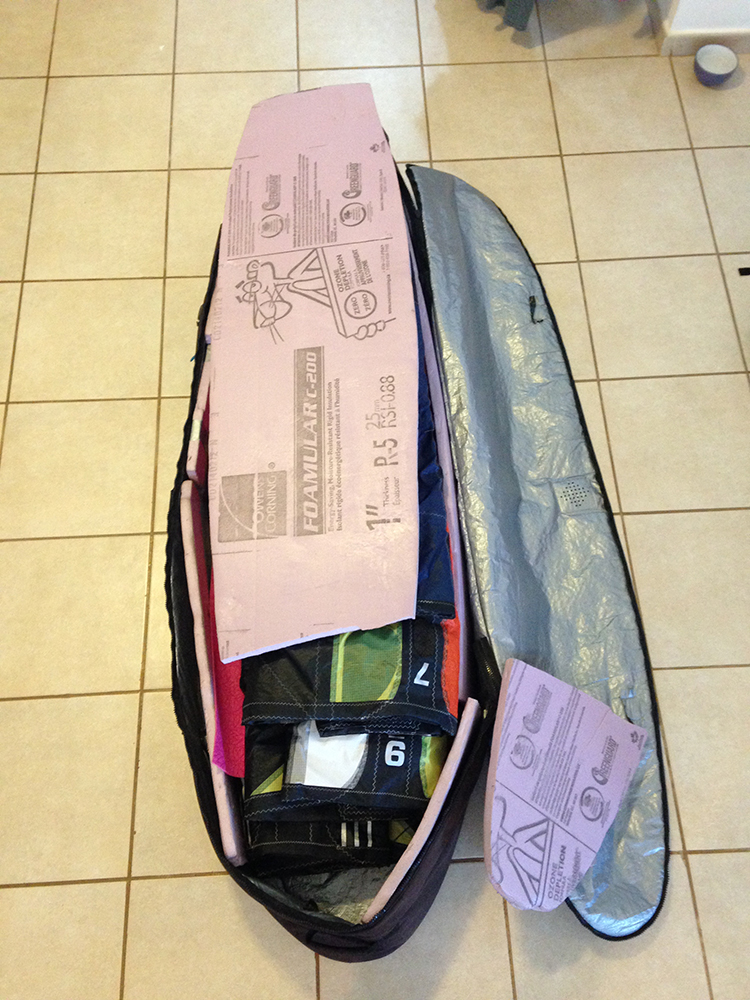
When all the foam lines up, you’ll have a reinforced coffin on wheels. As can be seen, I broke the nose of my top plate so that I could store easy to access items in the nose of the bag without having to completely unzip the bag to access its contents.
With this packing method, I can comfortably fit two surfboards, 2 bars, harness and four kites along with fins and other gear, and it all fits like a glove. For sure you’re going to pay oversized luggage fees for this bag. But packed this way you should still be under the extra costs of overweight luggage as well.
Once finished you will have a bomb proof board bag. Kick it as hard as you can, and you’ll only break your toe! I’ve even used it as a bed on especially long layovers where I’ve been unable to check-in for my flight before the next day. Push it up into the corner, prop your clothes bag on top against the wall for a giant pillow and snooze away on the board bag. I’ve done it more than once.
As I mentioned it’s been five years travelling around the world with this same setup; that’s why the bag and foam look so rough. But in 5 years not one breath on my gear. Time to customise another bag to last five more years.
Fri 19th Apr, 2019 @ 1:00 pm
By Andreas Lagopoulos
Andreas has been teaching kiteboarding for years; he's passionate about helping riders to progress. Through his business Uncharted Kite Sessions, he has enabled riders like you to live, ride and learn from some of the best kiters on the planet in some of the most incredible locations in the world! You'll visit places that aren’t listed in travel books, and Andreas will take care of every detail along the way.


![Best Video of 2025 [Nomination] – VORTEX a Kiteboarding Film by Tom Bridge, Xander Raith and Noe Font.](https://i.ytimg.com/vi/qv3Gd_6lL7c/maxresdefault.jpg)