
Strapless Chop Hop
Technique / Intermediate


Introduction
Strapless airs, what’s not to like? We all have to start somewhere and this humble chop hop is pretty much the best place to work on all the necessary ingredients. Get the approach, take off, inflight entertainment and landing down and the sky is your oyster… Velcro, super sticky wax and the dark arts. None of these will be necessary if you can get some air off the flat. Then hitting stunt ramps on the way out and landing without snapping your favourite stick will all seem a whole lot more realistic, attainable and dare we say it enjoyable, and those on-shore days will become something that you look forward to as much as perfect peeling down the line days.
Chop hop may not be the de rigeur name for a backside strapless air, but it should give you a good idea of what’s involved. And the beauty of some chop is that it will help you get your timing with kite, pop and ramp, even though the ramp is not actually doing a great deal other than making you go right “now”!


You’re ready to try this if you are happy riding upwind with a bit of speed, edging the board. No more is required. The only thing to keep in mind through all of this is that you should always be aware of where the board is. There will be plenty of times when you and the board part company at various stages of getting air, and you don’t want to be coming down onto your fins. It’s easy to avoid by tweaking the kite one way or the other to pull you away, but only if you know where to avoid in the first place.
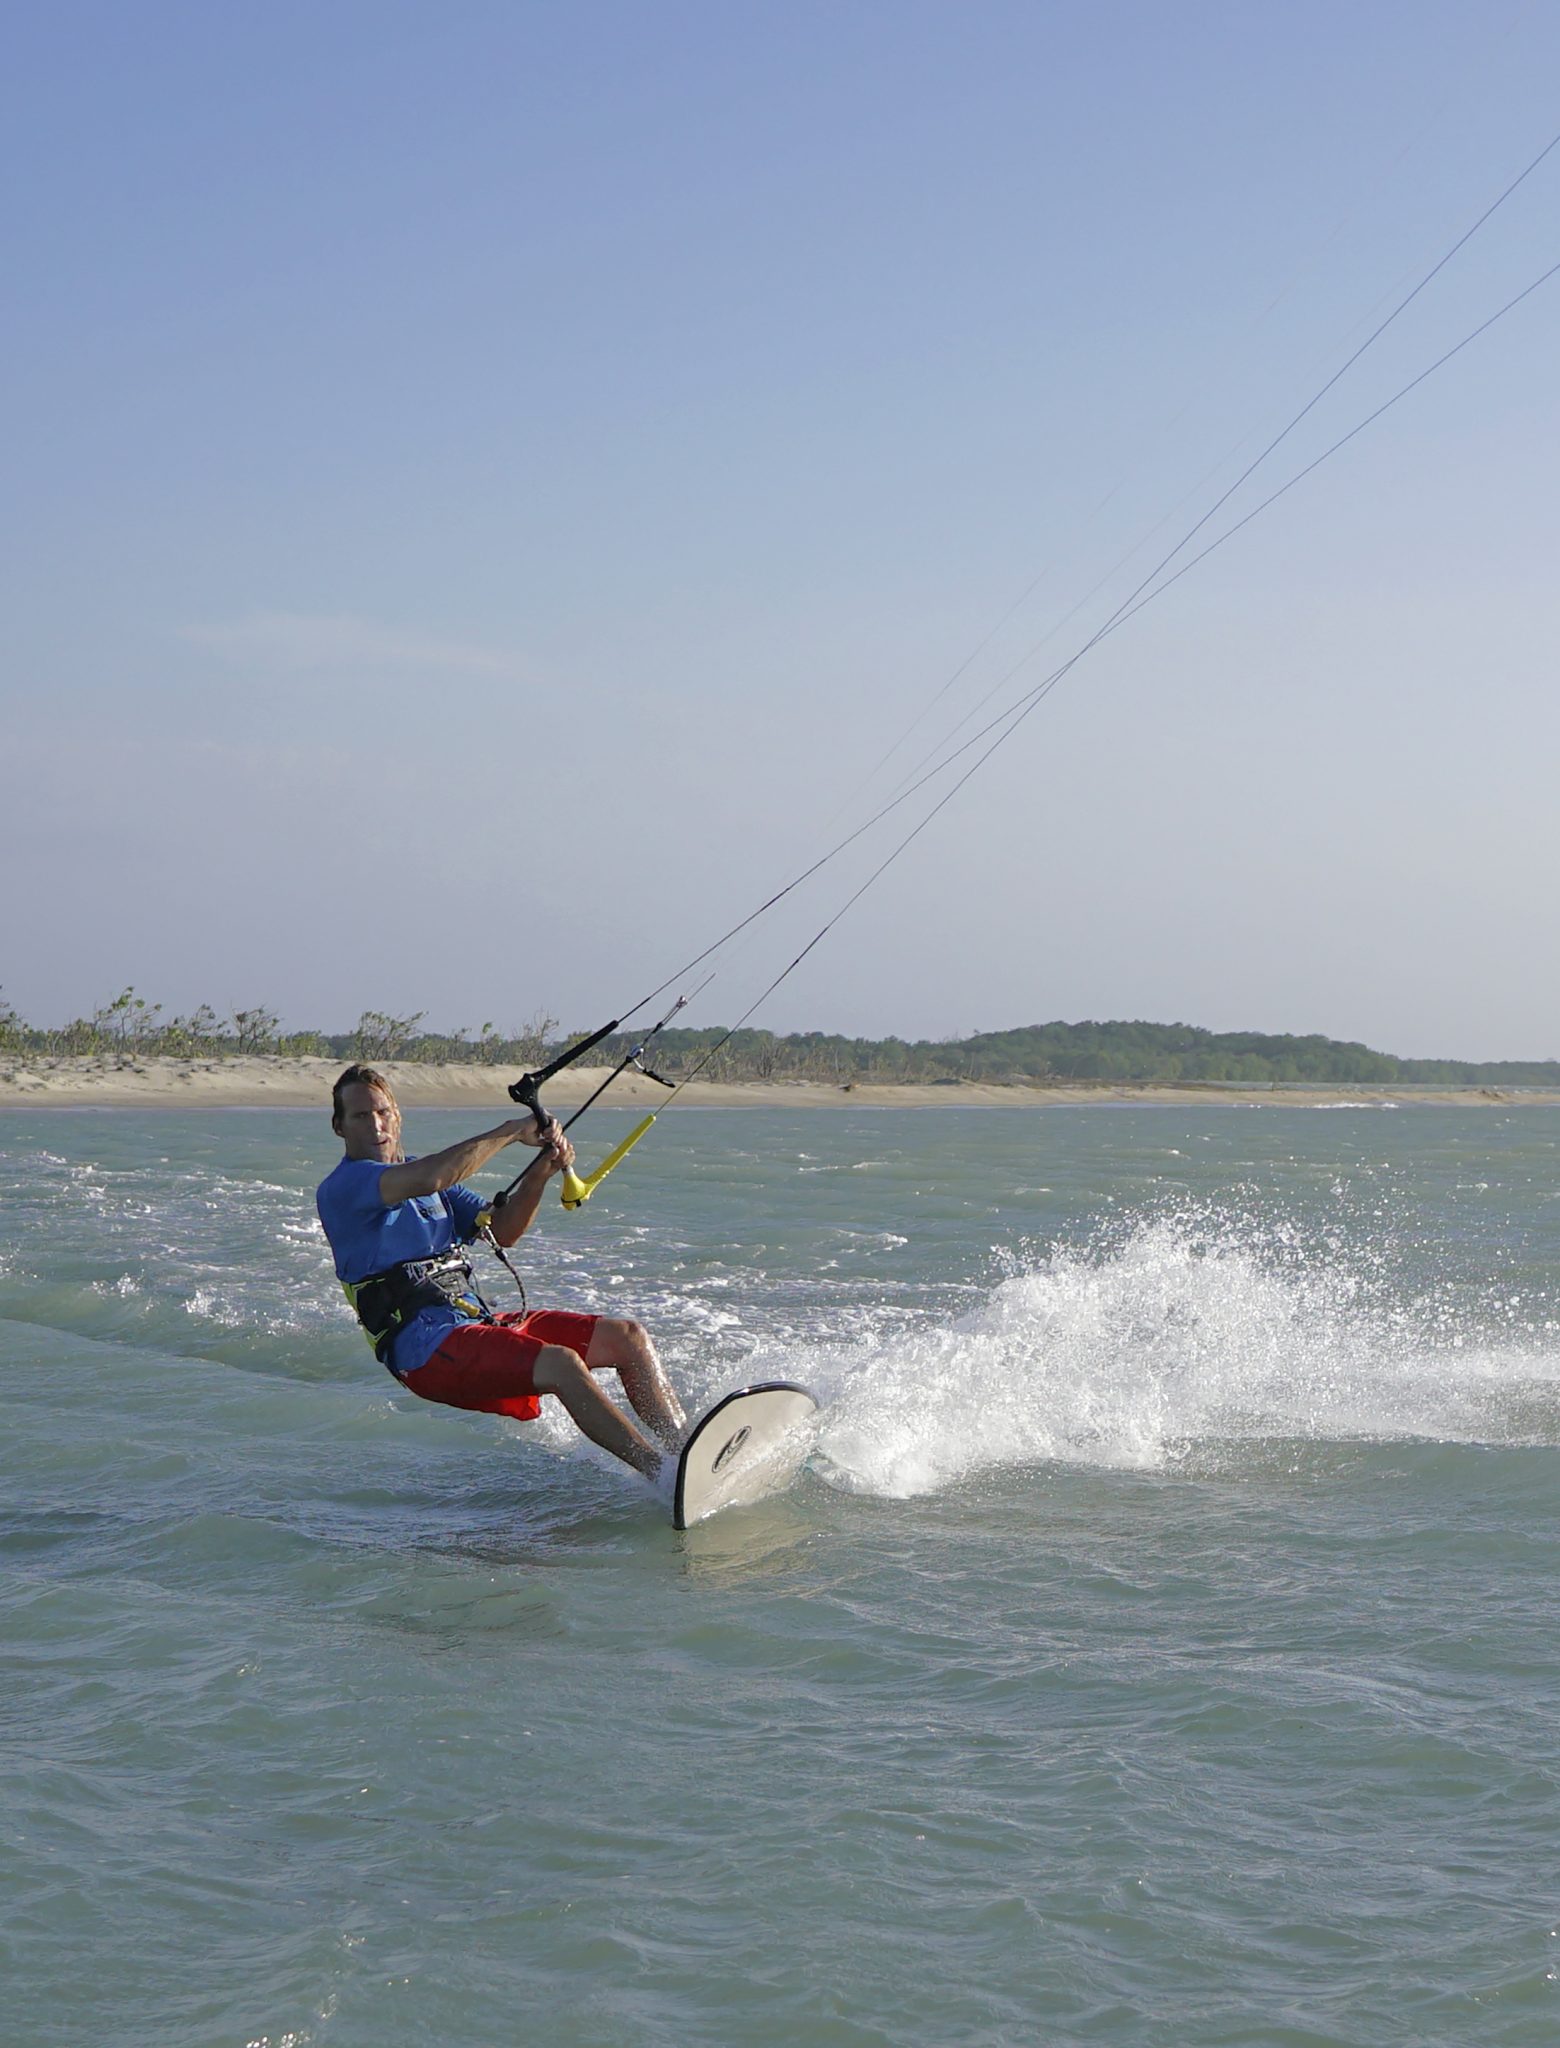
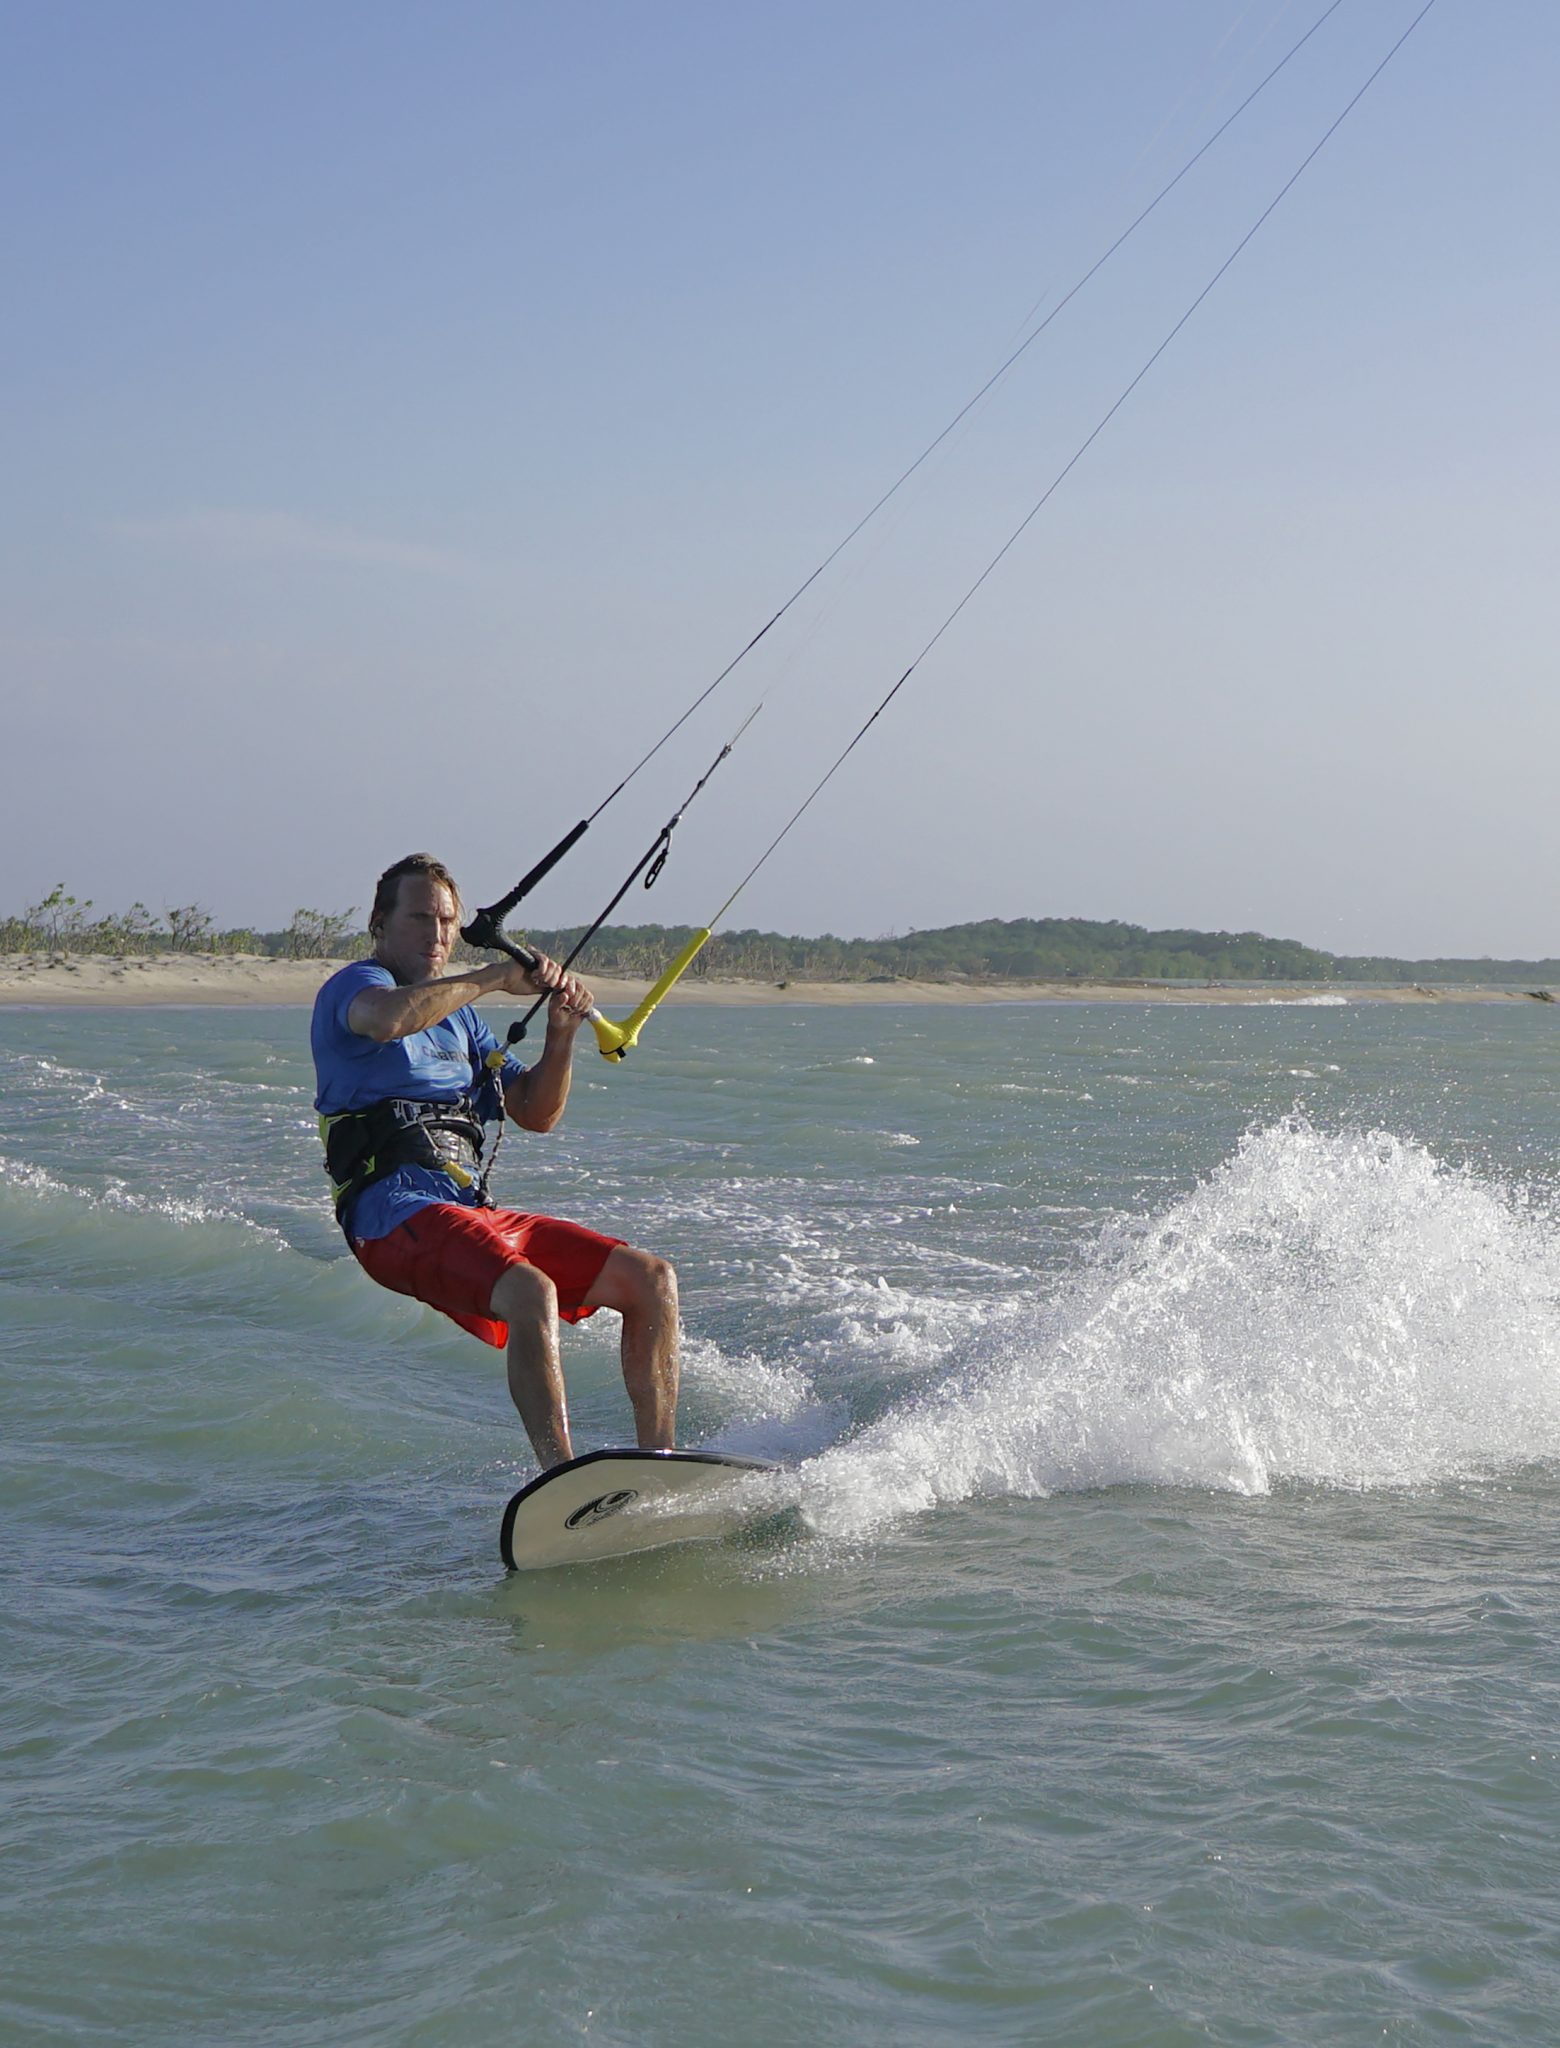
Balance & Control Before The Send Pic A.
Before studying how to get off the water, it is worth spending a moment contemplating how we stay on the water and on the board. To tap into some of that board sticking black magic you will need some speed. However, if you’re bouncing around, desperately gripping on with cramping toes you won’t have much hope of maintaining control as you transition from blasting along to launch pad. The object is to find a stance that allows you to be both comfortable and maintain speed whilst edging against the kite. Every board will be different and each one of us is different. For sure if you look at some of the pros they will be doing the splits with a foot at each end of the board, but just remember that one man’s beef is another man’s bacon and they are top athletes. Find the stance for yourself which is wide enough to control the board, but which doesn’t glue your hips into a locked position. You’ll need your heels sufficiently on the edge of the board, especially if it is a wider surf design and your front foot will need to be sufficiently forward to control the nose, whilst the back foot needs to be far enough to sink the tail when you stamp. As you widen your stance you may be pushing more board into the water this may slow you somewhat. To counteract this, you may need to lower your kite so that you can edge hard against it, or try a different position. The advantage of all of this is that if you’re edging you’ll be cutting through the chop rather than bouncing. Get comfy riding around this way and with your kite below the magical 11 or 1 o’clock.
In the pic you can see that Christian is edging against the kite, with his weigh low whilst pushing against the board. This way he’s got the perfect cocktail of speed and control. With tension on the lines he sends the kite upwards, giving the bar a short but meaningful send. He doesn’t want the kite to go past 12, and if it doesn’t get all the way there it isn’t a problem. He also has his eye on a small bit of chop upwind that he’ll use as a ramp. Although the ramp won’t push his board up much it will be his queue to launch and gives him something to aim at.
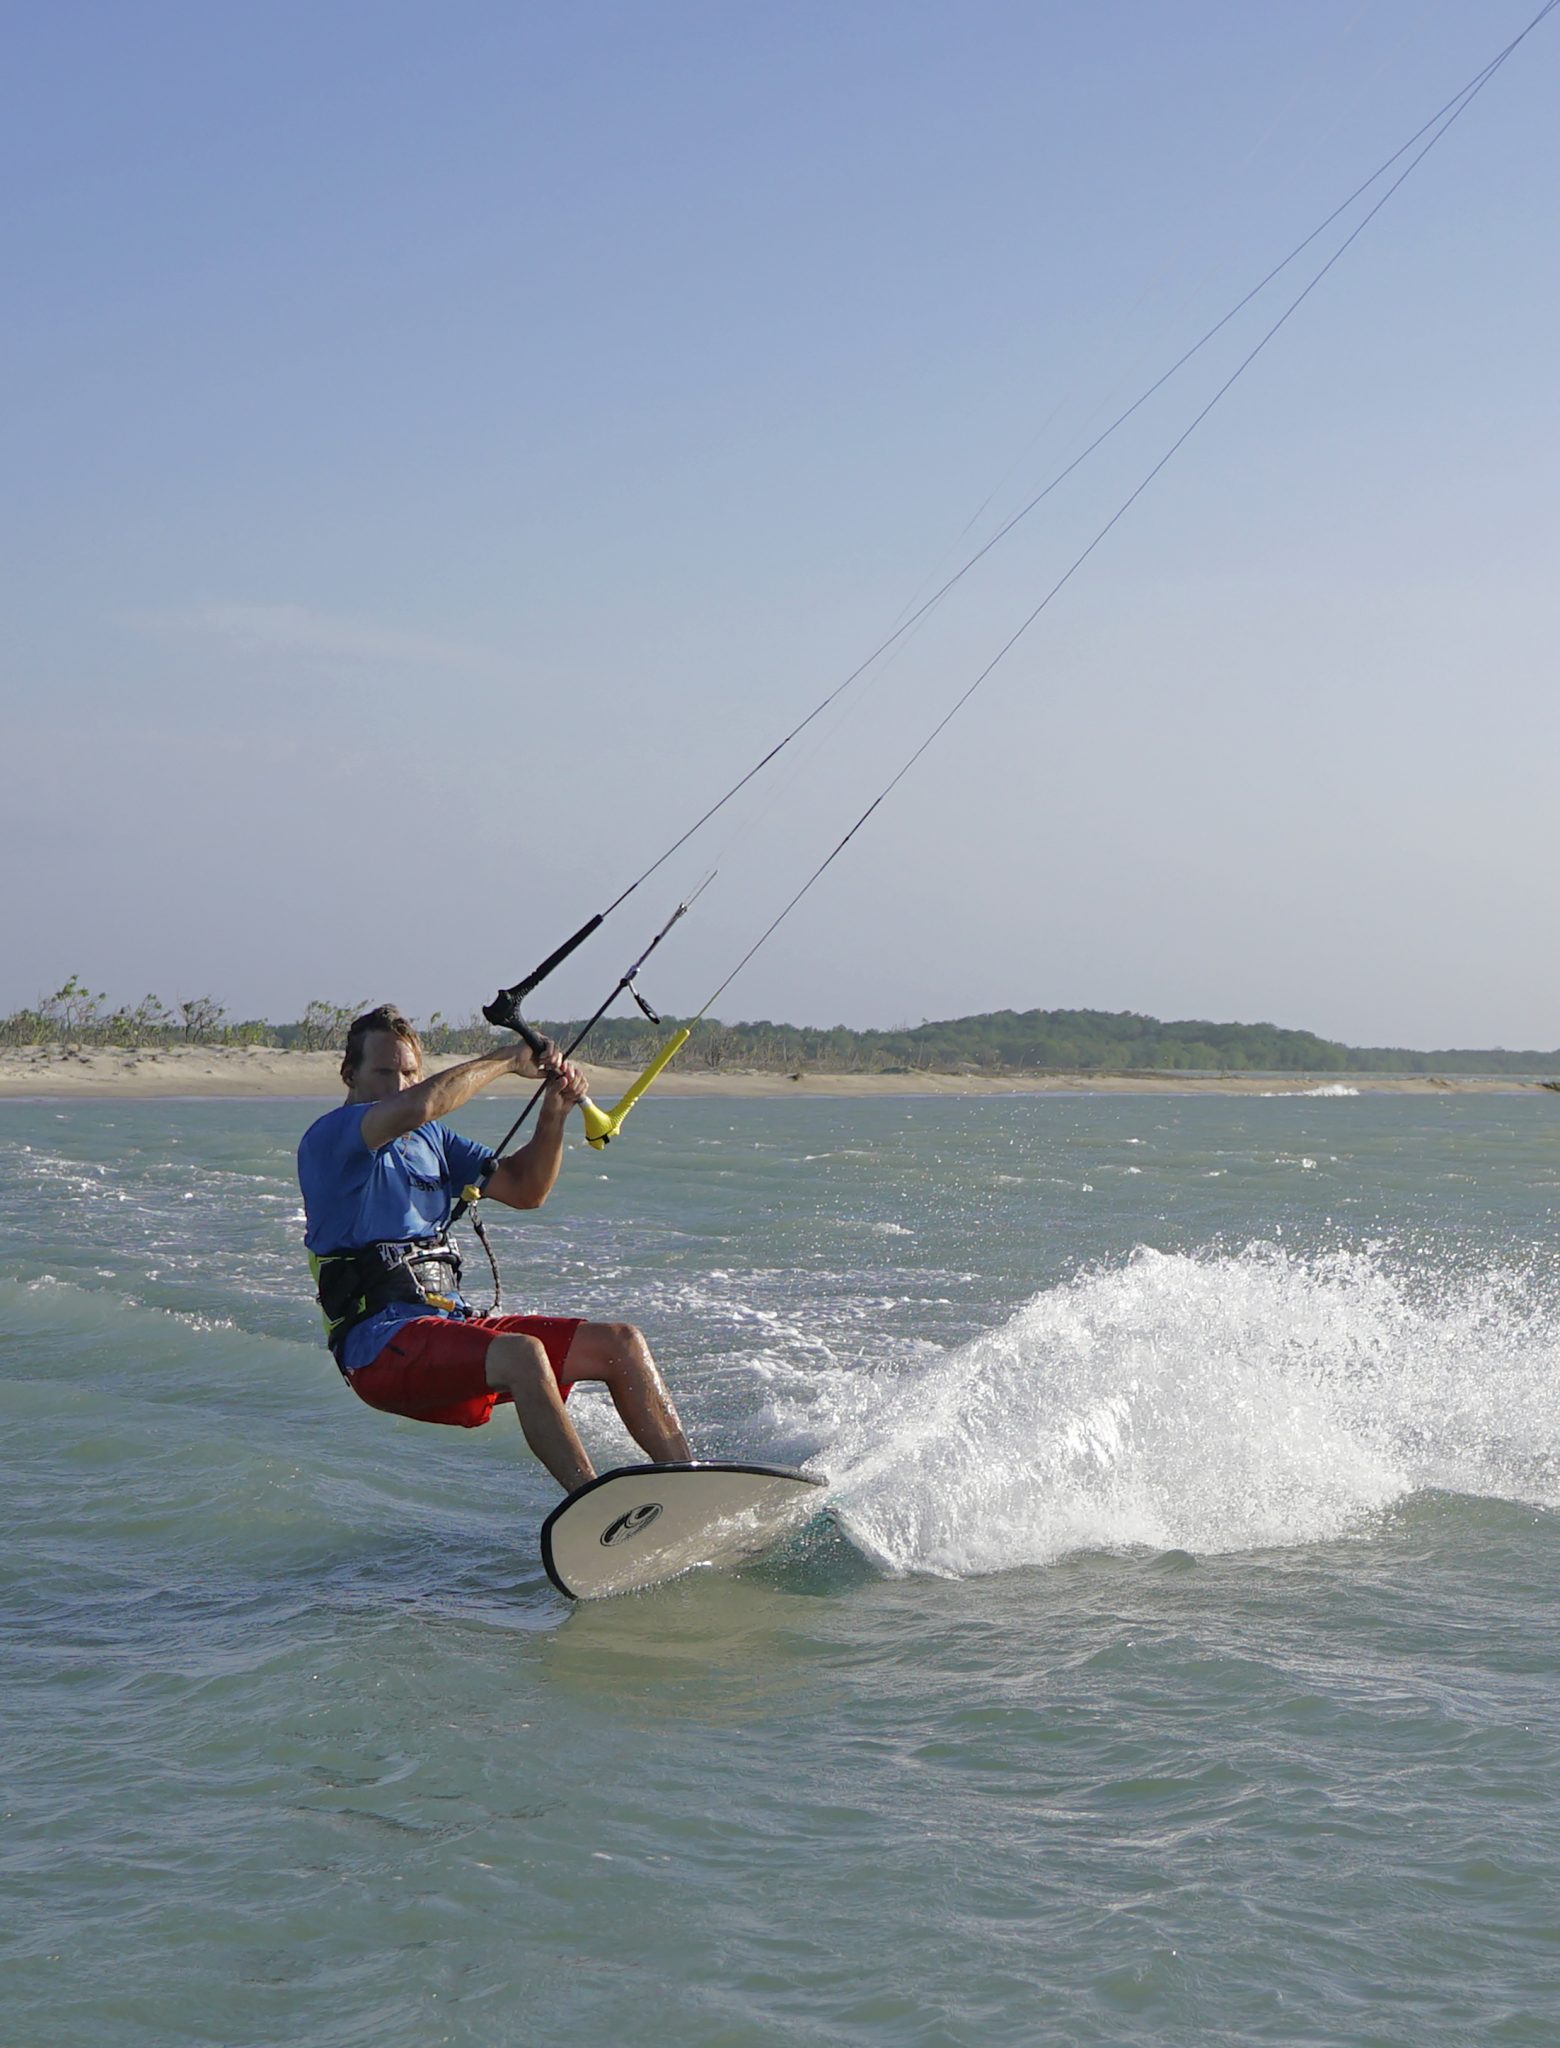
The Carve Pic B.
By far and away the easiest way to get the wind under your board is to turn the board into it. This way the wind will get under the nose of your board as it lifts. However, if you’re edging hard against the kite, you’re being pulled forwards. If you want to carve up further you need to let the bar out. Here Christian lets the bar out and hey presto he can carve up into the wind. As he carves he drops his weight by bending both knees so that his bum lowers towards the water. The more you flex the more you can pop and the less likely you are you jump yourself off the board, so the lower the better. The wider your stance yet again the lower you need to get to maintain mobility. Christian hasn’t just dumped all the power, but has let the bar out sufficiently so that he can carve up. This will not be possible if your sweet spot is miles away so make sure it’s close enough. It’s worth noting here that this part and the following two parts happen in rapid succession. By the end of you carve you want to be hitting your ramp with your kite slightly depowered and high in the window so that it isn’t pulling…
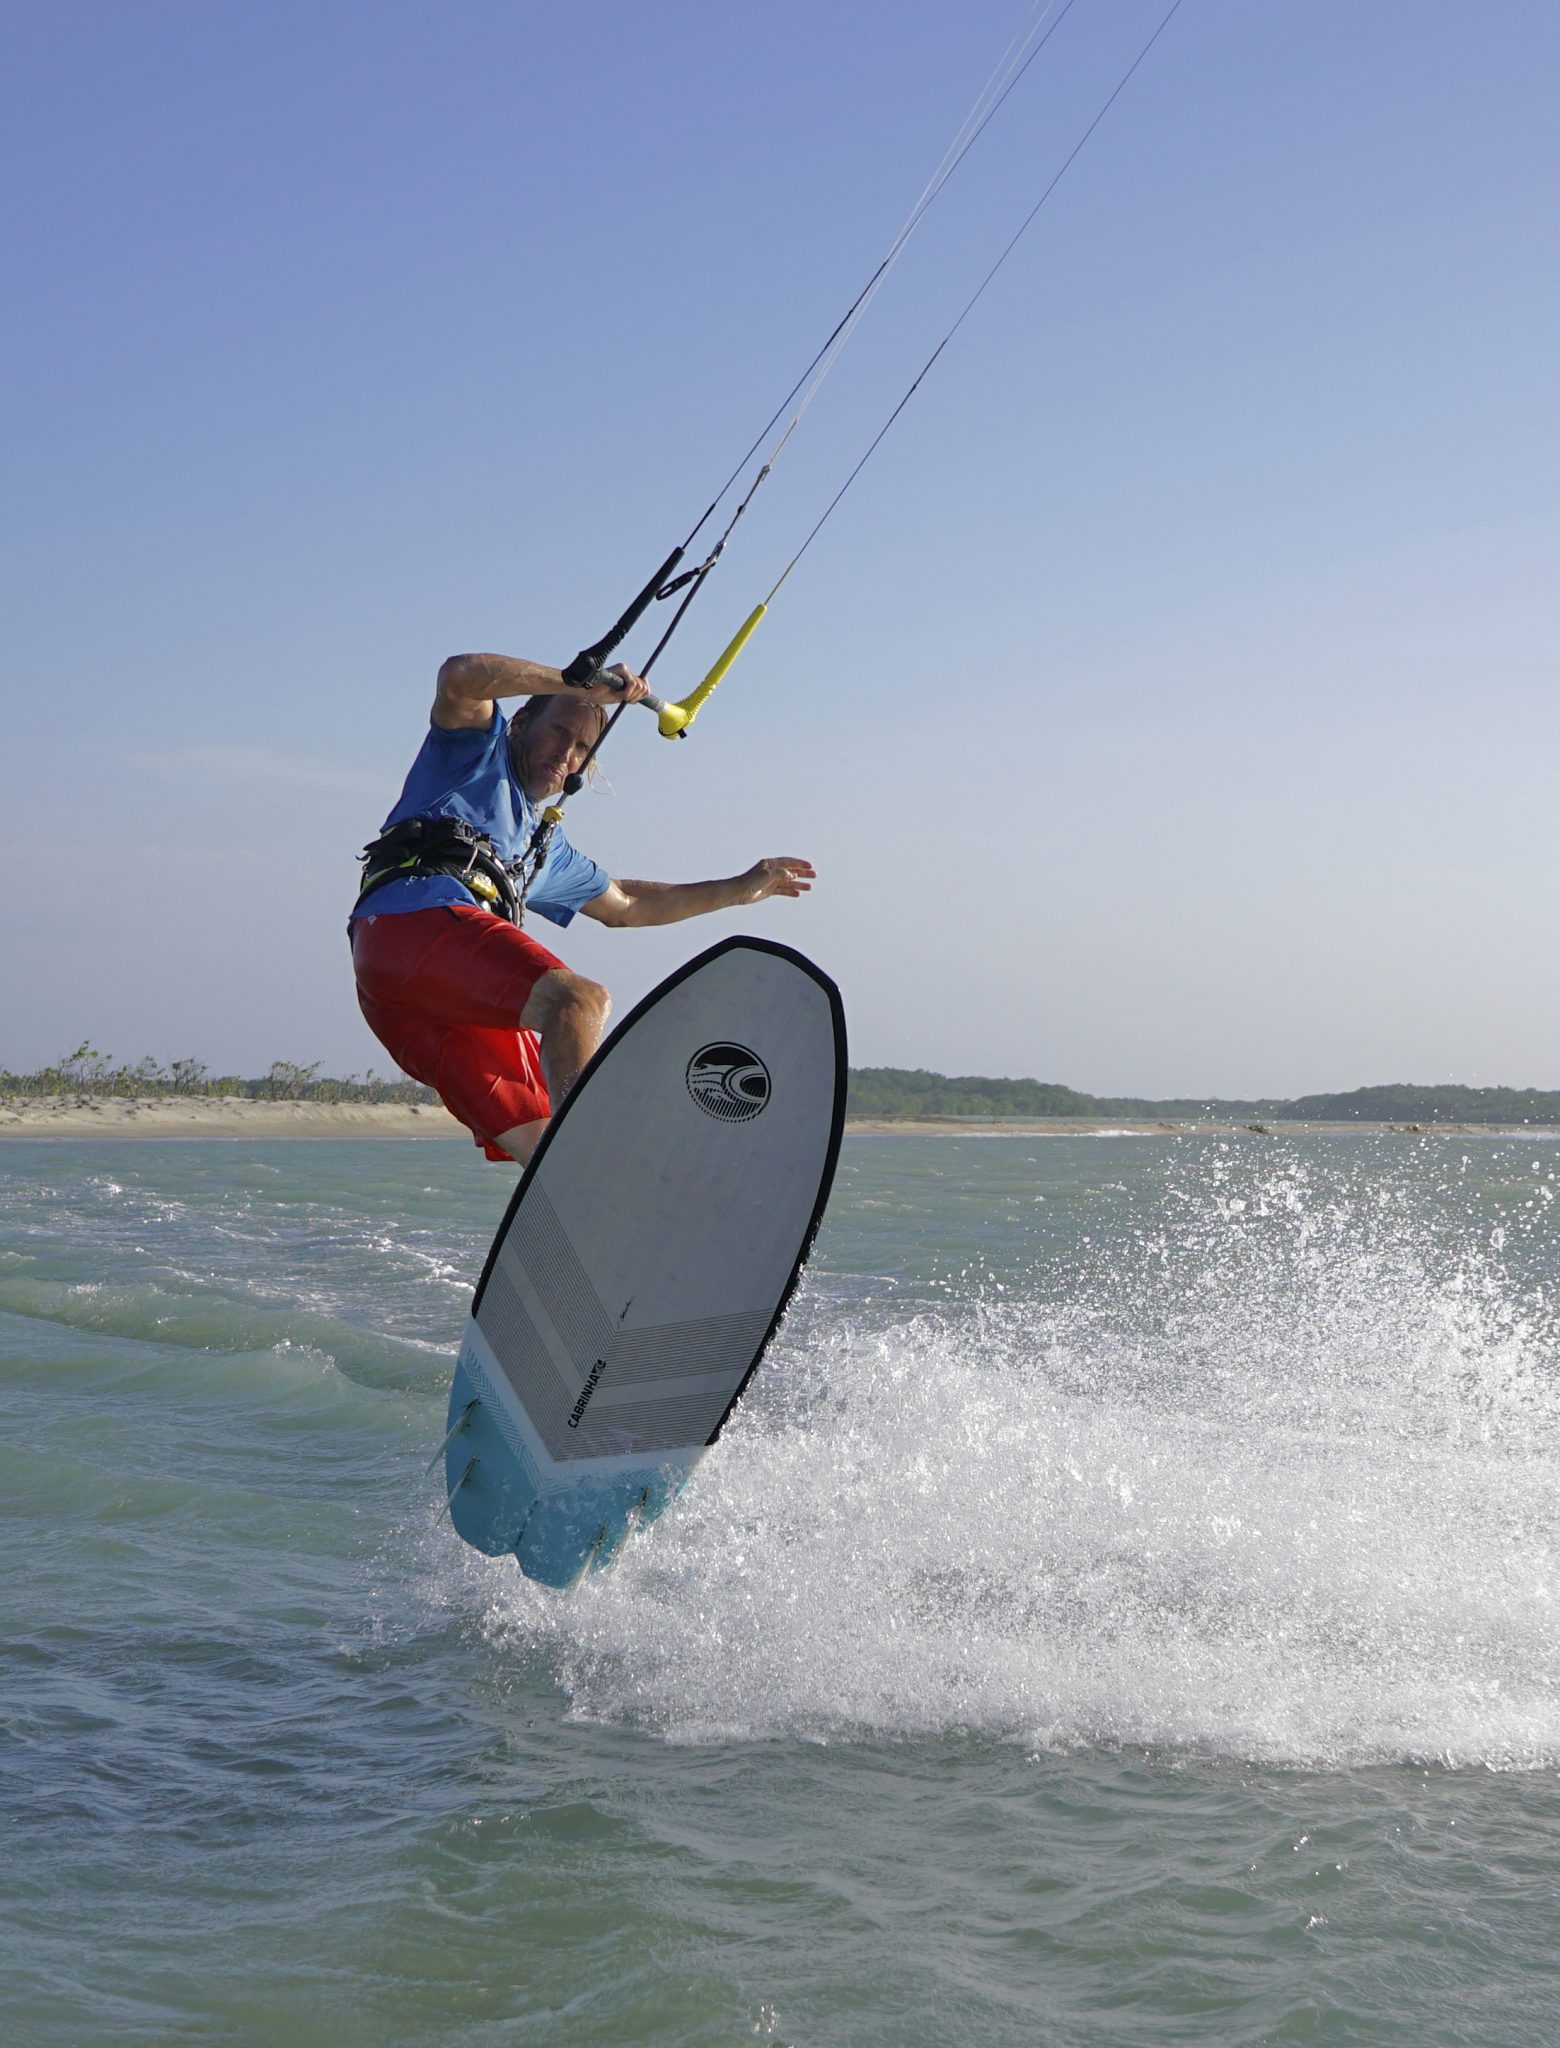
Compress, Pull & Cork Pic C.
This moment, a whisker before take-off will decide how successful your hop will be. In essence you’ll be performing an ollie whilst pulling on the bar for lift. If you don’t know what an Ollie is think of it as a flat pop and read on. It can help to compress a touch more before you hit the ramp. This has the added bonus of flattening the board slightly as your knees bend, which will get you more over the board when you take off and allow you to spring up even more. As the nose of the board starts to rise up your designated piece of chop, help it by dropping your weight slightly back towards the tail of the board and then stamp down hard off your back leg whilst you simultaneously pull the bar in. Christian is rising from his crouch and he’s pulled the bar in hard, His hips have moved back slightly which has also opened his hips and shoulders. The idea of stamping down hard on the back leg is to cork the board. Just like pushing a beach ball under the water, once you release it, it’ll cork back up and out of the water – so will your board. Last important point to note from the picture is how by compressing, then stamping and pulling on the bar, the kite has pulled Christian up and onto the board. This means that even though he has carved hard, when he stamps he is stamping down on the tail, not against it a la Twin Tip. This will make the in-flight entertainment a whole lot more fun as it encourages you into the correct flying position.


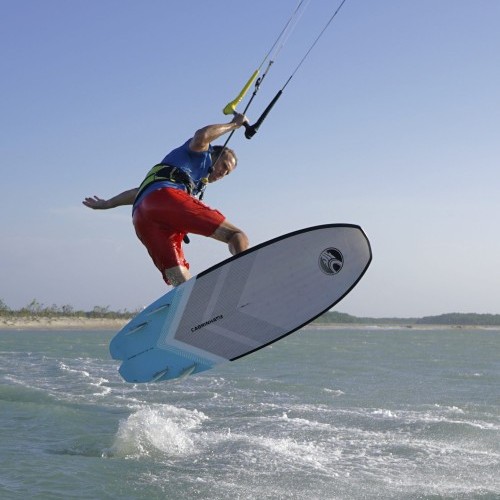
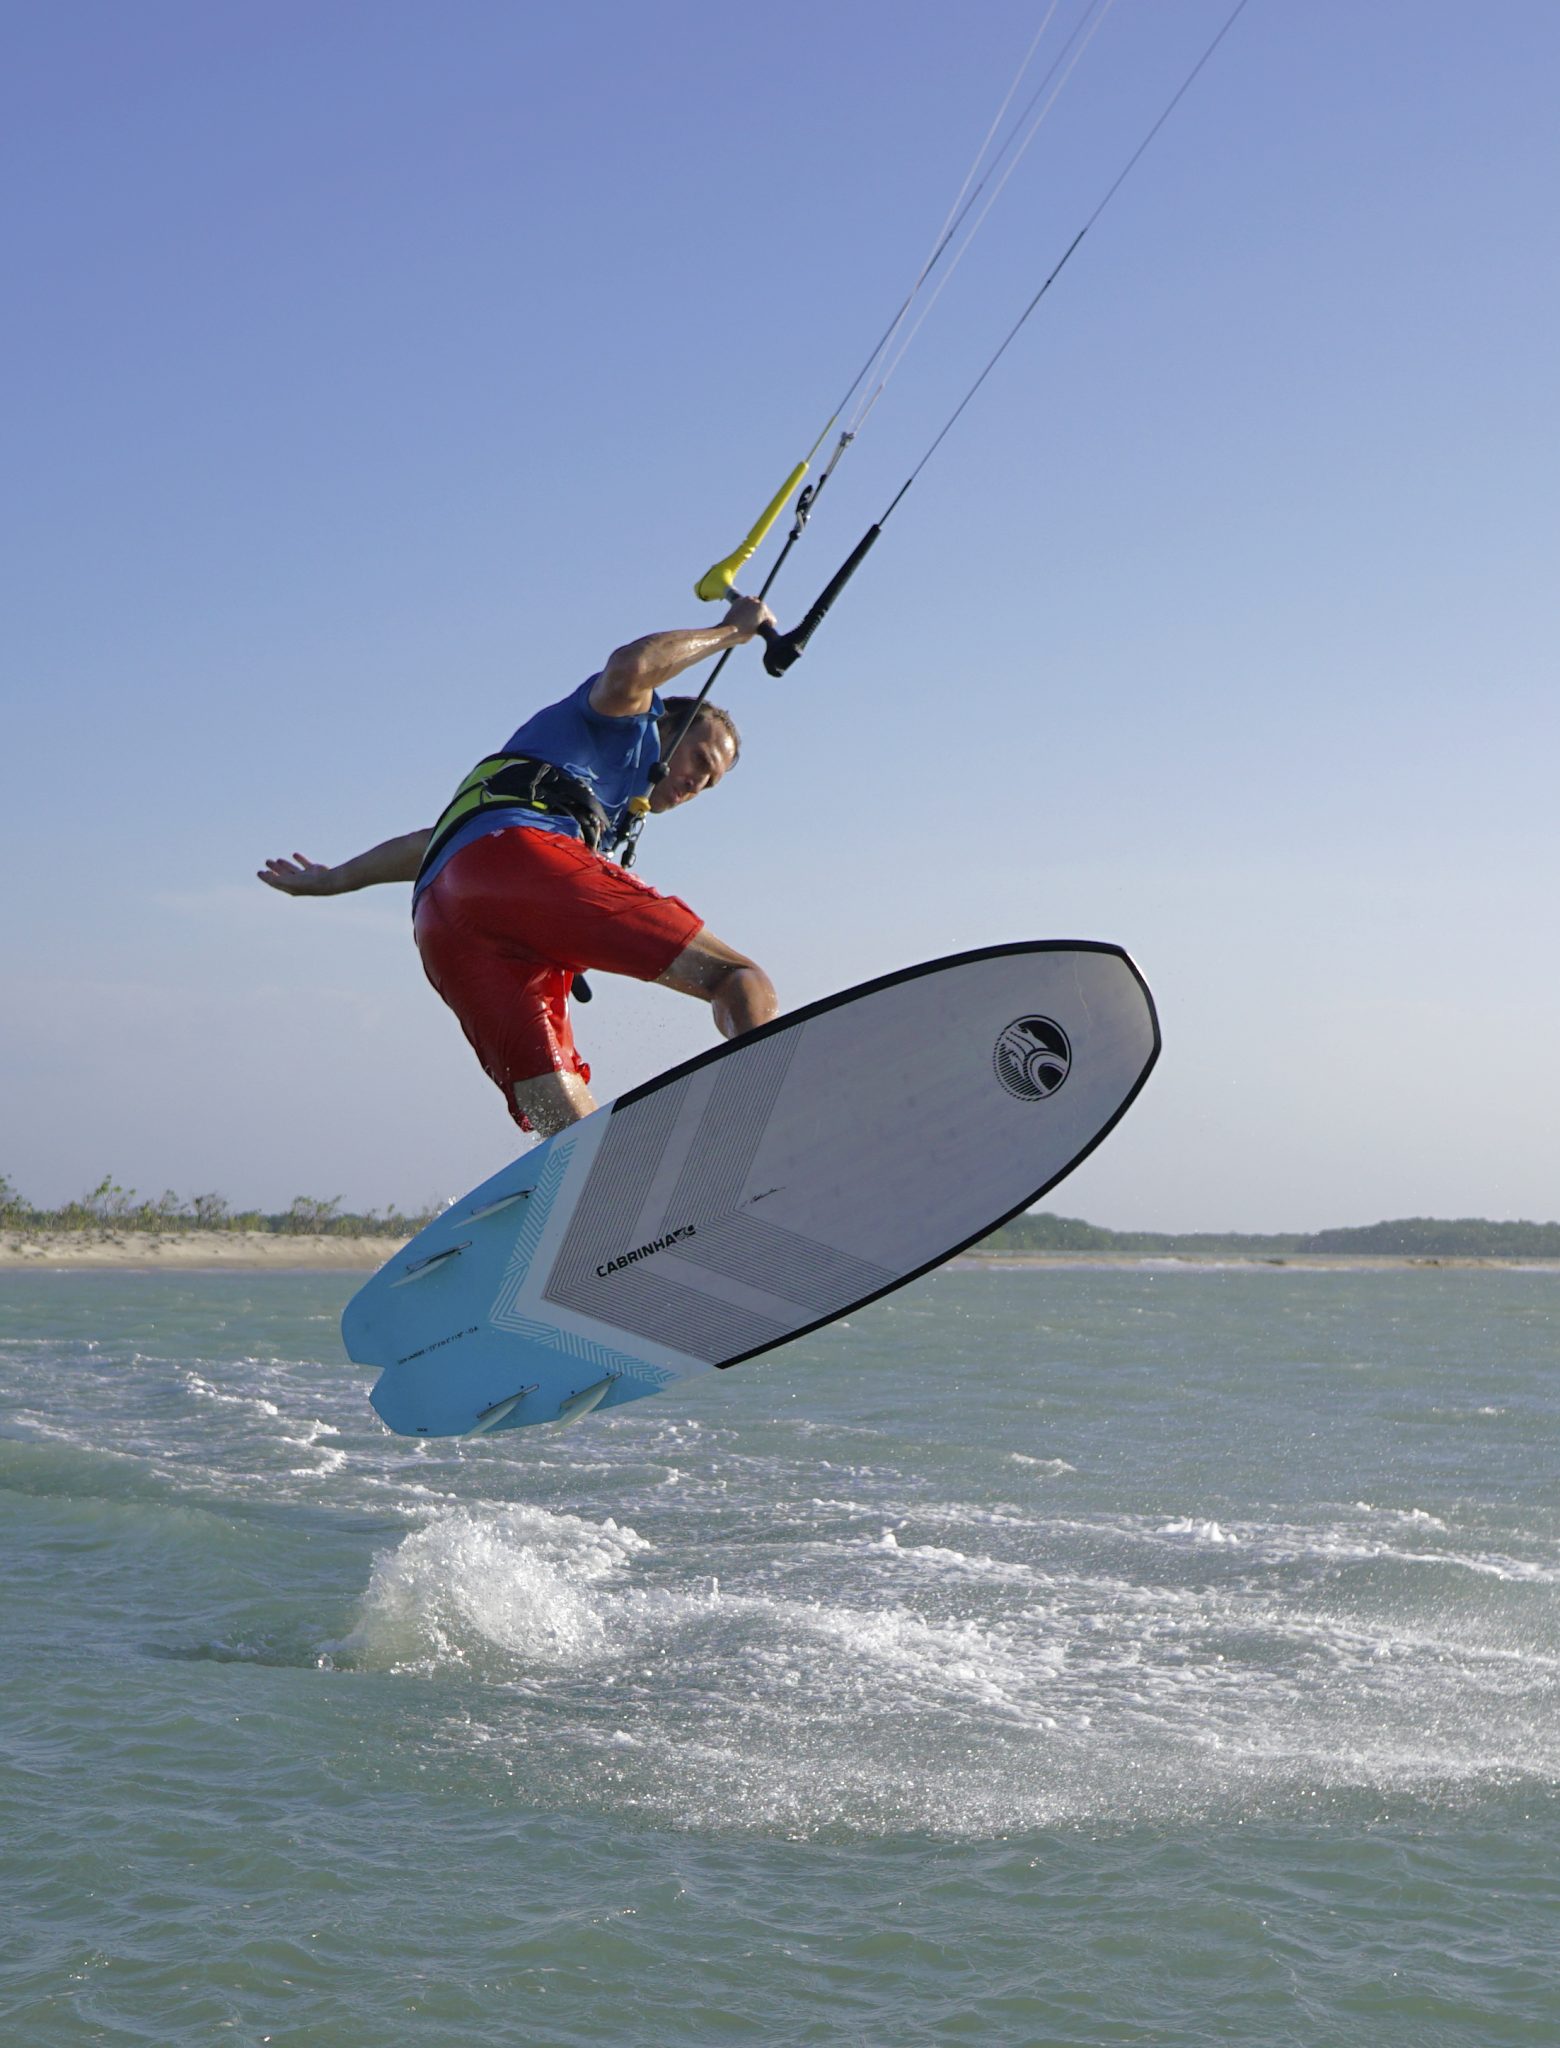
Airborne Pic D.
This is the moment we’ve been waiting for, the board leaving the water. However, your work is far from done. You can see how the nose is rising and the tail is still low. Immediately following the stamp Christian has put all his effort into lifting his front knee into his chest. Now this is where the picture doesn’t do the movement justice as he also tries to push his chest forwards and down towards his knee. If you just lean back you’ll stay in this position, but you need to get your centre of effort towards your front foot, which will help control the board and opens your chest which prevents you from turning immediately downwind. Other must dos are to release the back hand and push the bar away. Releasing the back hand pulls your body weight downwind of the board, encouraging the board to “stick” to your feet as the wind blows against it. And it also allows you to push the bar away, sheeting the kite out, which then prevents the kite from pulling you away from the board, also helping keep you in contact with the board.
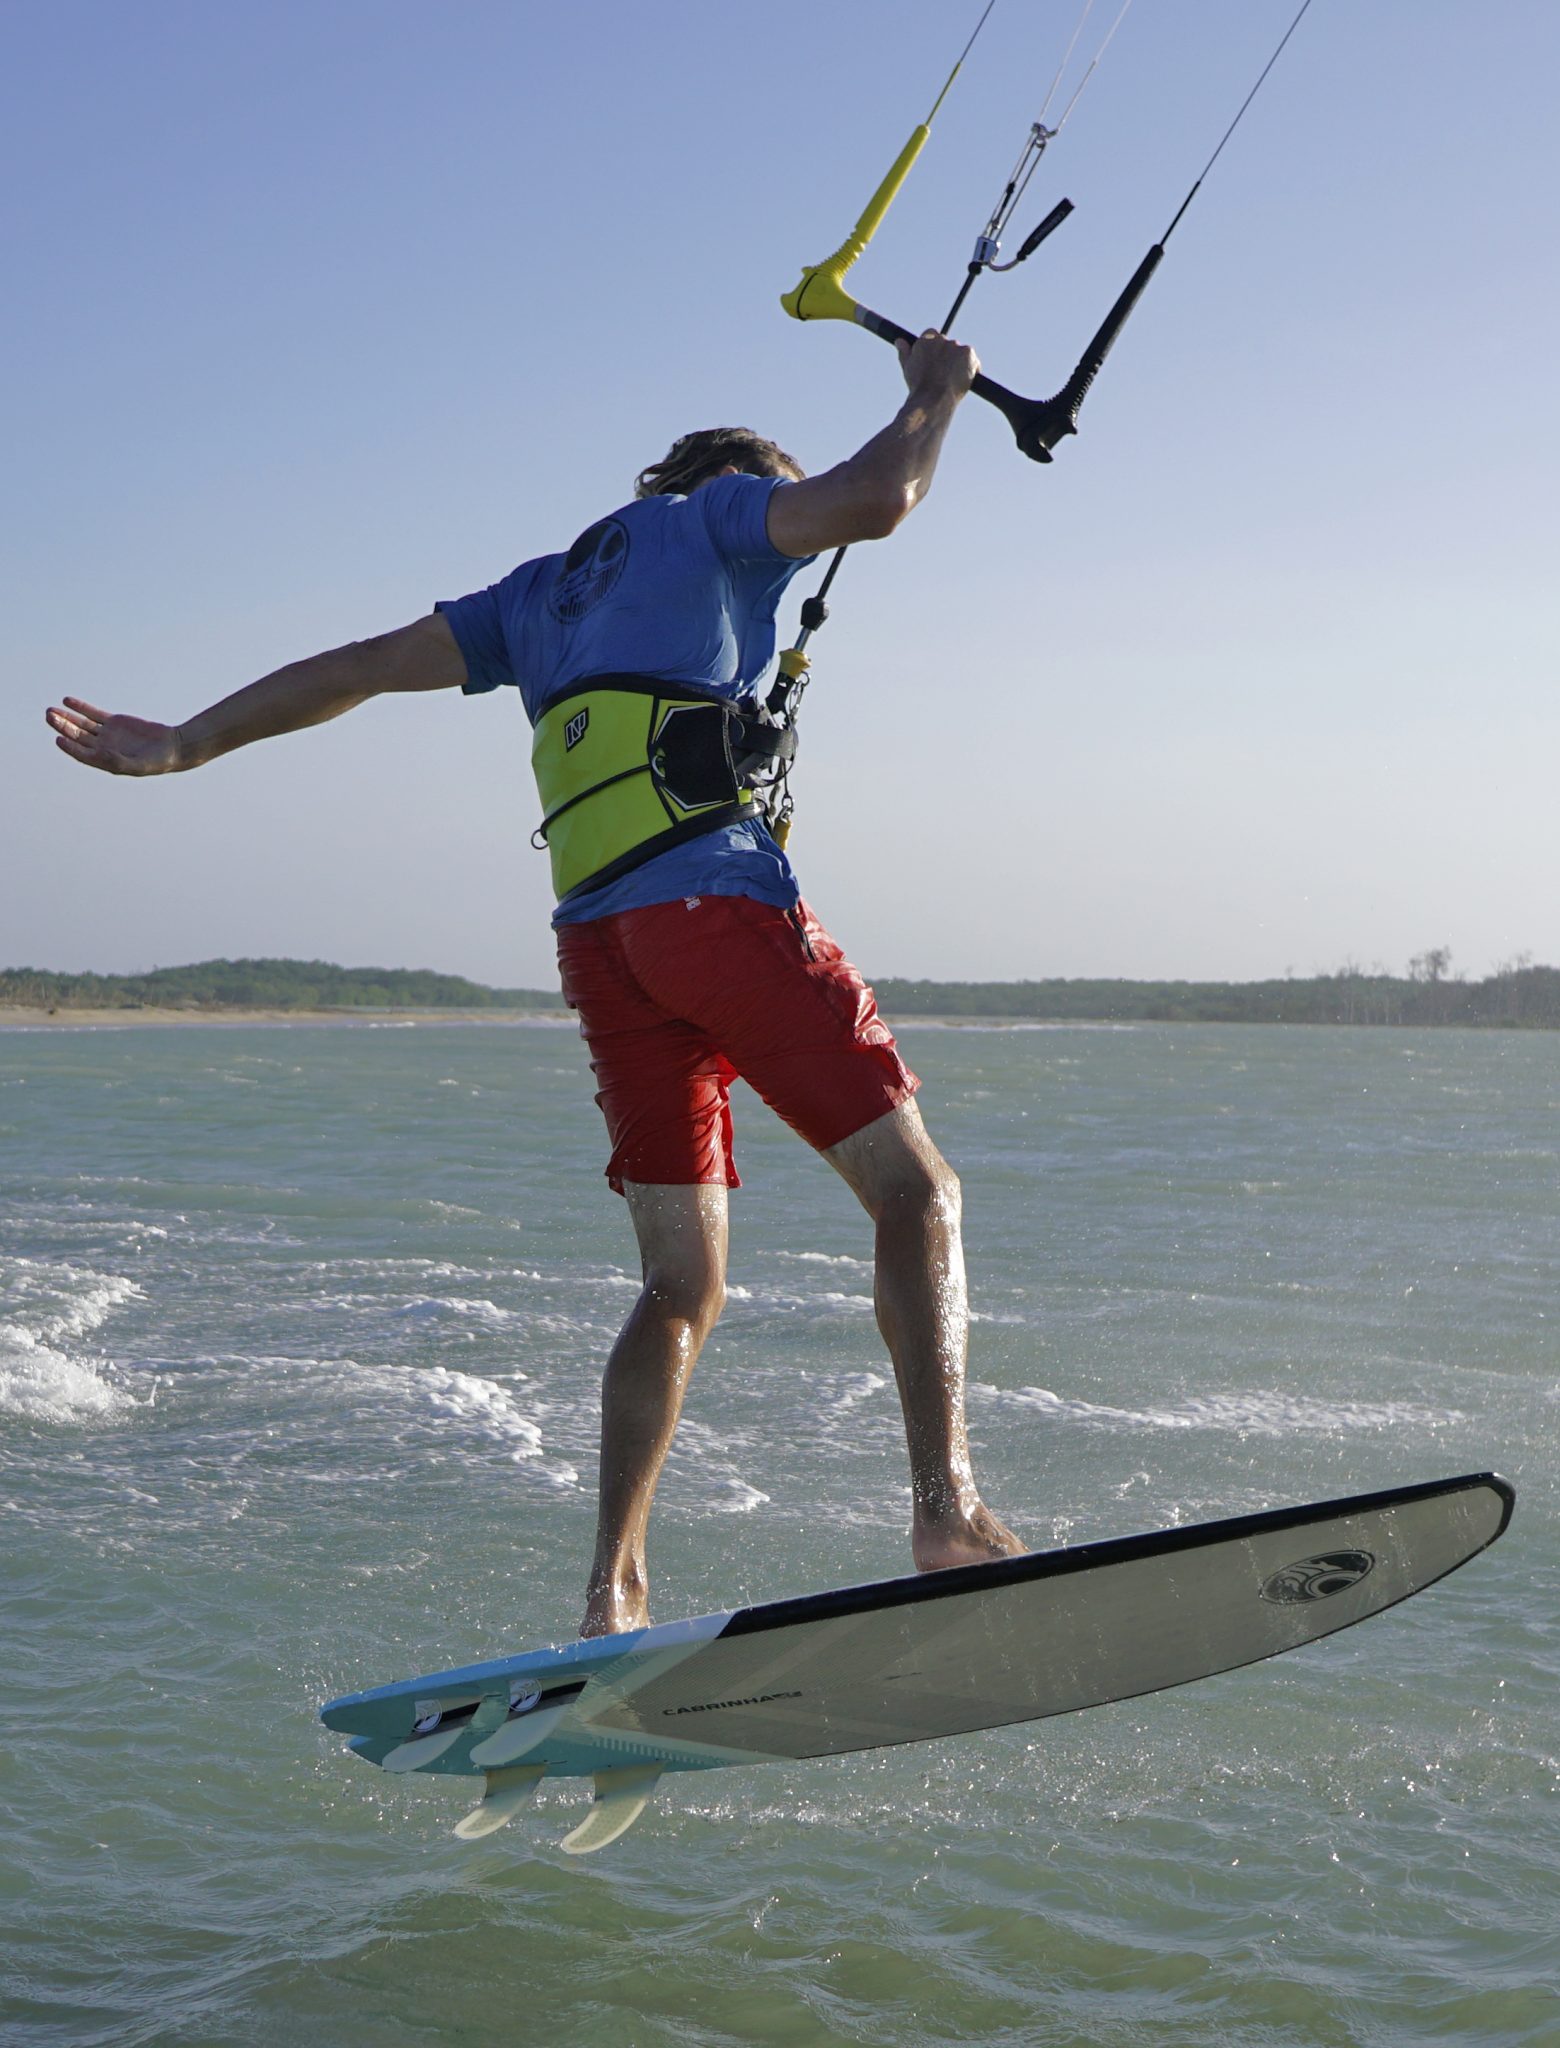
In-flight Entertainment Pic E.
Show me your board. If your board ends up in this position it means that you’ve mastered the witchcraft (at least on this attempt). This position has been created by the compressing of your knees pre stamp, the pulling on the bar and the moving your shoulders forwards. Those parts effectively positioned you downwind of your board, and done with enough control they’ll keep you there. Christian has both knees bent, as it’s important to bring the back leg back up after stamping. If you stamp hard enough the board will cork back up and find your back foot. However, if you don’t lift your back foot post stamp, you’re likely to push the board severely off the wind and you’ll lose control of it. With both knees bent the board will stay close to you. At this stage of chop hopping as long as the bar isn’t in you’ll be fine. You can see the position of the kite is just forwards of 12 o’clock, and this is where Christian sent it to pre cork, he hasn’t redirected it.
Newton’s Apple Pic F.
It is only a matter of time until it’s all over. Wind strength, speed, kite send, stamp, weight of board, they’re all factors but realistically your aim is to get off the water and feel the wind push the board onto your feet. It’s a remarkable sensation, you’ll know it immediately and it’s compellingly addictive. However, as you slow and drop the board will also give in to gravity. Try and drop down onto it, extending your legs to keep in contact for as long as possible, so that you’ll reunite after only the shortest of separations. Pushing the bar out further will also help you drop down onto the board. You can see that Christian is extending his legs (easier than compressing) and contact is maintained. If your kite didn’t go past 12, you’ll have some forward momentum to carry you through the landing. Just sheet the bar in and dive the kite and you’ll be off and ready for another attempt:)
Top Tips
It may sound silly, or even obvious but if you can visualise what you’re trying to do here with board, body and kite it’ll make the multi-tasking considerably easier, especially if you also ride a twin tip as you’ll be going against so many of your in-built muscle memory skills.
You essentially want to get some speed up, so edge against a lowish kite. You want the kite to lift you when you stamp so it needs to be high, therefore the short but sharp send. You also want to carve into your chosen ramp so you need to let the bar out post send. And then you want to cork the board and use the high kite to help lift your weight a bit before you dump all the power and hold the board up near your derriere.

Chop helps with the timing, but if you have tiny waves or even better, very small sections of white water (the air really kicks the board back up at you) they’ll work fine too. If you’re on a mirror flat water the timing will be much harder and as such you’ll be likely to use the kite too much.
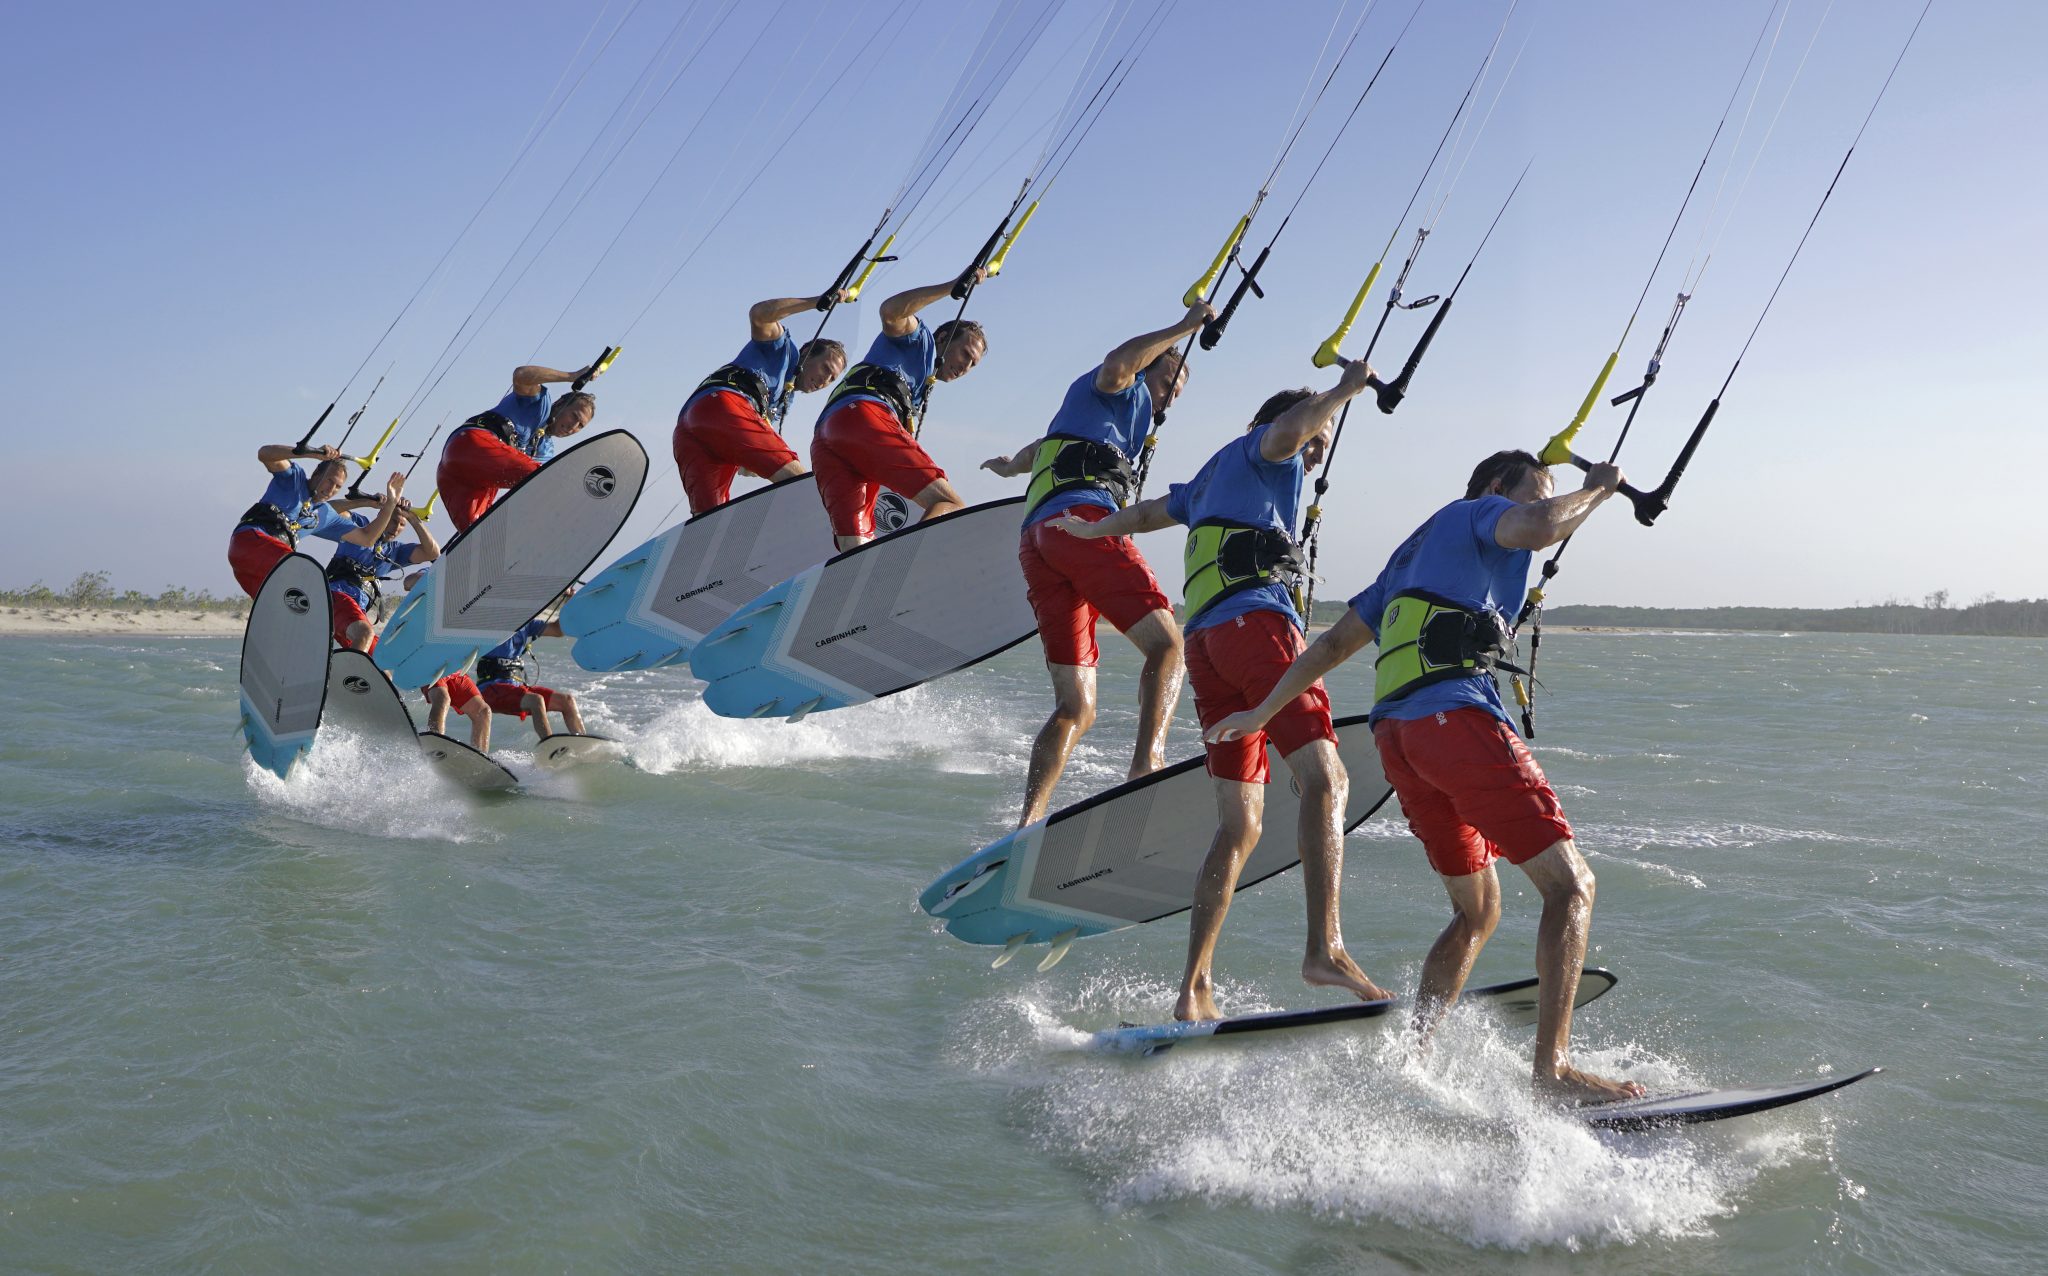
And finally speed also helps stick the board to your feet as the induced wind will push it onto you. So, the more comfortable you get riding a surfboard quickly, the better your hopping will get… Now have a look at the sequence and videos to get an idea of the all-important take off and in-flight entertainment.
Common Problems
Probably the most common problem to start with is feeling the need to take your front hand off the bar to carve up into wind. This is not wrong, and many of the top boys and girls do this, although they’ll get their front hands back on pretty sharpish. To start with it will encourage you to throw your body upwind of the board as you carve and present the top of the board to the wind rather than the bottom. If keeping the front hand on feels awkward try trimming in a bit to get your sweet spot nearer and try getting lower before stamping.
If the board spins down and away from your feet, chances are that the wind is hitting the top of the board. To prevent this, keep your front hand on and make sure that you are over the board when you pop. So, get low, stop carving before you stamp and pull the bar in a bit earlier when you stamp.
If you just get launched and pulled back away from the board, you have sent the kite too far. 12 o’clock is plenty but it doesn’t even need to go that far. Short and sharp. And don’t wait to feel the kite lift before popping as then it’ll be way too far back.
If the board turns away downwind as soon as you get into the air. If you don’t let the bar out when sending you’ll get pulled downwind and so the board wraps around you. Also, if you pop and wait too long before pulling in the kite will also pull you away and the board will do the same. And finally, if you don’t open your shoulders as you carve, it’ll turn you and the board downwind once you’re up there.
Keystones
- Edge with kite lowish
- Short sharp send
- Bar out and carve
- Compress, stamp and pull
- Back hand off, knees up and bar out
This technique article was in Issue 68 of IKSURFMAG.
Related


By Christian and Karine
Christian and Karine have been working together as a coaching team, running improver to advanced kitesurfing clinics since 2003.
