
Front Loop Down Loop Transition
Technique / Intermediate
Introduction
Perhaps we need to make more of an effort with names, the longer they get the more complex they may seem. Maybe all the rad beach talk has some weight after all! However we seem to return from each clinic with a trick of the trip. In Cape Verde it was last issue’s tongue twister, this time returning from Coche, Luke, Sophie, Phil and Nick adopted this beauty as their own. So now it’s your turn.
Although this move is a fancy form of turning around, in essence it is a front loop, so you’ll need to have them down, and if you do it’s well within your grasp. Because you will be down-looping the kite (pulling hard on your front hand), all the practice from under turning will come in handy, and a bit of forward momentum will not go amiss.


As far as the transition 540 bit is concerned, it equates to you not only landing riding away back from whence you came, but also doing so toeside as in Video 1. Don’t fret though, as realistically you will be landing down wind (wherever else) and carving out on your toes. In theory this should suit most of you, as the chances are you forward on your strong side, which means the other way could well be you favoured toeside. If this is not the case then you can ignore the toeside landing (which makes for a shorter name too) and land riding away heelside as in Video 2.
More Front Loop than Transition
Video 1 shows Christian going through the motions. In simplistic terms he is doing a front loop, and rather than just diving the kite to land, he pulls much harder so that it loops round and pulls him out the other way.
You can practice this by landing a front loop very down wind, but then rather than pulling your diving kite back skywards, just keep pulling as you truck downwind and sneak a cheeky under turn in whilst carving around to follow it!
This means that much like a front loop the emphasis is on keeping the kite moving with you and forward, rather than just leaving the kite above you as in a normal transition. This serves you very positively ways as the move will flow and the power from the down-looping kite will seem less extreme when powered and more helpful when not.
Keen not to kick the habit, we’ll once again break this down into the four stages of airtime, assuming that you are a comfortable front looper.


The Approach
Keeping the basics in mind, you’ll be prudent to check your mirrors for space, and remember that you could be landing further downwind than you think due to the down looping kite. As ever some water is preferred and puddles don’t count.
You’ll desire that comfortable feeling, when the kite feels right and your speed is controlled. In this environment you’ll have more confidence to commit to the downloop and you’ll feel that there is more time to get things done. So don’t enter with the speed and power you would for your biggest front loop, but rather a smiley 100% guaranteed one.
Take Off
Your take off will be exactly the same as your front loop. In fact it’s this similarity, which is the quintessential to a smooth flowing front loop down loop. The action of throwing your head and shoulders down and around for a front loop easily enables you to steer the kite forwards with your front hand as you lean down on it.
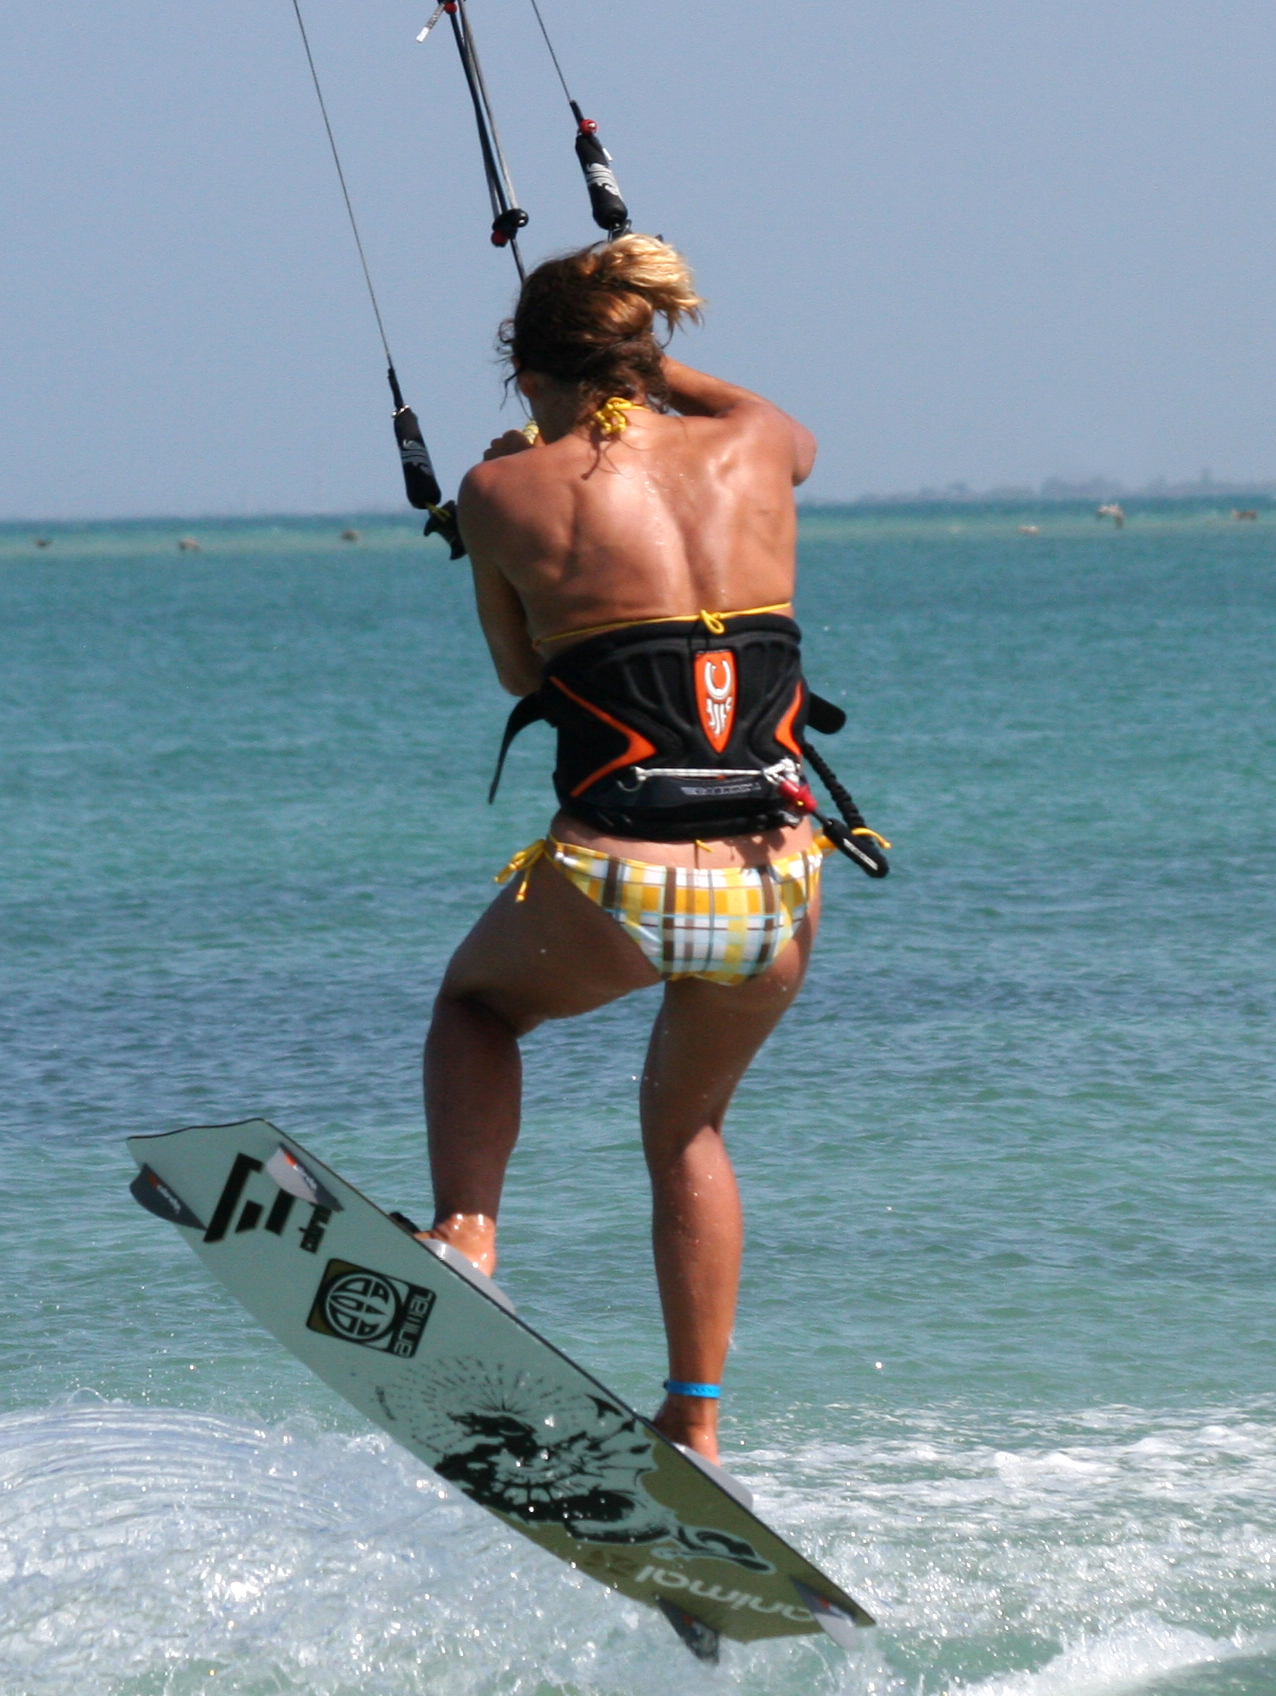
If you look at Pic A you can see that as Karine takes off, the bar is already being angled heftily forward. This action will keep the kite in front of you, keep tension on the lines and enable you to progressively pull down on the front hand, which in turn will pull you around and out of the move as the kite loops.
In Flight Entertainment
Apart from getting yourself around the rotation, you objective in the air is to keep tension in the lines and get your-self balanced and ready for a little pull and the landing. If you pull too hard too soon you could stall your rotation. If you pull too late you’ll get no power from the kite.


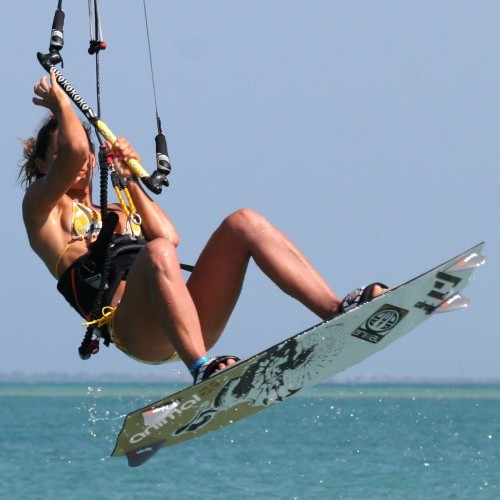
In Pic B Karine’s body is facing upwind, but her head is turning in anticipation of the pull from the kite, now that she has wellied down on the bar. She has also dropped her back hand, as this will help pull her around to land on her toeside. Her knees are still bent, holding the board in close and to keep spinning and balanced. If you are going for the non-540 variant be sure to keep two hands on the bar as in Video 2.
The Landing
As with your normal front loop you should be aiming to land tail first with the board facing downwind. If the kite has turned as desired you will then be pulled back in the other direction on your toes, chuffed and content.
Your concentration should be centred on your pulling hand and its need to keep pulling. It’s so tempting to see the kite heading down and stop pulling. This will lead to a downed kite and very slack lines as you coast towards it. For those of you who are used to diving the kite hard to land then it is merely a case of diving it a bit earlier and bit harder.
Pre Flight Check
As mentioned you can build up to this by diving harder on your front loop landings, but to really get a flowing move you’ll need to commit to the down loop a tad earlier. This trick will feel splendid on any sized kite, but on your bigger ones do move the front hand further forward for extra purchase.
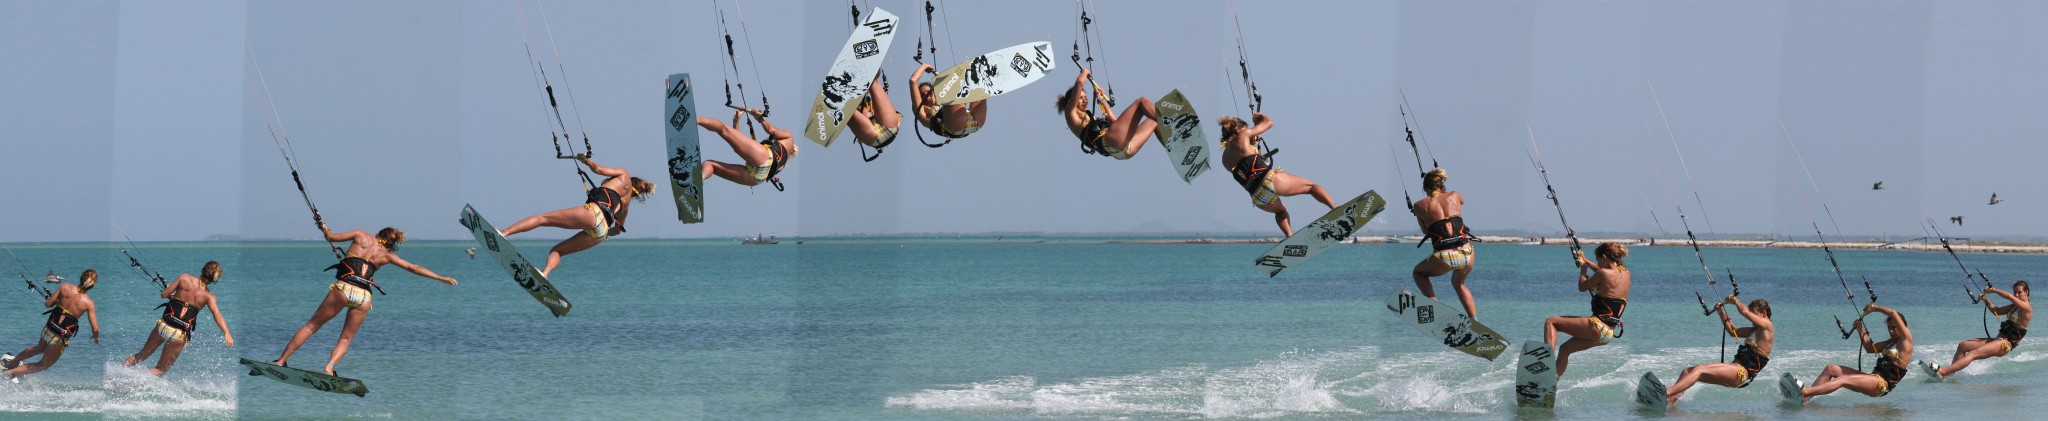
Following the sequence.
- Pics 1 & 2. Karine approaches a glorious empty space with some pace and set herself up for a front loop by sending the kite and then carving up into the wind with her front leg extended and her back leg slightly bent.
- Pic 3. As the kite starts to pull Karine up she explodes up of the tail of the board.
- Pic 4. Karine throws herself into a front loop with her head and shoulders, whilst lifting her front knee and immediately steers the kite forward with her front (left) hand.
- Pics 5 & 6. Karine tucks into her flying position, bending her knees and keeping the bar in and her steering (back) lines tight.
- Pic 7. Facing upwind Karine decides its time give the bar that extra tug with her front (left) hand to get the kite looping.
- Pic 8. In anticipation of the kite’s pull Karine looks round over what was her trailing (right) shoulder towards where the pull will come from to get herself ready and balanced.
- Pic 9. As a result of Karine forcing her head around, the kite pulls Karine around to finish her front loop.
- Pics 10 and 11. Karine drops her trailing (right) hand off the bar as she comes down to help her twist around to toe side and balance the landing.
- Pic 12. She straightens her legs ready for touch down and looks ahead to where the kite is going.
- Pics 13 & 14. Using her speed from landing Karine carves on her toes to complete the transition and to edge against the kite to get the tension back in the lines. Chevere!
Top Tips
This one is all about commitment. You best bet is to try it in conditions where you’re unlikely to get more than a dunking if your timing is out.


This technique article was in Issue 9 of IKSURFMAG.
Related


By Christian and Karine
Christian and Karine have been working together as a coaching team, running improver to advanced kitesurfing clinics since 2003.
