
Front Loop 540 Transition
Technique / Intermediate


Introduction
It’s been a long time since we took you through the front loop (or roll) air gybe, so now it must be time to encourage you to try this 540 version - a toe side landing. Coming around to toe side is effectively adding an extra 180˚, hence the original old school name of any such transition being a 540. Although this is slightly misleading as you only want to rotate the usual 360˚ and add the toe side on as a landing option, not throw yourself into an uncontrollable spin.
The great part here is that if you’re not the type to go trawling through old editions, even with the help of IKSURFMAG’s great new website, then most of this will get you into the idea of performing a bog standard front loop transition. Adding the toe side ending isn’t just about being flash, it’s also rather practical. Most of us have a preferred heel side to land on, and a natural leading foot, which means that sometimes landing an air gybe type move on your less favourite foot may be a tad abrupt, lacking in downwind glide and therefore not as smooth as it deserves to be. The perfect answer, landing preferred foot forward. This should increase your chances of planing out of this like Lewis Hamilton on slicks during a typically wet Silverstone weekend. Without wanting to teach your granny to suck eggs, we would of course suggest that you can already claim to have the front loop in your armoury, and if you can perform a floaty air gybe your life will be easier still. So how do you do it?


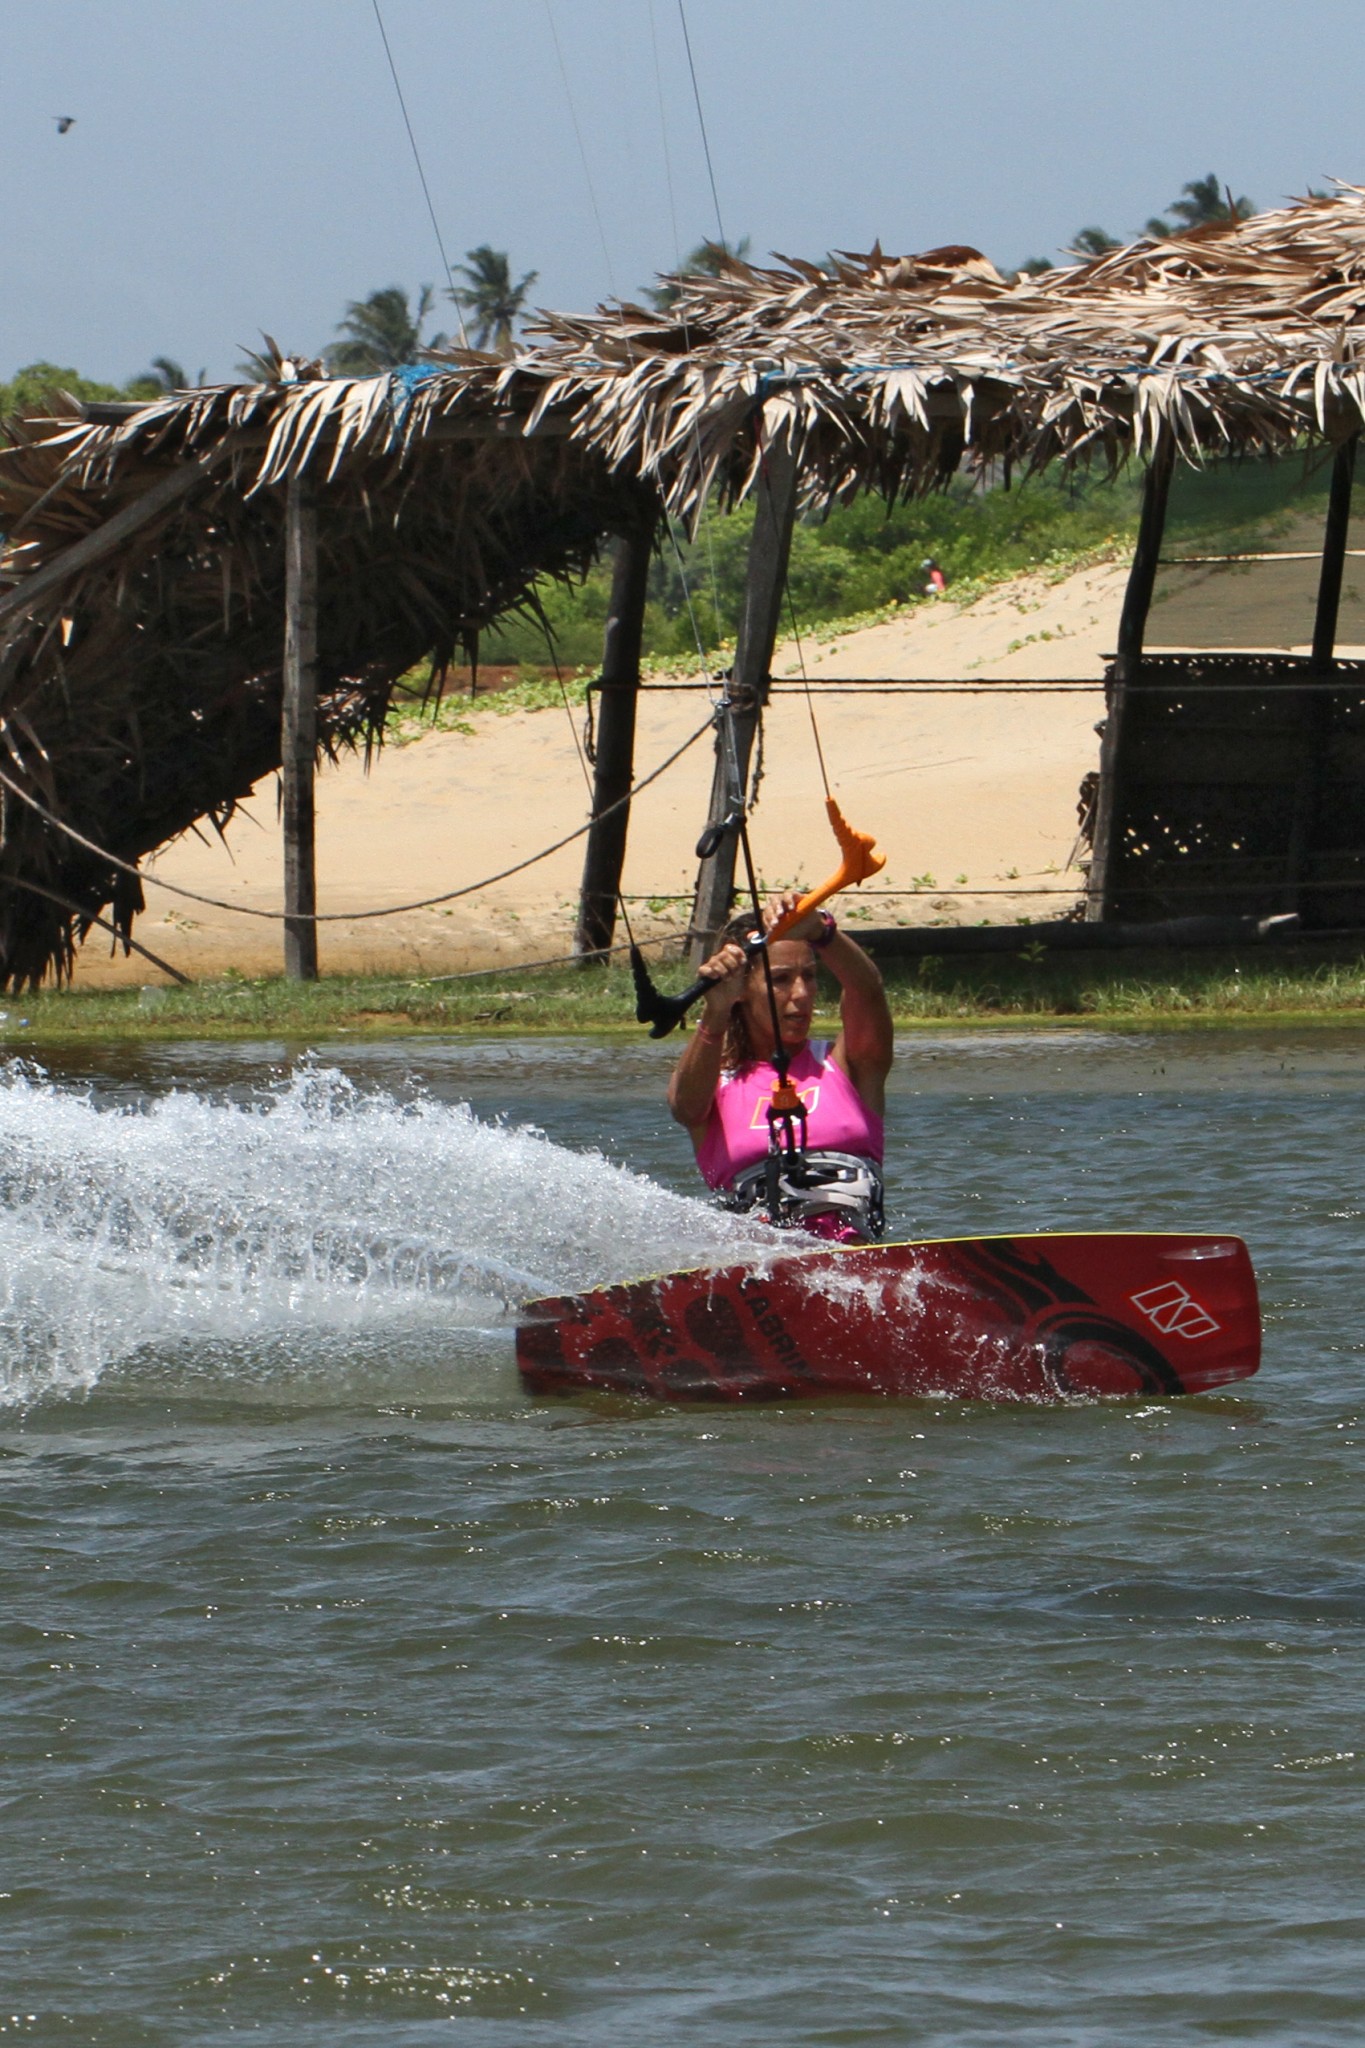
Short, Sharp & Early Pic A
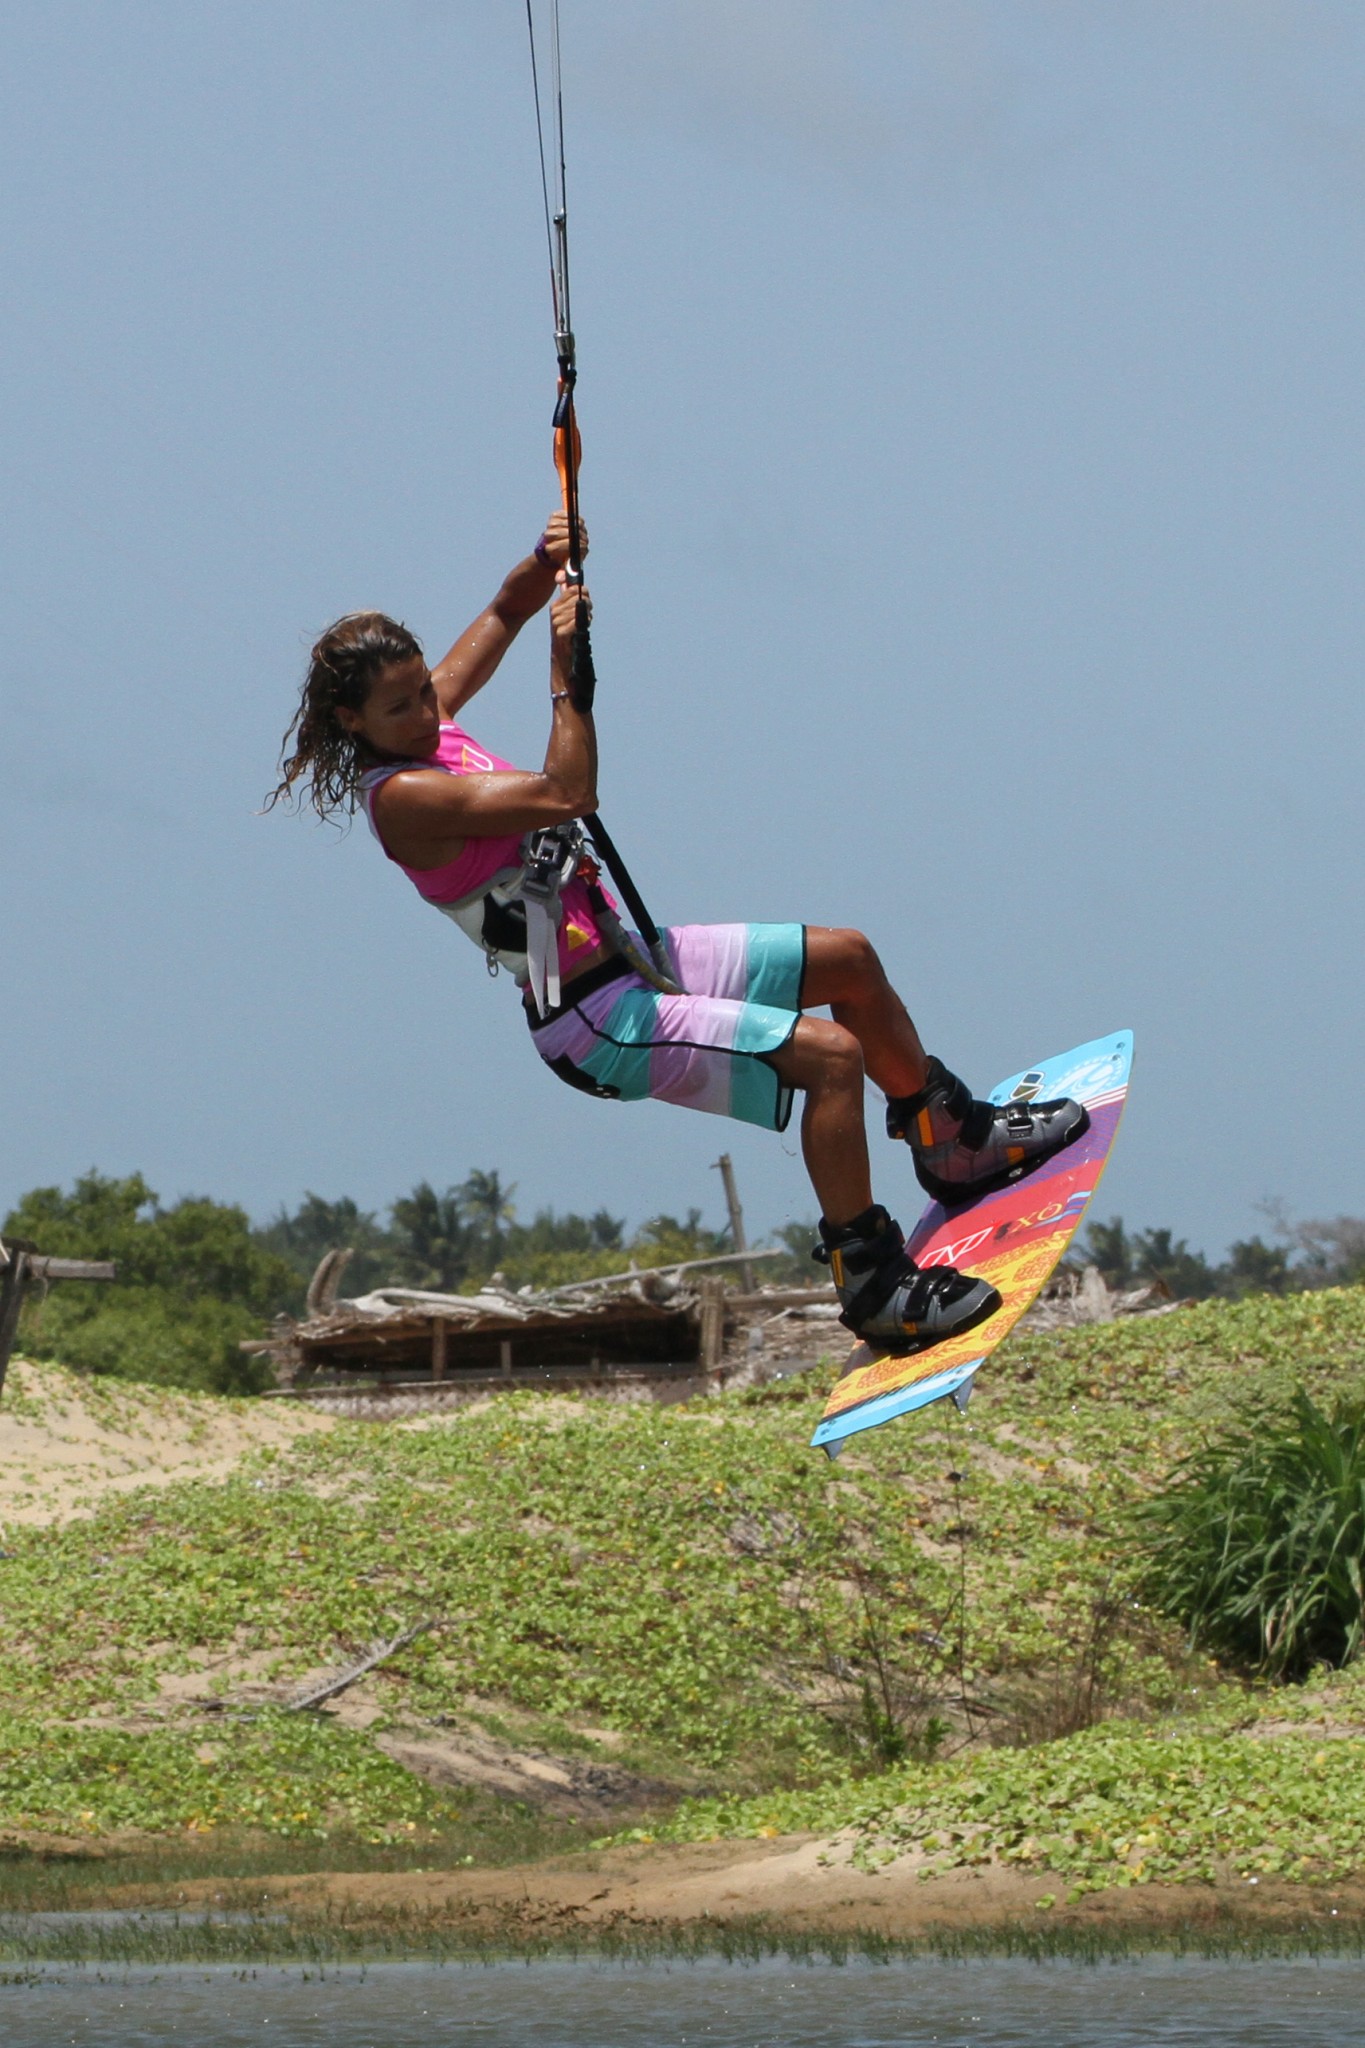
The take off and everything it involves needs to be precise to make this work. As is the norm you need a decent edge and your kite at 11 or 1 o’clock but no higher. Being a transition you don’t want forward momentum, so use your edge to slow down. You still need to send the kite as you want to get up in the air, however you don’t want the kite travelling too far past twelve so make the send as aggressive but shorter than for a jump. This way you’ll get the energy to go up, but the kite won’t want to go flying across to the other side of the window. This will only work if you keep the bar on the sweet spot. Let it out and your kite will drift way back before you get any lift. You can see that Karine has a decent edge and has sent the kite with meaning.
The only thing left is to go early. In an added effort to not let your kite go behind you too much you also need to pre-empt the up by kicking off your back leg against your edge before the kite lifts you, which means that you can get the kite back where you want it sooner.
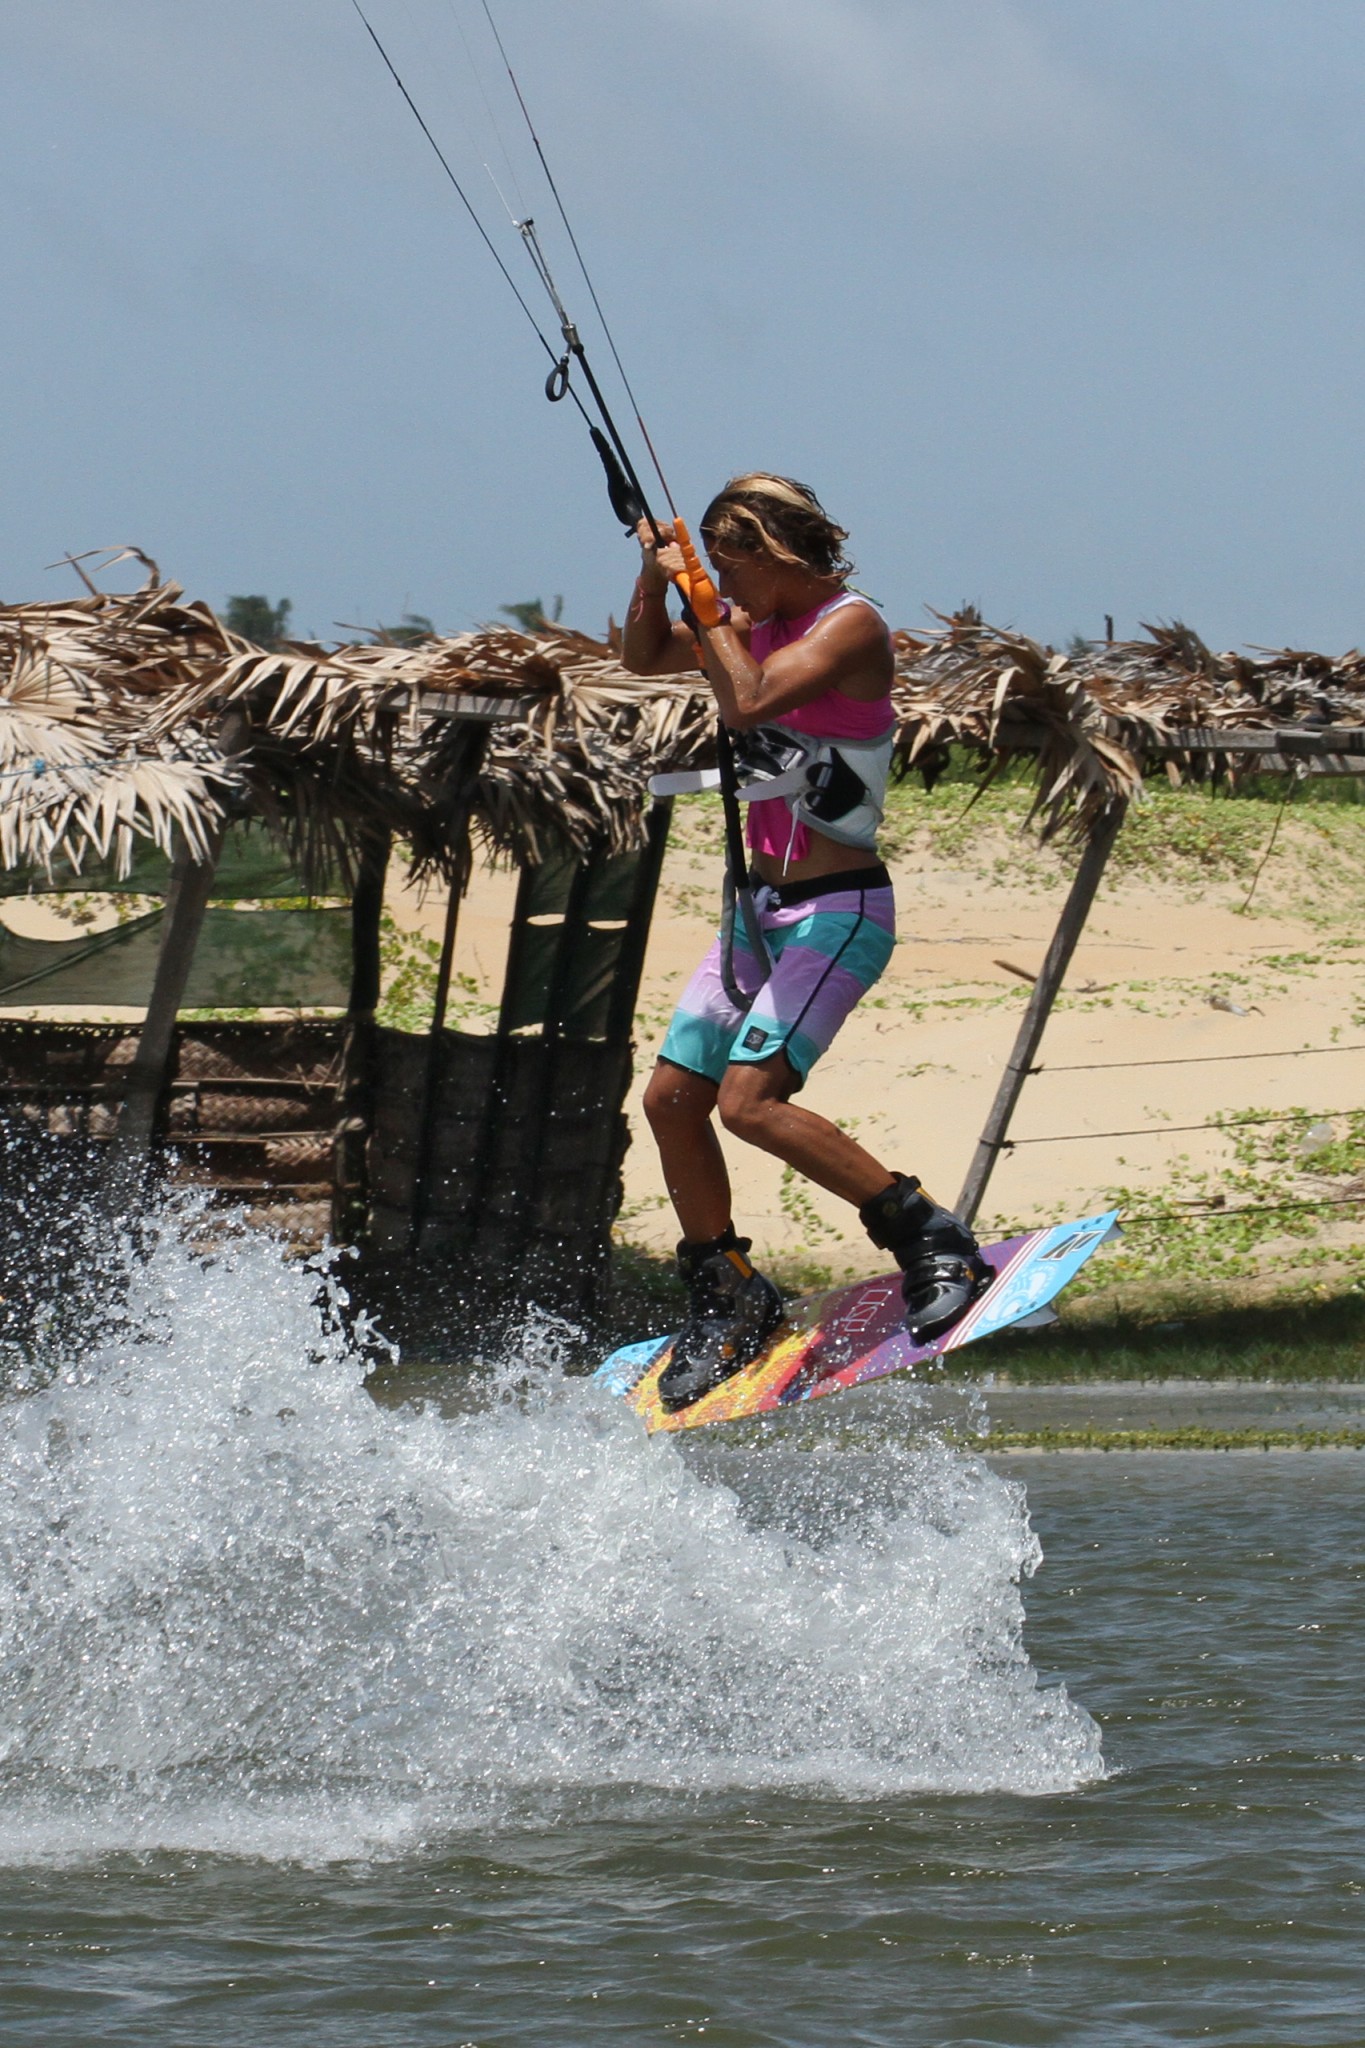
Slow Round the Front Pic B
Here’s the contradiction. Even though you intend to come back around, turning more than your normal 360˚, you actually want to rotate relatively slowly. Your objective is to hang under your kite, so you don’t want to over rotate, therefore as you kick into your rotation don’t give it too much head. By all means throw your shoulder down and turn your head and shoulders but don’t give it everything. In Pic B. Karine has her head down but only slightly turned, most of the impetus for the rotation coming from her kick off the back leg. As soon as she takes off she is pulling on her front hand to stop the kite from continuing on it’s backwards journey.
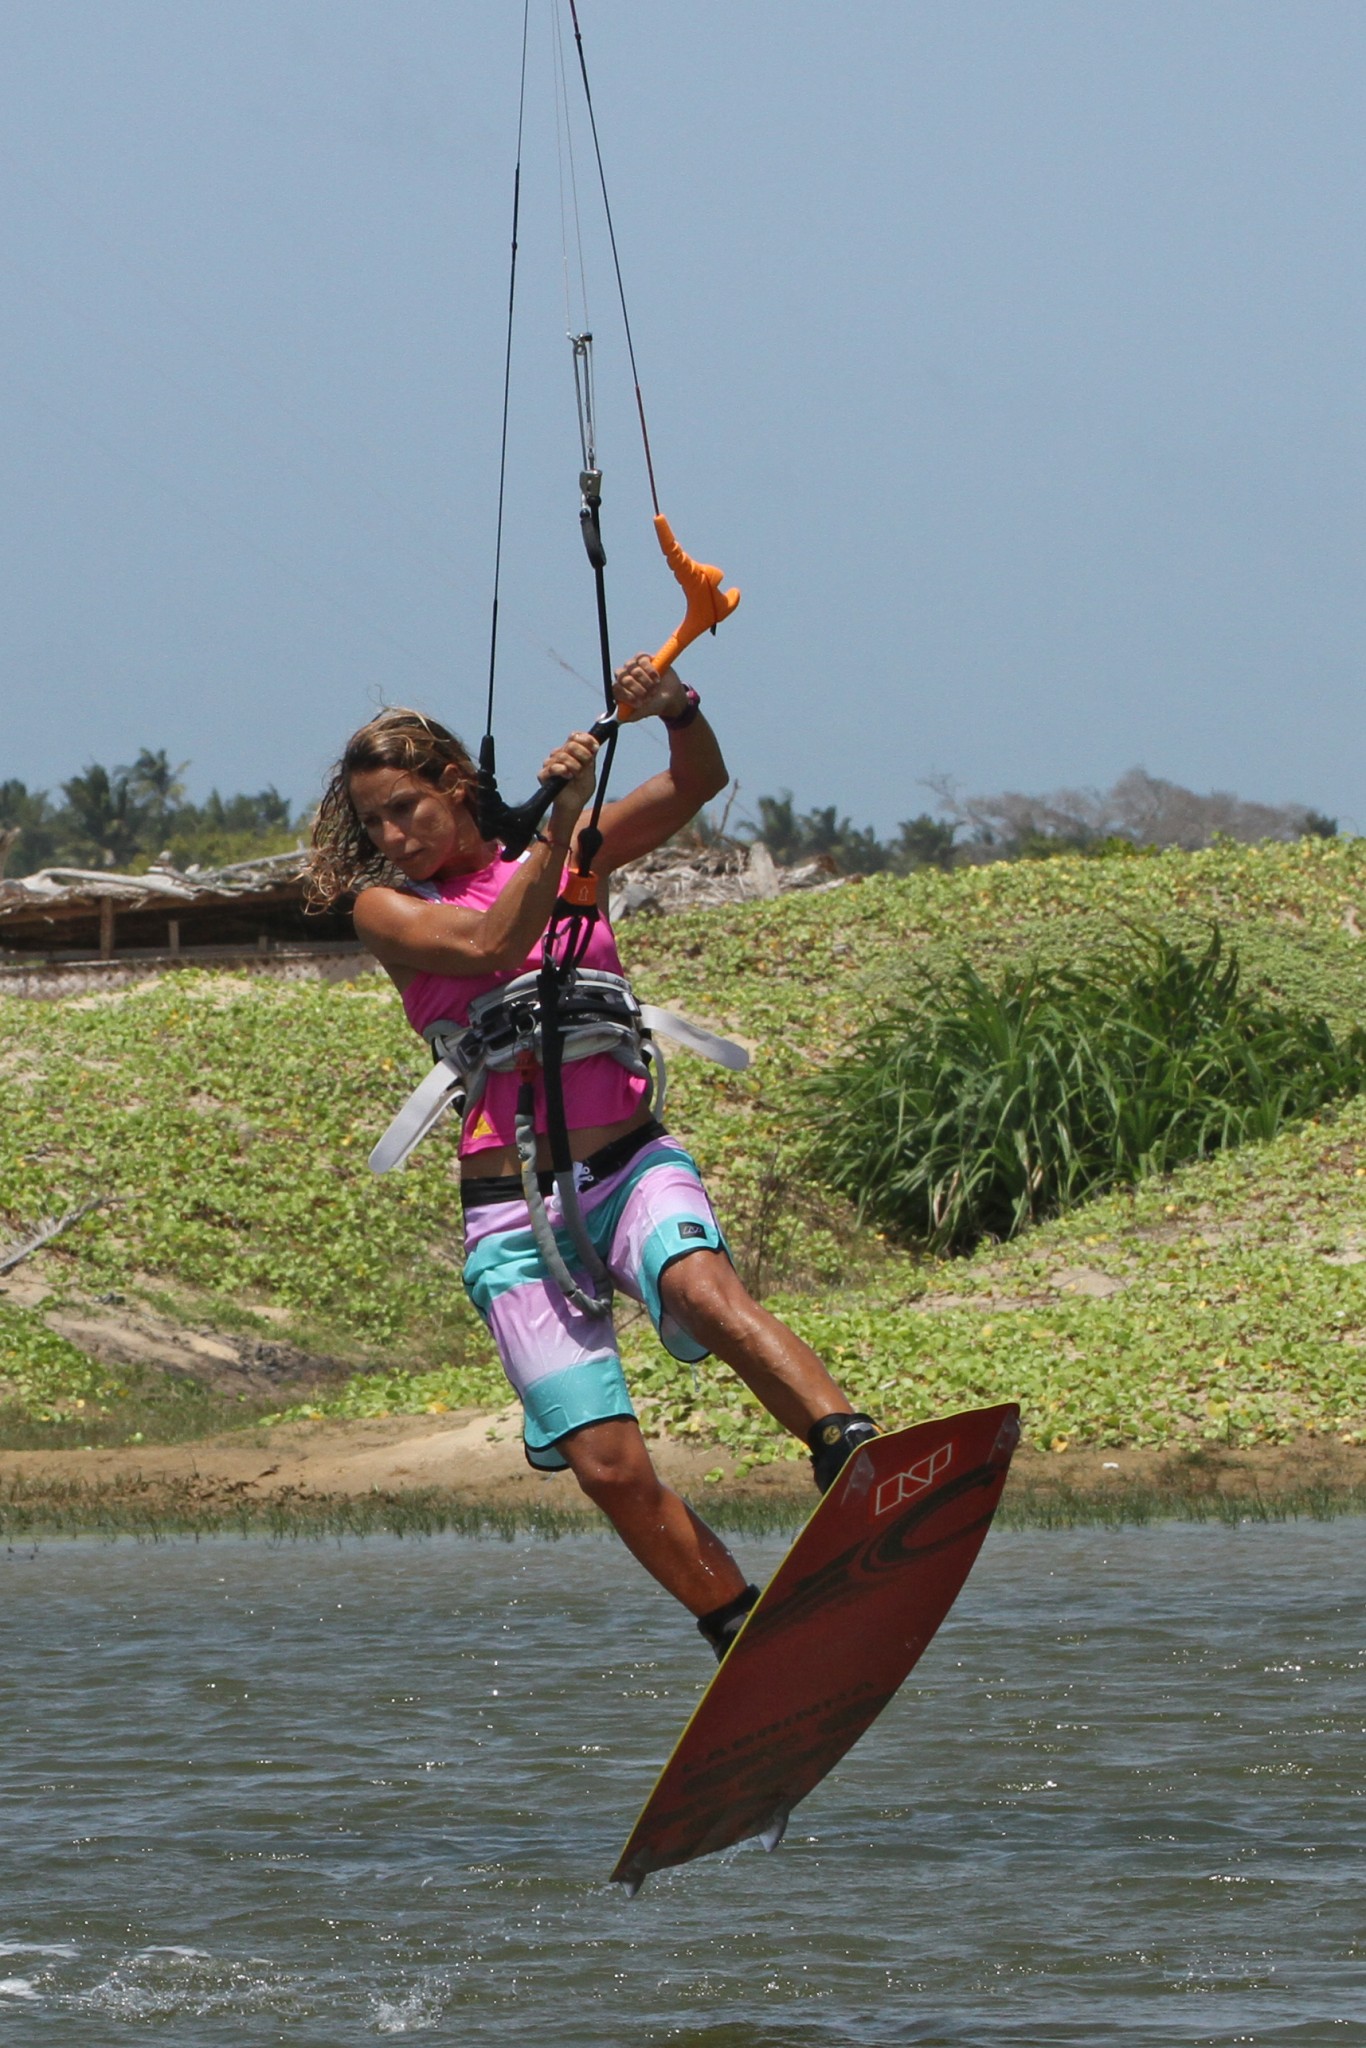
Hang Time Pic C
Here Karine is halfway around her front rotation. Her bar is in, her knees are up and her head is fairly centred. She is pulling noticeably on her front hand, steering the kite forward to get the kite back up above her at 12 o’clock asap. Once there the kite will give her time and float, and as long as she keeps the bar in on the sweet spot it means the kite is ready for when she needs it to land. It’s worth remembering that your rotation speed is related to your height, and this feeling will come with practice.
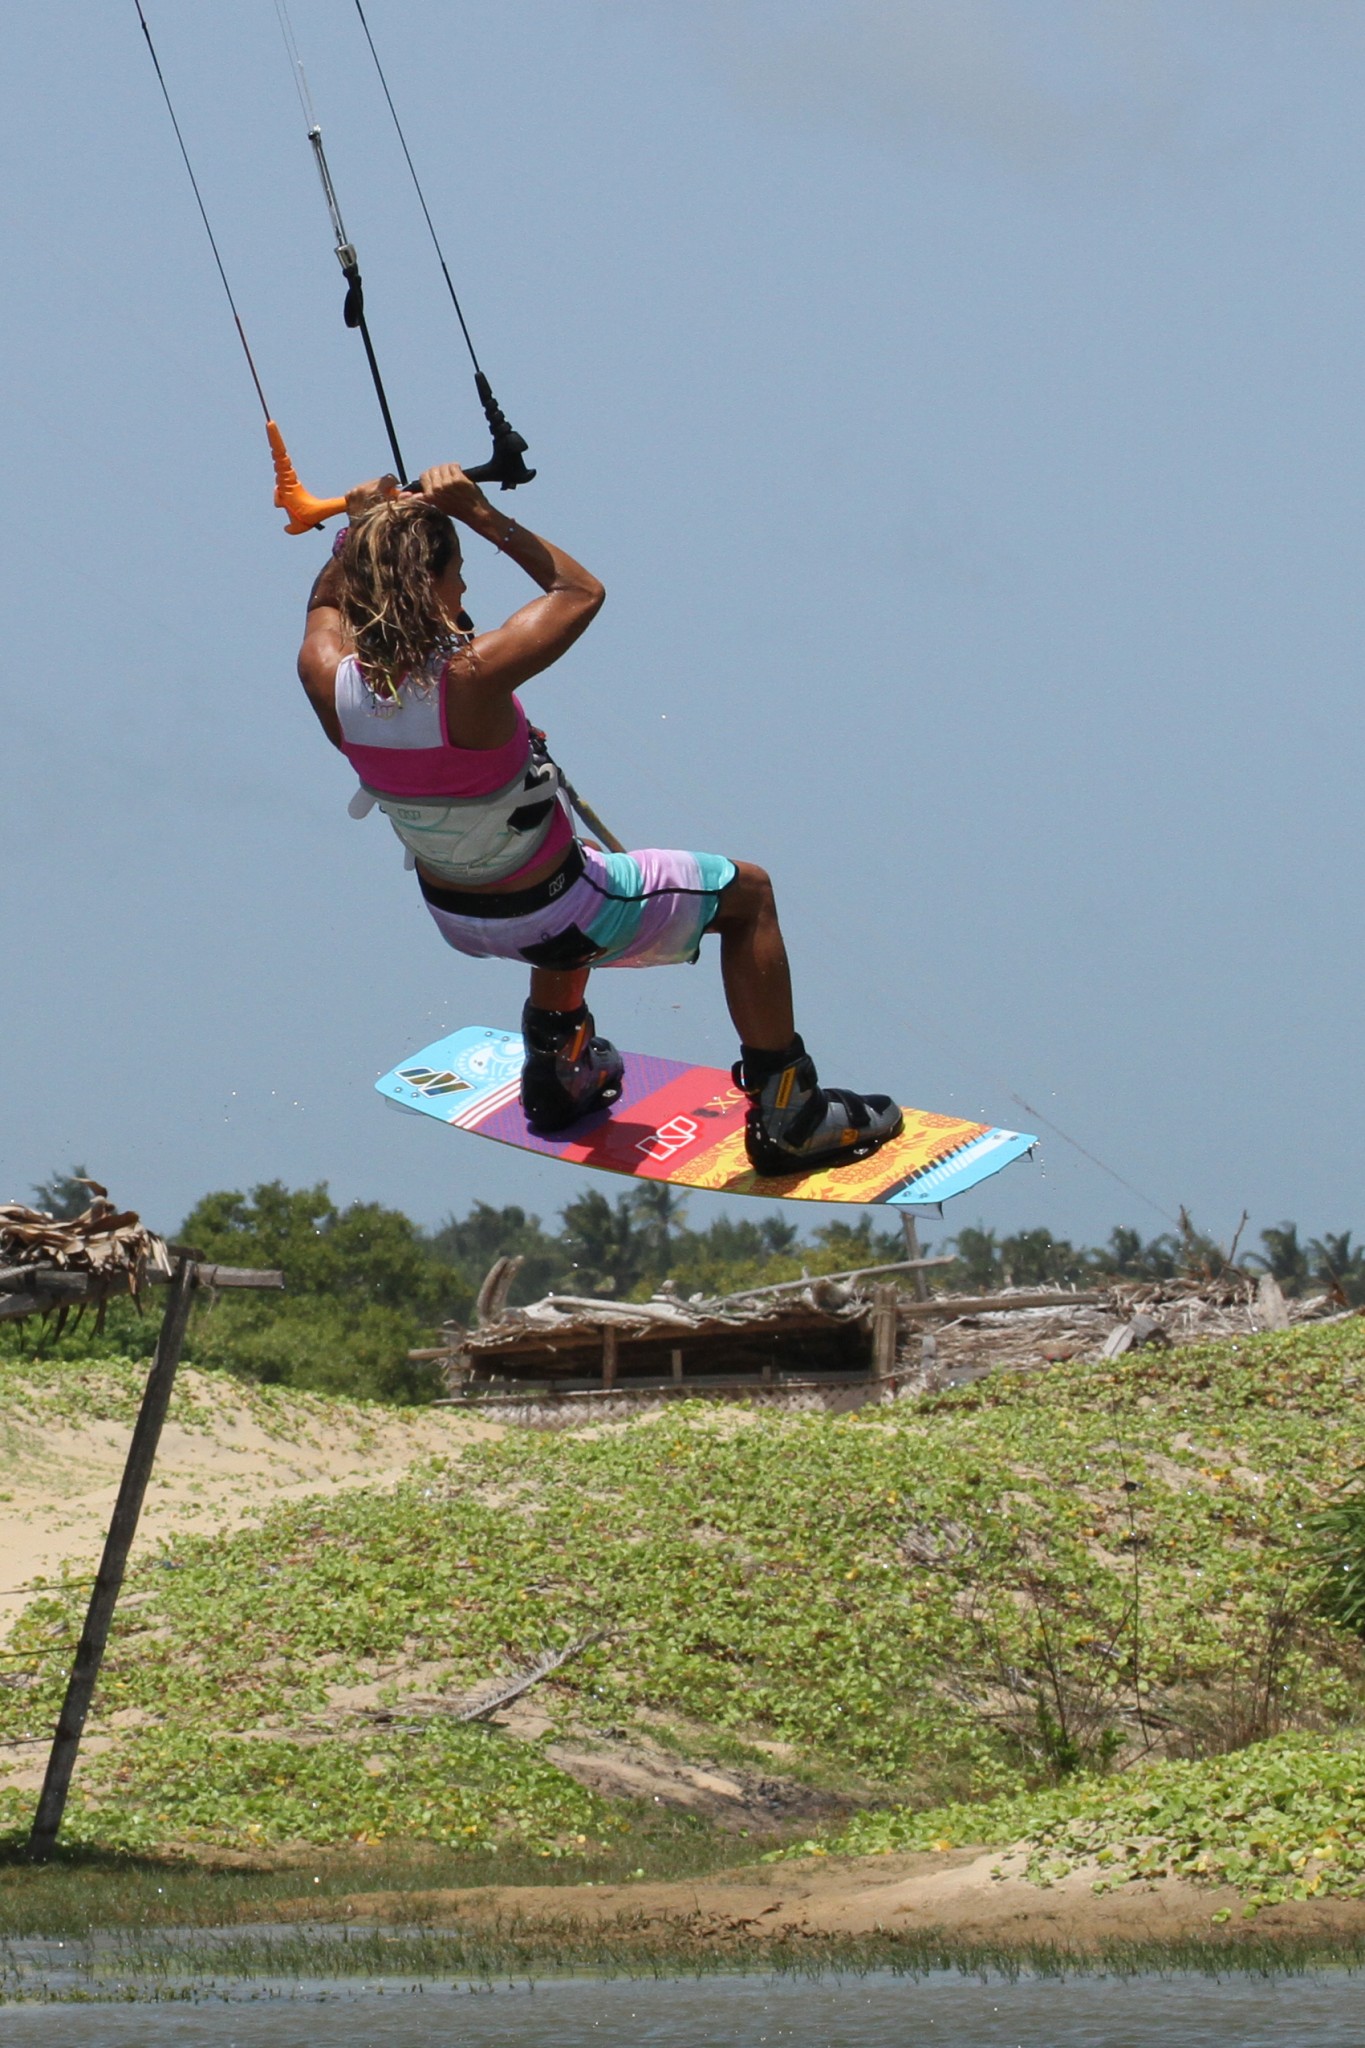
Chill & Change Pic D
Once the kite is above you, you’ll feel the float and lift. If you feel it pulling you have redirected it to much and the kite has now gone forward of 12 o’clock, which is an easy mistake to make on small quick kites. However despair not as this is when you actually transition, taking the weight and pull off your front hand and instead changing and pulling gently on your back hand to freeze the kite above you. Once here you’re in the chair of air, kite supporting you, and all you need to do is chill whilst you rotate slowly. Here Karine’s momentum is pushing her through the rotation whilst she does nothing but wait.
Look and Dive Pic E
As you come around your rotation you must keep the bar in, otherwise you’ll loose control of both your loop and the kite. As soon as you can see downwind it’s time to take control and prepare for landing. As always you must focus on where you’d like to land and dive the kite to pull you downwind and stop your rotation. Having already weighted her back hand Karine is ready for a hefty pull push to get the kite diving down towards the water, giving her some momentum to carry into her landing.

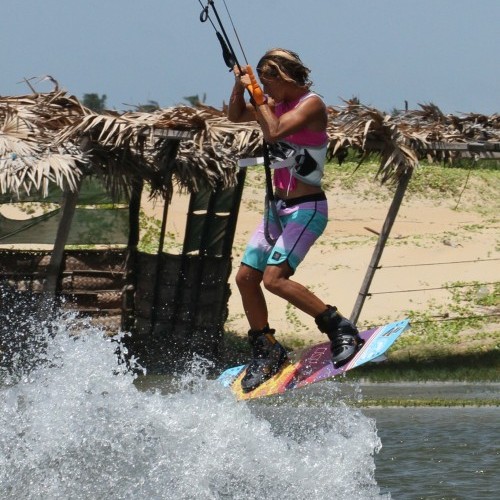
Knee Time Pic F
As the kite pulls you downwind, it’s your cue to get your preferred foot through for the toe side landing. Note that although you’ll be landing toe side you should still aim to land off the wind on the tail of the board, not facing back up wind on an edge. To get your foot forward, keep your back knee high and lift the leg through whilst turning your head and shoulders towards your desired direction. You should find that this is more than enough to swing the board around as this foot effectively wants to lead. Keep the kite diving.
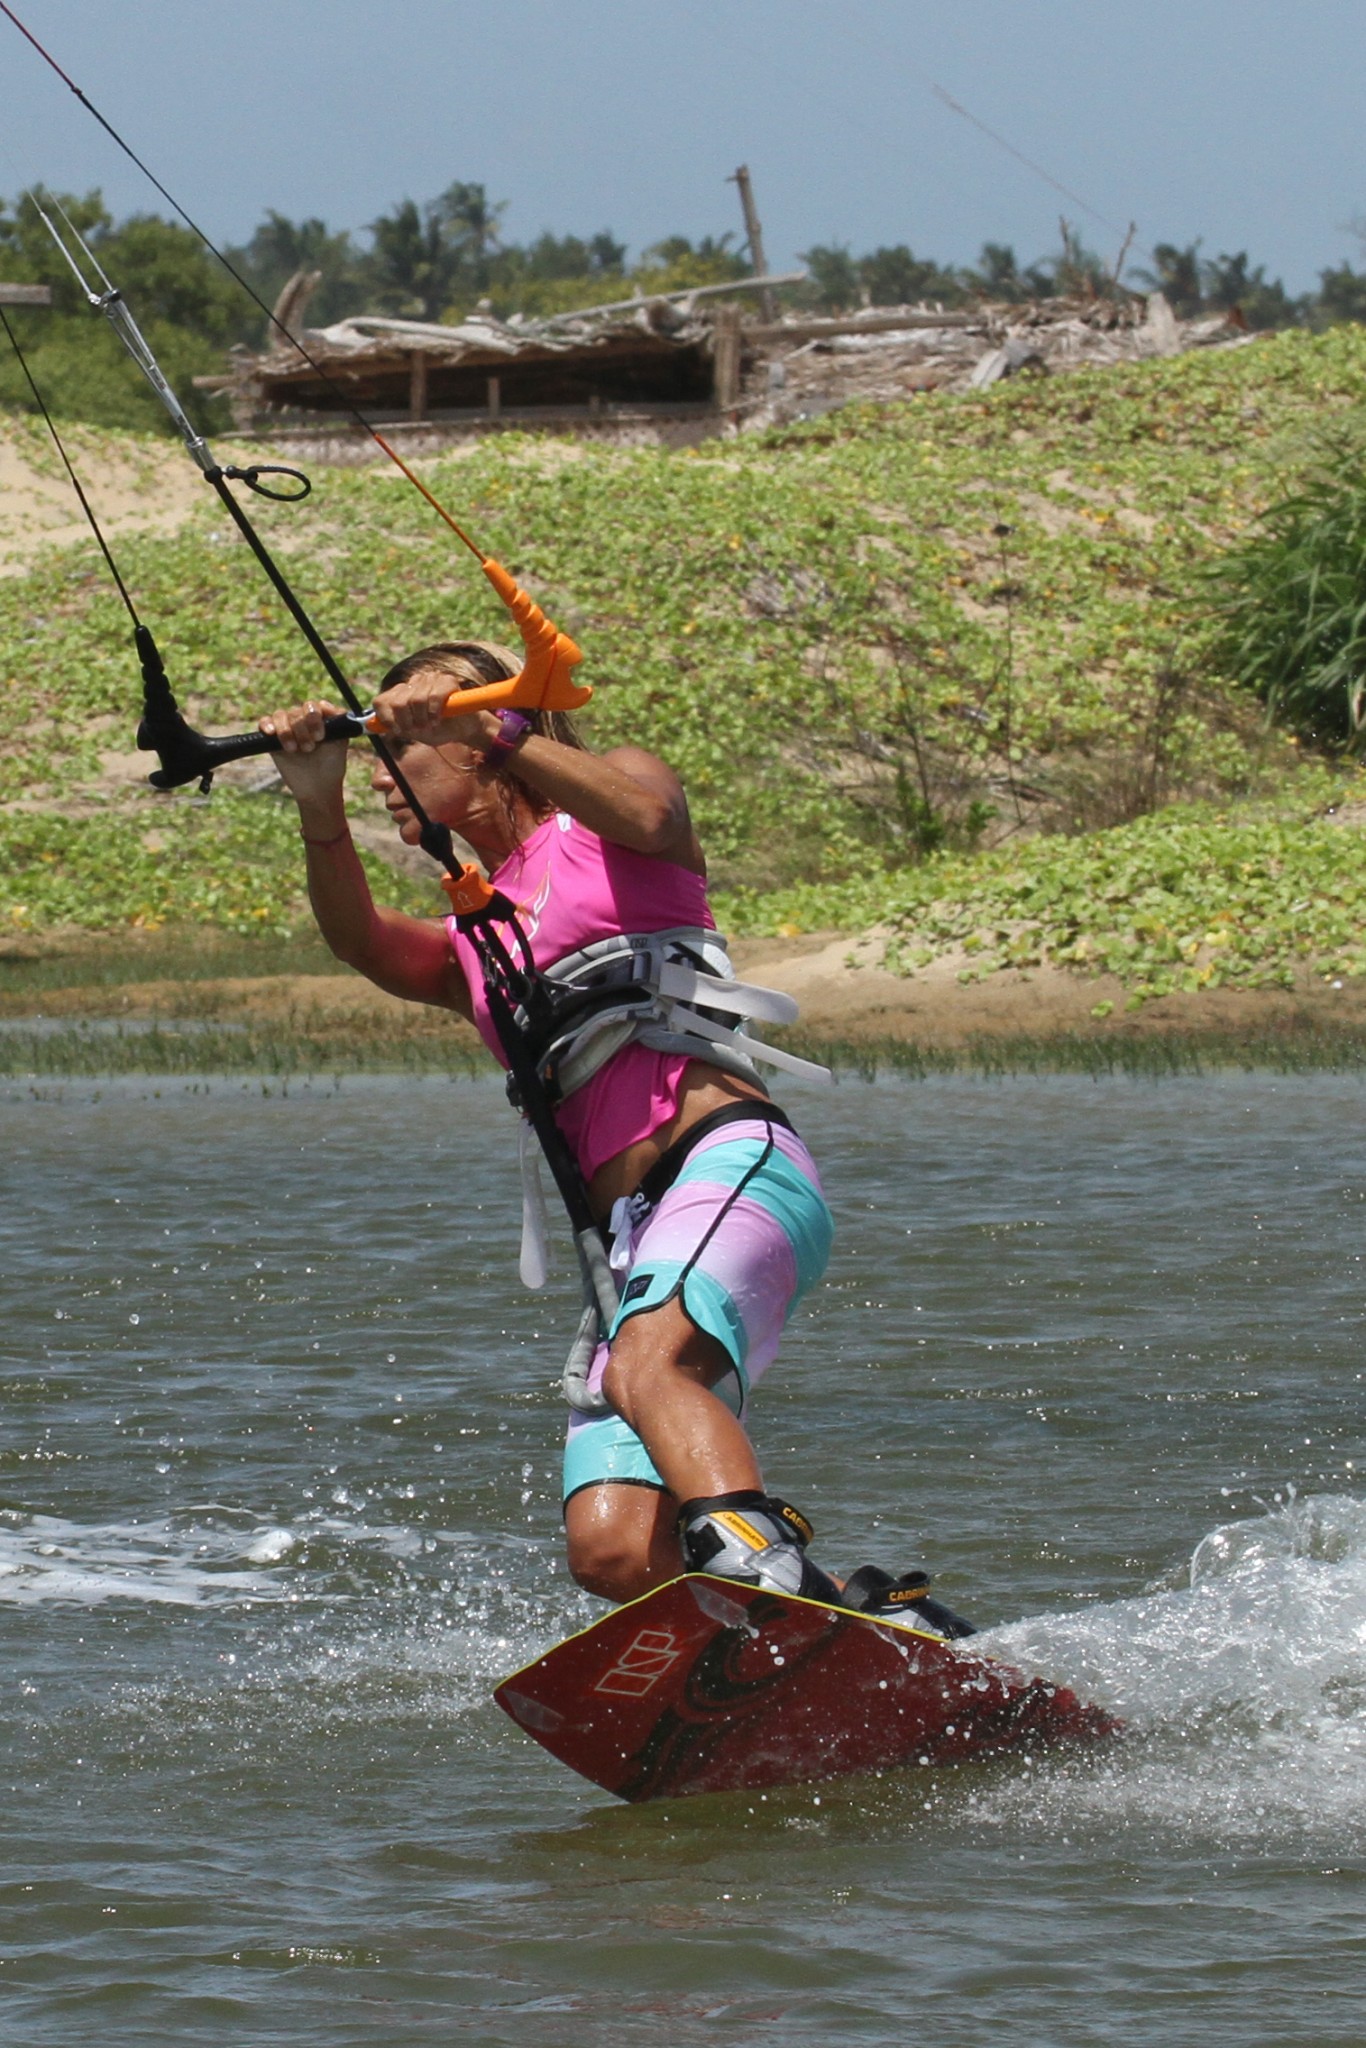
Look, Power & Carve Pic G
Once the board touches down use your momentum to carve the board back up onto its edge, keeping the power on in the kite whilst looking where you want to go. You can see how Karine has absorbed the landing and has her knees and ankles flexed so that she can carve out of the landing without loosing any speed. Try and keep both hands on the bar, unless the kite is overpowering you, in which case take your front hand off, to help get your body into a more dynamic toe side position.
Top Tips
The front loop 540 transition will be easier to learn if you have some power in your kite, this way you’ll be sure of some float, sufficient height and you won’t have to send your kite too aggressively to get off the water on your first attempts.
Keeping the bar in and rotating slowly can be practiced without a transition, so feel free to slow down and attempt your normal front loop with little forward momentum.
Diving hard is the key to landing all transitions, so make sure the bar is on the sweet spot and that you use both hands to steer the kite.


Now study the sequence and videos to ingrain the movements in your head.
Common Problems
First problem is likely to be the kite being too far back in the window after take off. Which then means you have no time and height during the rotation, and you can’t dive the kite for landing as it’s at the edge of the window. This can be the result of many things, but the most common reason is drifting the kite up, rather than sending it. A slow moving kite will still generate lift but slowly and as it starts to lift you off your edge you’ll naturally let the bar out and then it’s goodnight Vienna. If you come in too quick the same can happen. So slow down by edging hard, not drifting the kite up, and make sure you send it from 1 or 11, no higher.
If you’re getting the float, completing the rotation but sinking on landing chances are that you’re drifting the kite down around the edge of the window rather than diving it straight down at the water. Use both hands to get a good pull and push and keep the bar in as the kite pulls, you want that power. Also check that you’re not landing on an edge, as this is a sure fire way of killing everything.
If you’re not getting your foot through to toe side. Are you trying to land this going in your preferred toe side direction. Sounds silly but you won’t be the first person to try it on the wrong side:) If you are make sure you keep you knees up during the rotation as Karine doe back in Pic E. If your legs are dangling you’ll struggle to lift your back knee through.
Keystones
- Slow down
- Send kite, don’t drift
- Go early and redirect with front hand.
- Once hanging chill and change with knees high
- Hefty dive, lift back knee through & turn shoulders
This technique article was in Issue 53 of IKSURFMAG.
Related


By Christian and Karine
Christian and Karine have been working together as a coaching team, running improver to advanced kitesurfing clinics since 2003.
