
Foot Wash Transition
Technique / Intermediate
Introduction
We’re sure that this move has a multitude of apt names, but seeing as it fits into the “support” bracket of tricks such as the BLT Handwash, Darkslide, FLT Handwash etc. we’ll keep the clean theme. This one is a lot of fun to learn and joyously not too full of consequence when it doesn’t go to plan. Of course it also adds yet another string to your transition bow.
Stating the obvious has to be that a grabbed air gybe really is the pre cursor. If you can already one foot with the same foot it’ll help no end too, but a controlled grabbed air gybe really needs to be in the bag for this to work. That said, there are a few differences between this and an air gybe so we’re not saying that it can’t be learnt off the bat with no previous experience. In order to get the necessary parts and skills into our minds, let’s have a look at them in a bit more detail.


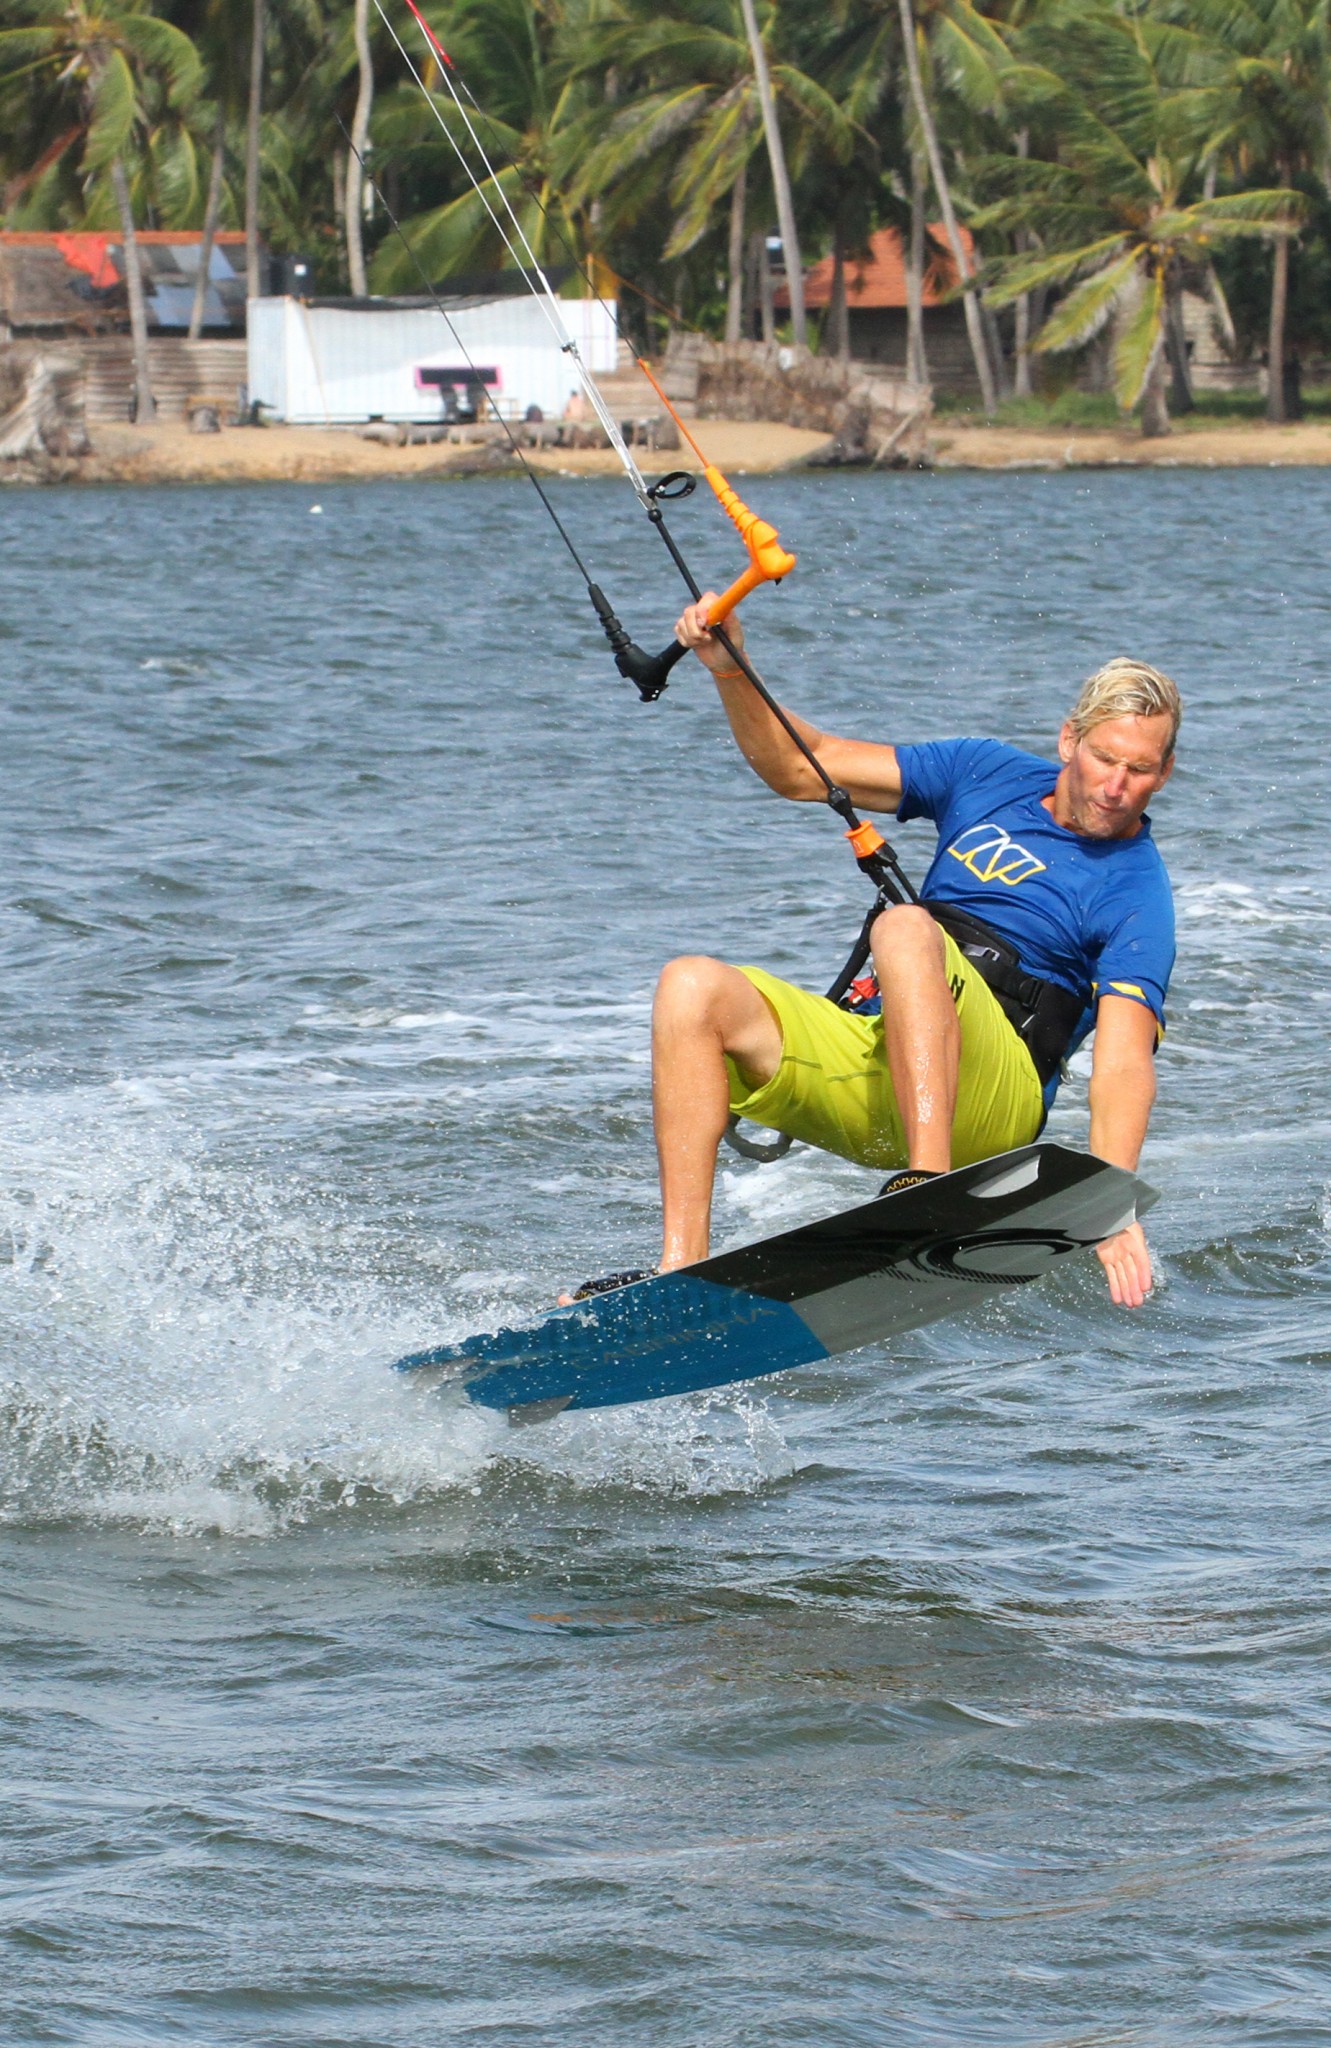
The Approach Pic A
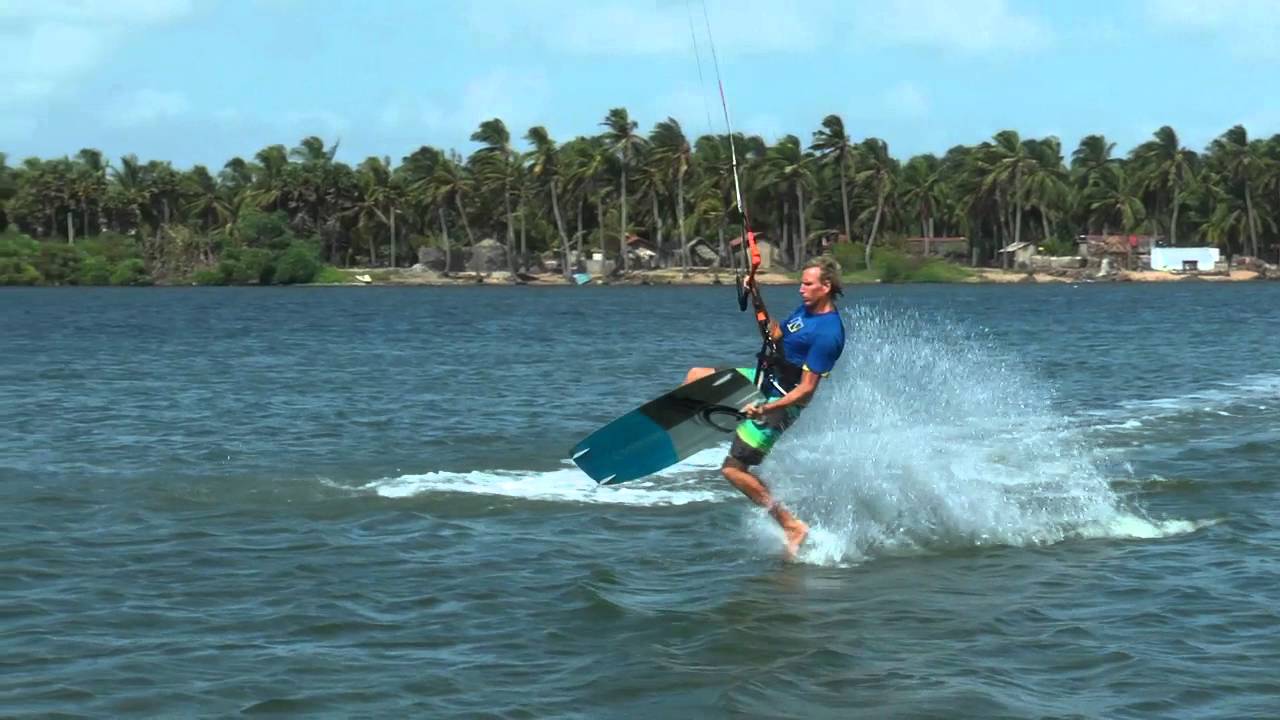
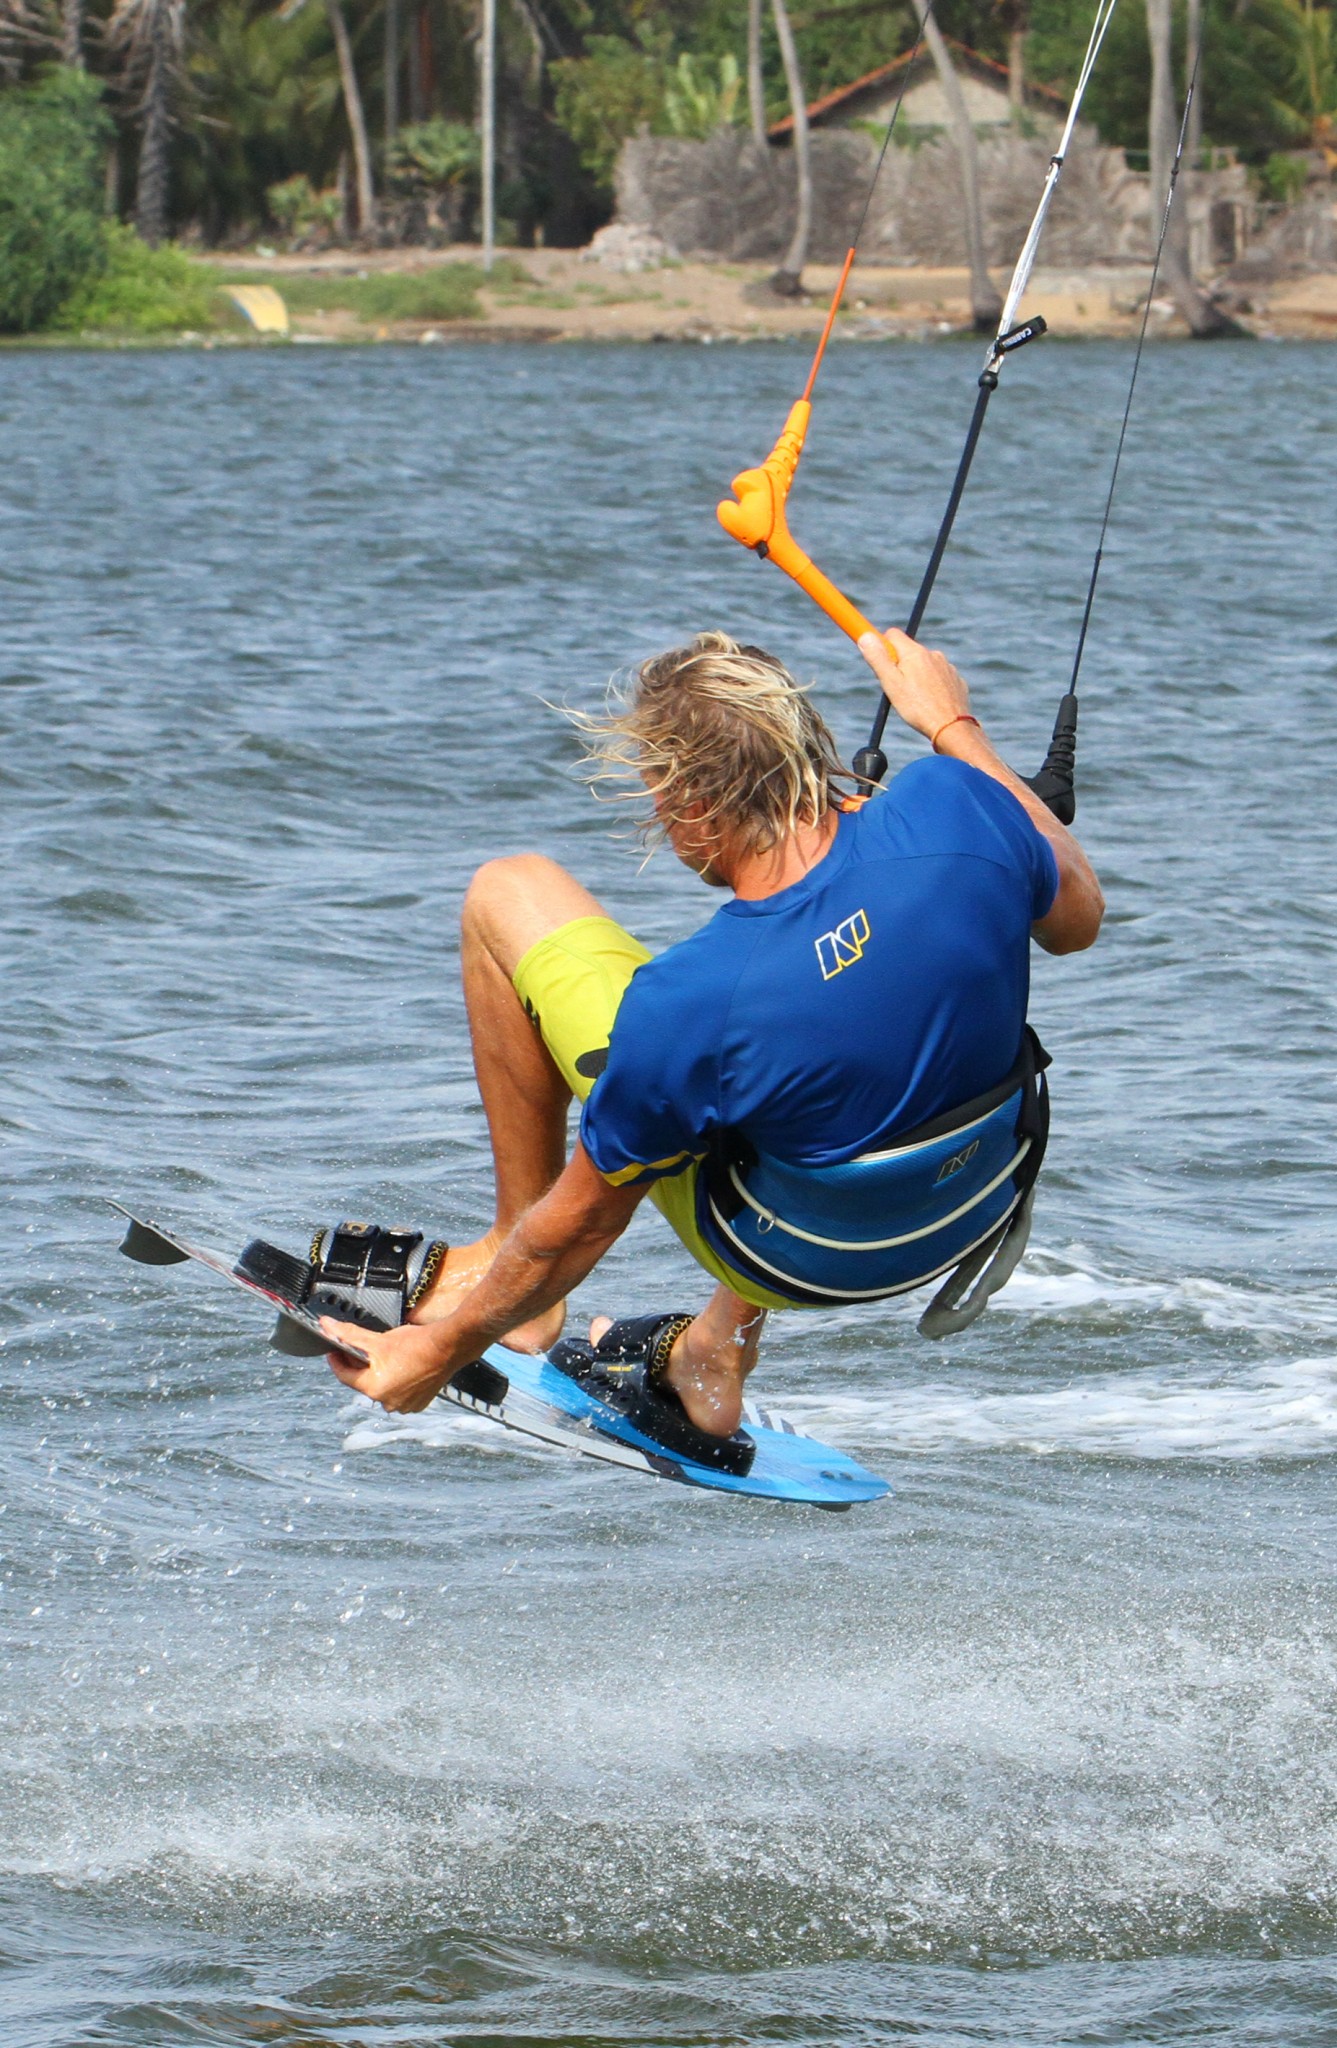
Kite position coming into this is the classic 1 or 11 o’clock. It’ll help to have your sweet spot trimmed out, as long as there is plenty of power to prevent you from stalling the kite too easily. So far so familiar. However, contrary to your air gybe you want to take speed into and through this move, so you can wash your foot for a longer period of time rather than dipping a pinkie in to test the water. Yet you still need to approach on a good edge with your bum low to the water and back on the board. To achieve this you can come in slightly off the wind and then edge up into this position. If you look at Christian all of the above is true, and there are a few extras too. First off, he’s got his back hand in the centre of the bar to prevent the kite from moving too quickly, and he’s pulling on it to drift the kite slowly up towards 12 o’clock. Secondly, he already has his front hand off and is reaching forward ready to grab the board so that he can get his foot out in double quick time. And finally, Christian has loosened his front foot in the strap, pulling it ever so slightly out. You can see from his wake how he has carved up into the move.
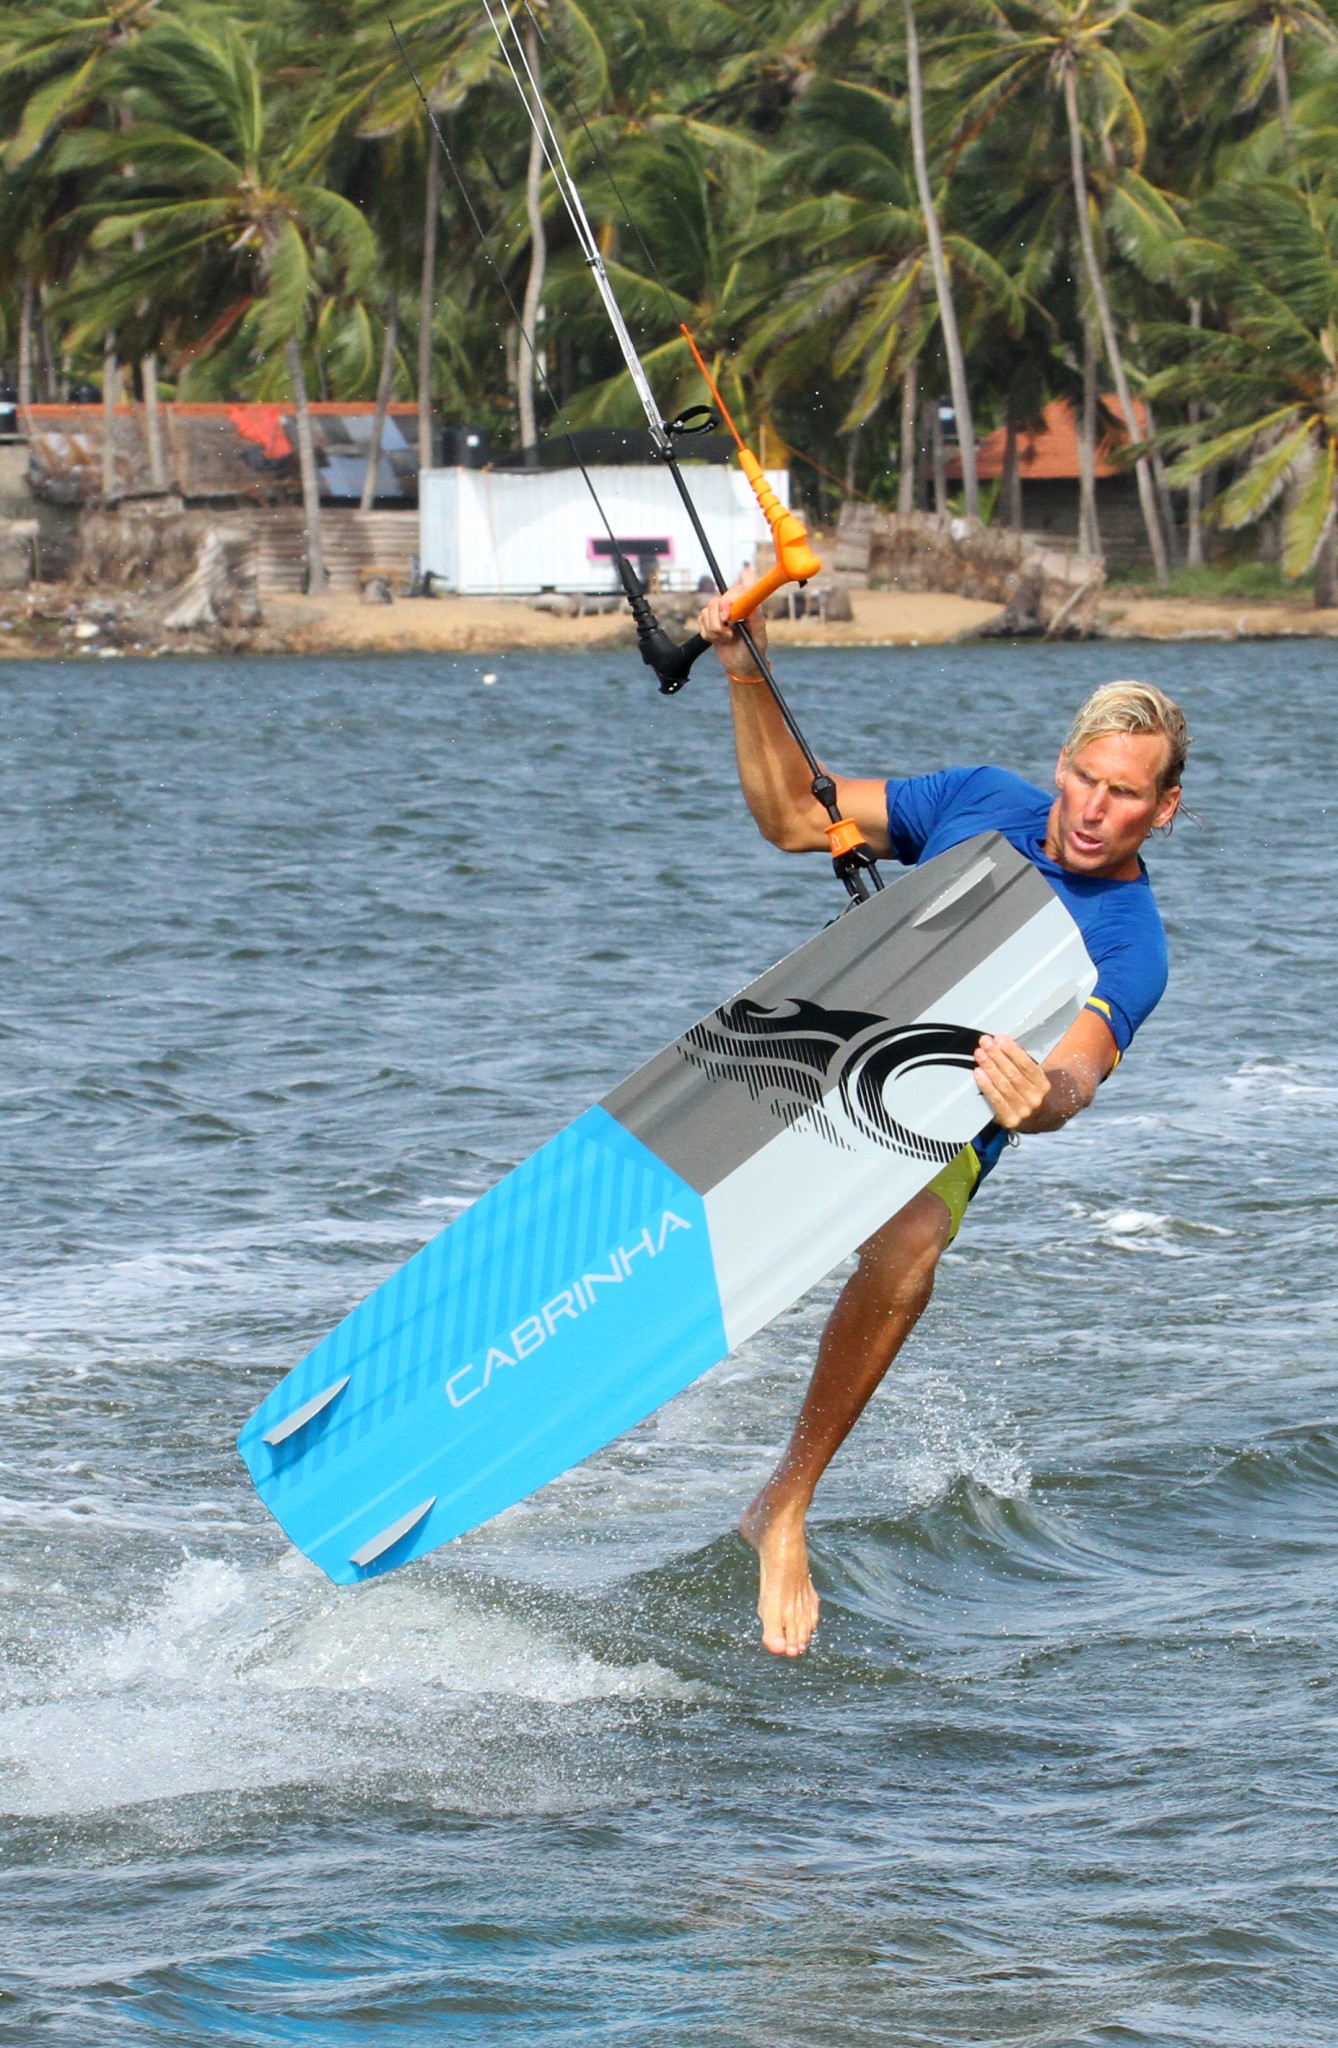
The Pop Pic B
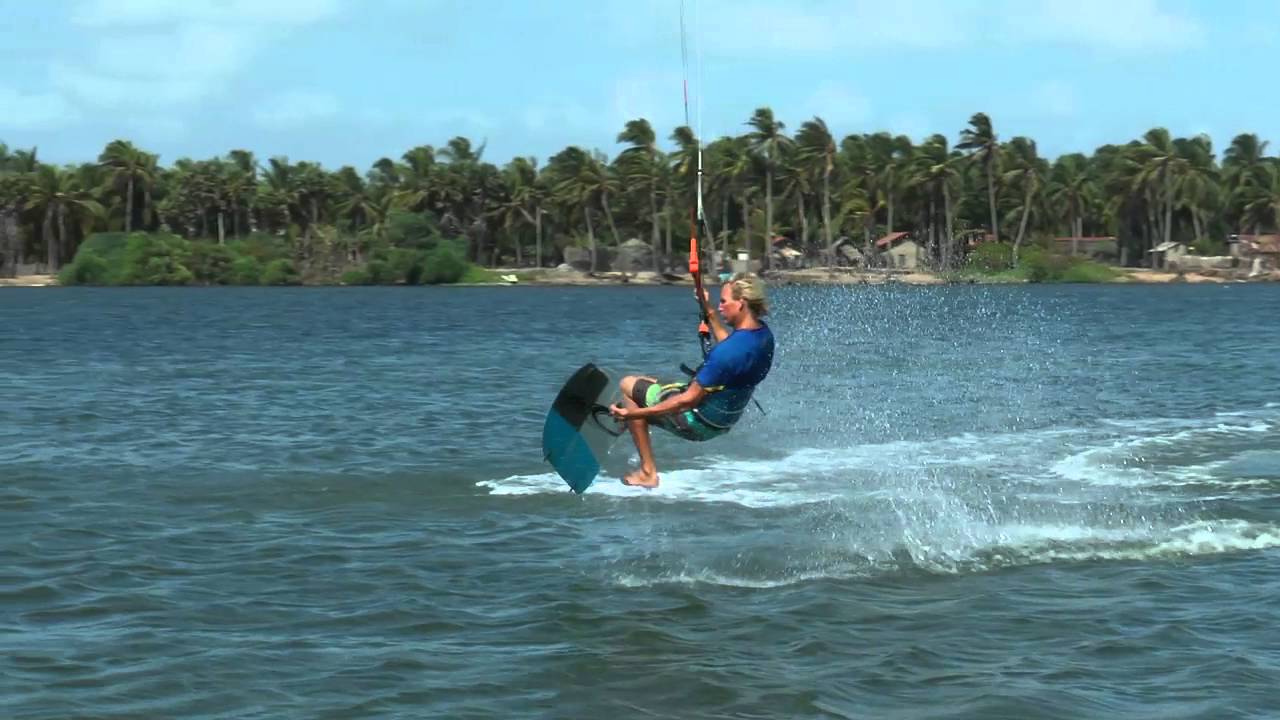
This bit is also very different from the air gybe. Rather than carving up and stamping to slow down whilst popping up and extending, here it’s almost the opposite as you need to stay low and keep some forward momentum. The timing here is important as you need to get into the air before the kite gets to 12. As soon as Christian feels a hint of lift in the kite he pops. However, the pop is a tiny kick off the back foot from his low position, without extending the back leg. You can see in the photo that Christian is off the water, but low, and he’s already lifting both knees up towards his chest, with no sign of extension. At the same time he’s reaching towards the nose of the board with his free front hand, focusing on where he’s going to grab. That’ll be the heelside edge just behind the fin. Whilst doing this, Christian pulls the bar for support and lift.
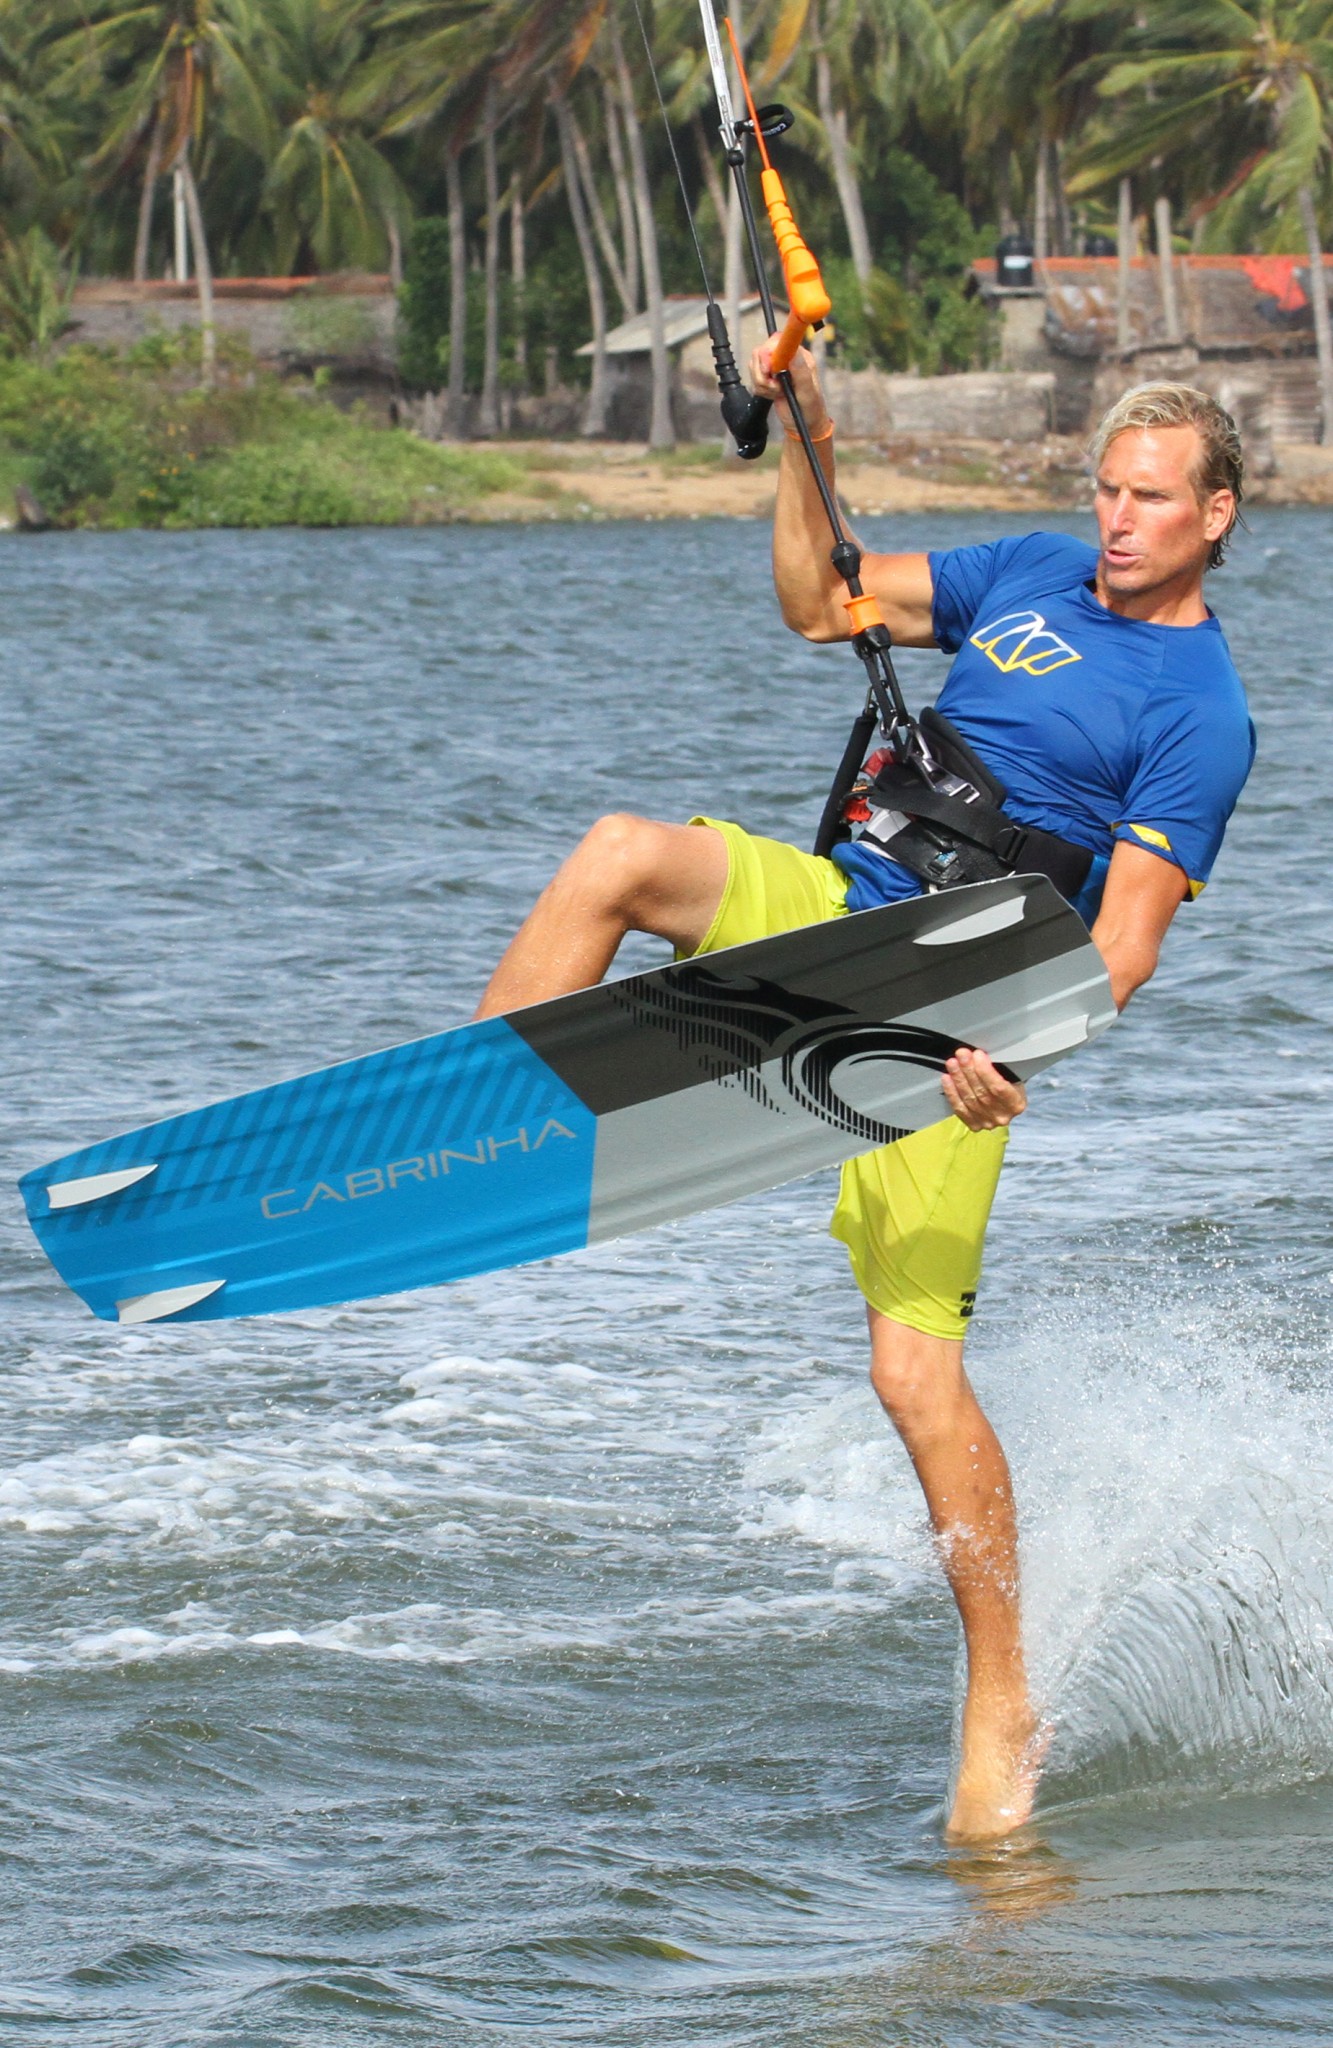
Grab & Foot Out Pic C
Make sure that you get a good solid grab off the board so that you can control it. Now, if you look at this pic and the last one, you can see how Christian takes his front foot out. By keeping low and bringing his knees up, and having already loosened his foot, Christian can just lift the board up and off his front foot with his front hand. Note how Christian is supporting himself on the bar and as a result the kite continues to move up and back.
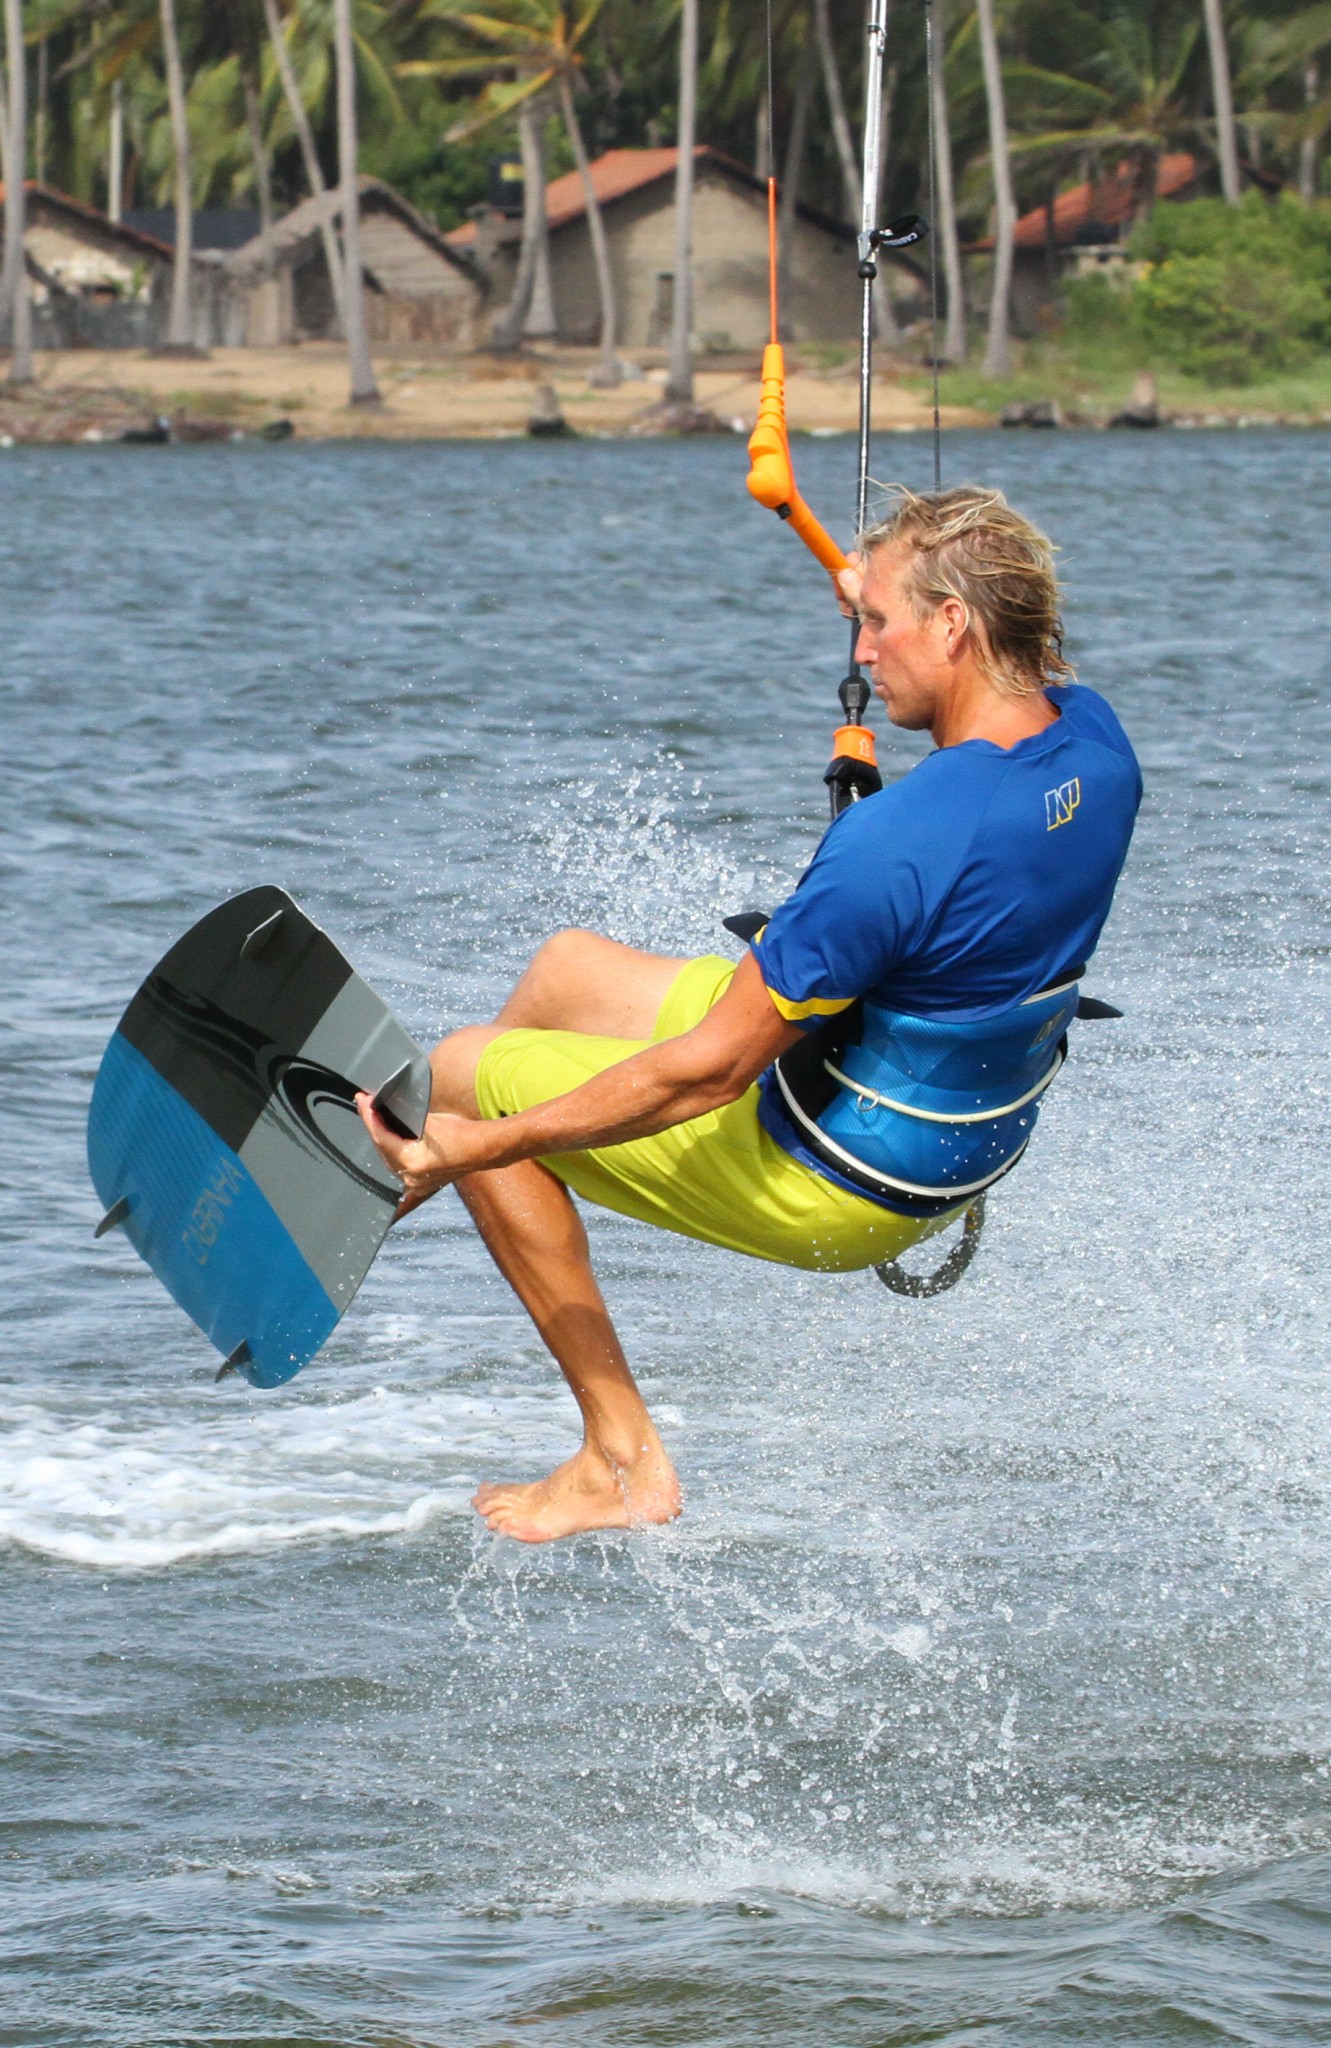
Bath Time Pic D
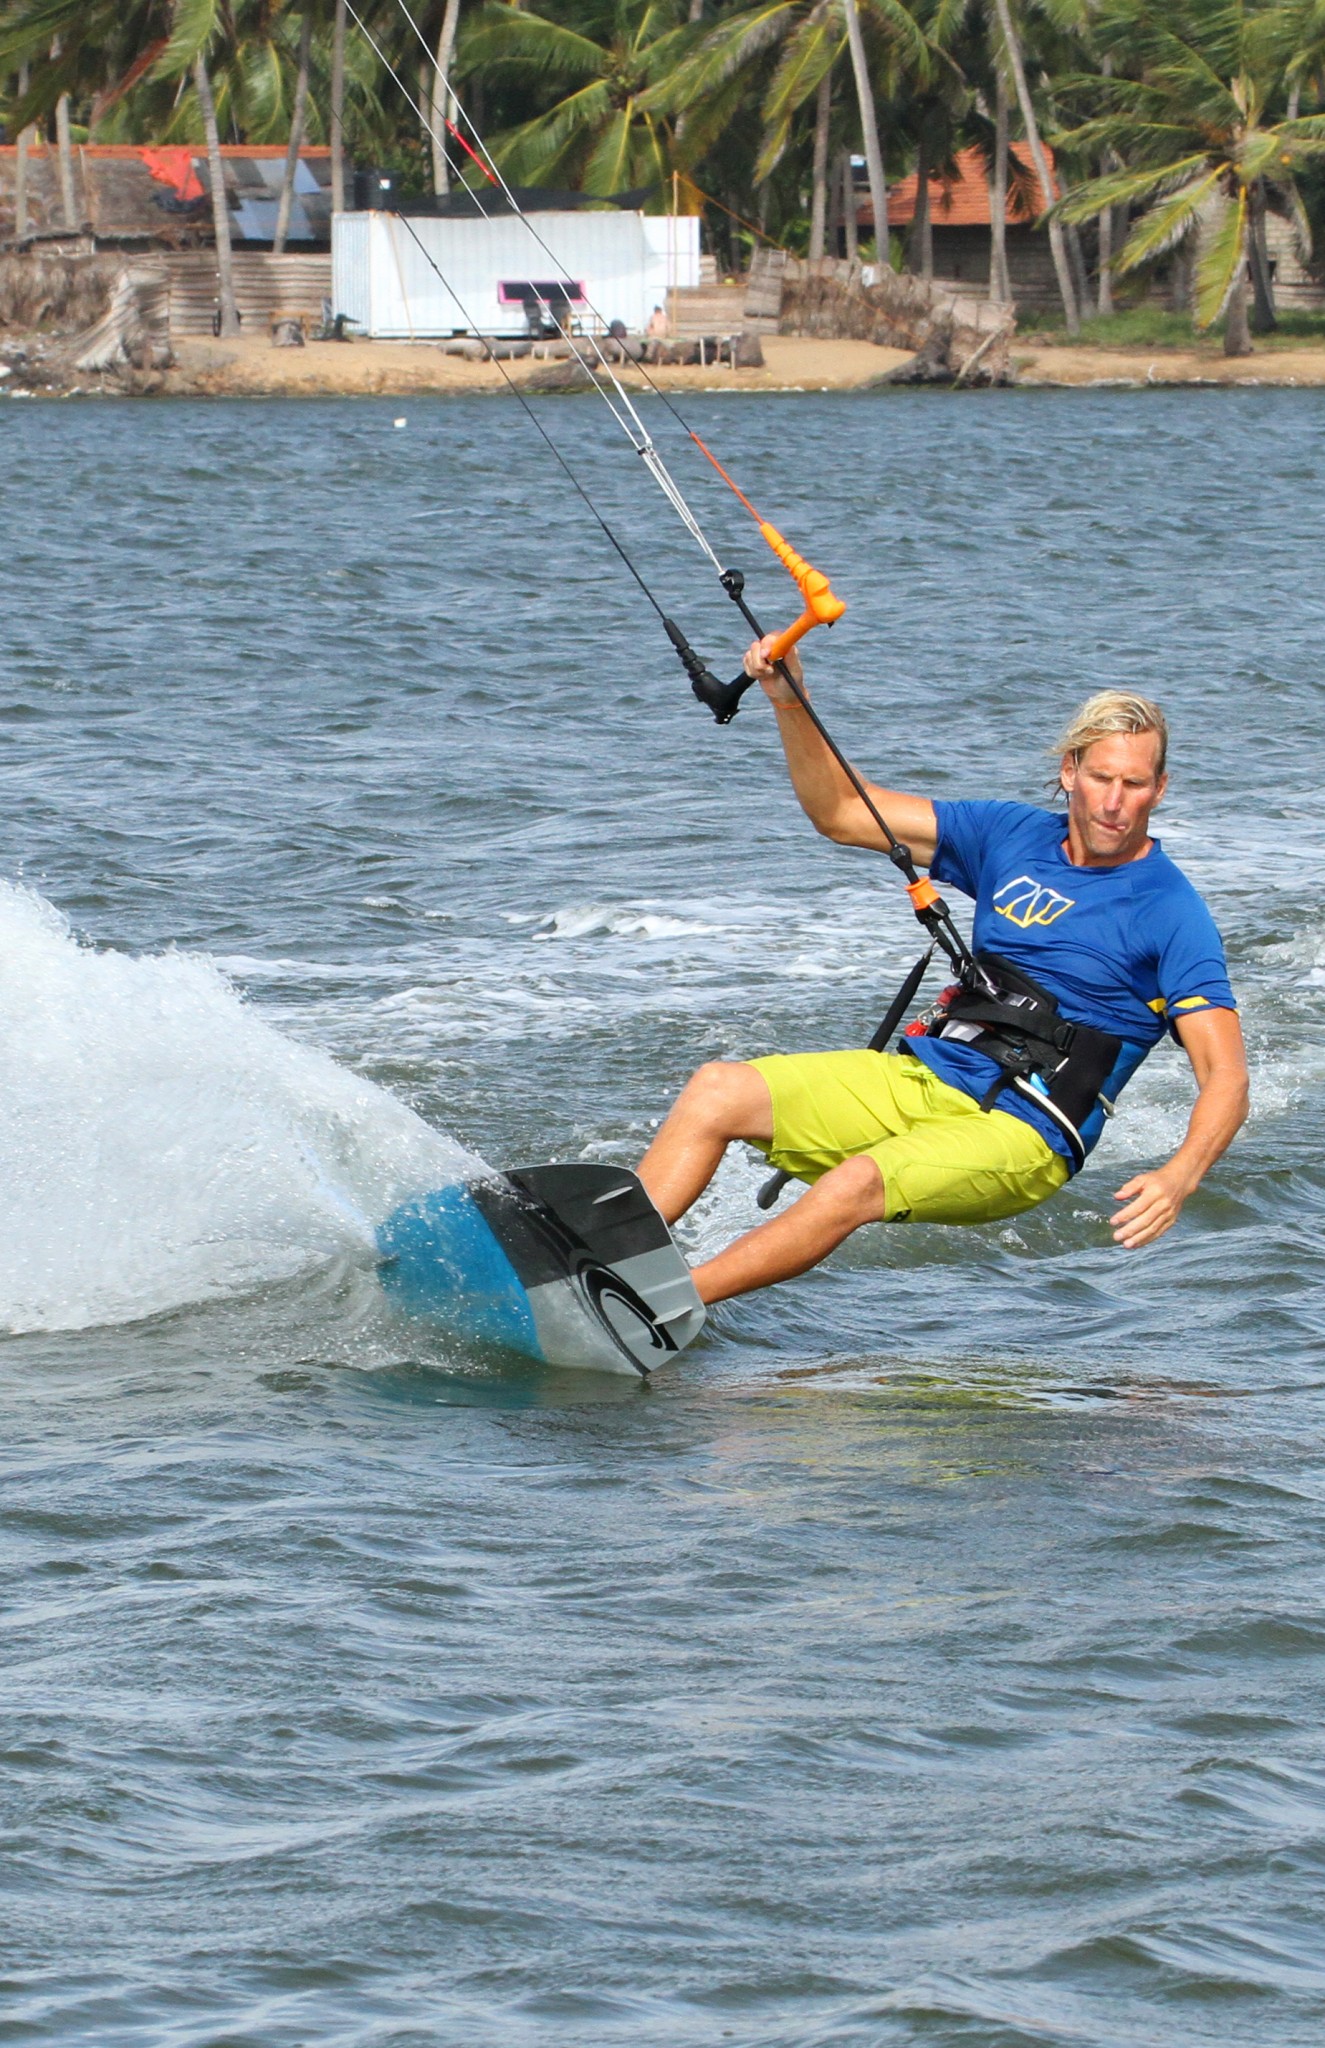
The moment we’ve been waiting for, time to wash your foot. This moment will depend on how gently you’ve drifted your kite and how much speed you have. Assuming that all is well, you merely need to extend your now free front foot down towards the water. You have two choices of how to drag it: either toes down or heel down, either will do. However, what is important is to try and straighten your front leg. By doing this you will create resistance, which will slow you down and thus prevent you from penduluming away from the kite as it drifts back. You can see that Christian continues to look forwards, which should help him to keep the kite relatively still, although the very nature of the move means that it is well on it’s way past 12. Keep the bar in so that the kite will keep you up off the water, but if you yank it in it’ll lift you up and off the water so there’ll be no wash. Remember to keep the other foot up, so that the board is ready in position when it’s time to get the foot back in.
It’s Time Pic E
As soon as you feel the kite start to pull from behind, it’s your cue to get back in and on the board. The lift from the kite will disappear and the lower and further back the kite gets in the opposite side of the window, the less power you’ll be able to generate to get out of the move. There are a few important bits you can see in this photo. Firstly, why you need the bar trimmed out. Christian is clearly pulling hard on the bar, milking every last bit of lift and tension from the kite. Secondly, why you need to keep looking forward, it’s easy for Christian to now focus on the strap, where his foot needs to go. And thirdly, with the right foot and front hand held high, Christian can lift his free foot up and lower the board down onto it.


Multi Tasking Pic F
The final piece of the puzzle to claim this prize is committing to the landing whilst stuffing your foot in the strap. This means that whilst you’re pulling your board and pushing your foot to get nicely into the strap so that you can land, you also need to be diving the kite with your other hand so that the kite pulls you out of the move, rather than dropping you into the drink as it flaps to the edge of the window. Christian is definitely giving the bar a good tug even though his foot is not yet in the strap. There just isn’t time to squeeze the foot in and then dive. Once your foot is in you can make a call whether to keep pulling and loop the kite once you land, or get the kite back up and show real control.
Top Tips
This will be easier to learn with a supportive/larger kite and flat water. 9m and upwards will do, 11m or 12m is perfect. Sweet spot out is your friend, trying to pop up without extension from low whilst keeping the bar in on the chicken loop will just make you miserable, so trim out, or in Drachmas – power up. And finally, loosening your front strap whilst learning this will not only make getting your foot out simpler, but getting the darn thing back in considerably more do-able.
Have a perusal of the sequence and videos for a complete run through.
Common Problems
Can’t get your foot in or near the water. You are likely standing too tall coming in, so even a mini pop will take you too high. Get low and close to the water. If that doesn’t help, tone down your pop and make sure that you’re not moving the kite too aggressively.
If you’re flying forward and the kite is drifting back too quickly. Assuming that your hand is centred on the bar and you’re going early enough, this will be a case of not creating enough resistance with your foot. Once it touches the water really concentrate on extending your leg forwards.

If you keep dropping into the water once your foot is in. This means that you need to start diving the kite sooner, so that it pulls from downwind. This does however mean that you need to be confident that you will get your foot in!
Keystones
1. Speed and low, loose foot.
2. Mini pop.
3. Lift board off foot.
4. Extend leg for resistance.
5. Dive whilst replacing foot.
This technique article was in Issue 54 of IKSURFMAG.
Related


By Christian and Karine
Christian and Karine have been working together as a coaching team, running improver to advanced kitesurfing clinics since 2003.
