
Riding Blind
Technique / Intermediate


Introduction
Looking back in annals of kitesurfing history, riding blind had a similar standing as the darkslide does today. It was considered a decent showy move and was much sort after. Casually skimming across a bay or lagoon in reverse gear, waving at your adoring fans with a Cheshire cat smirk etched on your face was a wonderful sight to behold. And much like the darkslide, the beauty of blind is that with some dedication and effort it sits well and truly within most kiters grasp. In fact if you can pop a bit and ride toeside you already have the skills necessary. And if that isn’t reason enough, it can lead on to a world of different tricks, landing blind or from blind. So if you fancy a new challenge or are interested in opening the door to a plethora of new moves, read on.
Those of you how have been loyal to the mag since the beginning may remember us covering this in the very first issue! However an update is overdue...

We’ll start by having a look at how this works on the water.
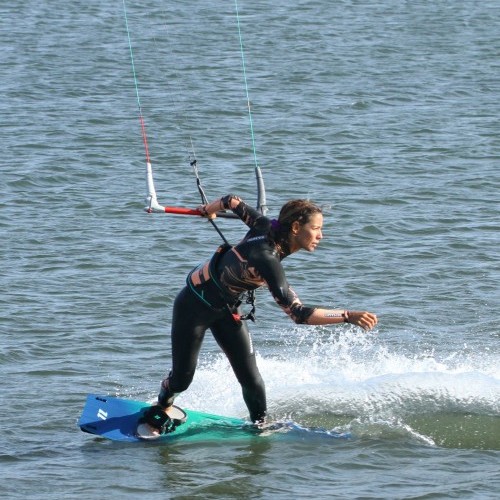
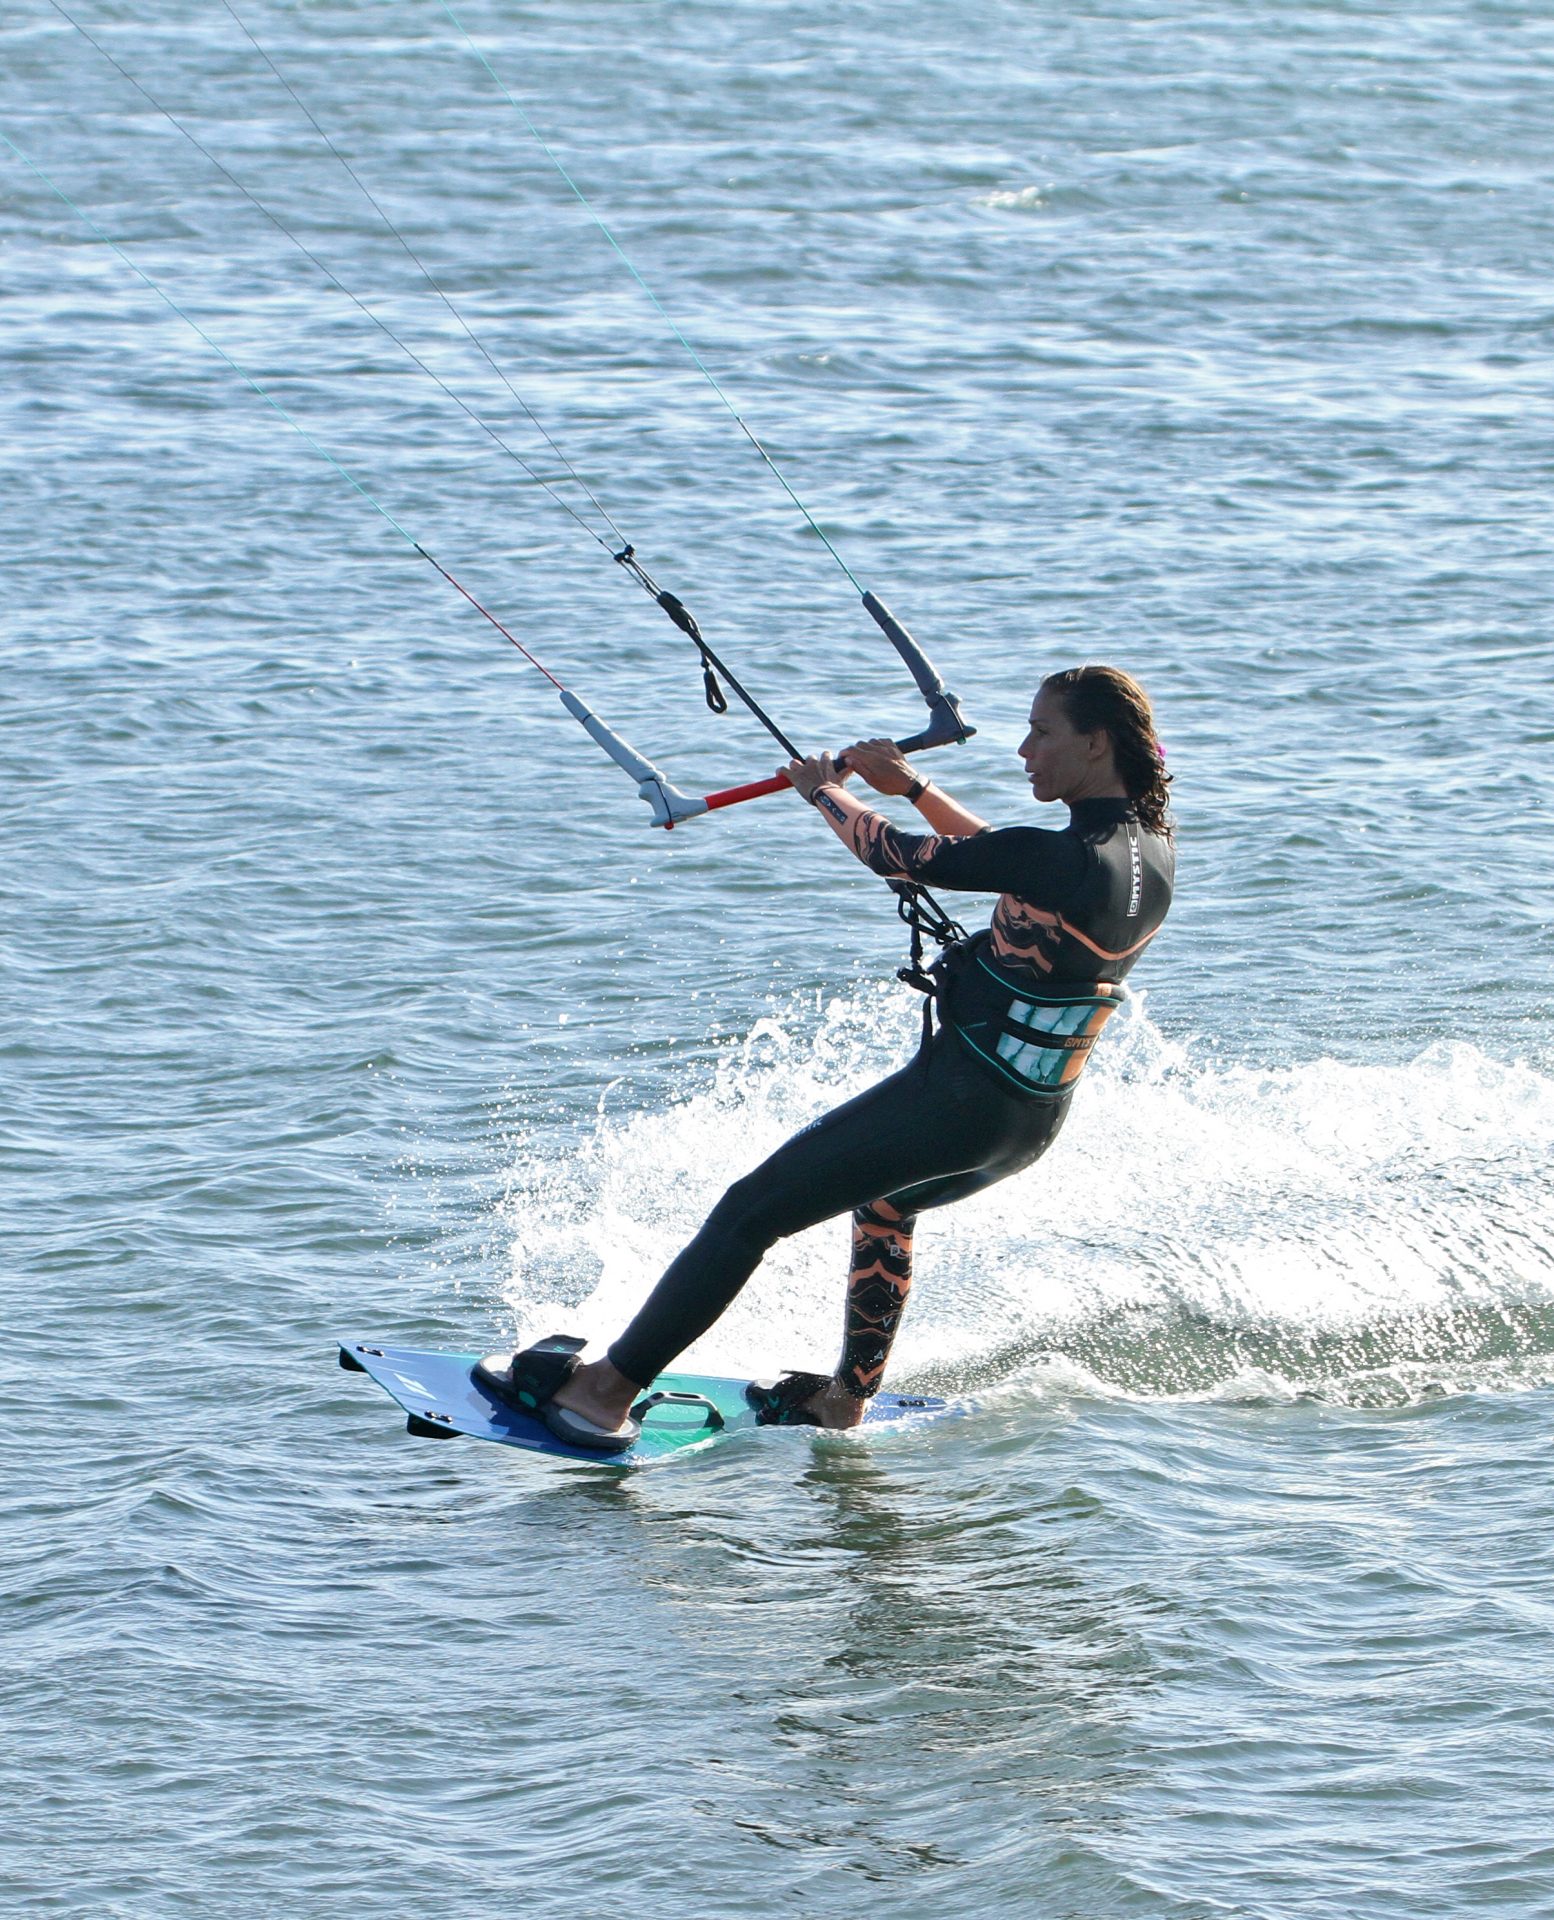
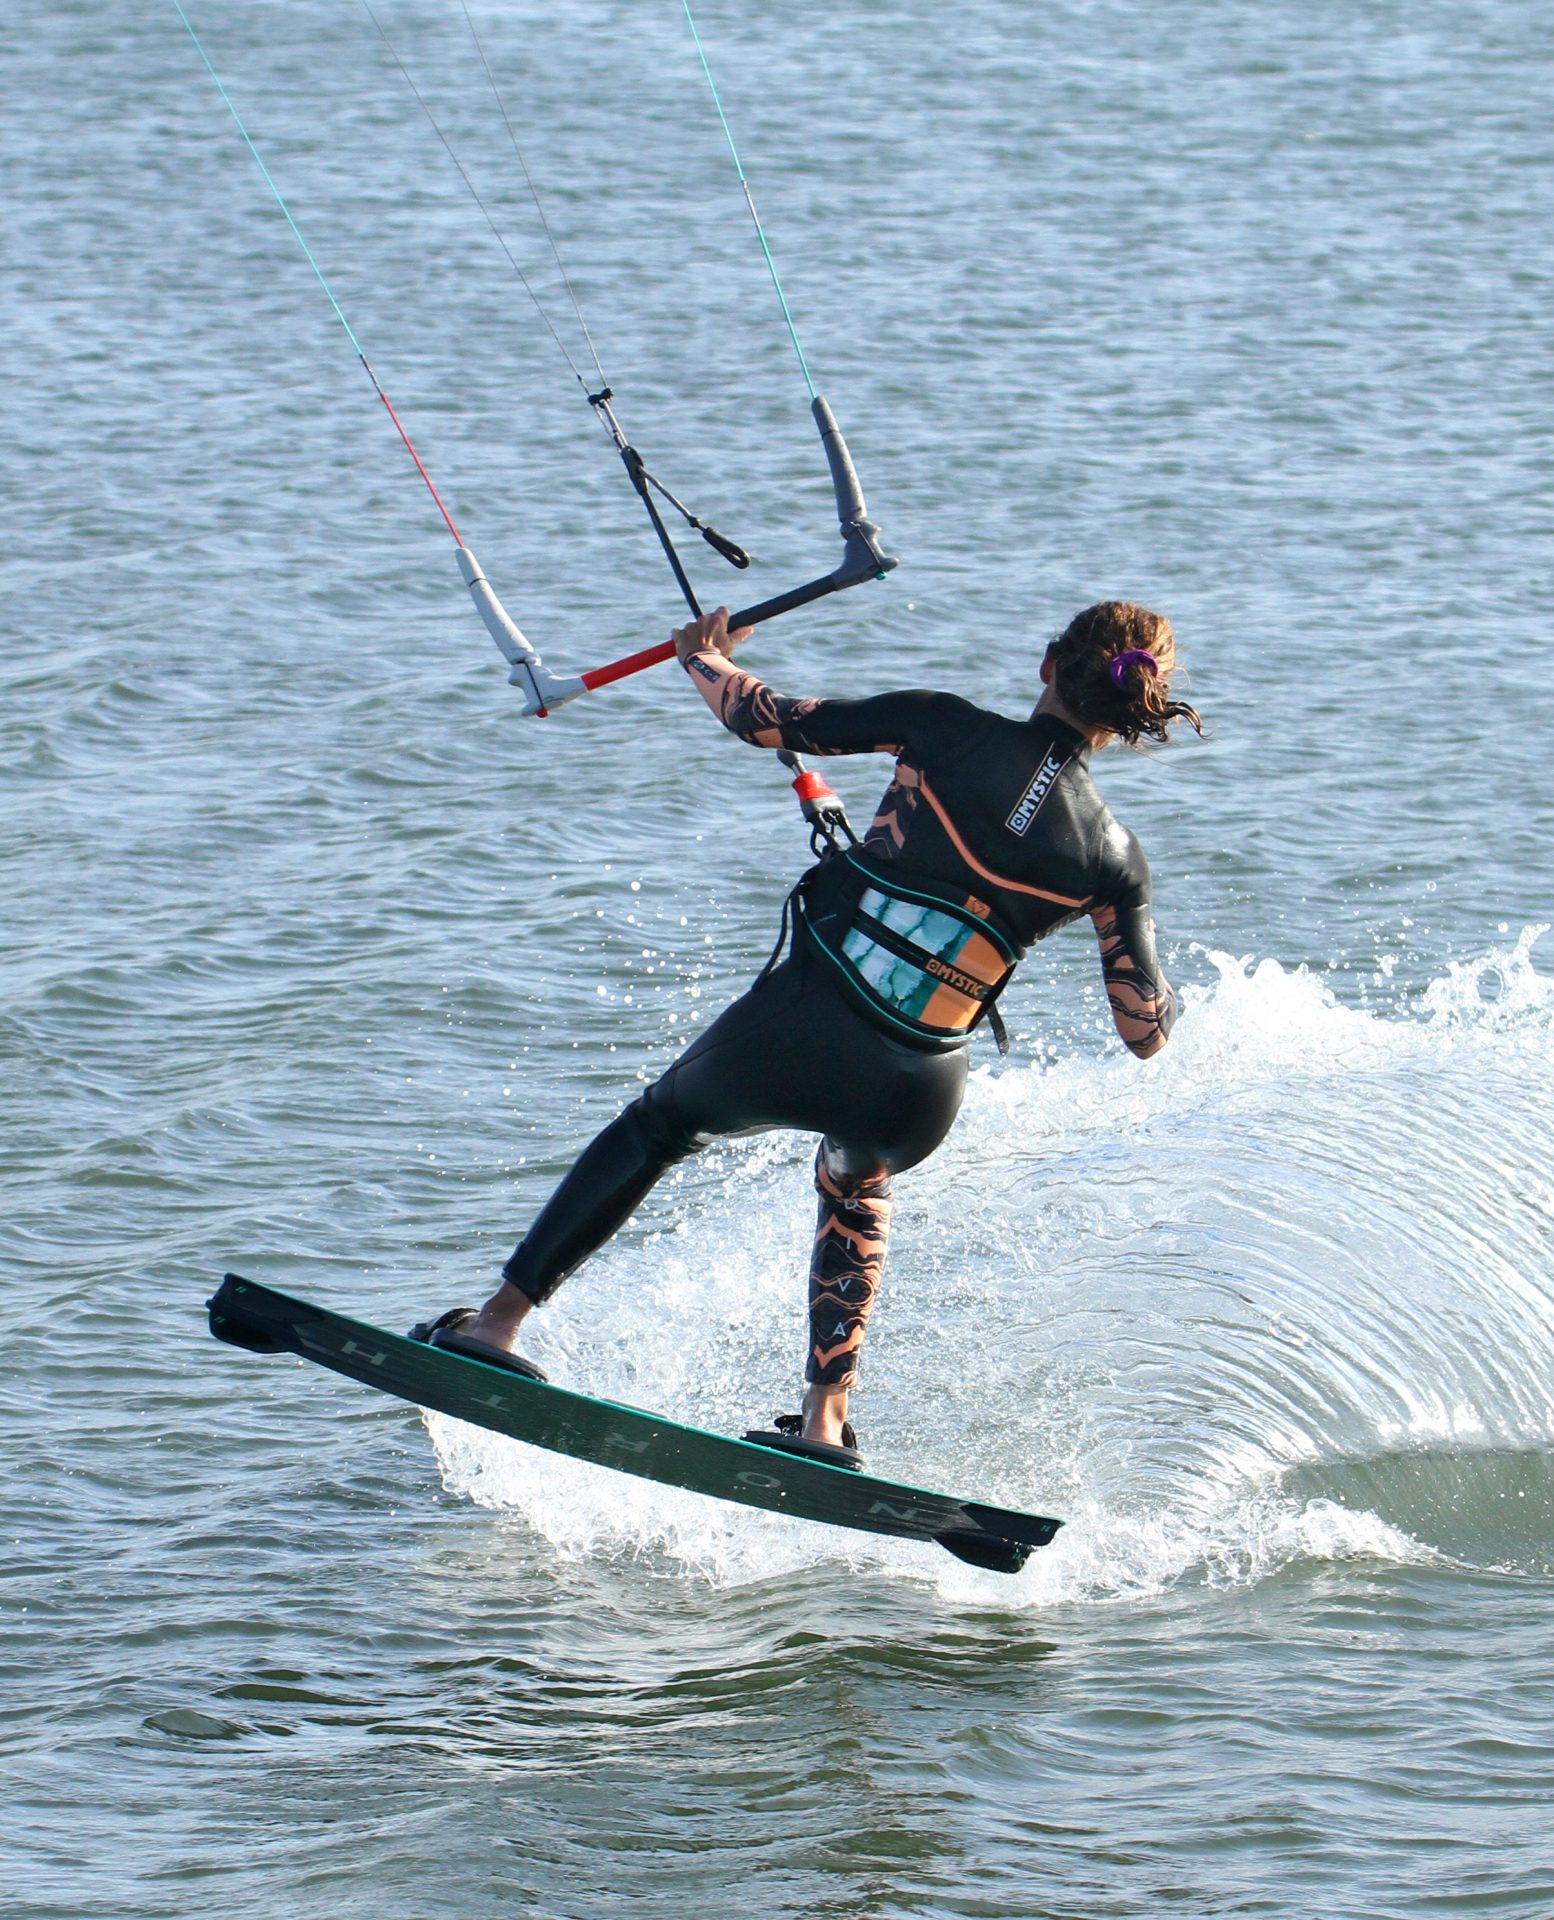
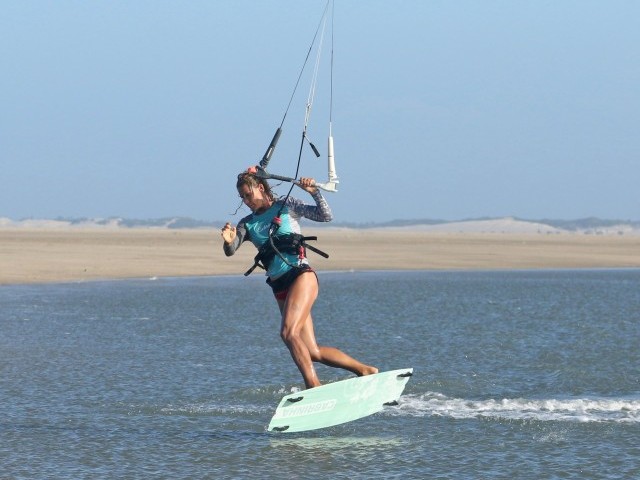
Your Approach Pic A.
When you’re contemplating turning your back on the action, you don’t want any unnecessary surprises. As such making sure that your kite is well behaved in the build up is mandatory. This means that you should approach on an edge, not hard upwind but upwind none the less, with your bar on the sweet spot. This way the kite will be flying at the edge of the window, pulling you forwards with tension on the lines. Also by kiting only just upwind you won’t have as far to turn the board for a comfortable landing. There is no need for break neck speed, but once you land, it is your momentum that will keep you going but you do need to get off the water, so no tootling along either. Your sweet spot should be trimmed in relatively close, so that you have the ability to sheet out easily when the time comes. Finally whilst learning blind you can keep your kite relatively high, just above 1 or 11 o’clock.
From this position you can then think about the pop. There is no need for height, you really just need to unstick the board and clear your fins. In preparation for the pop you will soften your knees and stand up over the board so that you are no longer edging. It’s important to keep your hips back towards the tail of the board to keep the nose up as you relax your edge. Looking at Karine, she is in the process of relaxing her edge and standing up over the board. Even though she is standing on the board, her weight is still committed upwind of the board, whilst her hips are back and as such her nose is high. Most of her weight should be on her rear heel. This means that she’s on the right part of the board, the tail, to turn quickly back onto her edge. Lastly Karine has centred her front hand on the bar, spreading her first two fingers either side of the centre line. If you don’t have a plastic centre line then butt your front hand right up next to it.
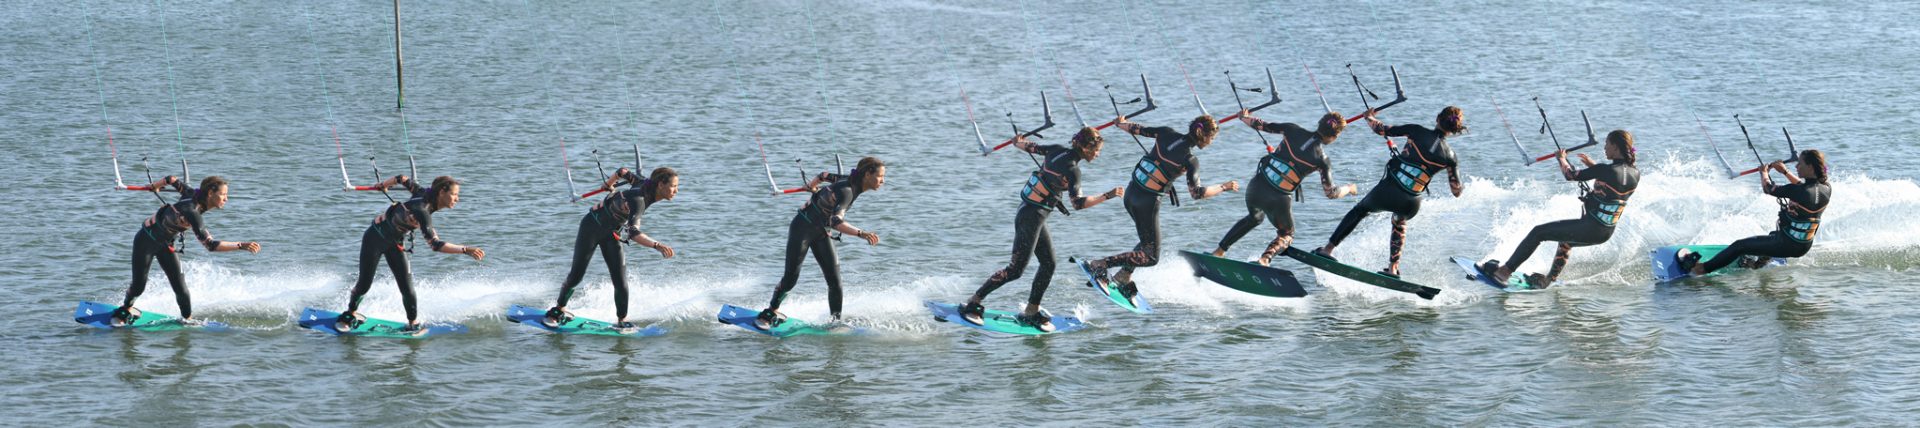
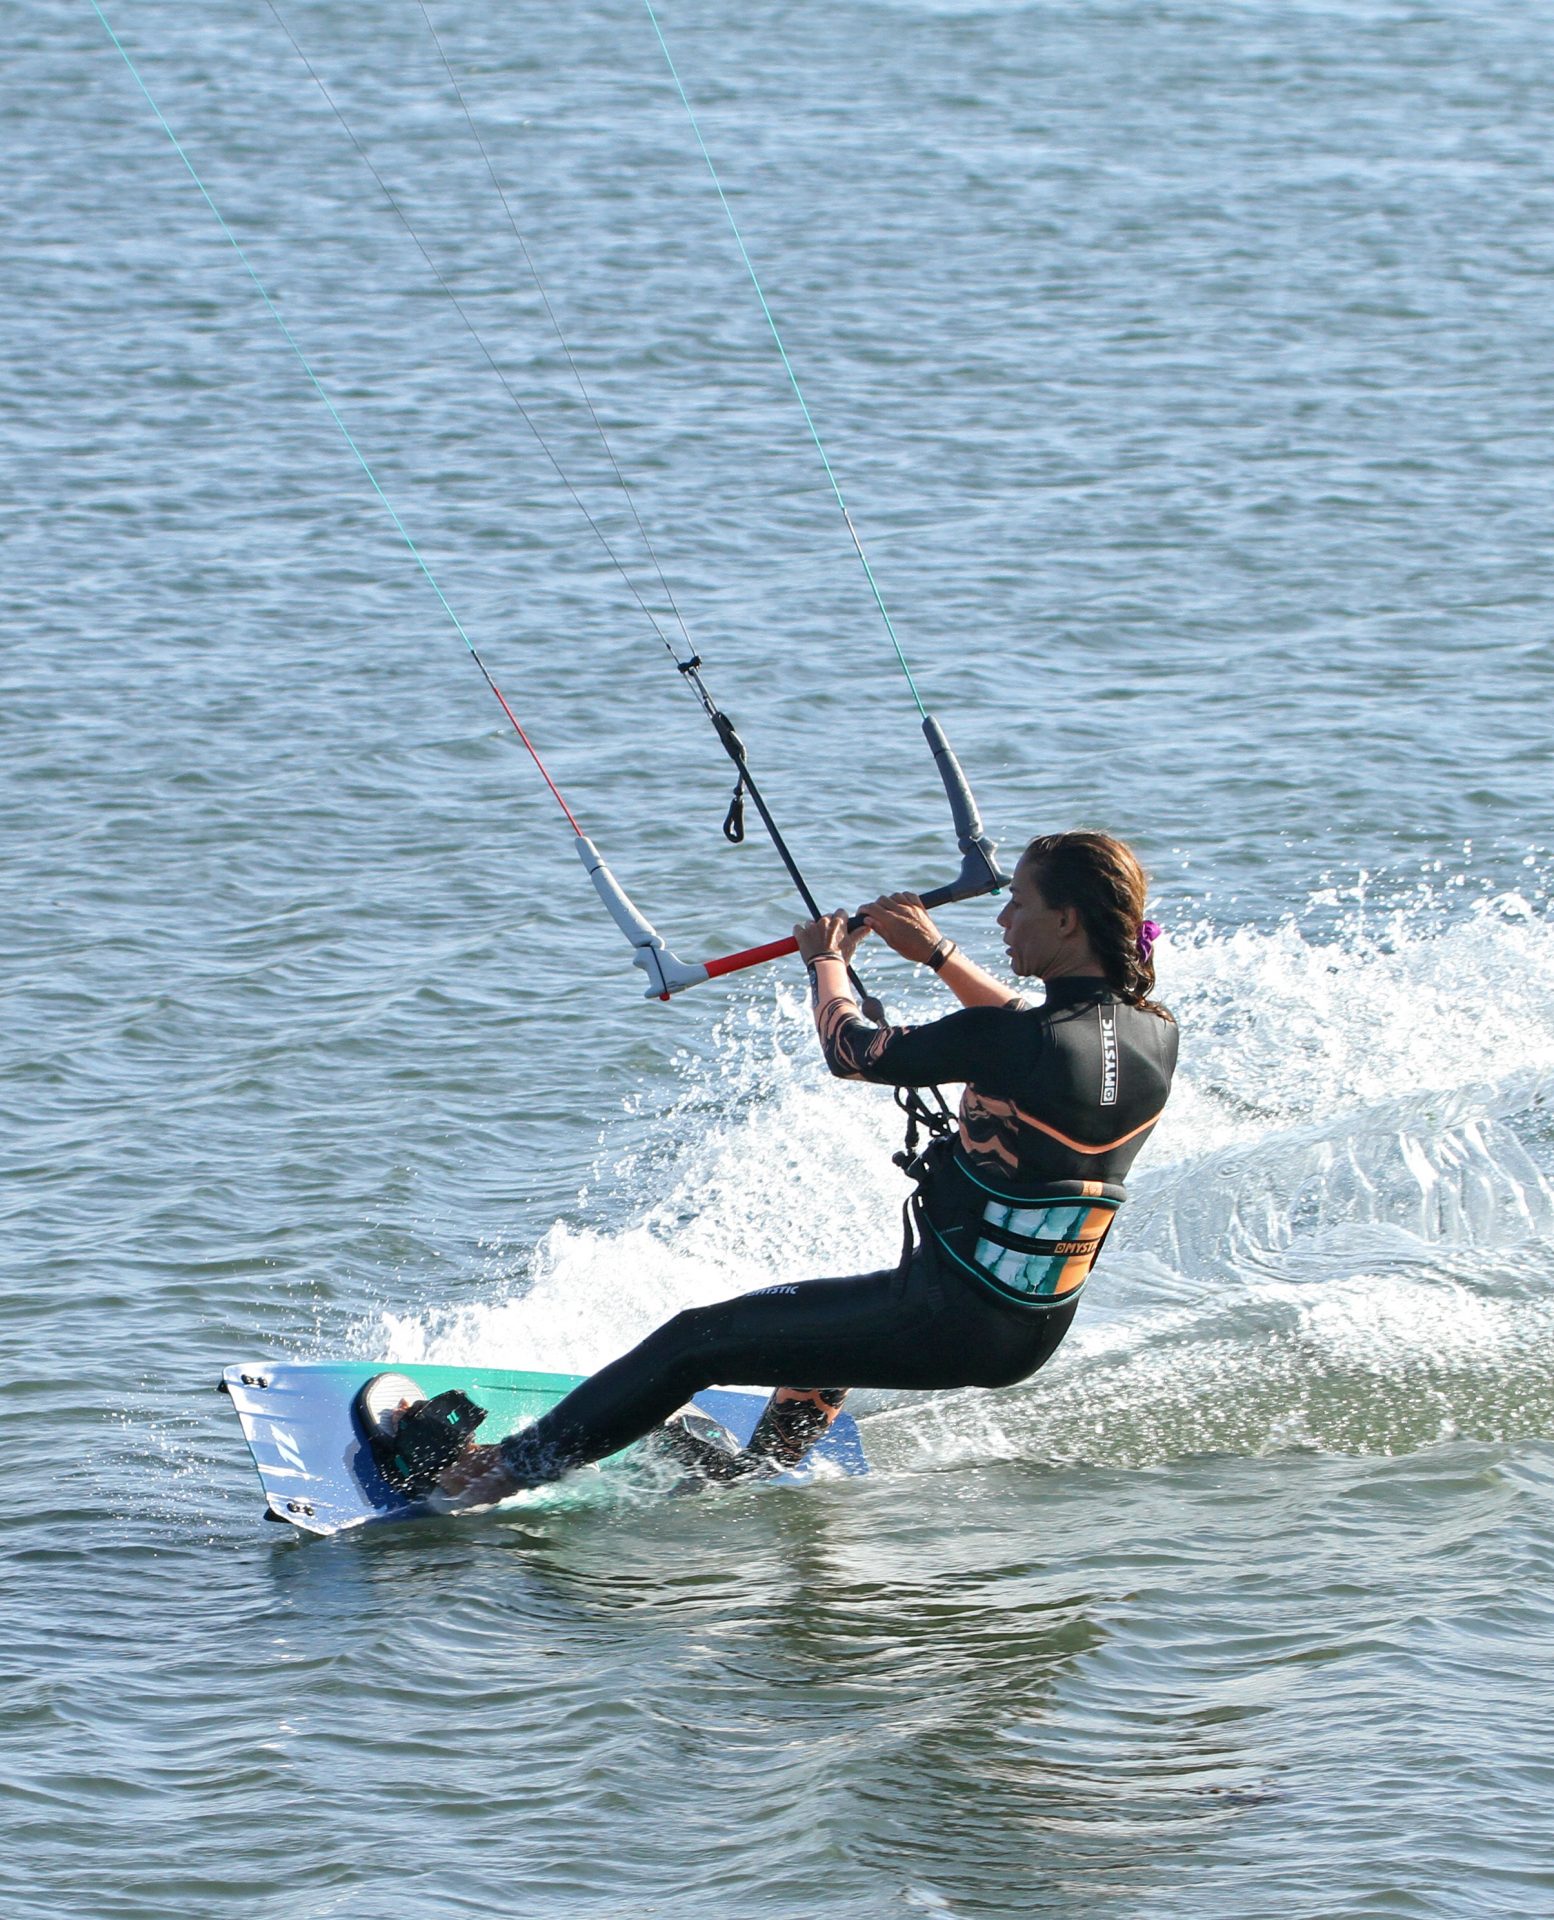
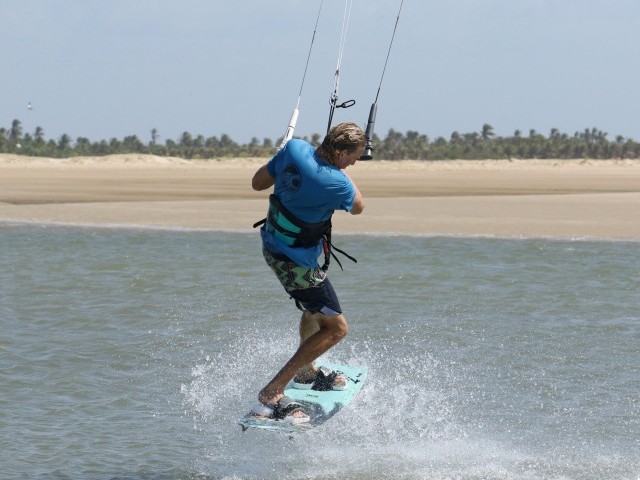
Quick Carve Pic B.
To pop, you’ll first need to carve back onto your edge. This is why you adopted the hips back position on your approach. From this position all you need to do is turn your shoulders and hips whilst pushing through your back leg. It’s also important that you don’t carve up all the way into wind, as this will cause you to loose all speed. This is also the reason that you relaxed your edge and stood up over the board at the beginning. Although only subtle, your board will have turned slightly off the wind, which gives you room and time to turn back up without ending up all the way back into wind. In the photo you can see how Karine is carving up, pushing against her back leg, throwing some spray and replacing the tension on her lines. The one thing she hasn’t done is send the kite. This is going to be a small pop, not a little jump.
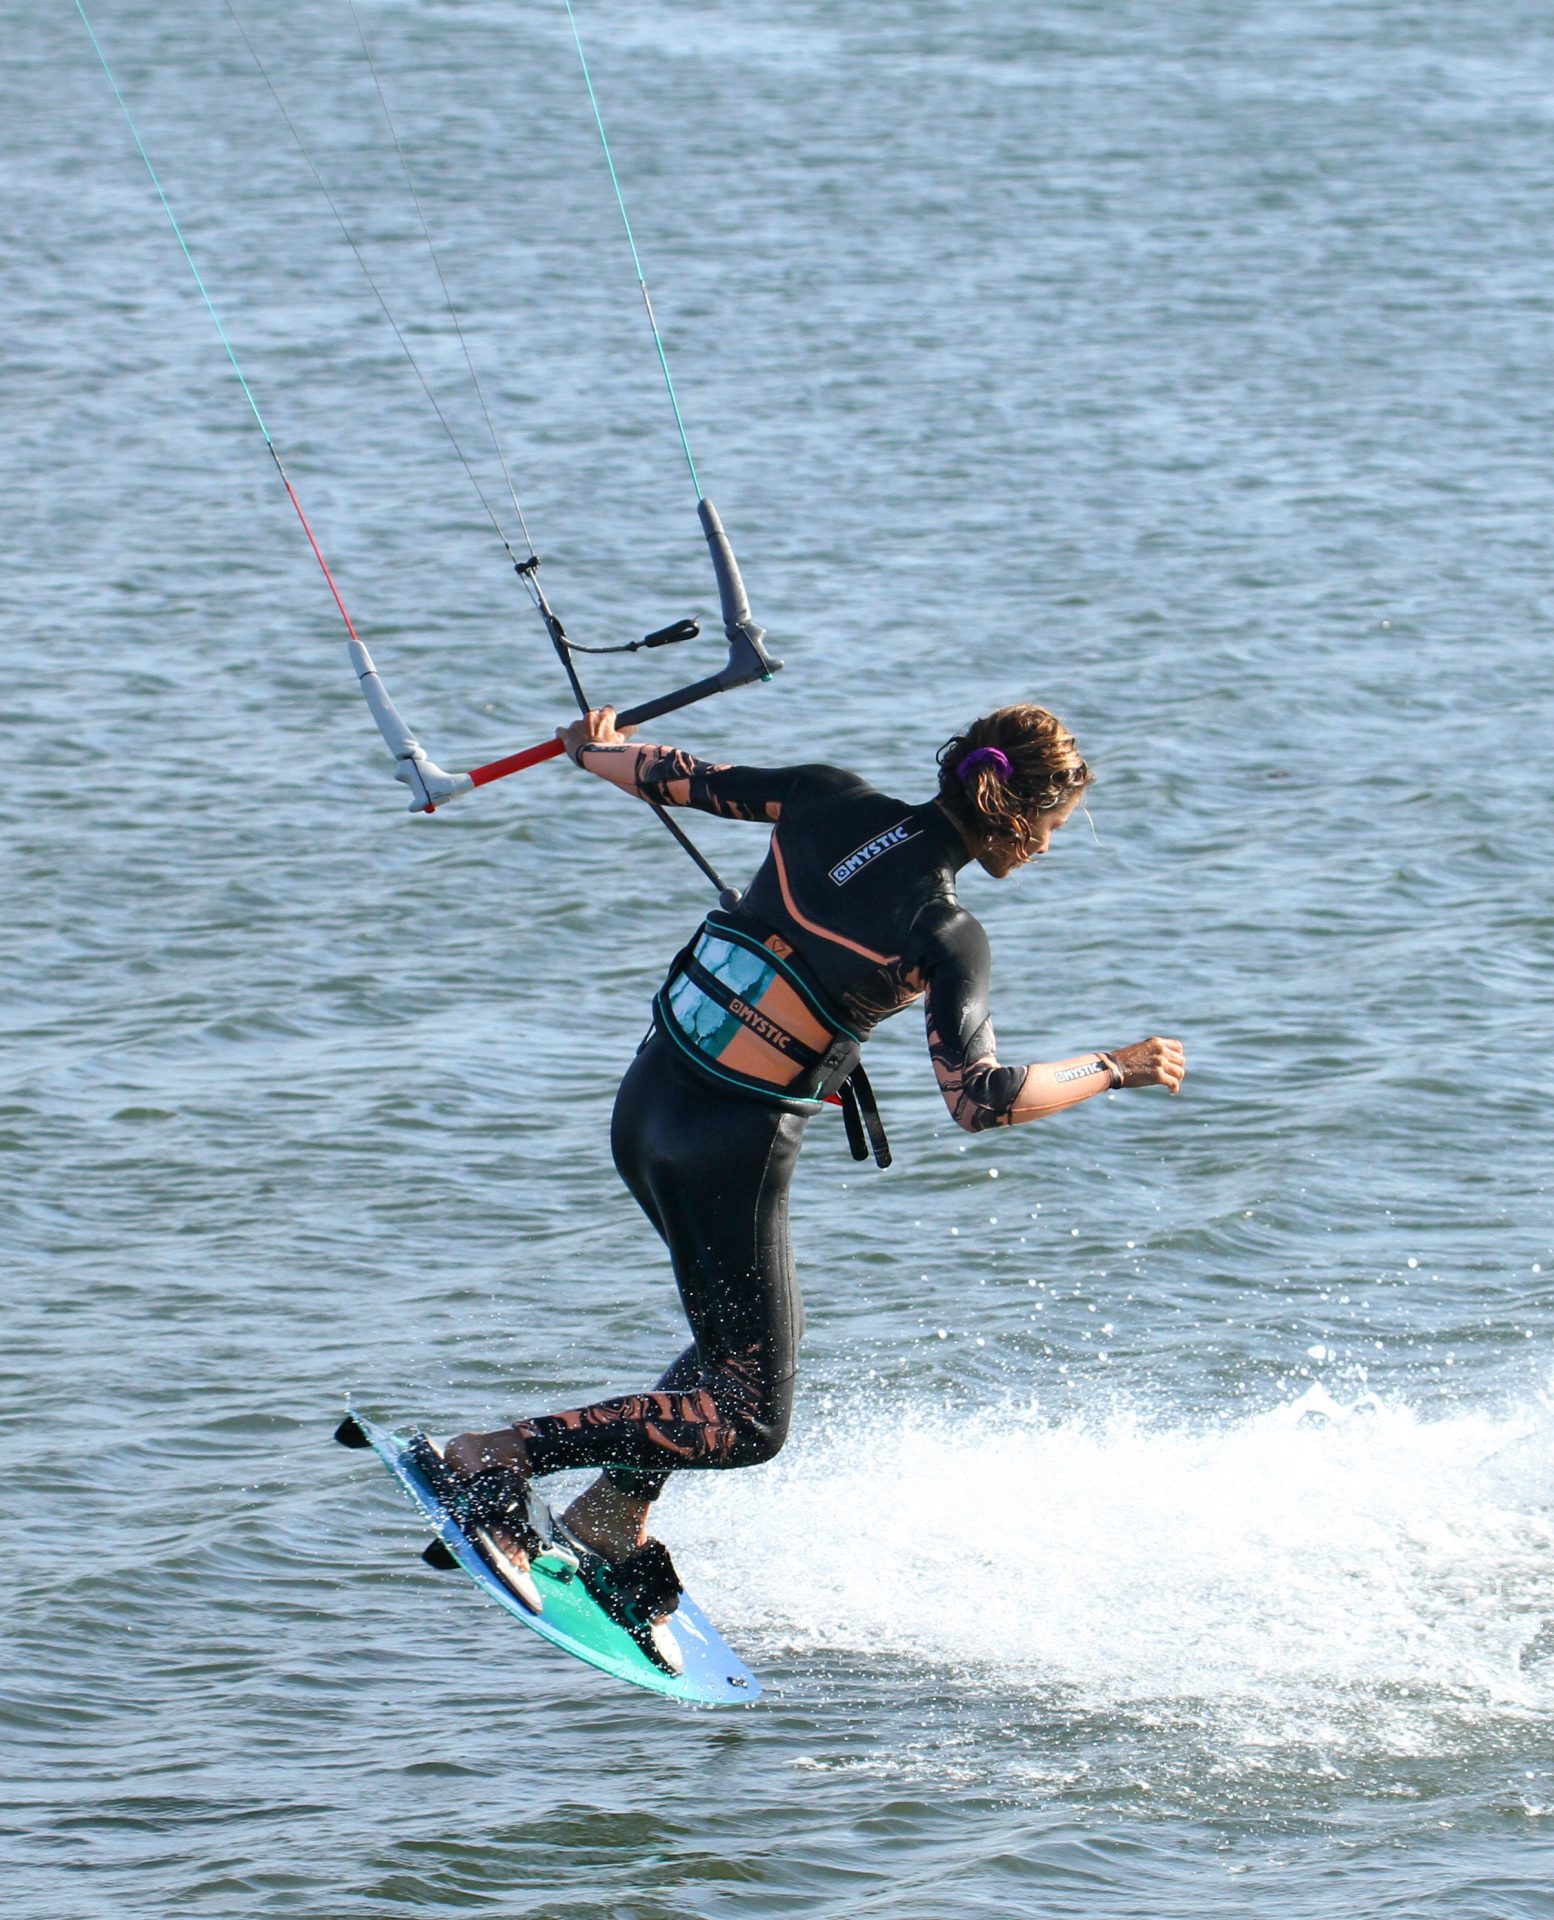
The Stamp Pic C.
A stamp off the back leg, that’s all the pop is. With the kite high you’ll soon free the fins. It’s important to understand that the carve and pop are almost simultaneous. Carve to long and you’ll slow down, so think of it as turn and stamp. You are kicking against your board with your back heel. This way the lines will lift you as you cork off the water. However you’re not trying to jump up off a flat board, you’re kicking against the edge. Counter intuitive, but it works:) Now the hardest part about your stamp is that due to over 4 million years of evolution, you’d prefer to compress before stamping. Please don’t as this will flatten the board again. Rather use the small bend you already have in your back leg, it’ll be more than enough. Final point here is that even though you want to turn to blind, the pop comes first. They are two separate actions, so think of stamping, then we’ll come to turning! Having turned up, Karine is immediately stamping down against the board through her heel. The nose of the board is lifting as her hips are still back. As she stamps she is releasing her back hand from the bar. Note how she is still looking forwards.

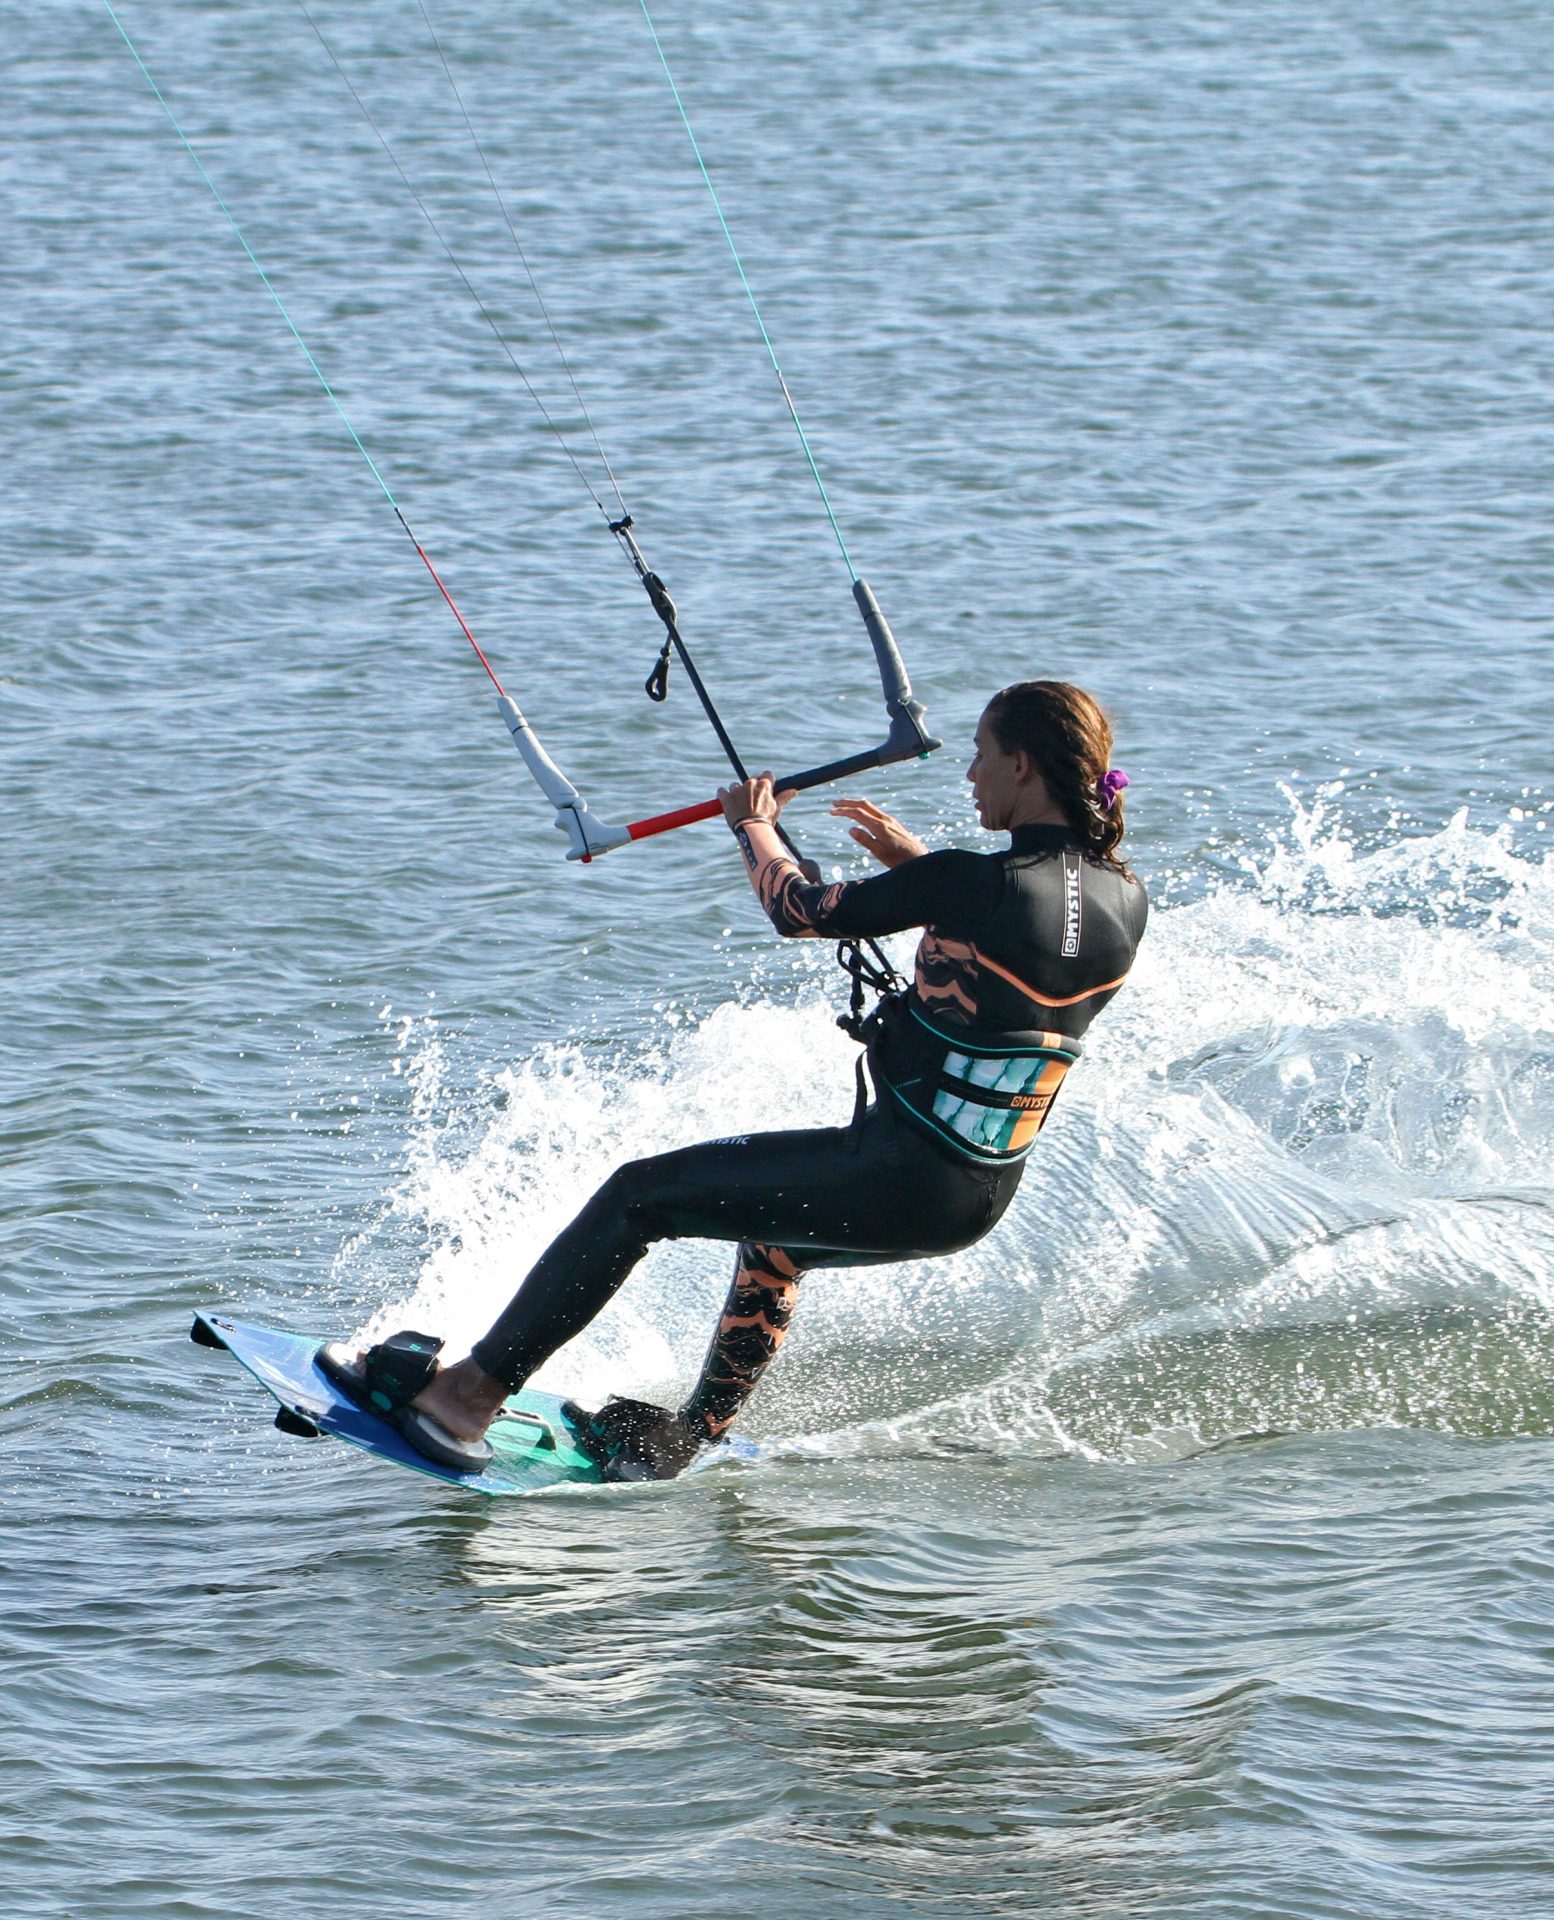
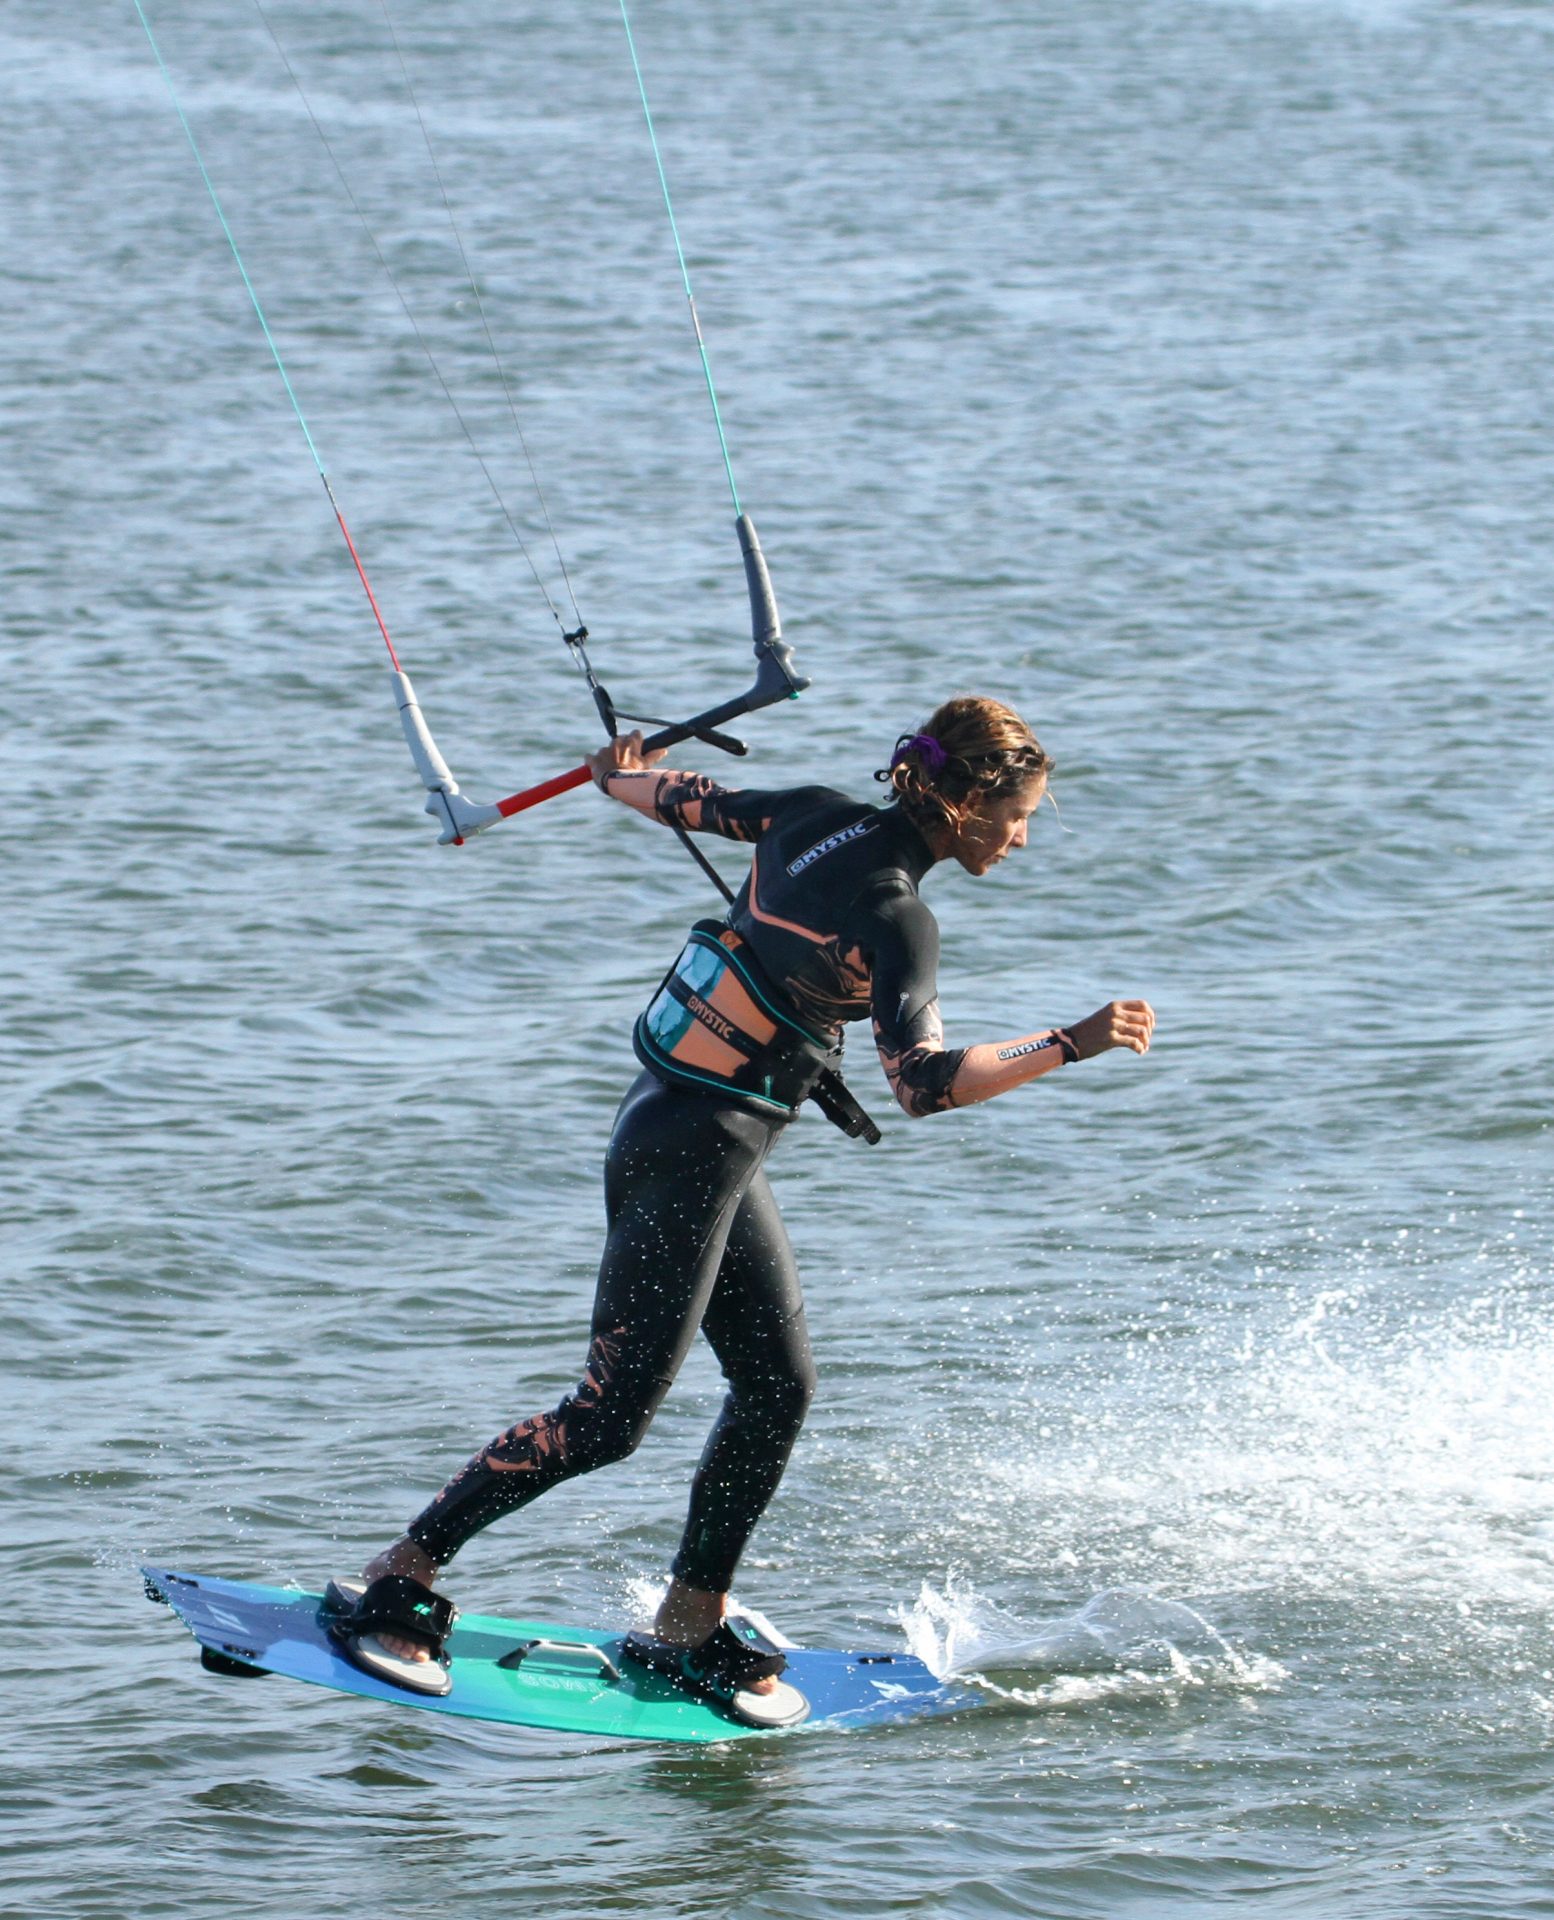
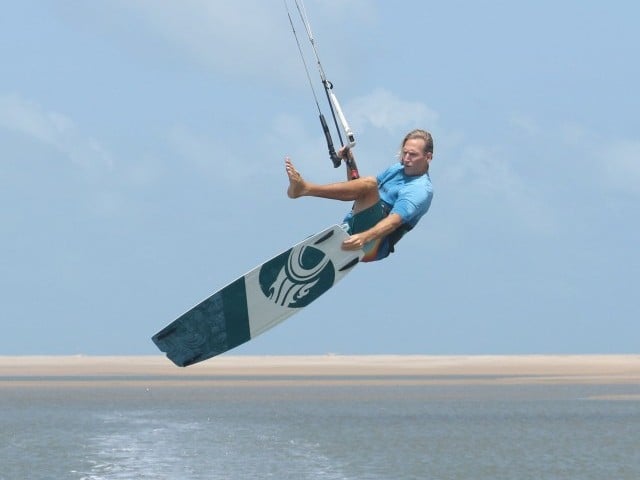
Then Turn Pic D.
Now that your board is free of the water it’s time to turn. It’s best if we already look at Karine in Pic D. First thing to note is that her back leg has not extended much, because she’s not trying to pop over anything, just get the board up. Too much pop will make it harder to land with momentum, so tone it down. Stamp, but not as if your life depends on it. Next as Karine is going up she is leaning her head back and twisting her shoulders and hips in an effort to rotate her body 180. If you start to turn your head this will help, and imagine that you are trying to turn to see your reflection in the water. This is really the key point. It’s called blind for a reason, and if you attempt to see where you’re going you won’t turn. At the same time Karine has pushed the bar away. This way as you turn, everything remains neutral. If you pull the bar in the kite will pull you downwind and you won’t be able to land on the board.
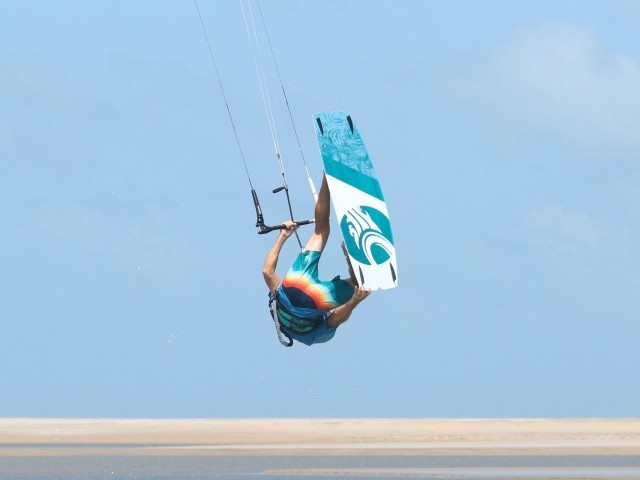
Back Leg Up Pic E.
As you come around you already need to prepare for the landing. You won’t have much time in the air from a little pop, but the only movement needed is to get your back leg up. Think about lifting your foot towards your bum. This way the tail is up and you’ll land nose first, and it keeps the board under you which means that you’re over it. The great advantage of this position is that even if you don’t turn enough, the nose will land first and pivot the board around further, increasing your chances of success. Looking at Karine, she has her back leg up, so the nose of the board is down. As a result she is over the board. Her bar remains sheeted out, she’s looking backwards and her shoulders are up. Set for landing.
Nose First Pic F.
And here’s the result, a beautiful nose first landing, body upright and centred over the board, head and eyes most definitely looking the wrong way. Both knees pointing back and the bar is still out. Landing over the board like this is important, as it means that you are not breaking on an edge which will slow you down. This way your momentum will keep you moving, even if just for a couple of meters, but believe us you’ll feel it, and it will feel good. The temptation when turning to blind is to push the feet around, Karate styley, but this will only result with you landing on all of your edge with your weight miles upwind. It’s a tempting position to aim for as at least you won’t catch your heel edge. However as long as you lift your back foot and push the bar away you’ll be more than fine.
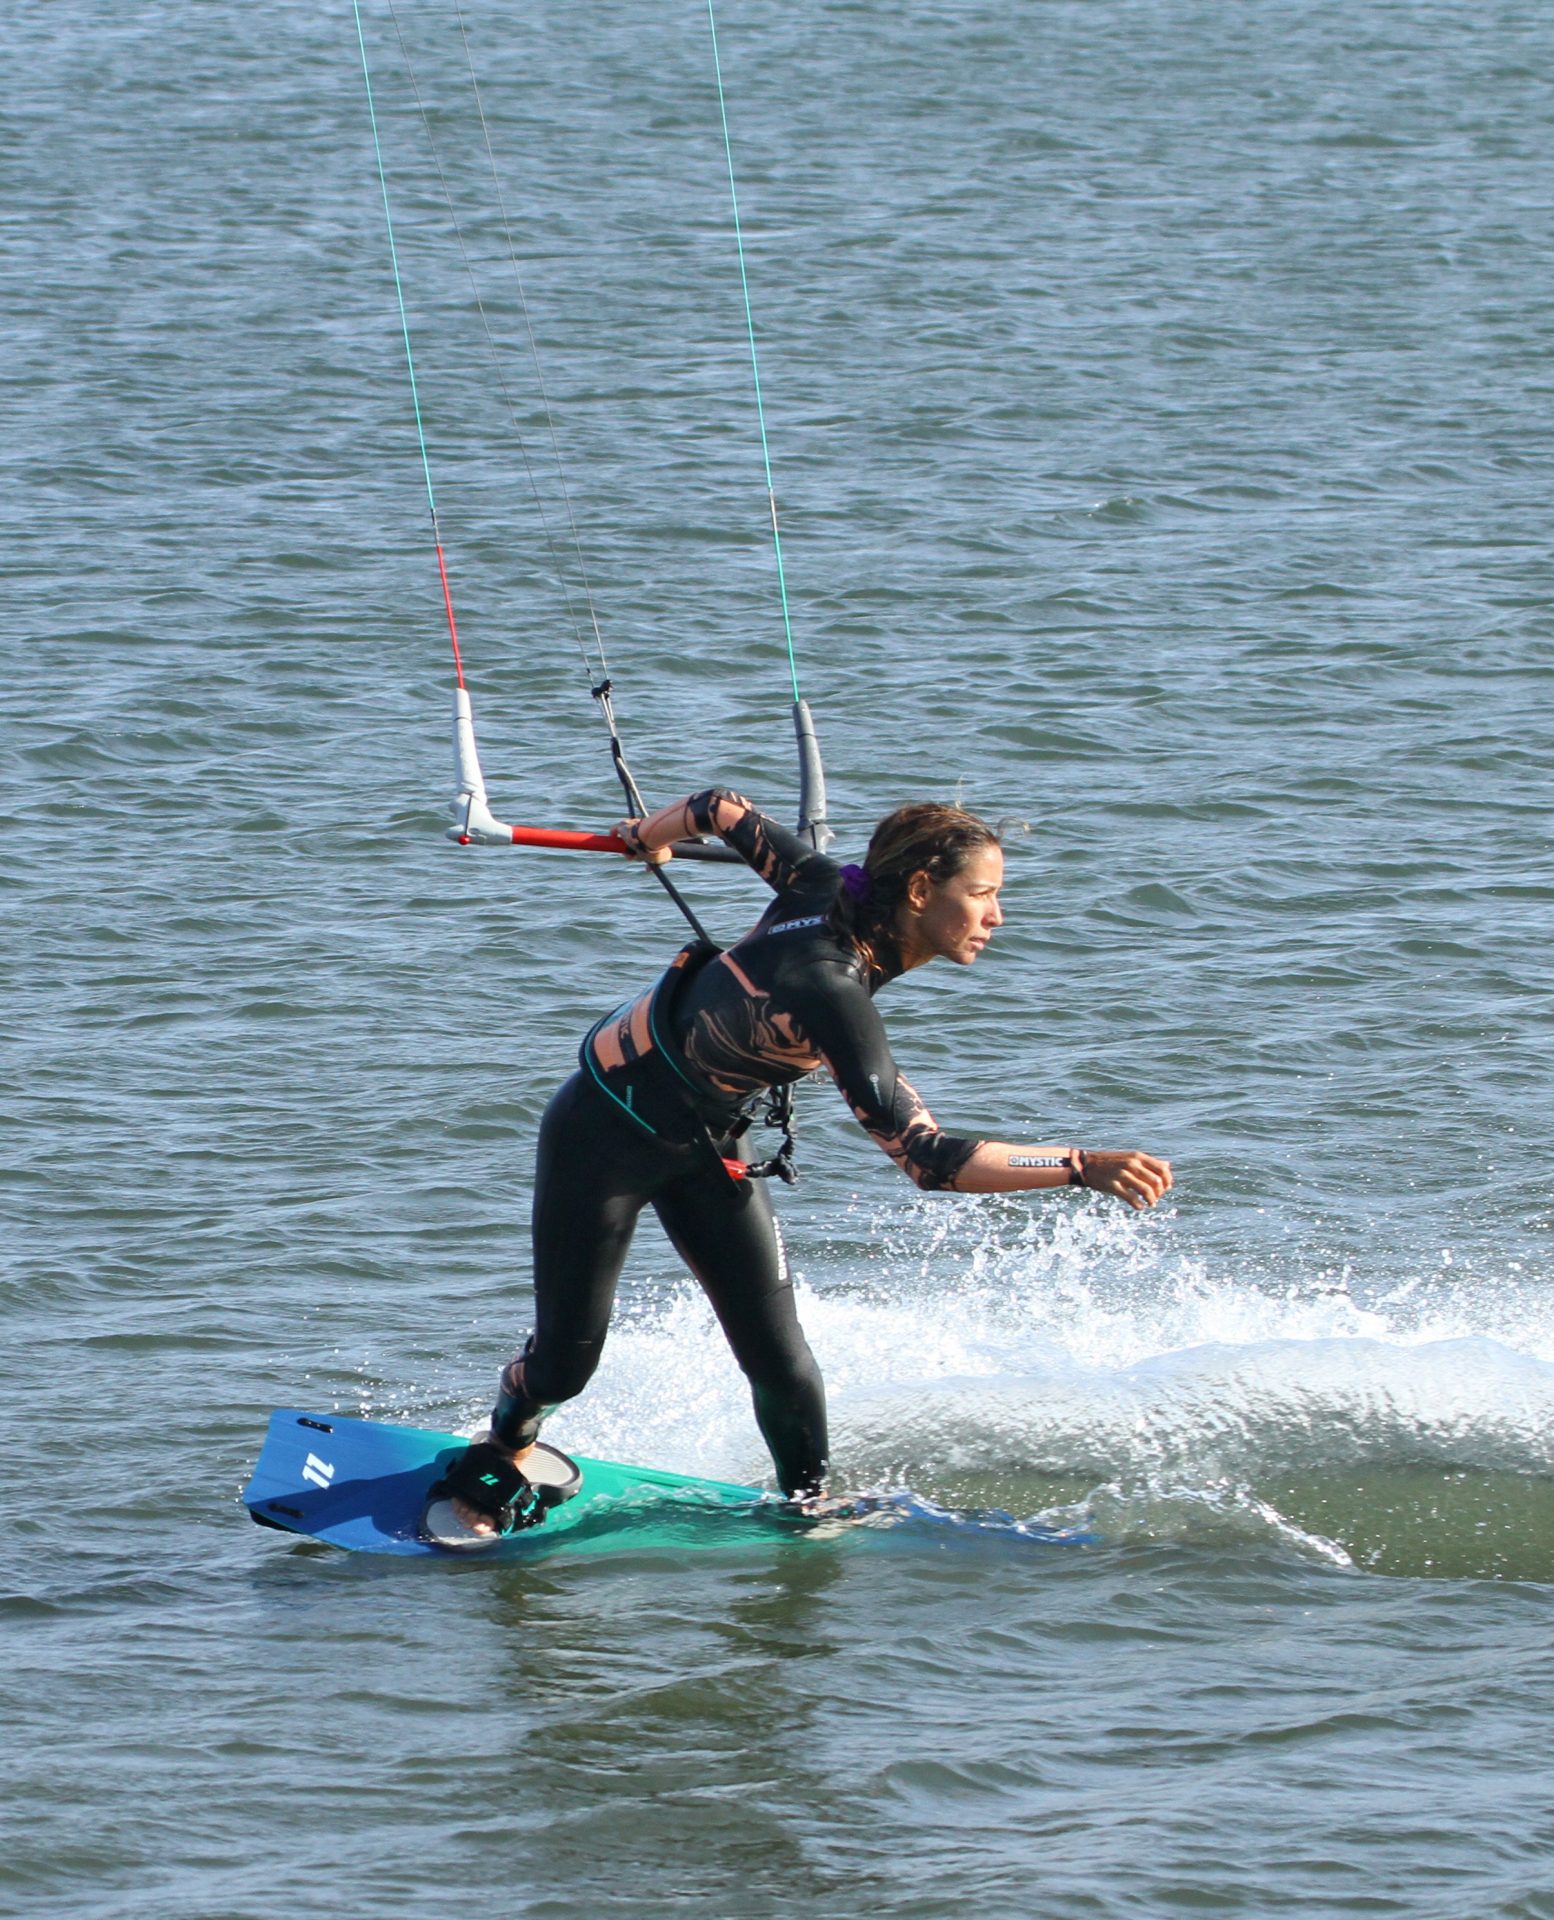
Power on Pic G.
Once you get to the stage where you are consistently landing and “blinding” for a few metres of your inertia, you’ll no doubt fancy adding some yardage. To do so you need to put some tension back in your lines. The desired method is probably not what you think. You don’t want to pull in on the bar, but rather get onto an edge, which will then pull on the lines, the kite and give you a little bit of oomph. This is where you knowledge of toeside comes in handy, as you need to get your ankles and knees involved. Karine is flexing her ankles and knees, which moves here weight over onto her toes. To keep balanced she raises her free hand and points backwards. Bingo, you’re riding blind!
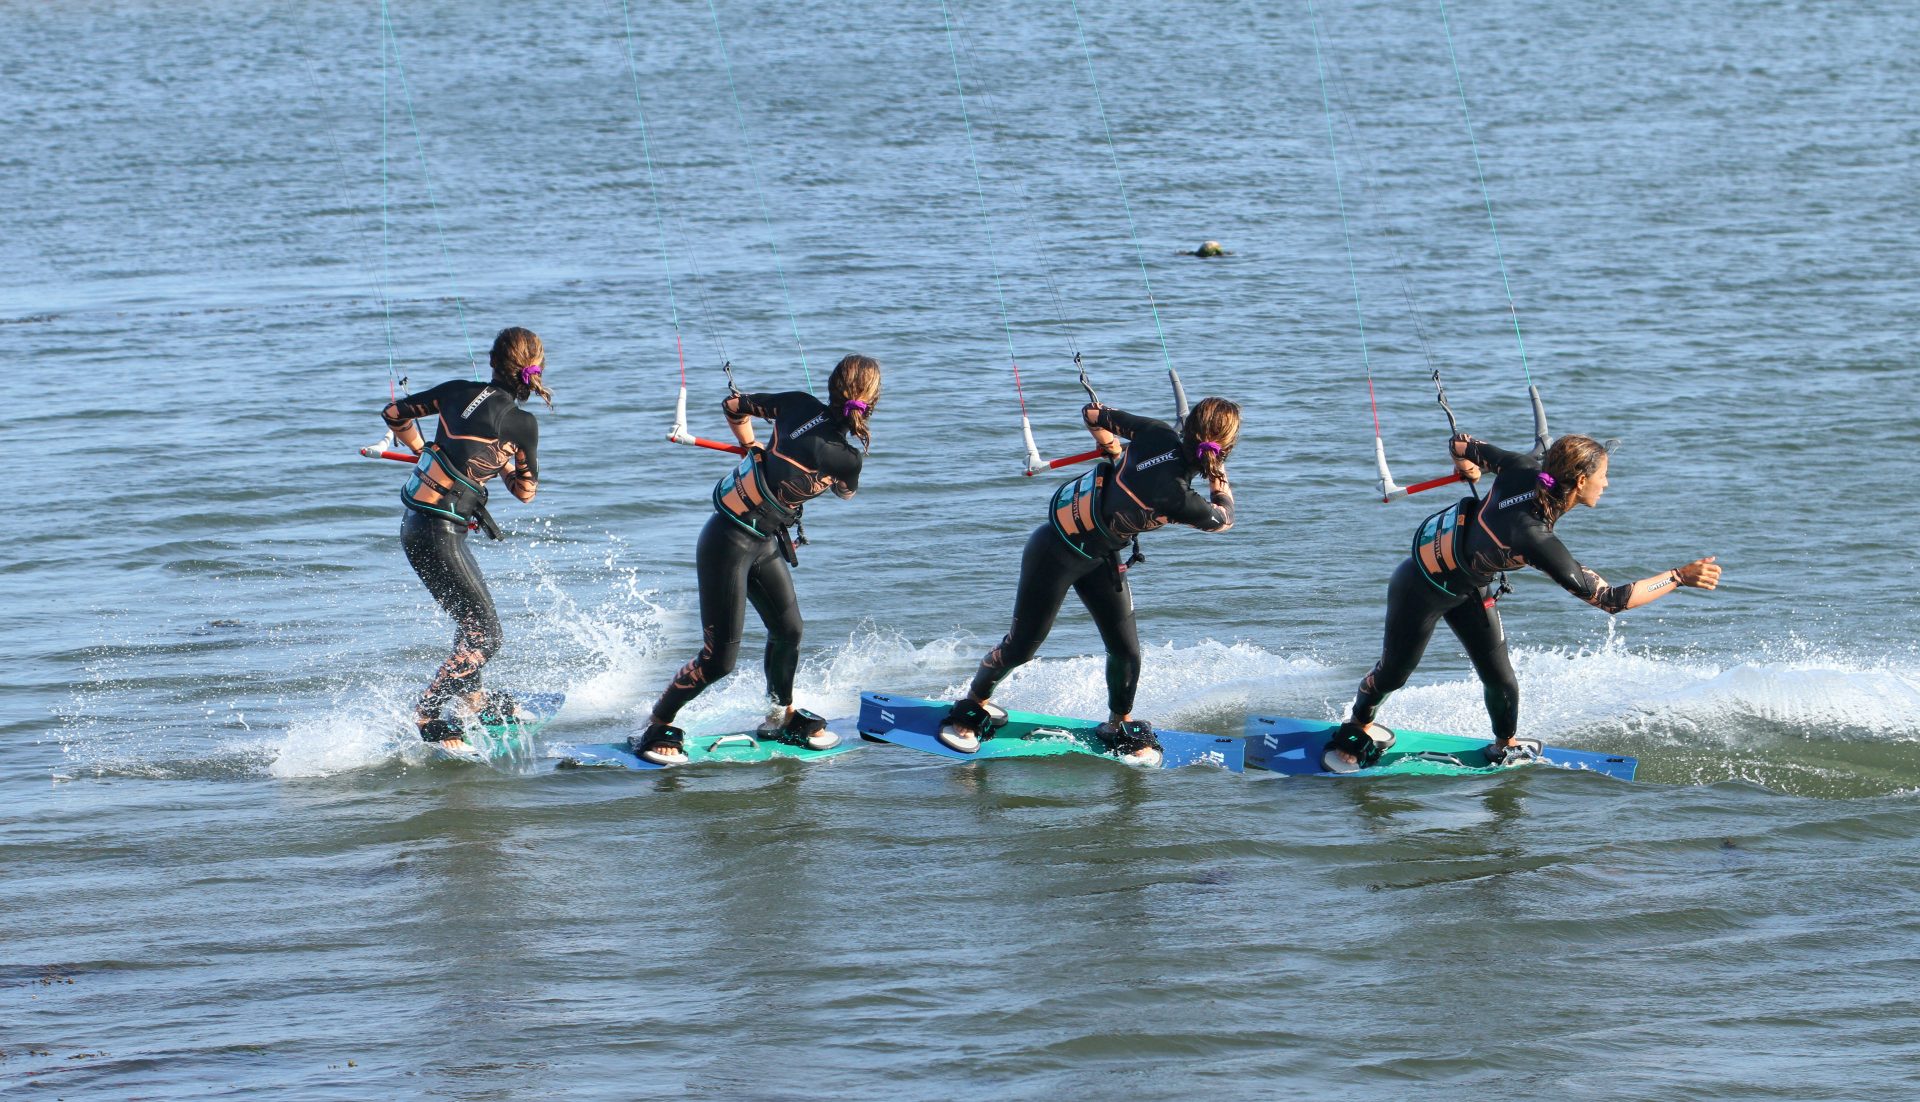
Best Way Out Sequence 1.
If you’d like to finish blind in style, rather than sinking slowly a la Titanic, by sliding back to heelside, have a look at the first sequence. Make sure you get plenty of weight onto your toes and lean your shoulders over the nose and upwind. This will turn the board more upwind and slow you down. From this position then turn your head to look where you’re going. The very nature of no longer being blind should be enough to twist you back out. For a helping hand you can reach for the bar with your free hand. Keeping your weight on your toes the board will slide and you won’t be in danger of catching your heel edge. Finally as you slide around, move your hips back over the real tail of the board and sit onto your heels.


Top Tips
Which way to try it? It’s always good to harness skills you already have. Seeing as we’d like to use some toeside ankle and knee flexing, it’s best to start with the side which uses this. If you think of blind as toeside backwards, it’s just that – meaning that if you like to ride toeside left foot forwards, from left to right, you’ll potentially find riding blind easier whilst kiting right to left, exactly as Karine does in all of the images and video. If you’re a goofy foot and right foot forward is your thing, you’ll be trying this heading right, popping from heelside with your right foot leading.
Terra Firma is as good as any place to start to get the idea of what you’re after. Once again, if you, like Karine, prefer riding left foot forwards, set a bar up on a tree, hung from your left and imagine that you’re riding heelside towards the tree. Now jump up and turn 180 so that your head turns back.
Flatter water will make this considerably easier as you won’t loose as much momentum when you pop, or when you land. Find some if you can.
Common Problems
First off, if you’re struggling to get airborne. Make sure your kite is high. Too high and you’ll have no momentum when you land but at least you’ll get a helping hand from the kite when you pop. Also make sure that you’re popping off your heel. A lot of kiters will twist their back knee in as they carve up pre pop and this will place your weight over the ball of your back foot, so concentrate on keeping the back knee out.
Coming out the straps. This is the classic and is merely the result of attempting to pop and turn at the same time. Practice on land, think up and then round. Not much of a pause but separate movements none the less.
Getting pulled over on landing. If you use the bar to help you pop it will choke the kite slightly. The result is that when you then push the bar away and sheet out, the kite breathes, flies forwards and pulls you. As such you will land off balance with the board slightly upwind of you and catch the heelside edge. Don’t pull on the bar.
Stopping on landing. This means that you’re pushing your feet and board around, rather than rotating you shoulders and hips over the board. Yet again think up and around and try to keep your chin and shoulders raised so that you stay over the board.
Keystones
- Gentle edge in, kite highish
- Hips back and stand up
- Carve and stamp
- Bar out, up and around
- Back foot up, nose first landing
This technique article was in Issue 77 of IKSURFMAG.
Related


By Christian and Karine
Christian and Karine have been working together as a coaching team, running improver to advanced kitesurfing clinics since 2003.
