
Front Loop Transition
Technique / Intermediate
Introduction
It’s about time that we shared the knowledge of how to learn the front loop transition. Some of you may have already mastered the air gybe in many of its various guises, and to add the front loop variant will hopefully put the icing on the cake as far as showing off when you turn around goes. The front loop transition can look truly spectacular too, as once you have it mastered it can be performed with a great deal of height and a multitude of grabs, foot outs and can even be executed on a strapped surf board if you add a stylish toeside landing (see Video 2 for a twin tip version).
Its wise to suggest that you should have learnt the air gybe before attempting this, and if you can already front loop it will help no end. If you can’t front loop you’ll be trying to learn two things at once, rather than combine two skills you already have. So go and have a look at Issue 2. Now let us have a look at a few key stages of this move that must be understood and completed in order to happily sail away.


The Early Bird
We have banged on about the importance of going early in everything air gybe related, and here is no exception. As your aim is to go back from whence you came the crux of this move is to keep the kite above you, supporting you. The greatest of sins here is to leave the kite behind you when you take off, so to make life easier you’ll want to be taking off before the kite goes past 12 o’clock.
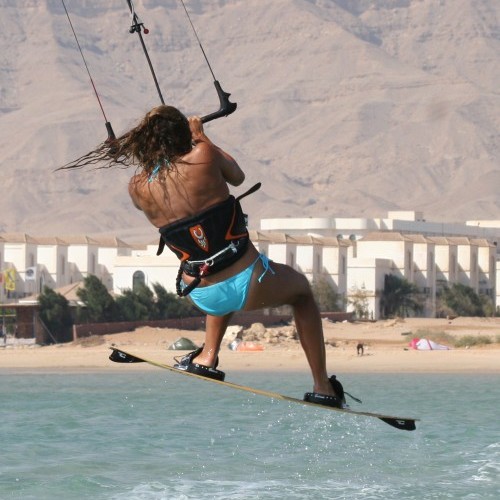
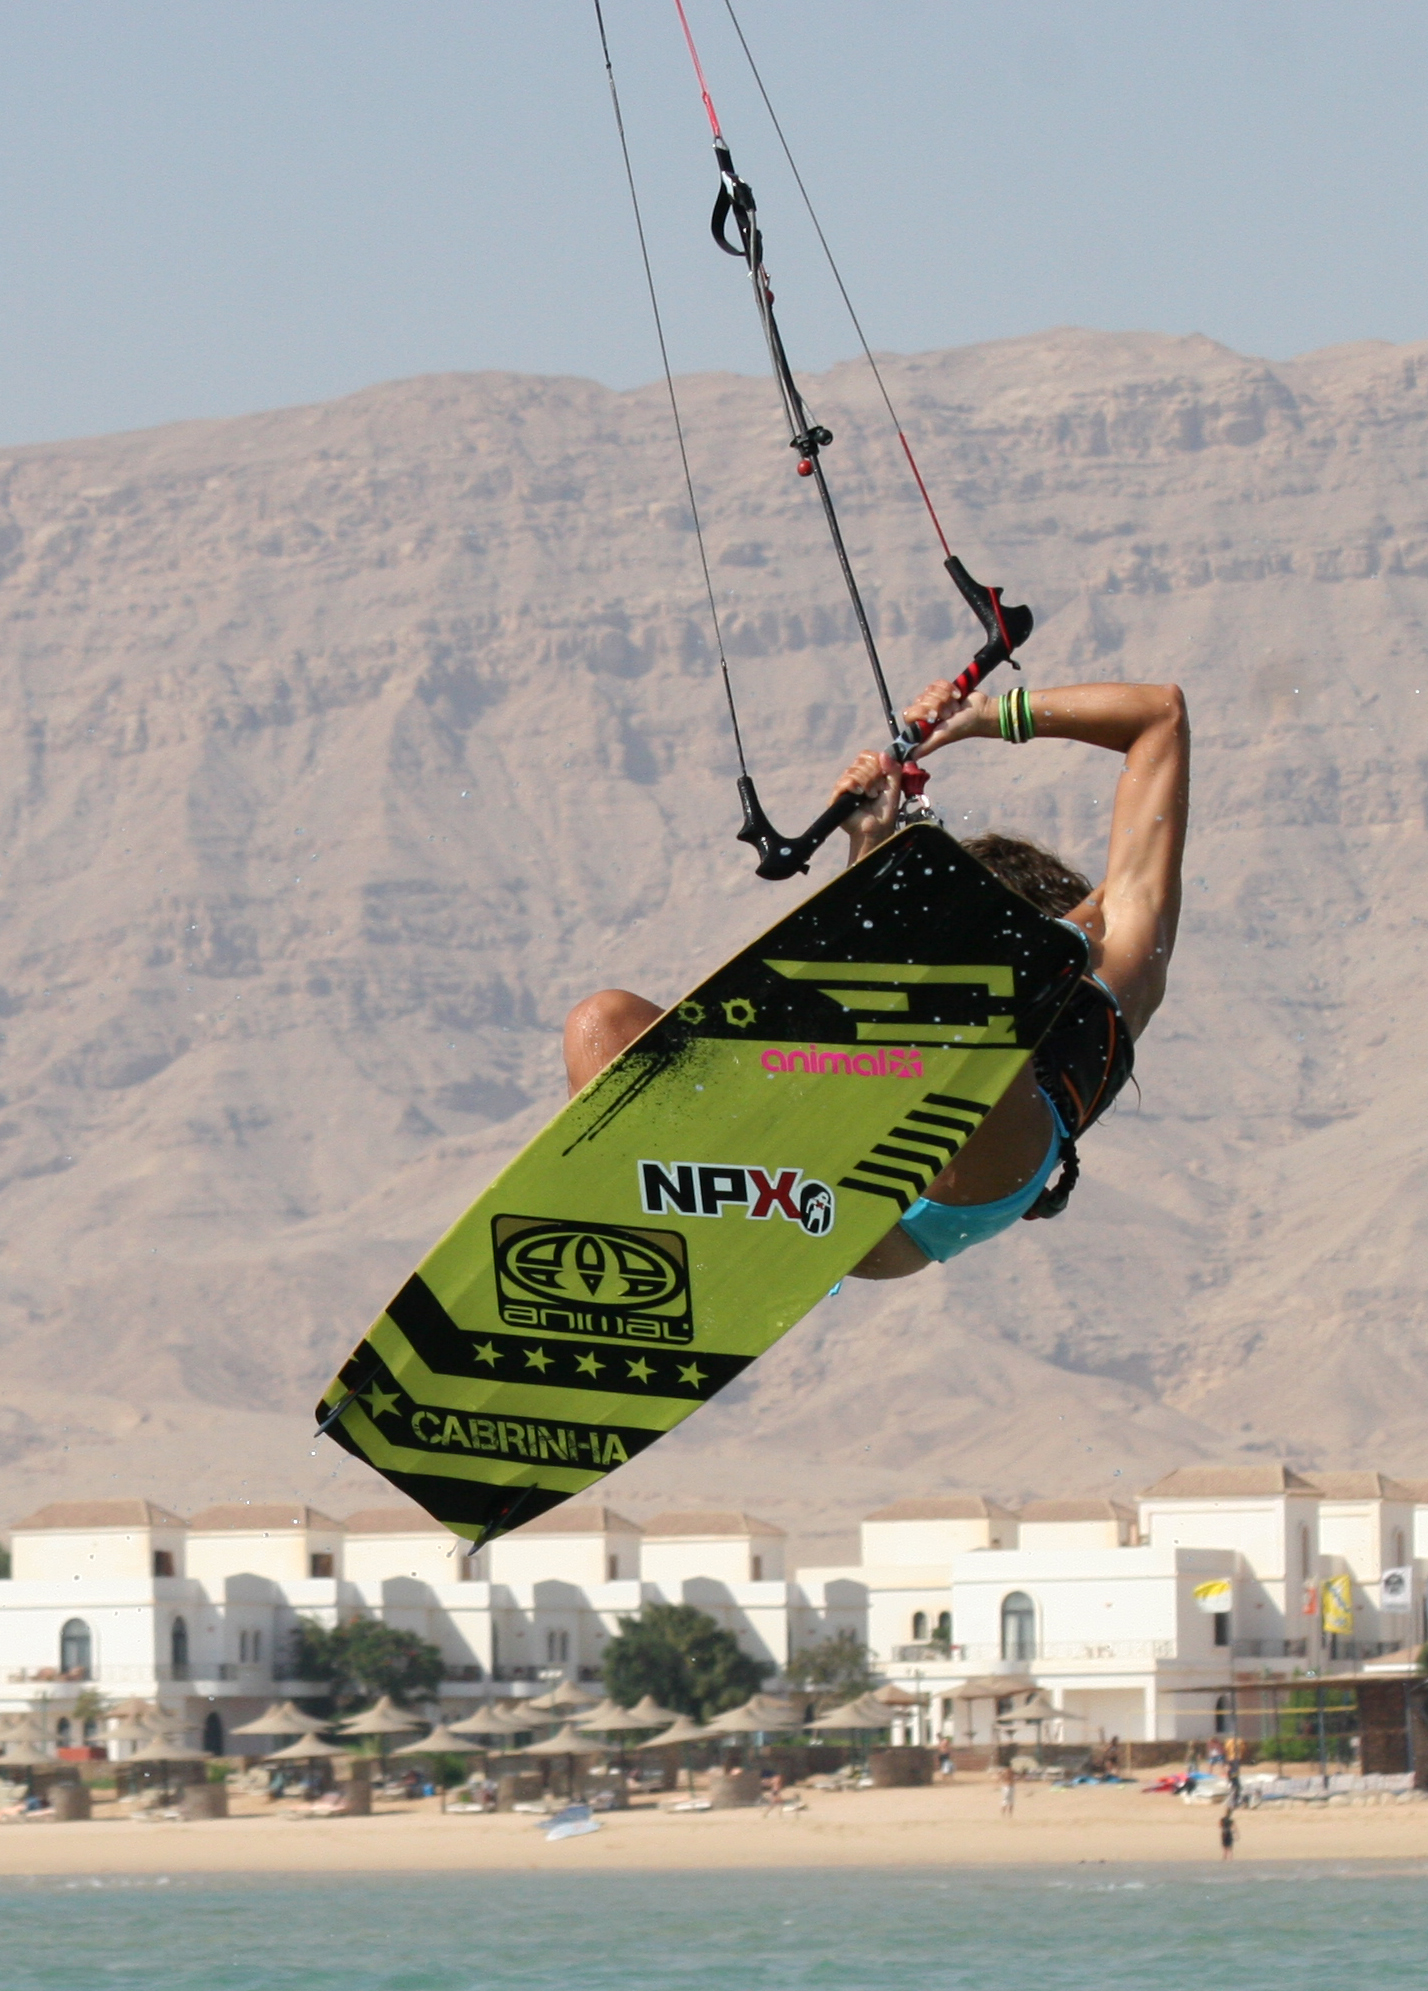
You need to anticipate the pull of the kite, so you are ready to spring up as soon as you feel the first sign of lift on the kite. This is only possible if you keep the bar sheeted in. As soon as you let the bar drift out when the kite lifts, you will miss the opportunity of going early. In Pic A. you can clearly see that Karine has popped up off her back leg whilst the kite is above her. She has her bar held in, so she can use all the lift generated.
It is also worth noting that Karine’s bar is almost parallel to the water. She may have sent her kite back as for a jump, but she only steered it to 12 o’clock. You are far better off with a short but aggressive movement on the bar to move the kite from 11 to 12, as opposed to drifting it up slowly. When you move the kite quickly you will feel it turn, and as soon as you do, you can flatten the bar off. If you drift the kite it’ll be harder to keep the bar in and anticipate the lift and therefore go early.
Redirection
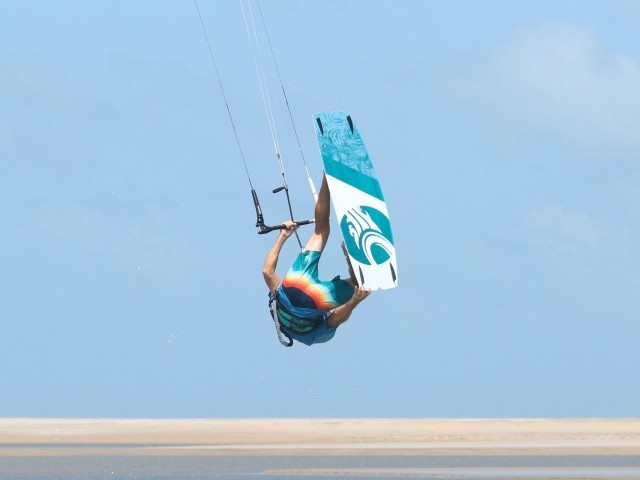
Your next requirement after take off is to maintain that support and float from the kite by once again keeping it above you, which in turn handily stops the kite drifting further behind you as you go up. So as you would in a front loop you must steer the kite forward with your front hand as you take off. Fortunately as is the nature of throwing yourself forward into the front loop, it is quite natural to lean your body weight onto your front hand. The effort is in applying the right amount of pressure to keep the kite above you without it actually dragging you forwards as you would for a bog standard front loop.
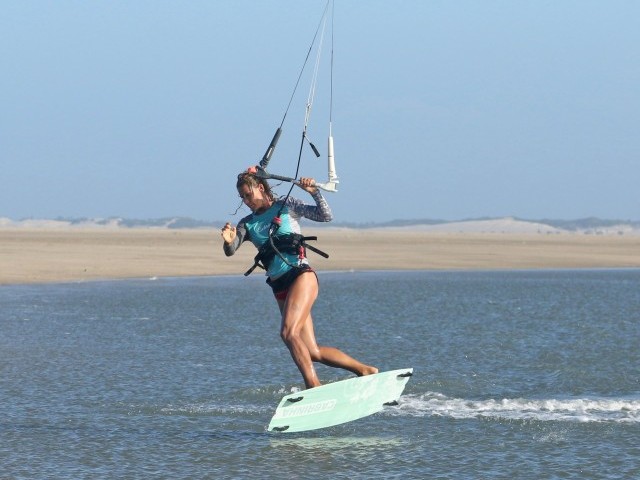
In Pic B. you can see how Karine has committed to steering the kite forward with her front hand, thus keeping the kite above her and giving her the float needed to complete her front loop.


When you start to learn the front loop transition, if you can complete a front loop and float down into the water with the kite above your head, you’ve darn near got it. So practicing that is a jolly good plan, if you often find the kite to far behind you.
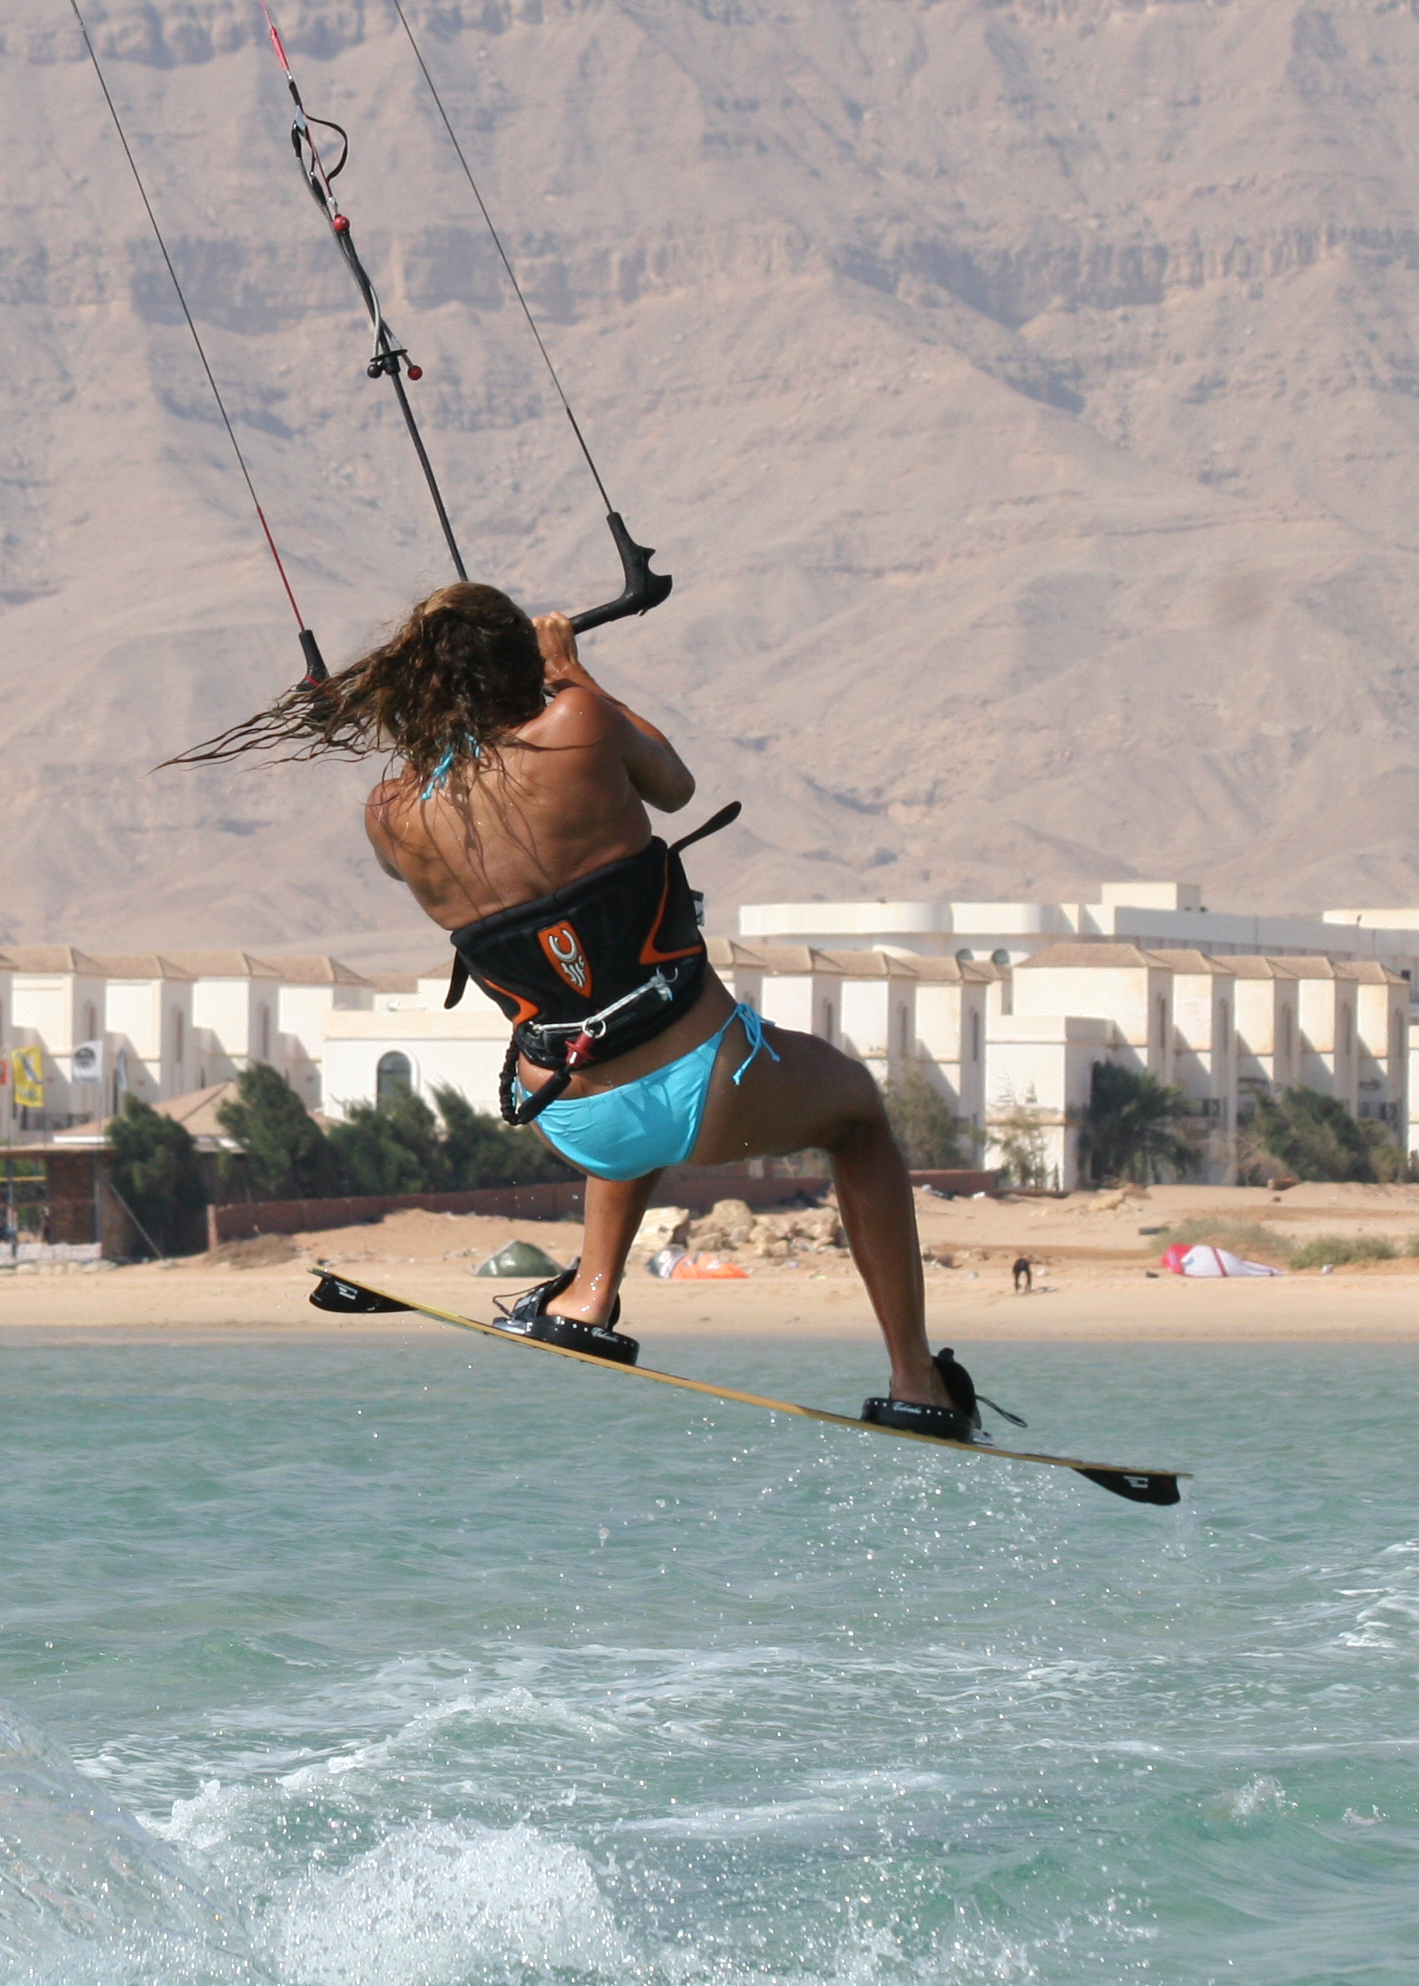
Pulling Power
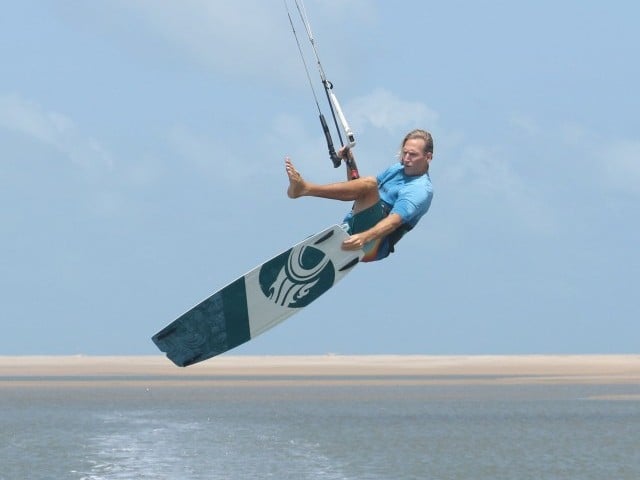
The process for landing and not sinking is the same as in most things kiting. You need the power of the kite to pull you out of the move. In this case you’ll be pulling like crazy on your old back hand to dive the kite hard enough to pull you out of your rotation and give you some downwind momentum so that you can land on a flat board and sail away. This will only work if the kite starts at 12 o’clock. Any further back and the kite won’t generate any pull. In Pic C. Karine is diving the kite hard with her right hand. She will have started to dive the kite as soon as she can see where she wants to land. Any later and she’s liable to over rotate, which will result in her landing on an edge and therefore sinking.

Helping Hand
You will find this move much easier to learn with some power in your kite. Firstly this will enable you to feel where the kite is, and secondly the power will give you more hang time, and therefore more time to think. That said a medium to large kite will be easier to control. Once you get down to 8m and below the kite will be more frantic and less forgiving. Finally before trying this do a shed load of air gybes just to get your kite doing the right thing. This way you just need your head to add the front loop as the jump part will be more automatic.
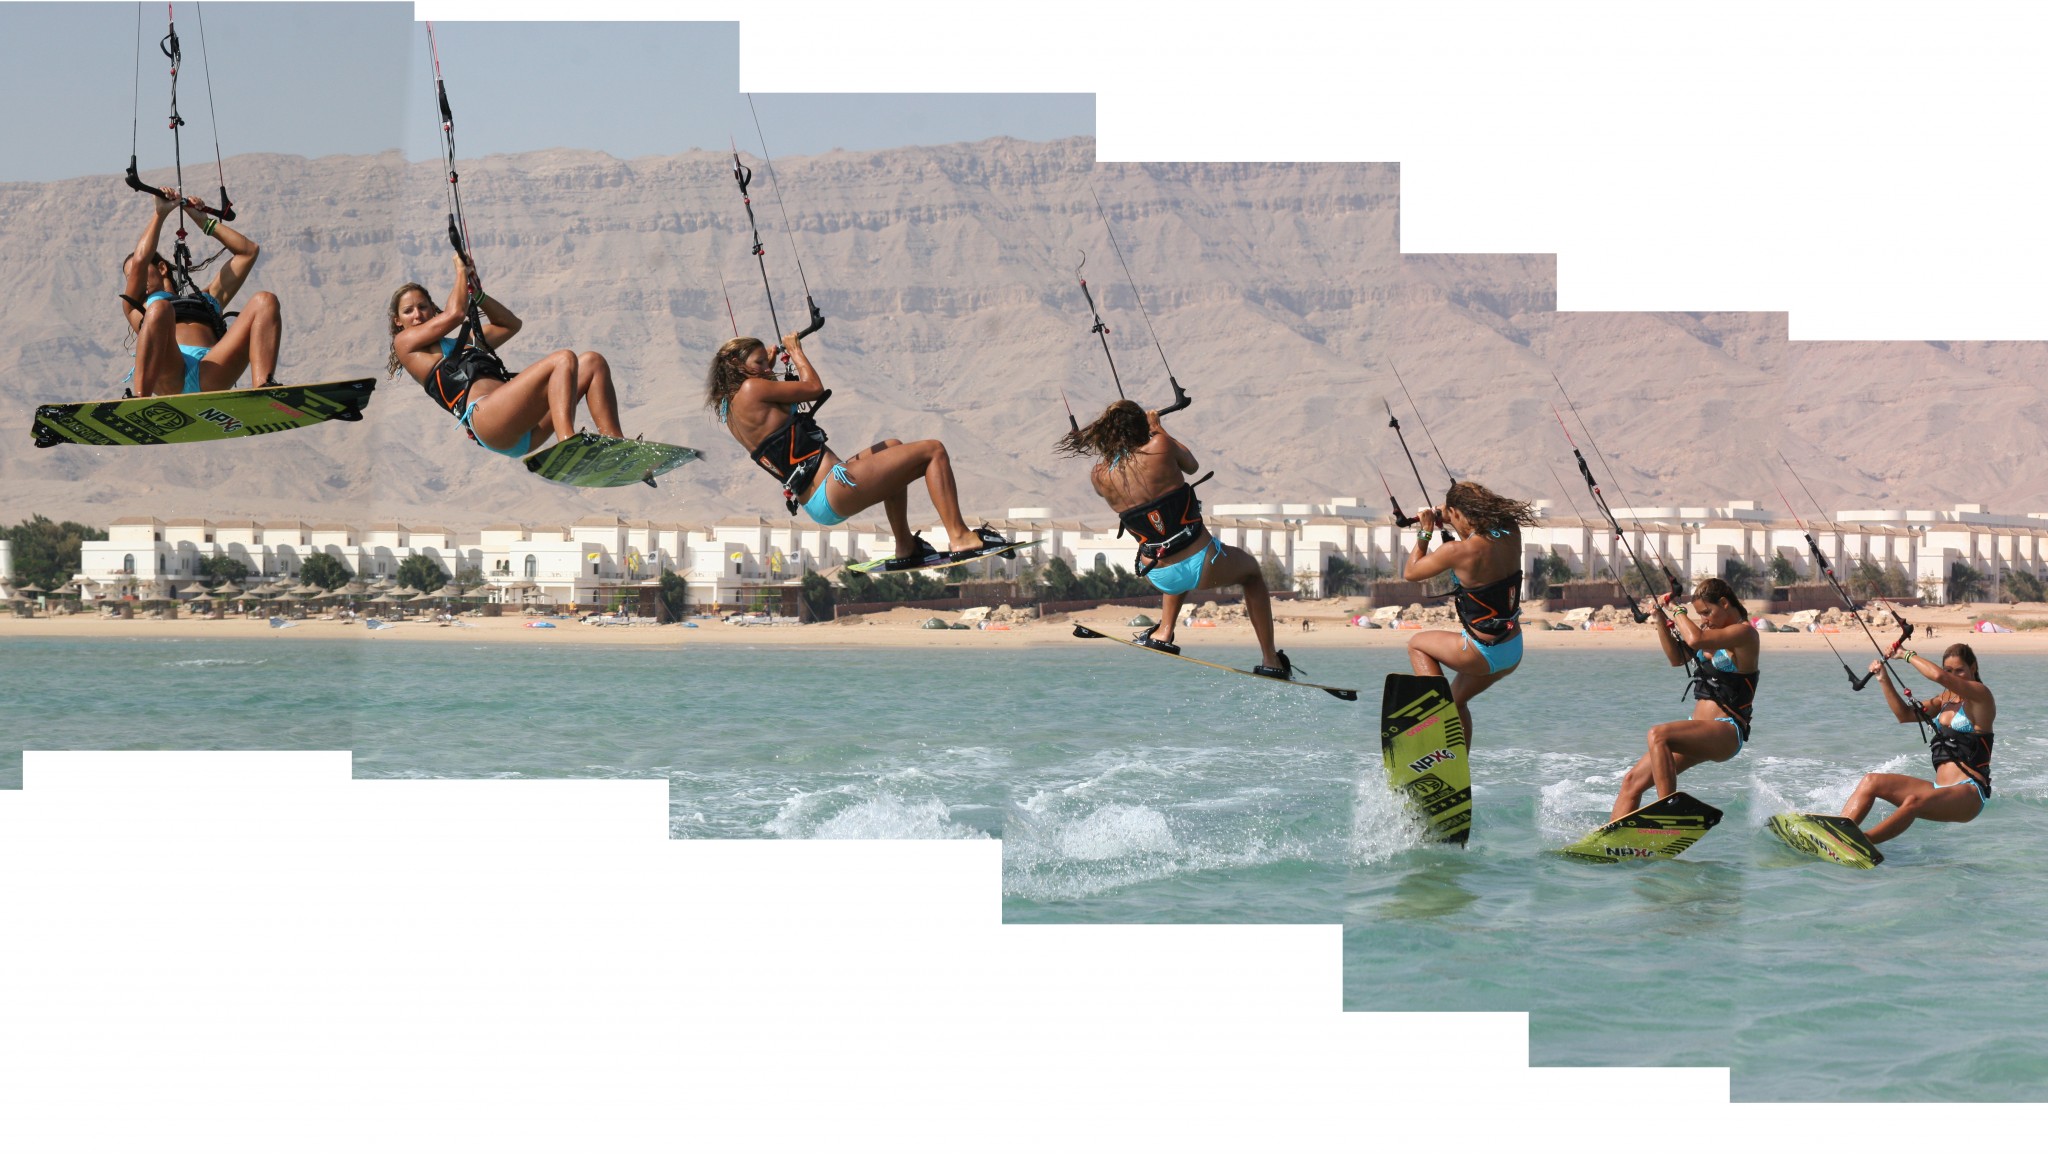
Following Sequence 1
- Pic 1. Karine has approached as for a normal air gybe. She has ditched some speed by carving hard into the wind and then she immediately sends the kite back aggressively, keeping the bar on the sweet spot. Her weight is over her back foot, extending her front leg.
- Pic 2. As soon as Karine feels the kite lift she explodes up off her back leg and levels the bar out by pulling both hands down towards her hips.
- Pic 3. She throws herself into the front rotation by dropping her leading shoulder, turning her head and kicking off the back foot.
- Pic 4. As Karine starts to rotate she redirects the kite with her front hand in order to get it back above her.
- Pic 5. She lifts her knees, making herself smaller to help the rotation and to keep her balance in the air. Karine keeps the bar in so she can feel where the kite is, and keep tension on the lines, which in turn keeps her up and floating.
- Pic 6. Karine is looking over her back shoulder waiting until she can see her potential landing spot. With the bar still in she can feel where the kite is, an in this case it is now above her so she levels the bar out.
- Pic 7. Now at the apex of her jump Karine keeps the bar in so that the kite will be responsive once she needs to dive it. She is still looking over her back shoulder, waiting to spot her landing.
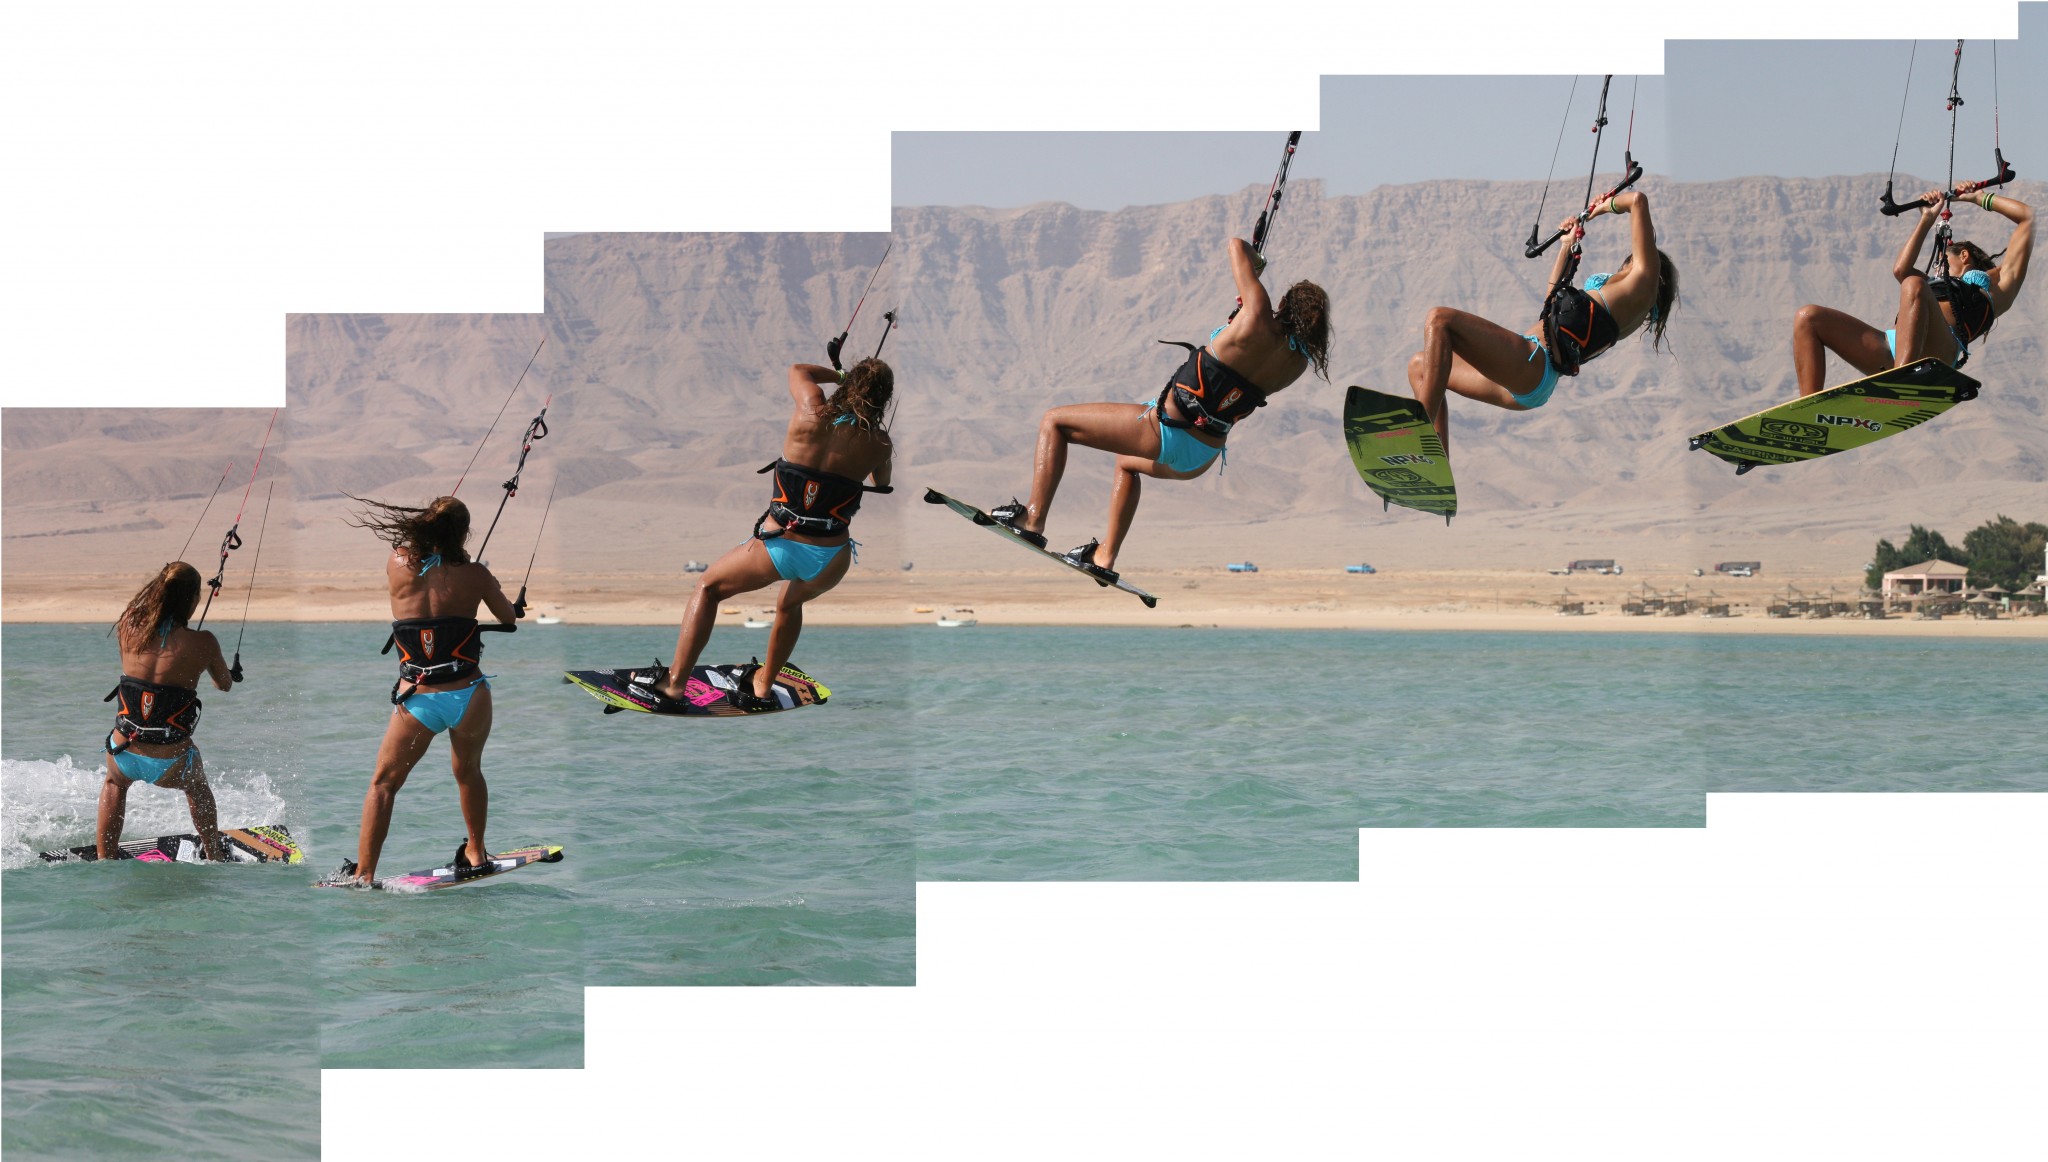
Now onto Sequence 2
- Pic 1. As Karine comes around her front rotation she sees the water downwind of her.
- Pic 2. This is her cue to dive the kite hard with her new front (right) hand.
- Pic 3. With the kite diving from above her it should dive downwind rather than to the edge of the window. At this time it is super important to keep the bar in so that any power the kite generates does pull her out of the move.
- Pic 4. As the power comes on Karine focuses her attention onto where she will land. She follows the pull, which should pull her downwind, allowing her to push her right leg out.
- Pic 5. Karine drops her legs and lands tail first on a flat board.
- Pic 6. As the momentum keeps Karine moving she carves back onto her edge, moves the kite back up and sails off in the other direction.
Common Problems
1. Most the time the problem is that when you dive the kite there just is not enough power to pull you out of the move, so you sink as the kite dives to the far edge of the window.
The cure depends on why this is happening. It could be that you’re pulling too early, in which case it is simply a matter of waiting until you can really see where you think you may land before diving the kite.

Chances are however that you’ve let the kite go too far back on take off. The first thing that will help will be to keep the bar in, then the kite can’t go too far back. Secondly send the kite, don’t drift it. And finally do redirect the kite forward when you take off.
2. If you go into the move as you would for a front loop, you’ll be carrying too much forward speed. This means that even with the kite above you, you’ll not get any pull out of the move. So to ditch some speed carve harder upwind before take off.
3. No matter how well you control the kite to get a smooth landing you need to land with your board flat and pointing off the wind. Nothing kills momentum more than landing on an edge.
Keystones
- Carve then send
- Keep bar in
- Go early
- Redirect kite
- Dive kite really hard
This technique article was in Issue 18 of IKSURFMAG.
Related


By Christian and Karine
Christian and Karine have been working together as a coaching team, running improver to advanced kitesurfing clinics since 2003.
