
Toe to Heel Spray Carve
Technique / Beginner

There is something profoundly satisfying in kicking buckets of spray, regardless of sports. Whether it be fanning deep powder on a mountain, annihilating the lip of a wave, chucking dirt on a bike or walling a slalom ski around a buoy, the inner kid in all of us can’t resist it and the ensuing look back to check, regardless of how mind-blowingly awesome it felt. Pushing against water, generating your prism, bending light, making rainbows, or simply soaking someone on the beach – the fun is ours. Who doesn’t get excited at the thought?
Spray turns are a great way to boost your kiting vibe and absolutely rock, whether you’re on a twin tip or pushing against foam on a surfboard. The foundation of this move is your toe-to-heel carve, so you need to be comfy with it. If you are, we can polish it, tweak it, and shape it into something that any joy-loving kiter can appreciate.


To crack this, we will look at what the kite will be doing and what you’ll do to make this happen. We’ll ponder how you get your board to carve and how you can achieve maximum super-soaker status. And we’ll focus on timing so that everything lines up and you can exit still moving with the broadest of grins plastered all over your face.
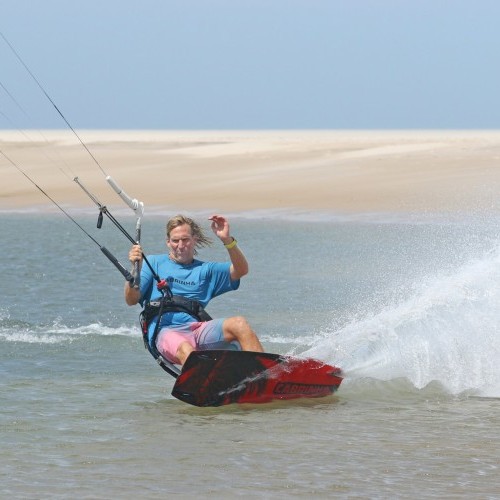
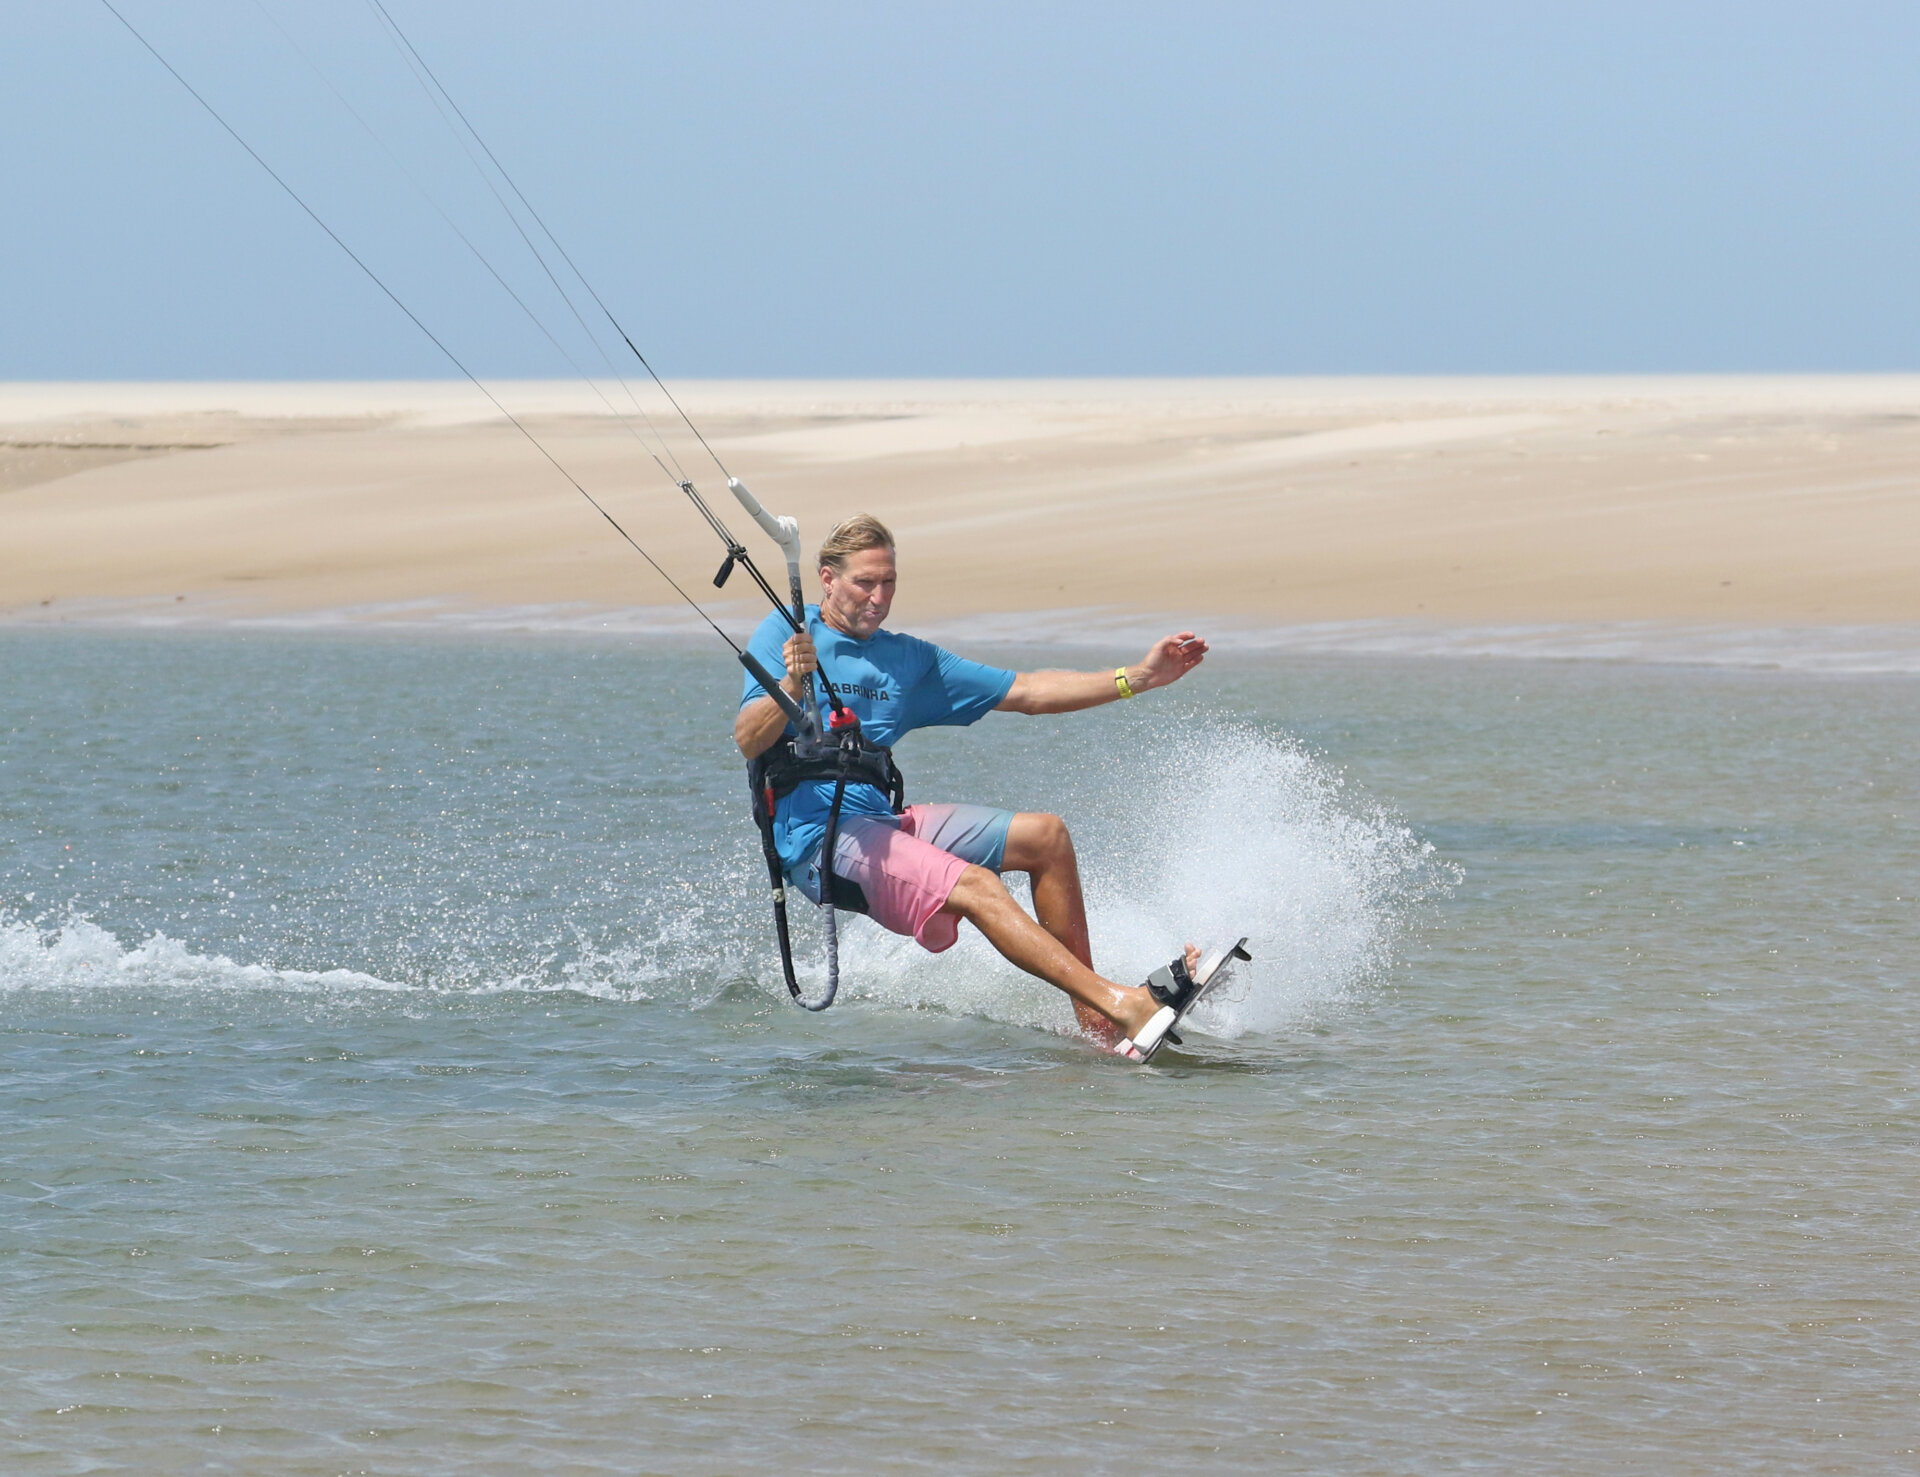
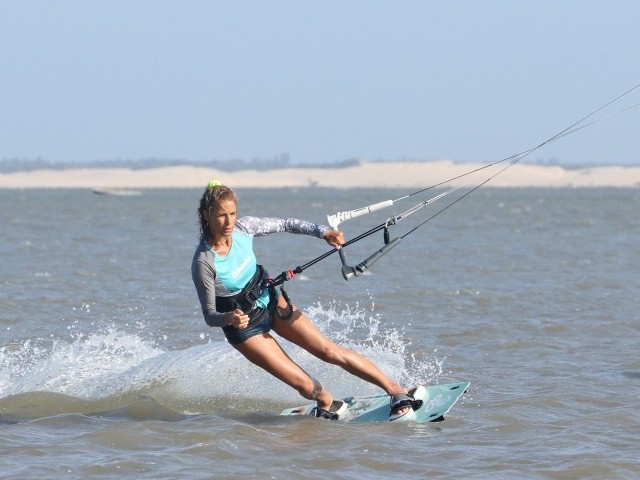
All About Toeside Pic A
If you want to throw buckets in this carve, it all starts with your toeside. A solid toeside allows you to enter with speed whilst maintaining control. A good toeside keeps tension on your lines, so the kite will react, turn, and fly when and how you want it to. And a good toeside position means you’re perfectly balanced and primed to carve your board.
Stance. A good toeside stance means getting much of the board’s edge in the water. A wide stance, with weight on both feet and a back knee lowered forward, will give you controllable speed and line tension. If you’re struggling with this, we’ve covered toeside in detail in IKSURFMAG issue 90, so have a look.
Direction. You want to be driving upwind. There’s no need to pinch as close as possible, but heading upwind will allow you to position your kite at the edge of the window and give you the best possible carve!
Kite position. This does vary depending on wind strength and water state. In a perfect world, you’ll have flat water to play on and be pleasantly powered. If true, you can have your kite just above 45 degrees. This will give you a larger window to cut, more time to carve, and more chance to exit at both speed and power.


If you look at Pic A, you can see Christian’s toeside. His kite is around 45, his back hand centred on the bar, front hand free and forward to help keep his weight on both feet. He’s looking upwind to where he wants to go, the bar is trimmed in slightly so that he can comfortably keep it on the sweet spot, and his weight is committed upwind of the board. His hips are twisted forwards and away from the kite, whilst both knees are bent, putting weight onto both feet so that he can drive hard against his edge, giving him good speed, glide and resistance. This isn’t cruising; this is energetic!
From this position, if you get the timing and order of events right, plumes of spray are yours to take!
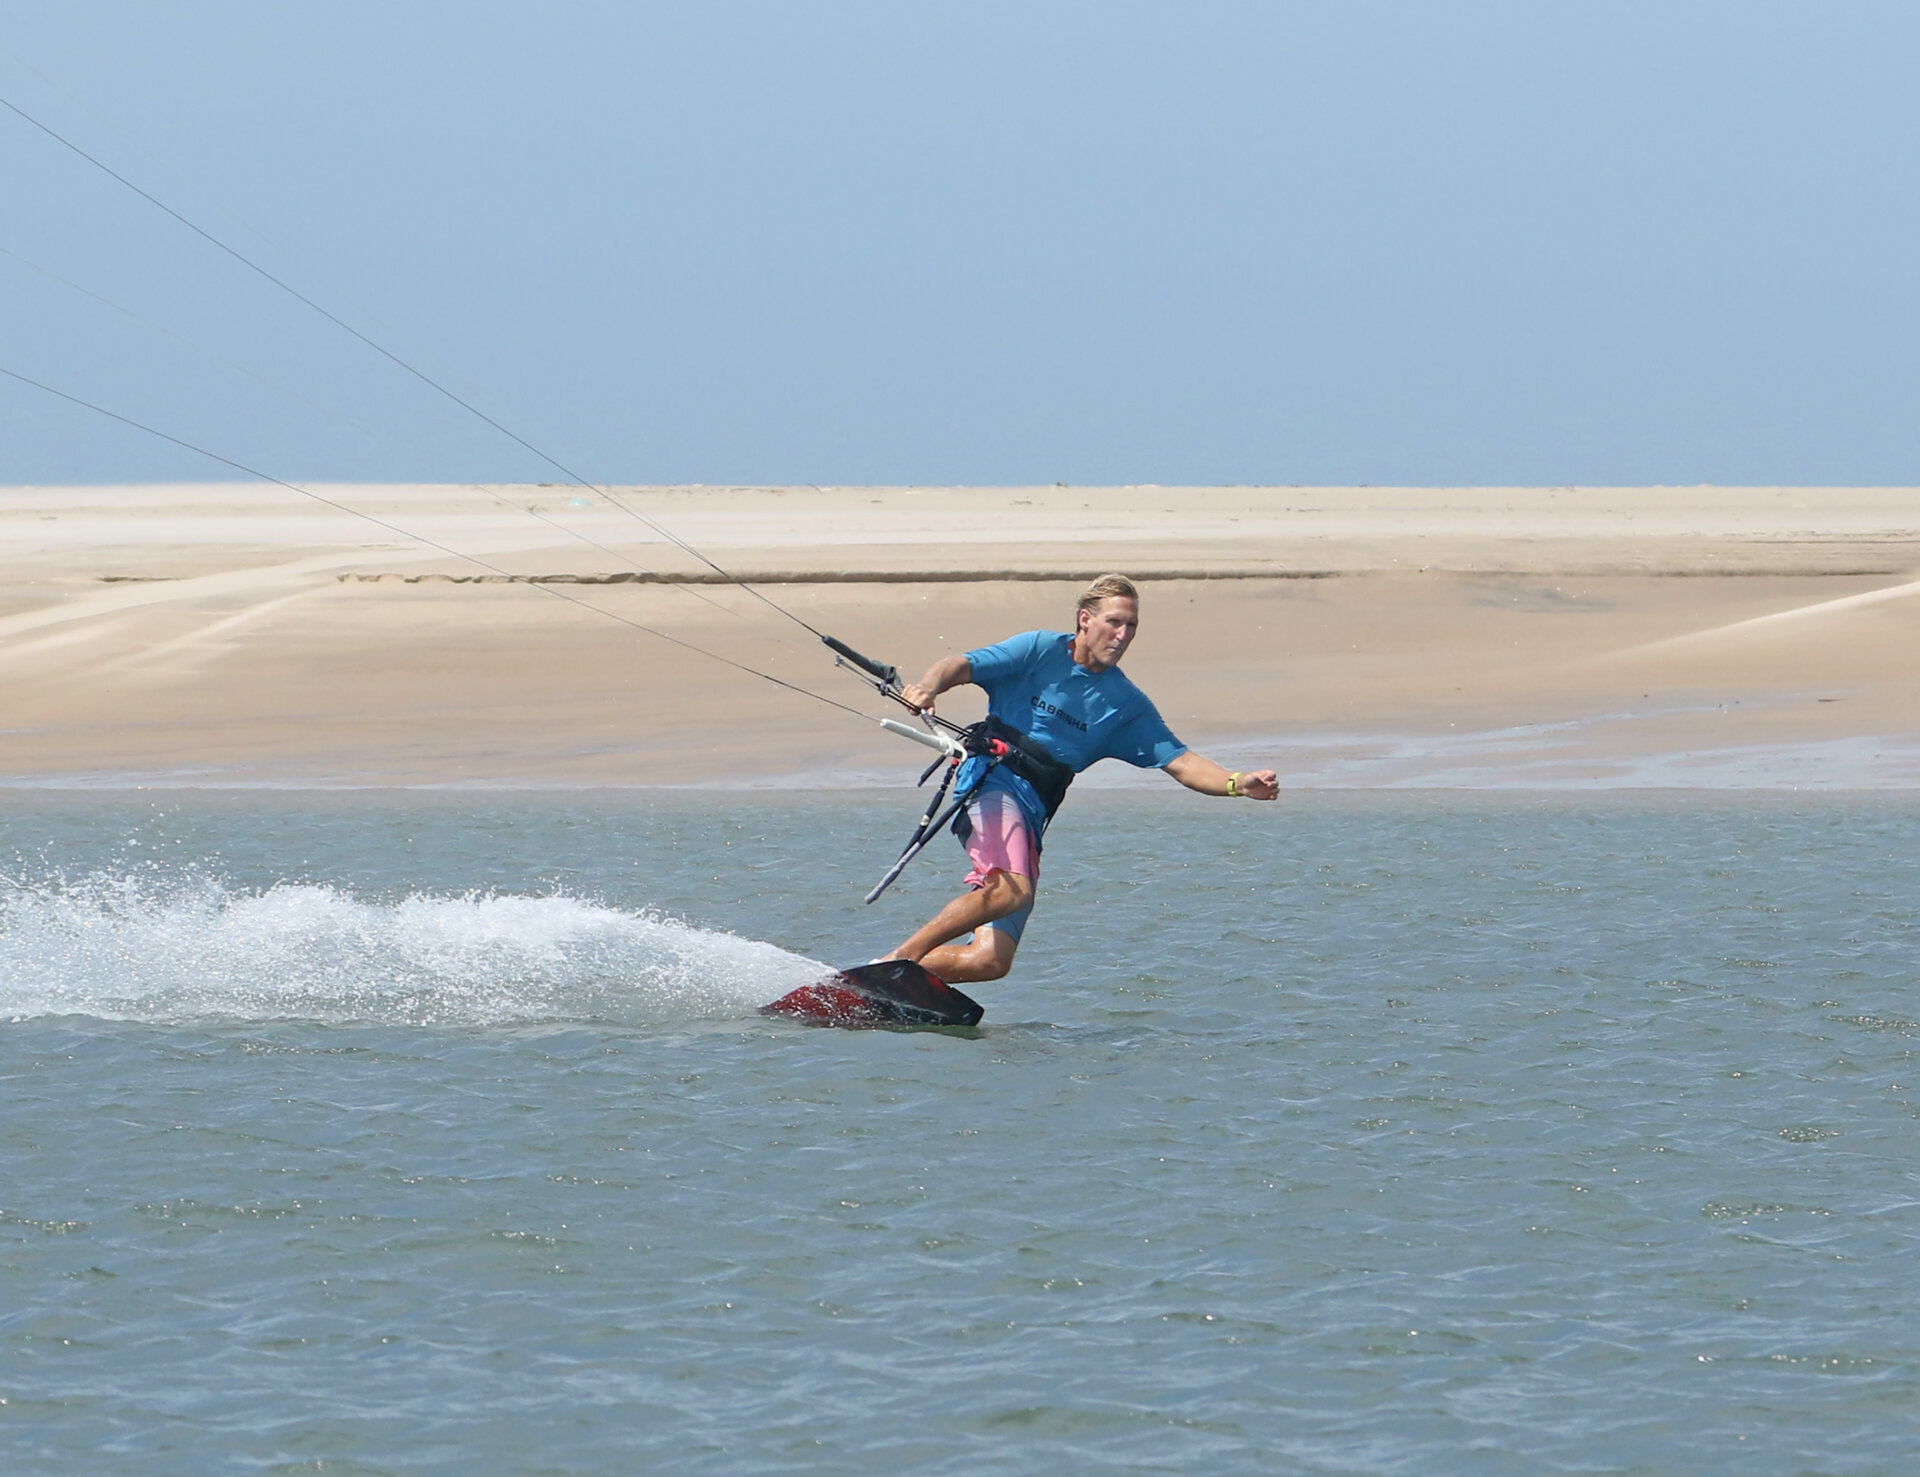
Cut the Window Pic B.
Now you’re set; it all starts with the kite. You’re aiming for a reasonably aggressive steer to turn the kite. Once it turns, you’ll need to let off so that it can fly straight across the window. This way, it cuts through the window rather than flying up and over. The simplest way to get the kite to turn and face the other way quickly is to have tension on your lines. As it happens, your upwind toeside edge is just the ticket. As long as you keep your edge, your kite will turn quickly. This also means there is no need to pull the bar past the sweet spot; steer it from it. To get the kite to steer without pulling the bar, you’ll have to use your wrist, cranking your thumb up to get maximum leverage. You can see in the photo that nothing has changed with Christian’s stance; he’s still edging with speed. The only difference is that he’s steering the bar aggressively, on the sweet spot, asking the kite to turn from its position at the edge of the window.
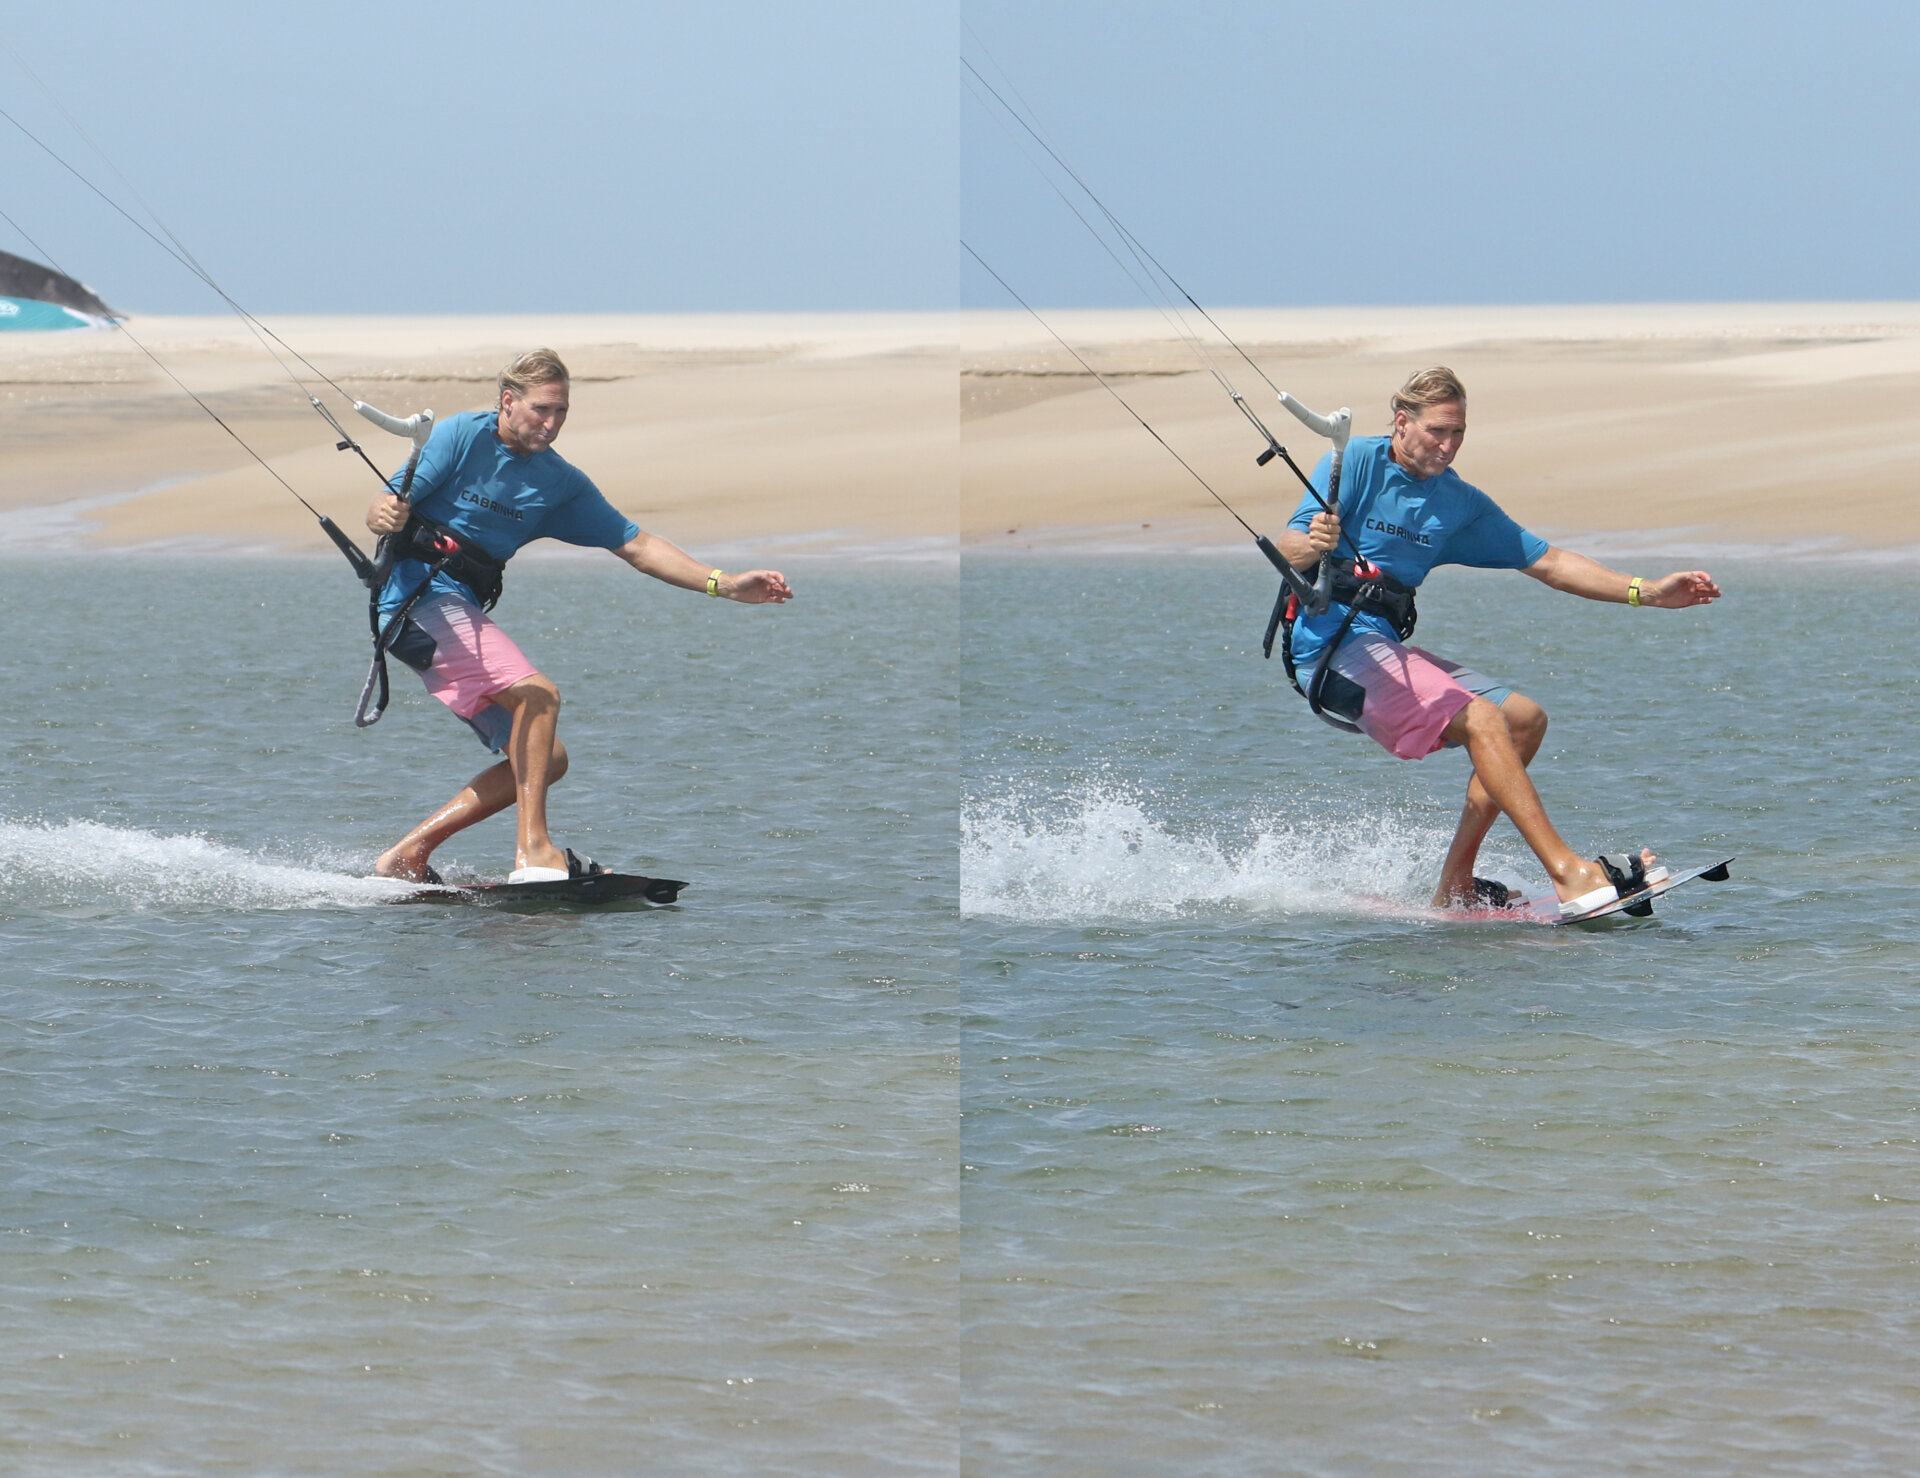
Timing & Transition Pic C.
Once you’ve steered the bar, there will be a lag before the kite turns. The actual time will depend on various factors, but the good news is that you will feel the kite move through your harness. As the kite turns and moves, it will generate more pull, and you’ll feel this. In everyday riding, you’d react by letting the bar out. Here, instead, it’s your cue to get your carve on. It’s in your interest to get onto your heel edge as quickly as possible so that you’re not flat on the board for too long, as this will lose you tension and make your exit less smooth.
This is the transition phase, as you’re transitioning from your toe edge, across a flat board onto your heel edge. What makes this process challenging is that as you roll from one edge to the other, you must also adapt your body position from toe side stance to a dynamic carving position. Otherwise, you risk being pulled back and off balance by your kite.

Have a look at the mini sequence. In the first photo, Christian is still toeside. He’s steered the kite, and although he’s not edging hard, he’s still committed upwind and away from the kite, with weight on both feet, hips centred, and back knee low. To get onto his heelside edge and the curvy tail of his board, Christian has to move his hips back towards his rear foot. The beauty here is that as you move your weight back, your bum will also move to the inside of your intended carve and weight your heels. As you do this, you must break at the waist to keep your body upright and hold your free hand to the outside of the turn to help stabilise. This now puts you in a strong position from which you’re ready to bank the board whilst keeping your balance. If you don’t break at the waist, you’ll fall to the inside of the turn.
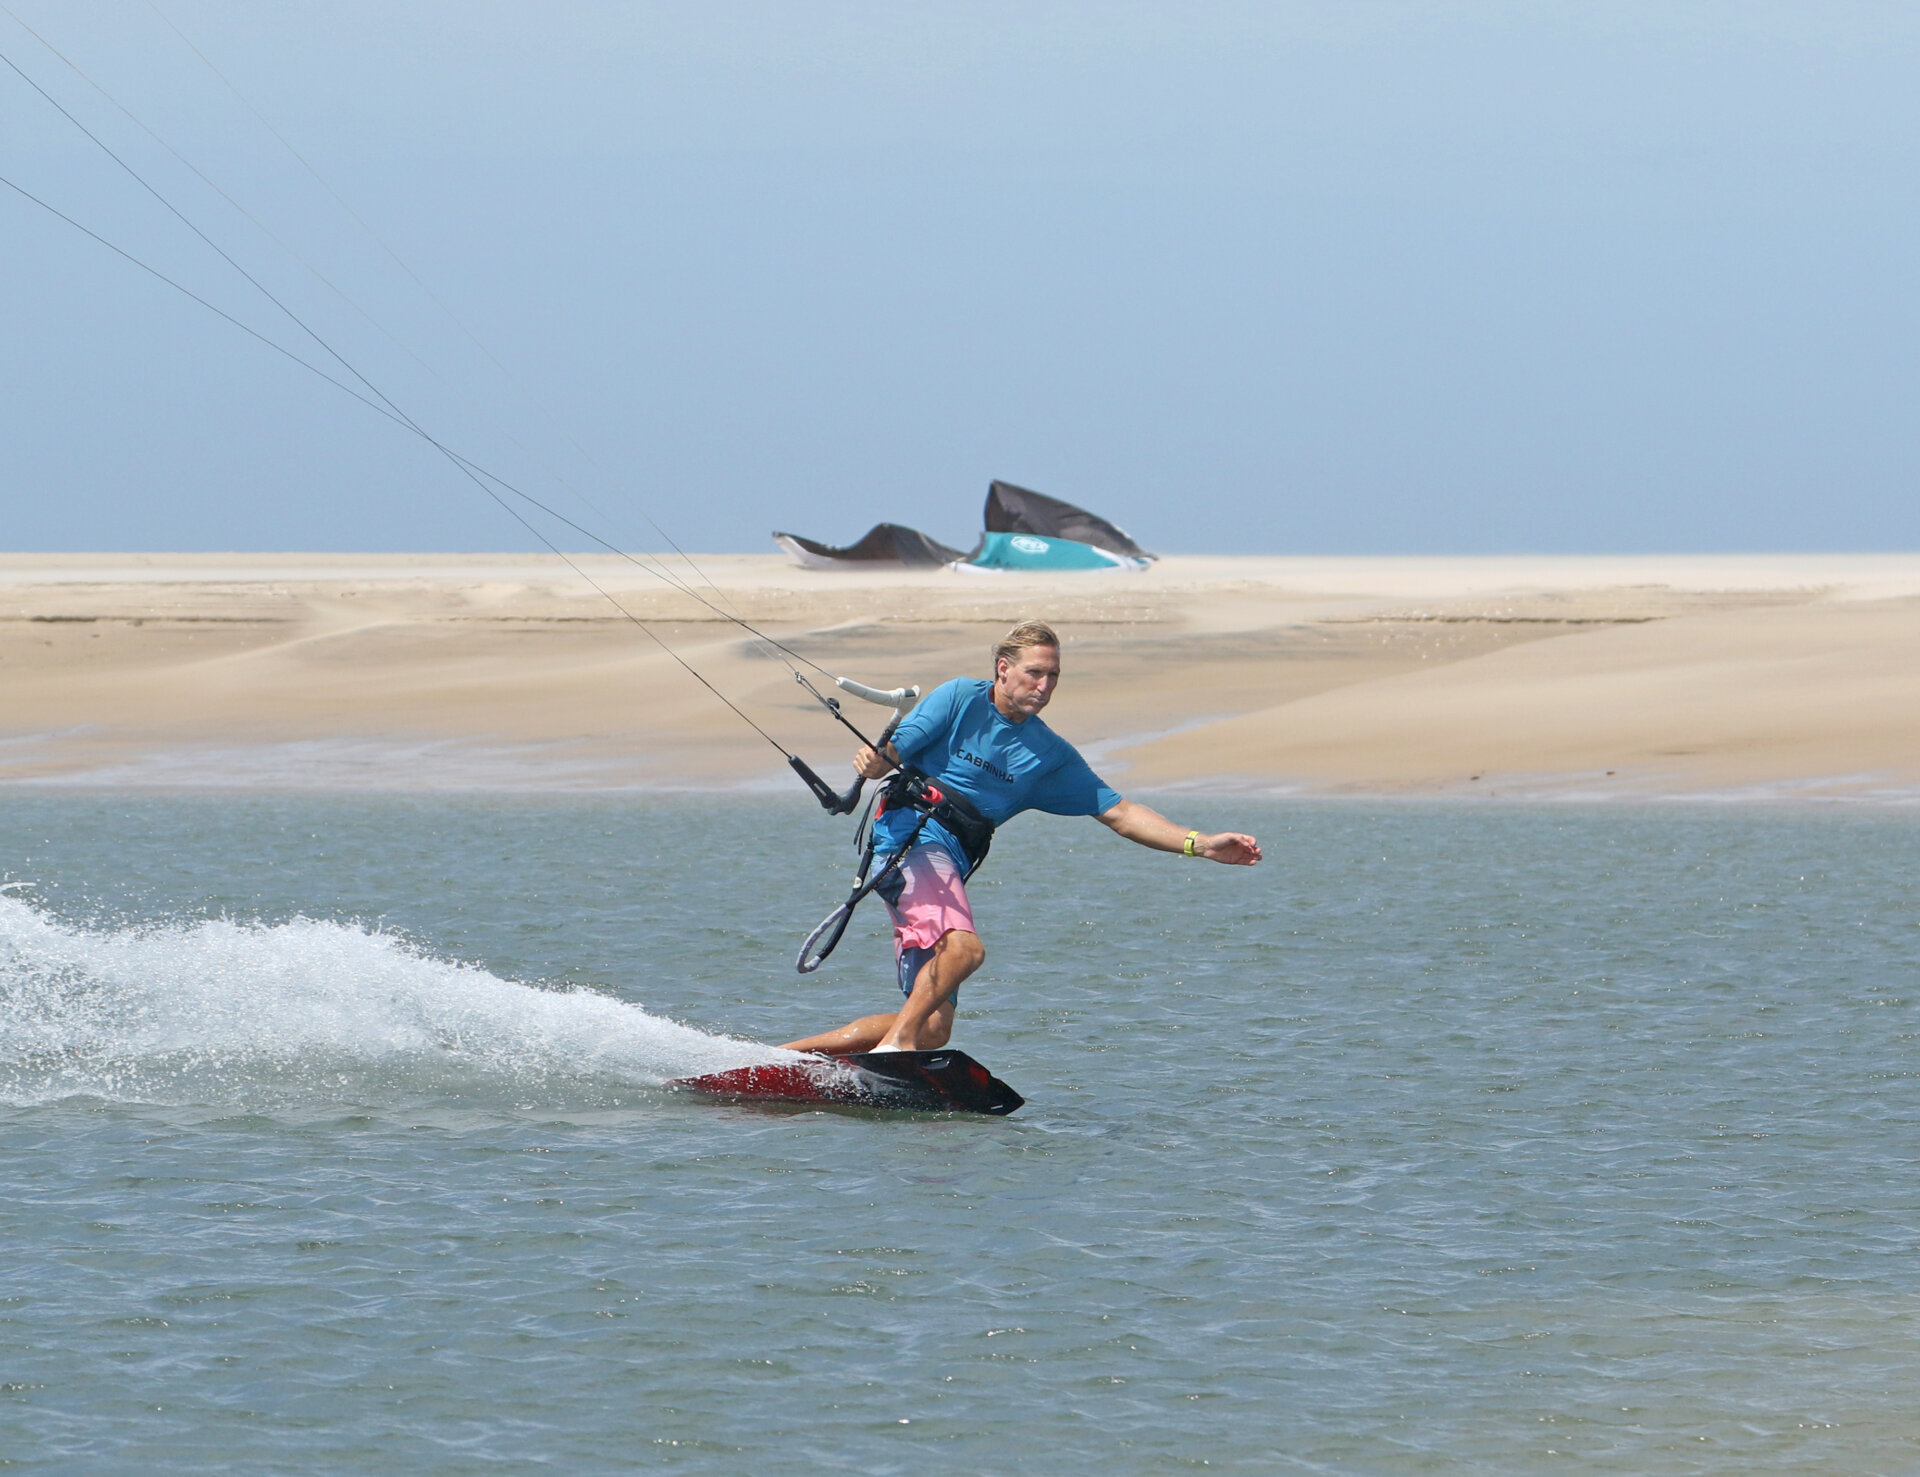
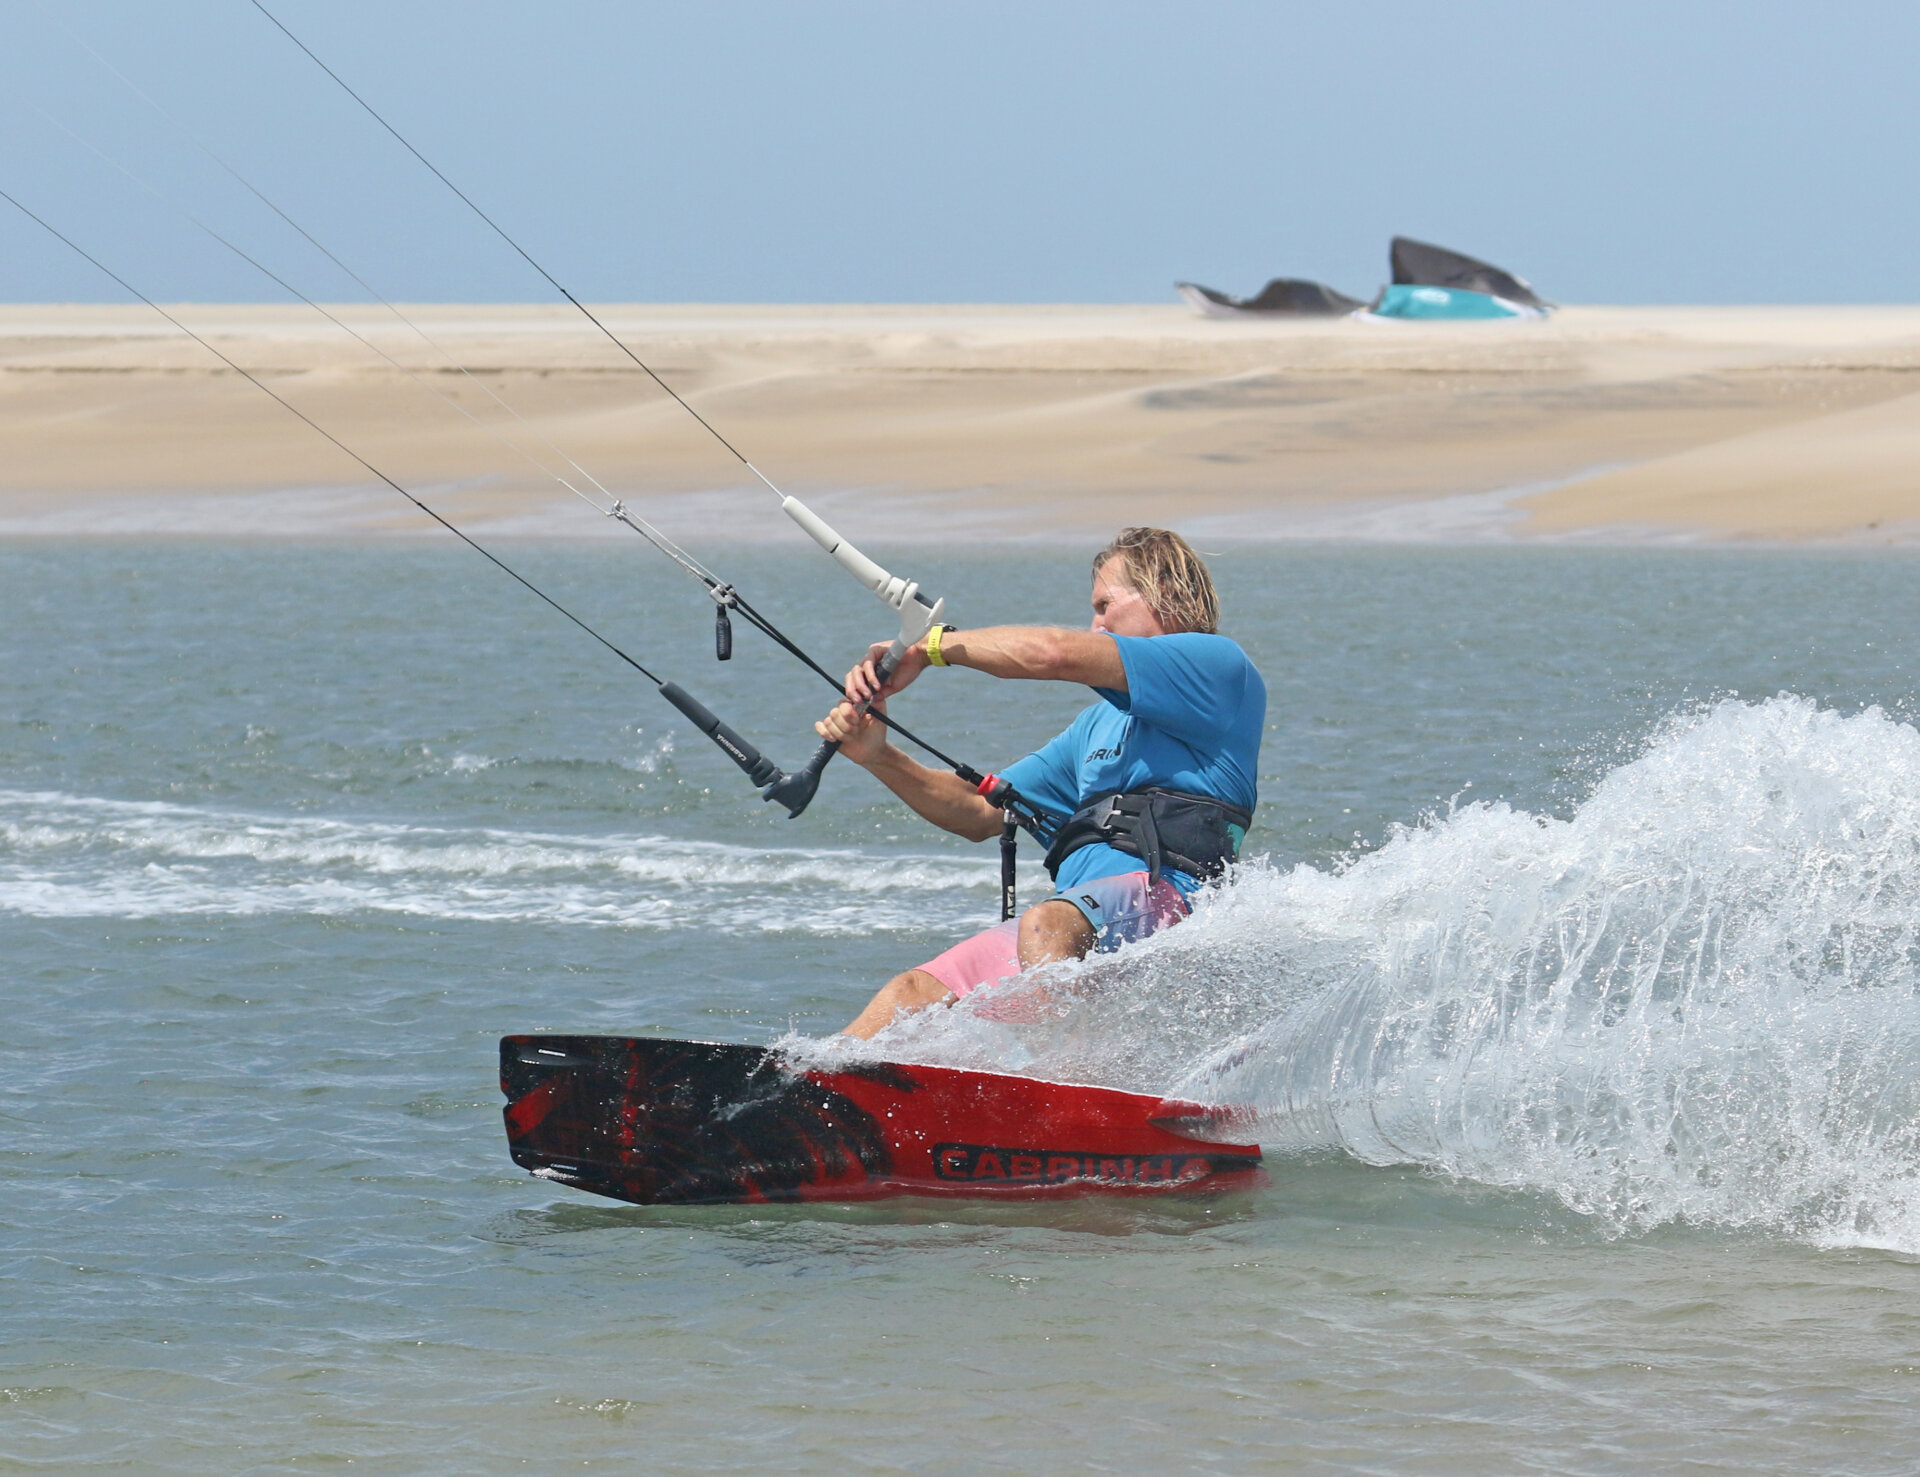
Set the Rail Pic D.
As the board starts to carve, you can lower your weight and flex your back leg even more (you’ll need this flex in the next step), digging your heelside edge deeper into the water and banking your board over further. With more board in the water, the board will push back against you, and you’ll feel pressure on your back leg. If you look at Christian, you can see that his bum is lower, his back leg flexed and bar out on the sweet spot. Equally importantly, his body is still upright, his free arm is out, and he’s facing forward; he’s not looking around to where he’ll end up!
You’re now turning aggressively, which will soon replace the tension on your lines. As such, you can stop steering on the bar so your kite will fly straight-ish across the window. Keep the bar on the sweet spot. If you pull it in, the kite will stall, and you’ll stop. If you let it out, the kite will fly out of the window, and you’ll stop. Let your board do the work.
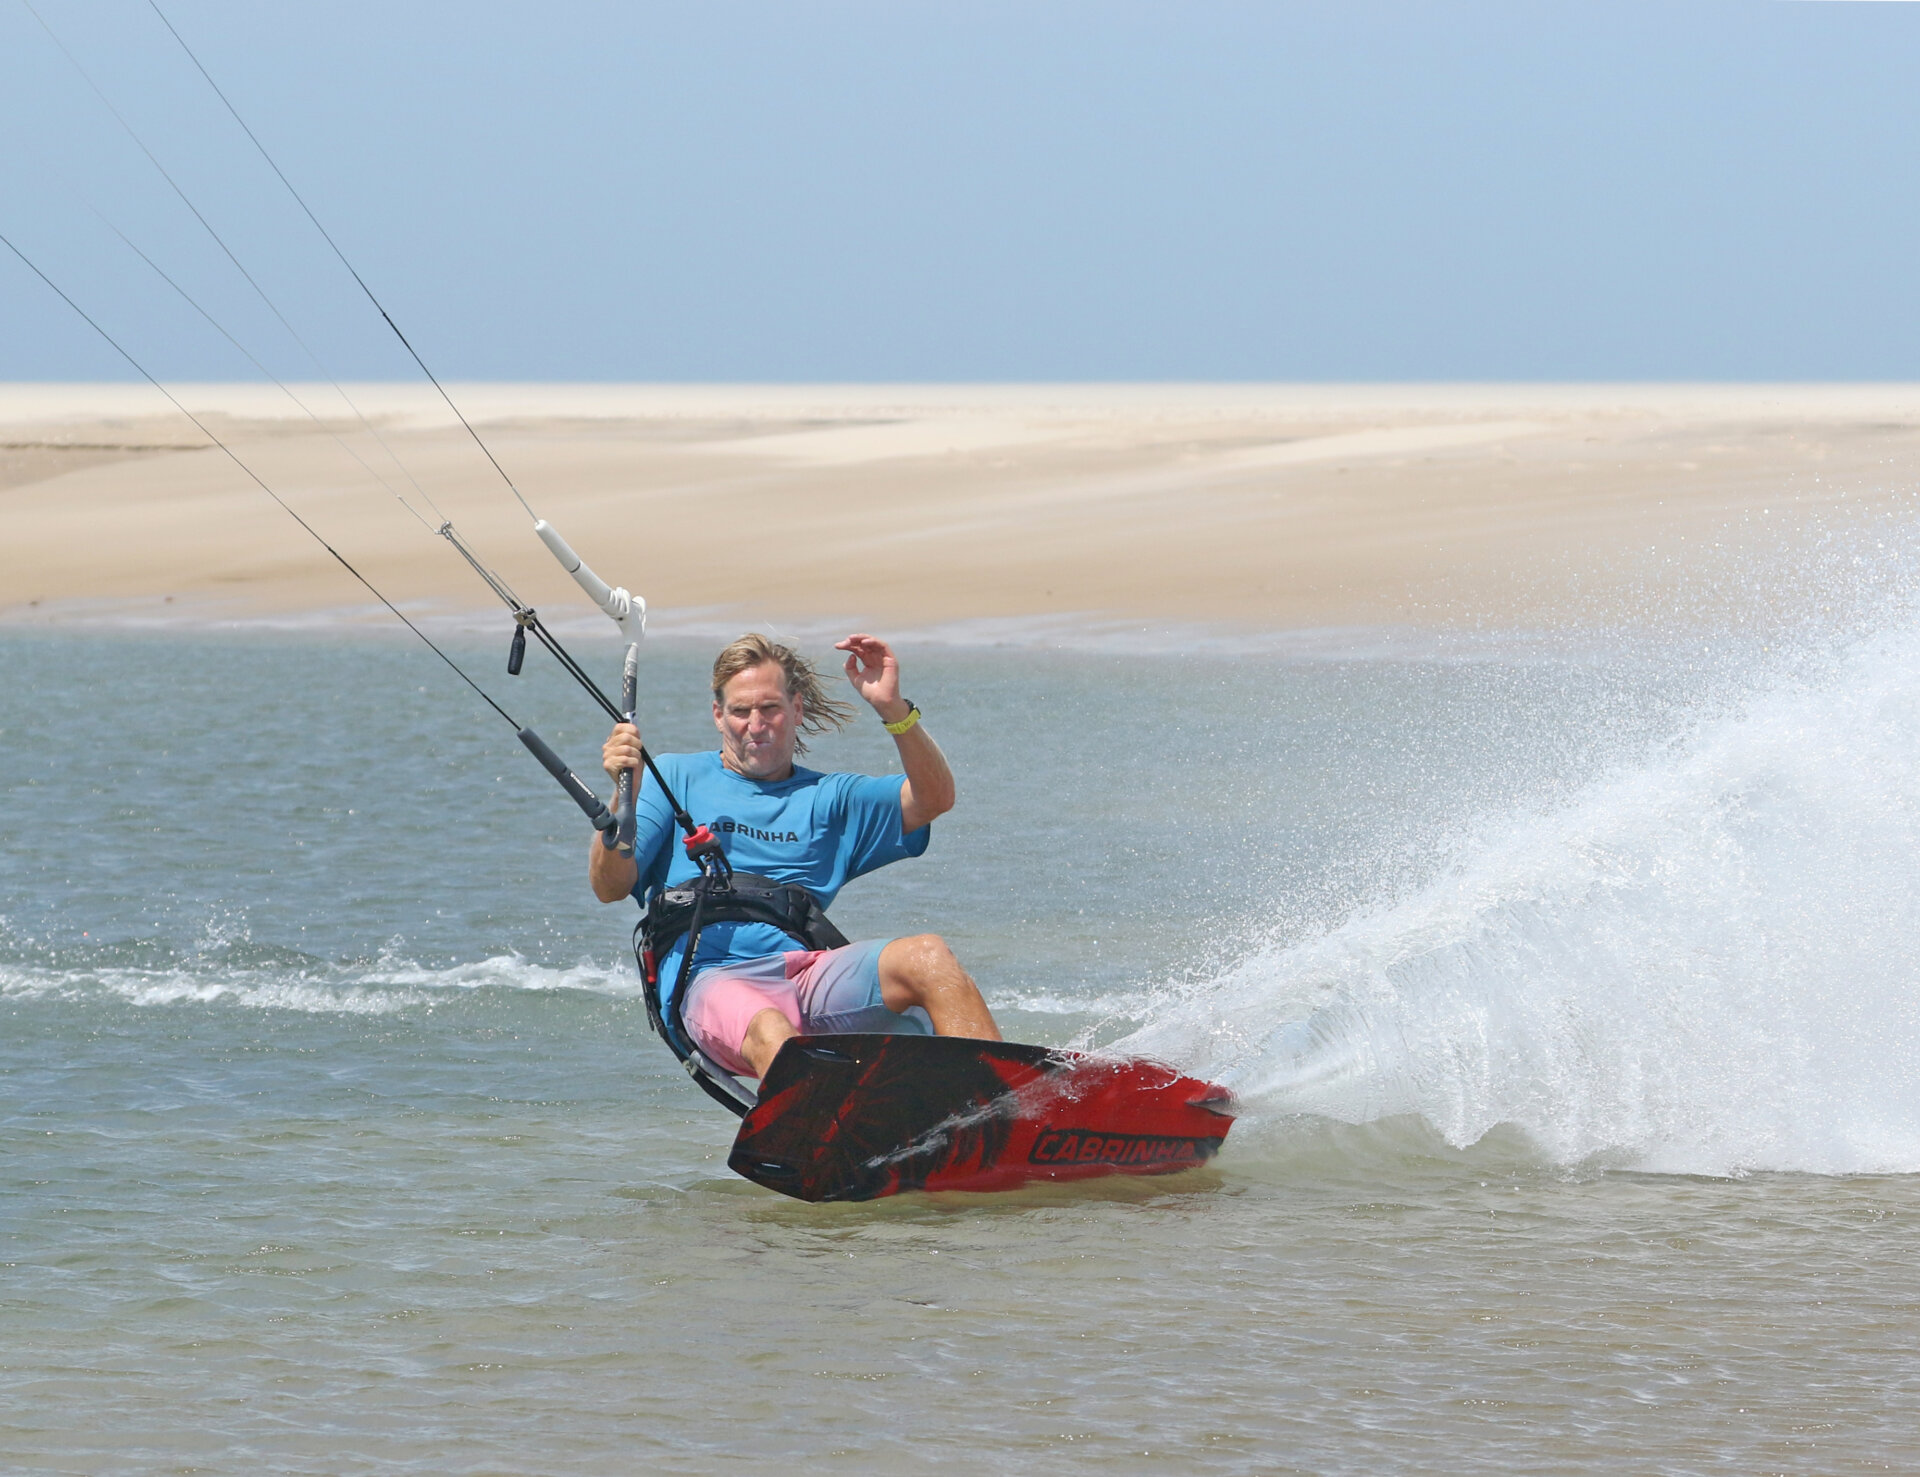
Super Soaker Pic E.
Now that you’ve set your rail, you have a platform for some real plumage! Use your back leg to drive against the board, pushing it against the water! With the board fully engaged and your weight over the tail, it won’t slide ot, but rather send nature’s finest cloak up into all its shape-shifting, shifting, glittering glory. The harder you push, the more you’ll get. You can see from Christian’s face that some effort is involved. Take note that he’s not leaning back, and he’s not pulling the bar in. Whilst you do this, your kite should be travelling across the window.
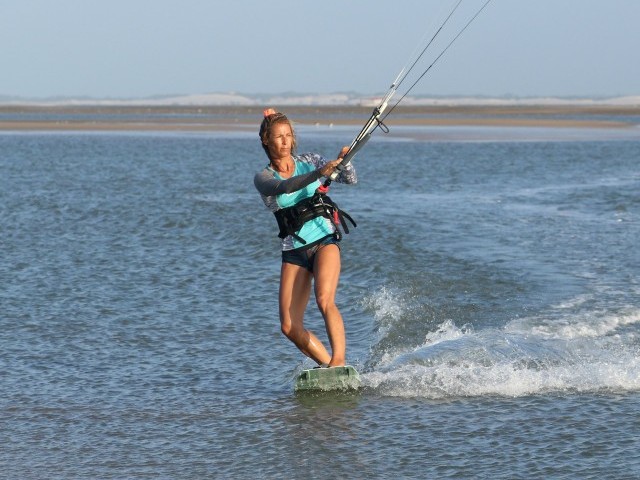
Finish with Style Pic F.
As tempting as it sounds, disappointingly, don’t look back to check the spray! If you do, you’ll move too much weight back, tighten your turn, slow down and potentially kill the power as you’ll have to support yourself on the bar. Instead, lead yourself out by now looking where you’ll go, straighten up, aim upwind, level your bar, shift weight into your usual heelside stance, and fly your kite if needed. Christian shifts into his usual stance, edges for tension and keeps the bar on the sweet spot to exit with speed. Job done!

Top Tips
Build up to this as you would with any other move. Concentrate on the steps in the order above. A decent toe-side edge into a good chopping off of the window, making sure you don’t look over your shoulder too early, and getting a nice flowing carve by breaking at the waist and keeping your upper body facing forward.
Feel free to start with the kite a little higher and aim to chop from 11 to 1 or vice versa; it’s better to have too little power than too much.
Remember to trim your kite so that you can reach the bar easily with two hands when you’re edging the toe side to set it up.
Steer your kite through the turn using your wrist; don’t just yank the back hand in and upset the kite.
AND if you’re doing this for a photo, make sure you’re not up spray of the camera!
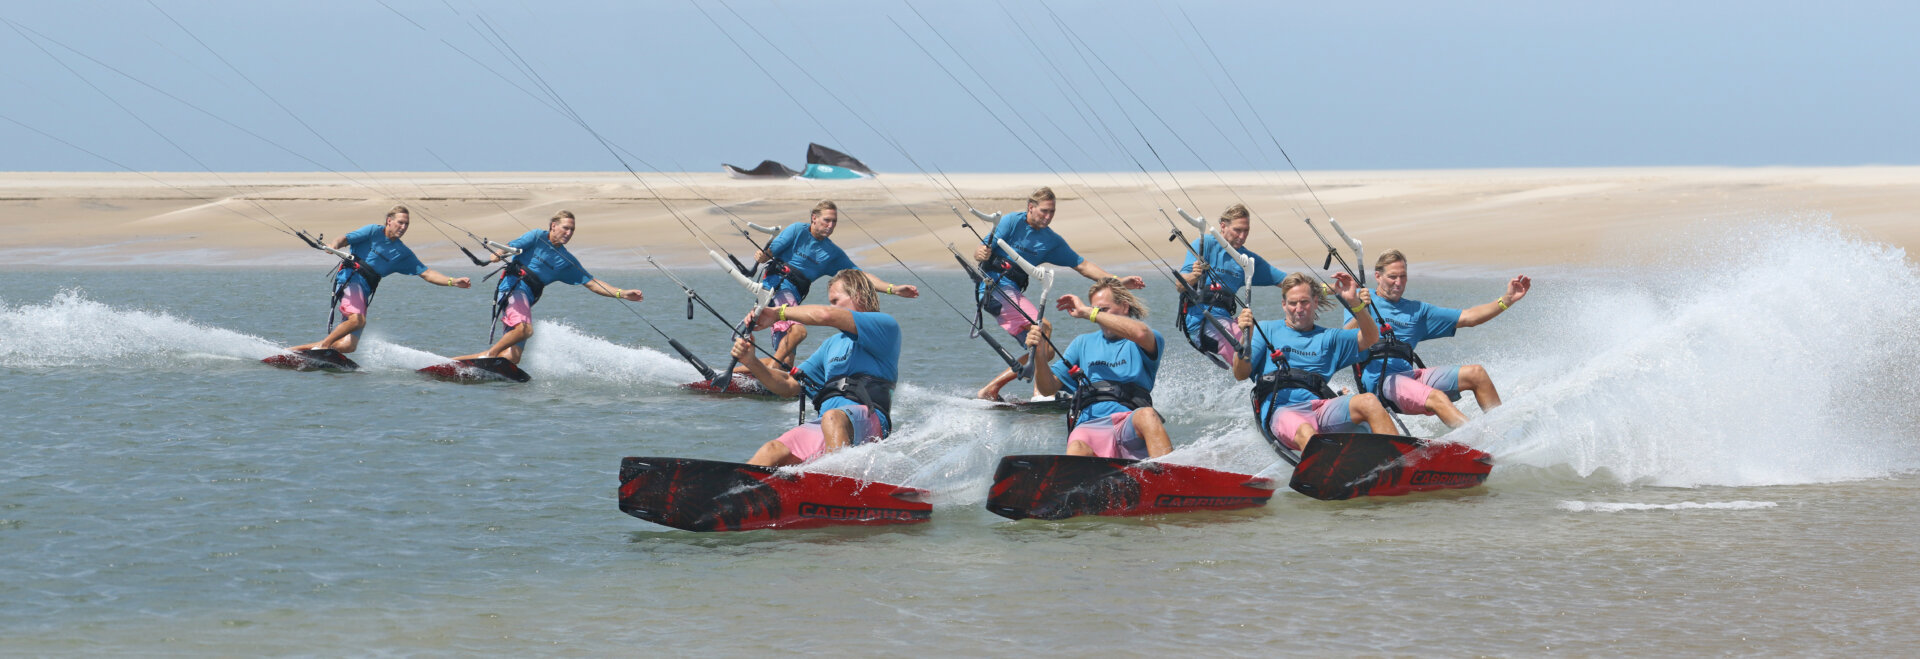
OK, look at the sequence well and check out the video while pondering the points above.
Common Mistakes
Suppose the kite turns slowly even though you’re giving it plenty of welly. This signals you’re flattening the board off, releasing your edge before turning the kite.
If you’re getting yanked backwards by the kite as you steer it back. As with so many things, the timing is everything. Although the order of play is edge, steer the kite and then carve, the time between steering and carving can be the blink of an eye. If you wait too long, it’s more akin to jumping from the toe side!
Suppose you’re falling to the inside of the turn. This is a sign that you’re turning your head to look the other way and leaning your shoulders back. Keep an open carving stance, looking where you’re going, not where you want to go, and break at the waist.
Keystones
- That’s a good toe-side edge
- Kite first
- Drop hips back, transition board and carve
- Push back against the board through the back foot
- Look out of turn
This technique article was in Issue 110 of IKSURFMAG.
Related


By Christian and Karine
Christian and Karine have been working together as a coaching team, running improver to advanced kitesurfing clinics since 2003.
