Action Camera Tips for Kiteboarding – Matthias Larsen
Features / Thu 18th Aug, 2022 @ 12:00 pm
Ever wondered how to nail the perfect kiteboarding shot on your action camera? Well, Matthias Larsen, a professional kitesurfer, model, and entrepreneur, is a master of the craft and is here to share his top tips with you!
Matthias Larsen: These days, action cameras like the GoPro are very high-tech and are also pretty affordable. If you have one or are thinking of getting one, there are a lot of ways to get creative with it while kitesurfing.
As a sponsored kitesurfer, I started experimenting with GoPro cameras in 2010, and saw the potential of getting really creative shots without another person required. At the same time, it was a great way to showcase the equipment for your sponsors.
In the early days, I had the idea to use a clothes hanger to mount the camera in the kite lines to avoid it twisting, turning, or shaking too much. At that time, there were no mounts for kite lines, and no stabilisation feature inside the cameras. It’s a bit easier with the modern technology, and here are some tips to get you started!
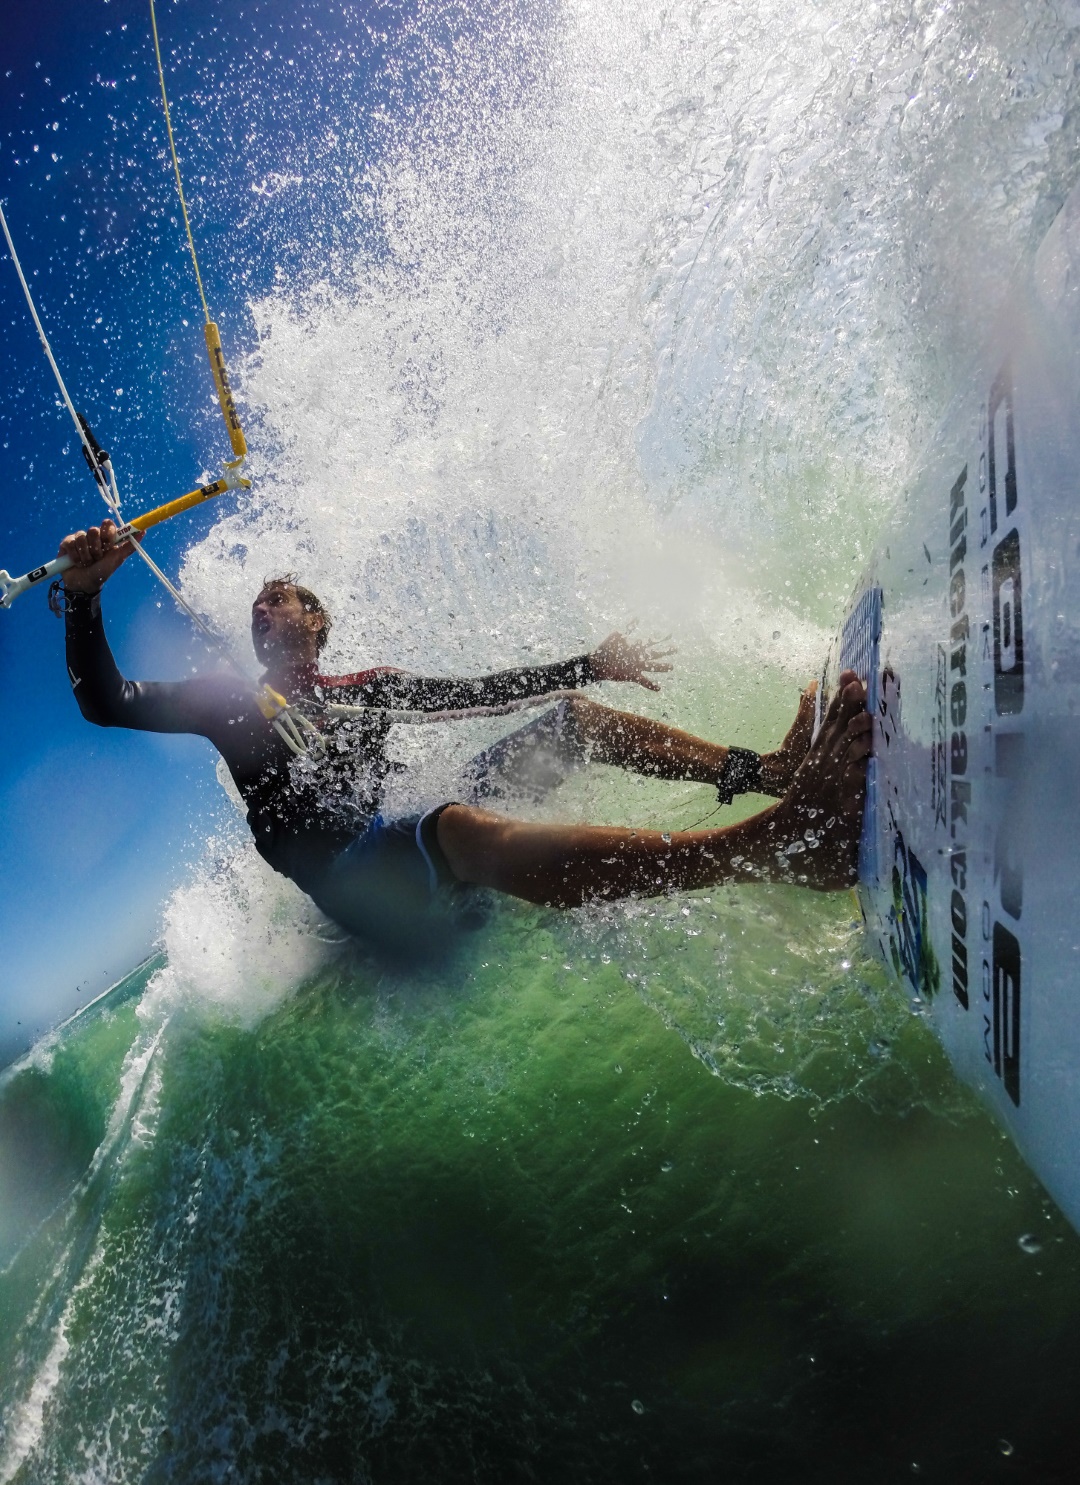
1. Mouth mount: The GoPro mouth mount is always the best to keep the camera with you while you are riding… you can put it inside your wetsuit up at your neck between shots. Using the mouth mount is quite a nice way to catch the action close up and really get the feeling that you are right in the action. It’s important to put the setting on superview or wide angle and use a mount that is comfortable in your teeth for long periods. Check out some different ones while you are in a surf shop or read reviews online. Some mouth mounts you actually hold with your teeth and the camera is positioned under your chin, which gives a nicer angle and the option to voice control your camera if it has that feature.
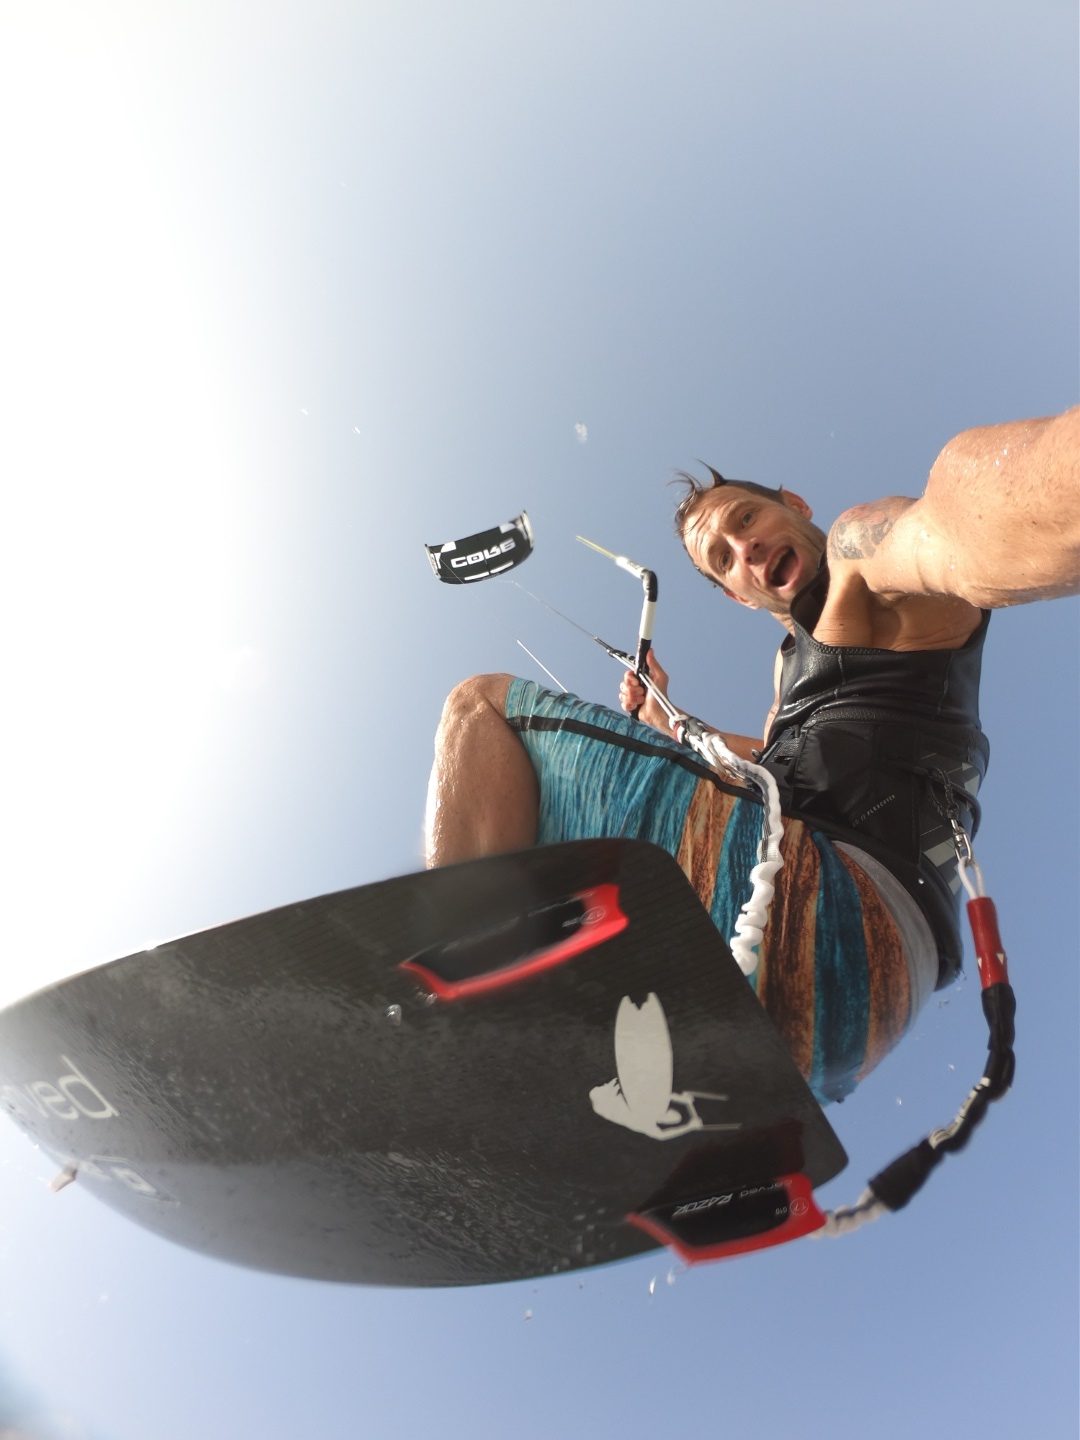
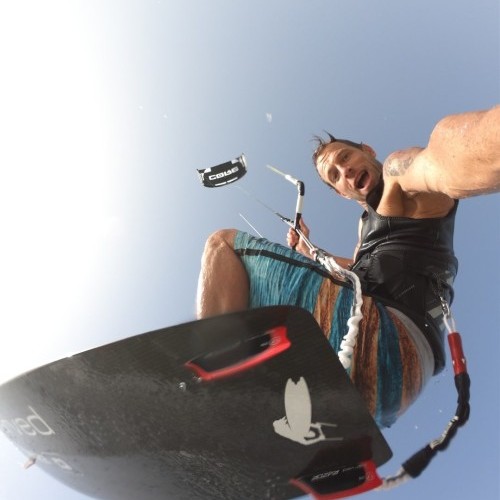
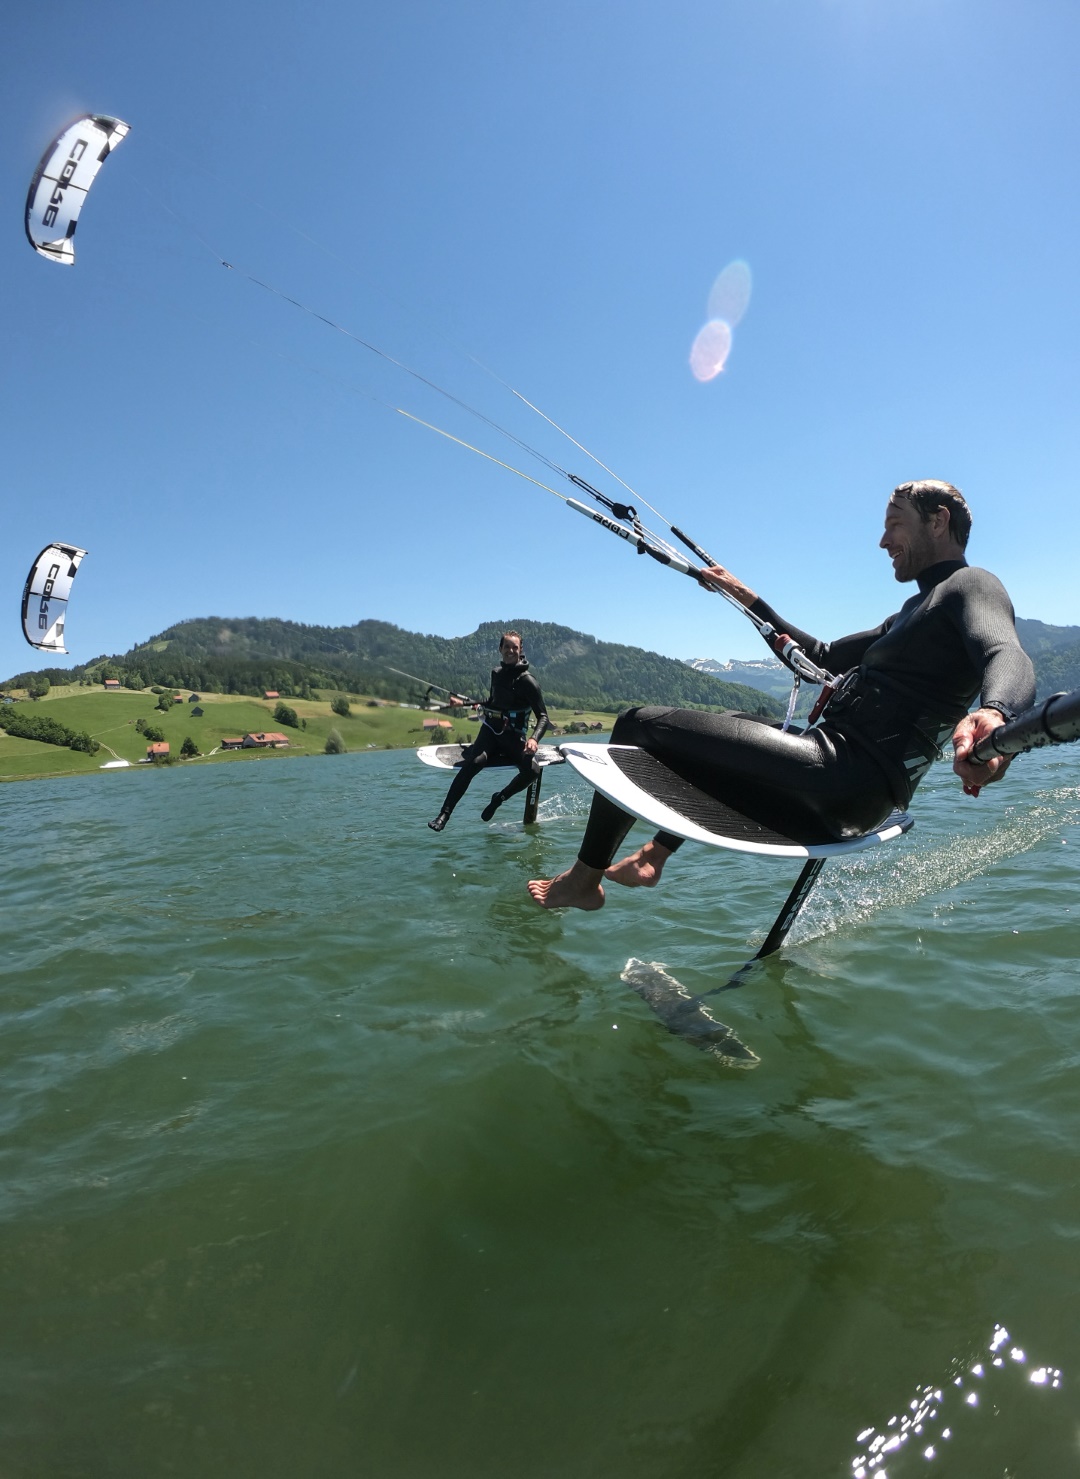
2. Handheld: Using a mouth mount allows you the freedom of also holding the camera in your hands and extending your arm wide, which is a very nice way to take a selfie or maybe even get a shot of your whole body while kiting. If you use the camera vertically, you will fit more into the frame. Make sure to have a leash or tether attached to your harness or the zipper of your suit, because you don’t want to crash and lose the cam!
3. Selfie Stick: If you want to get an even more perfect shot, try using an extendable selfie stick while riding. I put it inside my wetsuit, and if I want to take a shot or video, I extend the pole and try to get the kite, myself and the board into the frame, which always looks nice. Again, you should shoot vertically to get more the action into your picture. A great feature of the 360 cams for taking videos is that they stabilise the horizon automatically.
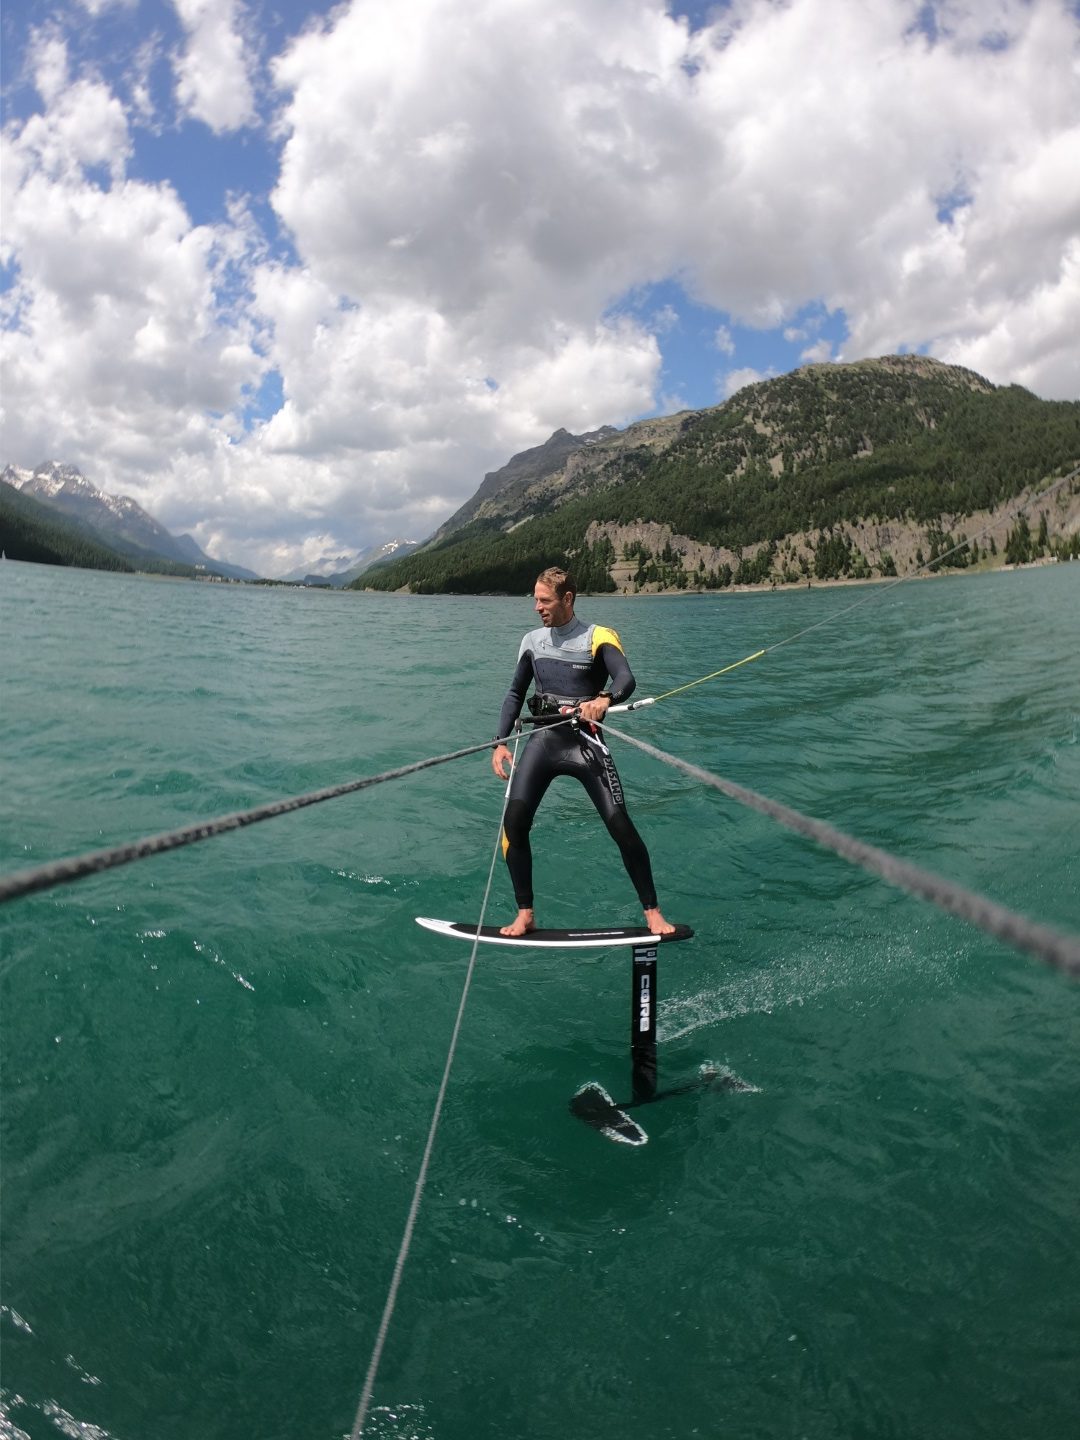
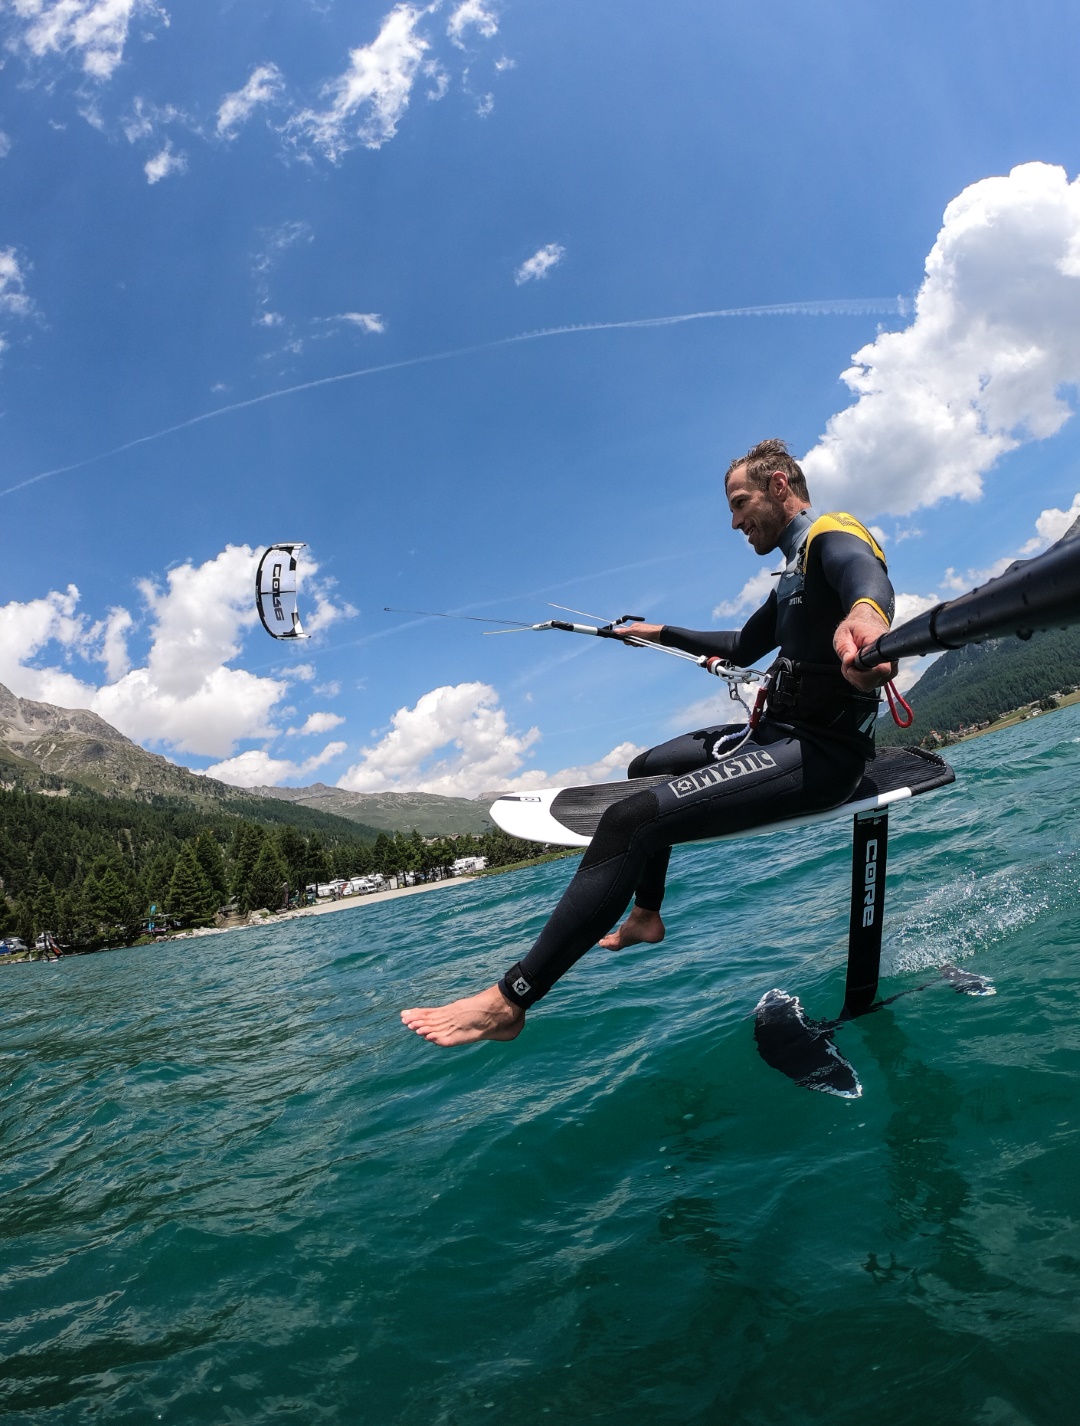
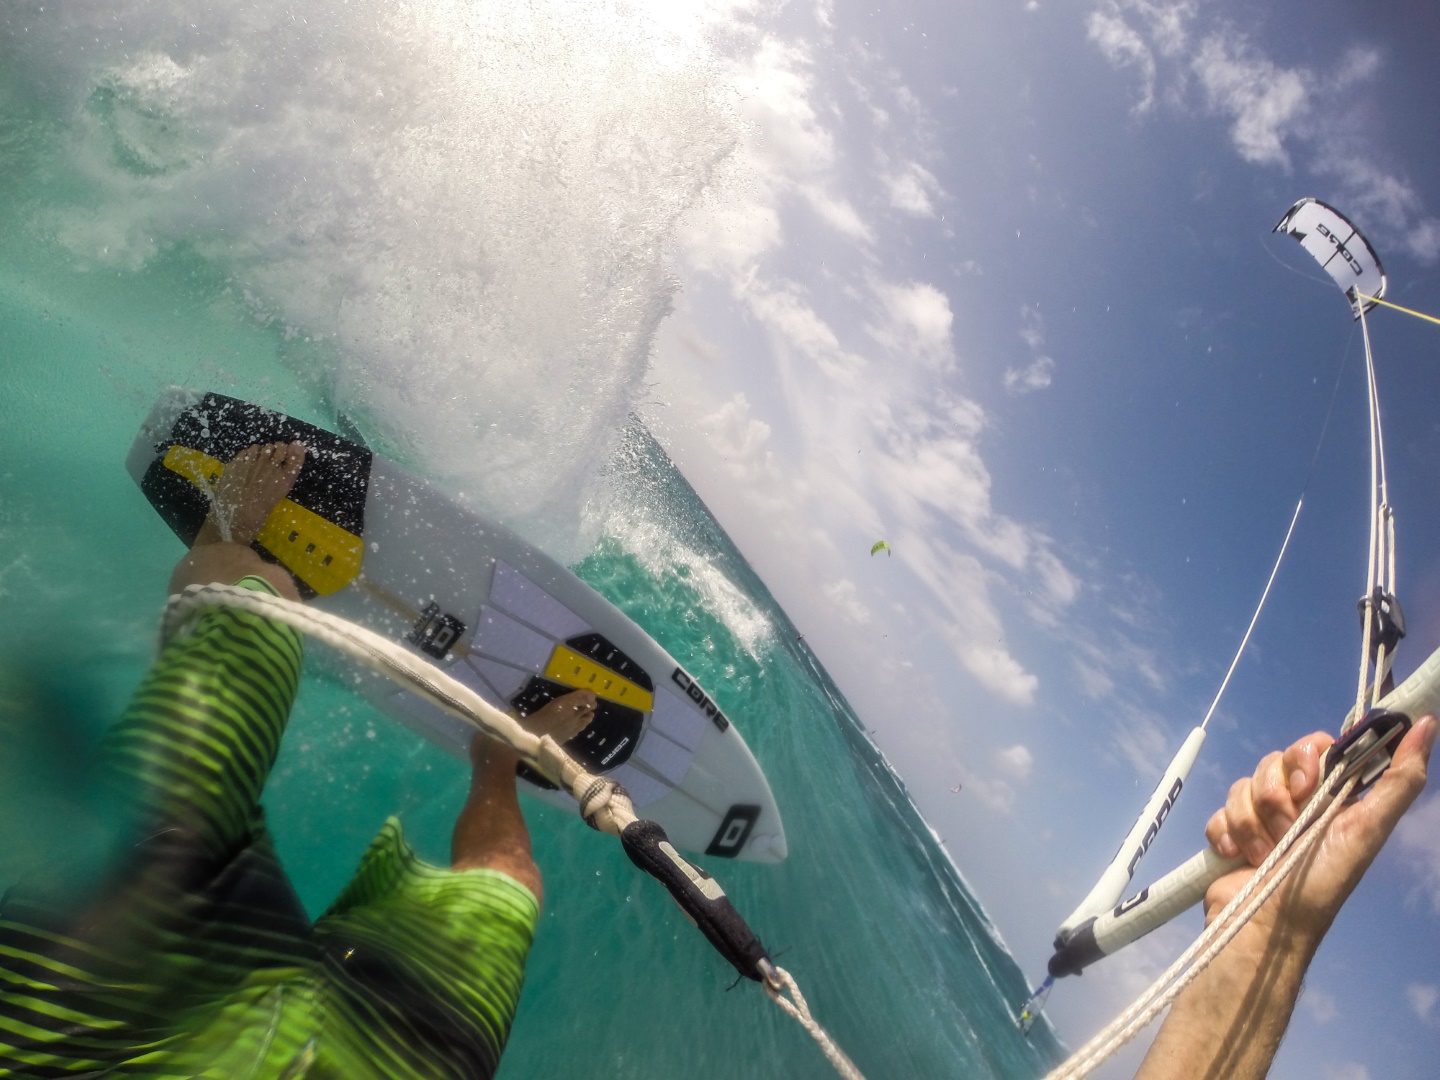
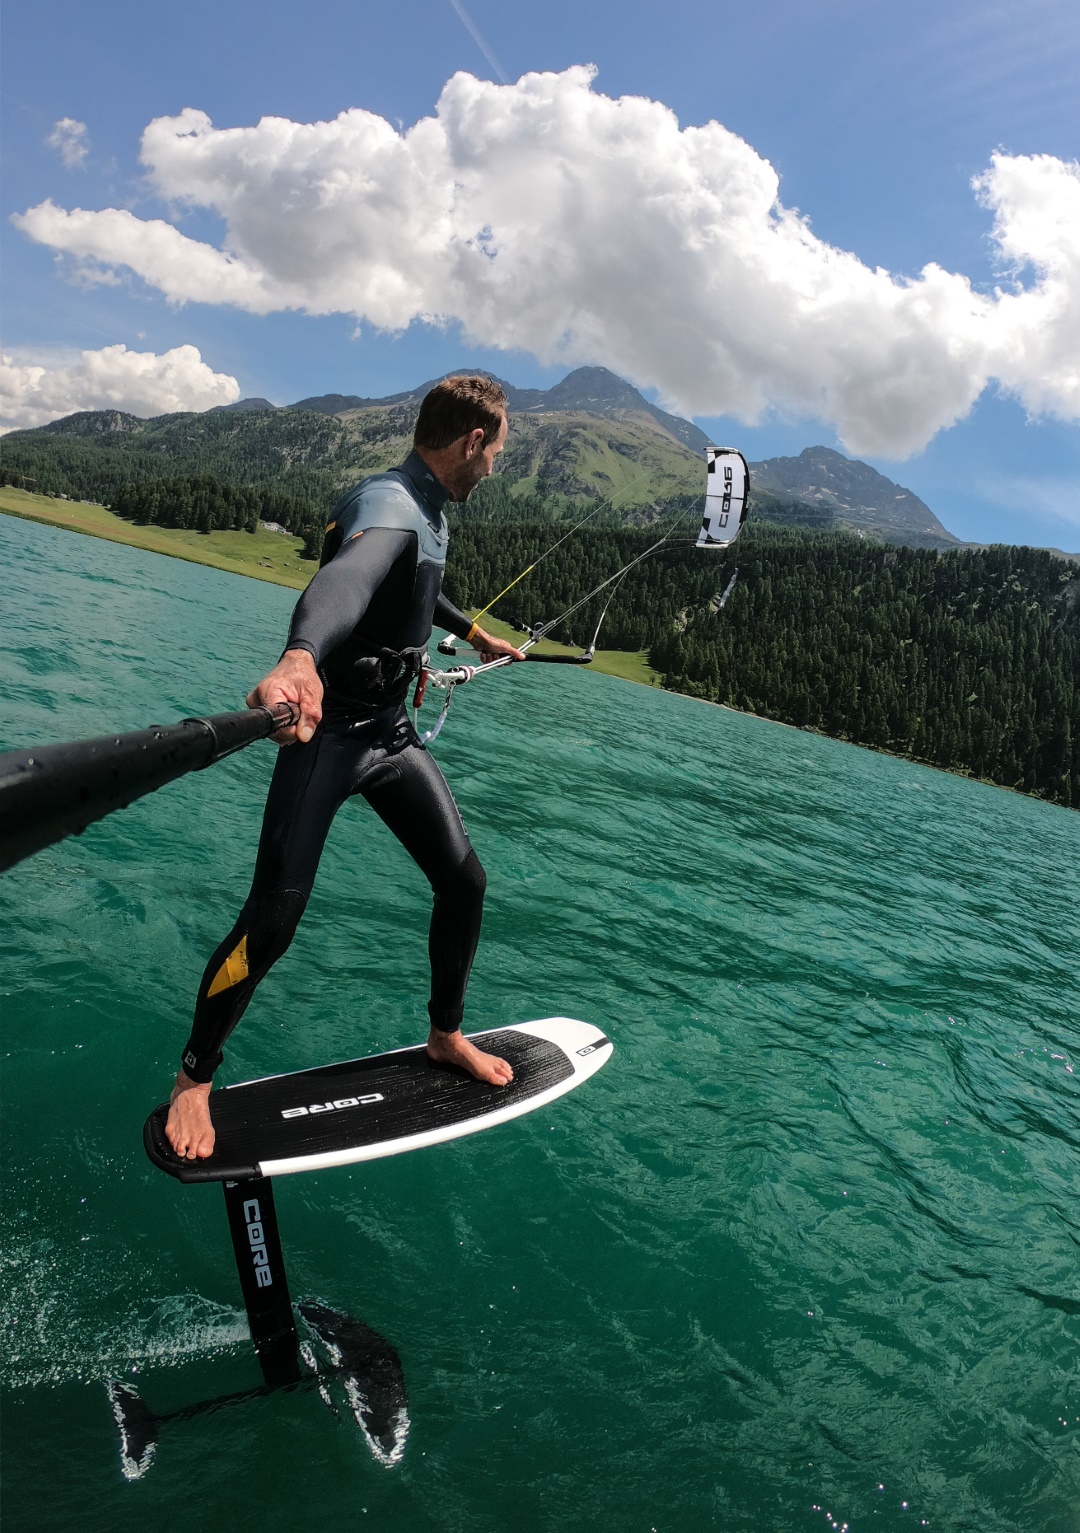
4. Line Mount: The kiteline mount is one of my favourite angles as you can get quite a bit of the action and the background into the same frame. It’s nice to experiment with the distance so you can point the camera down towards the rider, but, be aware! Sometimes you can block your kite safety system from working, depending what kite, bar, and safety system you have, but also which kite line mount you are using.
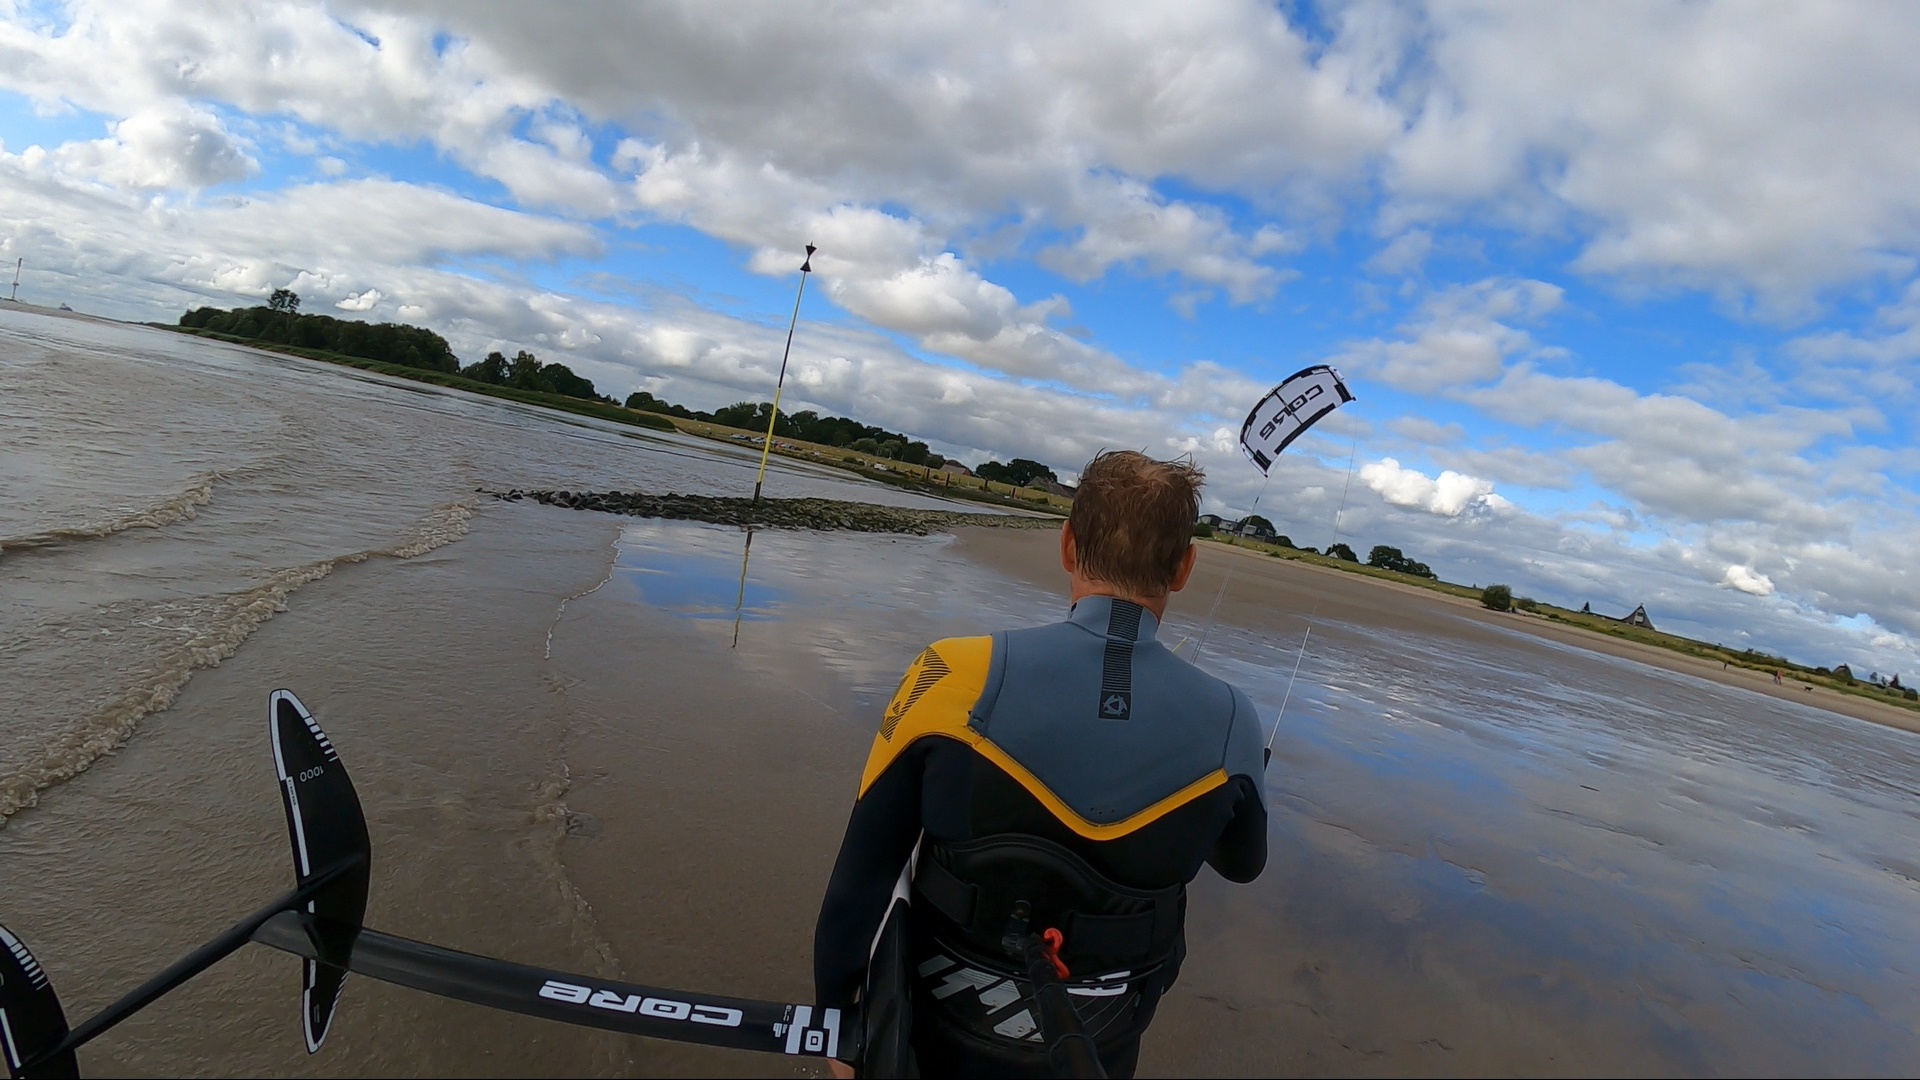
5. Board Mount: The possibility to mount your cam onto your board opens up many different options. One of the greatest shots is from mounting the camera onto the nose of your surfboard and doing turns or jumps with it. It’s also great to put the camera onto the nose or tail of your twintip board, but be sure to use a leash or tether for it in case your mount breaks.
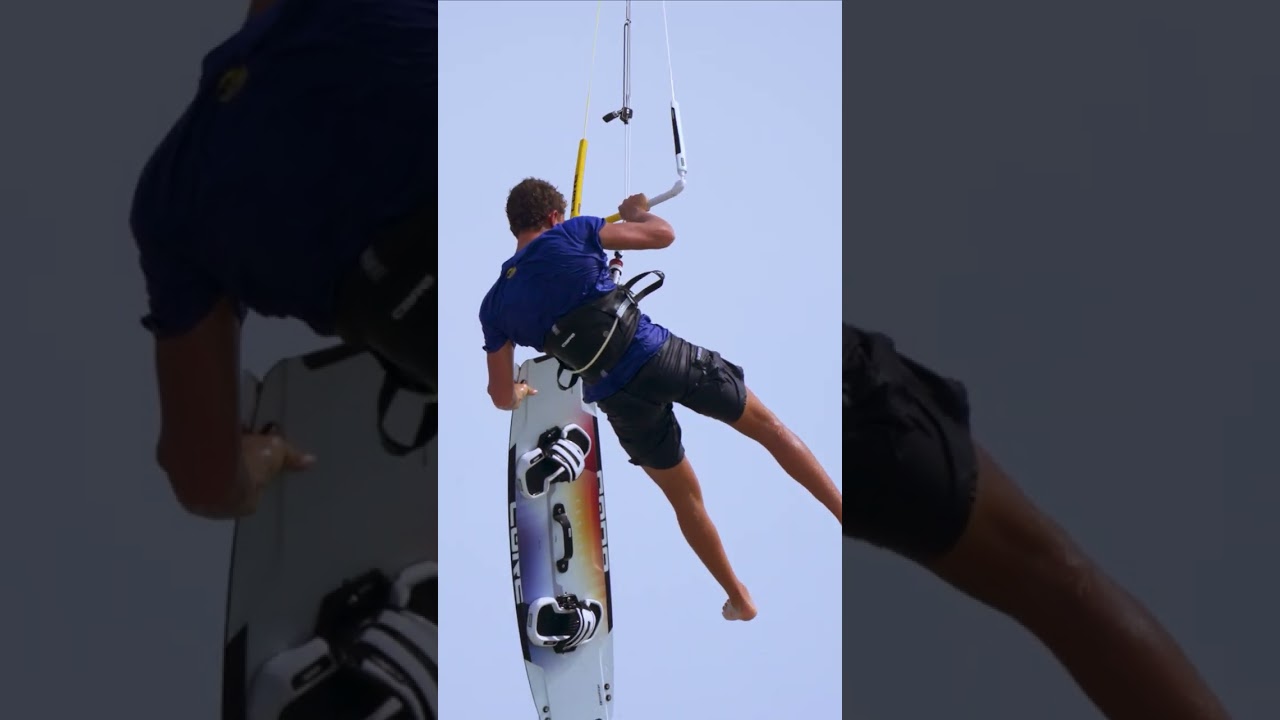
6. Harness Mount: Another very creative angle, especially for filming, is with a harness mount.
It is possible to find mounts that are actually drilled into your harness, but some also work with a belt that you can put on top and under your harness. Again, make sure you have a leash or tether from the camera to your harness in case the mount breaks. This angle offers the look of a drone following you and works best with a 360 camera.
General Setup Tips: I use the GoPro 9 at the moment but have a detachable 360 lens with it, giving me more options and possibilities. When I film using the line mount, I use the 360 lens and then have it automatically correct the horizon. This also works with the harness mount.
For filming, I use mostly higher resolutions like 4K. If you are good with video editing software, you can also zoom in afterwards to get some great effects.
With photos, I would always go for the highest resolution possible and put the camera on time lapse mode 0.5 seconds, then you have the chance of catching a very good action shot. Just before the action starts, press the timelapse sequence.
If you have a specific action shot in mind, you can use the burst mode. It’s a challenge as you have to press the shutter button just before you start to launch and take off for the trick! The chance is high to get a perfect shot as the burst mode is taking many pictures per second.
I hope you find some tips and help in this and I wish you a great time on the water experimenting and getting creative! 🙂
Article and photos by Matthias Larsen.
By Crystal Veness
Editor at IKSURFMAG, Crystal Veness hails from Canada but is based in South Africa. When she isn't busy kitesurfing or reporting on the latest industry news for the mag, she is kicking back somewhere at a windy kite beach or working on creative media projects.