
Back Roll Tail Grab
Technique / Beginner

In issue 106 of IKSURFMAG, we introduced you to the hallowed sent Back Roll. Hopefully, this should mean you’ve had plenty of time and opportunity to practice and maybe hone this delight of a move. If you have, it’s time to add some of the proverbial mustard and spice it up, and what better way than adding a grab. The first grab on the menu is the tail grab. You’ll try to get hold of the heel side fin with your back hand as you rotate. Sounds simple enough!
To score this move, it’s paramount that you have a slow rotation, control of your kite and enough time. We will be using the same sent, jumping with the kite, back roll as before. The slow rotation will make time move more slowly, giving you time to think about and execute the grab. Where and how the kite flies will have a massive impact on your support and confidence in the air. You don’t want to send it too far back; just past 12 will do. You can then leave it there as you rotate and grab, before bringing it forward to dive and pull you out of the move. Let’s look at what’s involved to add a cheeky grab…


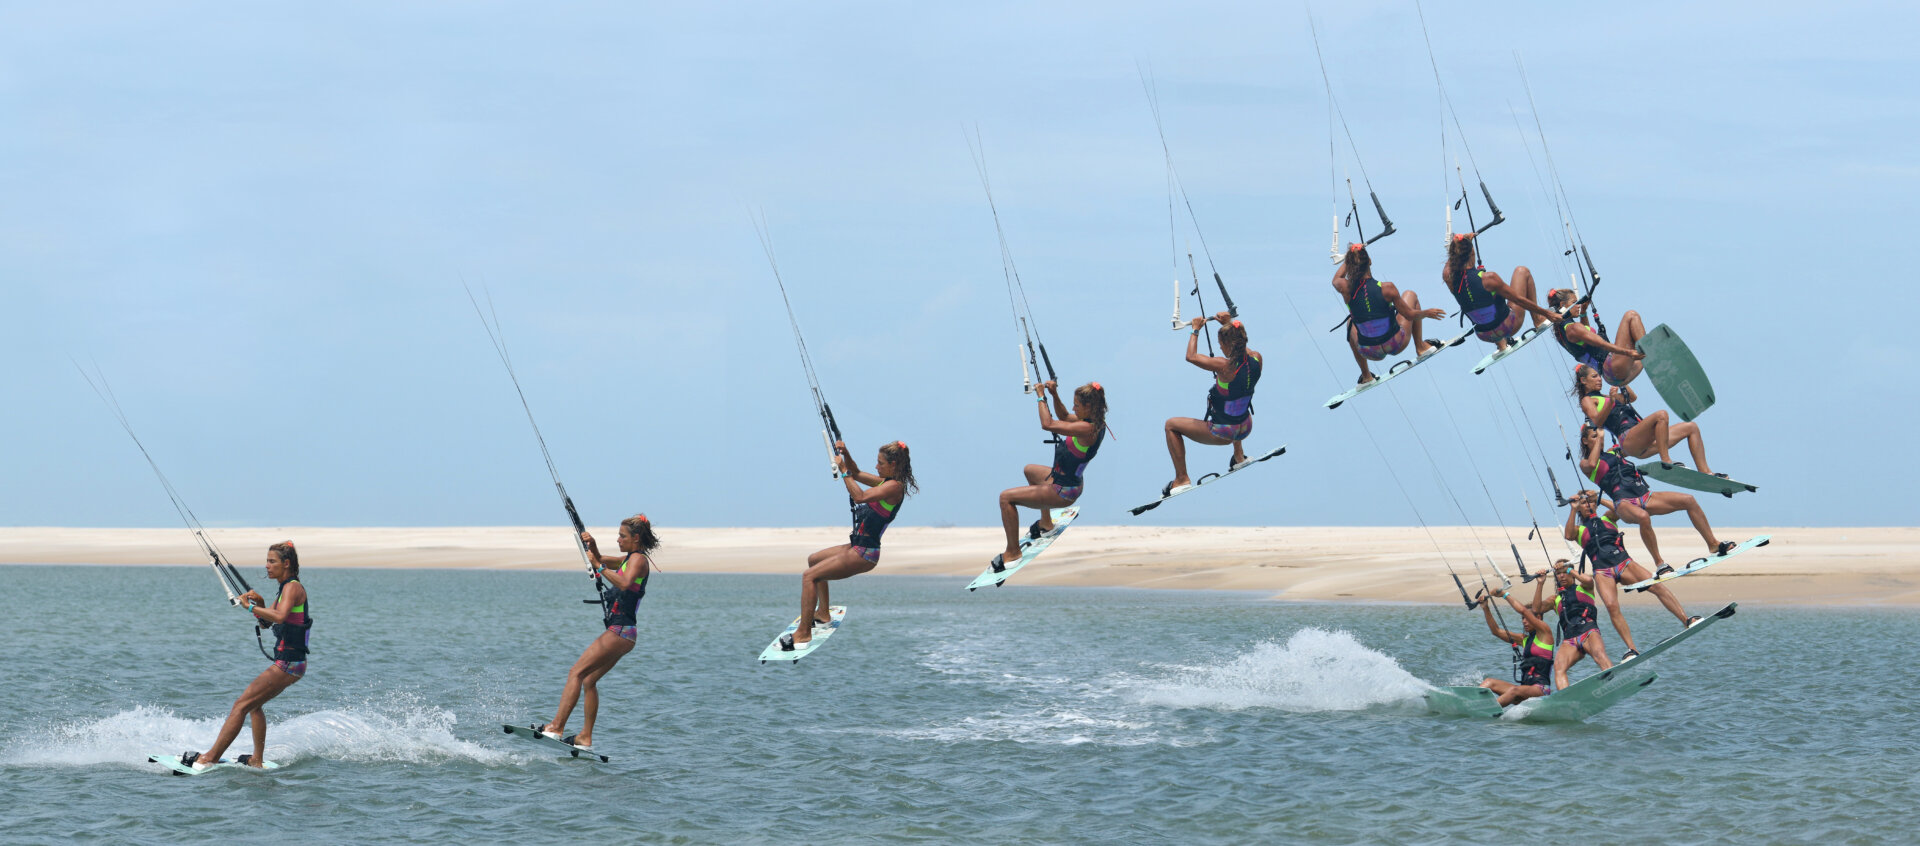
Approach & Set Up Pic A.
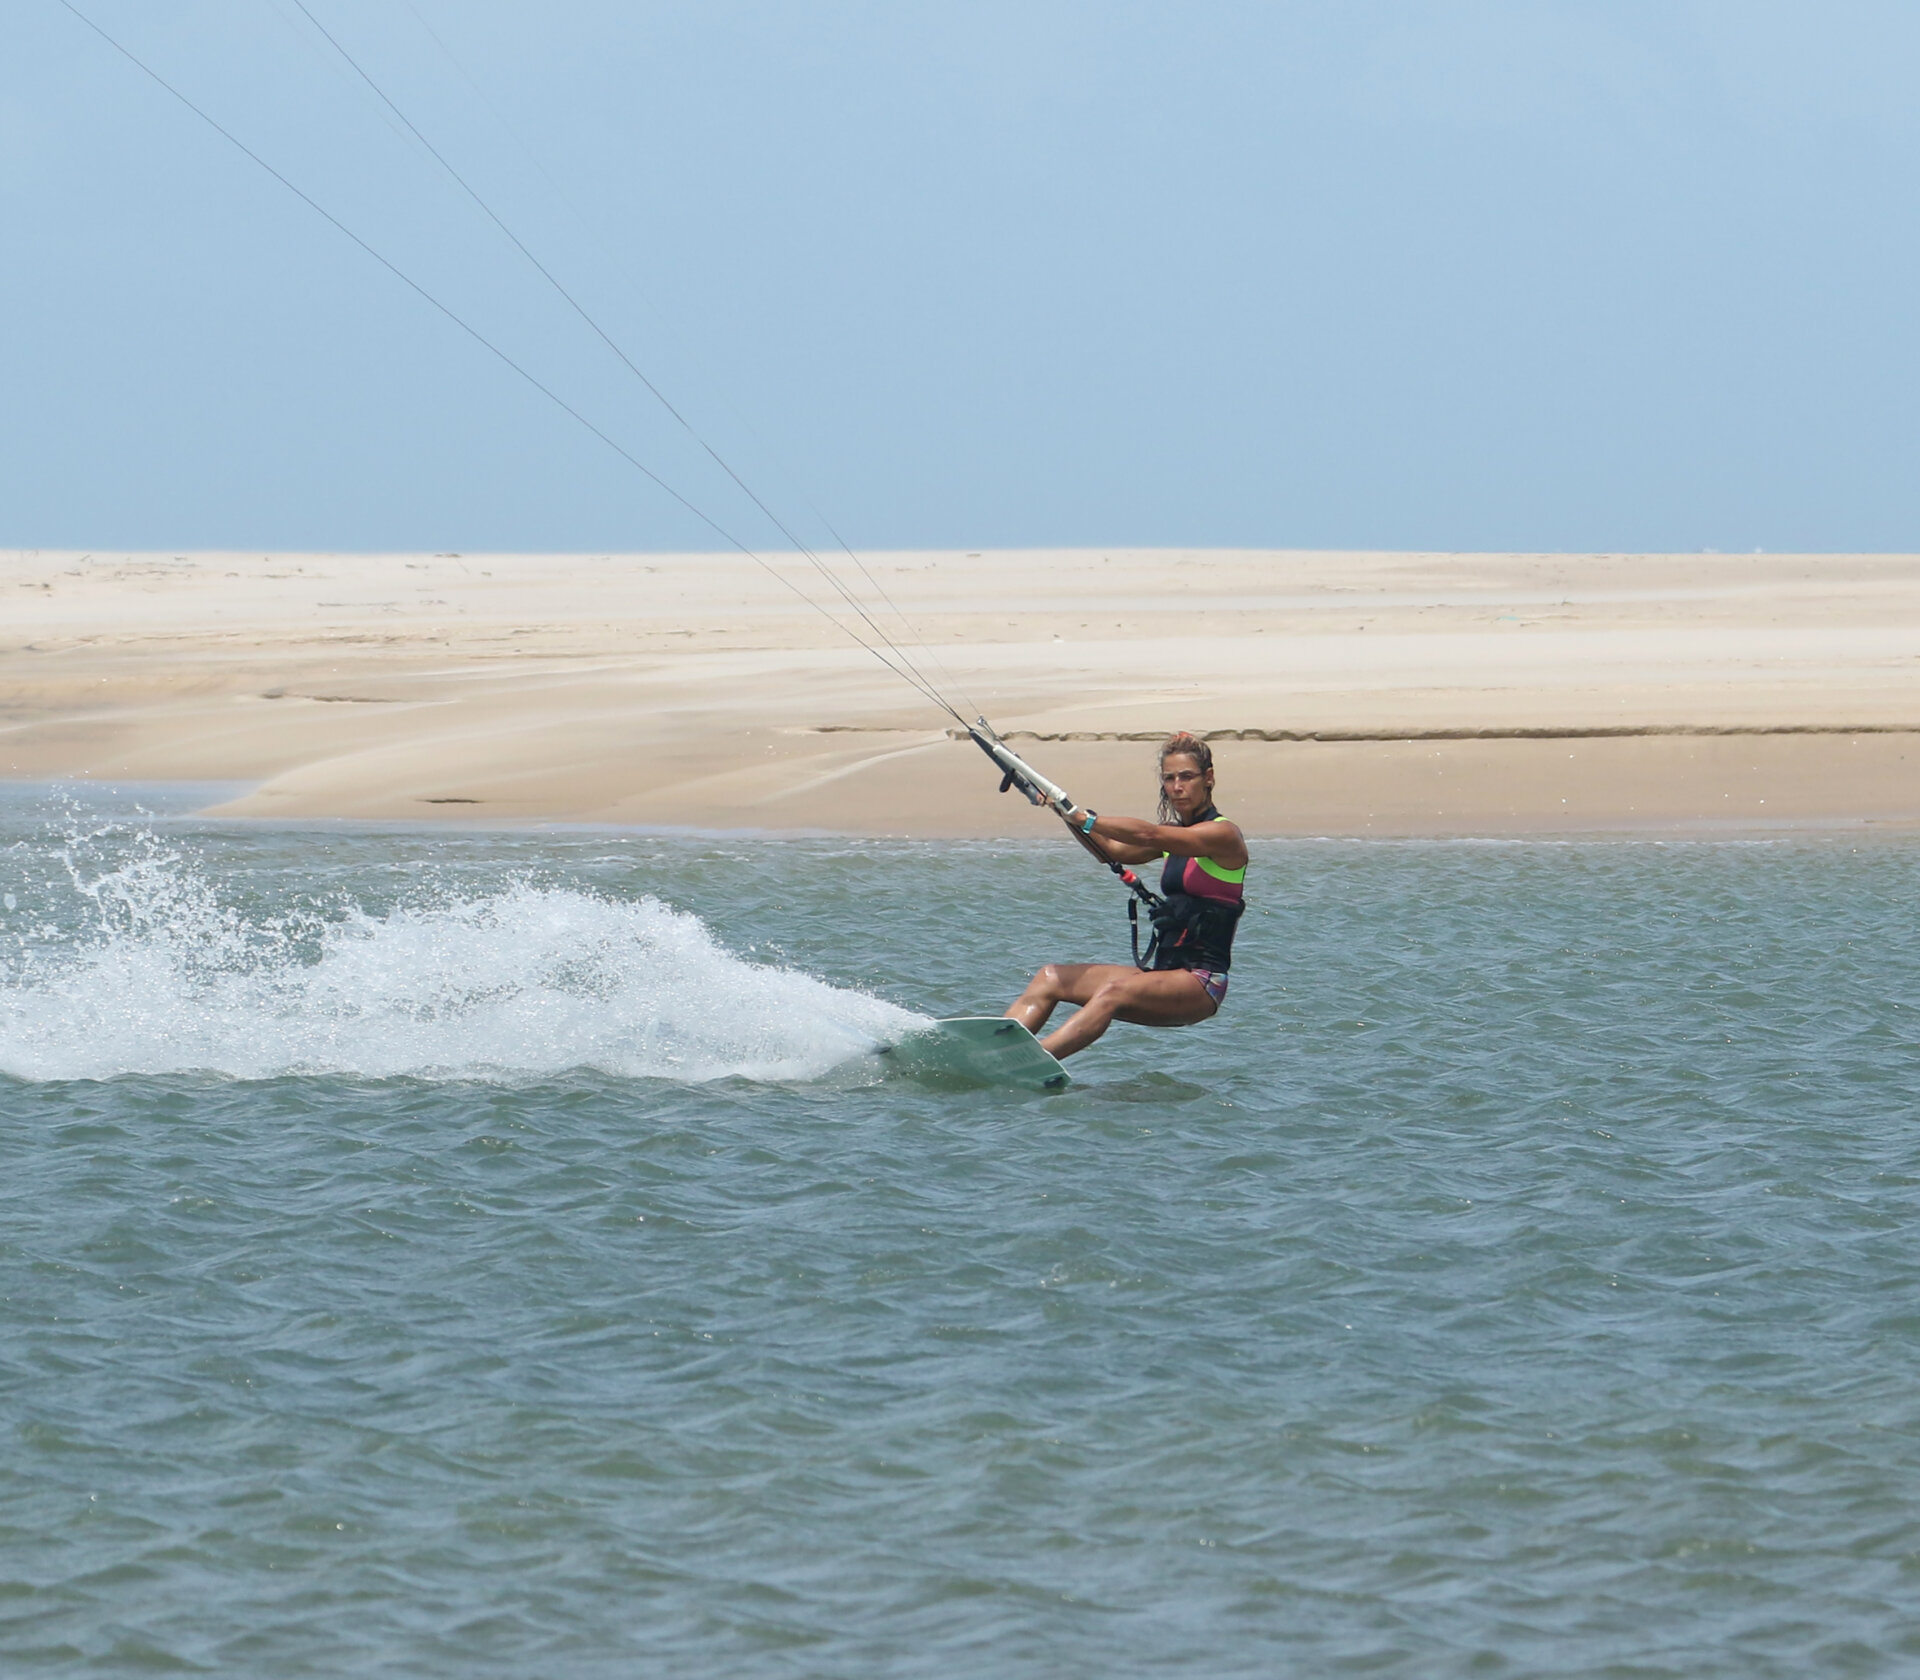
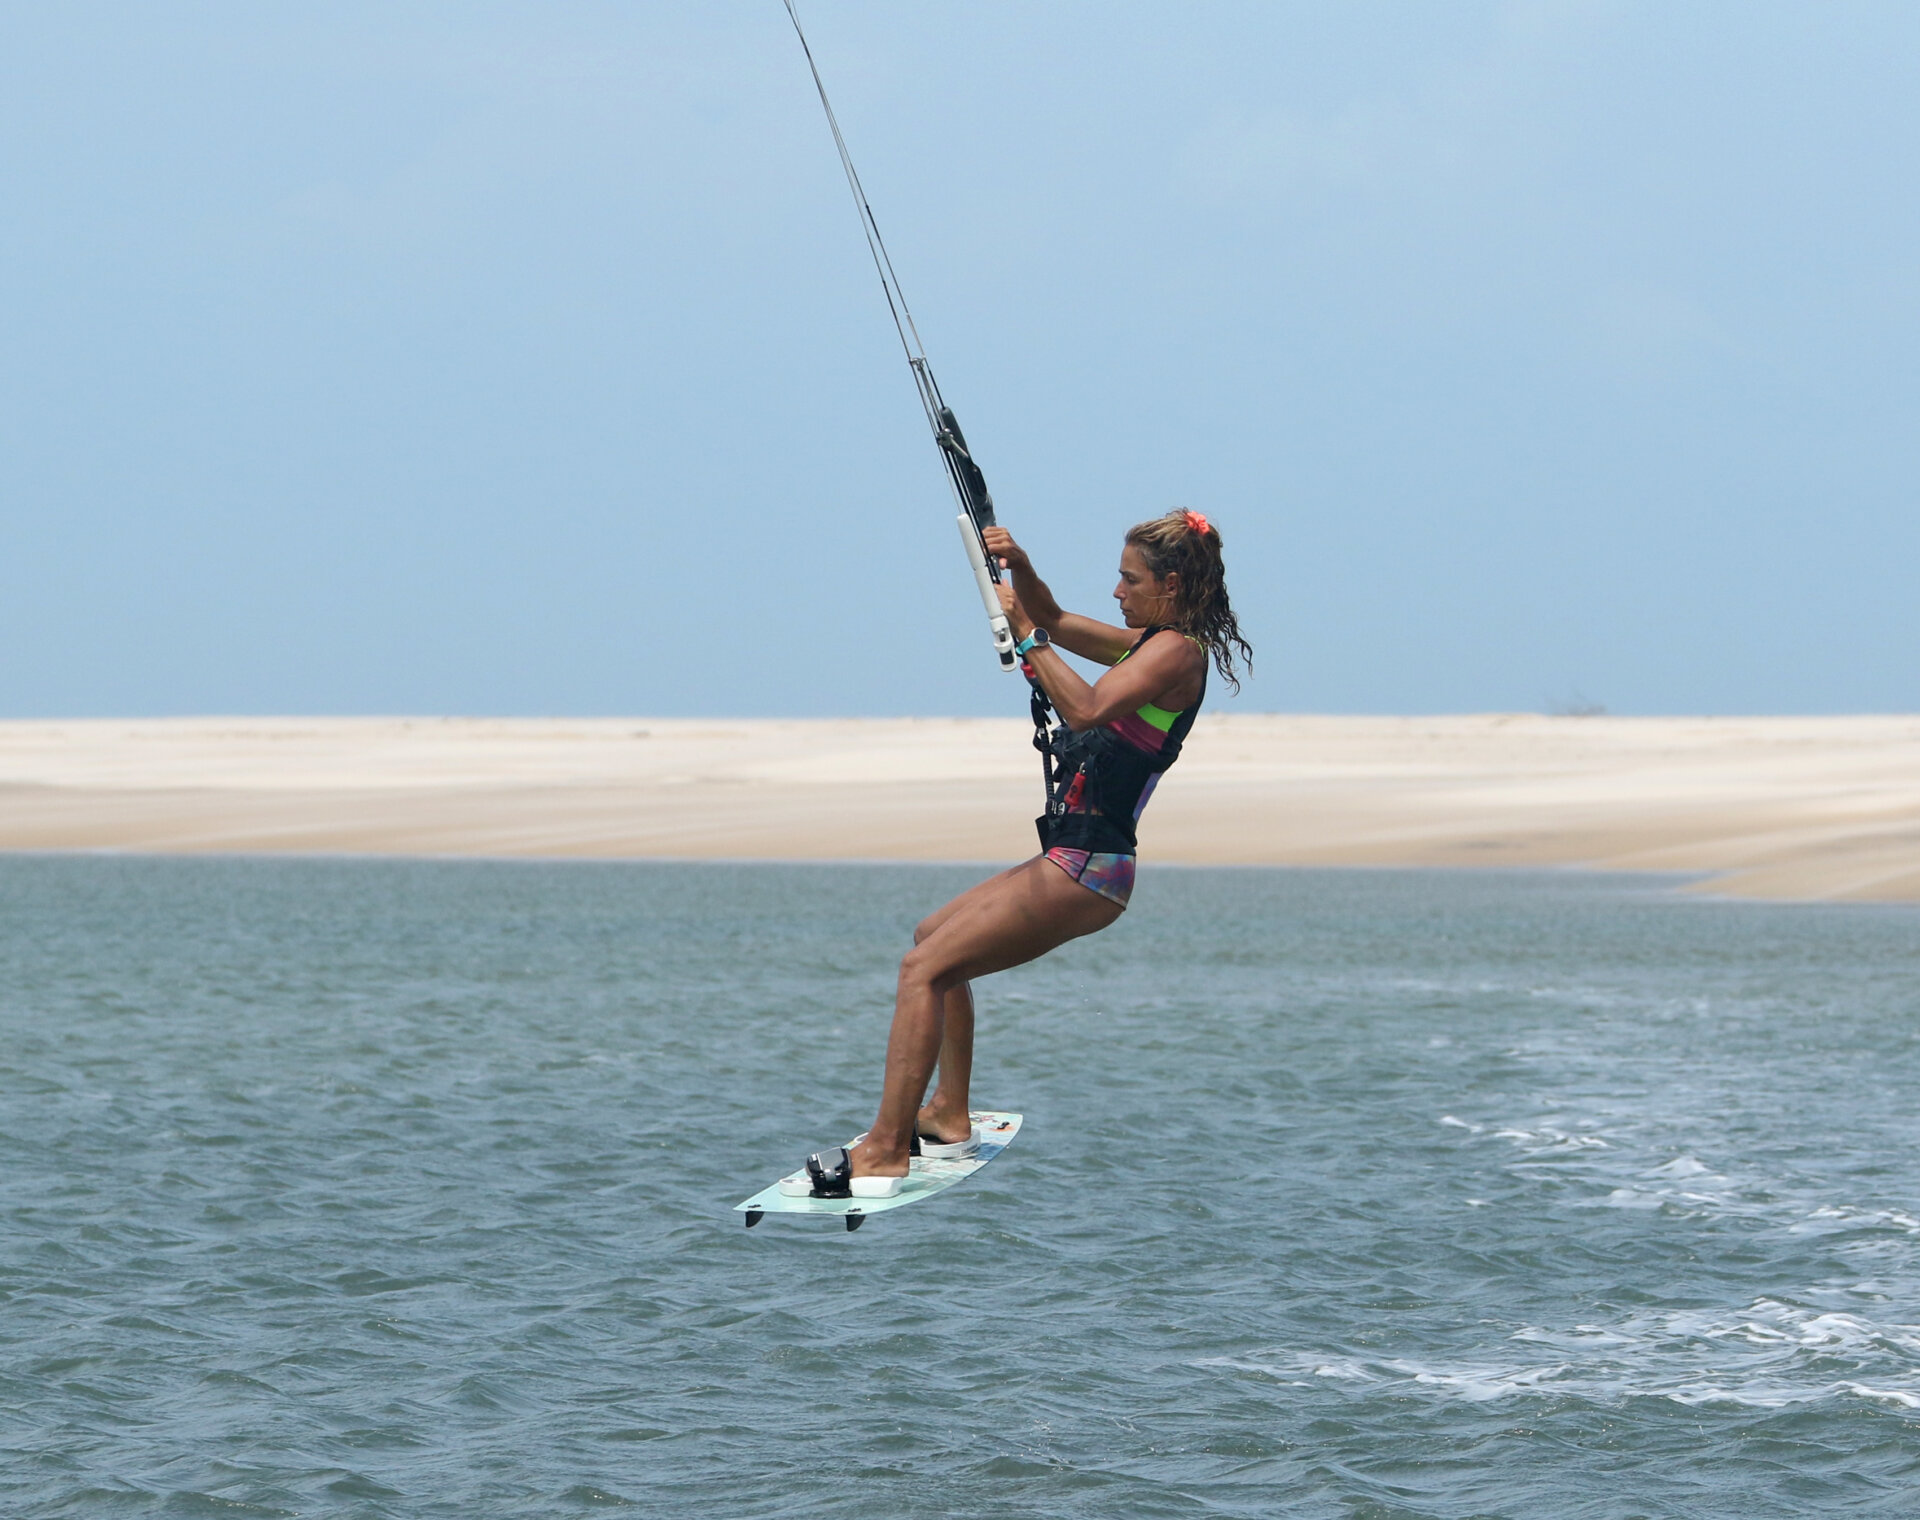
Just as per your back roll, your approach should be comfortable. Start on a decent upwind edge, your kite at 1 or 11 o’clock, with enough speed so that your board feels alive. You’ll need some power, as you want to get airborne without having to force it. Position your hands on either side of your centre line, butting up against it. This will deter your kite from moving too fast once you release your rear hand. When the coast is clear and you’re feeling good, it’s game on. Karine has a good edge, she’s riding comfortably upwind, hands are centred, and her kite is at 11 o’clock with enough power to get her off the water easily.
Send and Out Pic B.
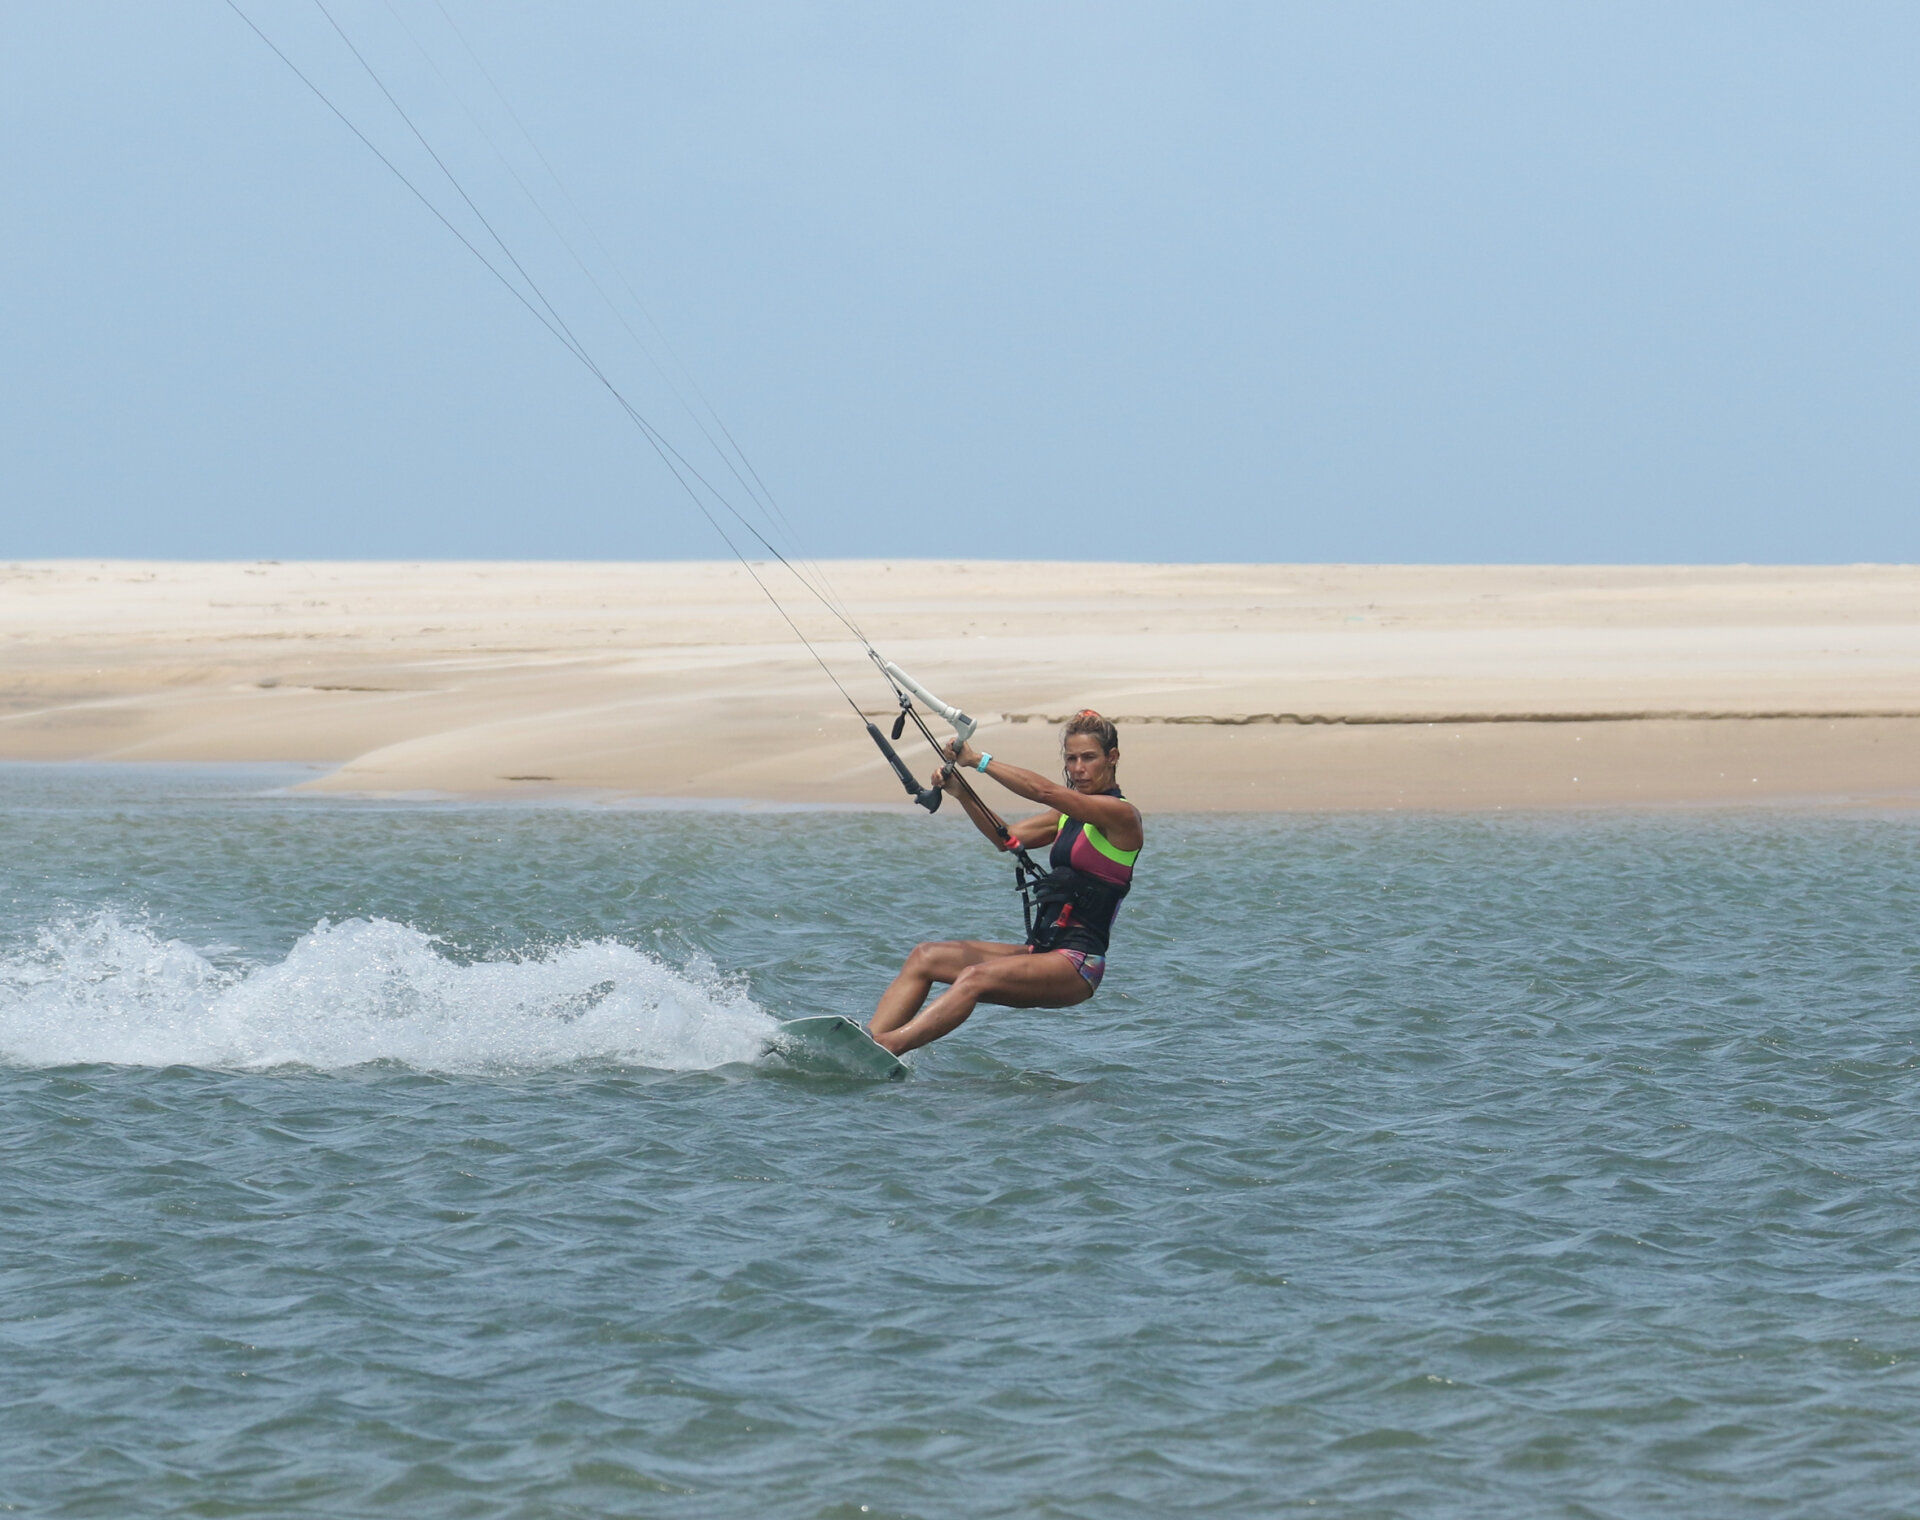
Now you’re ready, it’s time to get yourself off the water. Assuming that you’ve got enough power, you want a gentle progressive send so that you can feel where the kite is. In short, don’t wang it! It’s so important not to lose your edge when back rolling, and a gentle send will help here as the kite lifts. Feat the bar out to follow the sweet spot to hold your edge. AND keep your rear leg stiff! Don’t let it soften, otherwise you’ll carve upwind and rotate too quickly. Here, Karine has sent her kite, aiming to move it to just past 12, and as it pulls, she eases the bar out to hold her edge.
Level Pic C.
At the end of your send and whilst you’re still edging. It’s imperative that you do this before take-off. If you do, the kite won’t move back any further, and you already know where it is before getting airborne. The result is that there is no need to multitask as the kite is already sorted. You can rather concentrate all your efforts on the grab. You can see that Karine has levelled her bar to stop the kite; she’s still edging, her back leg is still stiff, so all her edge is in the water and she’s heading upwind, not carving up.
Take Off Pic D.
It’s all about rotating slowly, to give you plenty of time for the grab. This means less carve and less head. By keeping your rear leg stiff, you’ll avoid carving up, but by feathering the bar out, you will naturally turn up a tad further. From here, you can fully extend, kicking yourself up and off the water, turning your torso as you do. Once you’re extending, you can pull the bar in for extra lift. All your effort should be in the up rather than around. Looking at Karine, you can see that she is taking off whilst still looking over the bar and at the camera:) This guarantees that she’ll rotate slowly. Her bar is pretty level, and her kite is hanging just past 12, giving her both lift and float.
No Rush Pic E.
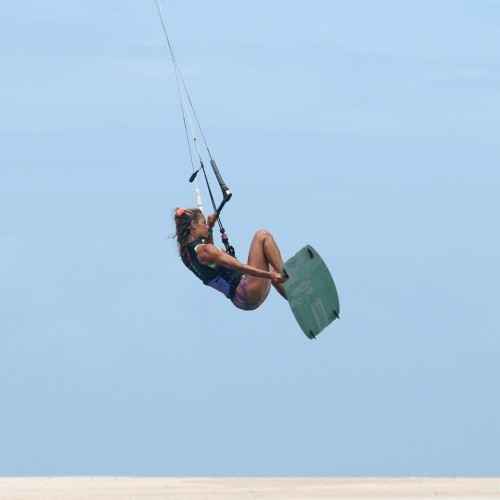
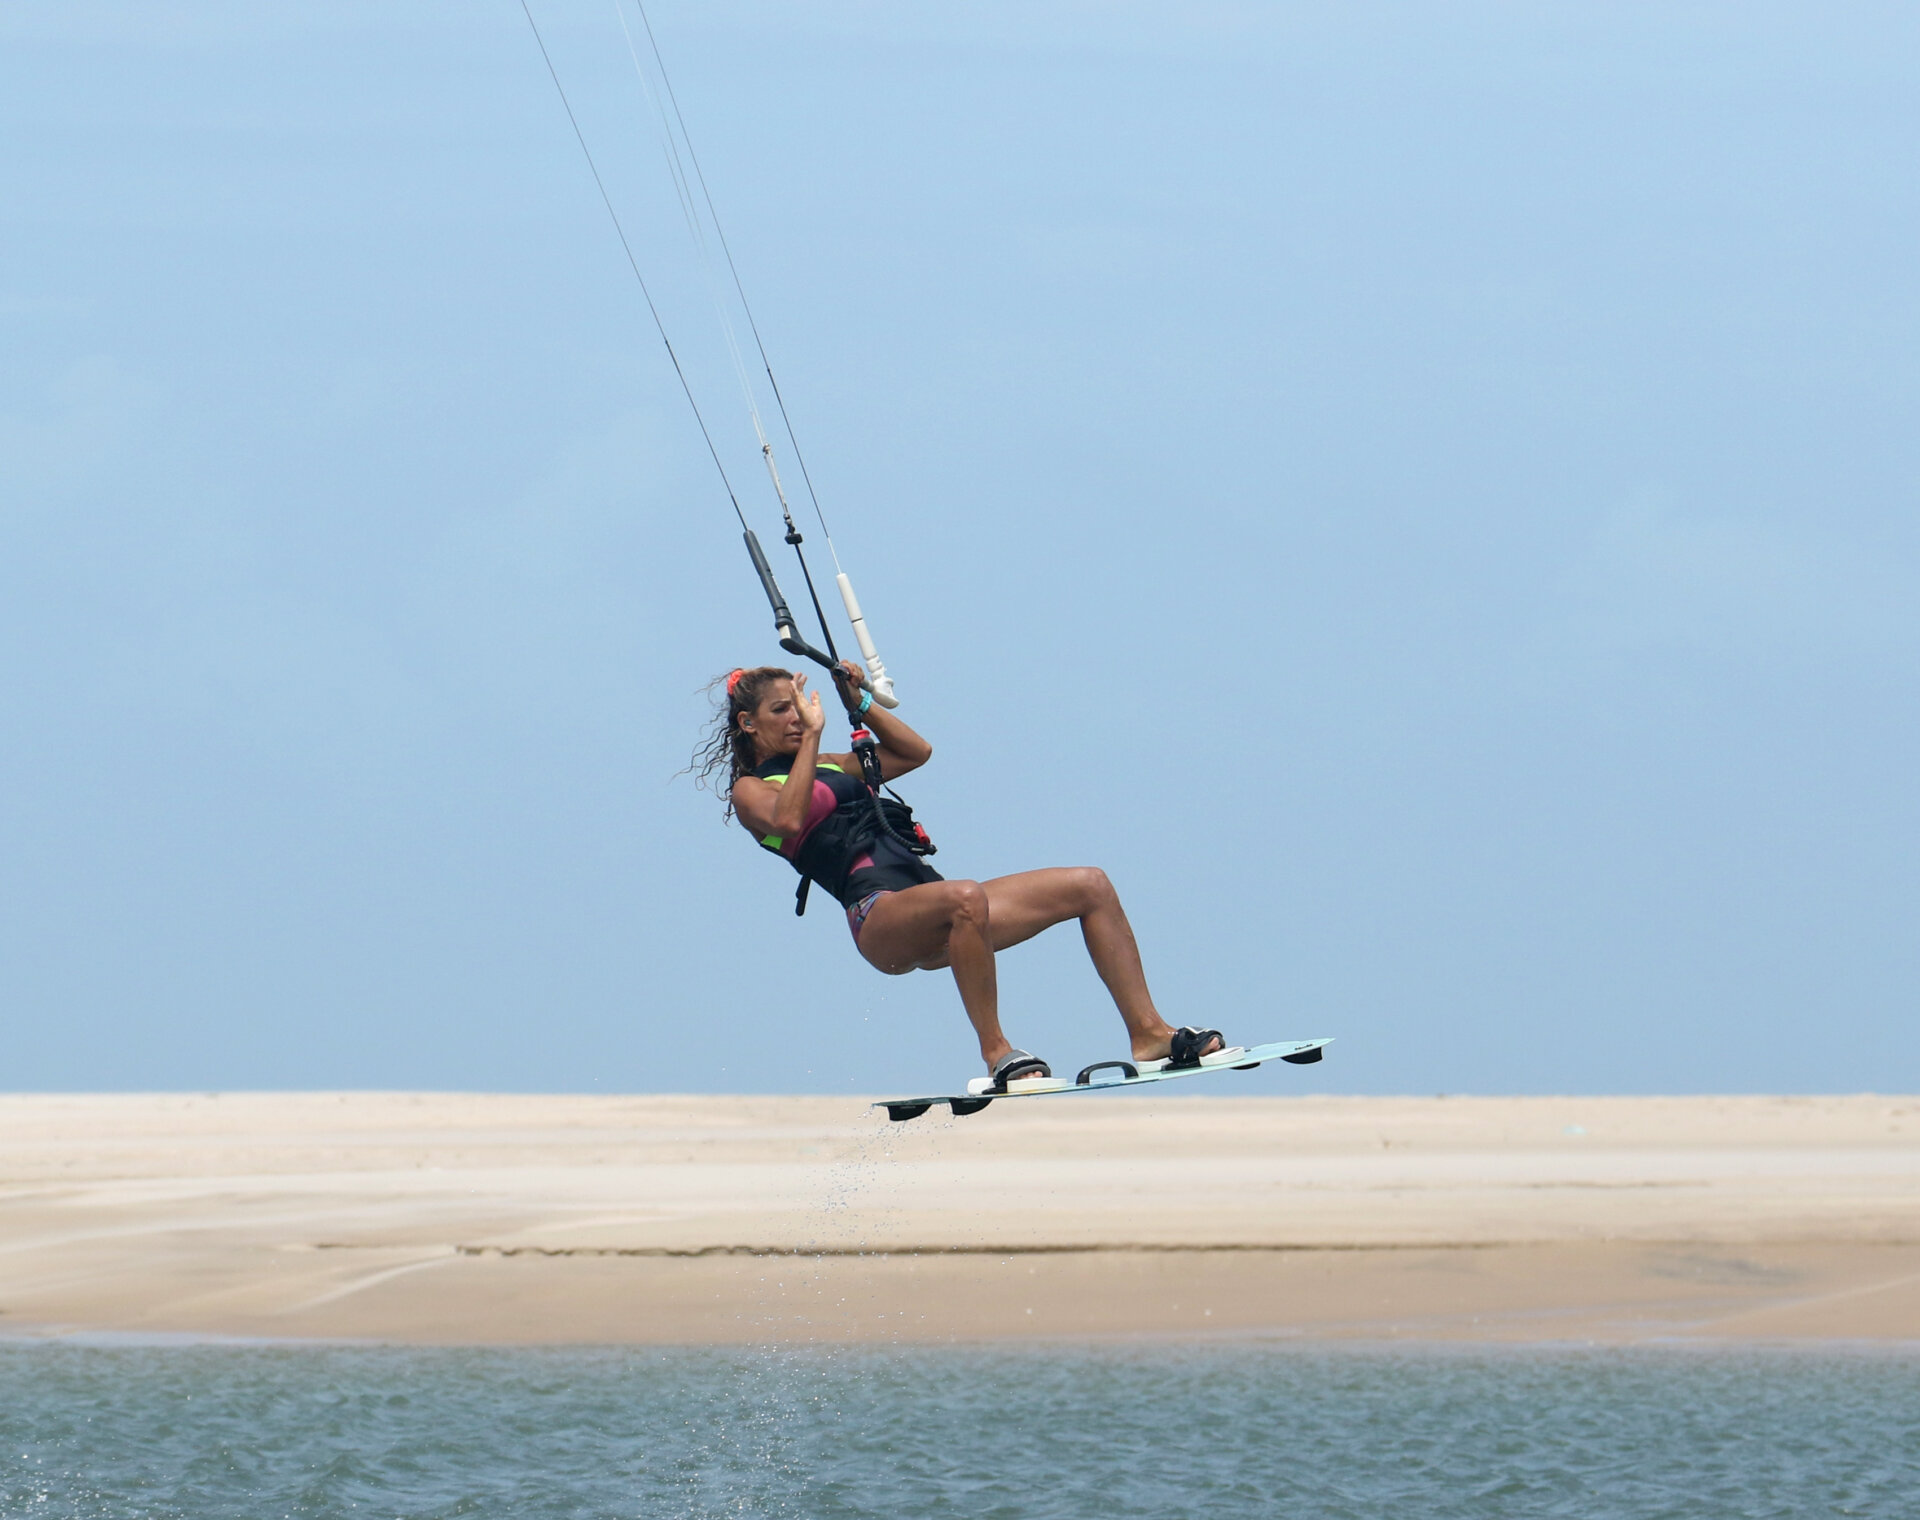
Even though this part is all about grab preparation, we prefix it with no rush because the take off is crucial. Even though you’ll want to get your knees up and start searching for the grab, extending fully into your back roll will give you more time. Your mantra is to make sure you extend before bringing everything together. Once you’re up and rotating, happy with your kite position and feeling the float, you can bring your knees up, and if you’re feeling balanced, you can release your back hand. Make sure you’re supported by your harness; don’t support yourself with your front hand. Ease the bar out a touch from take-off towards the sweet spot so that the kite doesn’t steer forward, you want it waiting just past 12, as then you won’t feel any unwanted pull, but you’ll still have the support. You can see that Karine is lifting her knees in front of her to bring the board nearer and has released her back hand with her bar on the sweet spot. She’s focused her eyes on the prize, her heel side fin area.


Grab It Pic F.
If you’ve taken off without carving, you should find that you can get the grab by the halfway mark, upwind. Bring your knees up as far as possible and extend your arm to grab the board. As much as an effort as it may seem, try to lift the board to you, rather than reaching down towards it. If you reach down, you’ll likely need to compensate by holding yourself up on your front hand, which could get the kite moving forward, which is not what you want. Karine has her knees and board up high so that she can easily reach the heel side edge near the fins. You can see that her bar is on the sweet spot, not pulled in, and she’s focused on her target for the grab. You can hold the grab for as long as you feel comfortable, but at first, it’ll likely be over in a jiffy.
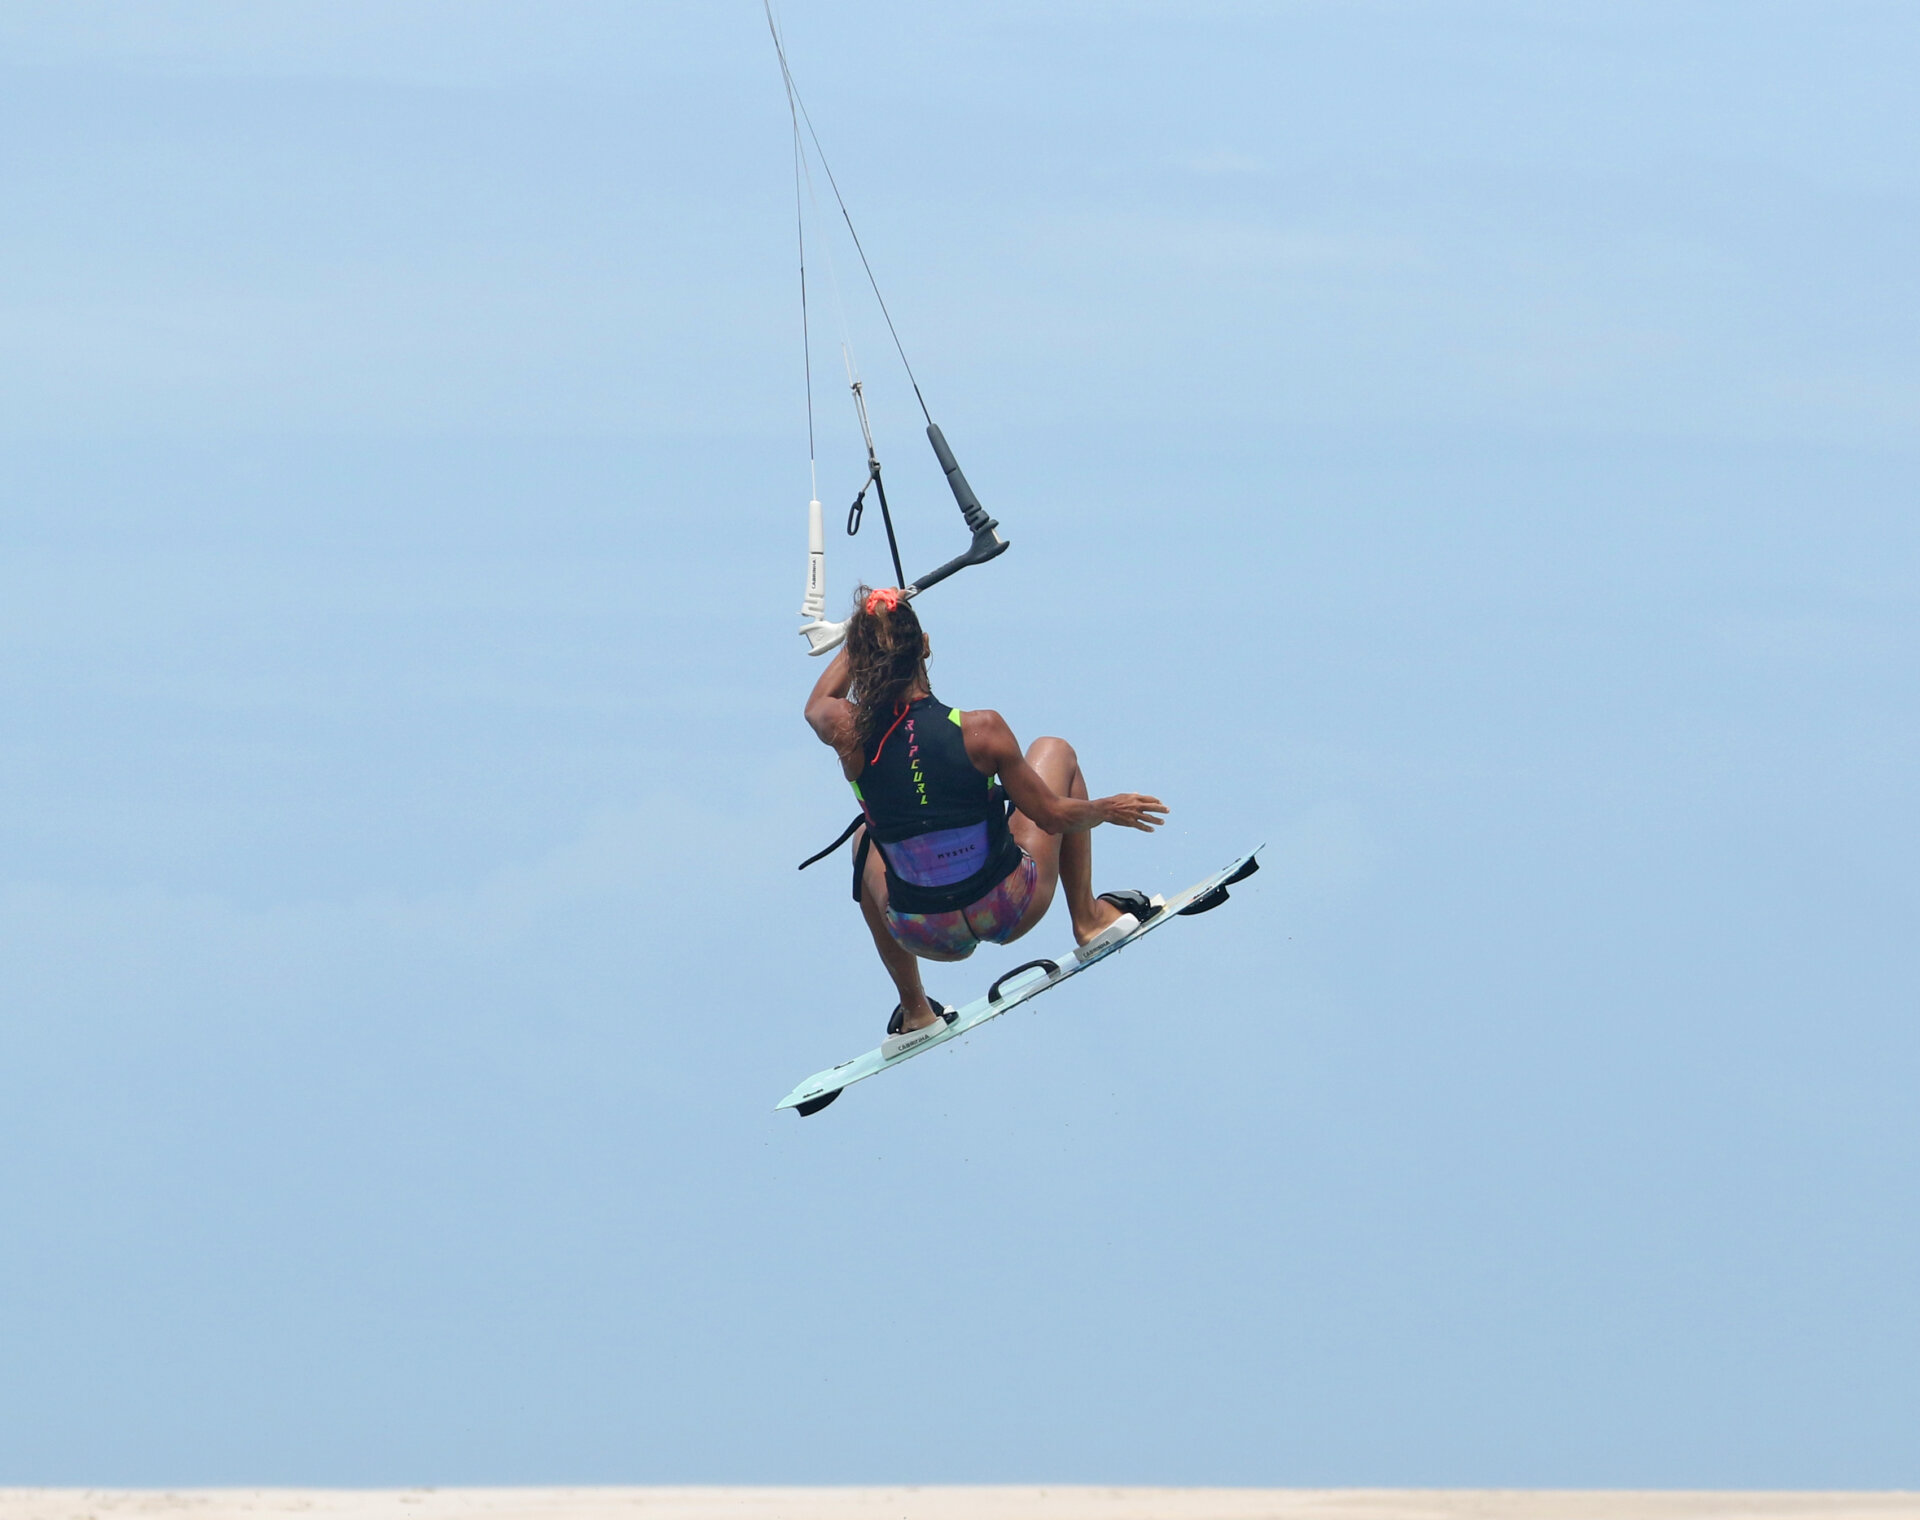
Coming Down Pic G.
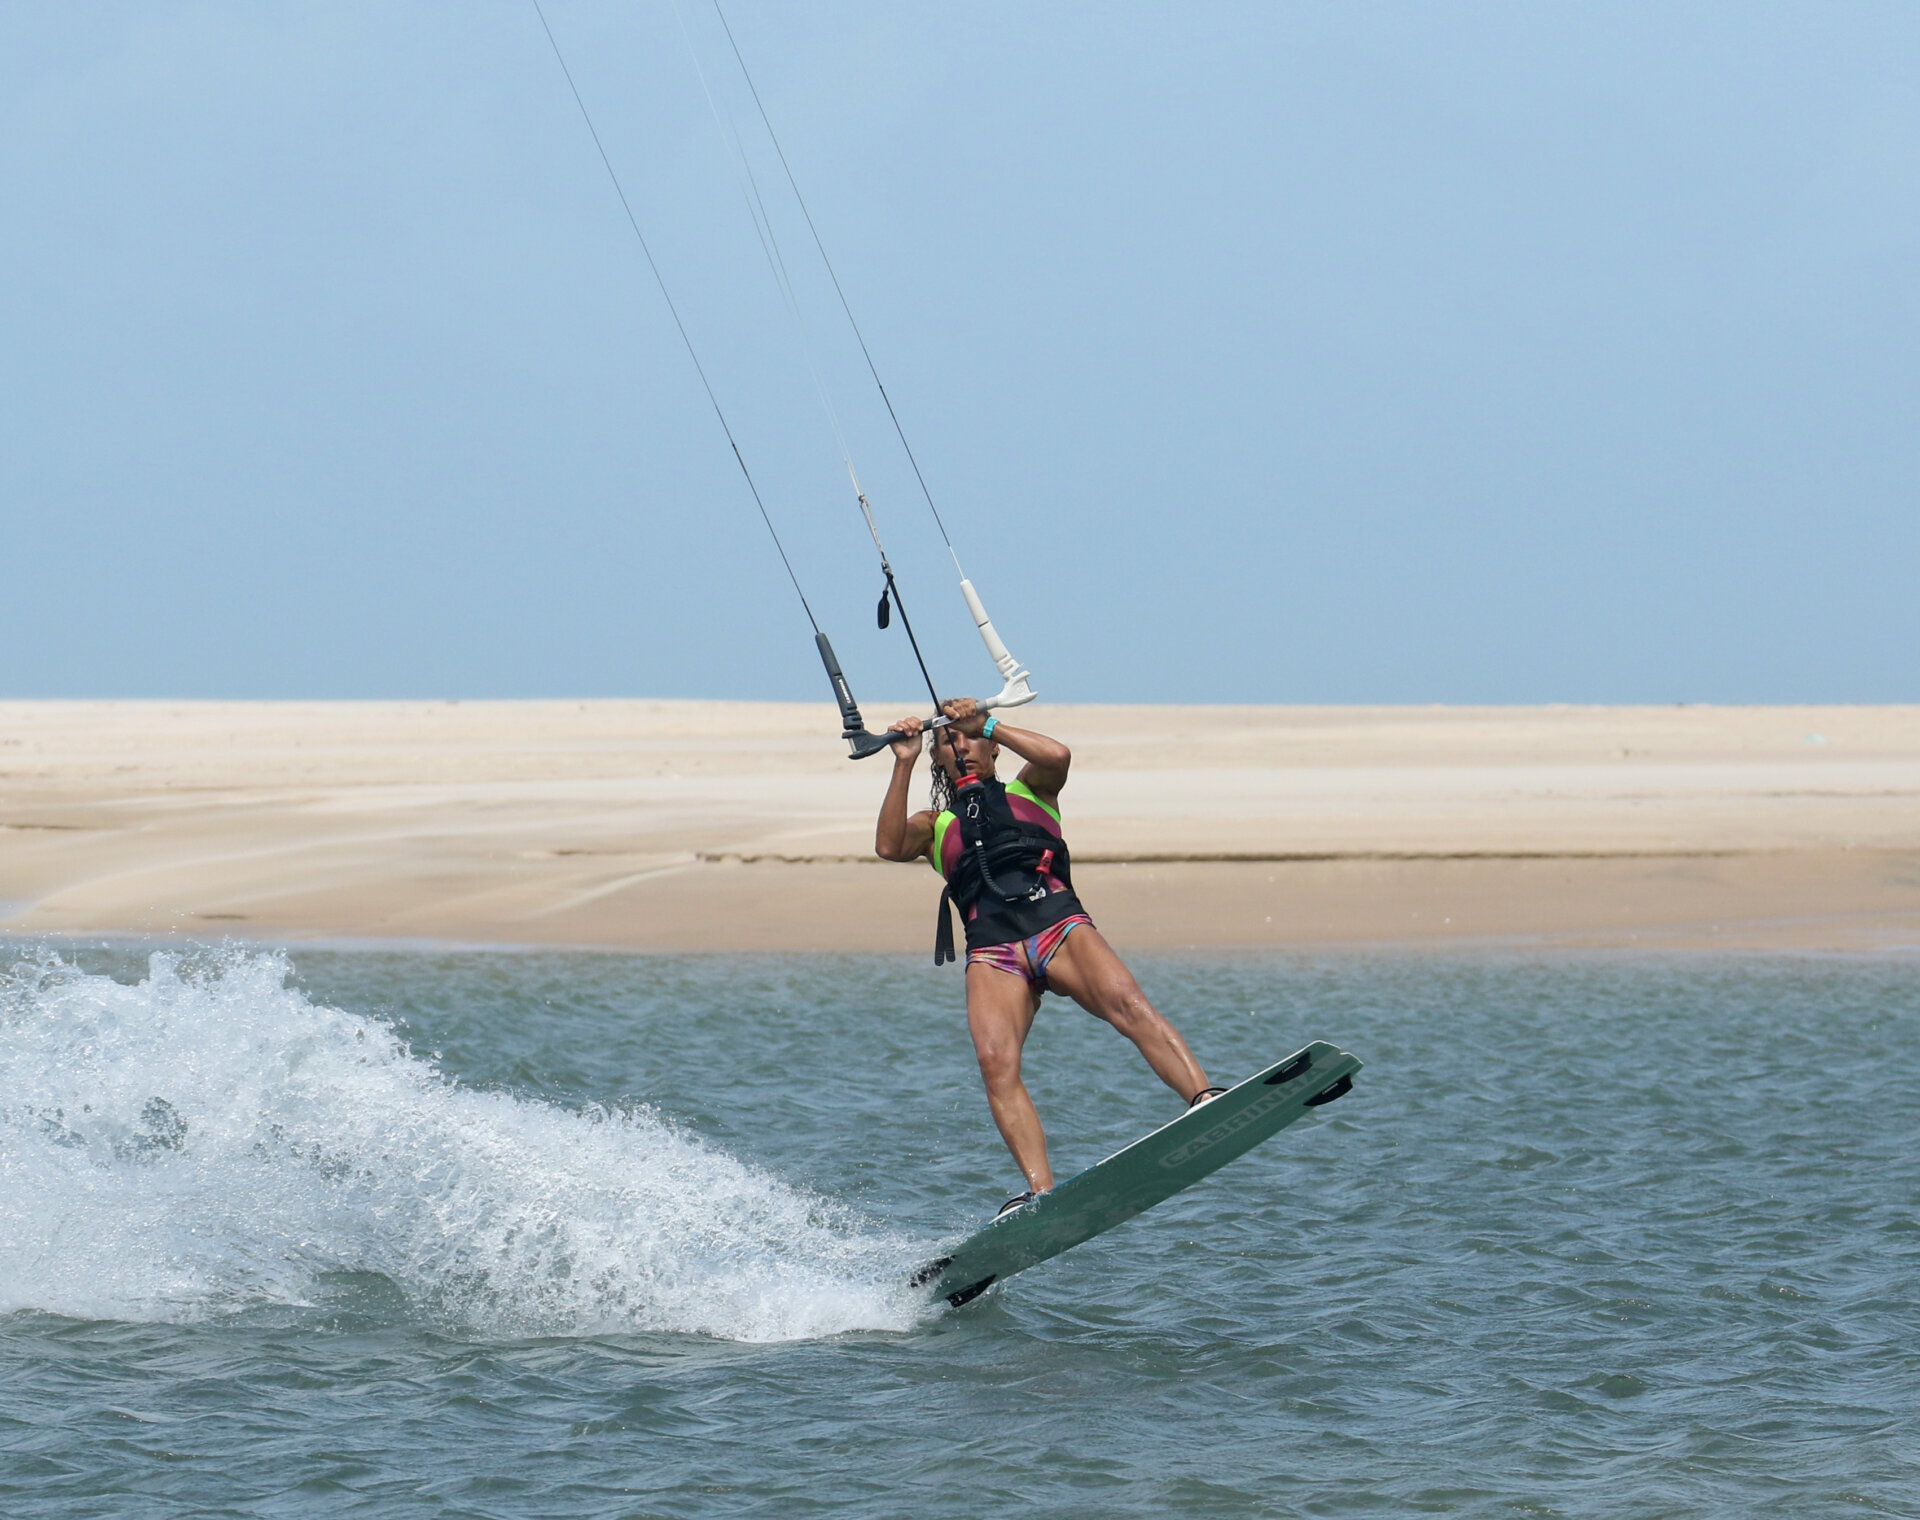
As soon as you feel yourself start to descend, it’s time to think about getting yourself around the rest of your rotation. The first and most obvious helper is your head. Turn it to look over your shoulder to encourage yourself around. The second is your kite. If you steer it slowly forward from its static position, it will pull you around as it moves. You can do both of these, either whilst holding your grab or having already released it and replaced your rear hand on the bar. Here Karine releases her grab whilst steering her kite forward with her bar out on the sweet spot. She gently turns her head to look over her shoulder to see where she’s going.

Dive Pic H.
Once you can see where you are and judge where you’ll land, dive your kite. As the kite comes over 12, it will lift and hold you for a soft landing. Look slightly downwind towards where you’ll land and drop the board underneath you, ready for touchdown. Karine is looking where she’ll land, her kite is diving, and she’s twisting her hips to point the board into the wind.
Touch Down Pic I.
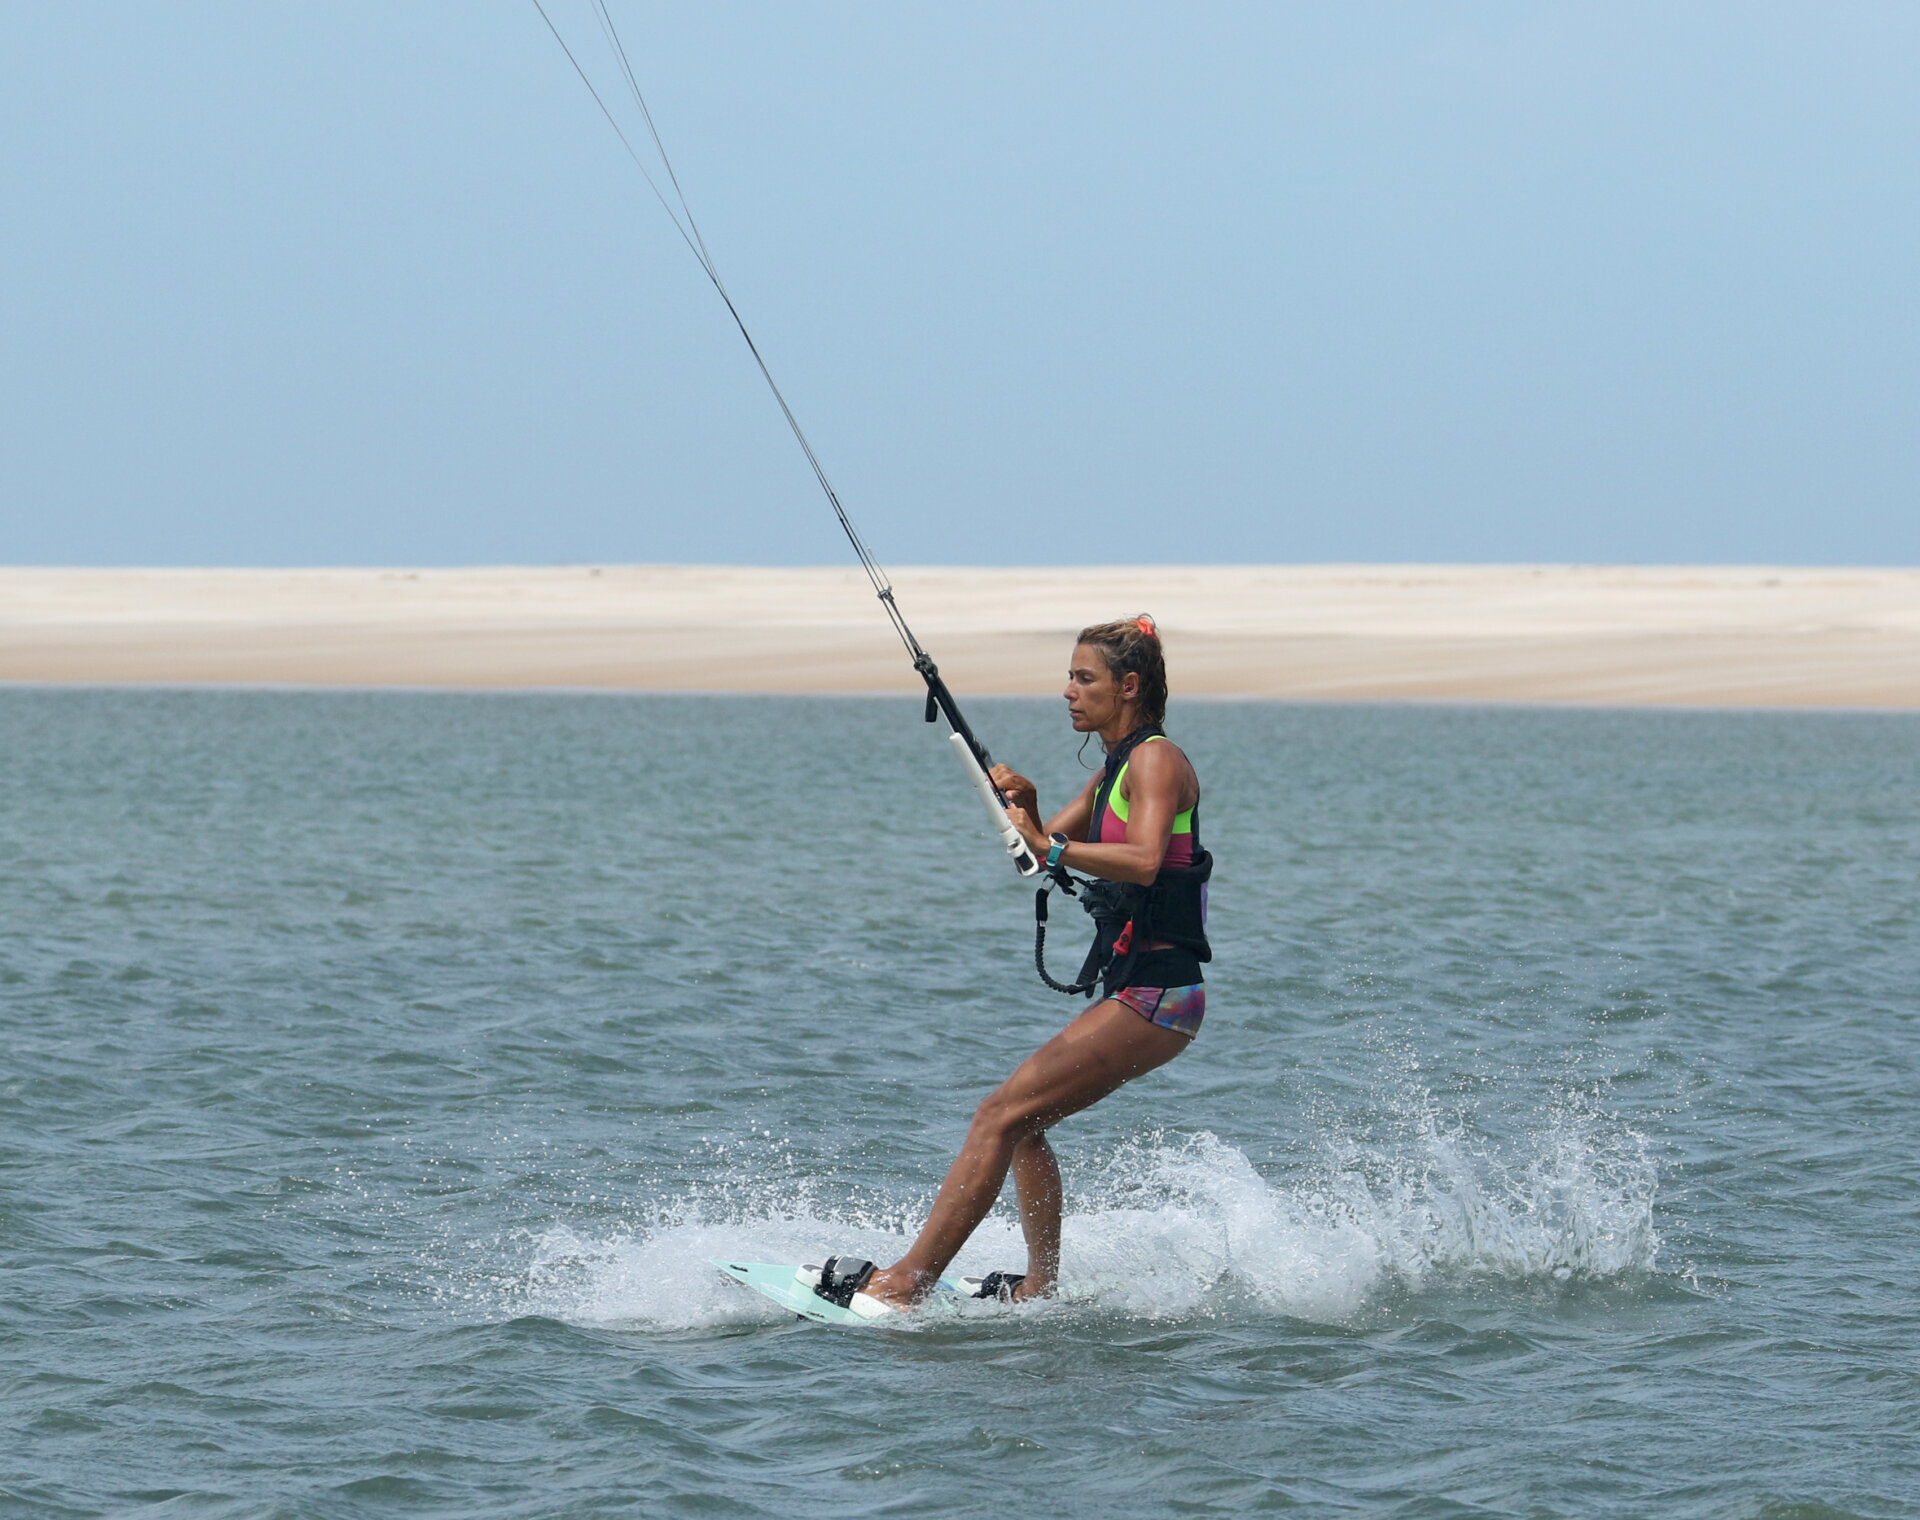
You can aim for a tail-first downwind landing with your board down and legs extended. Land over the board and make sure that you’re balanced before carving back onto your edge and steering the kite out of its dive into the new direction of travel. Et voila, Karine stomps the landing over her board before heading up, getting comfortable and untwisting her lines with a bar spin.
Top Tips
- It’s not always possible, but if the conditions allow you to avoid using a small kite, a larger, slower kite can inspire more confidence. You’ll have more float without needing height, and it’ll feel less twitchy when holding the bar with only your front hand.
- If you concentrate on only one thing, it is to rotate slowly. You can always throw your head and dive the kite to get yourself around, or even float down gently, facing backwards. However, if you spin uncontrollably, you’ll struggle to squeeze in a grab and struggle even more to land it. Time is your friend.
- Right, have a look at the sequence for a step-by-step walkthrough and check out the video for the real-time visuals.
Common problems
Rotating too fast. Bet you didn’t see this one coming! We’ve already mentioned it, but if you feel like you’re coming around before you’ve even got your knees up, you need to slow the rotation. Keep your back leg stiff and avoid leaning back into your takeoff. Extend up and around, and you’ll have oodles more time.

If you’re struggling to reach the grab, it’s tempting to lean back as you raise the board. However, by doing so, you’re tilting yourself away from it. Keep your head up and work those abs. Try lifting your back knee more than your front knee, as this will angle the board’s tail closer to you.
Keystones
- Upwind, comfortable
- Send, Out and Level
- Up and Around
- Head centred, knees up, grab
- Turn your head and steer the kite forward to finish.

This technique article was in Issue 111 of IKSURFMAG.
Related


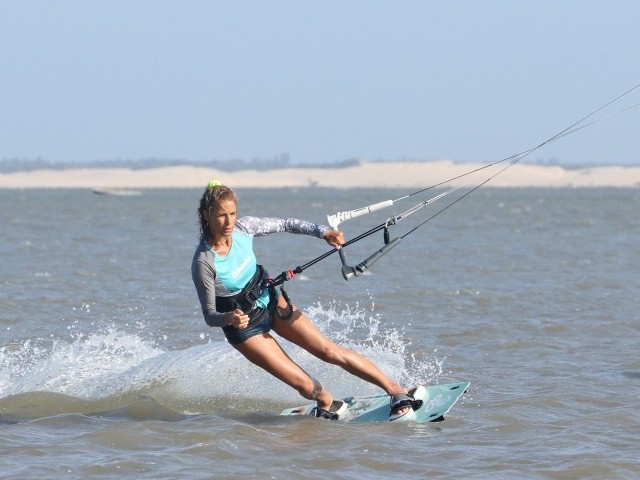
By Christian and Karine
Christian and Karine have been working together as a coaching team, running improver to advanced kitesurfing clinics since 2003.
