Industry Insight: Control Bars
Issue 69 / Wed 13th Jun, 2018
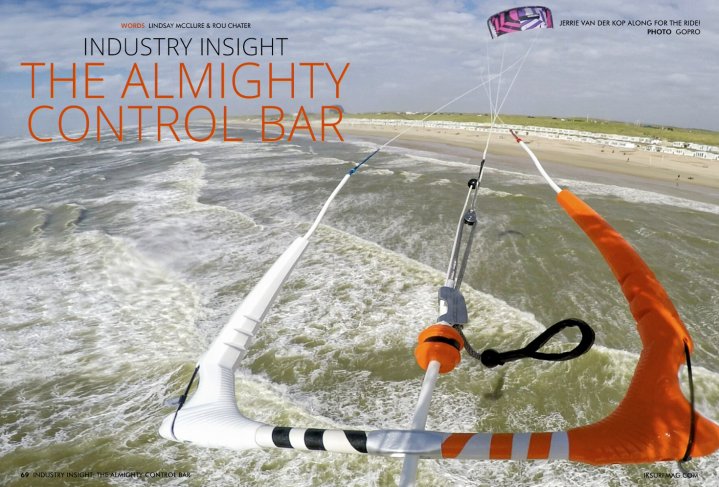
Without a control bar, you aren’t going to get very far. It may not be the most glamorous piece of equipment, but the control bar may have the most significant impact on whether your session is a hit or a miss. Read on to get informed about bar length, line length, connection choices, depower options and more!
Possibly the most overlooked and underrated bit of equipment in your quiver, the control bar is the connection to your kite, it channels energy to your board. It’s so much more than just a bar and some lines… We delve deep into the science, with some of the most knowledgeable designers on the planet!
Do you remember when you first learned to kite? Can you remember being at the shop picking out your first kites, asking all sorts of questions about different sizes, shapes, features and colours? And the bar, “Umm, yes. One bar please.”


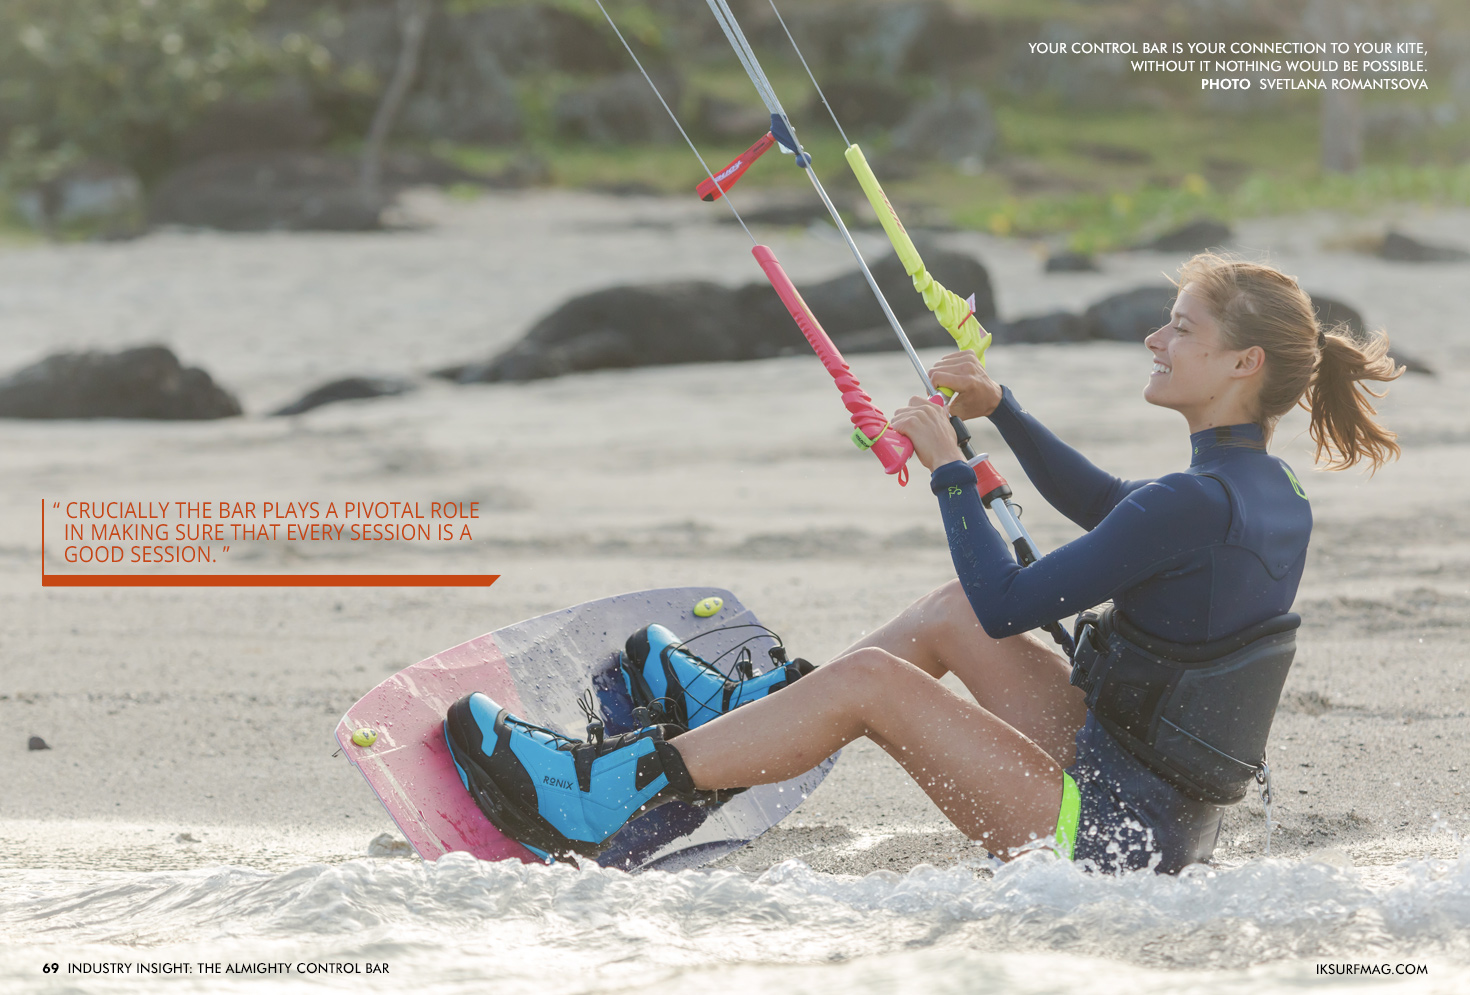
Crucially the bar plays a pivotal role in making sure that every session is a good session. Generally overshadowed by boards and kites, the bar may be the most essential piece of equipment in your quiver.
Designers know that the bar is the one piece of gear that cannot malfunction and must work 100% of the time. Bars get covered in salt water, sand, put under tremendous stresses and strains during wipeouts and they also offer us our safety escape route should things go wrong.
We can’t overstate how important a good control bar is; they should be well maintained and kept in good order, not only will it save your life in a pinch, it will also make your kite fly properly and is the conduit for energy to pass through you and into your board. In short, it’s where all the magic happens!
CrazyFly Sales and Marketing Director Juraj Bukovcak takes things a little further: “All parts of the bar are very carefully designed to be extremely strong and durable and at the same time. They have to work in harsh conditions from -30 degrees when snowkiting to +80 degrees when the bar is stored in a car during summer.”
“It has to work with sand or frost all over it as well. At the same time, customers expect it to be simple to use, durable and suitable for all riding styles. Plus, it cannot cost too much, because it is just a bar, right? To sum it up, the most challenging part of designing a bar is to design all the parts and select all the materials in a manner that will be safe for the customer to use no matter what the conditions are.”


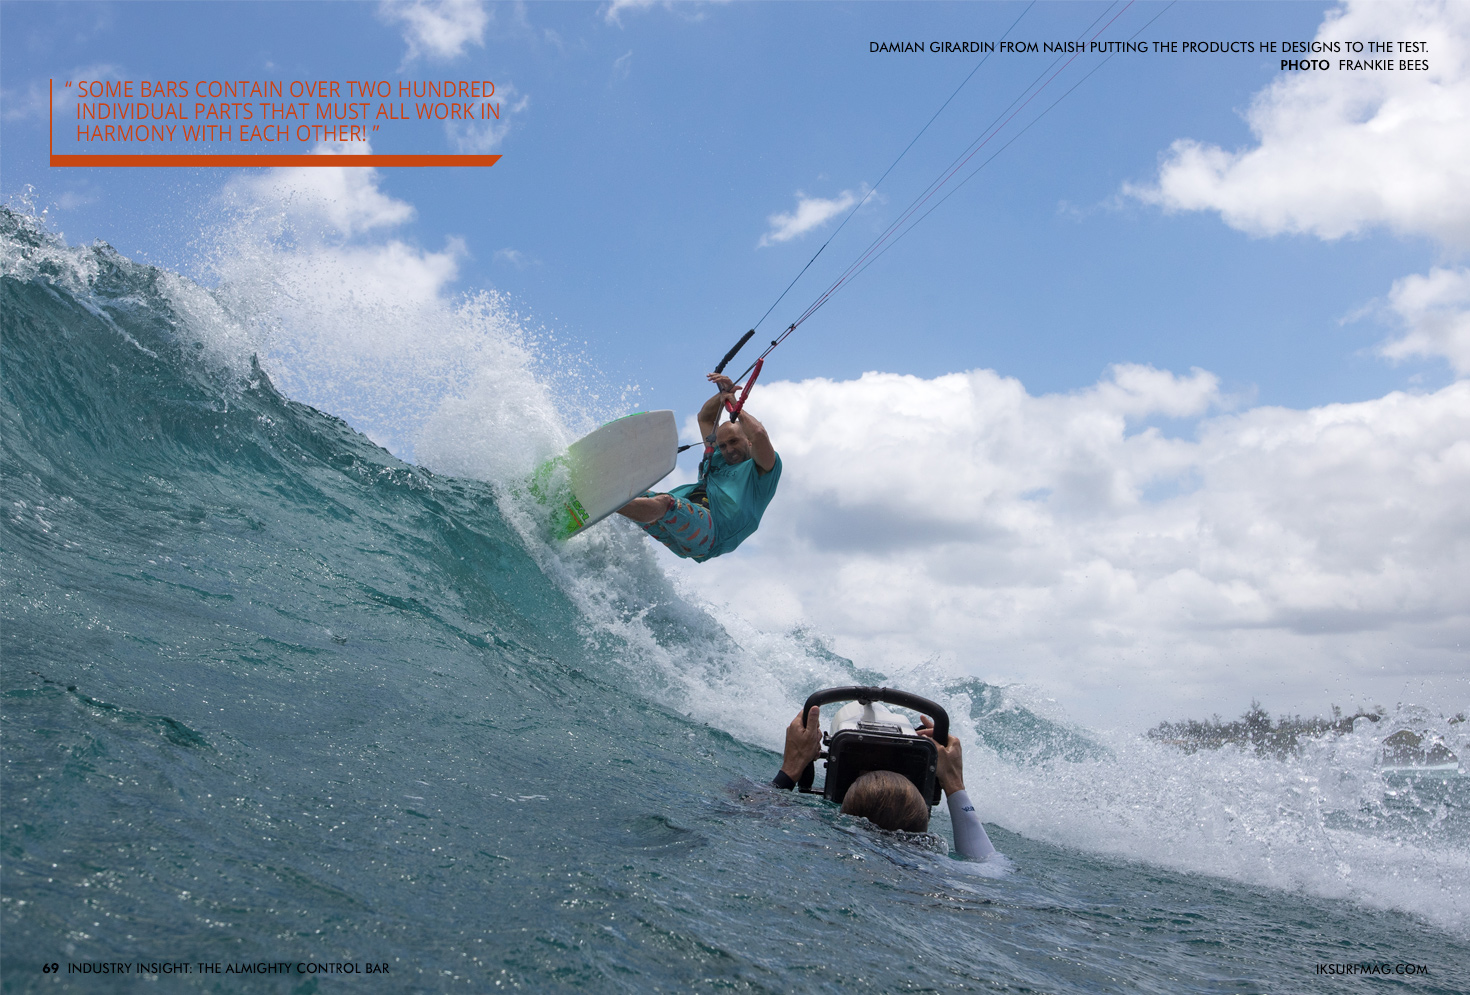
Let’s take a more in-depth look at the decisions designers are making as they create new control bars. We’ll break each component of the bar down, and trust us; there are lots of parts to put together, some bars contain over two hundred individual parts that must all work in harmony with each other!
Loop – AKA the Chicken Loop. The name originates from when four-line kites were first introduced in the early 2000’s. The most hardcore riders would ride two-line kites with a fixed loop, and the “chickens” would ride four-line kites with a chicken loop that allowed them to depower the kite.
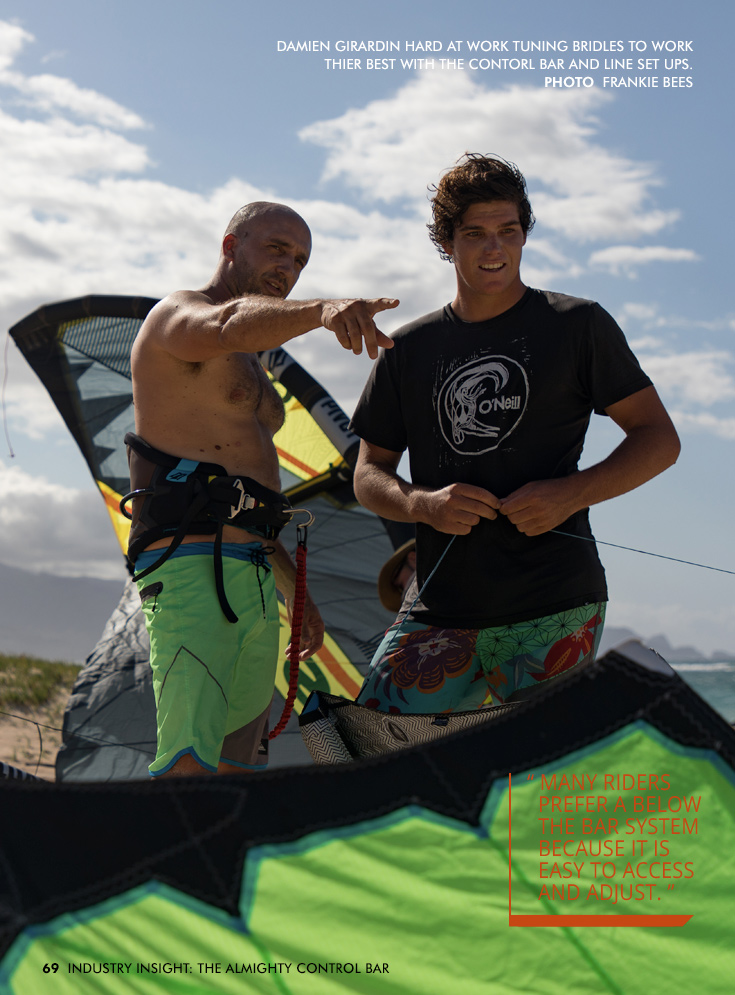
“Back in the late 90s, we had no quick release. Later on, we had garage-made quick releases made out of plastic tubes, bent wire and plastic balls. To me, the most important feature of a bar and control system is the safety. The release must work in any situation, and it must be intuitive.” - Damien Girardin – Naish.
A highlight reel of the developments in loop design would go something like this:
Chicken loop allows the kite to be depowered


Pull release safety systems enable the kite to be ditched at a moments notice
User-friendly safety releases allow the user to put the loop back together on the water
The push release makes your kite much less likely to release accidentally.
Is there anywhere else to go in loop technology? What could be better?
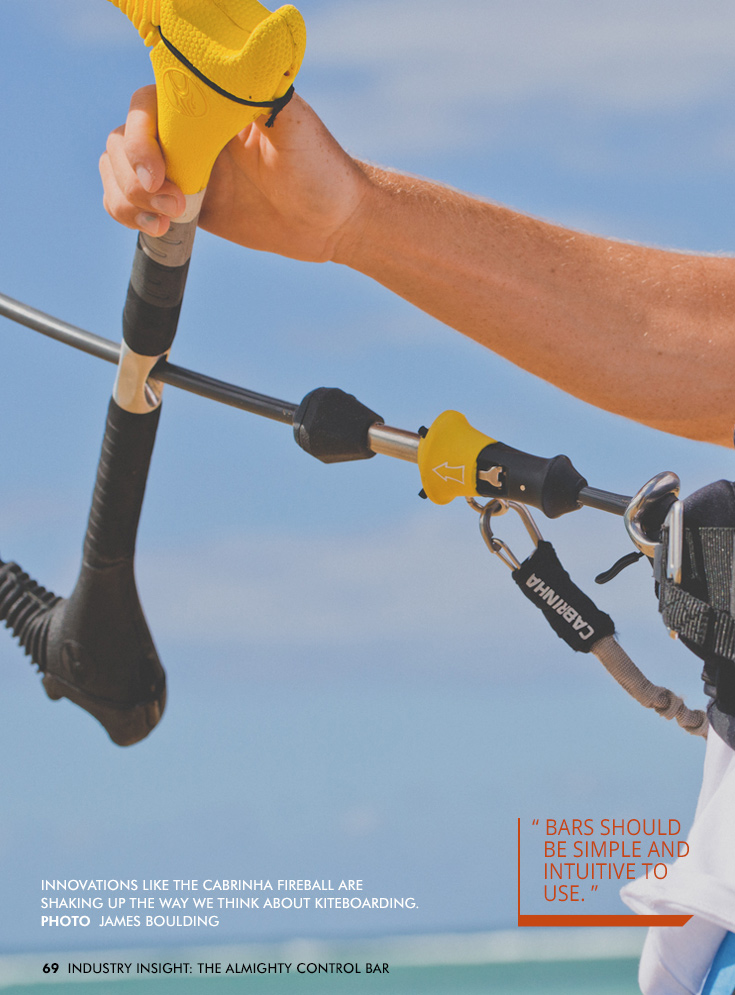
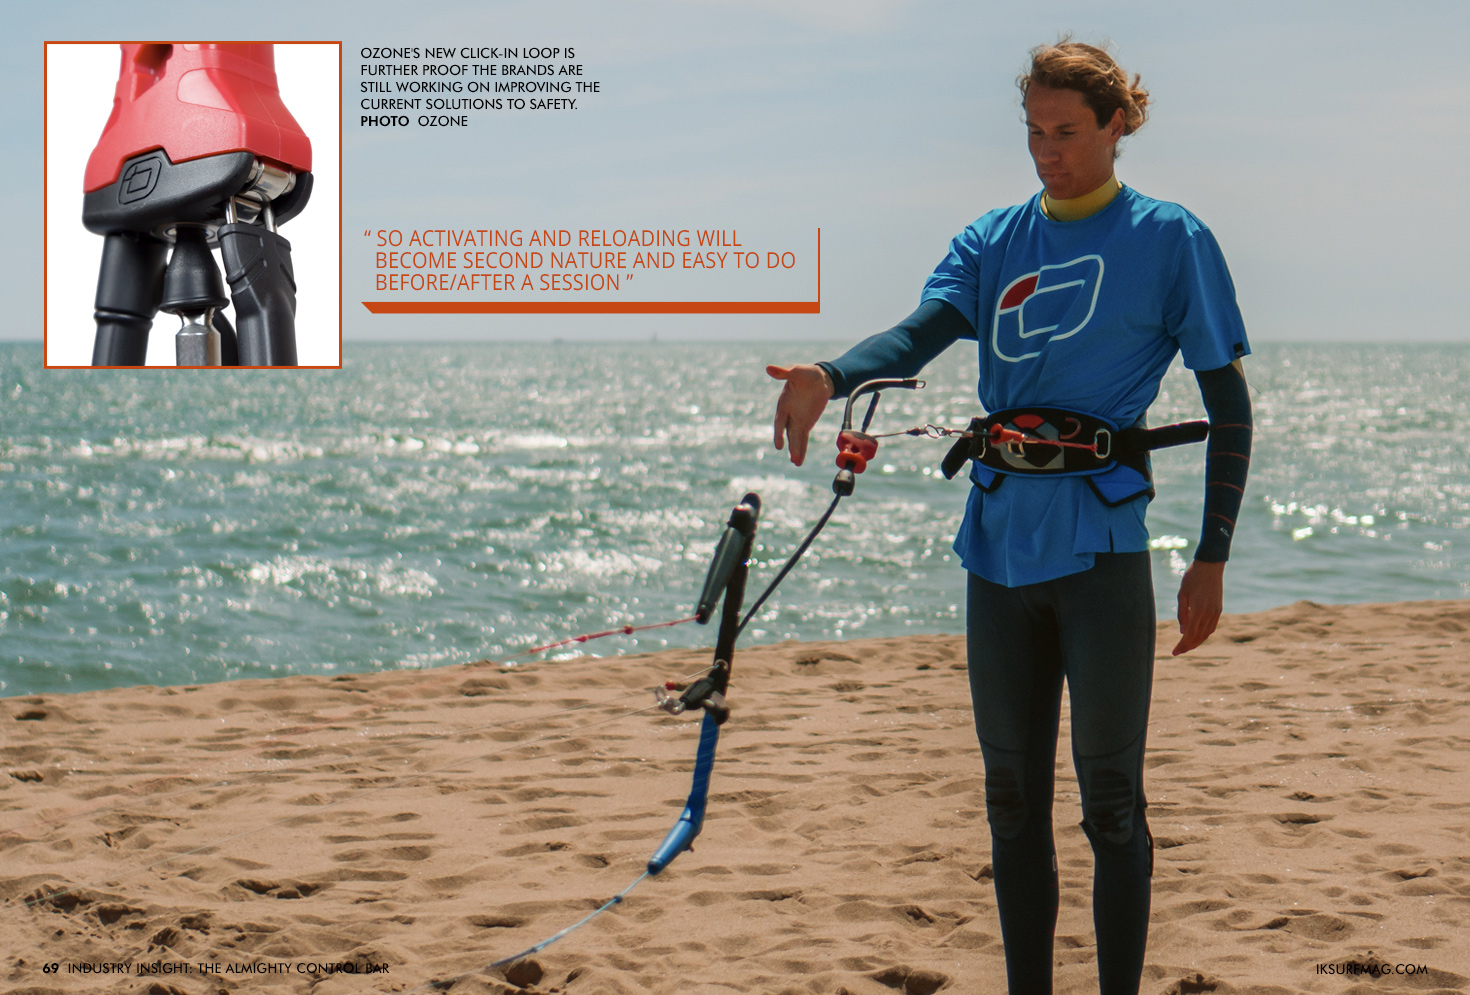
The team at Ozone Kites explained: “We believe an industry standard will become the one-step functionality on release systems, such as our Click-in Loop design. Bars should be simple and intuitive to use. We will likely see new ideas for the connection between the bar, release system, harness and spreader bar”.

The industry is working towards a universal chicken loop design that is easy to use, intuitive and works in all conditions, we’re close, but we aren’t there yet. There is a French Safety Standard that all brands must conform to if they want to sell their gear in France, which they all do as it’s a big market. However, it is a static test, that doesn’t take into consideration the extremes of our sport.
It’s better than nothing though, if the industry can come together to agree on a standard release system that is tired and tested then not only are we safer as kiters, we will all know how everyone else’s release works. When shit inevitably hits the fan, and it can happen to anyone, no matter how good you are, you have a split second to pull your safety.
The release needs to be instant, and it needs to be intuitive and something everybody can do subconsciously, if you have to think about how to activate your safety, the chances are it is already too late!
You should also regularly test your safety system too when was the last time you released it in anger? It’s good to practice on a not too windy day, eject the kite in a safe area and practice putting it all back together again. It is far better to be well rehearsed in this aspect than to try and work out what to do when things are going wrong. Just make sure you practice well away from other kiters in a safe area.
Bar Length - The standard bar length has changed significantly over the last twenty years. The first kite bars were nearly the length of a windsurfing boom, and bars have been shrinking ever since. More recently, companies began offering multiple bar lengths between 45 and 60 centimetres. Today, control bar offerings are trending toward one or two size options with adjustable lengths. I checked in with companies and riders to see if the adjustable bar is here to stay.


Karolina Winkowska offered her thoughts on adjustable length bars: “It’s a passing fad I would say. Kites these days are flying so well. I fly everything on a 17-inch stock bar, and it works perfectly for 7m to 14m kites.”
Paco Isoardi, Product Engineer from F-One, said: “People want more and more adjustability, even if they're not using it. Adjusting your bar is useful when using different size kites with the same bar. I think it's here to stay.”
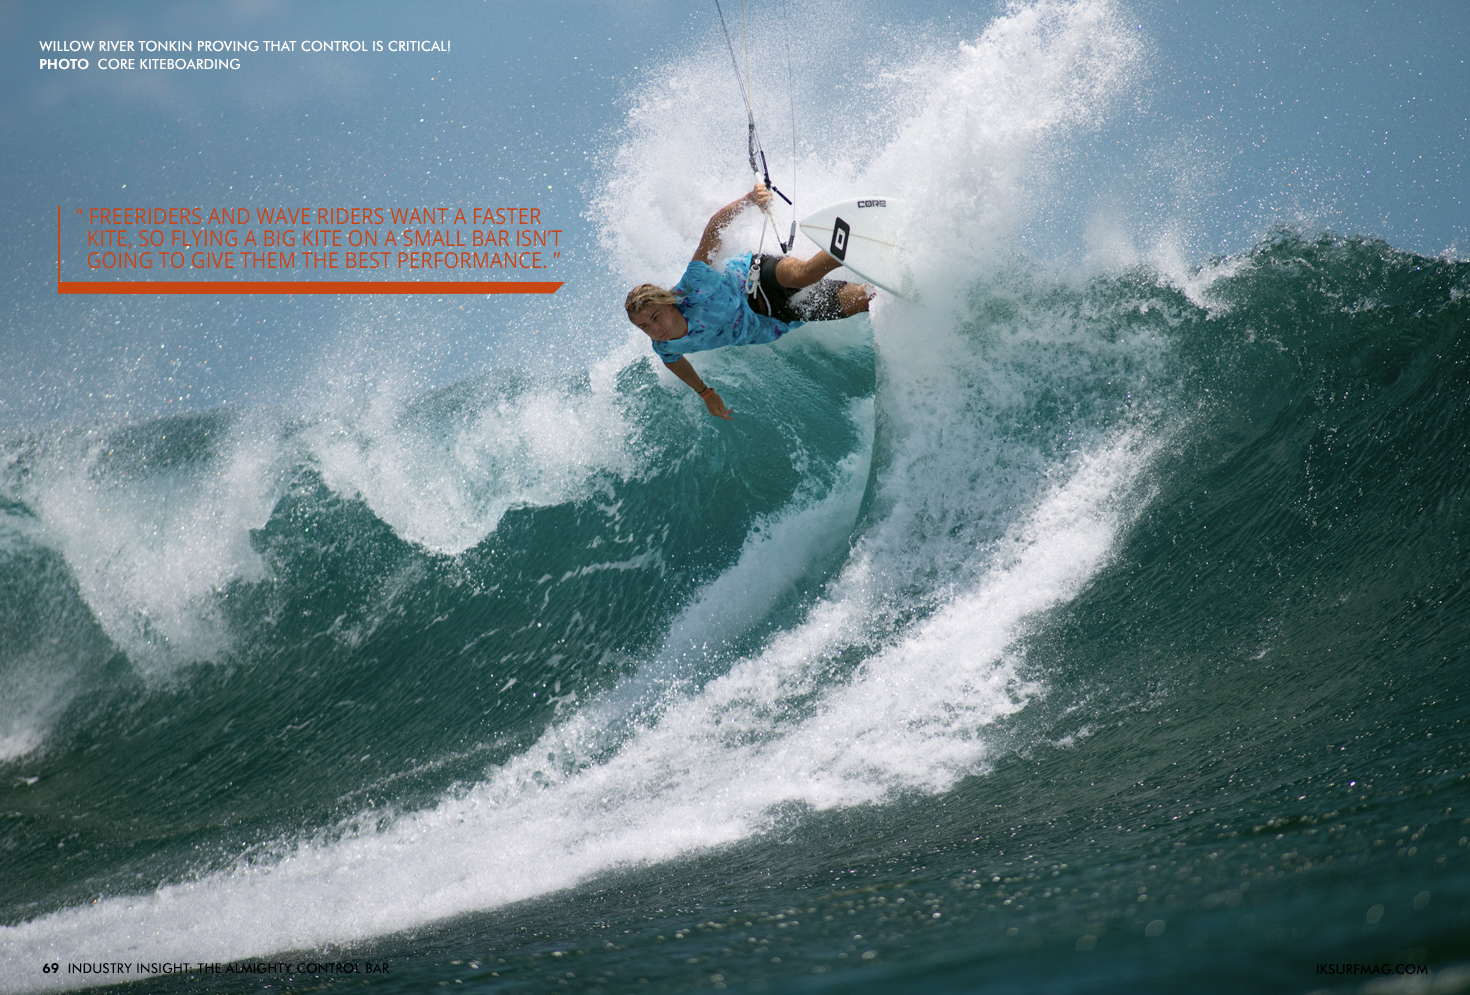
It’s worth noting that bar length comes down to each kite and also rider preference. Freestylers and wakestylers want a kite that doesn’t move too much, so a smaller shorter bar will suit them. However, freeriders and wave riders want a faster kite, so flying a big kite on a small bar isn’t going to give them the best performance. Manufacturers will always recommend a bar length, but think about how you ride and what you want to do with your kite too!
Lines - Did you first learn to fly a kite on short lines? Do you remember what that felt like? Often overlooked, changing line lengths can have a significant impact on your session. Most manufacturers are now producing bars with adjustable line lengths. So what impact does line length have on your kiting experience?
Short lines of 19 meters or less make the kite ultra responsive. The shorter the lines, the quicker the kite. The downside of short lines is a loss of power in the power stroke. Short lines are ideal for kitesurfers who want a kite that turns quickly or extreme megaloopers who want to get level with their kite when they loop.

Medium lines of 19 - 24 meters are the one size fits all line length. Most manufacturers produce lines in this length because it is a good balance of speed and power.
Long lines of 24 meters and up are suitable for the rider looking to get more power out of their kites. Adding line length can add a full kite size or two to your largest kite. Longer lines can also add height to your jumps as you can create more lift.
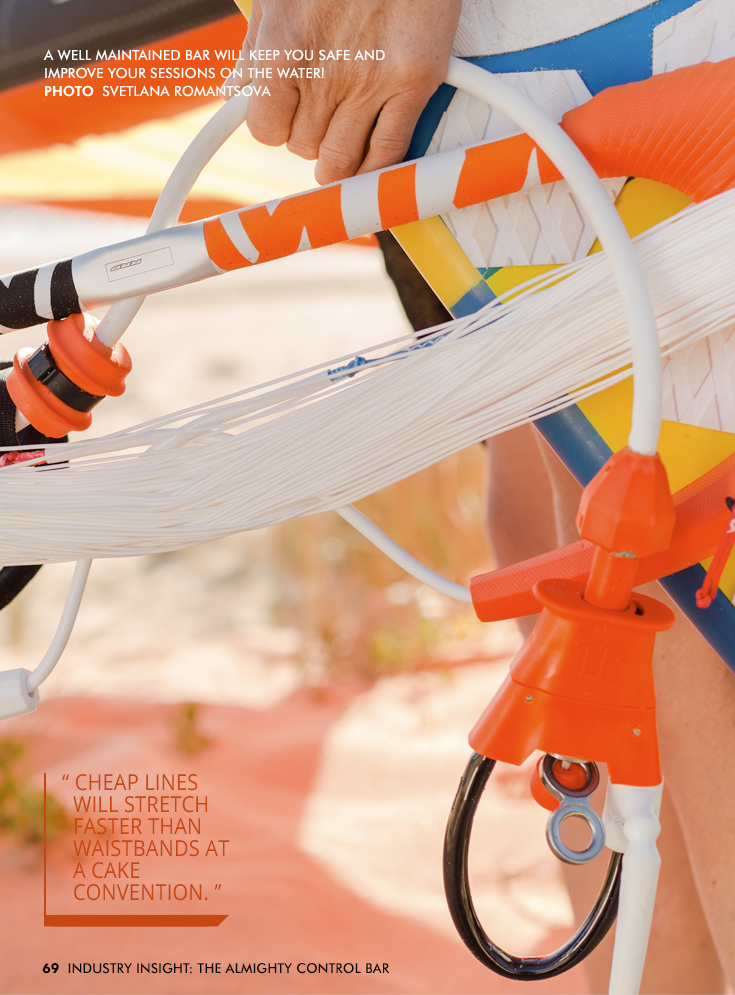
In addition to the length of the lines, you should also consider the quality of the lines too. Cheap lines will stretch faster than waistbands at a cake convention. If your bar is cheap, the chances are the lines will be cheap too. When the lines stretch or even shrink which they often do, it affects the way your kite handles. With uneven line lengths, the performance of your kite will be significantly reduced.
Lines can shrink as well as stretch, so it is always good to check your line lengths are even every few sessions. A windy session can put them under strain. When the lines are manufactured, they are pre-stretched under massive loads. As we then use the kite, the lines don’t experience such high loads, and over time they can shrink.
The rear lines are very rarely under huge tension and will often shrink a little, but can then stretch if put under loads when kite looping for instance. Your front lines tend to shrink or stretch in unison as they are usually under similar pressure most of the time. So many riders overlook this aspect of tuning the kite and miss out on having gear that performs at it’s best.
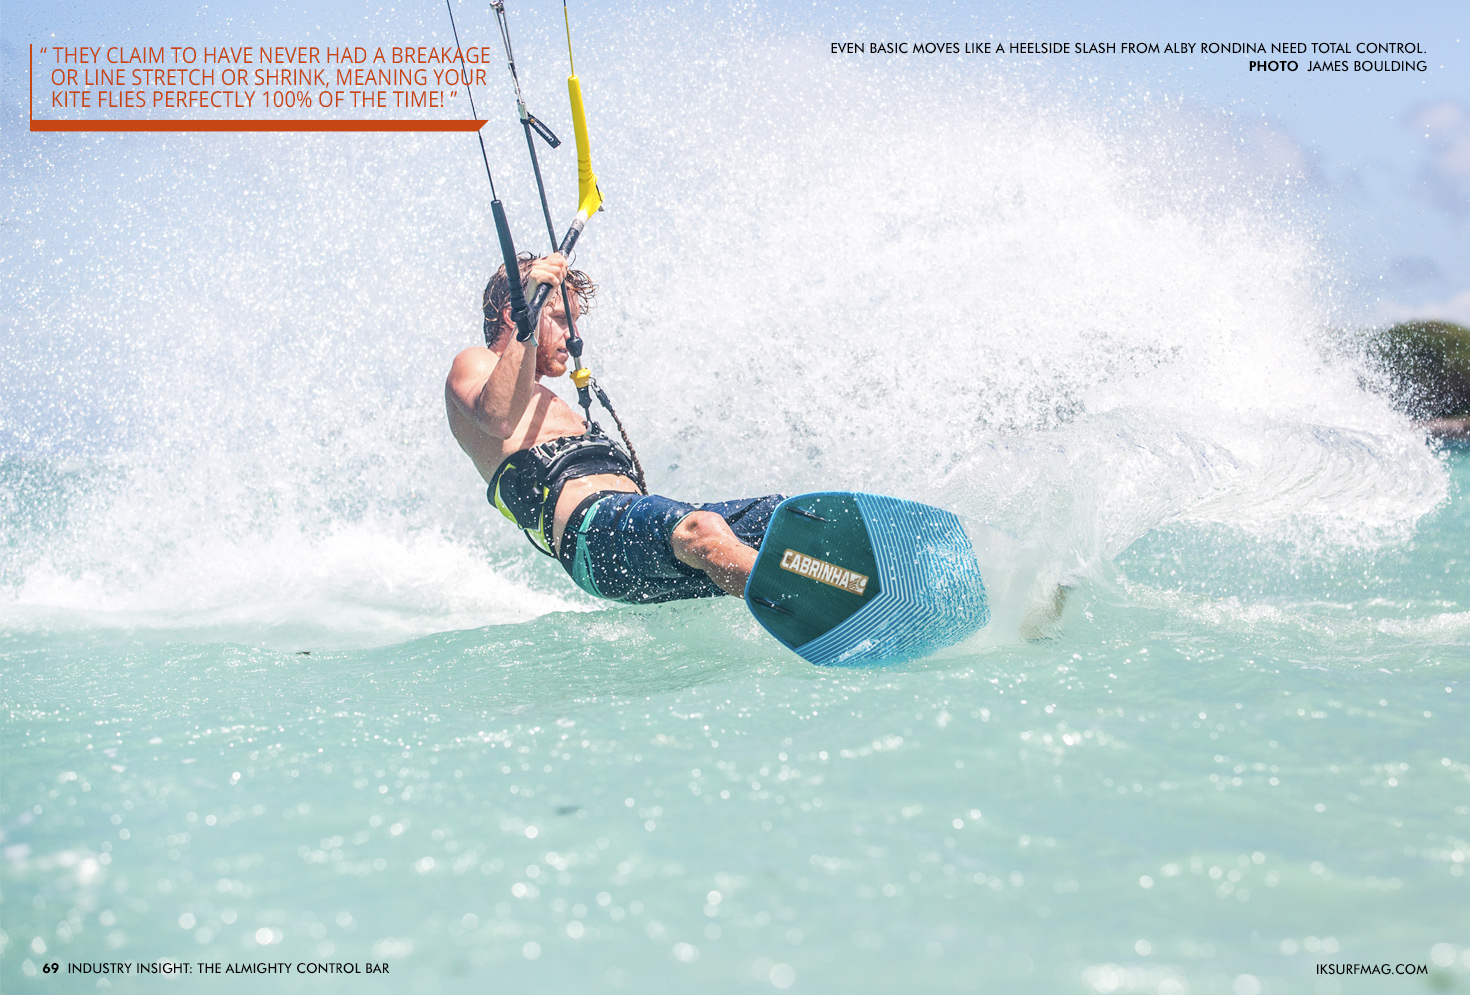
Imagine spending a heap of cash on a car, only to fit the most rubbish tyres that are old and worn; it will drive terribly. Look after your lines and your kite will perform so much better. RRD have a unique solution to this issue with their Rigid Thread Lines. At first glance they look like a standard woven line, however, what you are looking at is a protective sleeve that encases a series of unidirectional fibres, similar to fishing lines.
As the fibres aren’t woven together, they can’t shrink or stretch as it’s the weave that gives and shrinks on a standard line. RRD have been using these lines for over eight years and are unique in doing so. They claim to have never had a breakage or line stretch or shrink, meaning your kite flies perfectly 100% of the time! “The quality and cost of the bar is 80% in the spectra and the way the lines are woven.” - Roberto Ricci of RRD
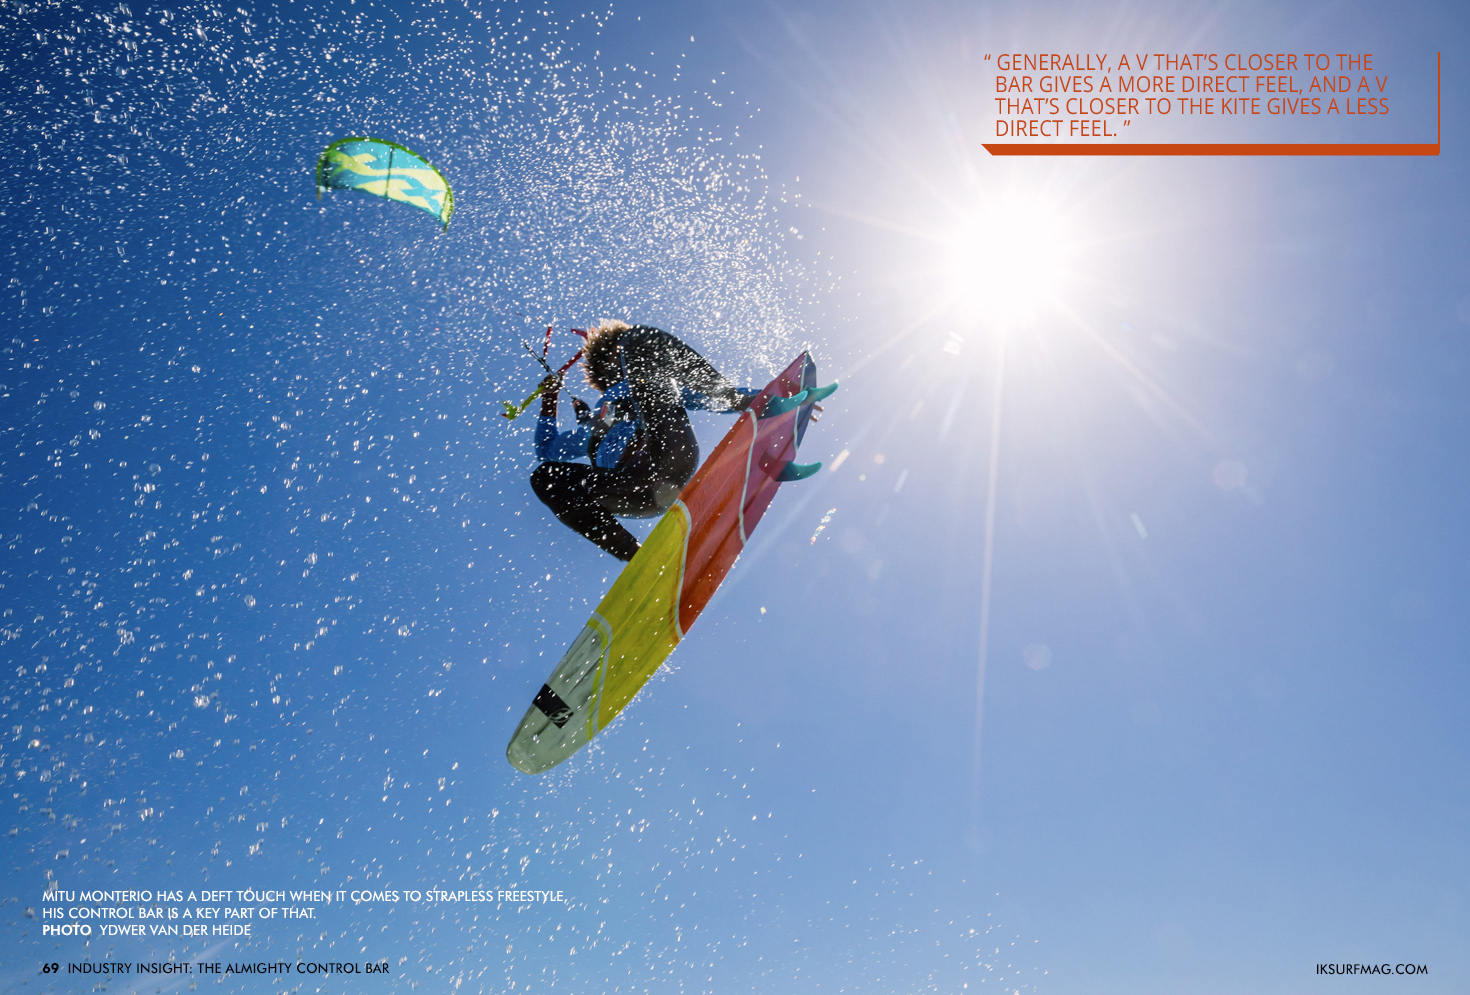
V-Split – This is the point at which your lines split and go to the leading edge of your kite. Does it matter? Absolutely. Kite designers play with the split location to dramatically change the feel of the kite. Generally, a V that’s closer to the bar gives a more direct feel, and a V that’s closer to the kite gives a less direct feel.
When asked if the location of the split makes a difference, Hugh Pinfold, the designer from Cabrinha said: “You get different kite turning characteristics between a low and high V bar. Low and high V kites require different bridal designs. You can imagine, with a higher front line V the opposite front line will be resisting the turn more creating more of a pivot style turn rather than a more constant driving powered turn”.
Juraj from CrazyFly said: “It matters. If you take a kite and bar setup and move the front-line split up by couple meters, the front lines will pull the kite in a sharper angle, causing the leading edge to close and vice versa. Closing and opening the leading edge by moving the front line split considerably changes the kite flying characteristics”.

This is why it is important to fly the correct kite with the correct bar; if the split is designed for a different kite then again the performance will be hampered. It might be subtle, but it will have an effect on the way the kite flies, which changes its performance, in turn, will hinder the way you ride.
Depower Style - Above the bar, below the bar, inside the bar? Today, we have options!
Each of these choices has pros and cons.
Below The Bar Depower - Damien Girardin from Naish explained his thought process: “Smaller riders need a shorter chicken loop, and they need a trimmer that is as close to them as possible. This is why at Naish we recommend our below the bar trim for shorter riders, so the trim is always easily accessible.” Many riders prefer a below the bar system because it is easy to access and adjust. However, when powered up some riders say it is hard to adjust below the bar trimming systems as there is less leverage.
Above The Bar Depower - The most common system on the market today, above the bar, depower is easy to access, easy to adjust, and stays out of the way when unhooking. The industry seems to have settled on the rope and cleat system, which is very easy to use and durable. The differences are how that system is managed, do you leave the tail of the depower line flapping, or do you tidy it up with Velcro or even magnets to keep it out of the way of the rider.

Head of R&D at CORE Kites, Frank Ilfrich - “We prefer above the bar depower adjustment because it is simply the most ergonomic position.” Frank offered more details about why the Core system excels: “Our adjuster is pretty awesome as it is a 4 to 1 pulley design, which means you can adjust very precisely with minimal effort and the rope will never get stuck in the clam cleat.”
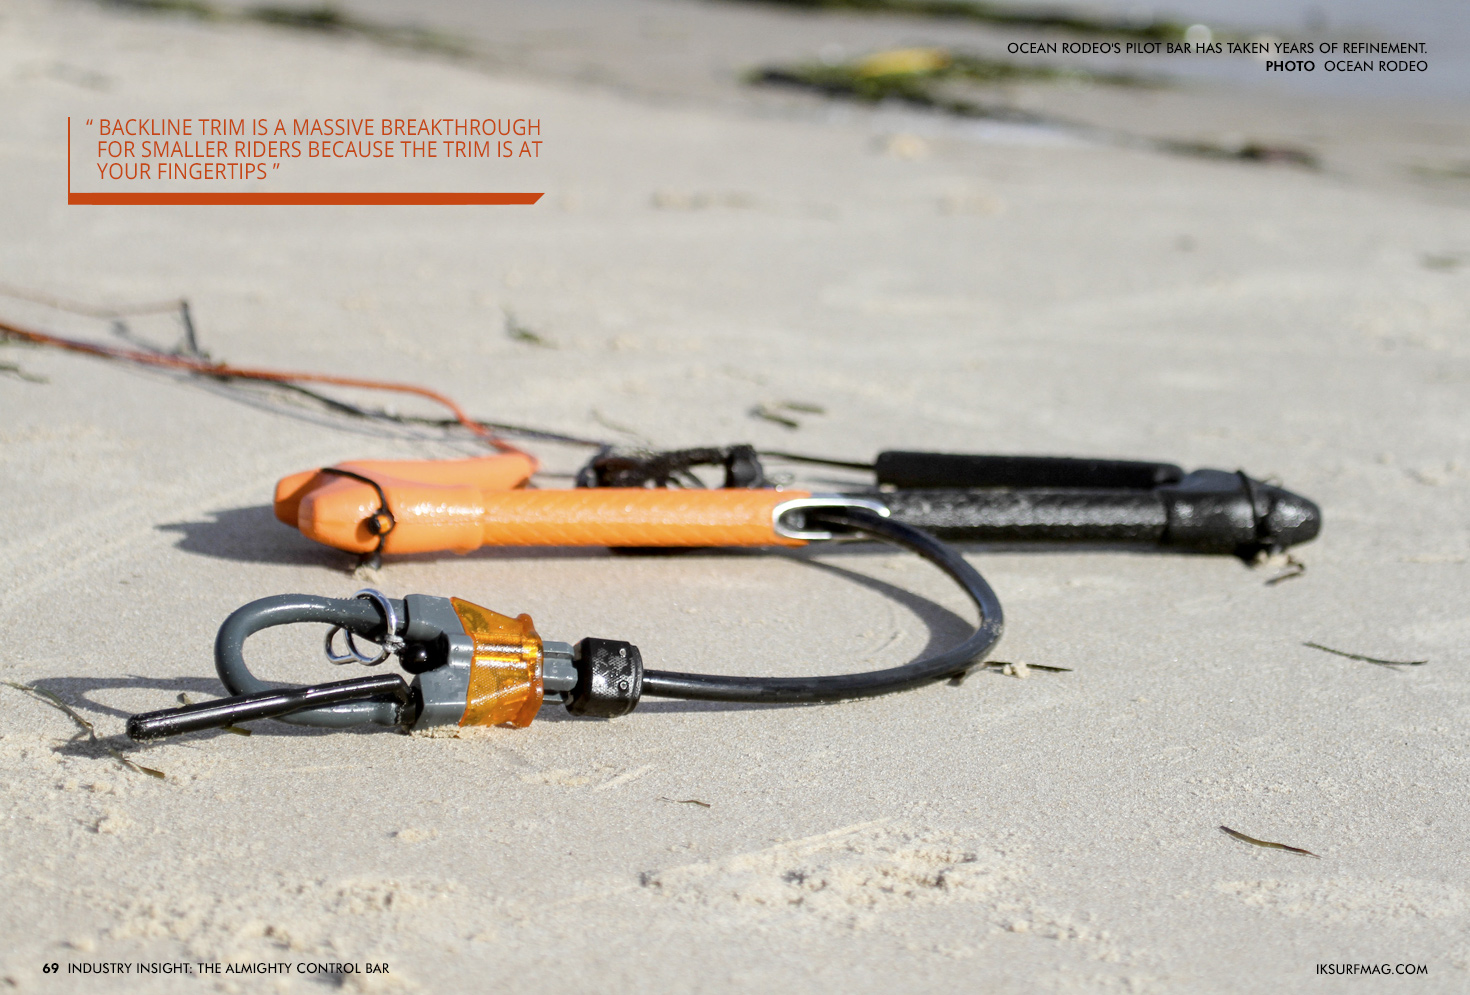
Inside The Bar Depower - North Kiteboarding’s Click Bar and Ocean Rodeo’s Stick Shift bar have moved away from the front line depower system and shifted to trimming the back lines. By doing this, the depower can run inside the bar with an adjuster on one end of the bar that can be used to trim the kite. This results in a super clean bar with no hanging ropes or cords. Will all depower systems move in this direction?
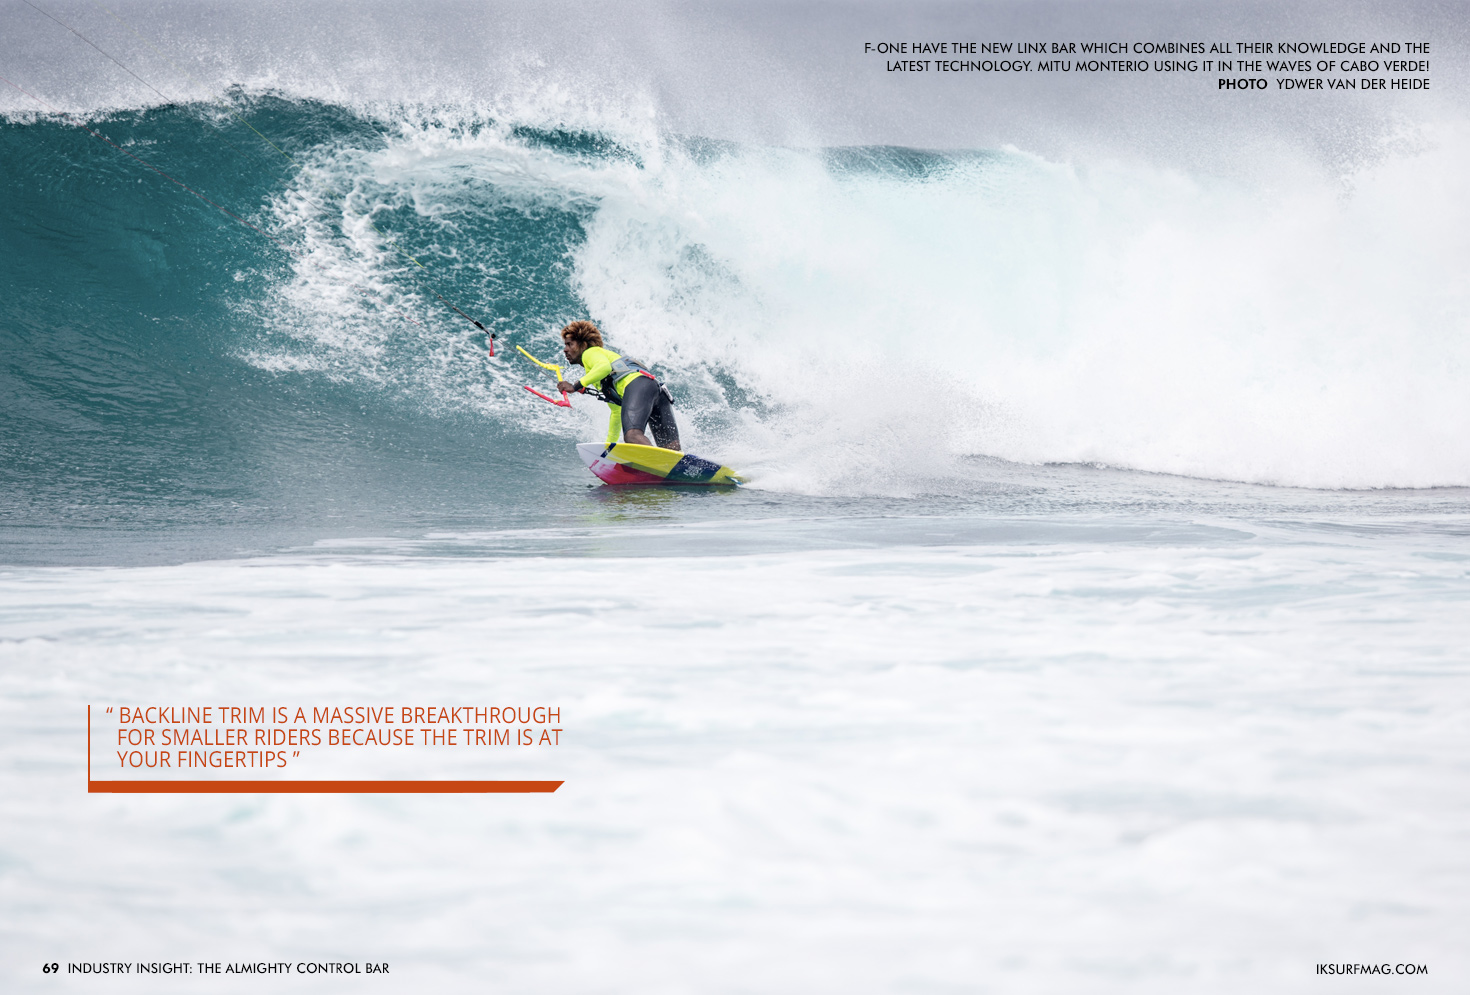
Ocean Rodeo designers believe the future is rear line trimming: “With backline trim, it seems that once you use it, you never go back. It is so clean, so precise, and so simple. Kiters of all skill levels instantly feel more in control of the kite and get a much more direct feel with backline trim bars. Backline trim is a massive breakthrough for smaller riders because the trim is at your fingertips”.
In our experience, it’s a love/hate affair, and again it depends on the style of riding you do. Rou Chater, our editor, loves it and finds that the ability to trim the kite mid-turn on a big wave is invaluable. The key to this system is that you don’t need to adjust your body position to use it. You can be leaning out on the foil, or cranking a bottom turn and the adjustment is right there. We’ve found that until you use one, you don’t appreciate how good they are.
However, in some instances they aren’t so suitable when the wind is powerful, they can be difficult to use if you don’t have the right technique, namely sheeting out to create slack before you try and pull in the lines. As with anything kiteboarding, personal preference rules and we’re just lucky to have this plethora of choices on offer!
Maintenance is sometimes cited as an issue for these systems too, we have had a North Click Bar on test for over two years that has never been cleaned, rinsed or looked after. It’s been dragged all over the world and used in coarse sand, fine sand and dropped on rocks and generally treated with utter contempt. It’s still going strong though aside from the usual wear marks the mechanism is solid.
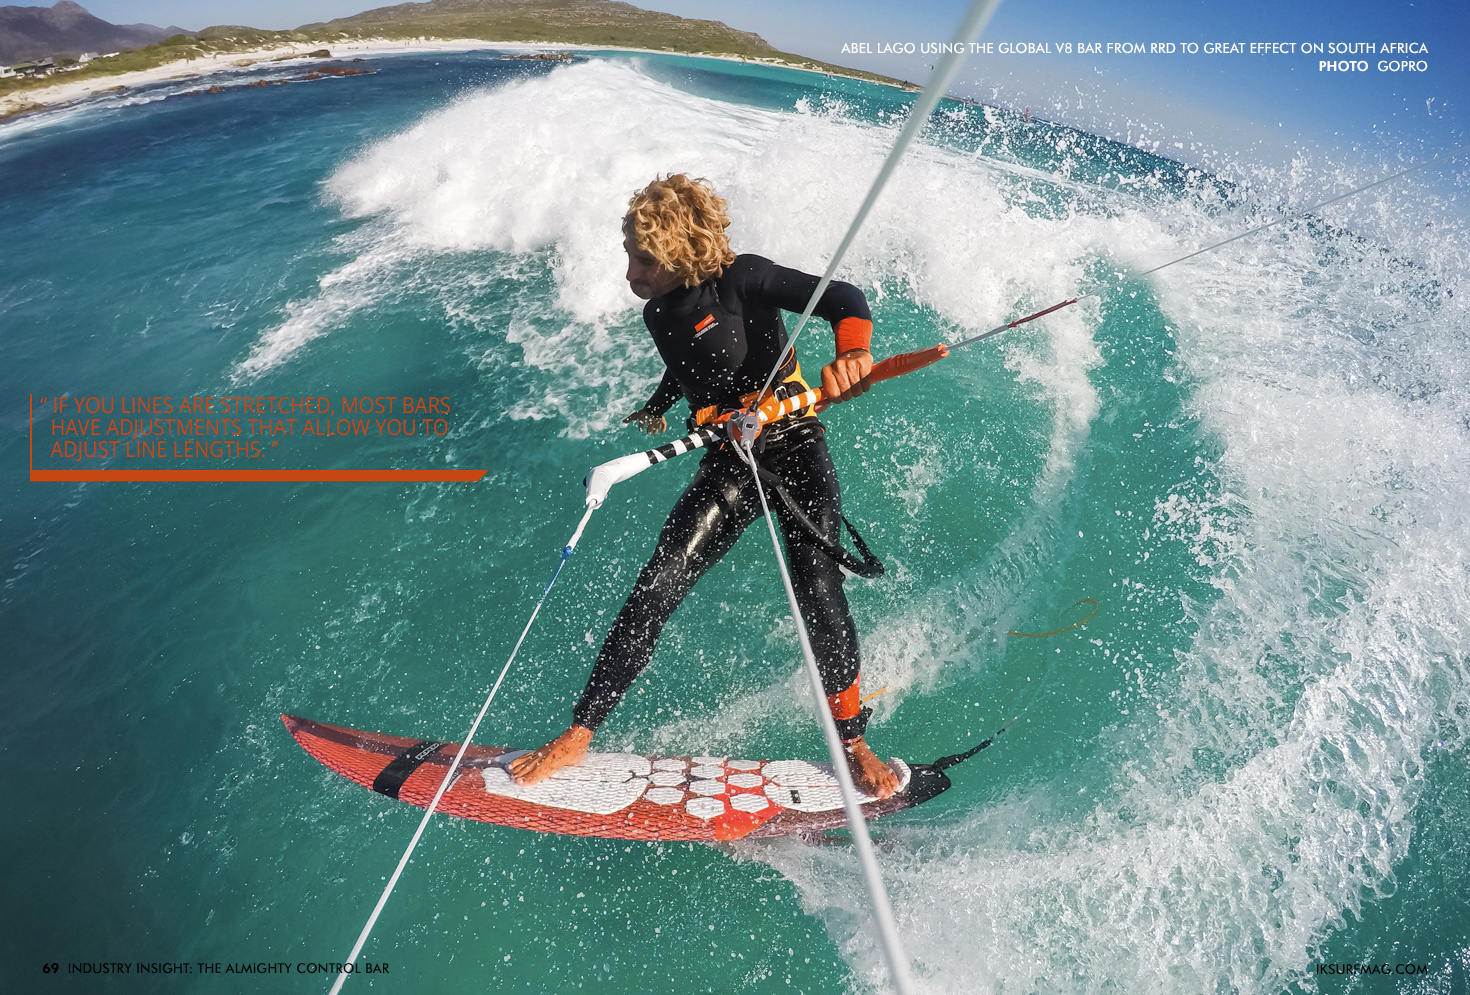
Bar Maintenance - What can you do to make sure your bar is flying well? Making sure that your bar is tuned is essential. If one line is longer or shorter than the others, it will greatly impact how the kite flies. If you lines are stretched, most bars have adjustments that allow you to adjust line lengths. On most bars, all line lengths should be the same. Check with your manufacturer to see the proper specifications for the bar you are using.
If you are ever questioning the life left in something on your bar it is most likely time to replace that part. A broken kite line, depower line, or loop is a session-ender and will result in a swim. Prevention goes a long way in bar maintenance. Rinsing your bar after any session that that takes place salt water will significantly extend the life of the bar too!
The Future - What is next? Where do we go from here? There are countless ideas on what will happen to the bar over the next few years.
Ozone believes that the future is now with their new Click-in Loop: “The design of our new release system was based on the principle of the car seat belt. In the same way, it has become a natural action when getting into a car to click in the seat belt; we believe kiters should activate and reload the release system before and after use. This important safety check that ensures the release system is set up and functioning as it should is often missed. We developed the Click-In function to be simple and intuitive, so activating and reloading will become second nature and easy to do before/after a session”.

Youri Zoon, Karolina Winkowska, and Paco Isoardi from F-One all see future kite bars containing some sort of built-in WiFi. Maybe kite bars of the future will be able to control your GoPro or will it have a speaker built in!
Hugh Pinfold from Cabrinha said: “Being able to control the angle of attack of kites was a huge breakthrough in the early days when we went from two lines to four lines. We’ve had above the bar trim, below the bar trim and most recently rear line trim options.”
“All do the job, and it’s down to personal preference on function, weight, cost and complication. With the expanding disciplines of kiteboarding, now we have freeride, big air, wake style, surf, surf freestyle, freeride foiling, foil racing, power kiting on mountainboards or buggies and snowkiting, we inevitably need to offer various specialist setups.”
“I’m a big fan of all the different connection methods on the market now. We started with fixed loops on spreader bars which still work perfectly well, particularly for freeride and freestyle twin tip riding. However, in disciplines where you benefit from increased mobility, we now have the Fireball, fixed loops on sliders and pivoting spreader bars like the Tracker.”
“I believe we’ll see an increased ease of modularity between riding style bar options in the future. Like everything, you start somewhere, go too far the other way and come back to some sort of equilibrium. Kite bars started simple, have got rather complicated and I would like to see control systems in the future come back to just clean designs featuring core functionality for whichever kite discipline keeps your stoke.”
Unanimously, bar designers listen to you, the rider to decide what features and characteristics should be added to bars. If you get the opportunity, try out as many bars as possible to see what works best for you. You are helping shape the future of bar design. Make it good, don’t forget to feedback to the brands that you ride what you like and don’t like. Believe it or not, this is how a lot of R&D gets done; the brands want you to be happy and listen to what you have to say!
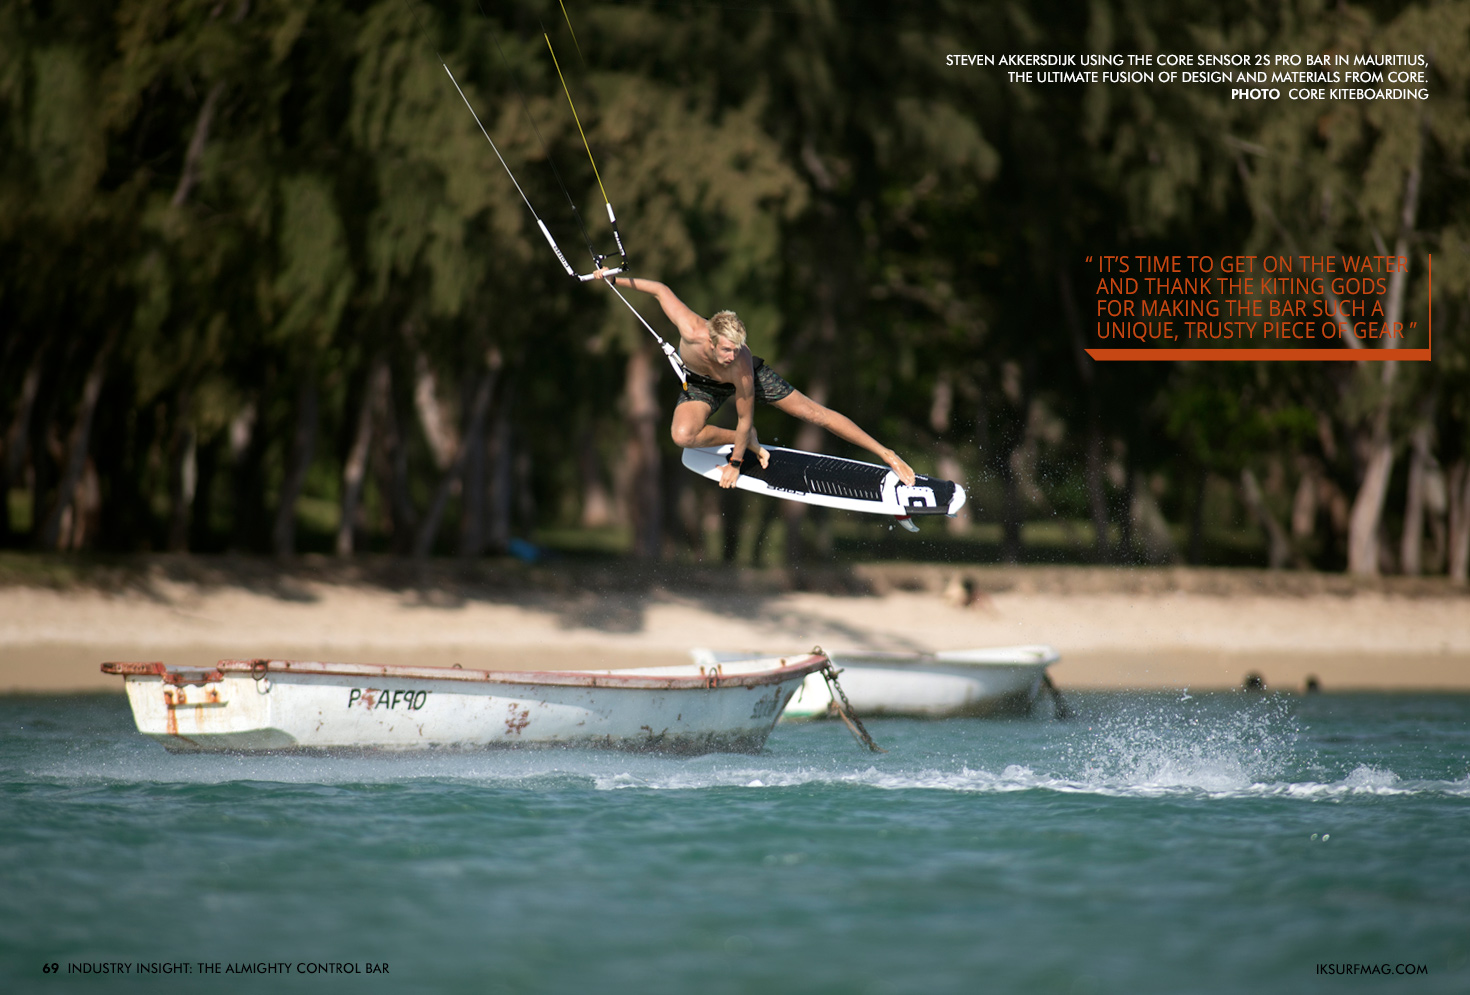
That’s probably enough time talking about bars. It’s time to get on the water and thank the kiting gods for making the bar such a unique, trusty piece of gear that allows us to get sendy.
Thanks
We want to extend a final thank you to the following individuals who offered their specialized and in-depth knowledge for this article: Francesco Grassi at RRD, Roberto Ricci at RRD, Blaine Baker at World Class Kiteboard Academy, Juraj Bukovcak at CrazyFly, Frank Ilfrich at CORE, Hugh Pinfold at Cabrinha, Karolina Winkowska at Slingshot, Youri Zoon at Slingshot, Nesan Furtado at Ocean Rodeo, Lucy Allnutt at Ozone, Damien Girardin at Naish and Paco Isoardi and F-One.
Videos


By Lindsay McClure
Lindsay is a pro rider from Hood River in the USA, she works for IKSURFMAG as our Features Editor and is an integral part of the team. Lindsay is really into wakestyle riding and can be found in the Hood River Slider Park during the summer months, she also travels all over the world with the World Class Academy helping younger riders develop through kiteboarding!