Under The Sea
Issue 62 / Sun 9th Apr, 2017
Have you ever thought about kiting underwater? No seriously, NousthaKoeckhoven does just that with an amazing photoshoot that will blow your mind…
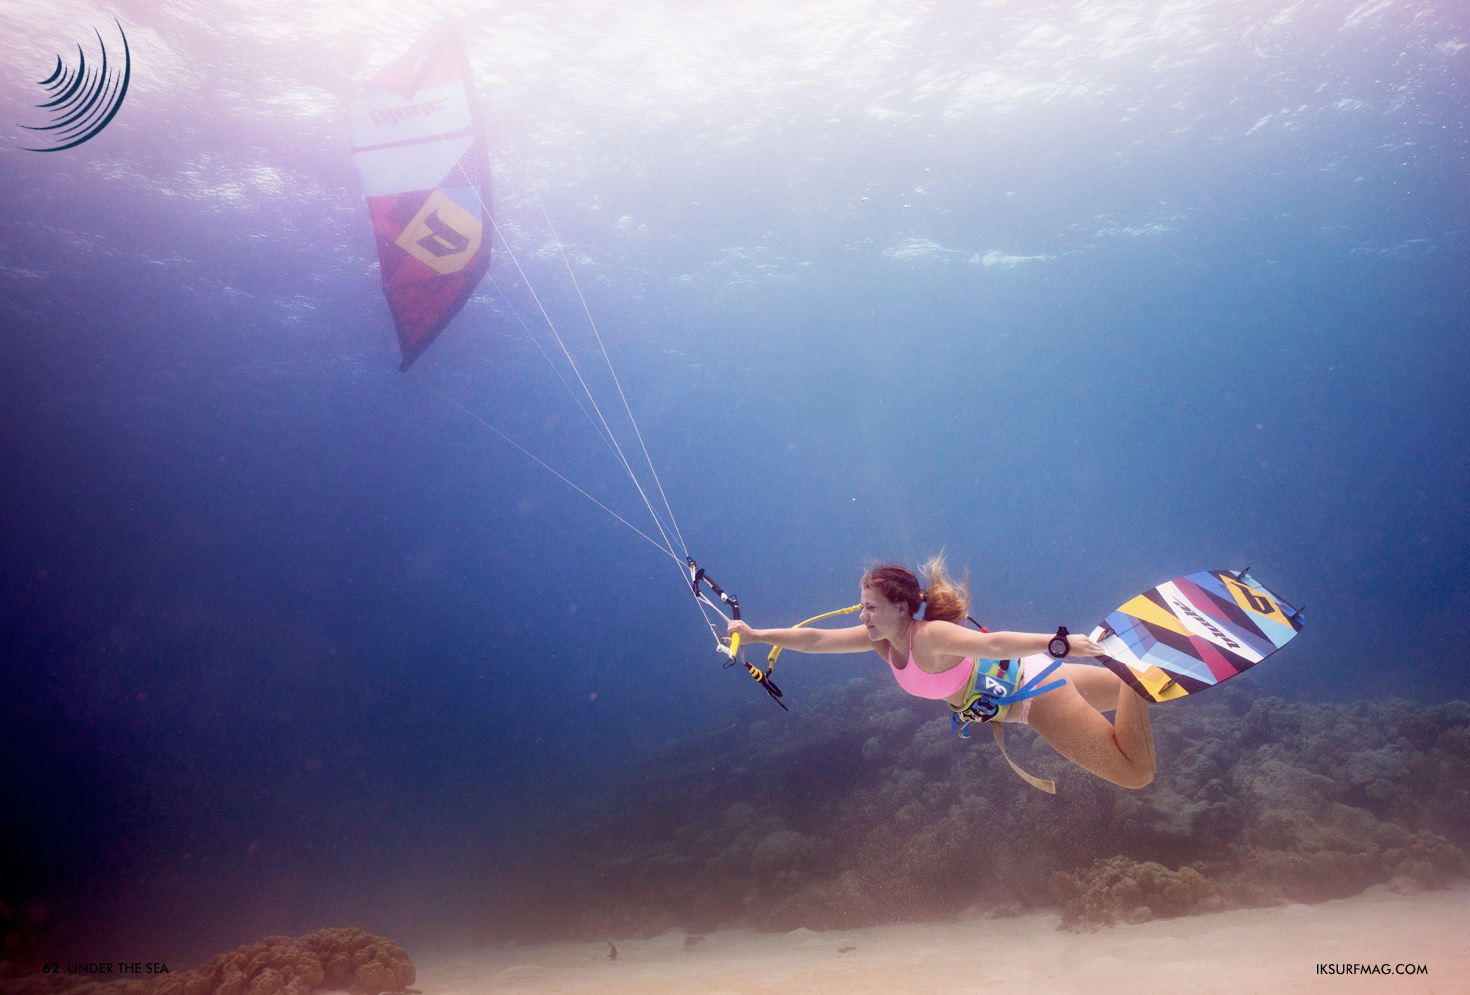
Have you ever seen anything like this? NousthaKoeckhoven creates some sublime magic with no trickery involved, just a lot of dedication and hard work! It’s the first time ever someone has successfully kitesurfed underwater…
Can you tell us a bit about yourself and how you came up with this concept?
I am Noustha, a young Dutch underwater photographer. While I'm travelling through Australia, I spent three months on Cocos Keeling Islands. Here I learned to kitesurf and fell in love with it. This was my new inspiration for an epic underwater photo shoot.


Is that where you shot this project?
The first idea was to do the underwater photo shoot on Christmas Island. There are some incredible marine drop-offs that I would have loved to have in the background of the picture. Normally the water there is totally flat around this time of the year, but I had some bad luck. I spent almost a month there looking at the big swell and waves around the coastline. For this reason, it was impossible to organise the photo shoot there, so I changed the plan. I flew back to Cocos Keeling Islands to do the photo shoot.
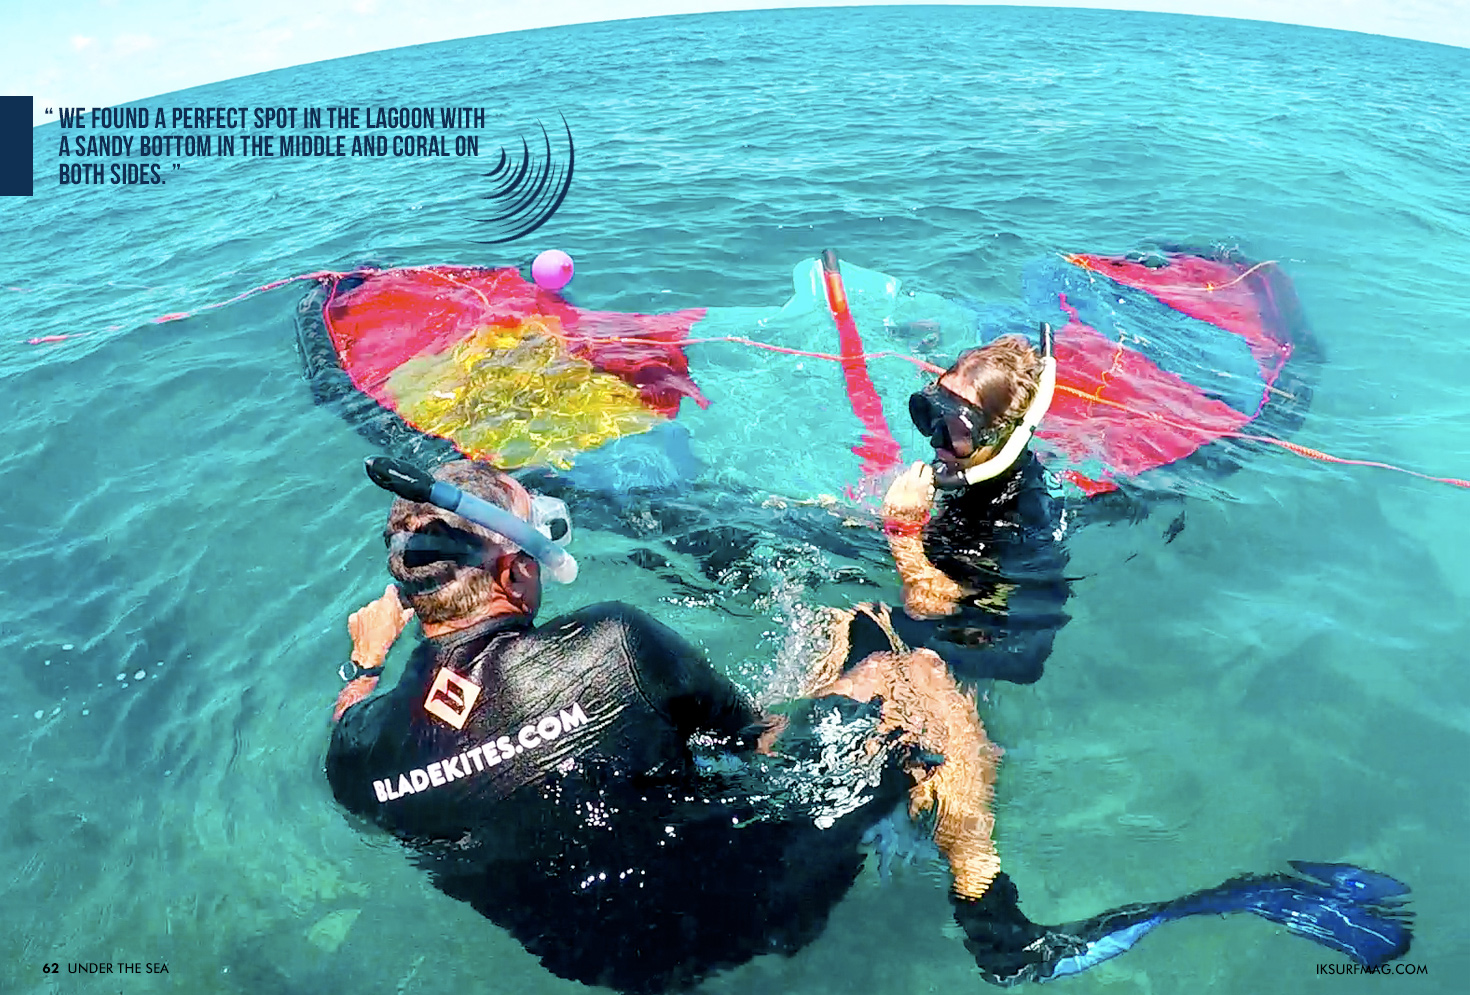
We found a perfect spot in the lagoon with a sandy bottom in the middle and coral on both sides. We set the kite up above the sand so that we wouldn't damage the coral. The location is a popular dive site called 'Cabbage Patch'. Luckily the weather was perfect on Cocos Keeling Islands for the photo shoot.
Who took part of this shoot?
I needed a team of four people for this photo shoot: a photographer, model, safety diver and an all-round diver. Of course, I also needed kite equipment. For that, I used the Skinny Boy 6m from Blade Kites who were very enthusiastic about this project.
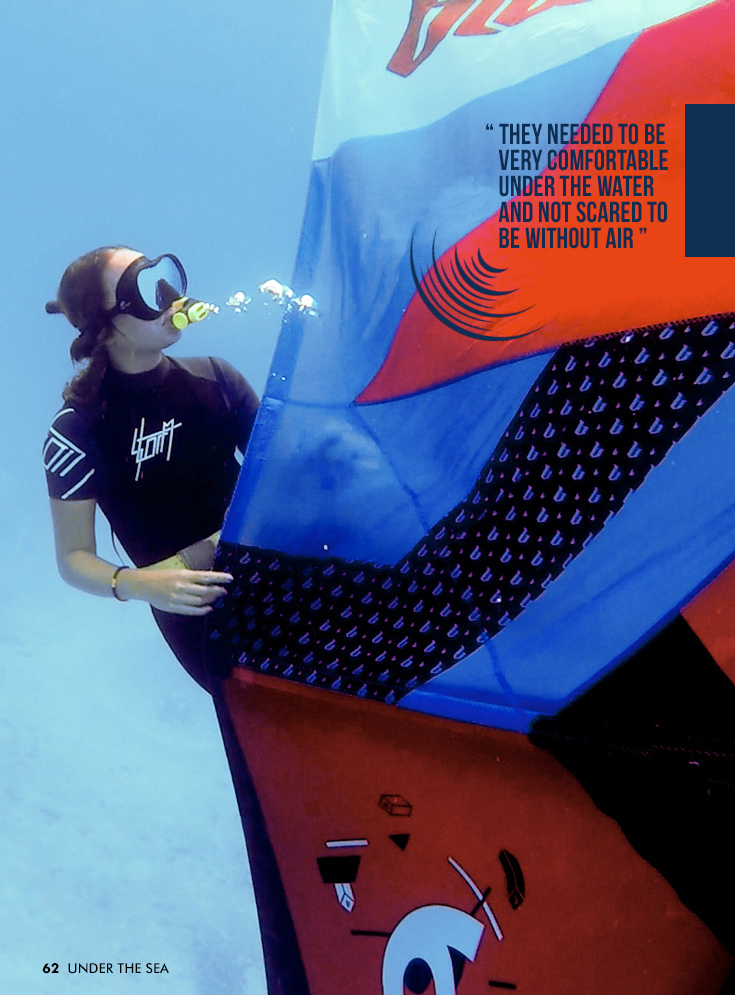
The model needed to be someone who could freedive, scuba dive and kite. Luckily I found some energetic people to work with! They needed to be very comfortable under the water and not scared to be without air for a while.
For the whole team, including me, it was the first time to put a kite under the water. The only way to find out how to do this was by trial and error. The team members kept changing for the photo shoots because not everybody was available on all days.


Photographer: NousthaKoeckhoven
Models: Levi Fowler, Hugo Heuman and Chynna Cahill

Safety divers: Chynna Cahill and Steph Hagen
All-round diver: Chris Dabbs
Kite brand: Blade Kites


Did you have any mishaps along the way?
During the photo shoot, many mistakes were made. We’ve had sand kicked up in front of the model, lines untying from the kite and floating away. The kite deflated and sagged down in the water. We lost the backstage camera, which was found a month later by a scuba diver. But in the end the photo shoot was successful, and luckily no one drowned.
How did you progress from each shoot and how long did it take to get the final shots?
The whole shoot took four days, and it panned out something like this…
Day 1:
The first day we were testing the kite equipment under the water so we knew what to expect for the real photo shoot.
We had to check how much weight we needed to keep the kiteboard under the water. Trying this under the water with my dive gear on felt like flying on a hover board. When the weight was perfect, it was possible to do everything on it, even making back flips under the water.
We filled the kite bladder up with water to create neutral buoyancy. We used weights and floats so we could hold the kite in shape and place.

Day 2:
It was a perfect day with very clear water. We made some amazing photos this day. Unfortunately, when I reviewed the photos, later on, I realised the shape of the kite was not perfect. We had lines tied on one of the corners of the kite back to the boat. The rope was pulling the kite out of shape. This was a mistake to learn from...
Day 3:
This time we tied the corners of the kite on the bottom of the seabed with anchors to hold the kite in the normal shape. The weather was perfect when we were setting up the kite. When we were ready to start the current changed which reduced the visibility to almost zero. It was impossible to see the kite clearly on those photos. It just looked like a faded out smear in the water.
Day 4:
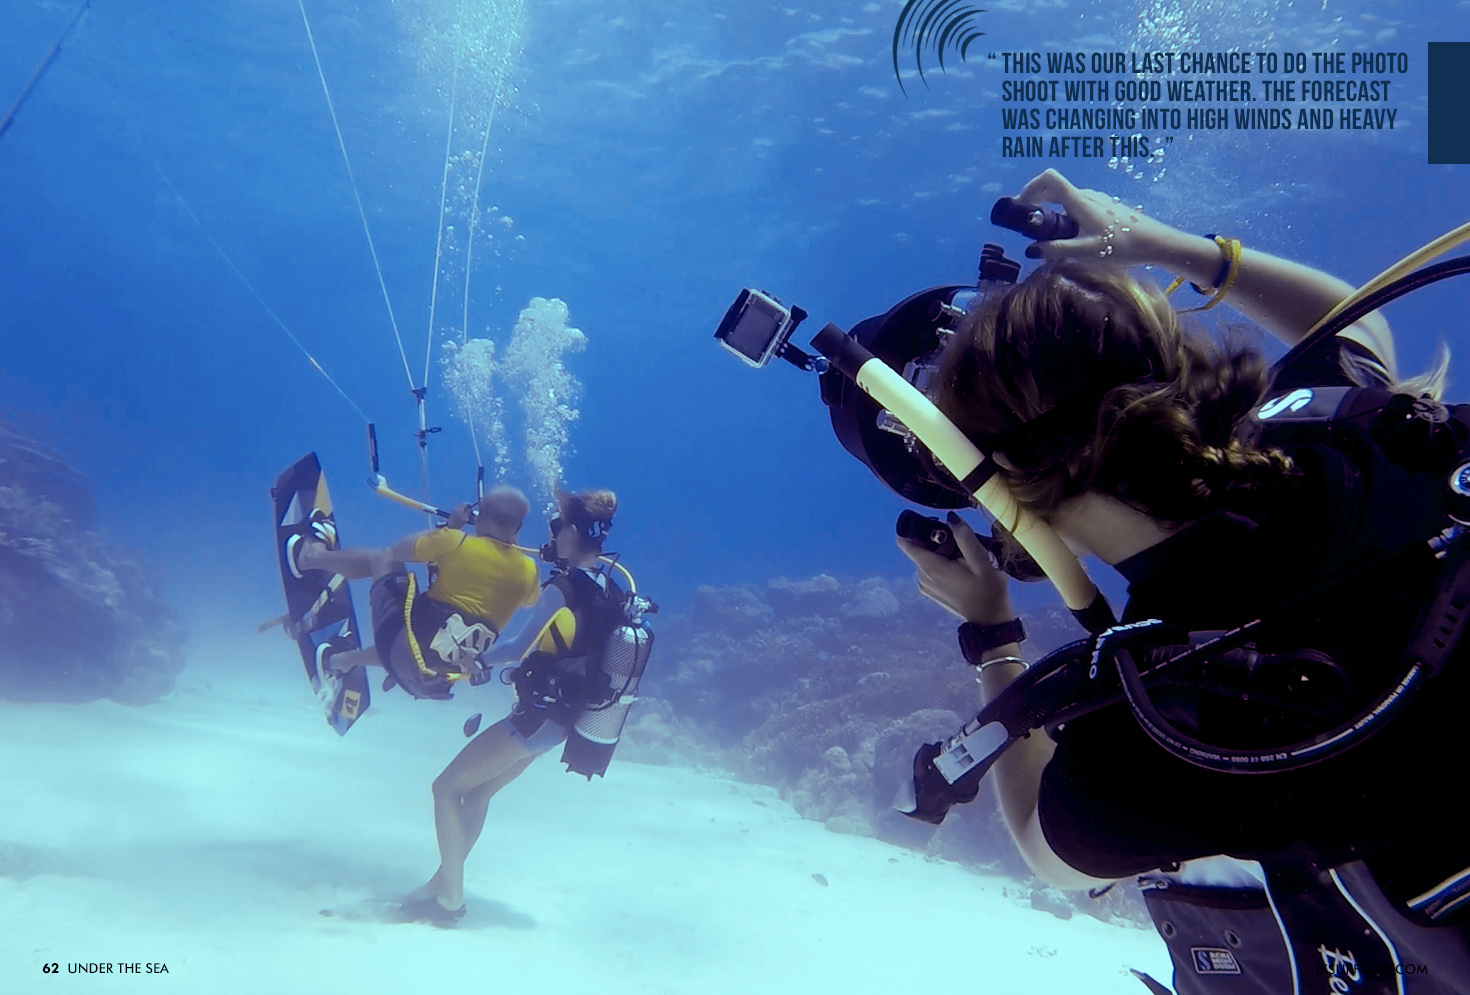
This was our last chance to do the photo shoot with good weather. The forecast was changing into high winds and heavy rain after this. We learned from our previous mistakes from the other days. This enabled us to do the photo shoot perfectly. On this day we made the perfect shot!
How did you manage to suspend everything and get tension in the lines and the rider in the right place, it must have been really tricky?
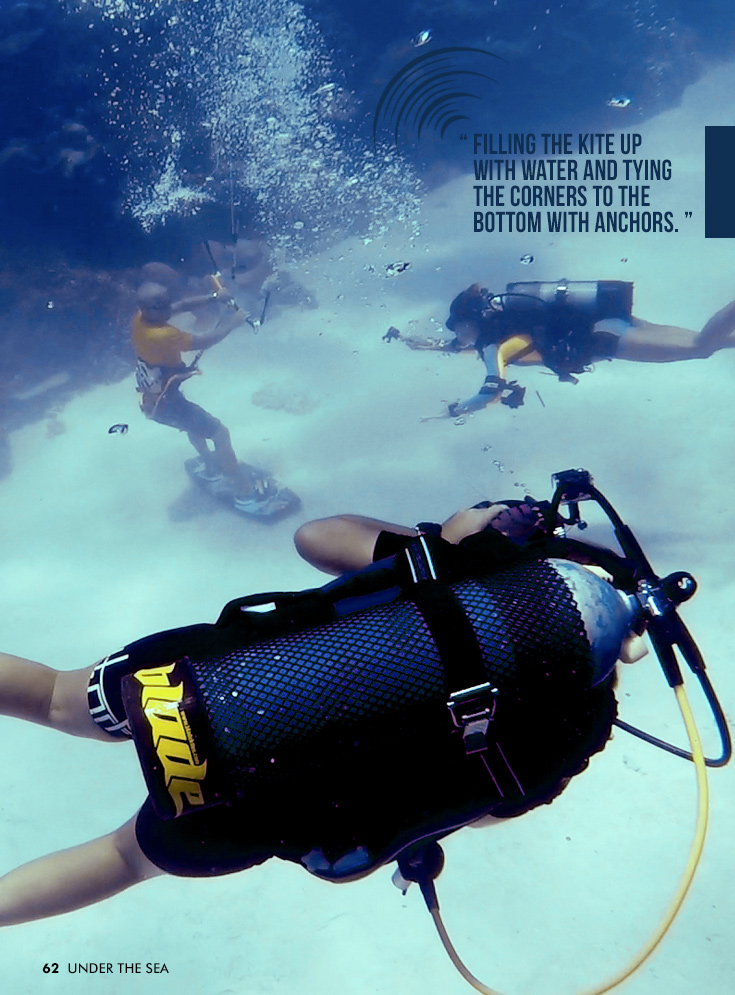
We started early in the morning setting the kite up under the water. It takes 4 hours to get everything in the right position. First filling the kite up with water and tying the corners to the bottom with anchors. Secondly, we had to keep the struts in place with floats. When the kite was in the right position, we needed to tie the lines to the kite and put them on the bottom with a weight on the bar. It was a tough challenge to get this done without getting tangled. On the seabed, we weighted the board down in the right position.
Before getting into the water, we talked about different signs to communicate under the water.
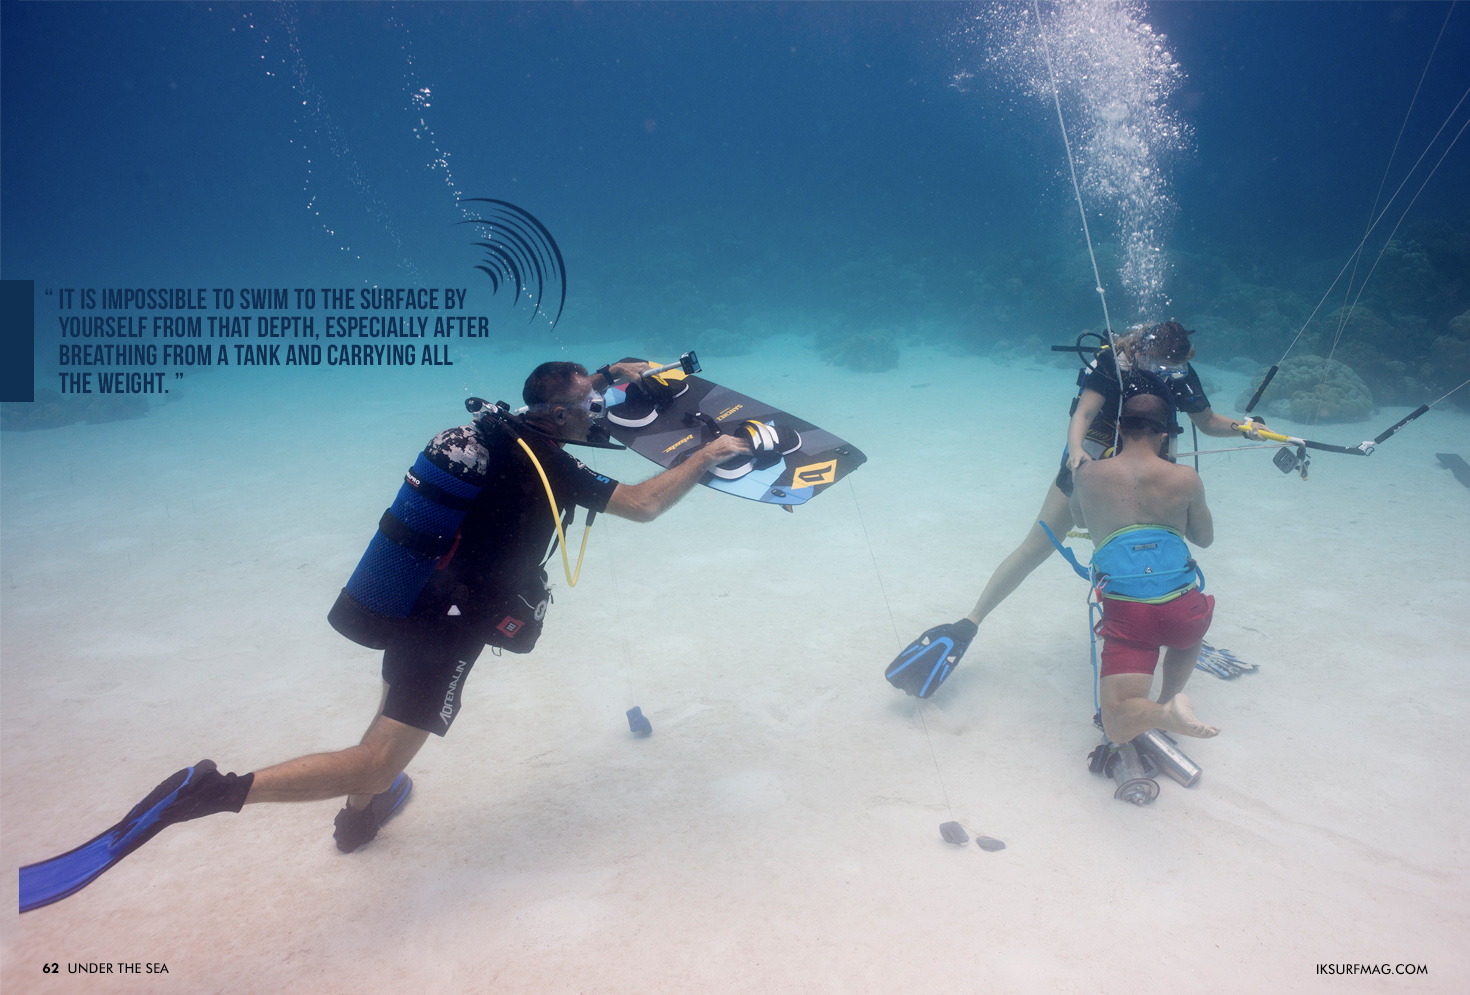
The photo is taken at a depth of 10 meters. Everybody was diving down while breathing through scuba gear. Of course, those big tanks are not exactly beautiful for the photo. During the photo shoot, we needed to remove the scuba equipment from the model. The model was breathing through the spare mouthpiece of the safety diver while getting into the right position.
Deep under the water, we had to sort out how much weight the model needed on the harness. When everybody was ready, the safety diver swam away quickly to get out of the shot. At this time I was busy taking photographs.
The first sessions of posing were very short but increased in duration as time went by. The board caught a lot of current; this made it hard to stay in the right position. For the model, it was also hard to be relaxed when they couldn't see the photographer or dive buddy. It is impossible to swim to the surface by yourself from that depth, especially after breathing from a tank and carrying all the weight. If something went wrong, so they needed to trust the whole team completely. Every time the model was close to getting out of air they could give a sign to the safety diver. The safety diver then swam directly back and gave them air. After some breaths, it was time to try it again, again and again. The model tried different raleys and grabs under the water.
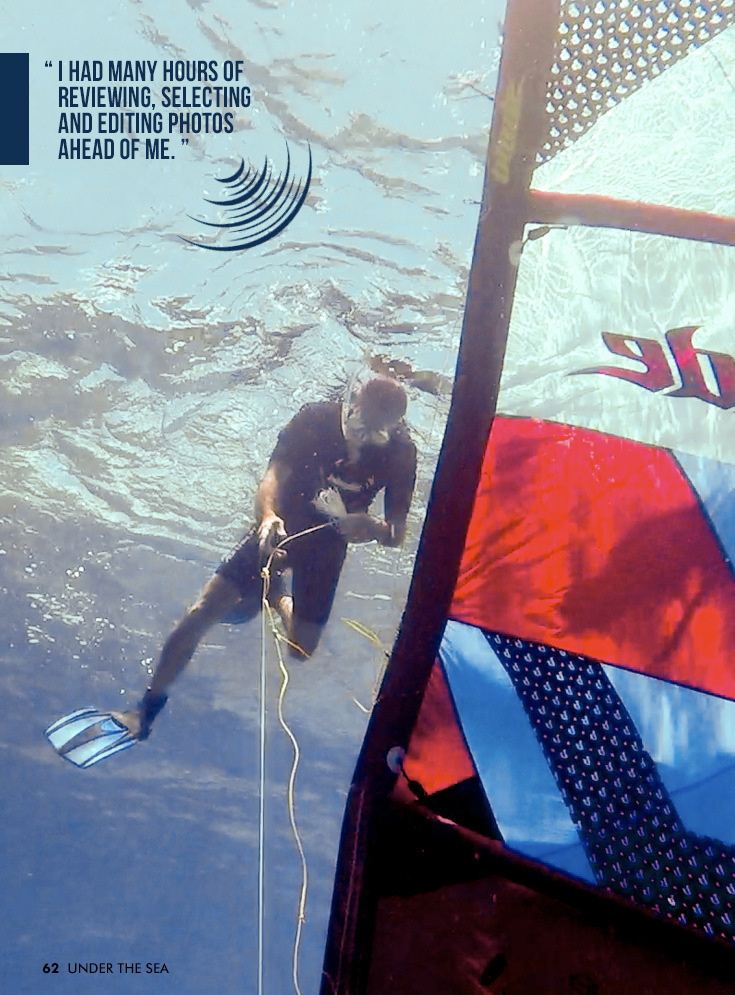
To get the perfect photo I had to take hundreds of shots. After this, I had many hours of reviewing, selecting and editing photos ahead of me.
What about your kiting models, how does it feel to kite under water?
Levi Fowler
"When Noustha asked me about being part of an underwater kitesurfing photo shoot, I was wondering how on earth we would get it to work. No wind, no air and I won’t be able to see!
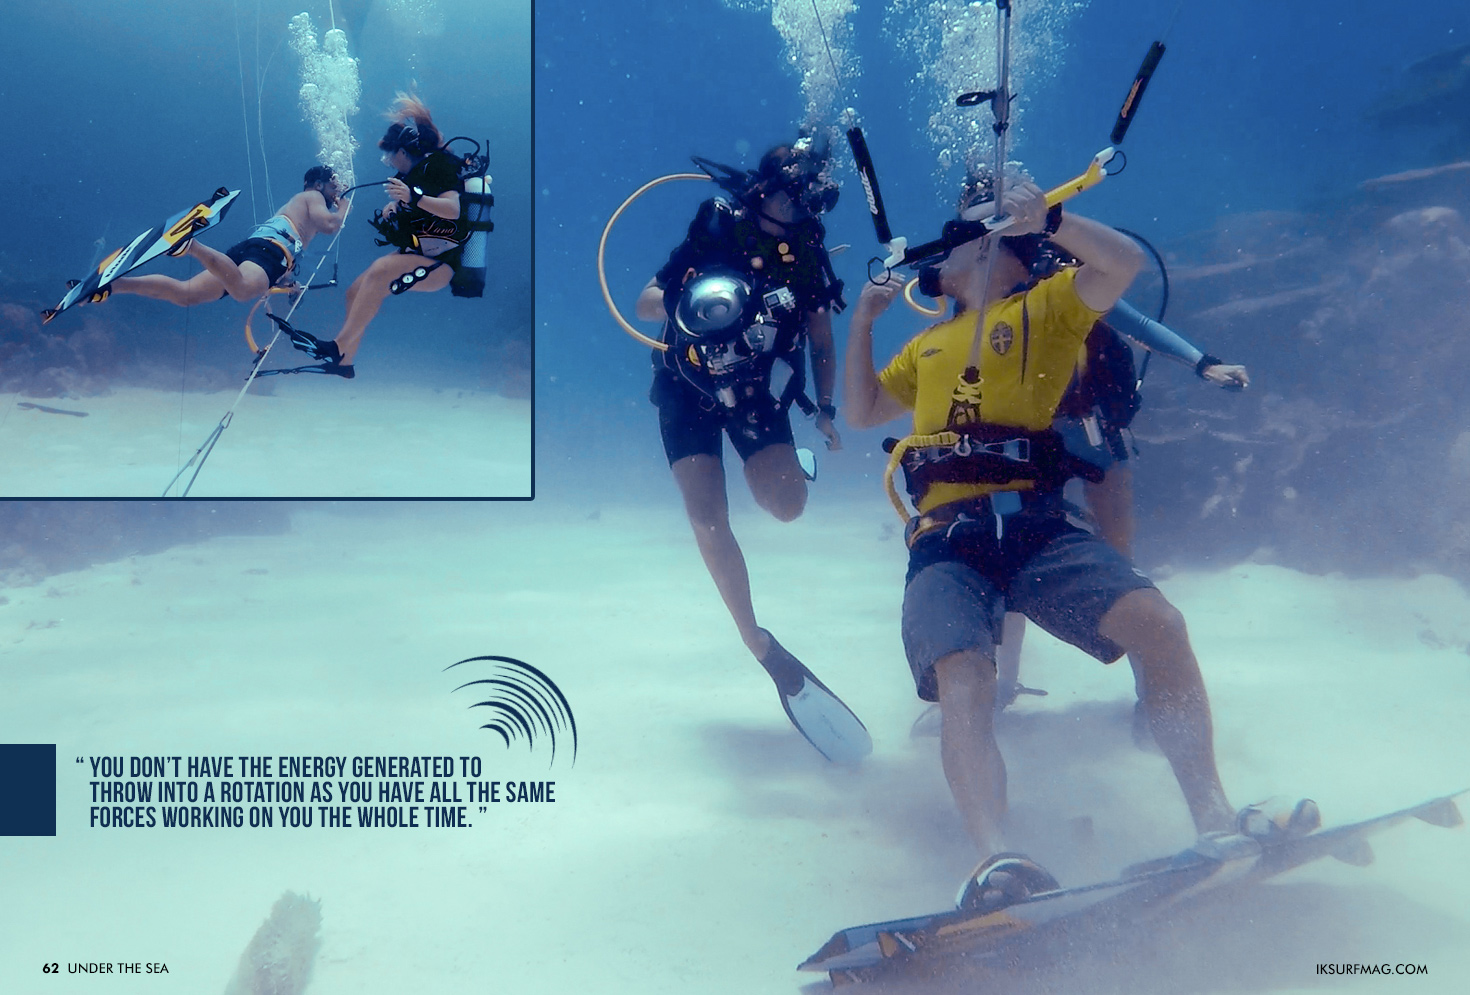
When you load and pop riding normally, you get the initial pull then weightlessness and freedom to throw your body around in free space before landing downwind and edging away. Underwater it is different; you don’t have the energy generated to throw into a rotation as you have all the same forces working on you the whole time.
You notice the forces working on your body as you try and pose, it is definitely harder than kiting on the surface. There is the pressure of the water from above which is approx. 3 atmospheres at the depth we were at, the tide and wave currents pushing you around and the buoyancy or lack of possessed by your body, the kite gear and rigging that you are constantly trying to balance out.
But it is FUN! Rather than only being able to hold your tricks for 2-6 seconds in the air, underwater you can hold them, sink into the trick and adjust it to where it feel perfect. It was good to practice getting your body into the positions you want for riding on the surface, as you are not bound by the time you are in the air but simply how long you can hold your breath! I would be keen to do another shoot in another location and try new tricks now that I have the first session under my belt. Hopefully, Noustha decides to do a follow up somewhere in a cool place around the world."
Hugo Heuman
"A kite photo shoot under the water doesn't have much to do with one on the surface. It took a while to figure out how many weights we needed to stabilise me at the bottom. A shoot like this requires great trust in the team you’re working with. Since the weights are inside the harness, it would be tight on time to get up to the surface if your helper with the tubes couldn’t make it back to you when you running out of air."
Chynna Cahill
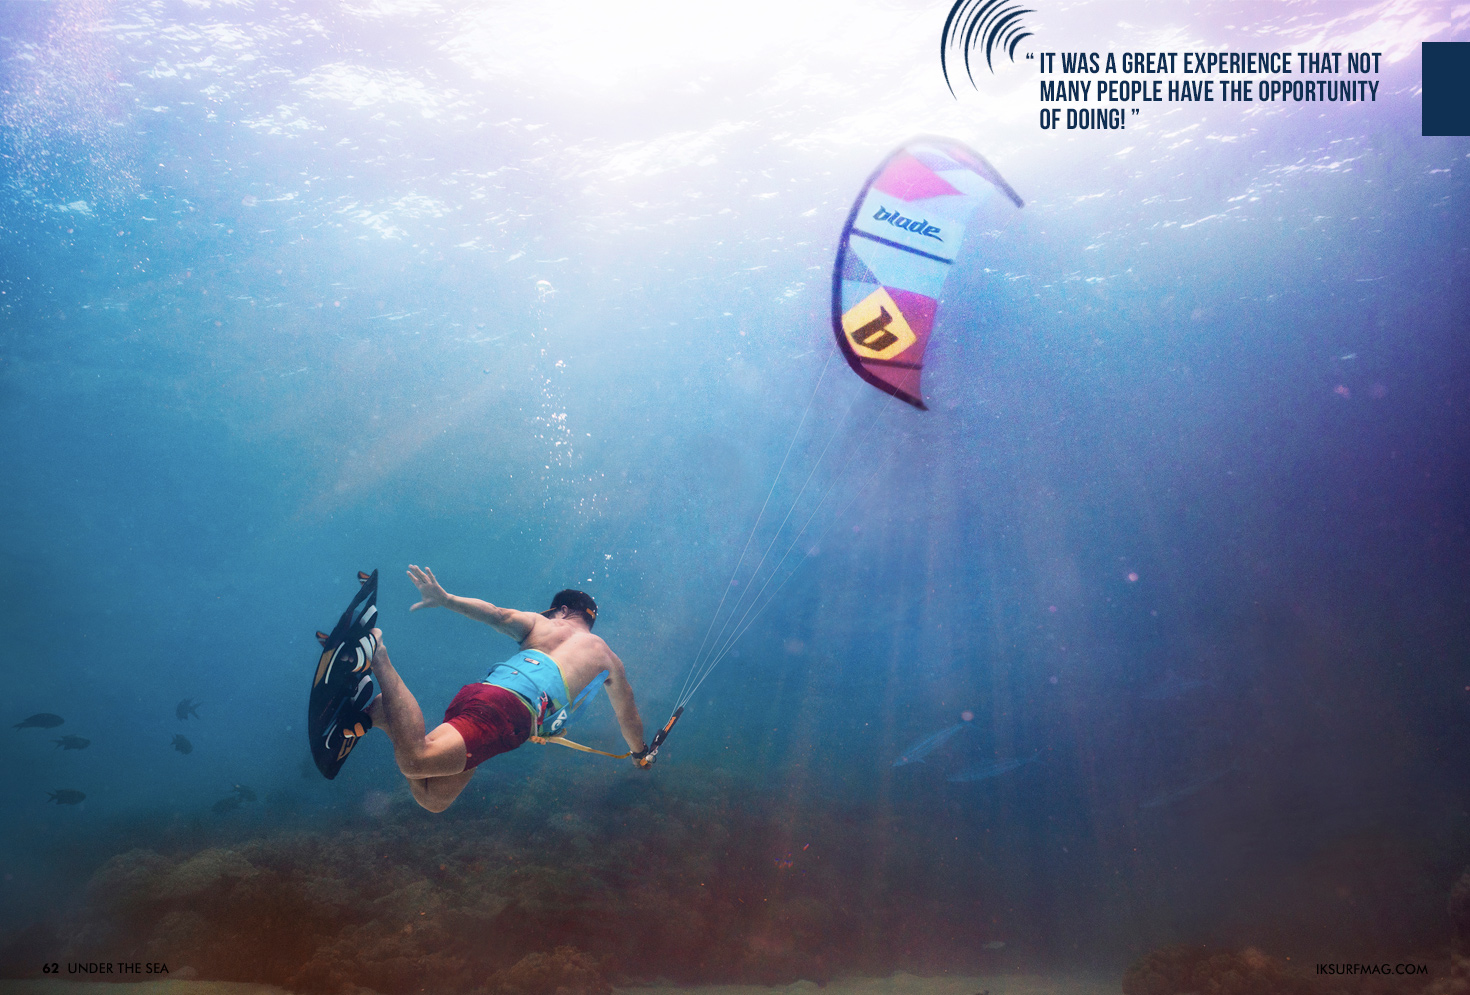
"Being photographed with a kite underwater is a completely different feeling than kiting normally. You don't have the pull of the kite to keep you up and steady, instead, you have the movement of the water and current pushing your body in different directions. It was more complicated than I thought and it took a lot of time and effort to set the kite and board up with ropes and weights but definitely worth it to get such a unique and amazing shot. It was a great experience that not many people have the opportunity of doing!"


By Rou Chater
Rou has been kiting since the sports inception and has been working as an editor and tester for magazines since 2004. He started IKSURFMAG with his brother in 2006 and has tested hundreds of different kites and travelled all over the world to kitesurf. He's a walking encyclopedia of all things kite and is just as passionate about the sport today as he was when he first started!