

Surfboard Gybe Part 2
Technique / Intermediate

Introduction
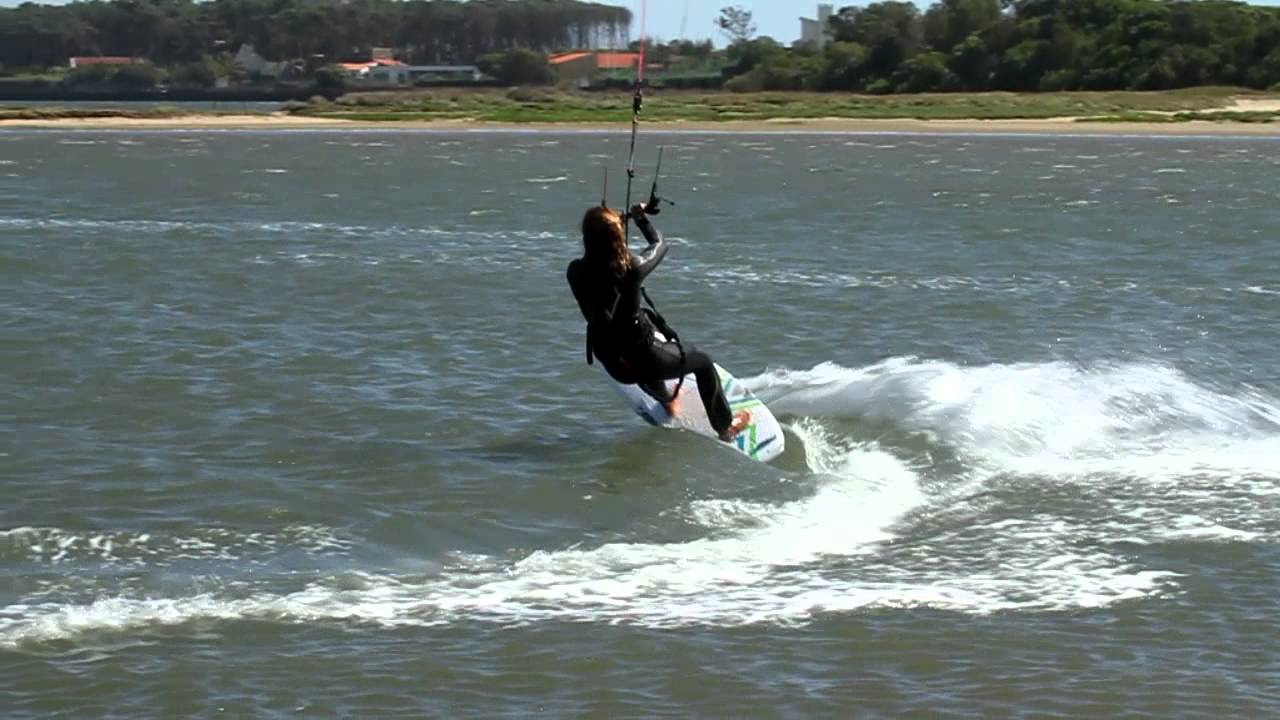
As promised in the previous instalment of the Surf Board Gybe we’re now back with the other variation. This time we’ll be challenging you to change your feet from heelside to toeside before carving the board around as in the Video.
This method of course has its uses. First off if you’re new to riding a surfboard the chances are that you have one side on which your toeside is weak. This not only makes it difficult to carve to toeside, but also once you are there the board will not feel steady and balanced enough to then change your feet. Secondly if you are intending to ride waves backside due to the wind “not being your side”, then this allows you to ride in and upwind heelside, before changing your feet to shred the wave. Pretty cool and it’ll save a lot of back leg burn!


From Heelside
This is the good bit, as no doubt you’ll be happy riding your board the right way round and can therefore enter this confident and comfy. Another good bit of news is that you’ll be using the same 2 basic steps as in the previous gybe and entertaining your fellow water users with the “Daddy I need a wee stance”.
When you first learn this foot change you should take off some speed and think more about changing your feet and then pivoting around the tail. Once you’ve got the feet dancing you can commit with more speed and really throw a carve.
Once again if you are riding with straps you’ll need to free the back foot in anticipation and loosen the front foot by wiggling it out a bit, otherwise you’ll be glued to the deck. And finally just as in the pics and video you’ll find this much easier to learn if you practice it on flat water, as the board will keep moving and feel a lot more stable.
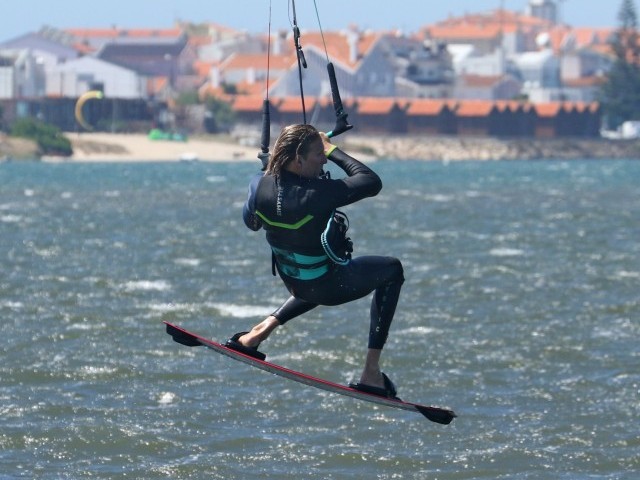
Breaking it down - The Feet
Lets start by thinking about your feet and where you’ll be placing your weight on the board to make for a smooth yet dynamic change.
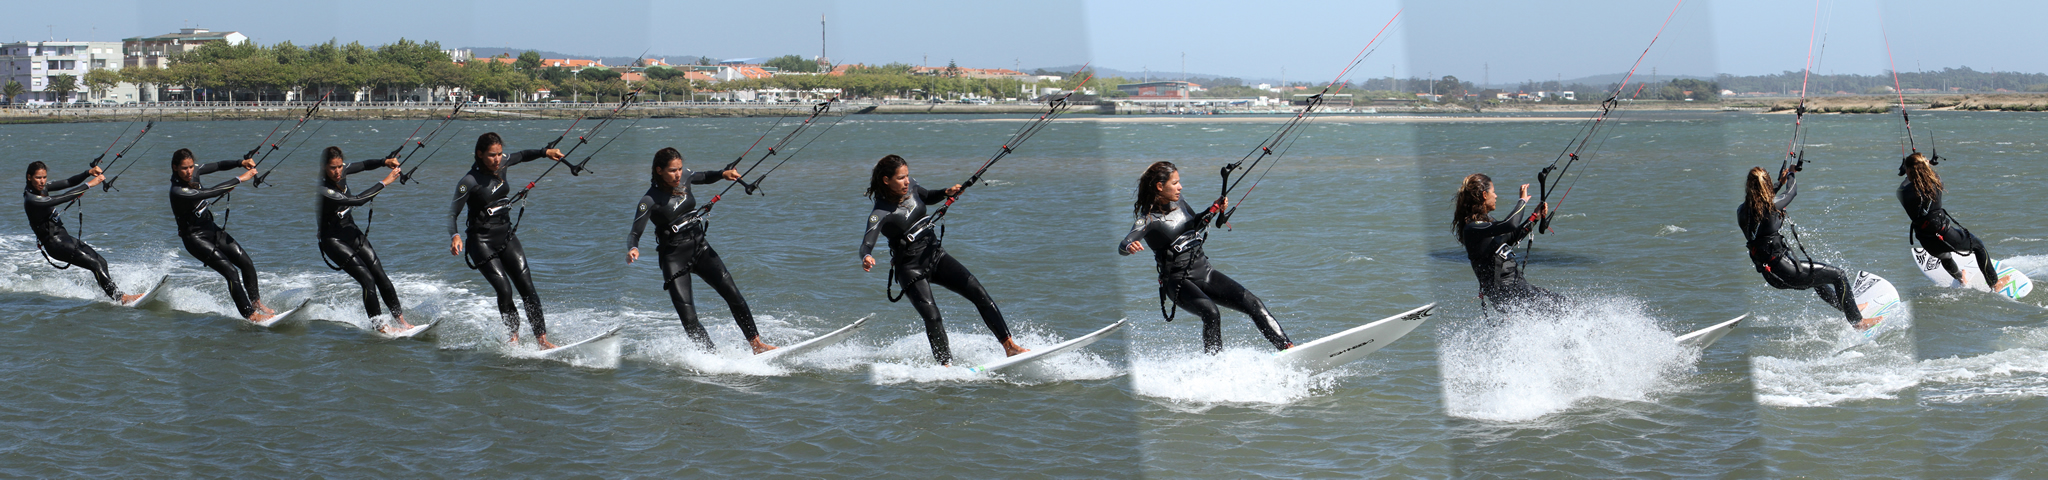
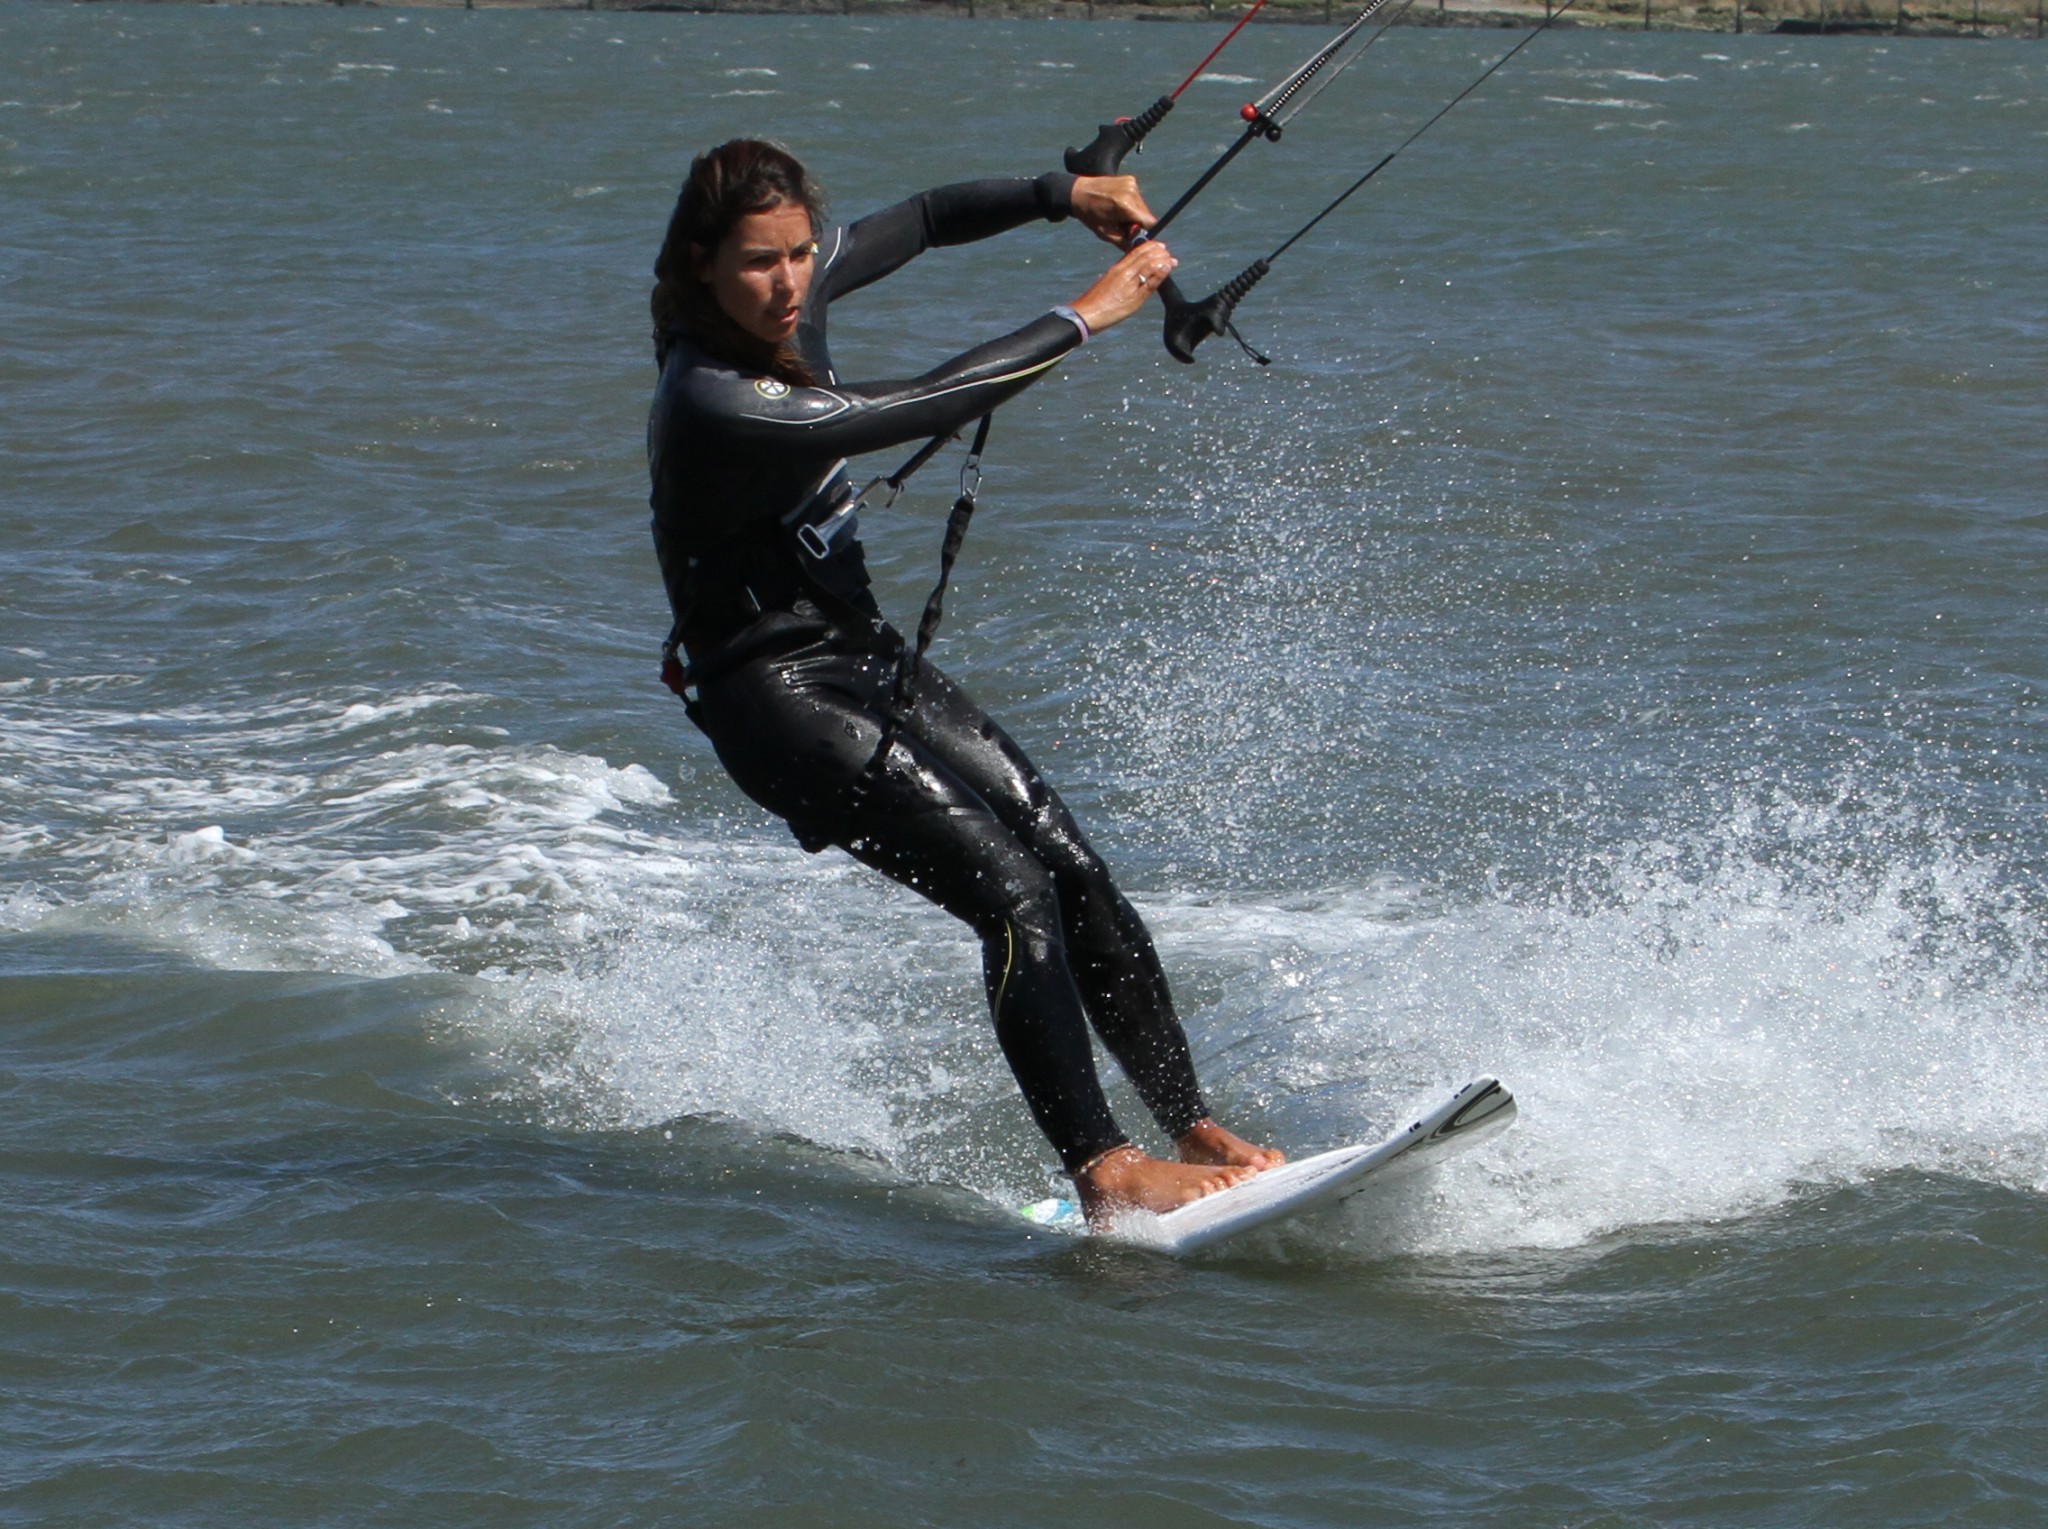
Pic A
This shows Karine’s feet approaching her foot change. Her front foot is forward on the upwind side of the board and her back foot is back on the tail pad straddling the centre of the board. Karine has her weight evenly on both feet. She does this by moving her hips slightly further forward towards the nose of the board.


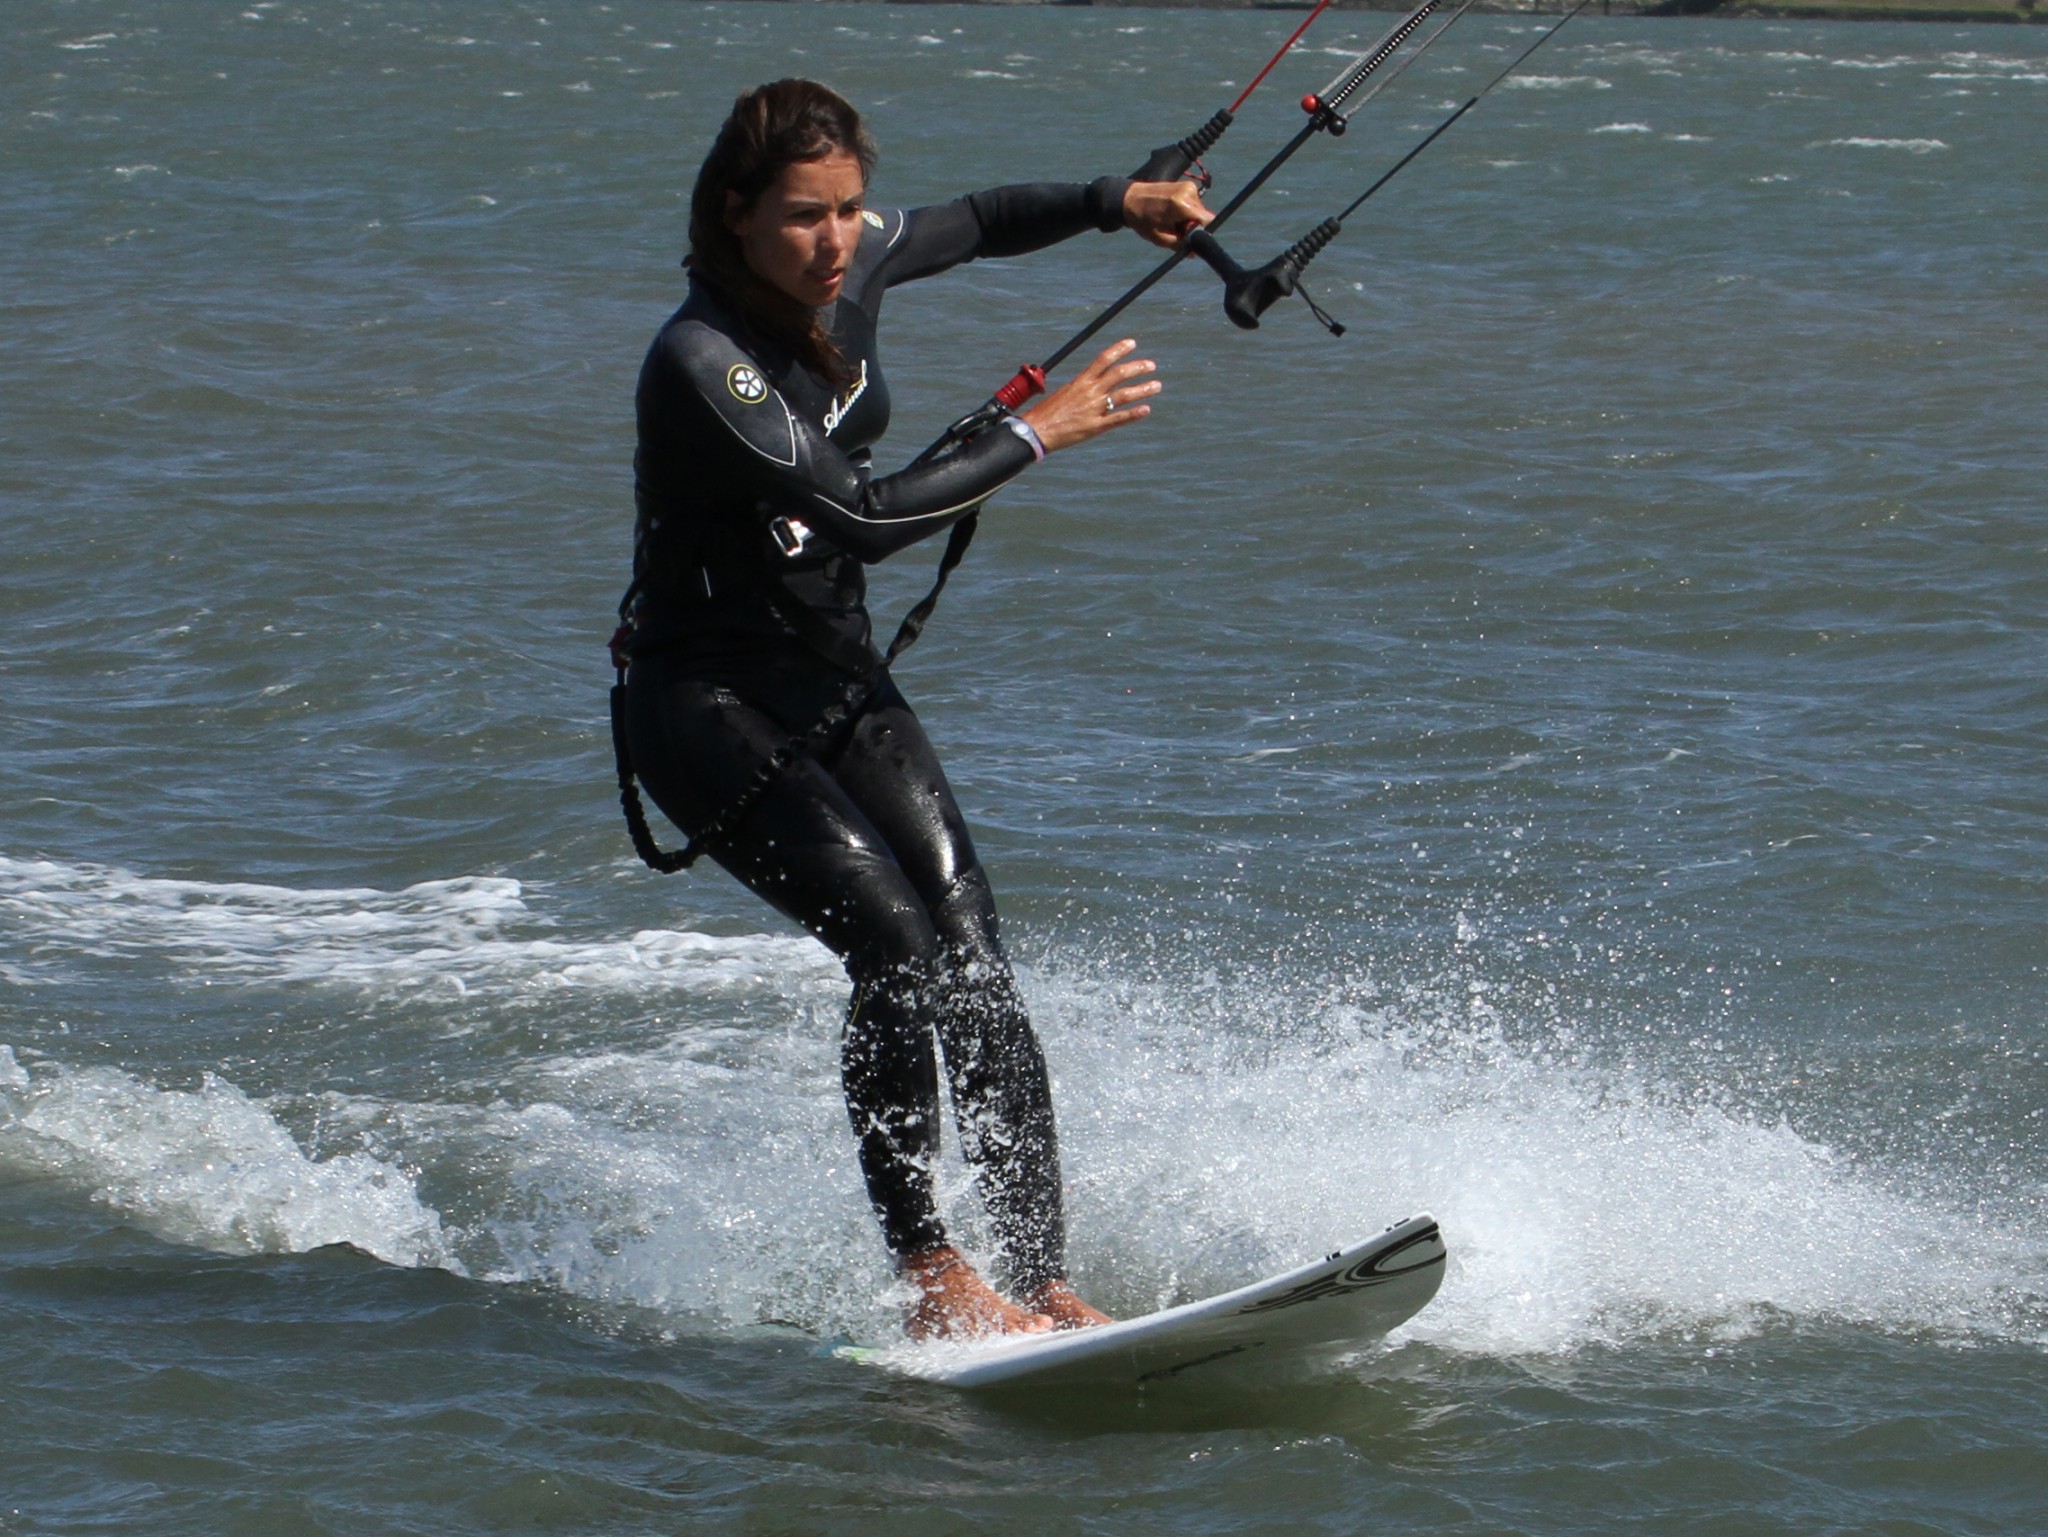
Pic B
Karine now moves her weight forward onto her front foot so that she can then lift her back foot to move it forwards without the board noticing. This way the board stays edged and therefore stable.
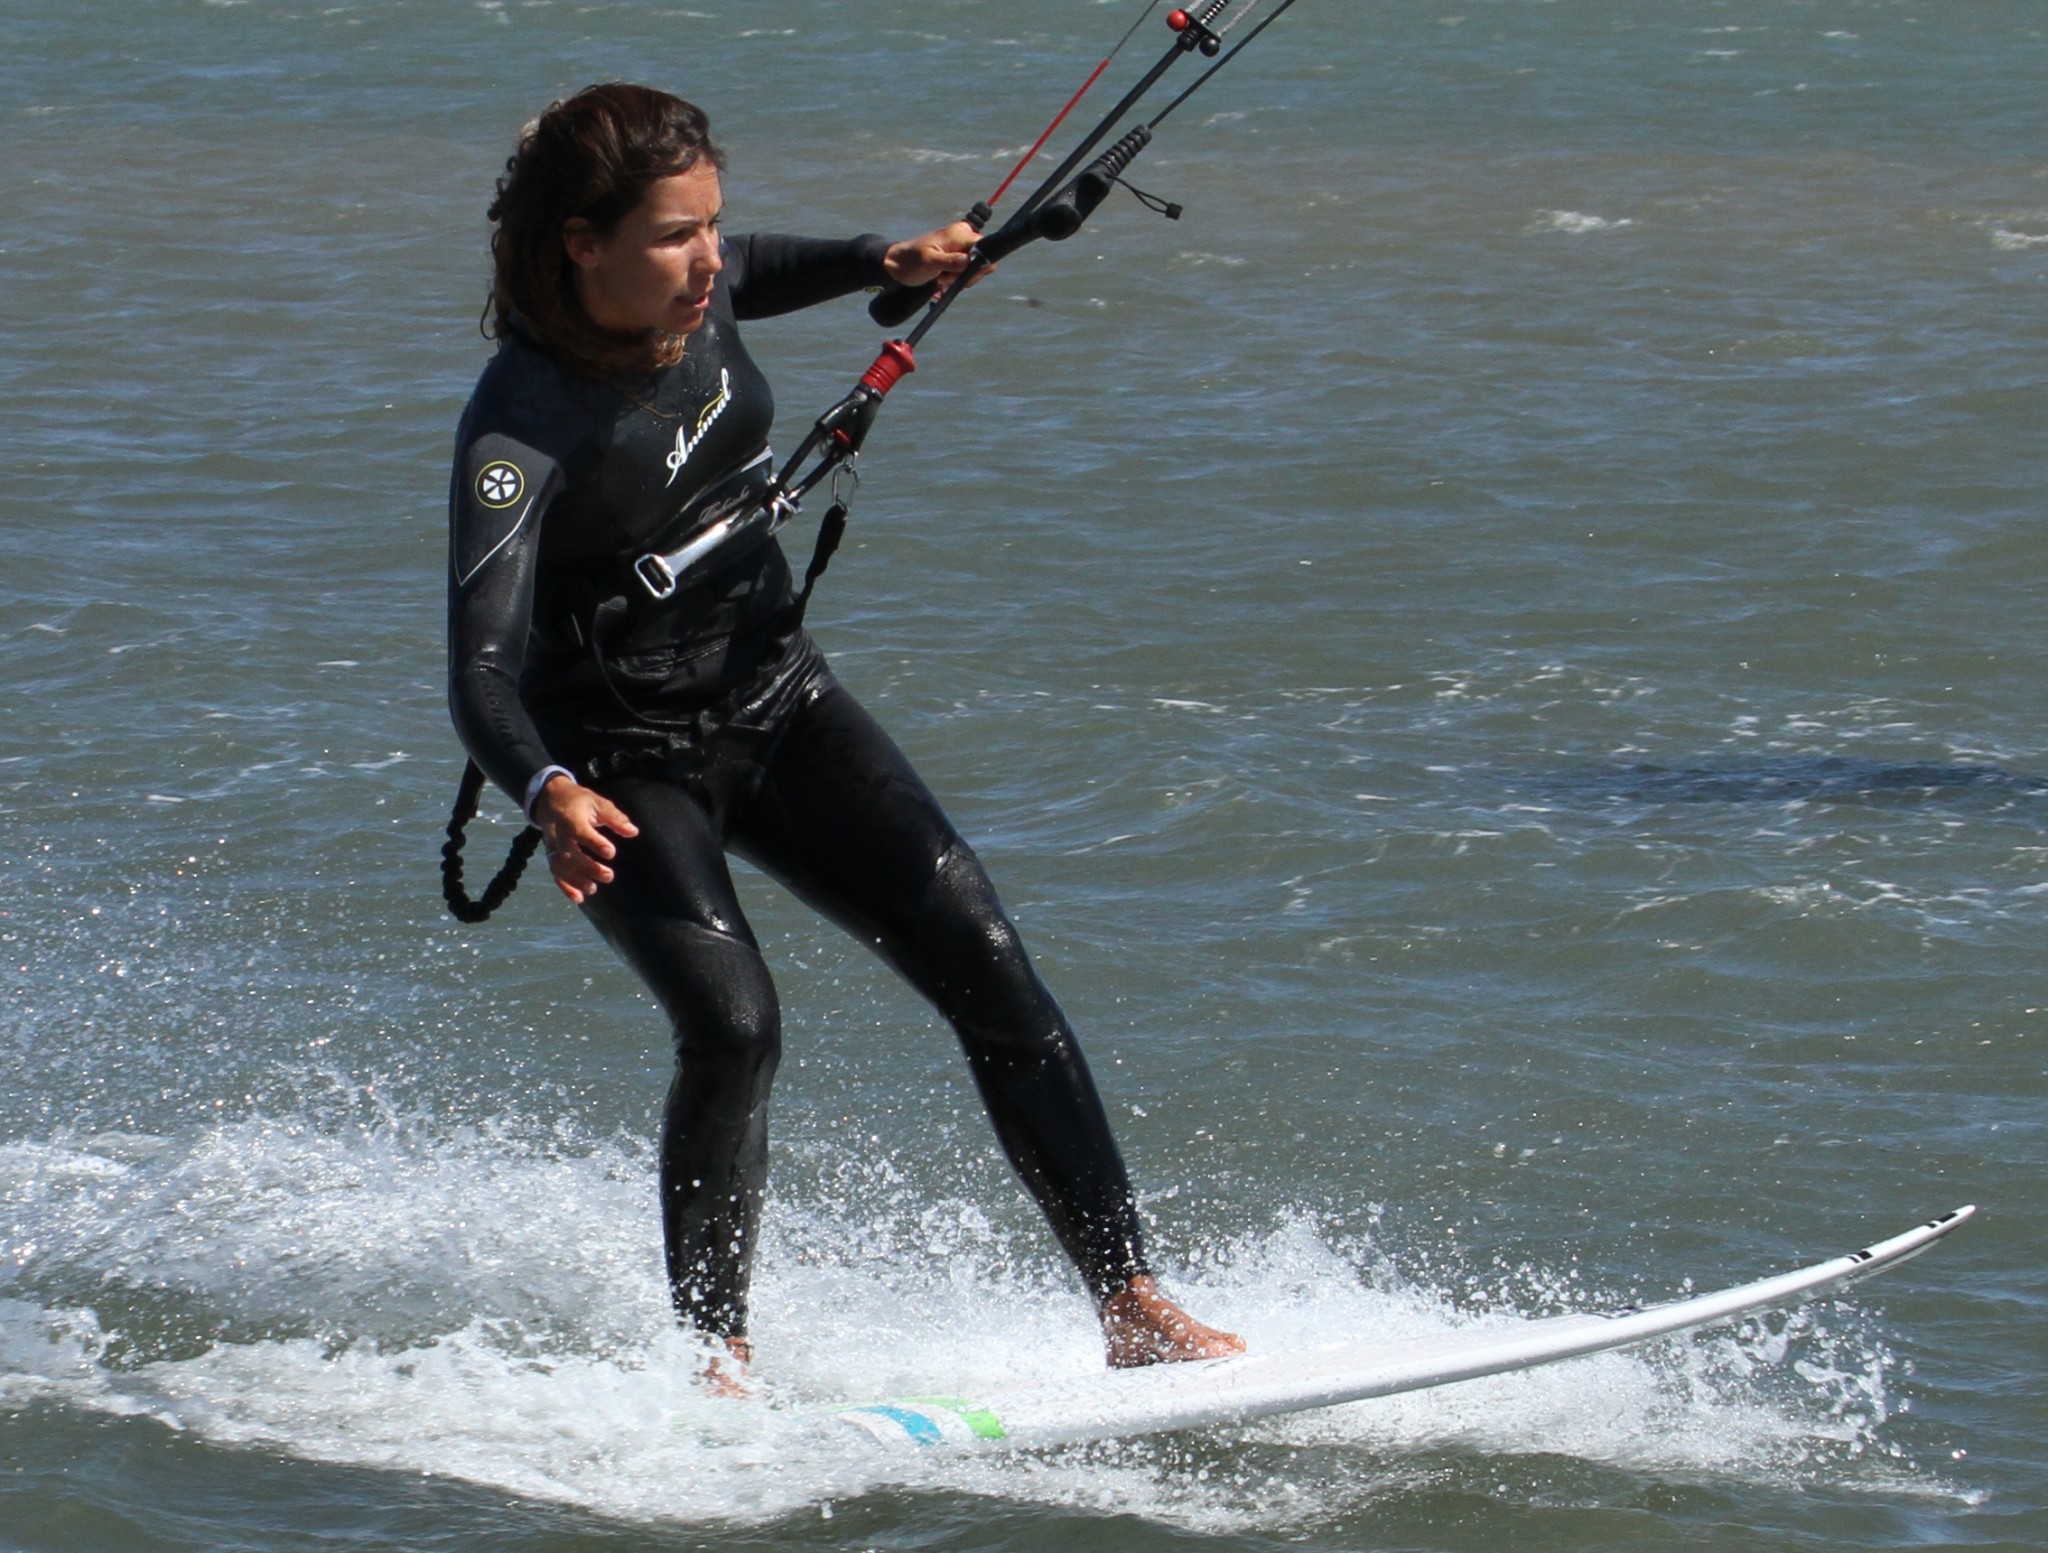
Pic C
Which allows Karine to place her back foot up next to her front foot in the Daddy I need a wee position that you already know. To practice you could now kite along in this position to get used to it. Karine’s weight is still on her front/right foot, so the board should carry on as if nothing has happened.

Pic D
This is the moment when you commit to the turn. Karine has moved her hips across the board, which puts her weight onto her left foot. As a result the board comes off its edge and starts to bear off the wind. However because both feet are forward the board does not stop, just alters direction. With her weight now on her left foot Karine can lift her right foot and move it back. The key here is to move the foot back, BUT NOT your weight, otherwise the board will leave you behind. Once we start thinking about the kite this moment will be crucial.
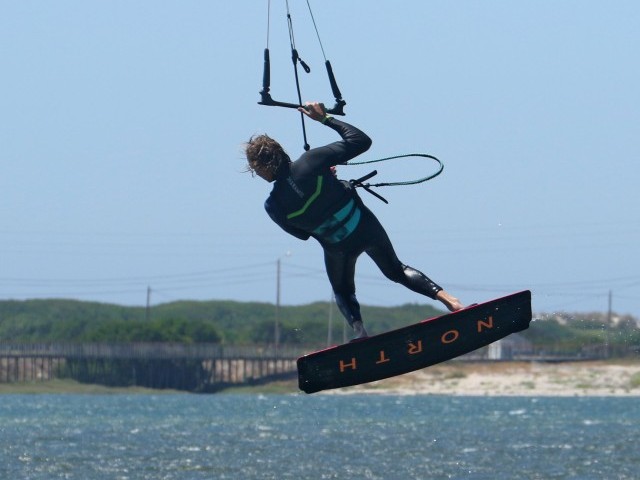
Pic E
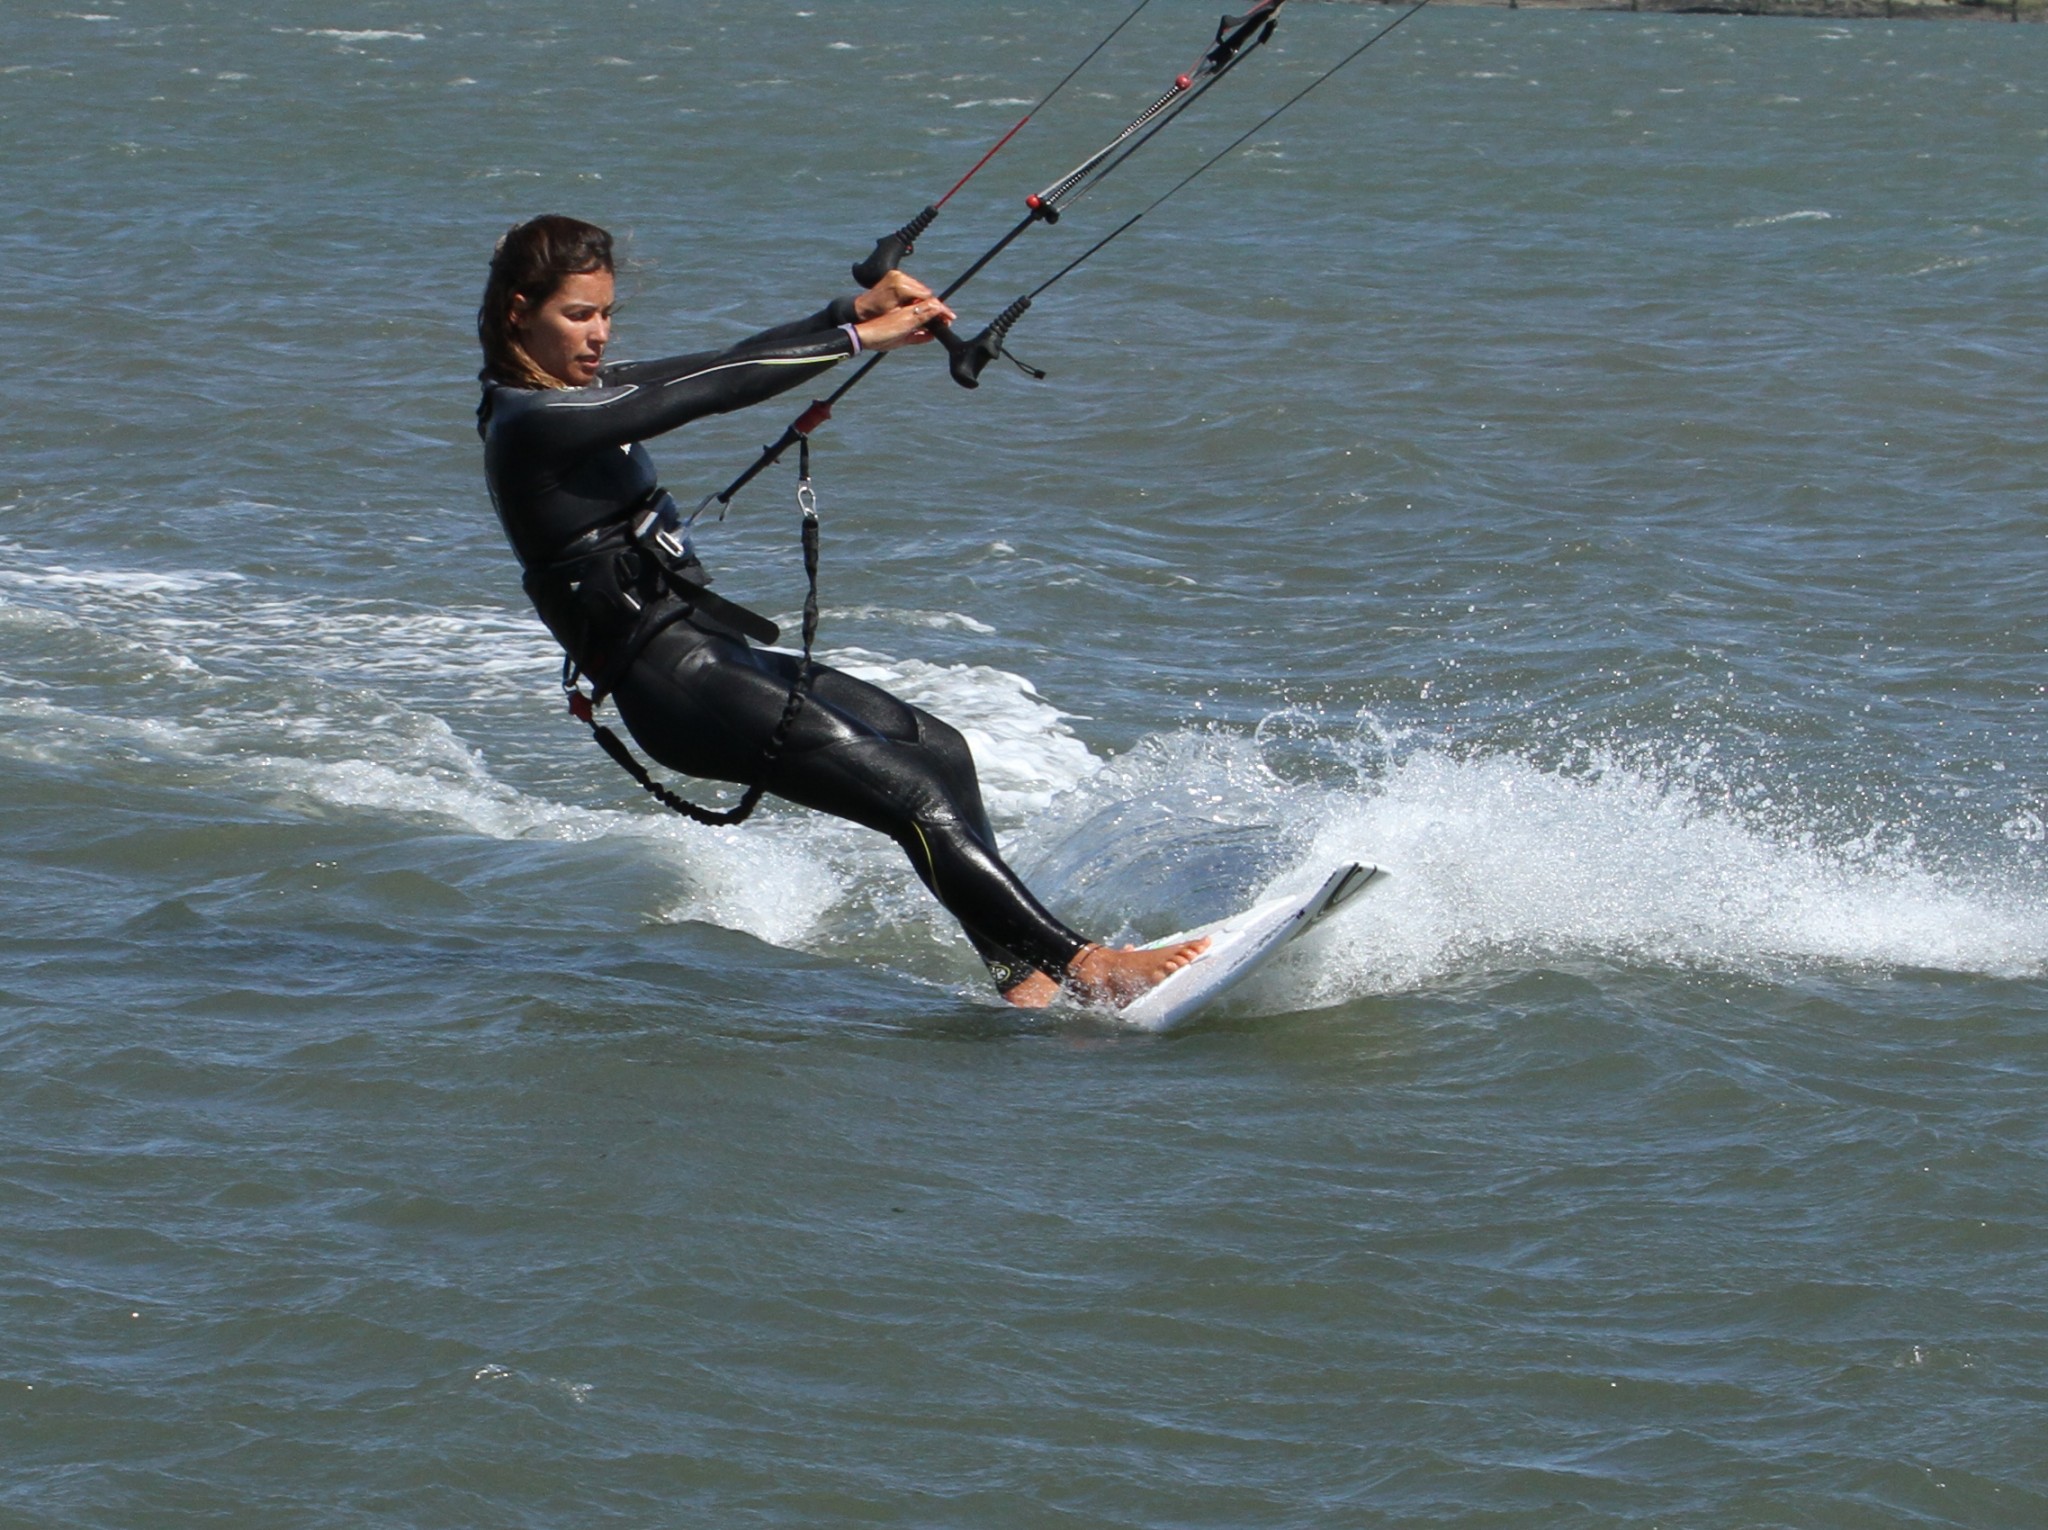
Now with her right foot planted on the tail pad (or in front of the back strap) Karine can move her weight back onto this foot so that she can carve the board around the turn from the tail.
Pic F
This shows the position of Karine’s feet as she carves around the turn, and this is the position you should aim to change you feet to during the step back. Karine’s front foot is where she moved it up to, and Karine’s back foot is far enough back on the board that she can carve the board from her heel.

Breaking it Down - The Kite
Now to make these foot movements into a steady turn we need to ponder the kite.
Pic A
Karine has the kite about 1 o’clock, which means she can edge upwind and doesn’t feel that she’s getting lifted off the board, whilst still taking the power through her harness.
Pic B
Kite is still the same, but as Karine moves her weight forward she pulls the bar in for a bit of extra lift and support from the kite. See how Karine has bent her front leg and moved her shoulders towards the nose of the board to get all her weight onto the front foot, so that she can lift her back one.
Pic C
Kite still hasn’t moved but Karine now has both her big toes kissing, her weight forward, and has turned her head and shoulders to face forward to make for an easier step up.
Pic D
The moment of truth! As Karine moves her hips over her left foot she releases her front hand from the bar, and therefore will loose the support of the kite.


Pic E
With her hand off the bar Karine can now easily step back with her foot and at the same time start to turn the kite across the window by pulling on her left hand. These two movements combined should start you turning fairly automatically! Ideally the kite will not go up via 12 o’clock but rather straight across to 11.
Pic F
With her feet correctly positioned and the kite moving across the window Karine can turn her head and commit to the carve, with her weight to the inside of the turn. As a result of the board bearing away as you change your feet, moving your weight back over the tail, and aggressively moving the kite across the window, the continuation of the turn and a smooth exit should be well within sight.
Top Tips
Practicing the movements on land is always a good idea, as then when you go to move your feet for real they will be far more likely to go to where they should! When doing this think - 1 move weight forward, 2 move back foot up, 3 rock weight across onto new front foot, 4 step back.
Once you go out onto the water do a few toe to heel carves to get you warmed up for the kite movement, and then add the two together as in Sequence 1.

Common Problems
If you feel locked onto your back foot and can’t lift it. Remember to bend your front leg and move your weight forward onto it before trying to lift the back foot.

If your board wobbles terribly as you go to move your back foot up, it is because you did not shift your weight onto the front foot, ride along for a little bit and then lift your back foot. If you just pick up the foot which had some weight on it the board will complain.
If you loose your balance once you have both feet together. Chances are you are standing up too tall, so keep your knees flexed and shoulders forwards. Also make sure that you are pigeon toed, if the old back foot is facing forward rather than inwards it will push the board forwards and underneath you.
If you fall down wind of the board once you change weight to the downwind foot. This is often the result of having the kite too high, no speed or both. With the board moving it will start to turn and feel more stable. Once again keep your knees soft.
Keystones
- Enter with weight on both feet
- Move hips forward to weight front foot
- Step up
- Weight onto downwind foot and step back
- Turn kite hard across the window
This technique article was in Issue 28 of IKSURFMAG.
Related


By Christian and Karine
Christian and Karine have been working together as a coaching team, running improver to advanced kitesurfing clinics since 2003.
