
Double Back Loop to Toeside
Technique / Intermediate


Introduction
This jump really typifies what kiting is all about, both getting air and adding together moves, marrying them, adding parts on like a text bundle and coming out with something new and exciting. The constant challenge in kiting makes it fun, and combining skills that you already have makes it achievable. With this win-win in mind, let's ponder the killer combo, which is the double back loop (or roll) landing toeside.
Ideally, we’d strongly recommend that you can already land a decent sent back loop:) And having a dependable toeside will also make sticking the landing one hundred times easier. If you’ve already got the double nailed life will be simpler still! Bearing this is mind let us ponder the finer points of this move.


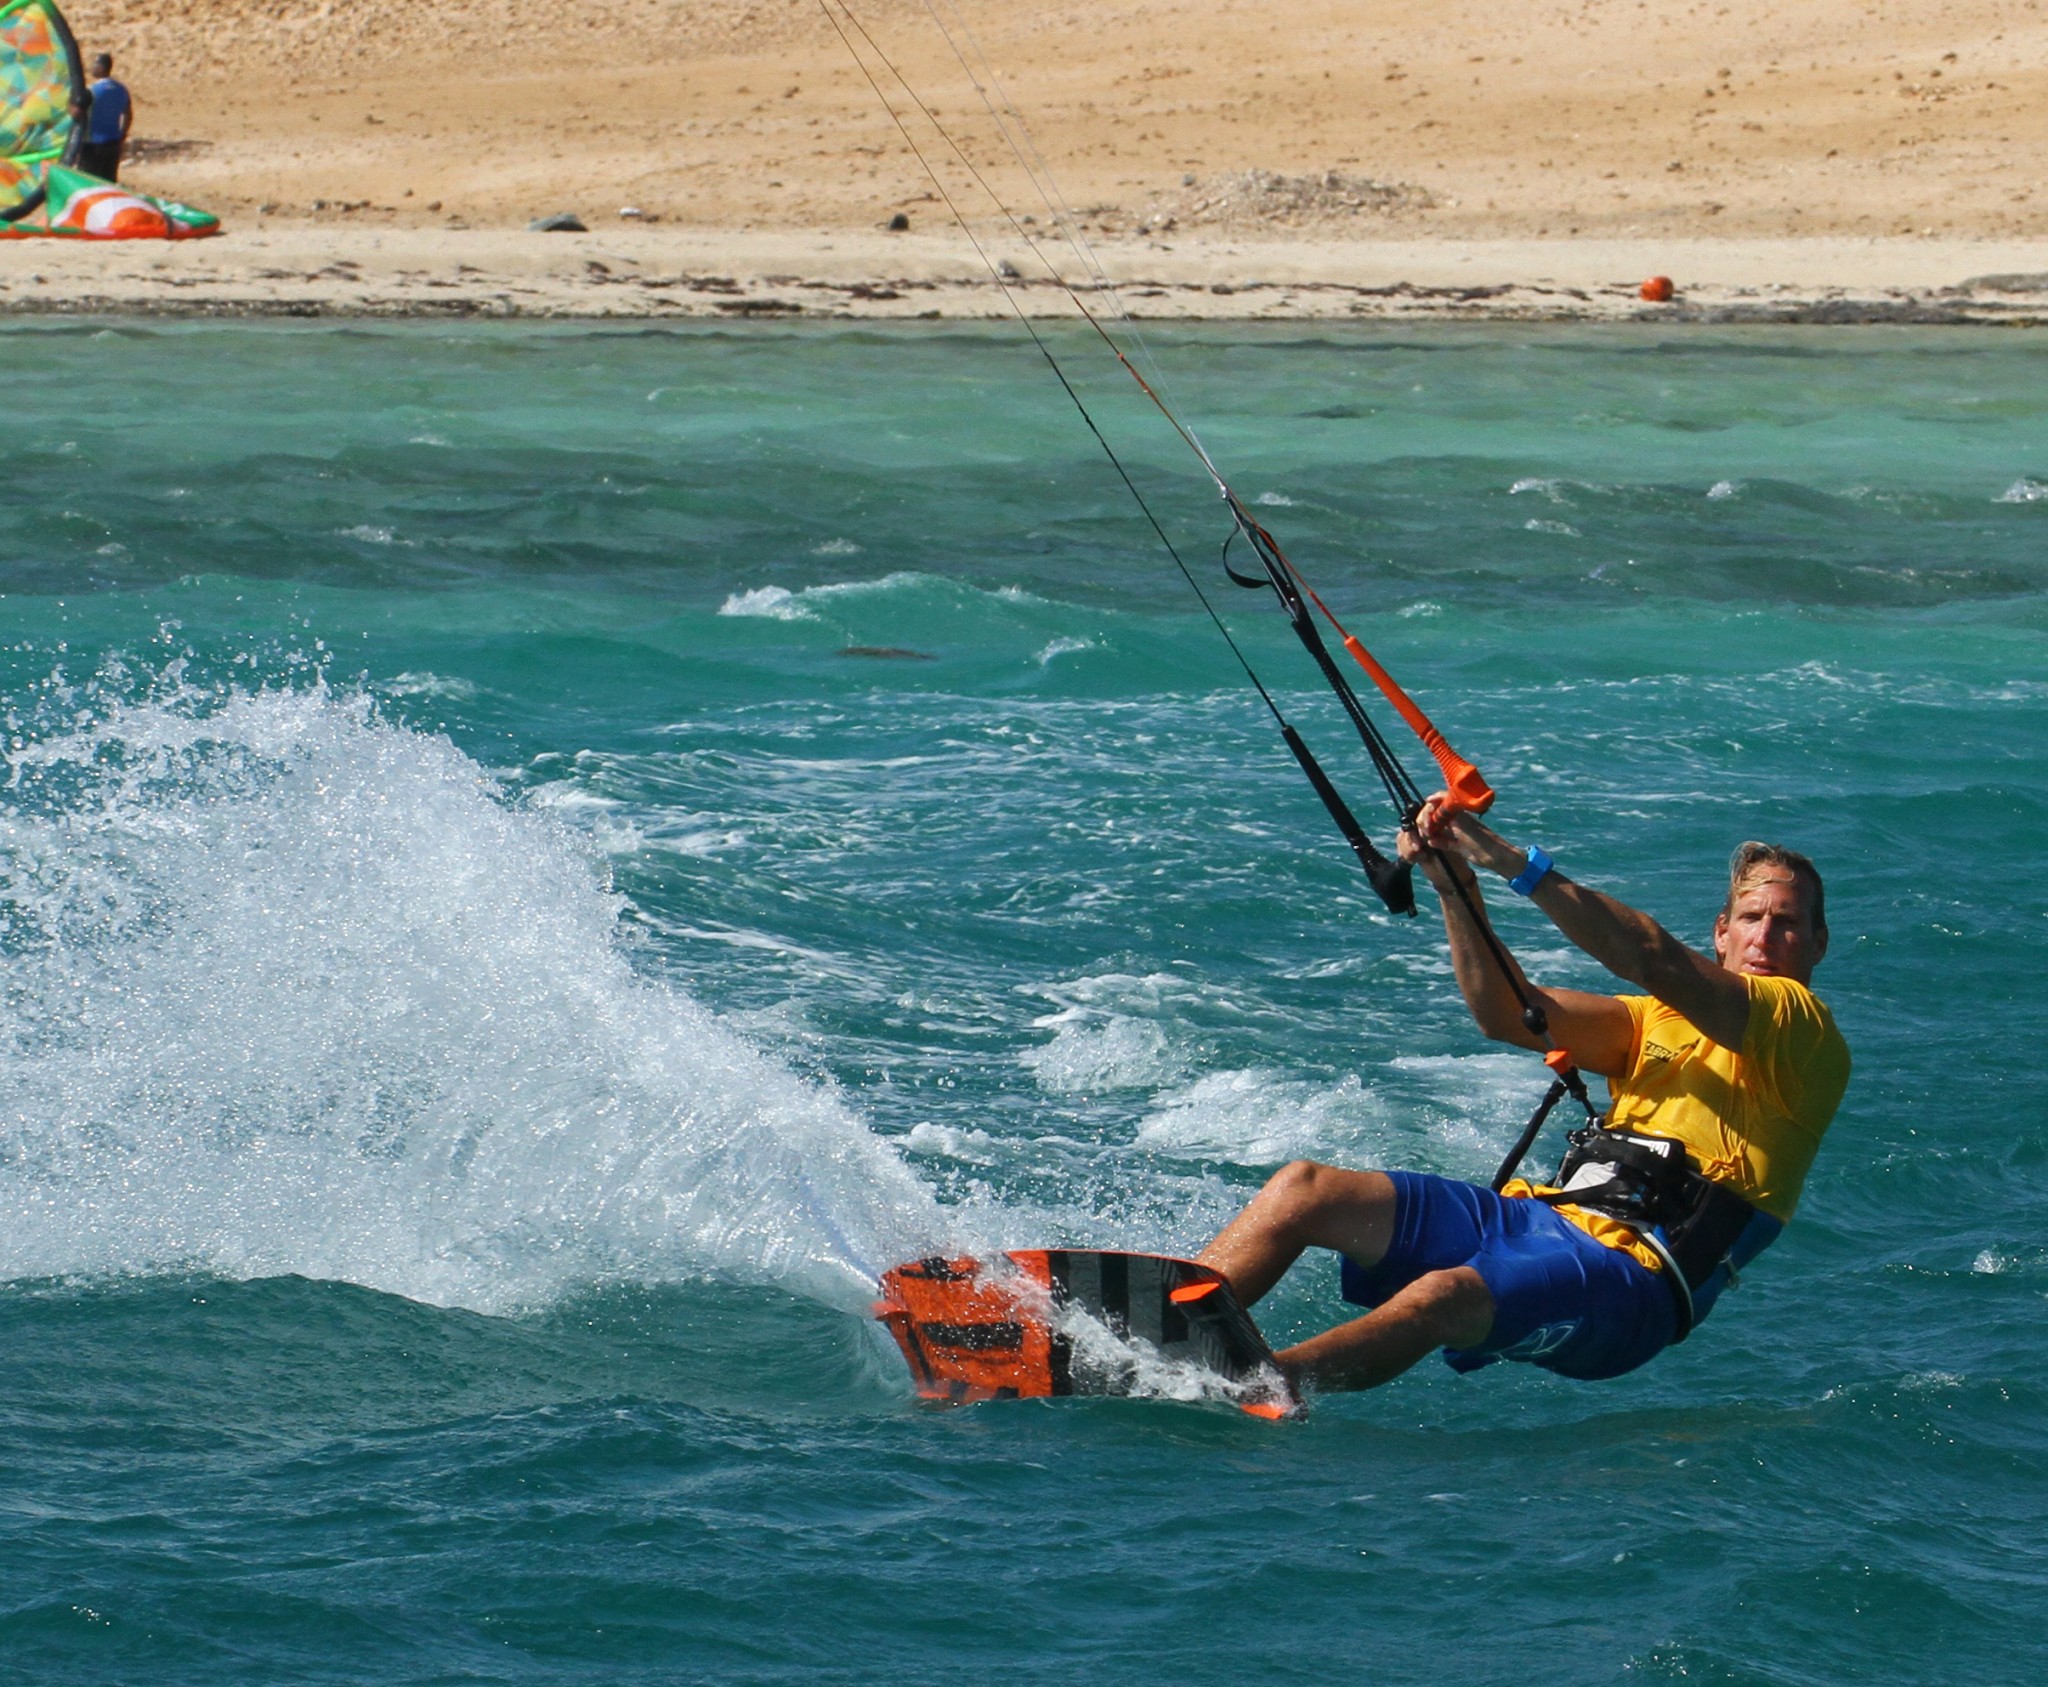
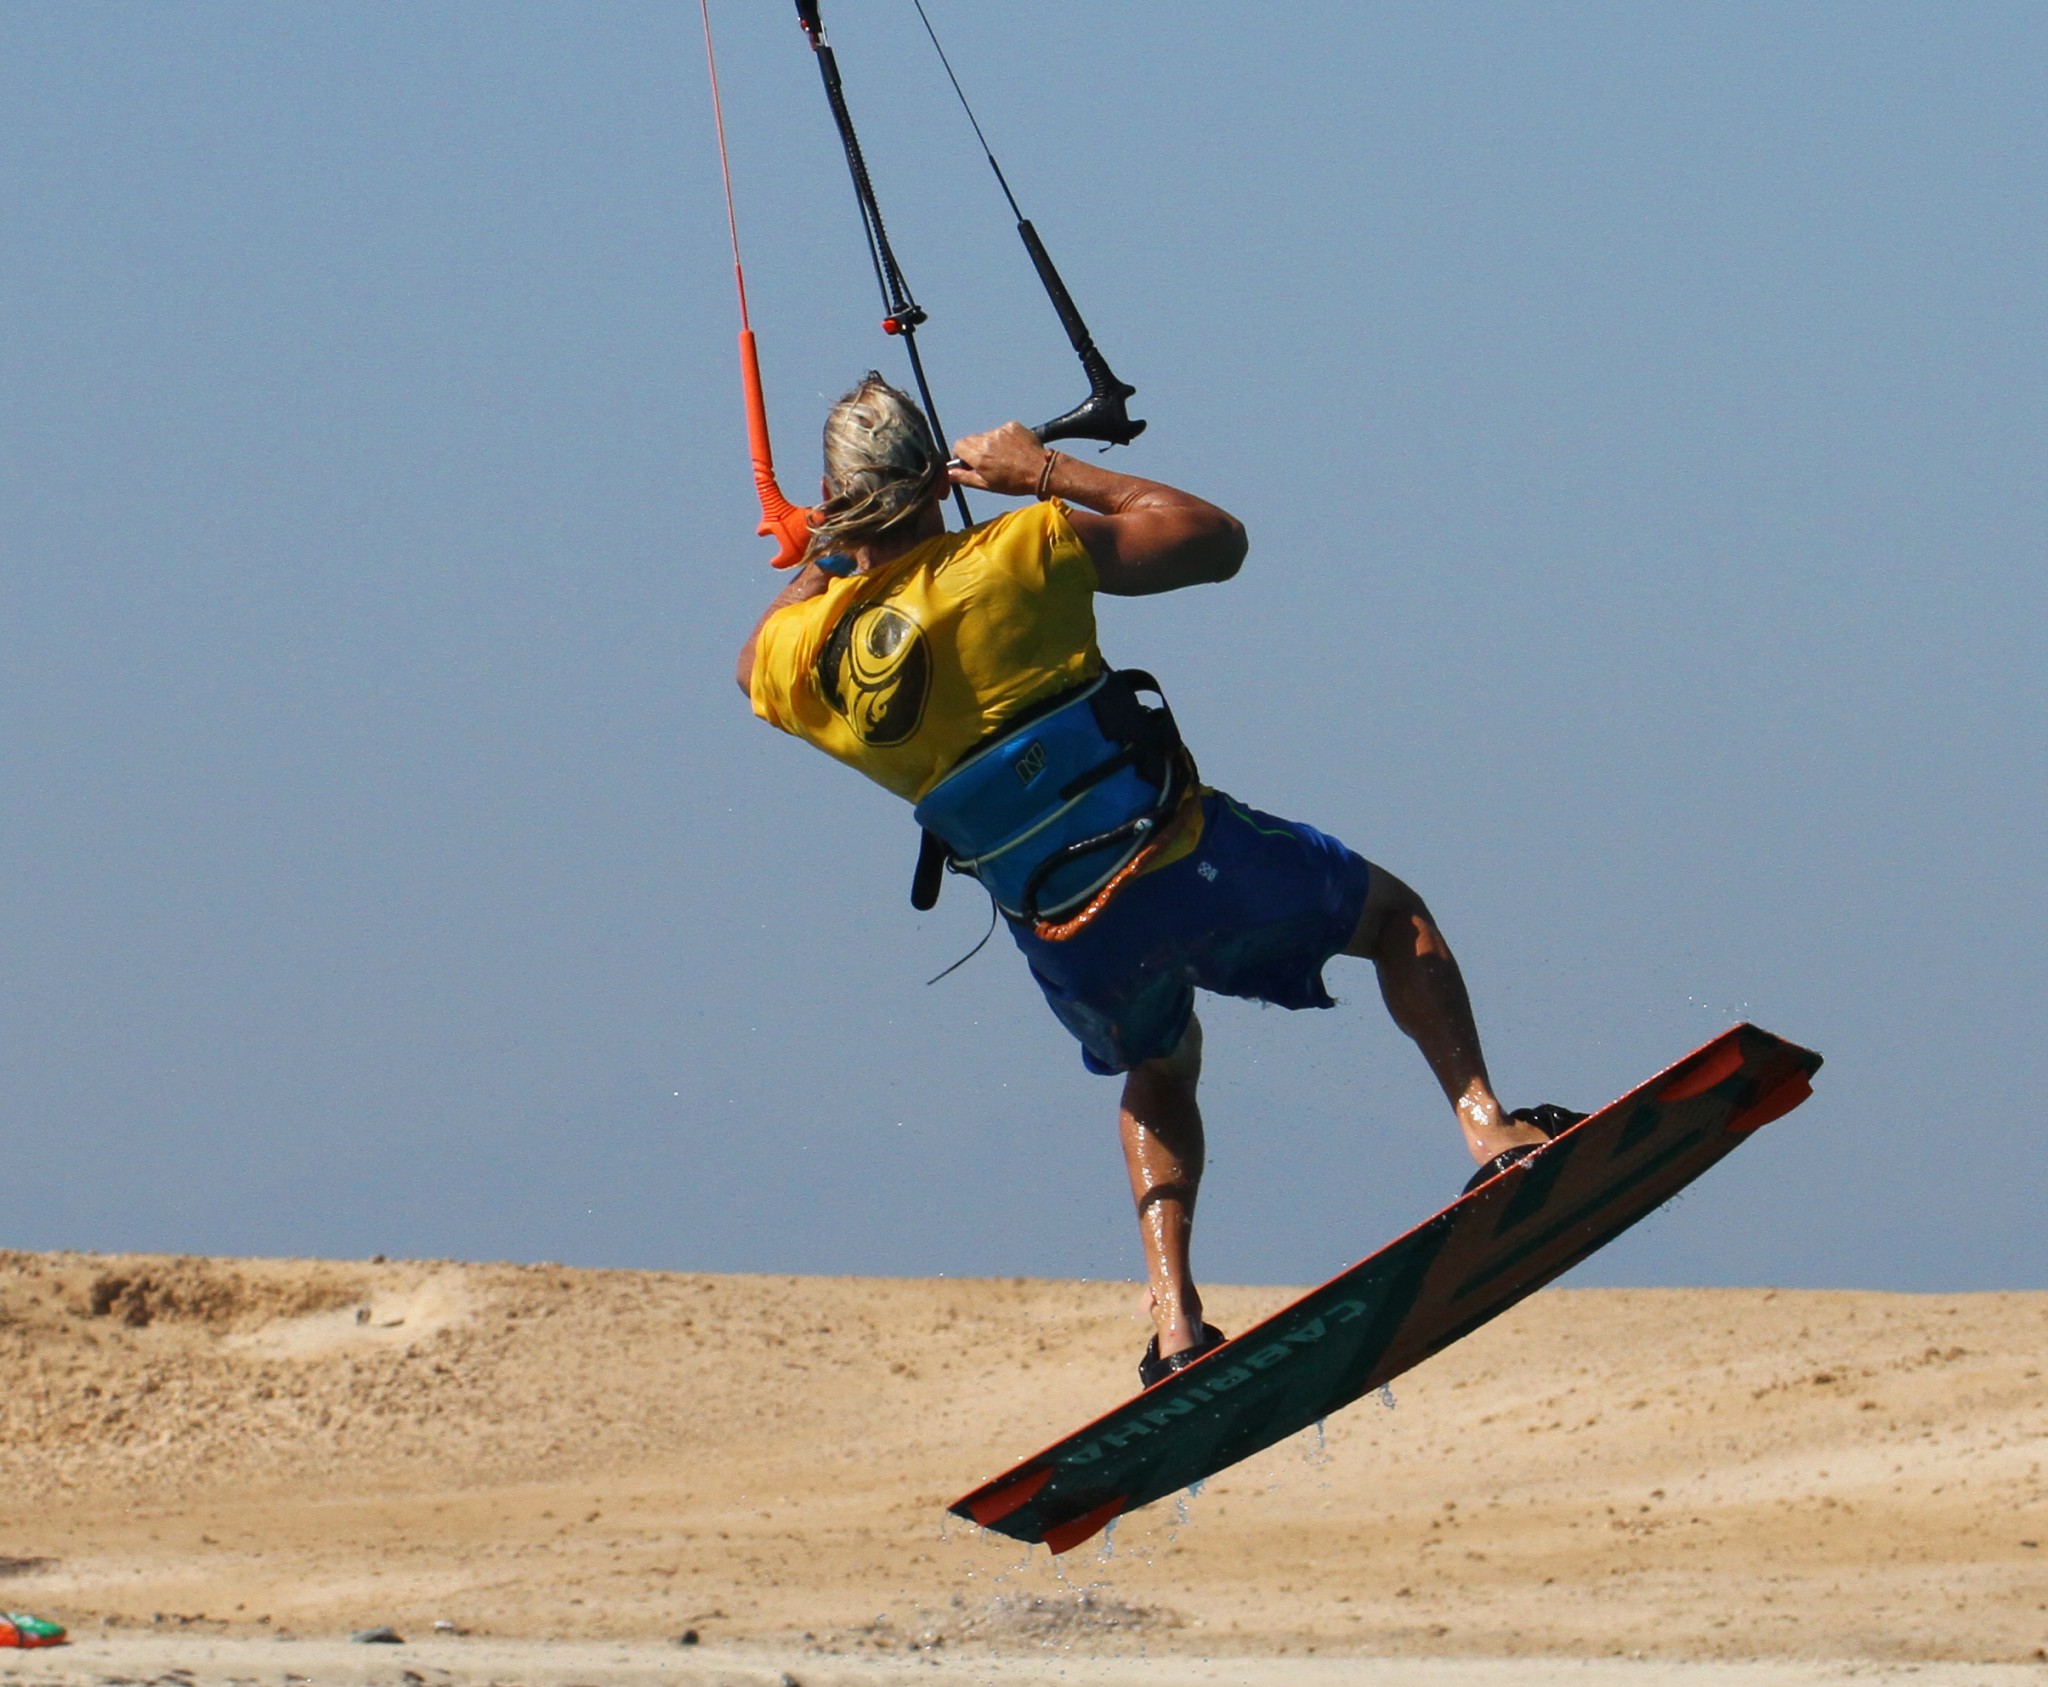
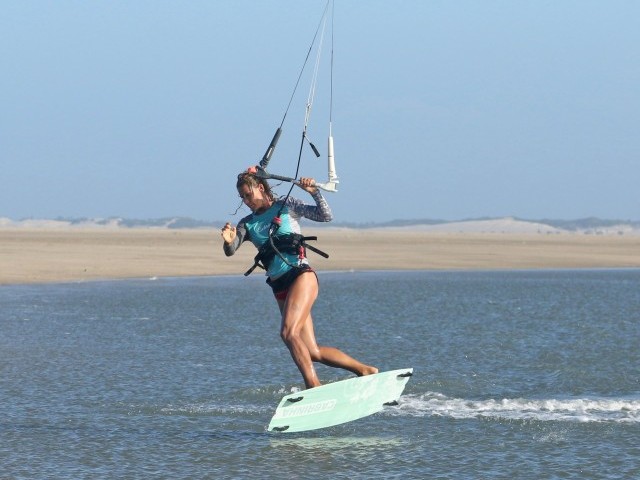
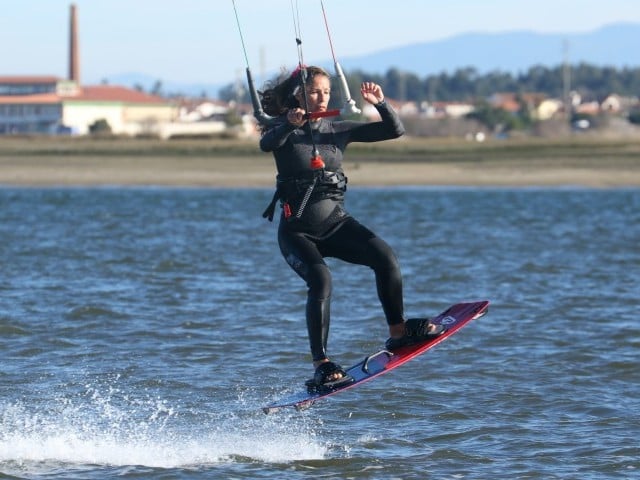
The Approach Pic A.
If you read this column regularly, you’ll know by now how important the approach to any move is. If something is missing on the run in, your chances of success will be drastically reduced. So make sure you go through your pre-flight checklist. You will need enough height to complete a double back rotation. You’ll need enough rotation to complete the double. And you’ll need enough control to have the kite in the right place and bring the back foot through to toeside at the end. So come in on a good edge with speed and send the kite positively to get enough height while maintaining forward momentum, just as you would for a normal jump. Here, Christian is on a solid edge with his hips back, but back leg resisting hard so his bum is low, shoulders twisted forwards to keep as much board in the water as possible. He’s sent the kite with both hands, pushing away with his front hand as well as pulling in with his backhand. He’s looking forwards and upwind to keep a good straight line into the takeoff.
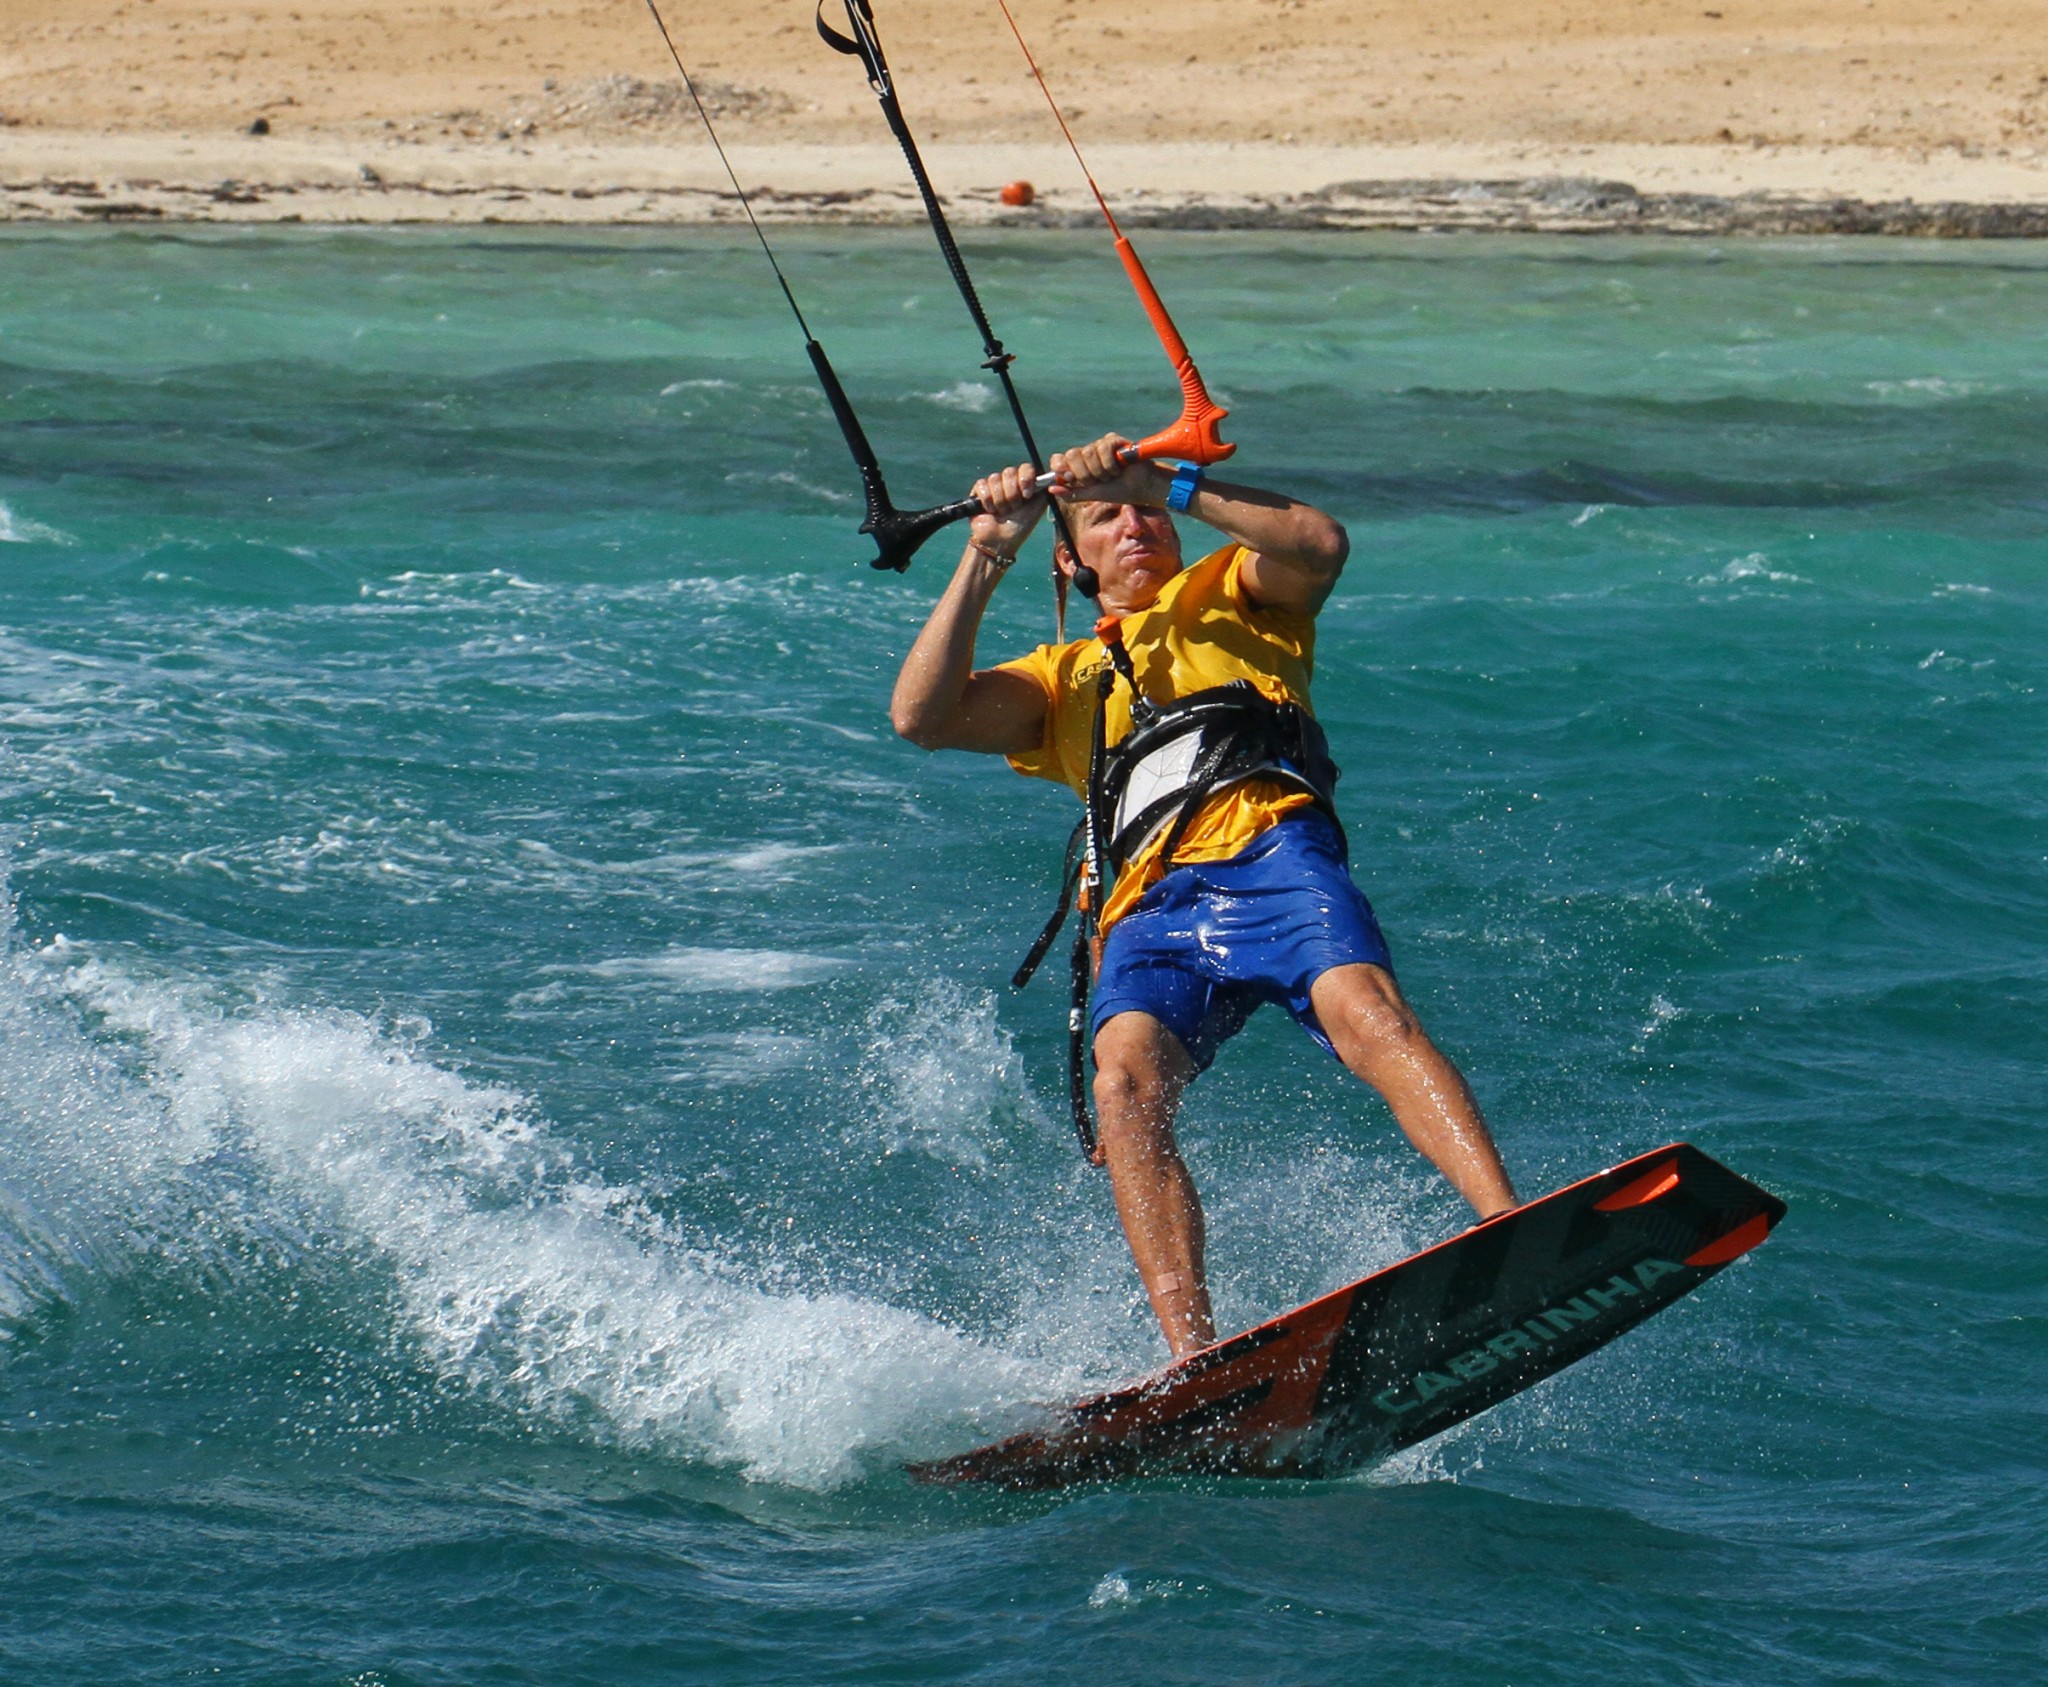
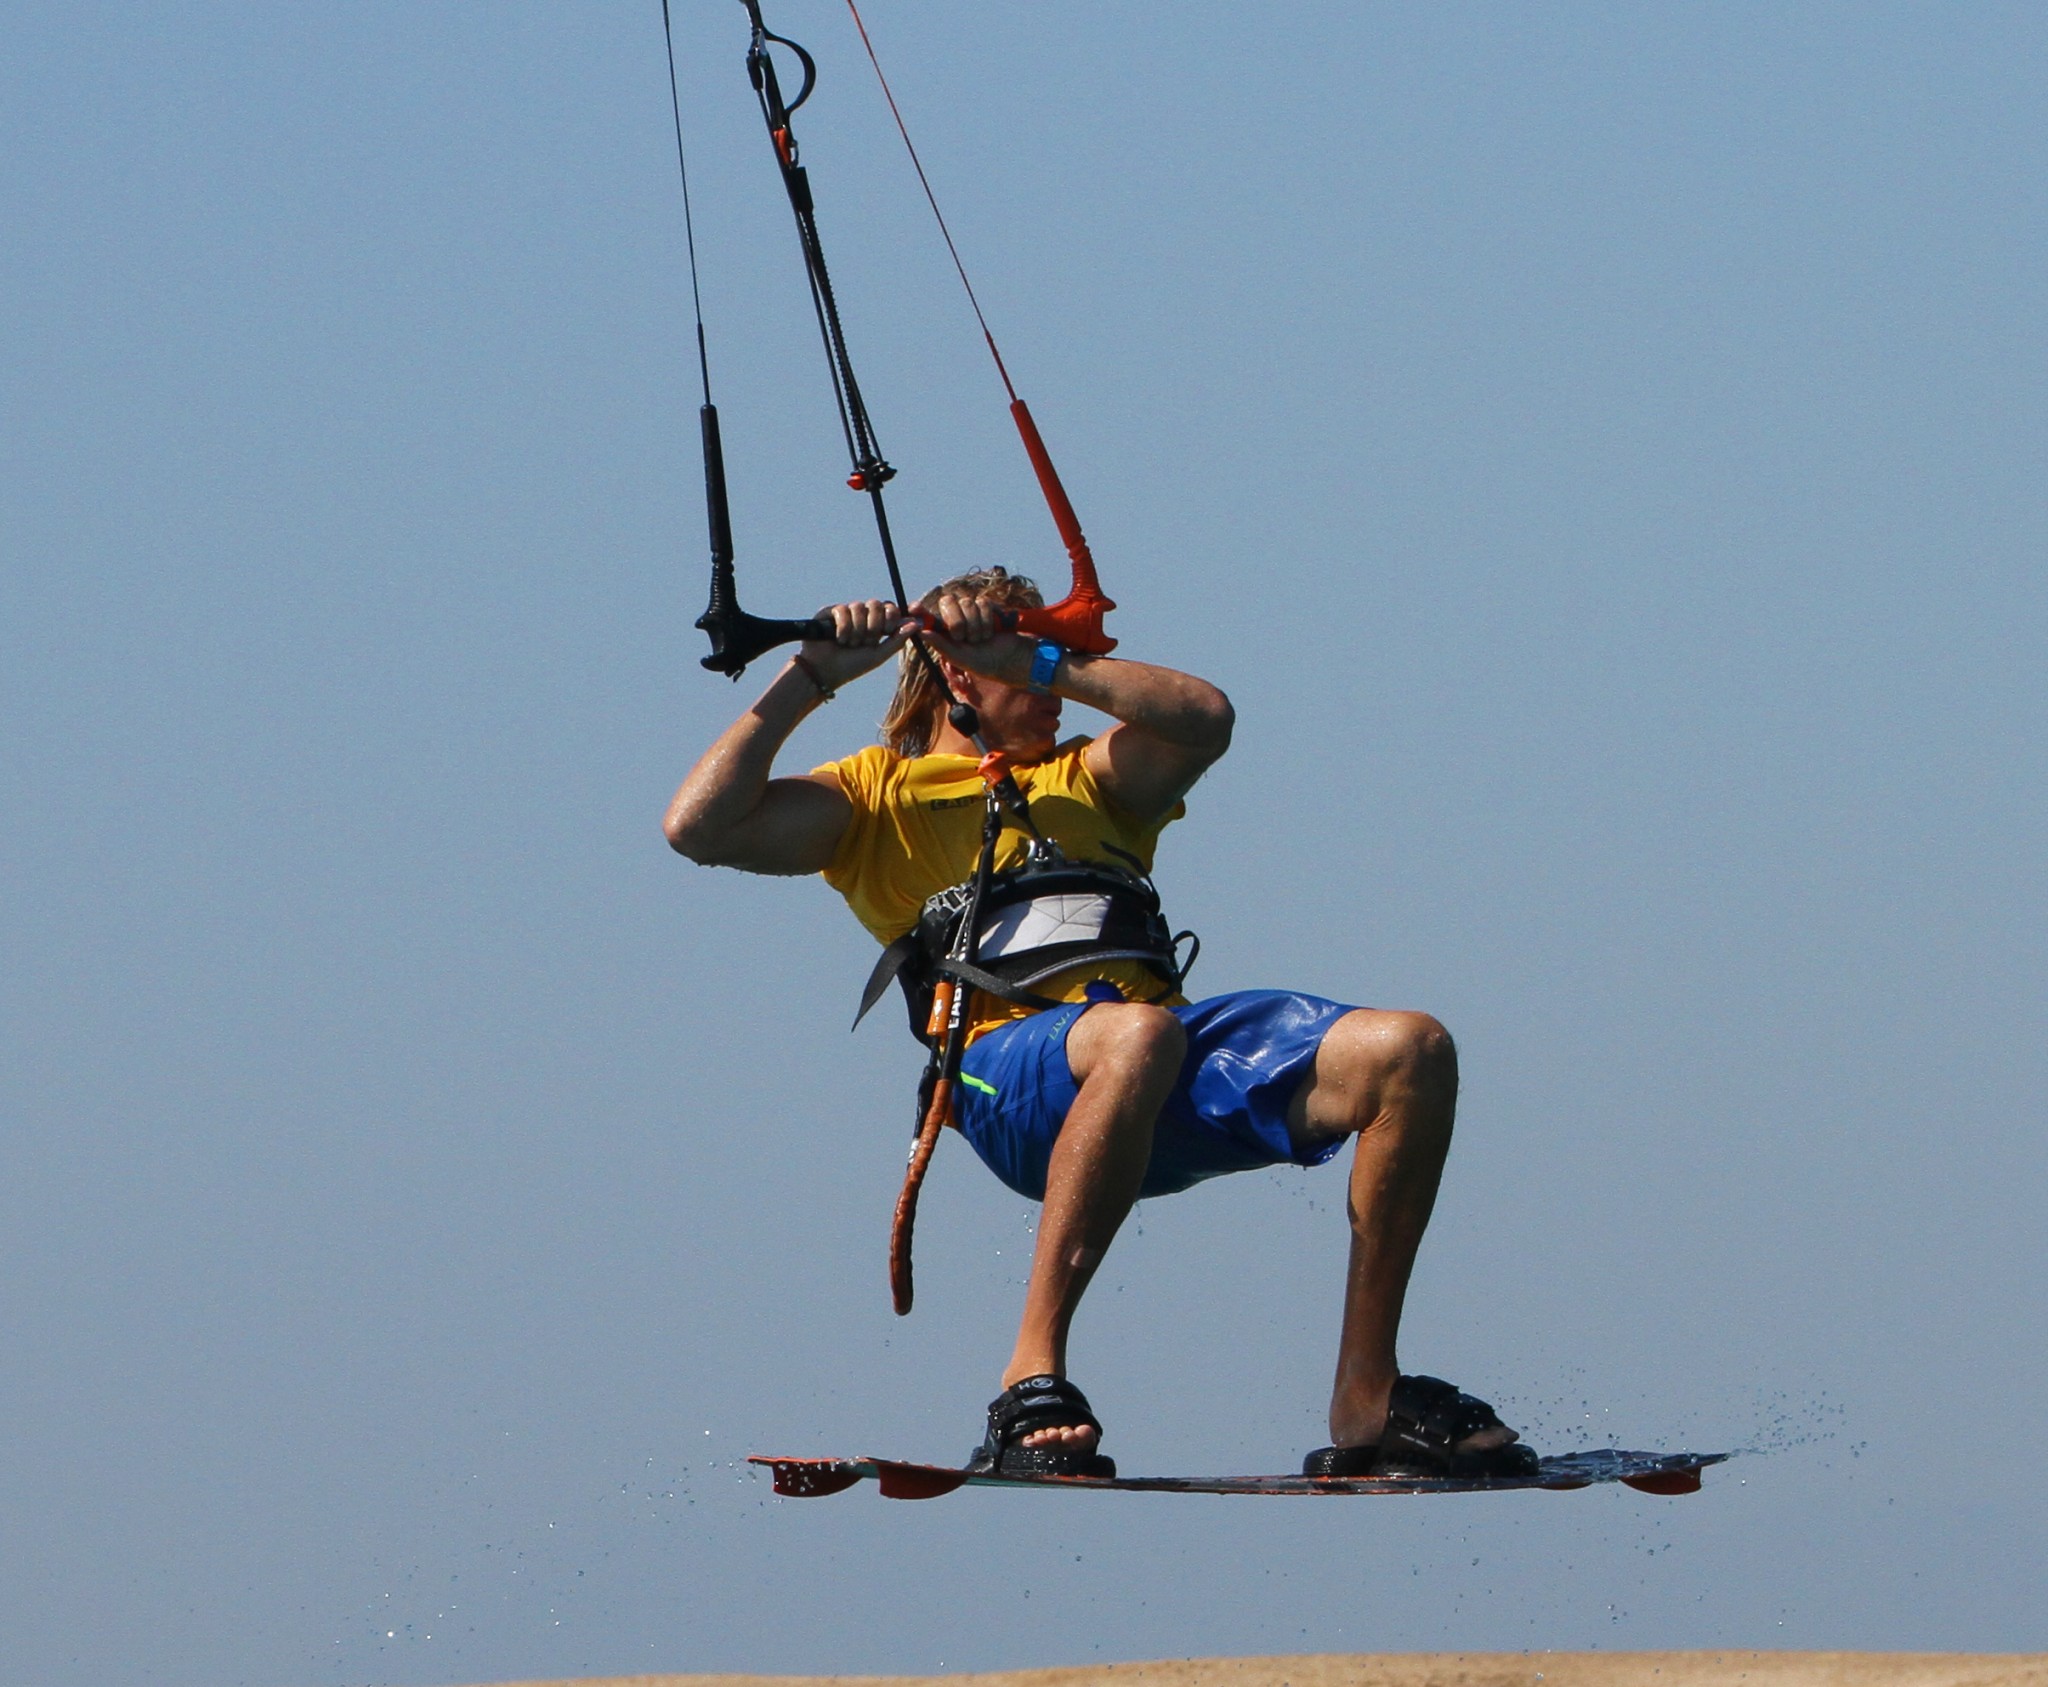
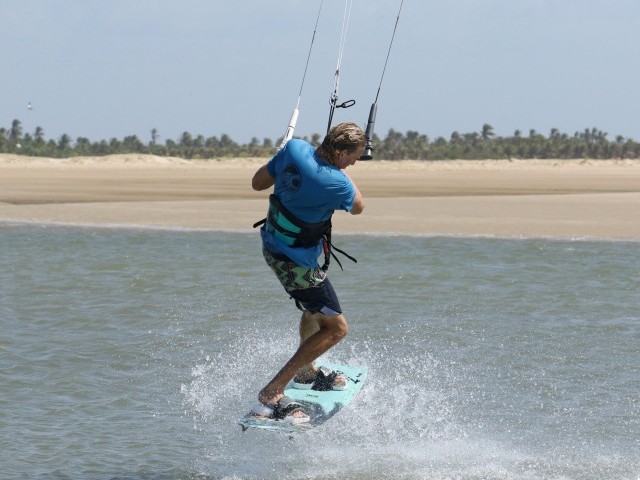
The Take Off Pic B.
As if the approach wasn’t important enough, it’s your take off which will set everything in motion, so here you’ll need total concentration. As you’re going for the double, it’s necessary to get a bit more spin to guarantee you get into the 2nd rotation. However, this part is a compromise as you don’t want to wildly throw yourself into the back rotation because you need control at the end for the toeside landing. To get enough spin you will carve into the rotation hard with the edge of your board, and you can lean back slightly to use the boards tail to push you round – this will spin you quicker. However, you must still keep your head relatively perpendicular to your shoulders, if you throw your head around over your front shoulder you won't have the control, and you’re more likely to lose your edge. The other must do here, is to use your back leg. You can see how Christian’s back leg is extending. He’s pushing against the board, which results in him going up and around. The danger here is to soften the back leg and roll back, which will only end in tears. The final but equally important part of the take off is to level the bar as you go up. Christian has pulled the bar in and as a result levelled it. This will stop the quite swinging too far back and means that as he rotates, the kite should move forwards towards 12 o’clock. In essence, the extension of the back leg and the levelling of the bar keep any unwanted surprises at bay.
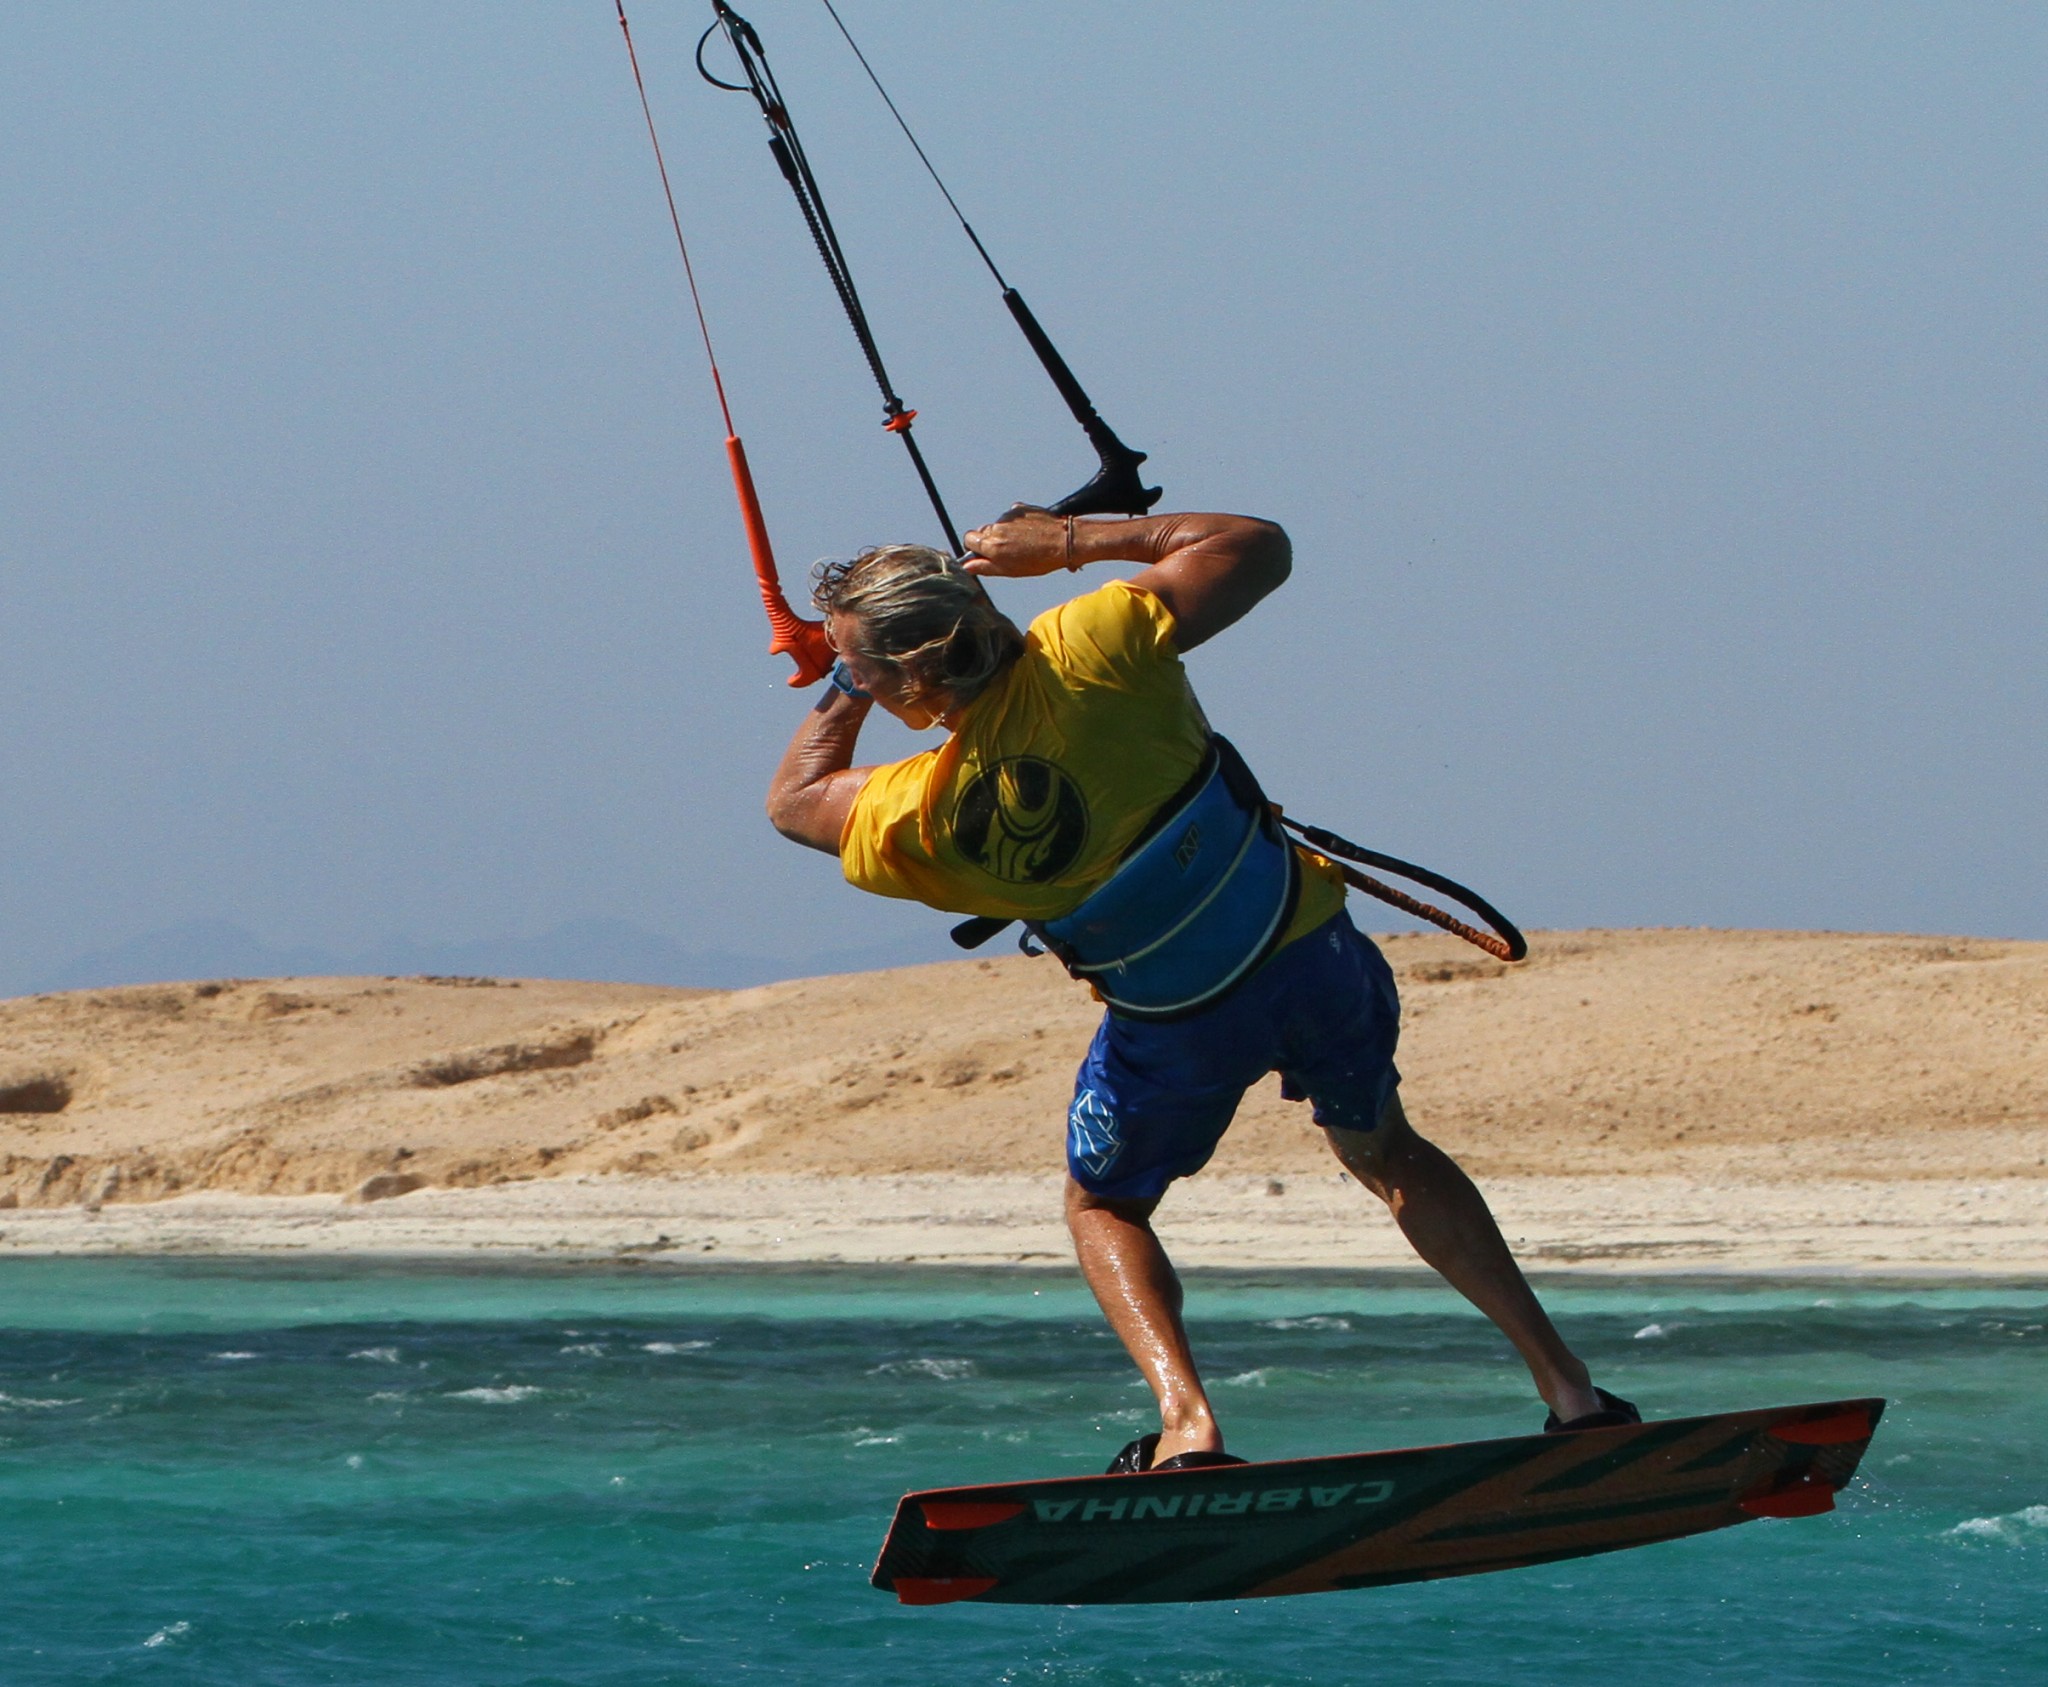
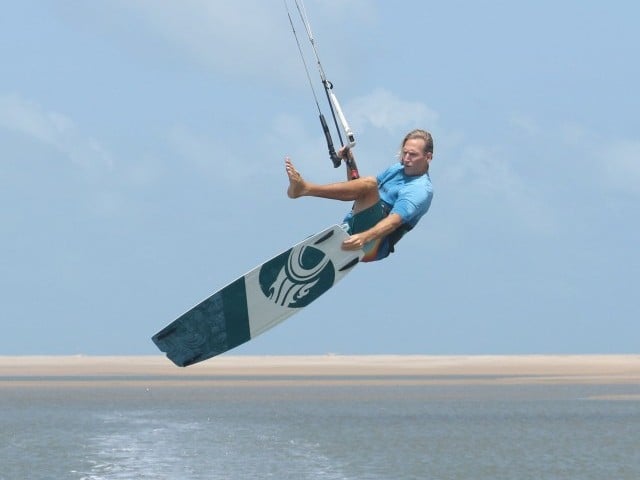
The First Rotation Pic C.
Immediately after take off your job is to get the kite back where you want it for the most float, and keep tension in the lines so that the kite is ready for action when you next need it. As you rotate, you can have a cheeky peak, as Christian is here. If the kite is too far back, pulling on your front hand will bring it forwards towards 12 o’clock. Christian’s head is still looking forwards, not looking over his shoulder. With the kite moving forwards towards 12 o’clock you should be lifting all the way around your first rotation. Your aim is to get number 1 out of the way on the way up as this way you will steel feel where the kite is. Once you start to drop you won’t have the same feedback on the bar so it will be more difficult to time your landing. Christian has finished his first rotation here; the bar is still in, and his knees are up for balance.
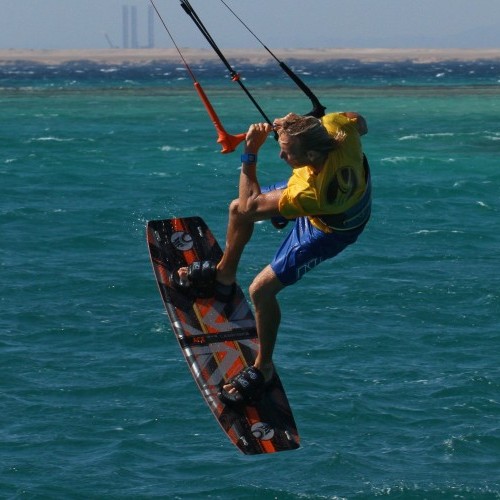
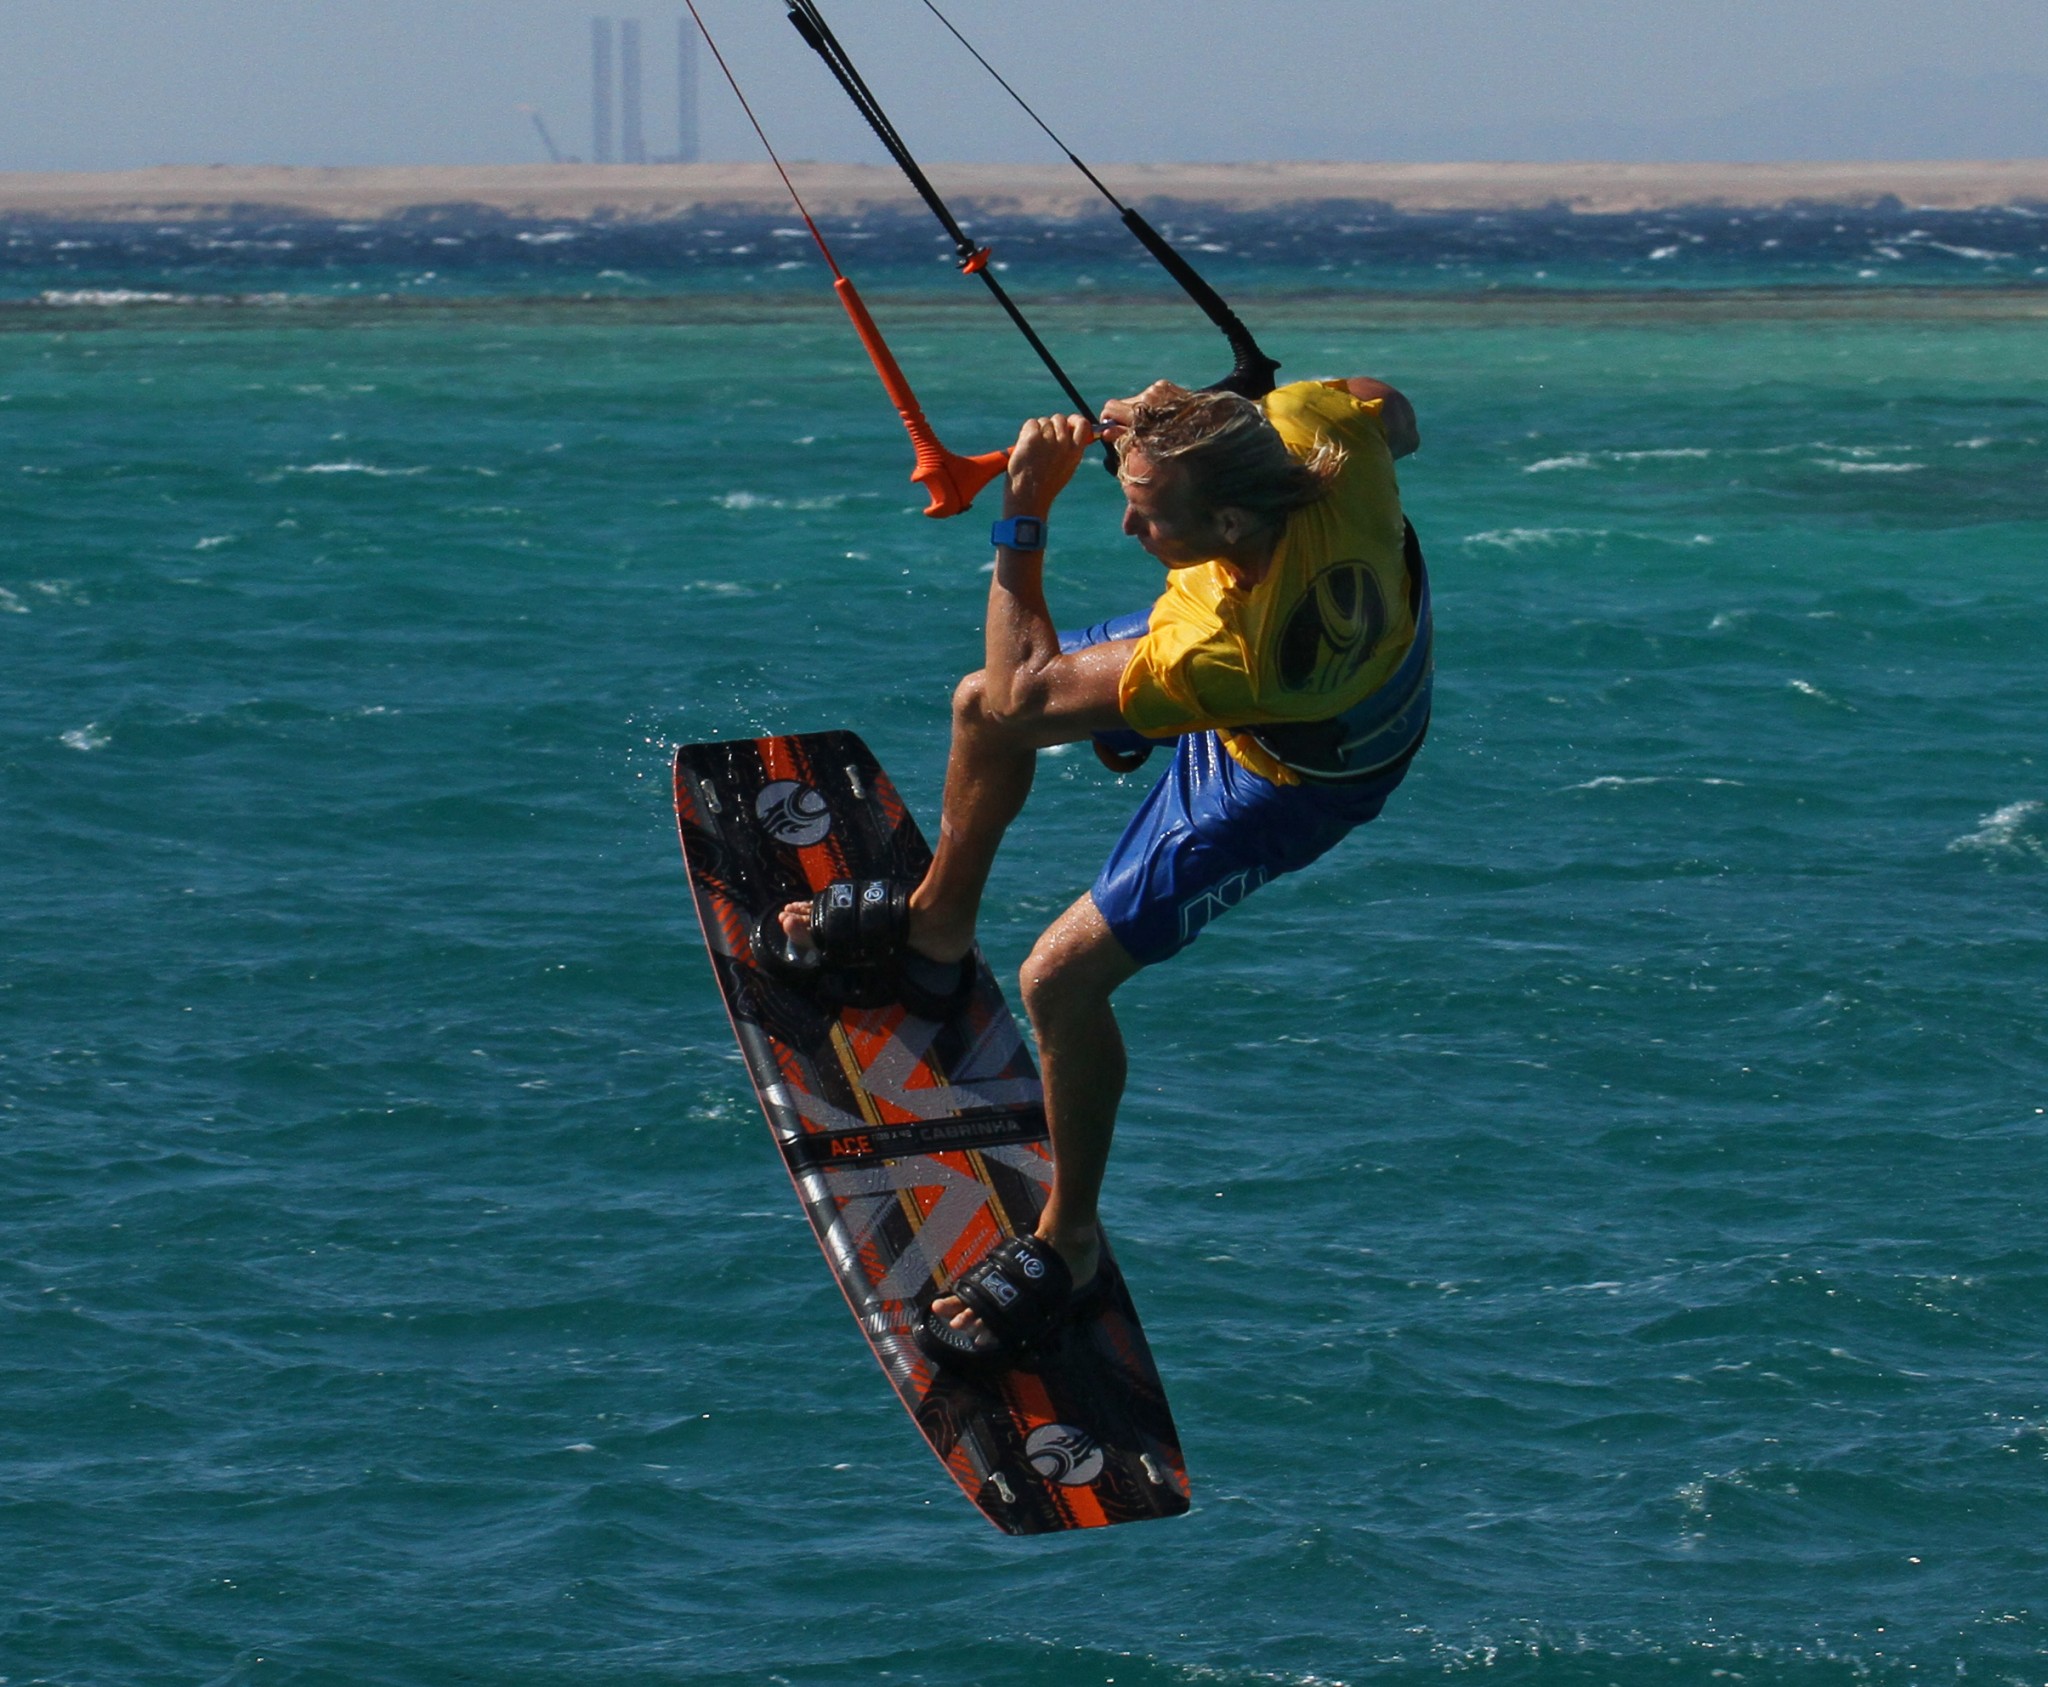
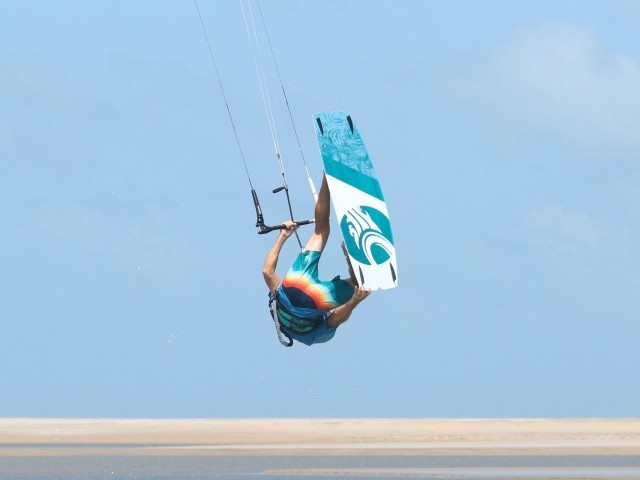
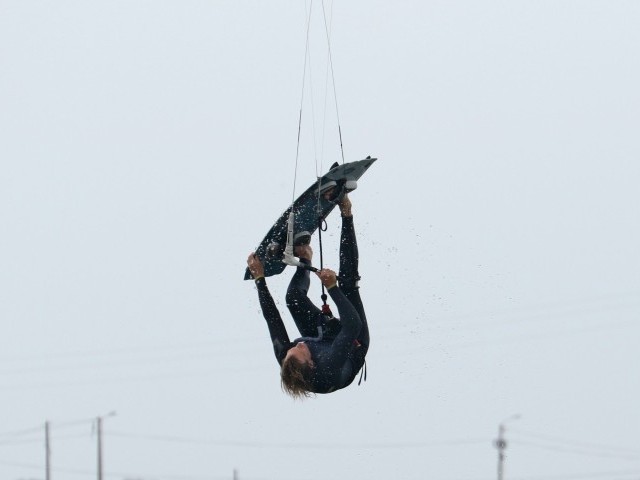
Number 2 Pic D.
To get the 2nd rotation happening with enough urgency you now need to use your head. Christian literally throws his head around, looking over his front shoulder, encouraging the rotation. This also gives him a view of where he is, giving him the cue to move the kite further forward. Bringing the kite slightly forward when you can see the water over your front shoulder will give a bit more lift as it comes over and past 12 o'clock. This will give you a bit more time in the air and with the kite pulling you’ll feel where it is and it will react more quickly when you come to dive it. Apart from that Christian still has the bar in and his knees up.
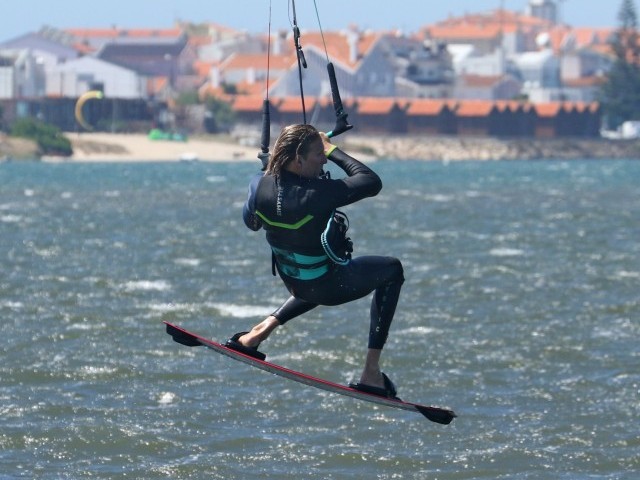
The Decent Pic E.
If you’re already familiar with toeside landings, you’ll be aware that to start with you should prepare as for a heelside landing. If this is new to you, it's even more important on a back rotation. Theoretically, you’re aiming for a double back loop; you’re not aiming for two and a half. You want to be coming down reading for a downwind heelside landing, and the toeside is an “add-on” at the last minute. So really the only difference is that you’ll keep your legs up and knees high, rather than put the undercarriage down. In the pic, you can see that as Christian drops he’s diving the kite to pull him out of the rotation and downwind for a smooth landing. However, he has his knees bent, and he’s leaning his shoulders down and forwards ready to bring the board through…


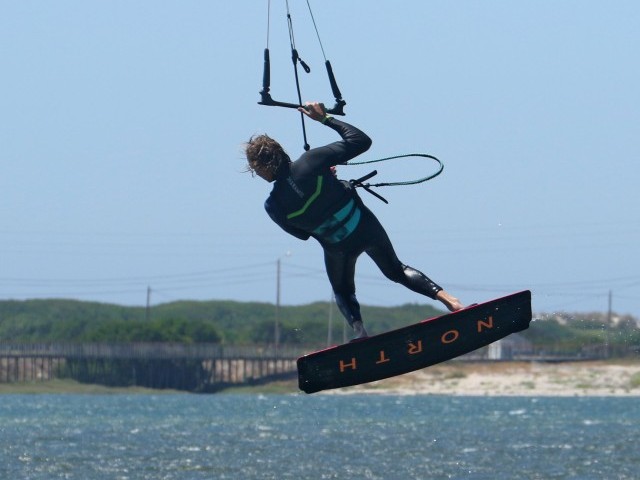
And Finally the Toeside Pic F.
With the shoulders down and head forwards, Christian can bring his back knee up and through, turning the board to toeside and ready to touch down tail first. It’s worth noting here how his shoulders have not yet turned. This is because his body is not rotating another half back loop, but actually facing downwind, the way in which he’s travelling. Only the lower half is “toesiding”.
Top Tips
Height is your friend here. You don’t need to be breaking any records, but if you get a couple of meters in the air you have time to rotate in a controlled manner, which gives you time to think and prepare. Whereas if you’re getting shoulder high and spinning like a Tasmanian Devil, you’ll be leaving everything to chance. Assuming that you get the rotation right your aim is to really concentrate on trying to land heelside, but at the last minute, as the kite pulls, to bring your legs and board “through” to toeside. Don’t try and rotate there; it won’t work…
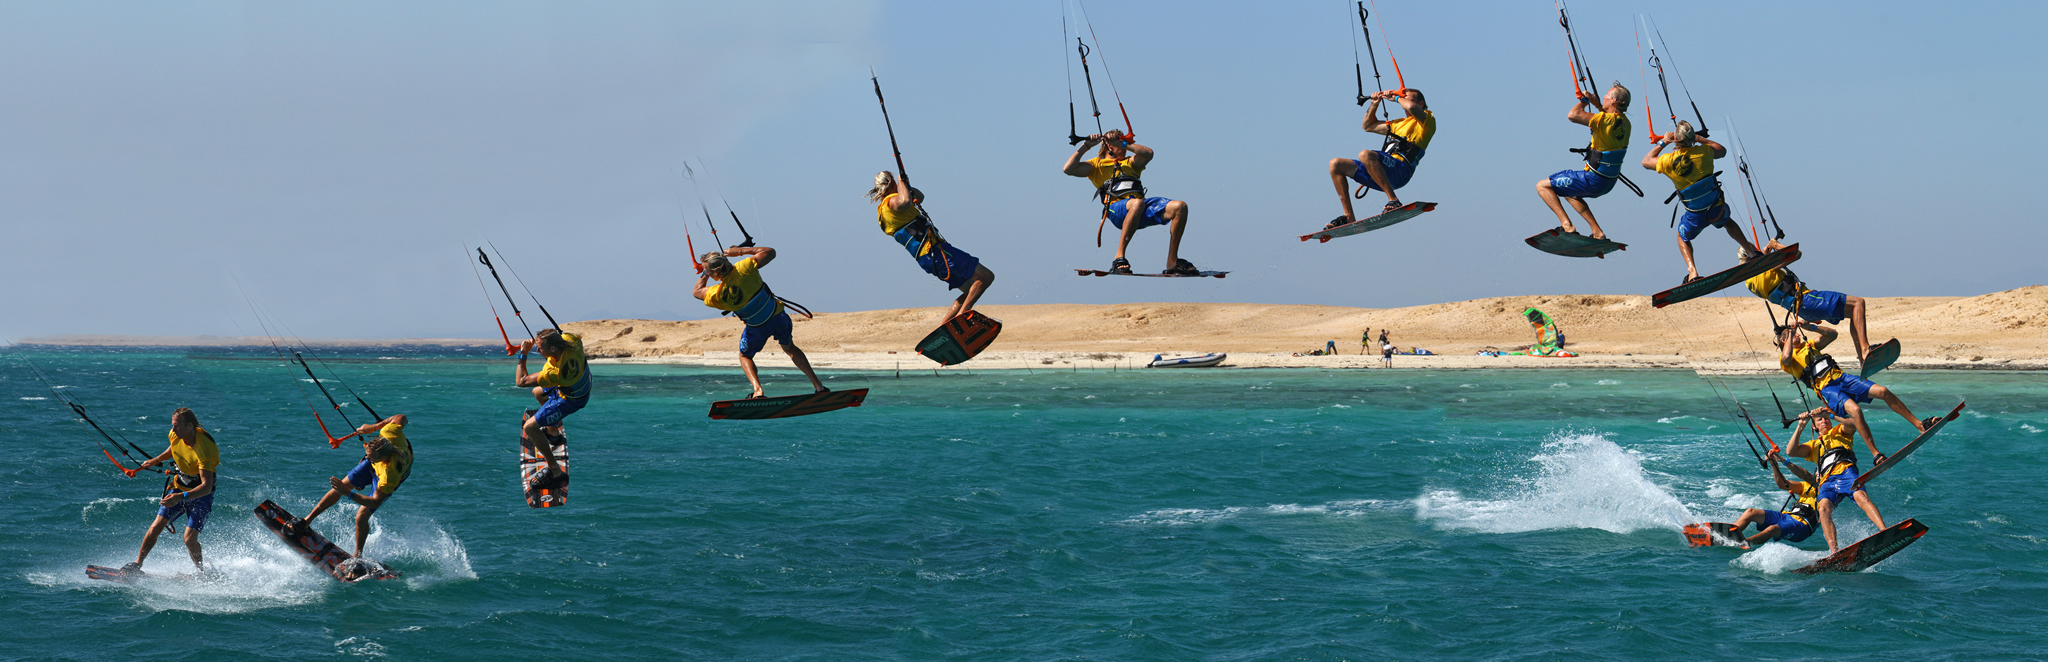
Have a look at the sequence and videos to see the move in its entirety.
Common Problems.
Kite is flying too far back after take off. This is really the most typical of errors, and it’s a result of trying too hard to rotate quickly. The chances are that if this is happening to you, you are softening your back leg as you send the kite in an effort to lean back and get yourself turning very quickly. The result is that your weight goes onto your backhand and the bar is left behind you. From here it is very hard to then redirect the kite. Make an effort to pop up into the rotation and get the bar level before you leave the water.
If you’re under rotating but getting the height, the chances are that you’re not redirecting the kite forwards as you finish the first rotation. If the kite stays back you’ll stop and drop, so try and steer the kite forwards as you throw your head into number 2.


However, if you’re over rotating it’ll be similar to the kite flying too far back. Your take off will be a wild effort as opposed to controlled rotation. Look at the videos, and you can see that it’s about one up and one down, so flying the kite throughout the move is key.
Landing with too much power is a result of moving the kite forward too soon. It’s an easy mistake to make, especially if the wind is strong. After the first rotation, you only need to bring the kite forward just past 12 o’clock as from here you can dive it. Also beware of pulling the bar too far in, past the sweet spot, as this will stall the kite and accelerate you downwind.
Keystones
- Controlled approach on solid edge as per jump
- Up and around while levelling bar
- Knees up, number one while rising
- Throw head into number two and bring kite forward
- Dive as for normal landing and bring board through late for toeside
This technique article was in Issue 59 of IKSURFMAG.
Related


By Christian and Karine
Christian and Karine have been working together as a coaching team, running improver to advanced kitesurfing clinics since 2003.
