
Heel to Toe Carve
Technique / Beginner

Introduction
In the last issue, we guided you through the process of improving your toe to heel carve on a twin tip. It seems only right that we should now shine some light on turning back the other way, from heel to toeside. This carve is often considered a tad more tricky than its counterpart, based on the fact that you still need to control your kite whilst concentrating on turning and carving your board in a potentially less intuitive manner. What makes the heel to toe troublesome is the fact that it's not simple to carve your board quickly around, and as such, your kite control needs to be sharp and precise. However, now that your toeside is in the proverbial bag, you have a default position for which to aim, and this should make the transition across your board, from heel to toe, a much more manageable challenge. Let's have a look…
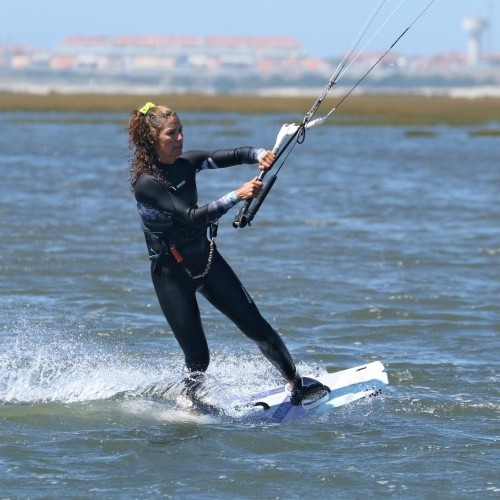
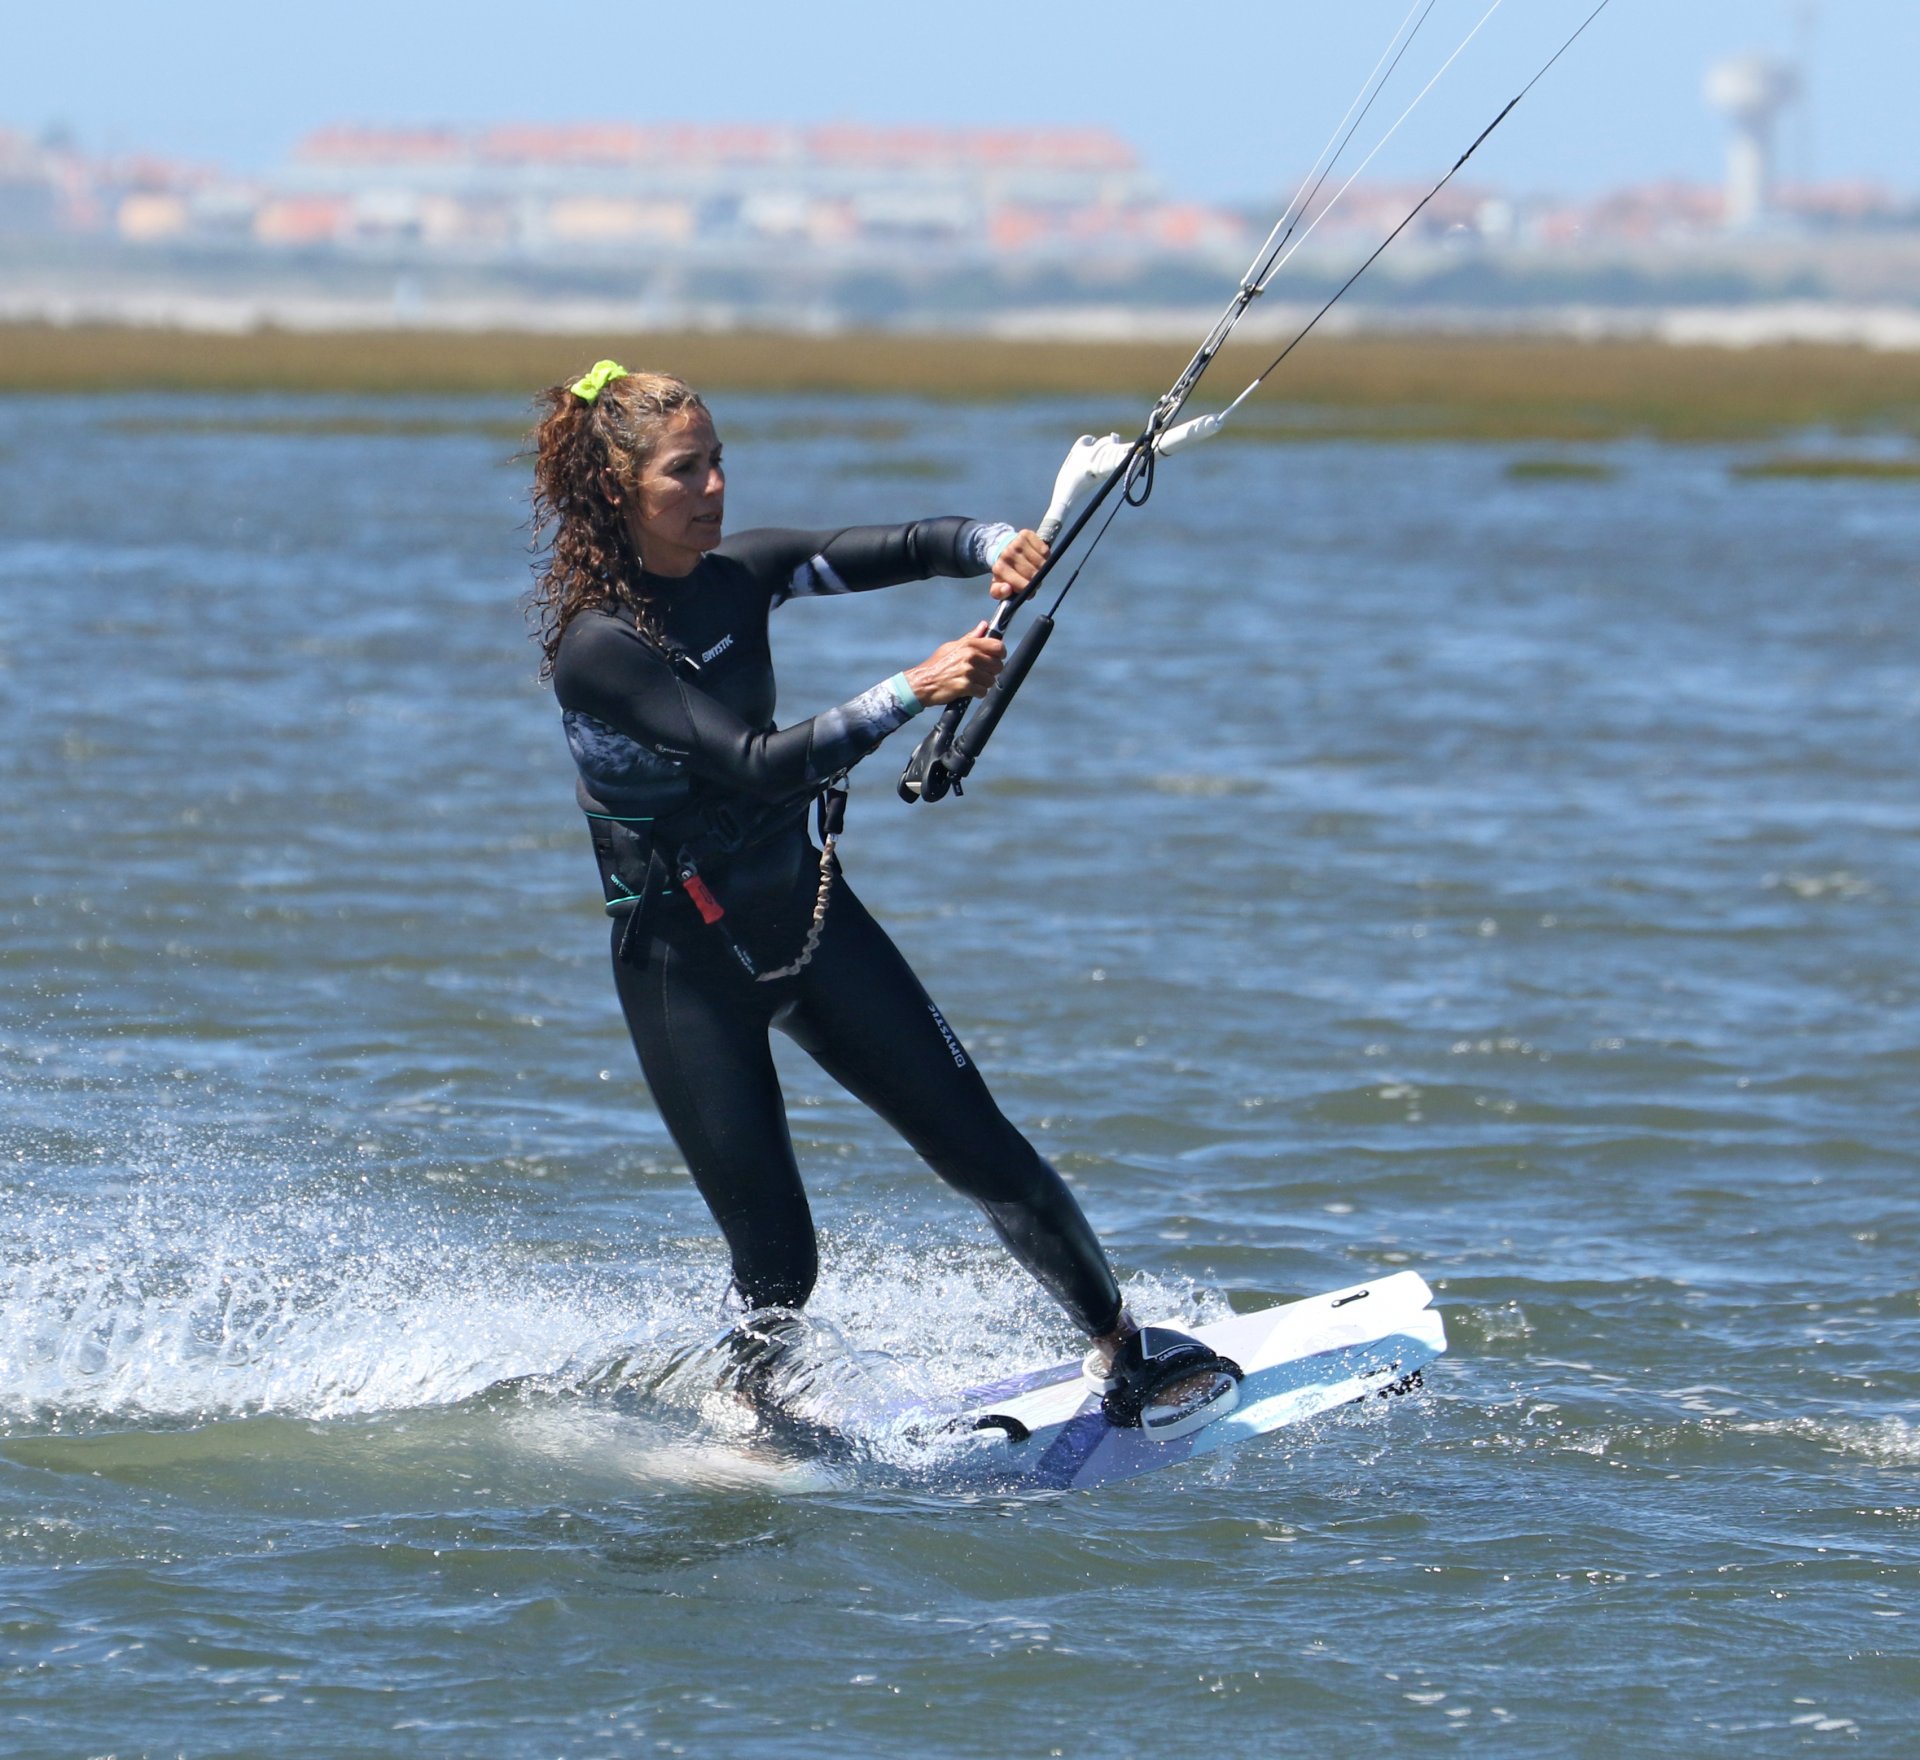
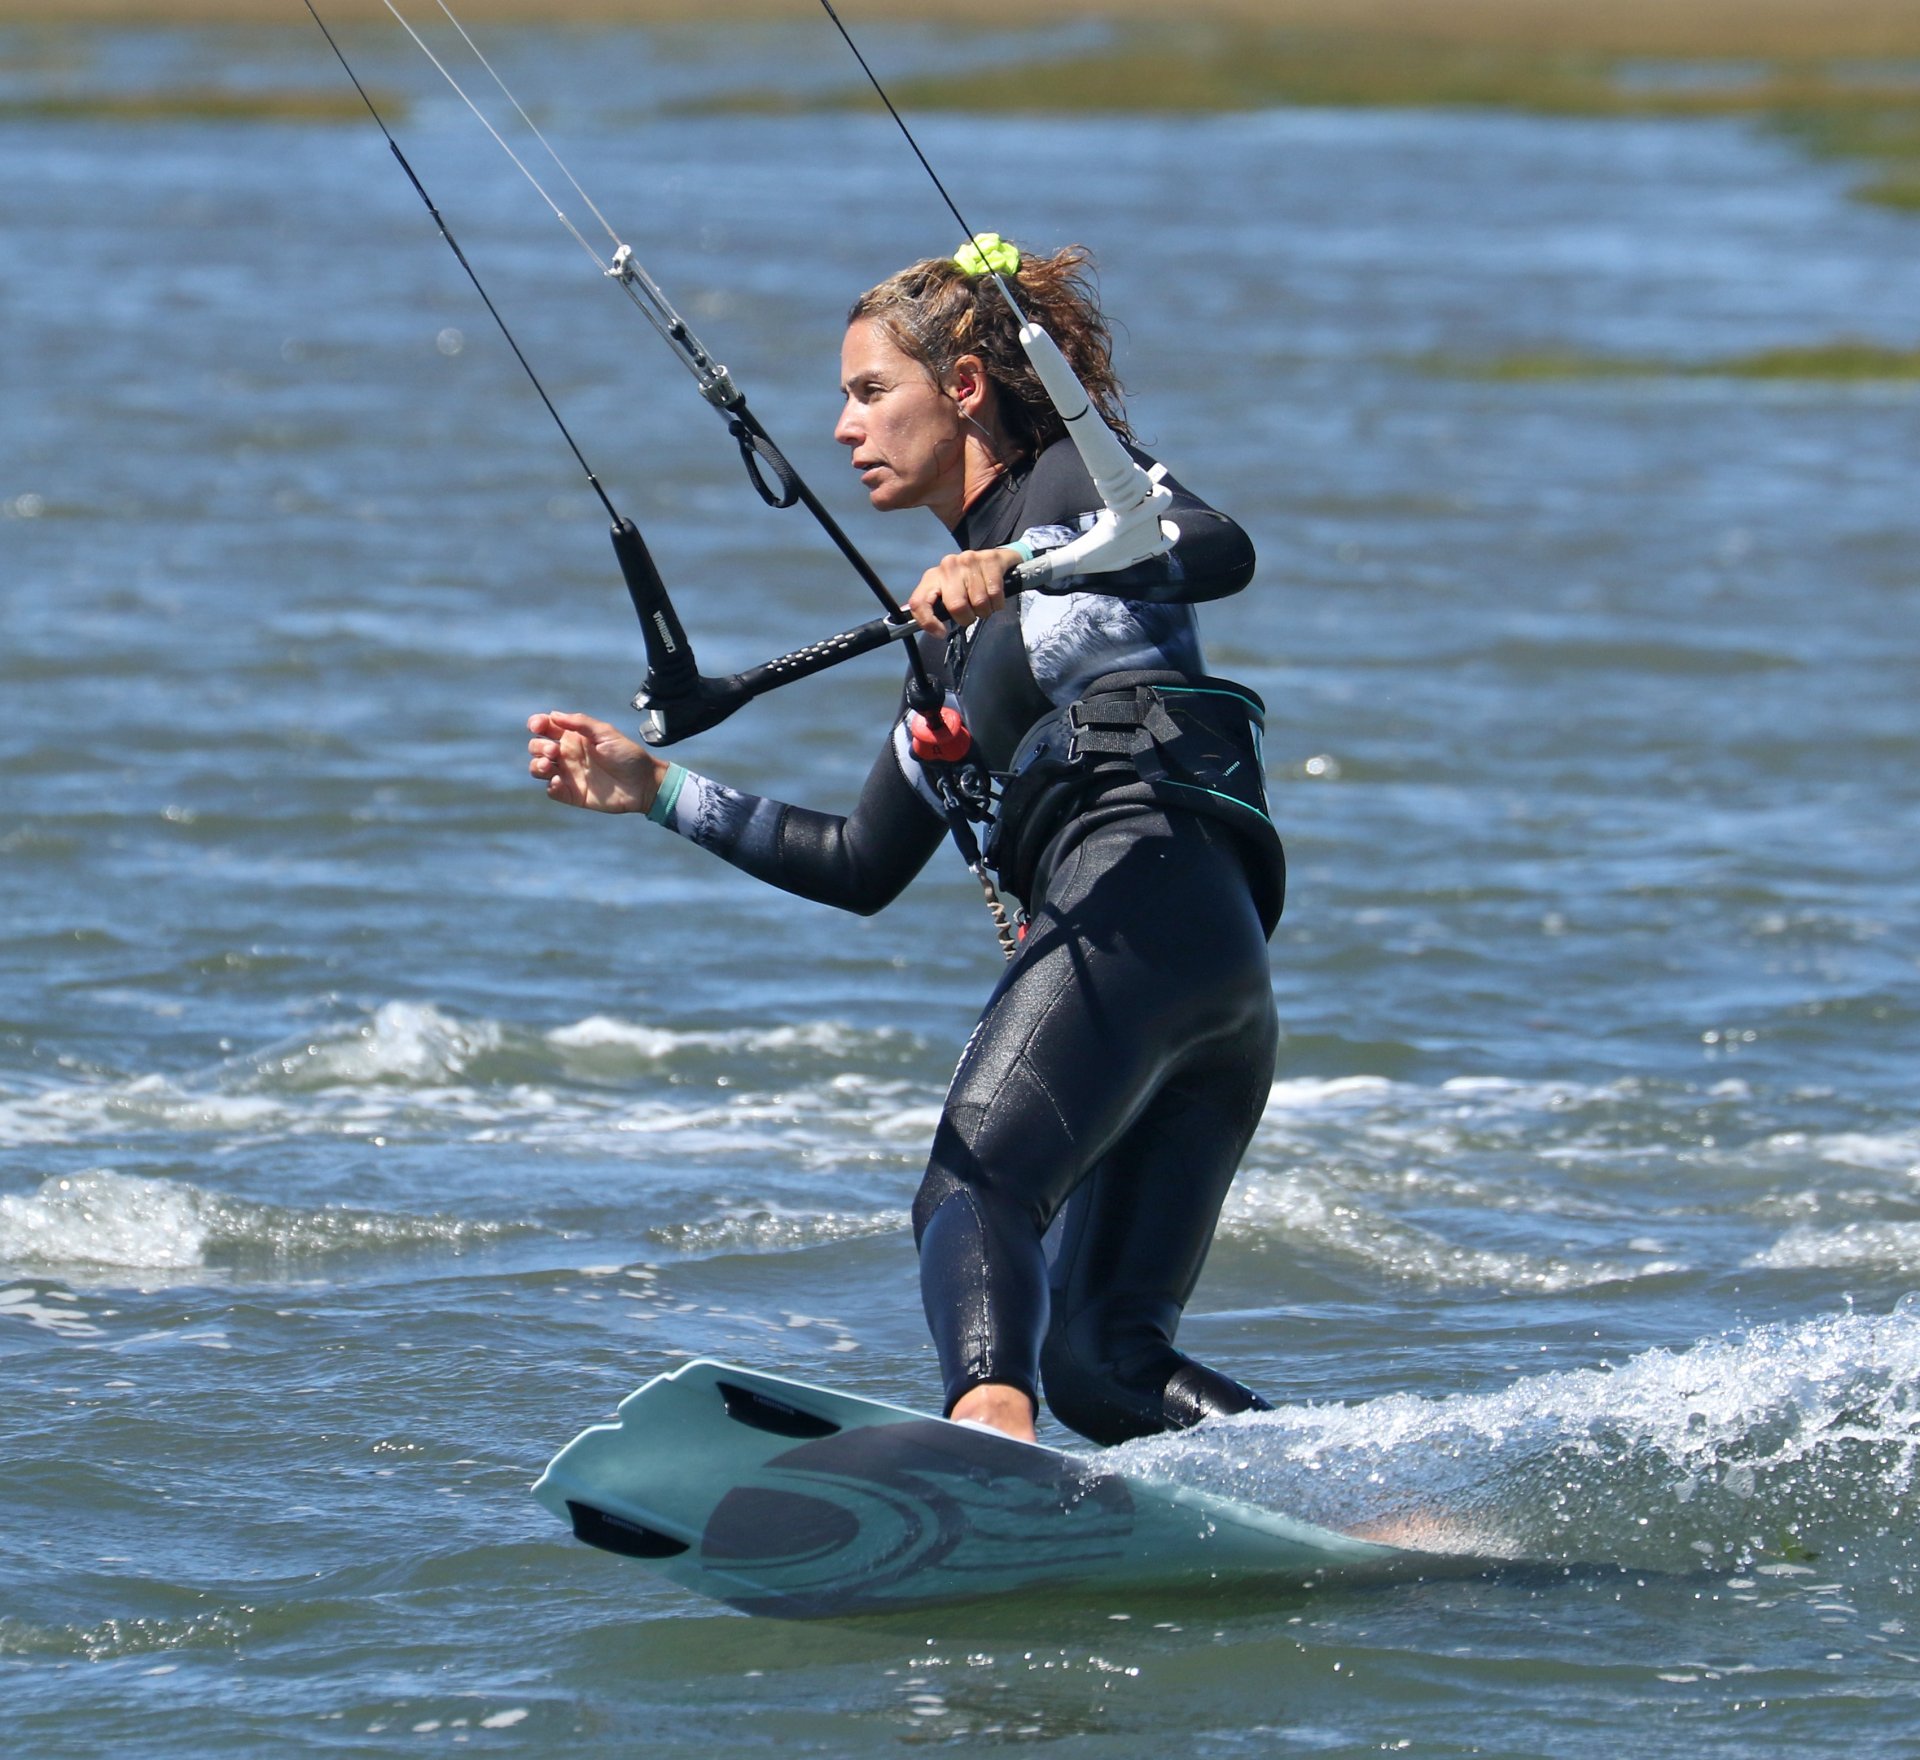
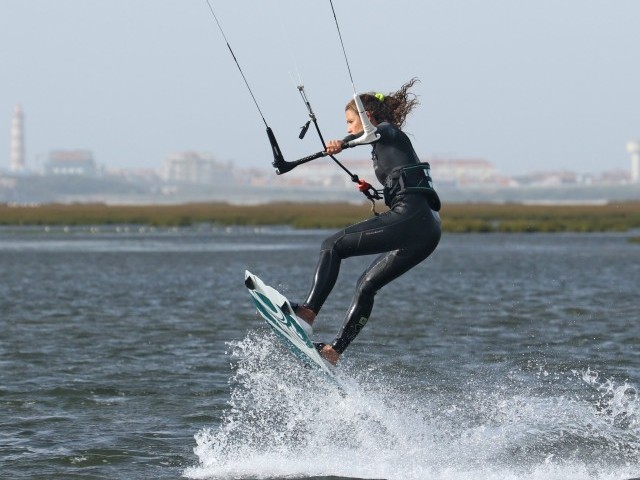
Approach & Setup Pic A.
You'll be pleased to hear that it's business as usual here. Before any twin tip carve, the same rules apply. First off, check that the coast is clear and you've got space to turn! You need tension on your lines, which means that you need to be on your edge. You don't need to be edging as if your life depends on it; in fact, in the learning stages of this move, that will only make life more difficult, as you'll have a lot of real estate to cross before you can get the board turning. It's also somewhat related to wind strength, in the manner that if the wind is light, you'll need a touch more edge, whereas if the wind is strong, you can get away with a bit less. To keep things simple for now, we'll start with a gentle edge so that you have tension, and are going upwind, but you're not leaning hard away from your board. Kite position is also important. The "thing" that'll kill your chances off early is a high kite. You want your kite no higher than 1 or 11 o'clock. From this position, it is leading you forwards on entry and is well placed for what's to come. Have a look at Karine in the photo. She's on a gentle edge, with tension in her lines, hands centred on the bar with her kite at 11 o'clock.


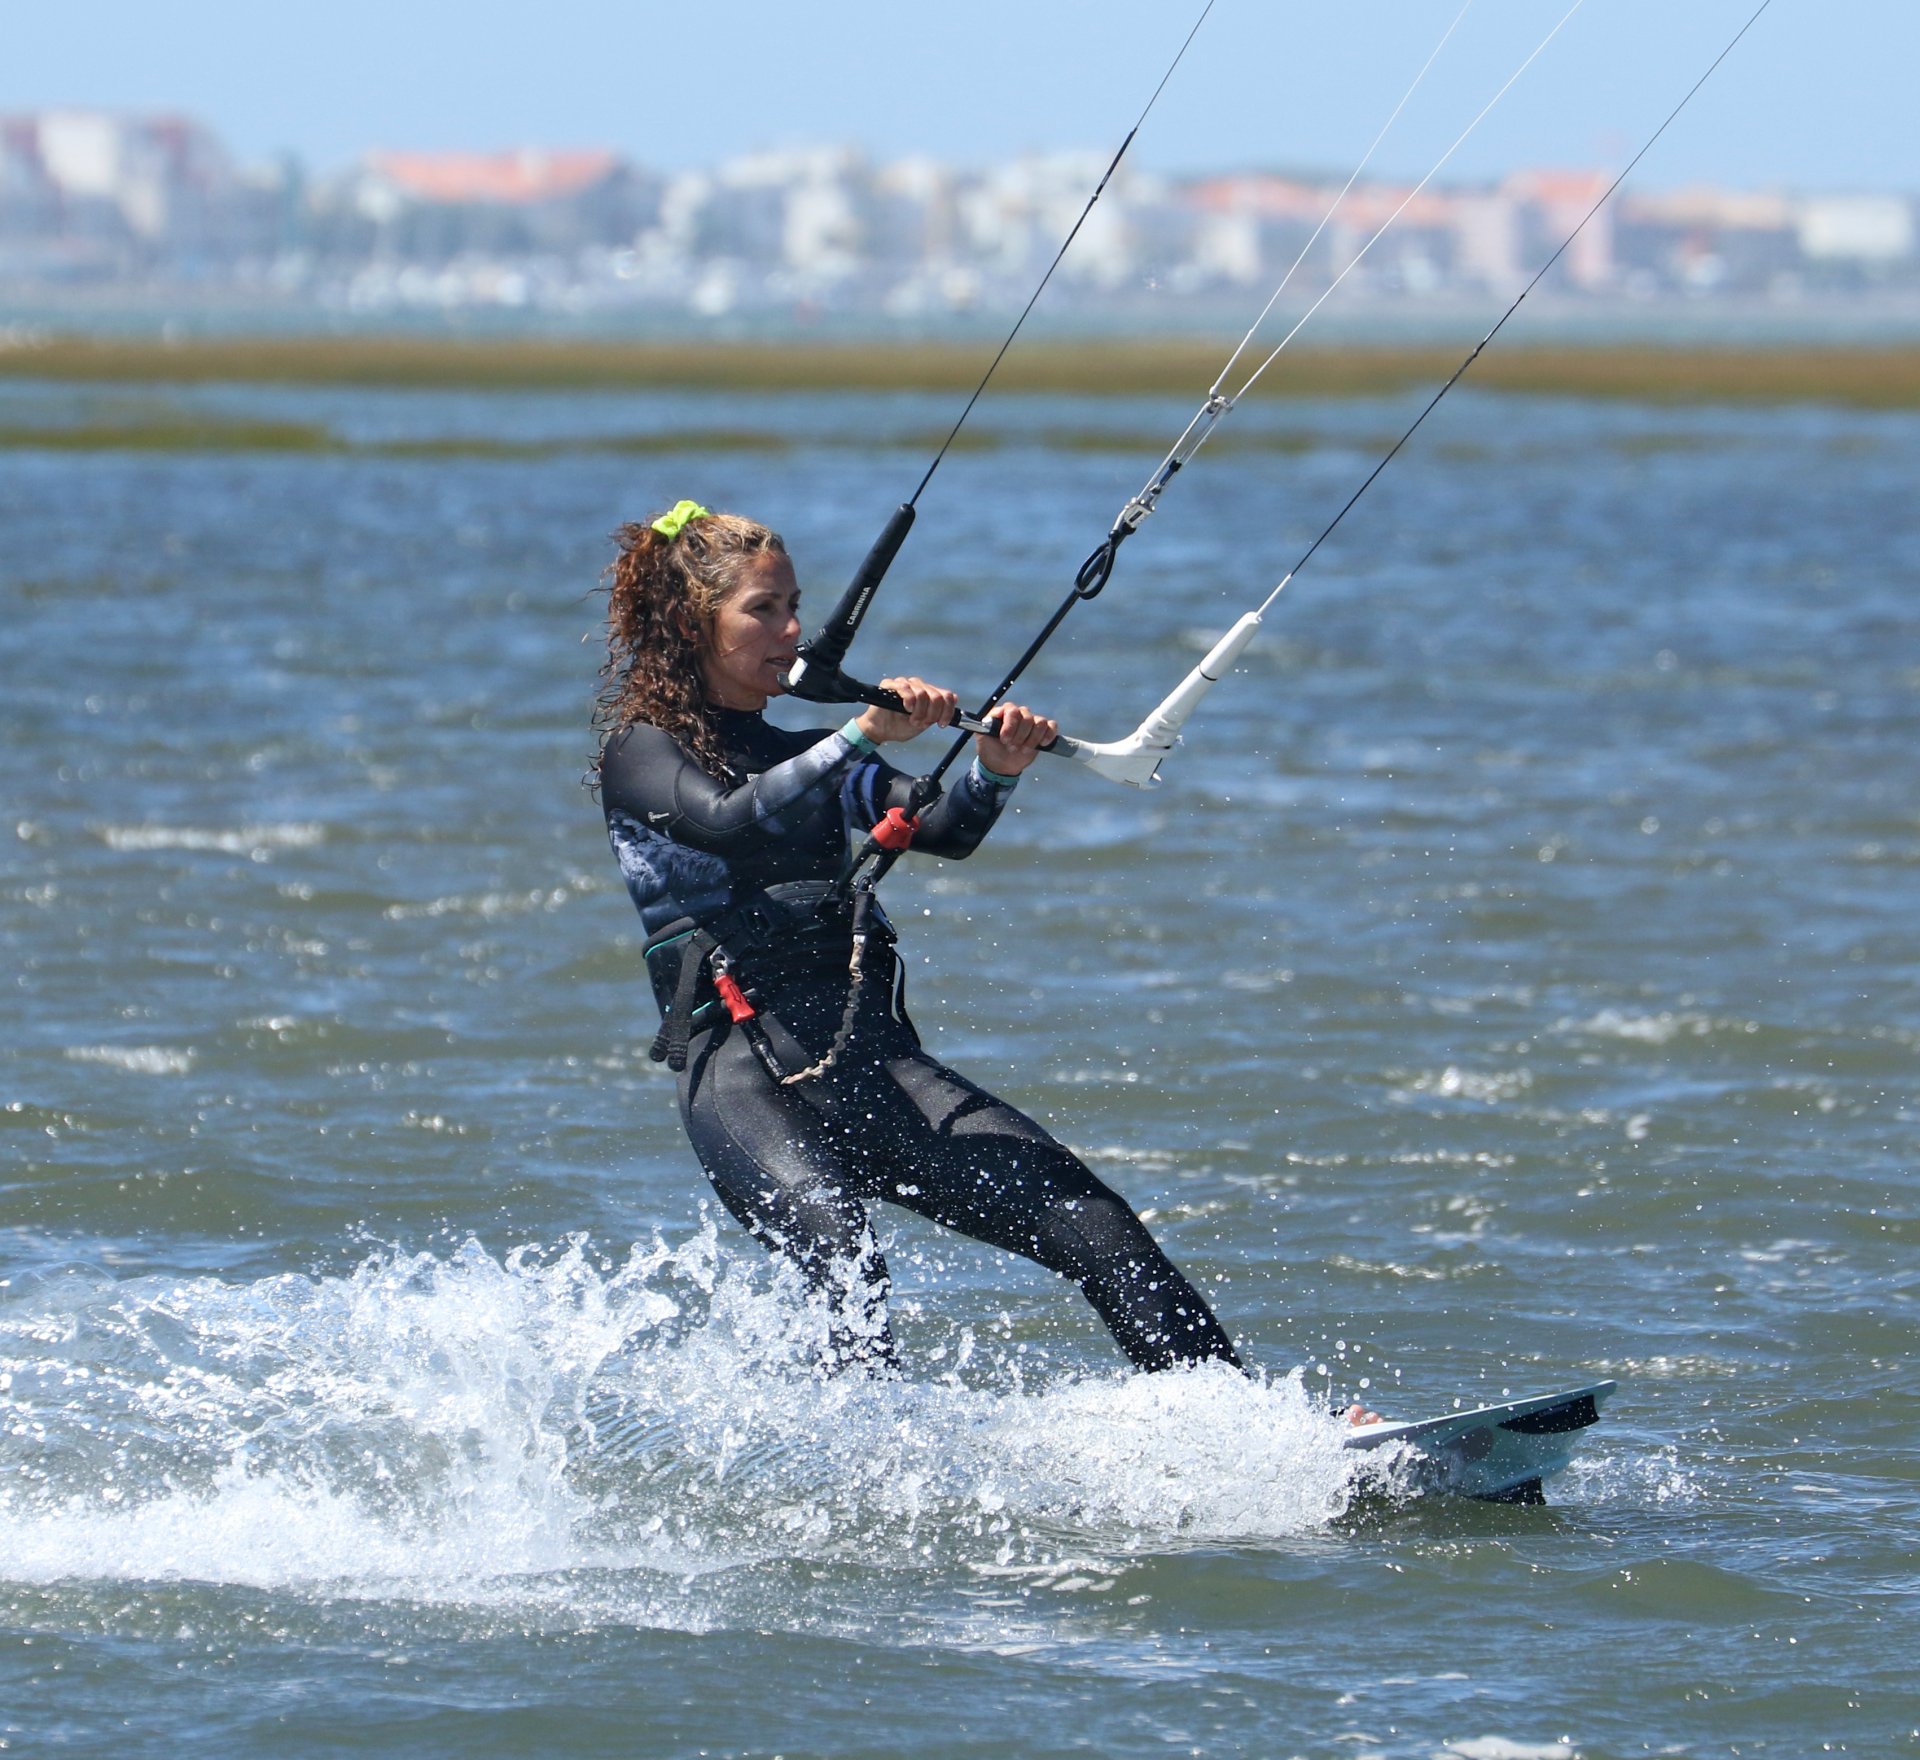
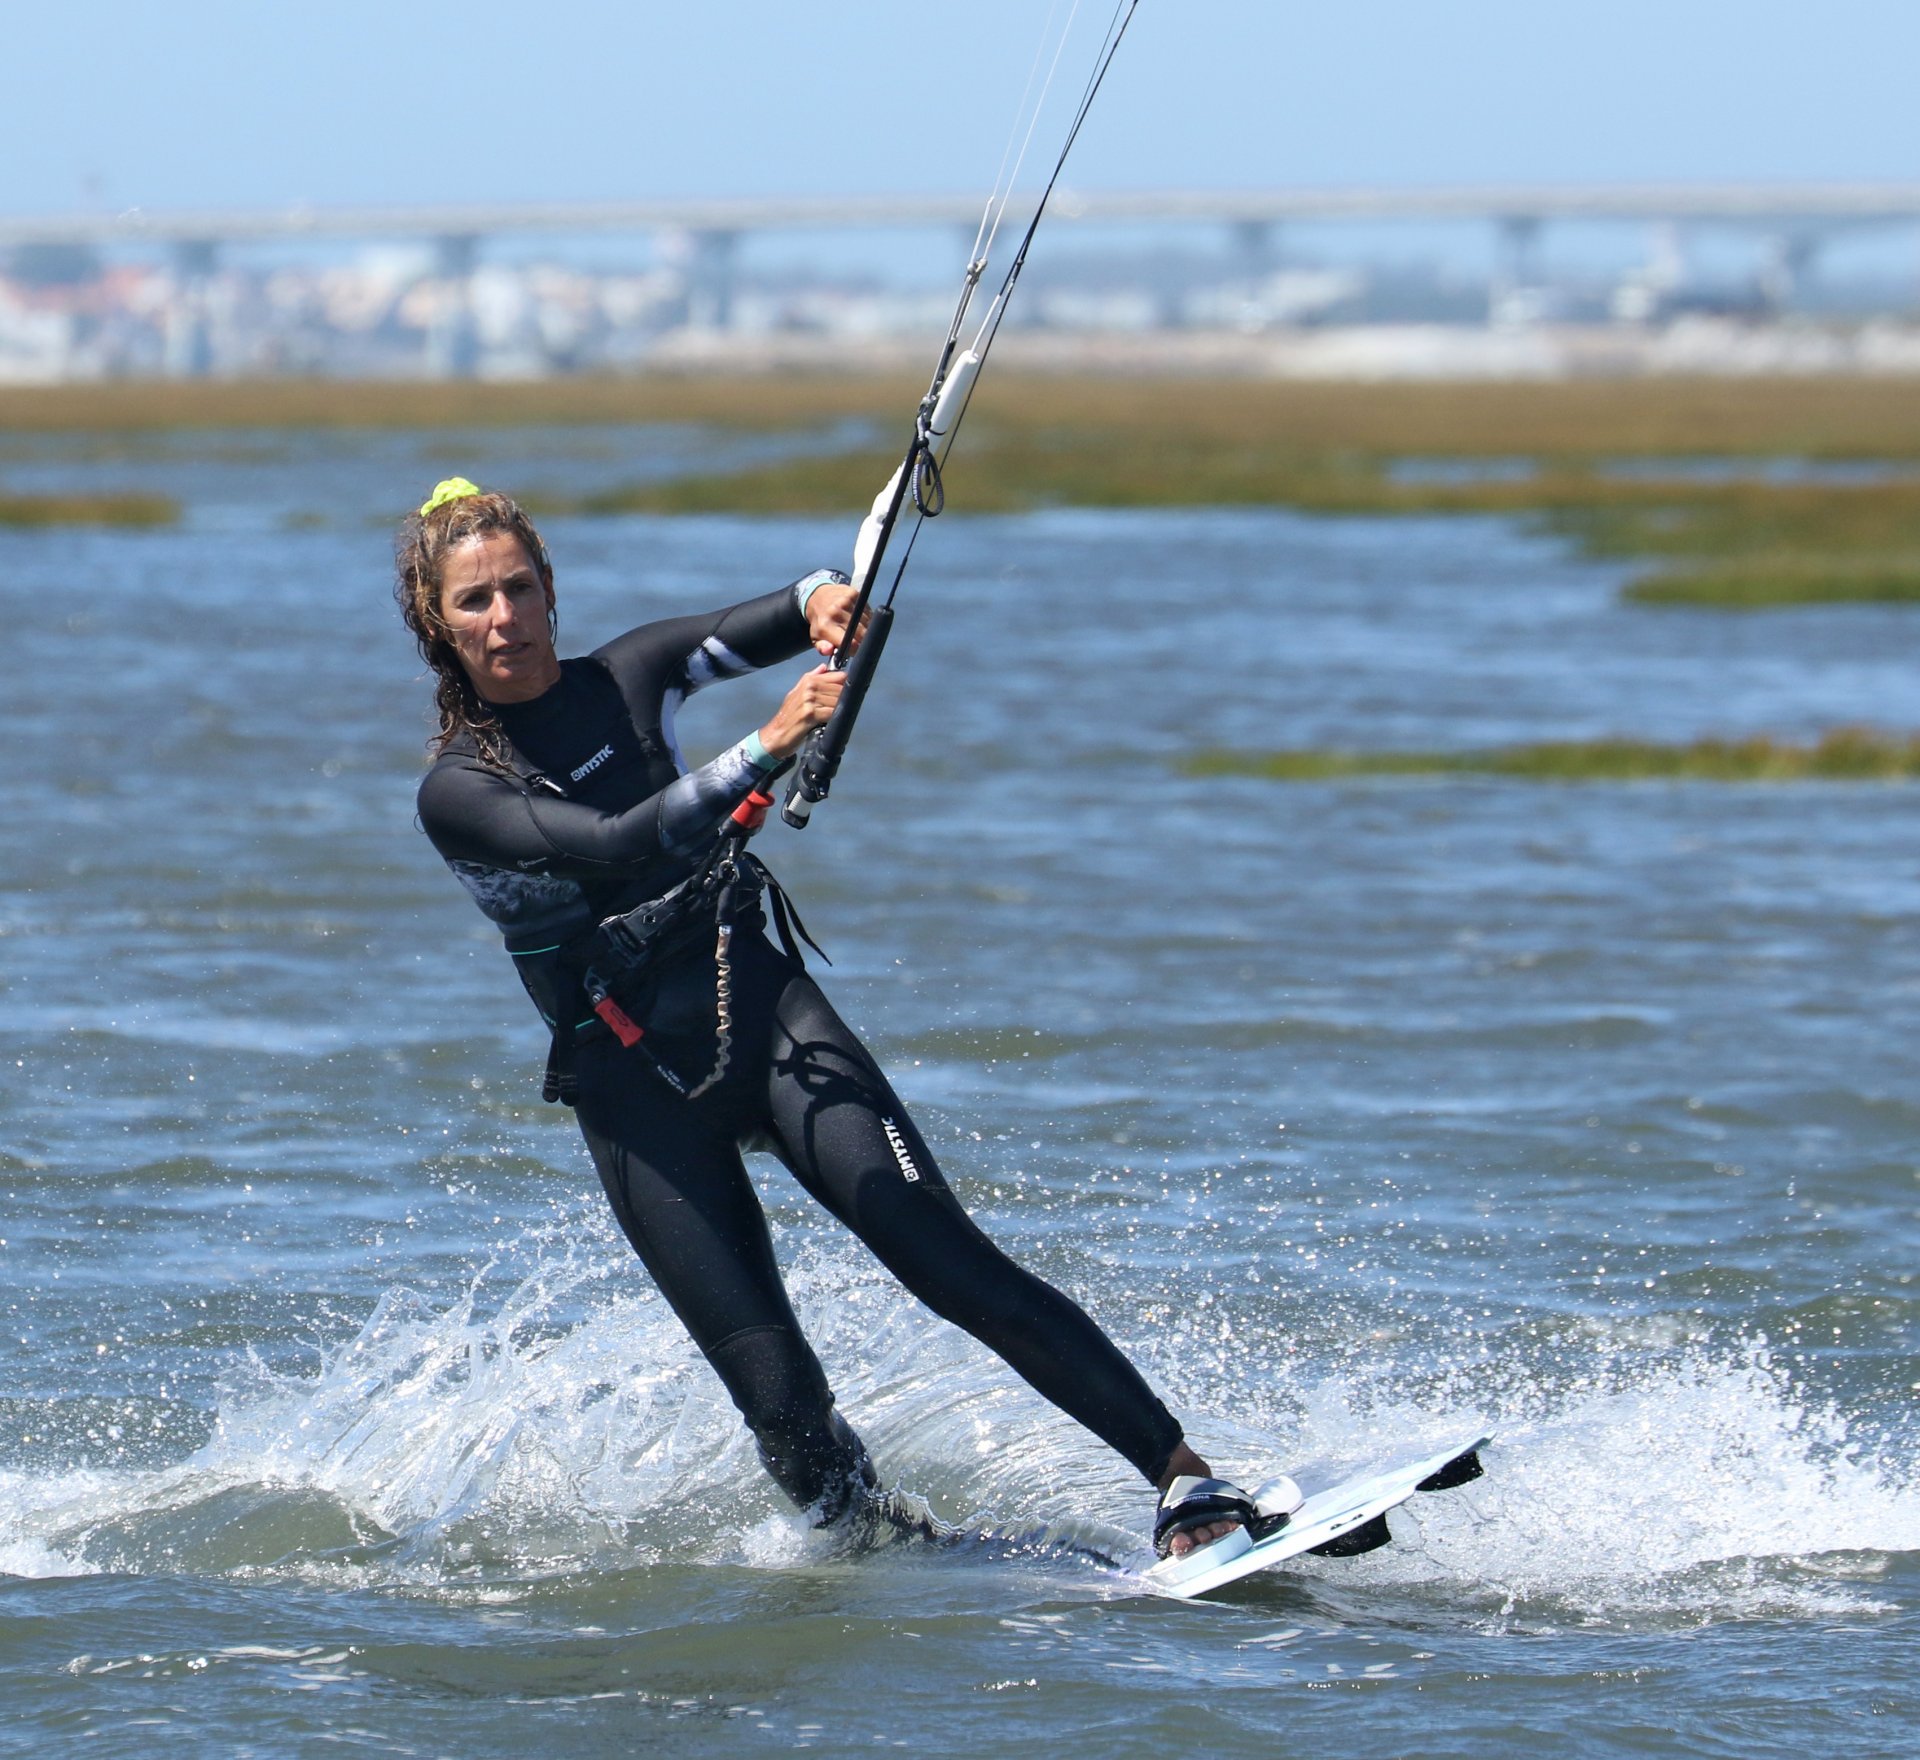
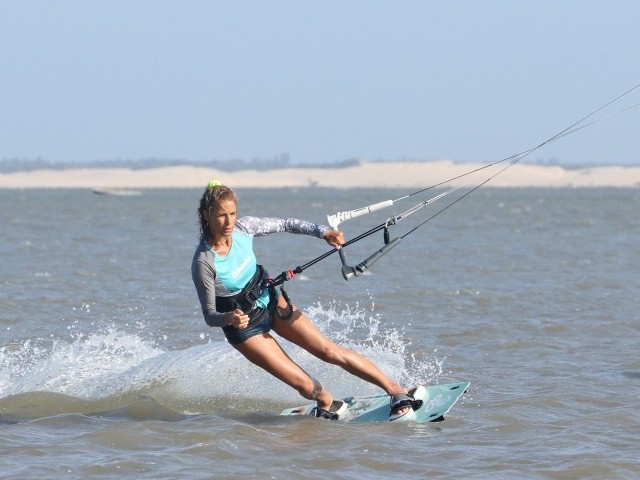
Kite First Pic B.
And again, it's about using the tension to turn your kite, so the sequence is kite first and then board. Use both hands to steer the kite, pushing and pulling so that you can keep the bar on the sweet spot and therefore prevent yourself from pulling it in and choking the kite. With your kite positioned at the side of the window, you need to be positive on the bar to get it to turn. You're aiming to turn the kite enough that the leading edge turns and just about faces back across the window, sitting deep. If you turn it any less or too gently, your kite will just creep up to 12 o'clock, right above you at the very edge of the window. Here, Karine has started to steer the kite with both hands whilst still on her heelside edge. She's looking forward towards her kite.
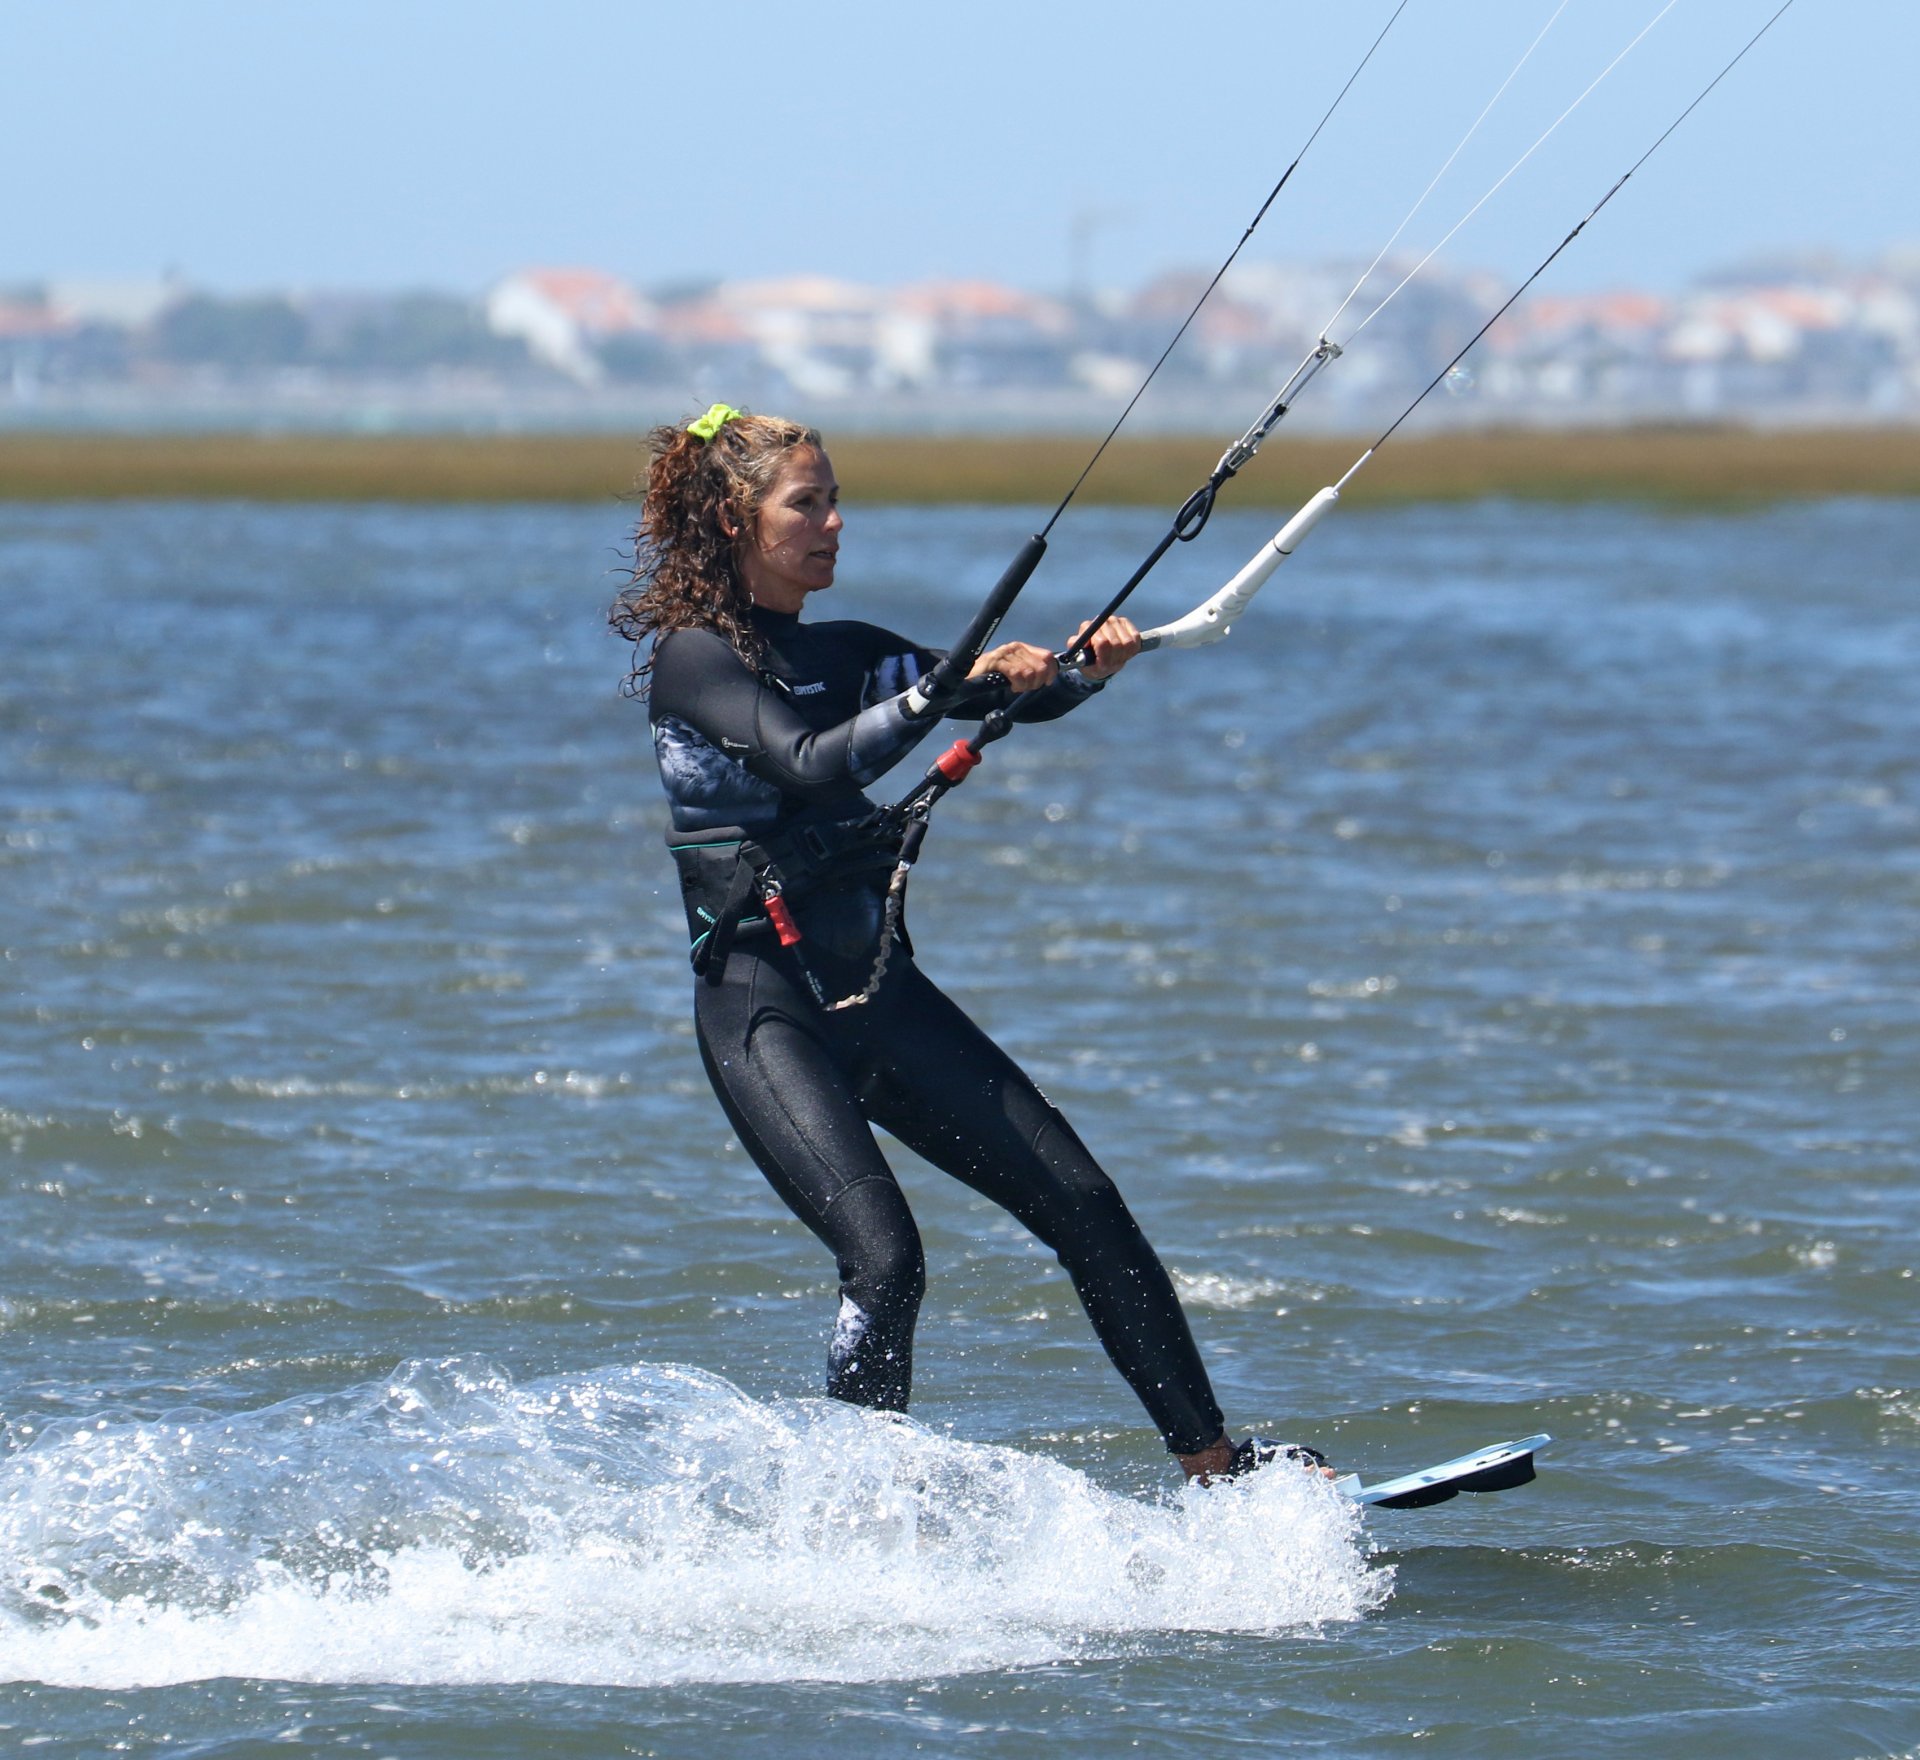
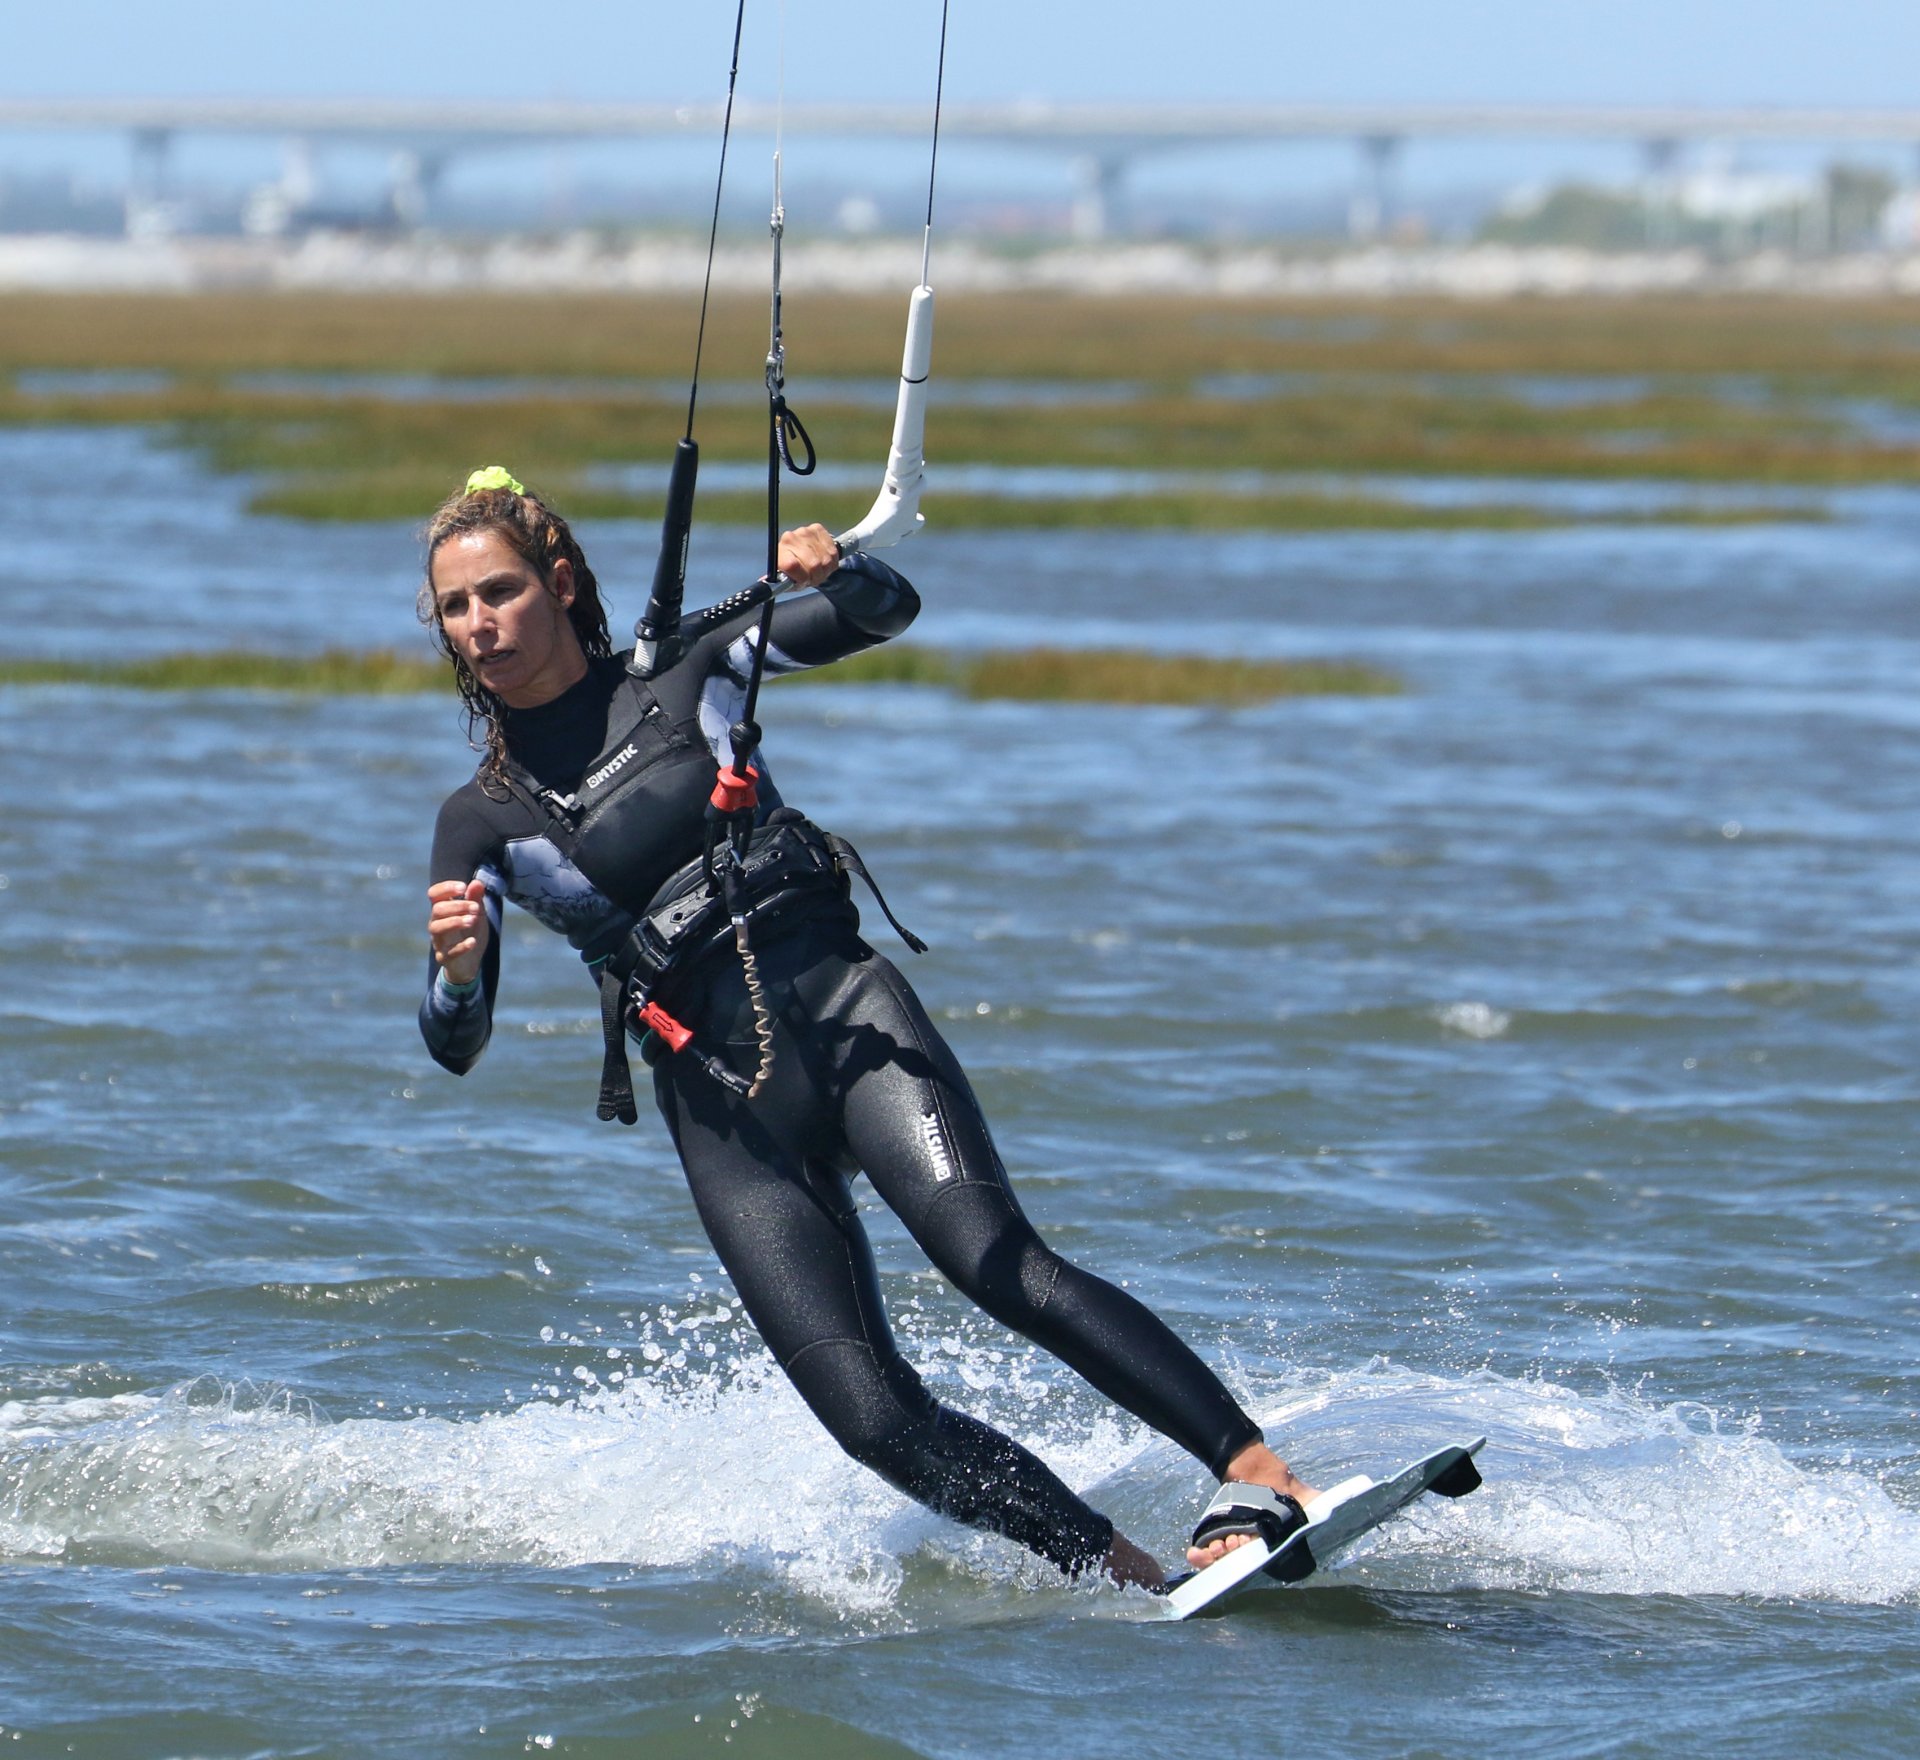
Flatten Pic C.
The great news is that, by using both hands to steer the kite, it will encourage you to rock over the board as you push and extend your lower arm and hand forward. The result is that you'll flatten your board, leaving your heel edge in the past. This is exactly what you want. As soon as you steer the kite, you can flatten the board. Now's a good time to ponder what your carve is. A carve is moving forwards and steering around a semicircle. The first half leads you until you're pointing downwind, whilst the second half finishes the turn until you're on your toeside edge heading back the other way. To maintain this, you should always be looking where you're going, not so much where you want to go. In less subtle terms, don't look back; you've got a long way to go until that's where you're going! You and the kite will be taking a similar path, and if you can keep some harmony going throughout the carve, you'll have a good chance of succeeding. Karine is now over her board, and she's steering the kite with both hands. She's watching the kite, which is still very much in front of her.
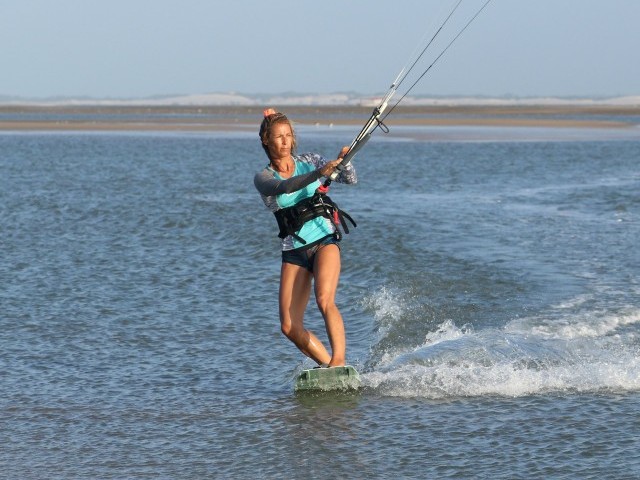
Toeside Carve Pic D.
The crux of this move is making sure you get the board carving. Carving comes from your ankles, so it's as good a place as any to start. Really flex your ankles; this will drive your knees and weight across the board and onto the toeside edge. Keep your head up and resist the urge to bend at the waist. The last piece of the jigsaw here is to drop your weight back slightly, over your back foot. This will put you over the turny rockered tail of your board and should set the carve in motion. Once you're carving, you know that you can keep up with the kite. Keep turning the kite so that it comes across and down through the window. This might generate too much power, but at least it will prevent your kite from going up and over 12 o'clock. It's clear that Karine is still steering her kite positively. She rolled her weight over onto her toes by flexing her ankles, and her weight is back onto the tail of the board, so it carves. Note as well how her head is up and body upright.
Kite Control Pic E.
As you carve towards the halfway mark and the board points downwind, it's all about doing very little with your body and board so that you keep carving whilst controlling the kite. Once the kite is moving across and down through the window, you need to straighten it up so that it flies straight rather than continues to turn. Ease off the bar and level it. If you've been aggressive and the kite pulls too much, this is when you can momentarily let the bar out to regain balance and control. However, if you do, make sure that you pull it back to the sweet spot immediately. Otherwise, with no tension on your lines, your kite will fly across to the edge of the window. The point is that here you are flying your kite, using micro-adjustments to make sure that it doesn't race ahead of you. All the time keeping your ankles flexed, knees driving and head up. You can see that Karine's body position hasn't changed at all, even though she's busy easing off on the bar to stop the kite from flying any lower.
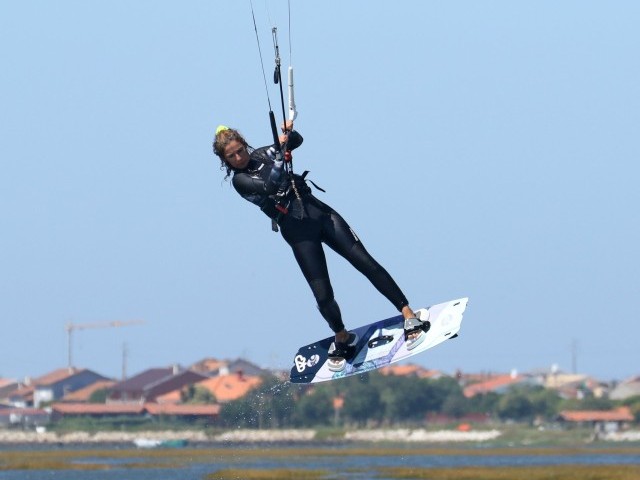
The Second Half Pic F.
As you come through the wind, it's all about keeping your carve on and kite pulling. To help keep momentum, you can release your front hand and hold it forwards. This will help re-centre your weight as you carve around, preventing you from sinking too far back over the tail and putting the brakes on. To help with drive, you can steer the kite gently up with your backhand. If your sweet spot is trimmed close enough, you can do all of the above with two hands on the bar. Karine is looking where she's going, hand leading, and she's still committed to her carve. For a bit of pull and to stop the kite from disappearing to the edge of the window, she has steered the kite up. Her head and shoulders are still upright.


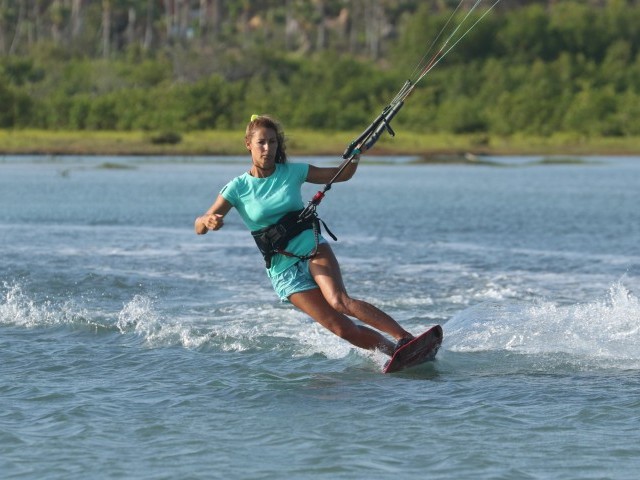
Finish The Turn Pic G.
From here on in, it's all about getting back onto your toeside edge, finishing the turn. It's so incredibly tempting to look for power by pulling in on the bar. However, do this, and you'll kill power as the kite stalls. Concentrate on turning back upwind and find tension in the lines by using your edge. You're aiming to come out into your default upwind toeside position. You can see that Karine is doing exactly that. Her bar is on the sweet spot, whilst her ankles, knees, and core drive across the board. She pushes her hips forward to centre her weight and get onto the flat planing centre part of the board's edge and then pushes against the board, creating more tension and driving herself upwind against her edge. Job done, carve complete!
Top Tips
Sometimes in an effort to edge gently and slow down, you may be inclined to lift the kite before starting your carve. This isn't wrong; however, if you do this, you'll need to dip your kite by steering it down just before you steer it into your carve.
Concentrate on keeping your head and body up. Just like with toeside, it's easy to fall prey to the body's natural disposition to bend and lean into your turn. Unfortunately, this will have the opposite effect and stick the ballast that is your bottom upwind of your heel edge instead of across and over your toe edge.
Your kite movement and radius of carve are intrinsically linked. They have to work together. You can't throw your kite across the window if you are carving slowly and vice versa. At first, go slow with both and steer your kite throughout your carve.
The timing of the kite first can be very subtle, like a heartbeat, kite then immediately board. There's no need for a comedic pause.

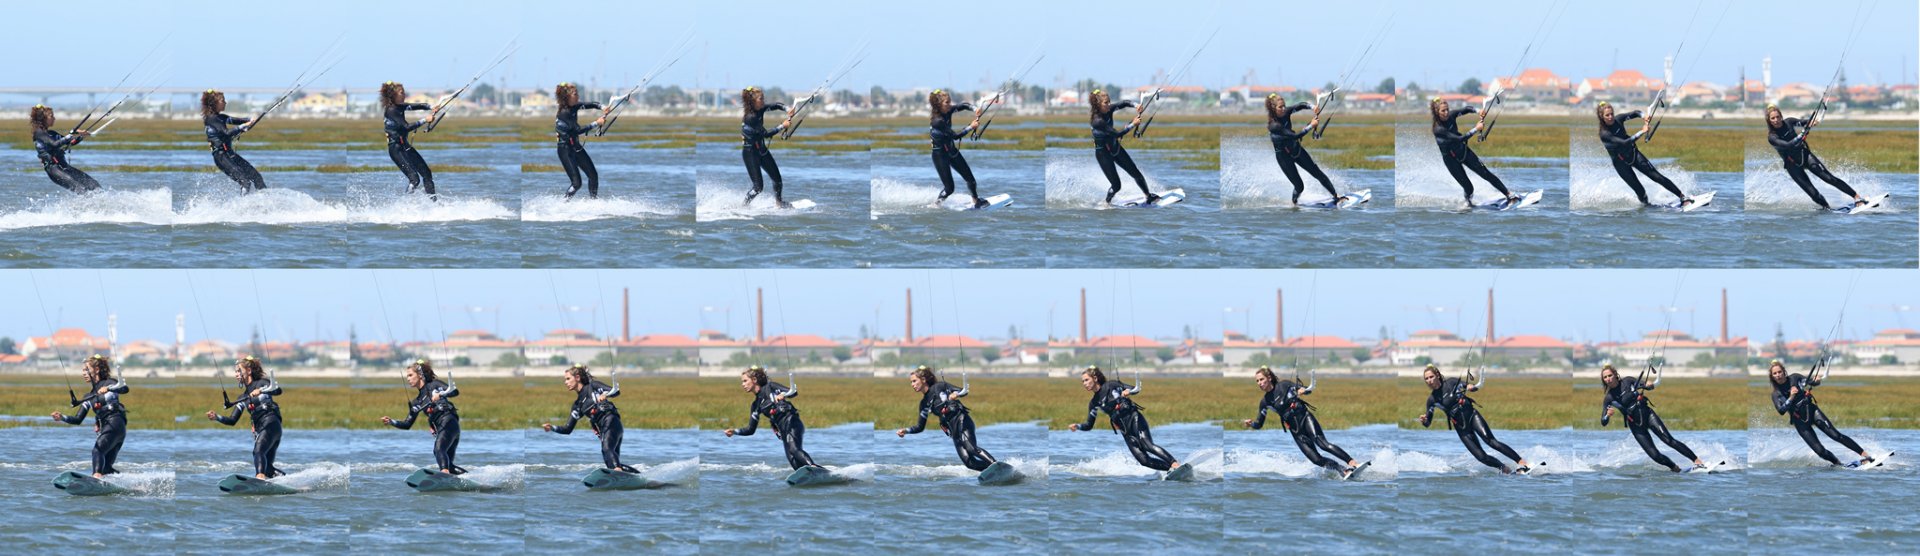
Brilliant, now have a butcher's at the sequence for a step-by-step run-through and check out the more detailed video.
Common Problems
By far and away, the most common problem is the kite finishing its turn way before you do. This can happen for a number of reasons, so you'll have to work through them to find out which one is the culprit.
Firstly, taking the kite up and over 12. If you do, you'll end up under the kite, and it can do nothing else but flutter to the other side whilst you slowly sink.
Moving the kite too quickly. When you move the kite too quickly, you don't have a chance to keep up unless you've got a well-polished carve, so ease off the gas. Also, moving it too quickly can generate a huge amount of power. This will cause you to sheet out, which can encourage the kite to sprint off to the other side.
Your carve!! That's right. We can't blame it all on the kite. Carving is a skill, so you'll need to ease into it, practice and persevere. If your board is turning, you can fly the kite and pull yourself around. However, bend at the waist, and your weight goes back and onto your heels. This stops your carve, and you end up going in the opposite direction to your kite. No harmony here.


Keystones
- Edge in with kite below 11 or 1
- Kite first, flatten board
- Steer kite across window with head up
- Ease off kite, keep on carving
- Finish your turn to find tension
This technique article was in Issue 94 of IKSURFMAG.
Related


By Christian and Karine
Christian and Karine have been working together as a coaching team, running improver to advanced kitesurfing clinics since 2003.
